
This work is licensed
under a
Creative Commons
Attribution-NonCommercial-
ShareAlike 4.0
International License.
This week students should have:
Modelled experimental objects/part of a possible project in 2D and 3D software.
Shown how you did it with words/images/screenshots.
Included your original design files.
For this week's assignment, I want to learn about Blender and Fusion 360.
At the same time, I want to keep in mind the concept of my final project and the chemical make-up of the soot and smoke that destroyed my apartment in Chicago.
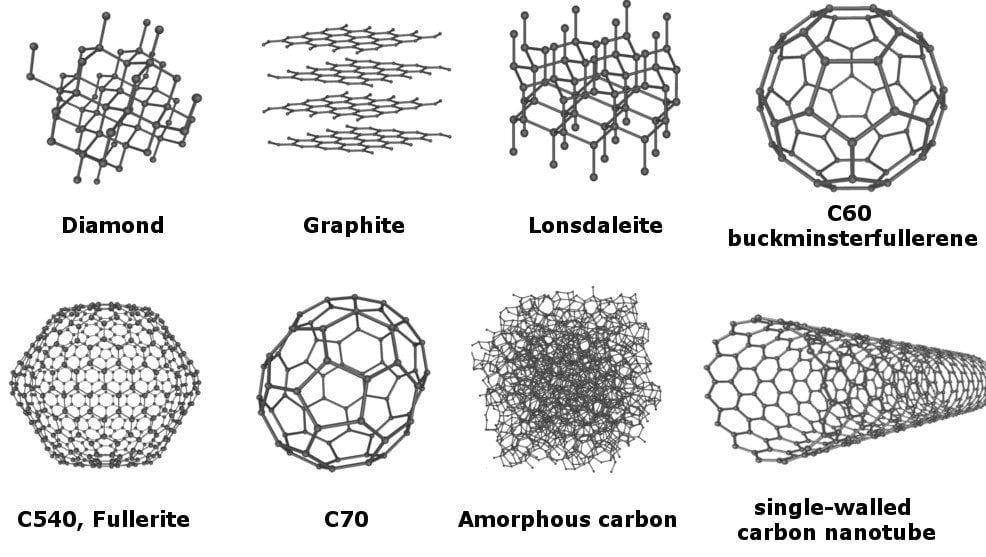
Amorphous carbon and black carbon are among the main compounds of soot. The latter is a result of incomplete combustion of fuels released from fires and engines among others.
While soot is for the most part, made up of amorphous carbon (a unpredictable layout of carbon molecules), it also consists of other carbon compounds. These are single element carbon molecules which are all
laid-out differently. Each one of these arrangements is a carbon allotrope. The diagram below lists the common carbon allotropes. In other words, it underlines the molecular relationship between
amorphous carbon and other compounds. Source:
At this time, in the second half 2018, the composition of soot is still being researched since it is one of the largest polluting agents.
Jacob Martin, a PhD student, and his research team at the Department of Chemical Engineering and Biotechnology at the University of Cambridge, have recently discovered new curved carbon nano-molecules present in soot:
One of the most fascinating things about allotropes of carbon is that new ones are constantly discovered. Graphene, an extremely hard semi-metal and one hottest research topics in chemical engineering, is only one of them.
Here is T-Carbon or C-20 for example.
"Carbon offers unmatched versatility among the elements of the periodic table. Depending on its hybridization state and atomic arrangement, carbon forms the layered semiconductor graphite, the insulator diamond, with its unmatched hardness, the high surface area amorphous carbons, and the nano-sized fullerenes and nanotubes, among others." - "Carbon allotropes: beyond graphite and diamond" - Eduardo HL Falcao, Fred Wudl.
My goal this week is to learn the basic steps needed to model a molecular sample of amorphous carbon similar to the one depicted below, part of Amihai Silverman's research. Source:

In order to do so, I will first model a diamond sample and then move around the bonds.
This week was specially challenging because in addition to teaching myself new 3D software, I had to first get a sense of the nature of these compounds without a background in chemistry. This site provides an accessible and clear overview of these structures:
Carbon Structures: The Building Blocks of Our Worlds.
In order to learn Blender I will follow the following tutorial.
To change the functions of the mouse clicks go to: file --> user preferences --> input.
Hot keys:
G - translate
R - Rotate
S - Scale
Shift + D - duplicates
Shift + A - shortcut to the create object menu
Two types of object selections: Active (primary in yellow) & selected object (secondary in orange).
In order to get started with my molecular structures, I followed this tutorial. Just a warning it goes very fast.
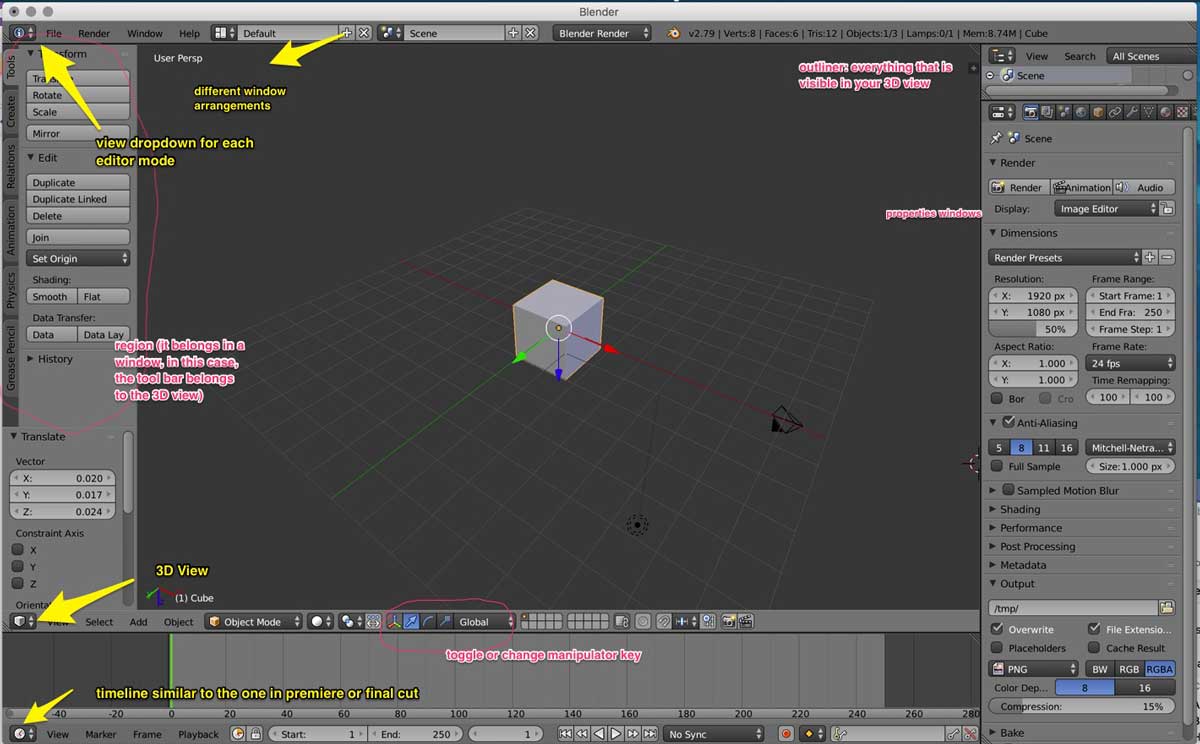
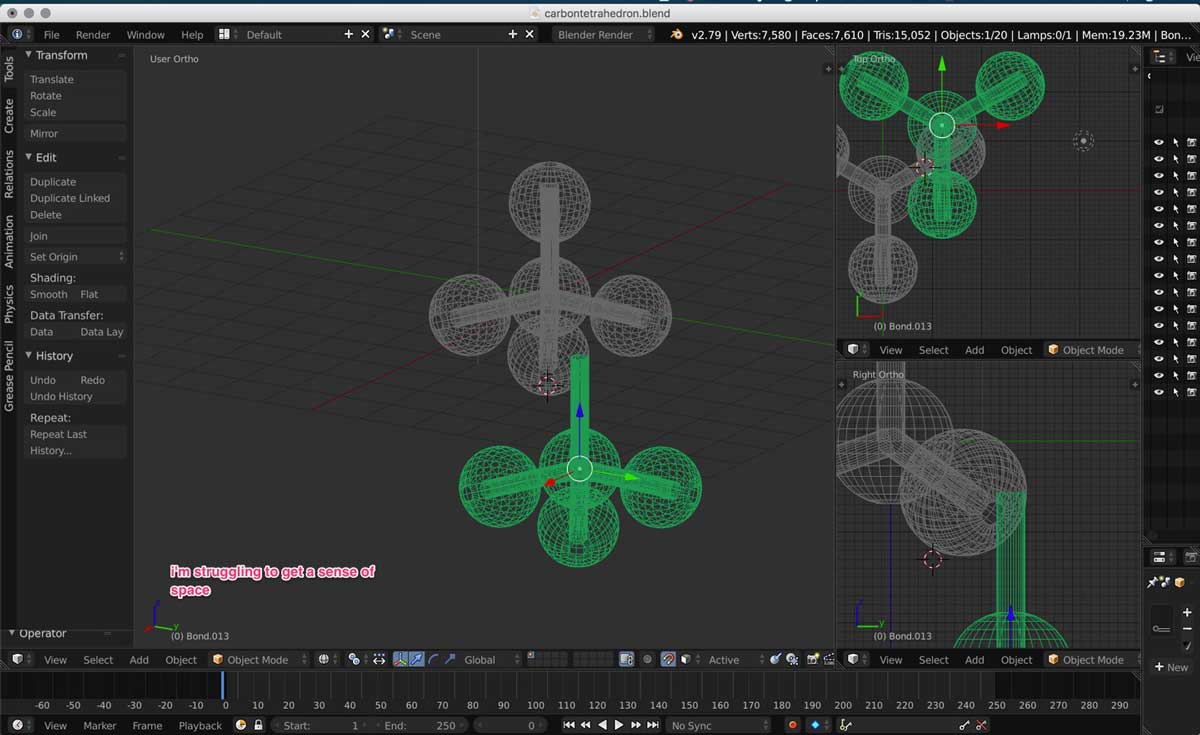
Below is an image of the main Blender workspace with my notes on it. This came in specially handy at the beginning since the Blender UI is very different to that of other
software I am familiar with:
1. I first followed the steps in the Youtube tutorial above to create a carbon tetrahedron, a set of 5 carbon atoms:

2. I then duplicated one tetrahedron by using the properties editor mode on the top right section of the screen and adding an array modifier.
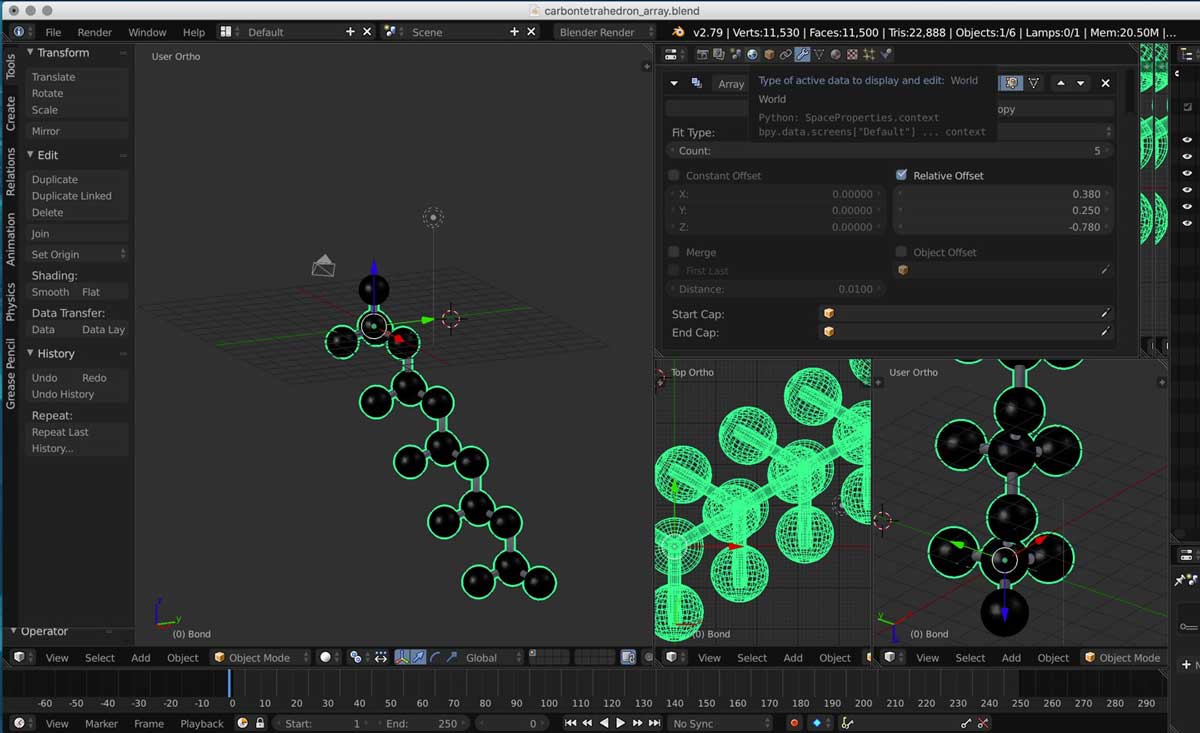
3. Then I had to figure out the position of a copy of a tetrahedron in relationship to the original one. This is also known as offset.
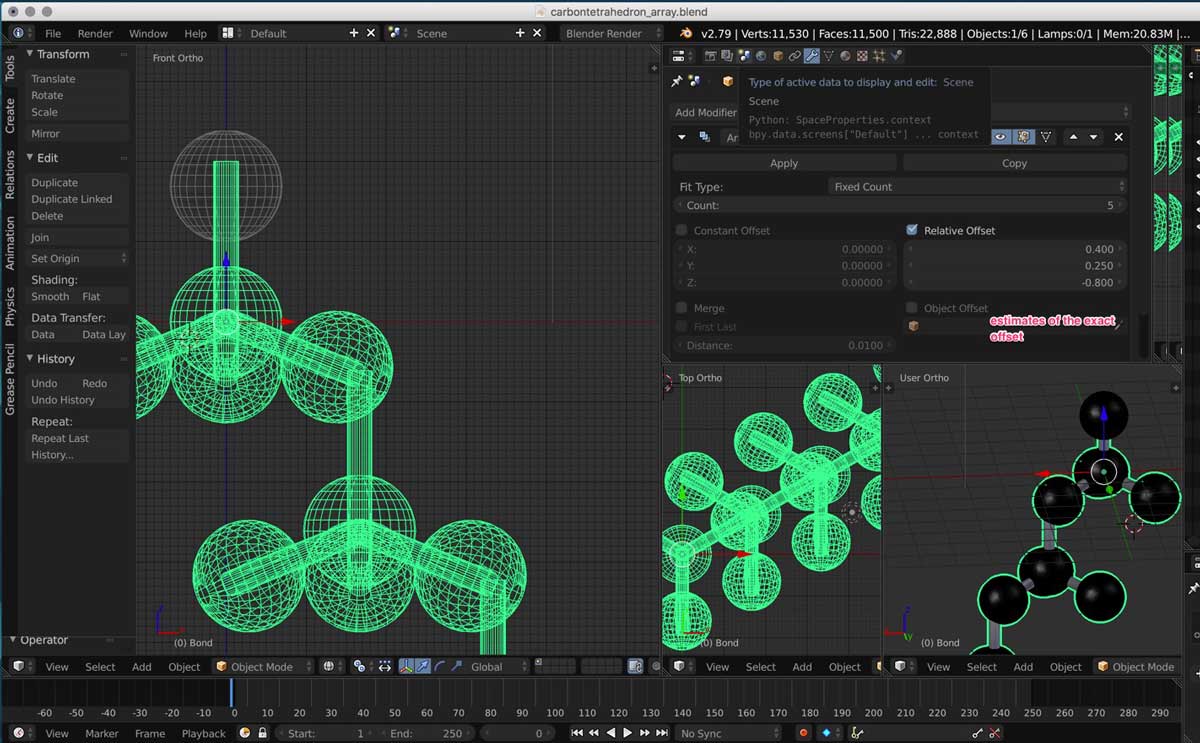
4. As my first time using a 3D modelling software, I had trouble orienting myself in 3D space.
I opened three different orthogonal views and tried to match the position of the tetrahedrons manually. I found out about the snapping tool but it was hard for me to know how to apply it.
I understand its function is but I do not know how to apply to my design. I therefore had to manually place each bond under the atoms.
5. Because of the issues I had with Blender , I did not manage to complete the diamond molecular structure. I had to
postpone creating my amorphous carbon structure . Below is the model of how far I got this week. I first exported the file from blender as an .obj file. I then uploaded the file to Autodesk's web visualizing tool called A360.
But more on Blender on Week 3 where I managed to make a model of the graphene molecular structure by myself!
At this stage, it was very helpful for me to run into the protein database website. It is a huge archive that focuses
on molecular structures. The files come in a .pdb format which can be opened in Blender. I downloaded the files for graphene, diamonds, fullerene and graphite.
In this way, it was easier for me to have a reference of how carbon allotropes look and what I should aim for.
I also looked into Fusion 360 modelling techniques. I chose this software because I wanted to learn a parametric CAD program.
In order to get acquainted with Fusion 360, I have followed the following tutorials available on the Autodesk website.
I then tried to make the same model I created in Blender:
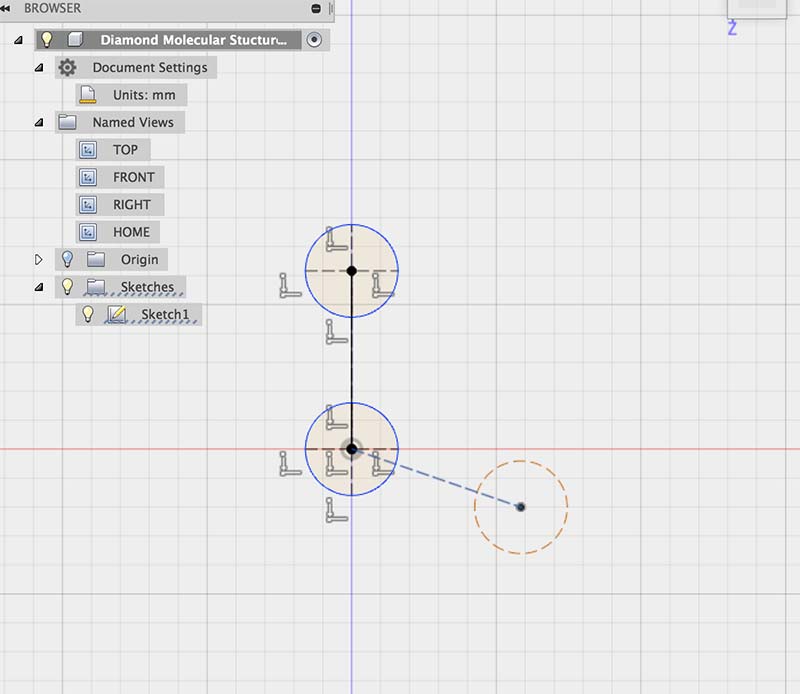
My plan was to first try to draw a sketch of the front view of a carbon tetrahedron. In order to do so, I used measurements that are
proportional to those of the bonds and atoms in a diamond structure. I used the reference below from this helpful site: Atomic World.

However, Fusion also had a steep learning curve and I could not get very far. In any case, in the following
weeks, it becomes my software of choice because of its parametric capabilities. For more, go to Week 7: Computer Controlled Machining, for example.
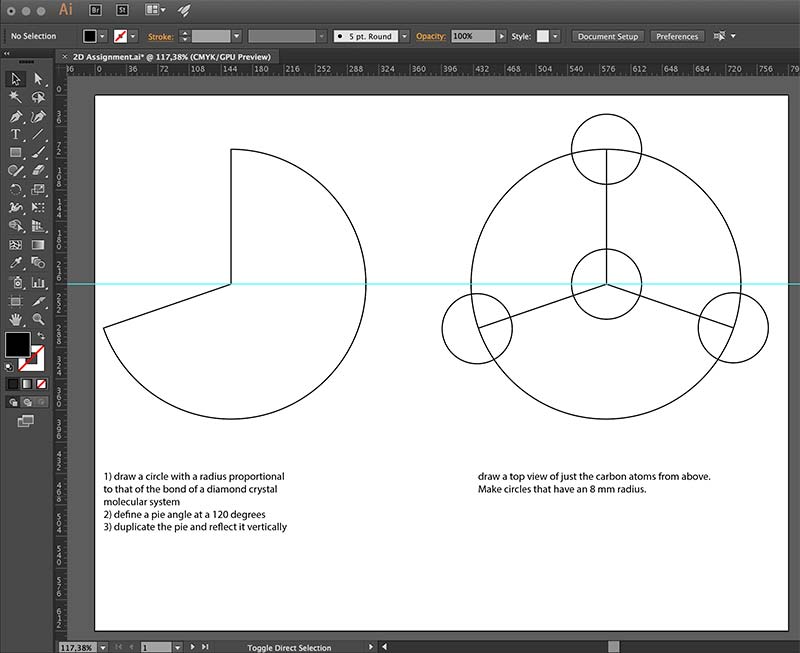
For this part of the assignment I used adobe illustrator, software that I was already relatively familiar with.
I first tried to reproduce a 2D version of the diamond tetrahedron, by using the pathfinder and shape tools. The instructions
I gave myself are outlined in the screenshot below:
Then I took the following amorphous carbon image I found on the internet and I vectorized it. Source: Sydney VisLab 1998.

Below are a couple of considerations when vectorizing images in Adobe Illustrator:
I selected the object and went to the menu Object -> Image Trace -> Make. This will transform a bitmap image into a vector image. Vector images can then be read by vinyl and laser cutters.
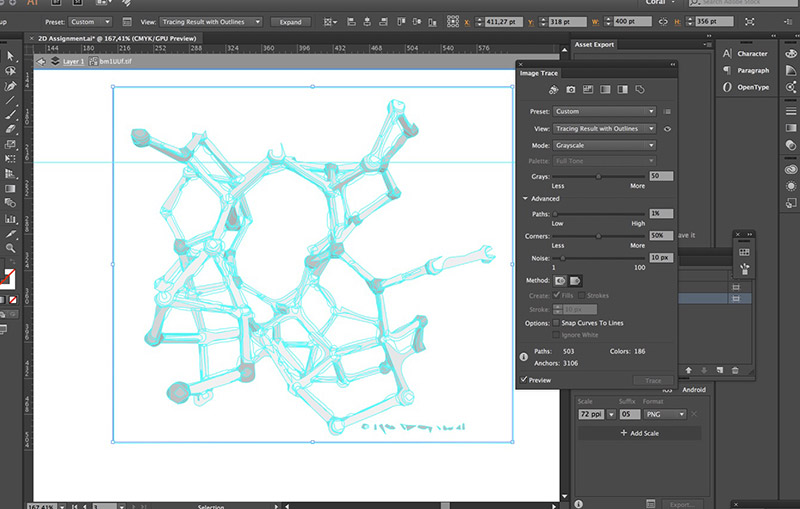
Then I played around with a couple of settings to see which one would give me the smoothest result.
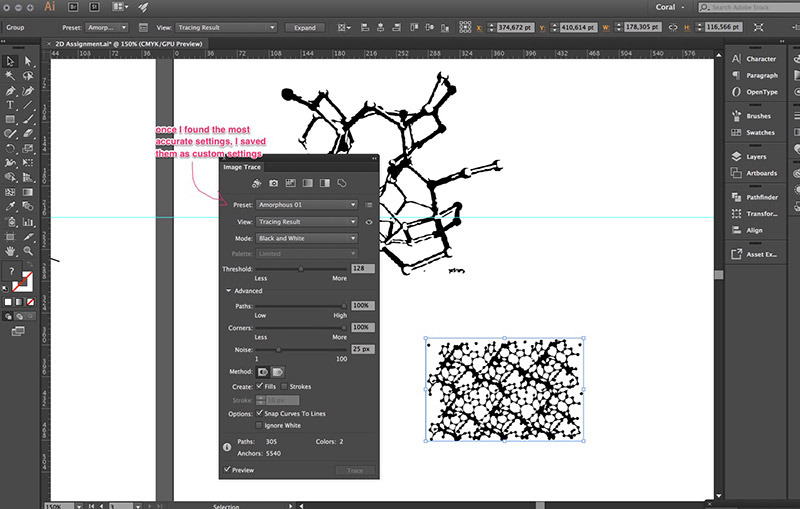
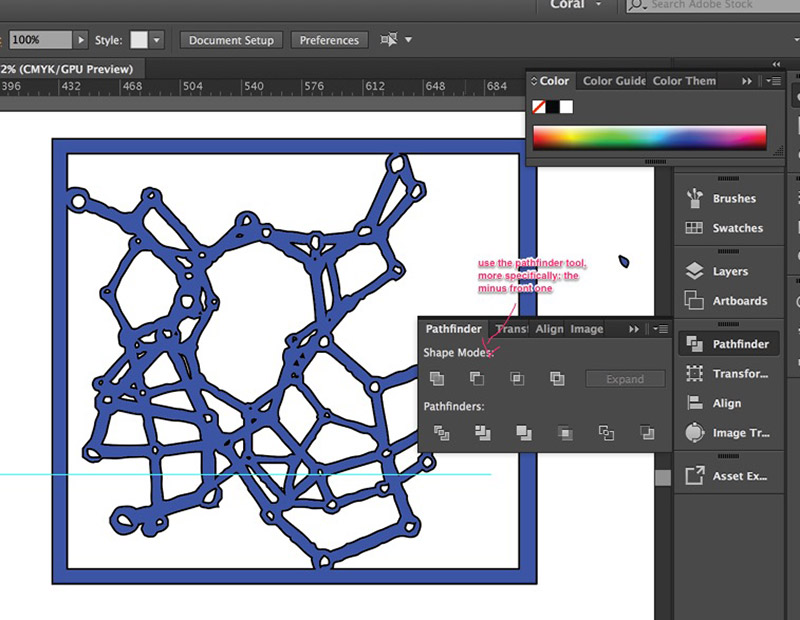
Lastly, once I had picked the settings I liked the most, I grouped different sets of vectors: one group was made up of the inner strokes and
the rest from the outer srokes. Then I used the pathfinder and the minus front tool so that I could have a closed path. This is key when cutting the shapes out as I discovered during Week 3.
Blender Carbontetrahedron(Diamond)
2D design Amorphous Carbon