This weeks assignment we are learning about composites and will produce our own test pieces by designing a 3d Mold, to use to form a fibre composite part.
Again an amazing amount of potential for design this week, I was exited to start the process and find out as much as I could.
A Composite material is built by a combination of layering and binding of materials with different inherrent chemical and physical properties in order to create a solid part. The main constituents are fundamental and structurally supportive of each other to enhance the overal properties and strength of the material. This fusion of of synergous materials essentially consists of a binder - the matrices or resin and the reinforcement counterpart - the fibre or particles.
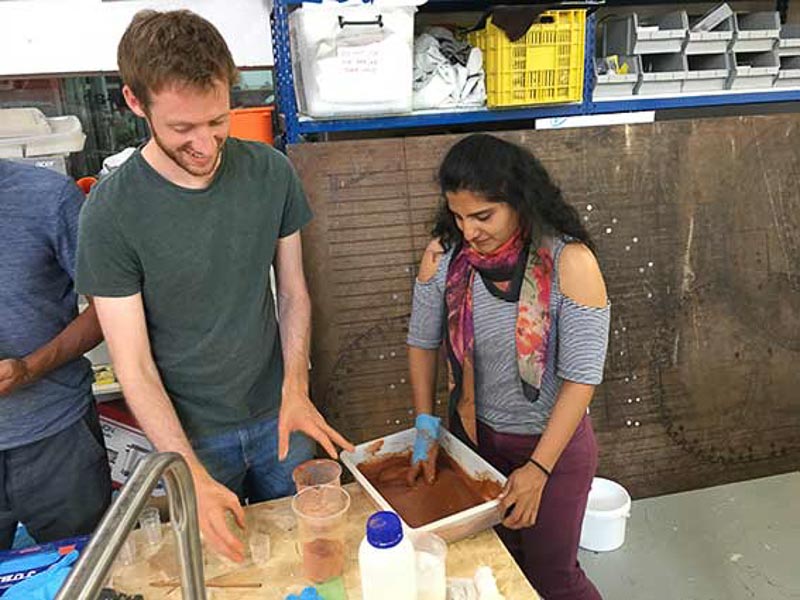
This week we were visited in the lab by a local composite expert - Joaquin Melchor. He is particularly knowlegeable in the chemistry use of biological and natural materials and a professional Canoe maker by trade.
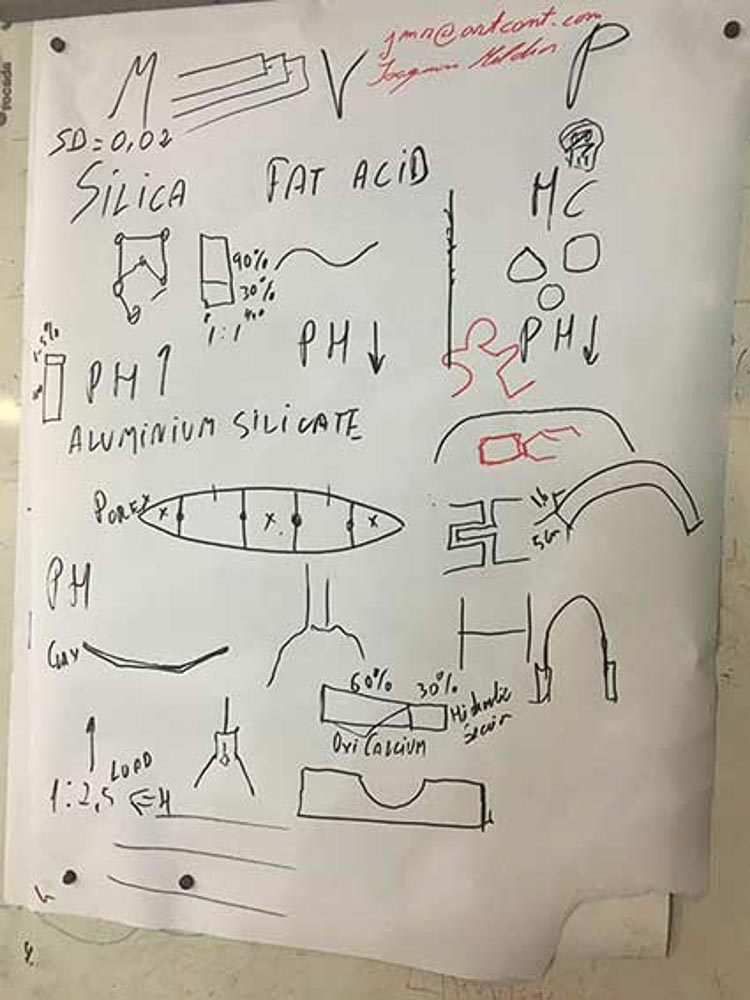

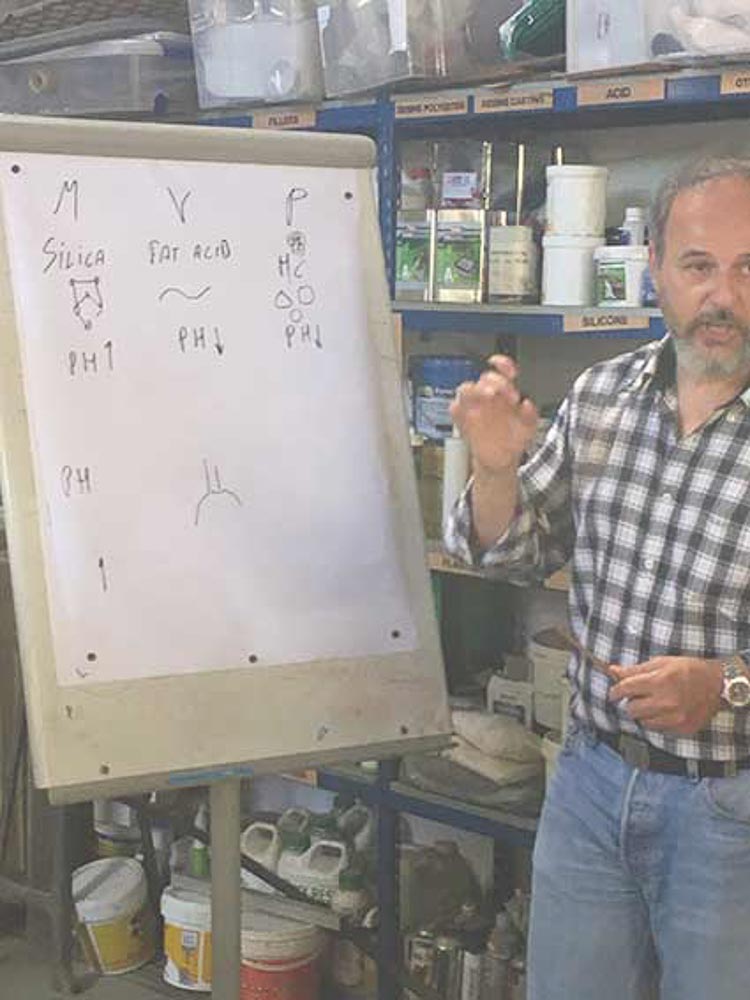
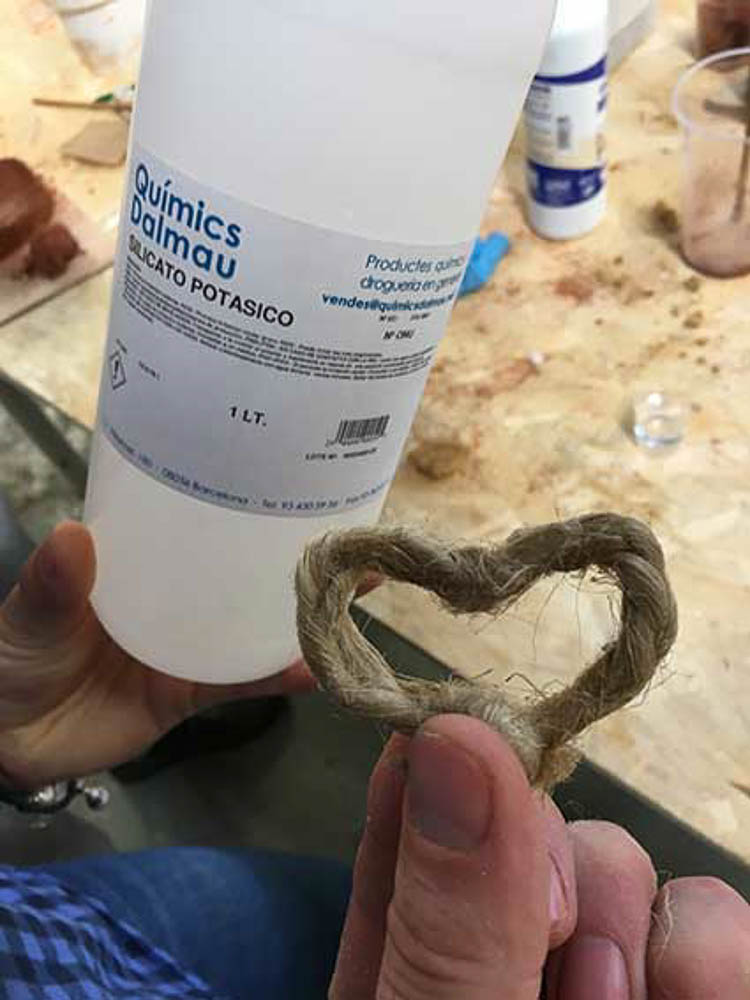
He talked about the composition and some history and differences in materials. To understand the types of things that could be mixed effectively, or not. It was super interesting. Learning about some of the distinctions between Mineral, Vegetal and Petrochemical sources for both the Binder and bulk reinforcemnt material. Mixing ratios and layers and curing times. Ideally an intelligently arranged and neatly packed reinforcemnt uniformly infused with minimum quantity of binder will create the most solid and lightweight strength in the part. In particular we were shown how to use Potassium Silicate and water with the correct reinforcement matrix it will form a solid epoxy like stiffness and rigidity.
We were ushered into smaller groups and set to work on four mini projects. To make a laminate shelf in wood, some ceramic clay plates, a surf-board foam with fibre and epoxy lay-up. And a thin layered lamp shade, using Isaac's laquered casting he made in concrete as a mold.
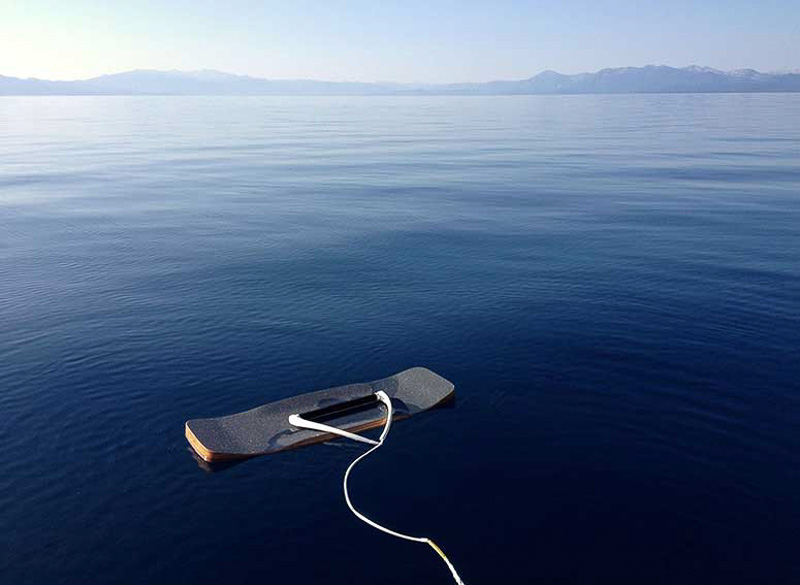
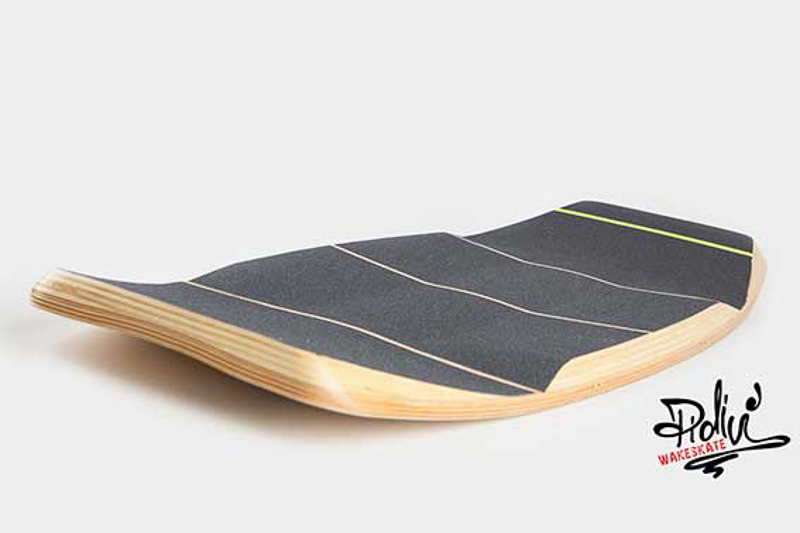
As I had already begun thinking about the assignment and I really wanted to try to make a wake-skate either in fiberglass on a foam core or as a wood laminate with fiberglass/resin coat. Therefore I went with the surfboard as a test.
 Hemp fibre cloth and Epoxy resin test
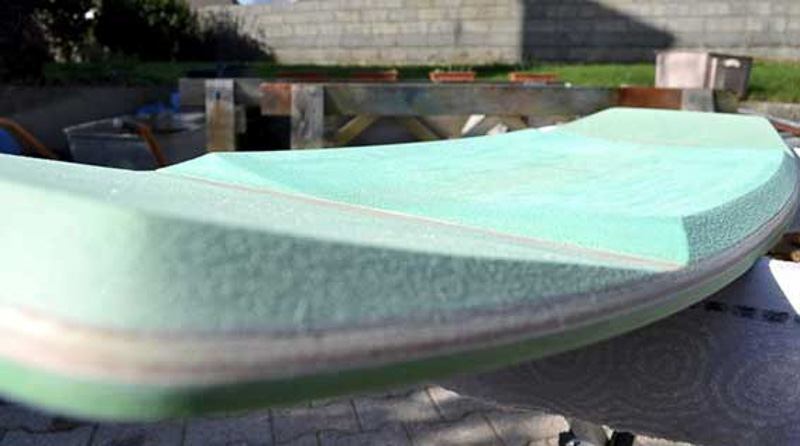
First we found a sizable lengthy chunk of Polex - cheap white foam and cut it and glued it together to give us more width. The next morning I was in early and began by roughly drawing out the shape of a small surfboard and then roughly shaping using a handsaw then a file as best I could. It then took a surprising amount of time to clear up! and some final sanding and get it smooth.
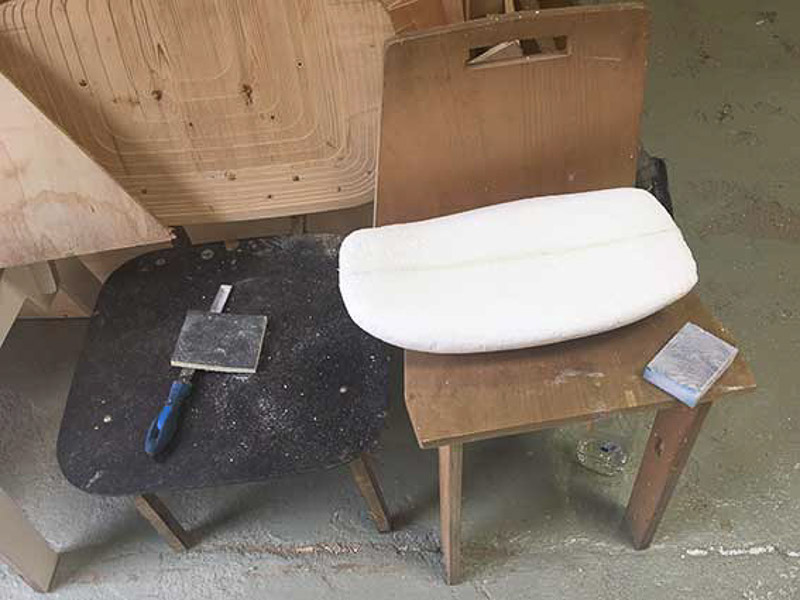

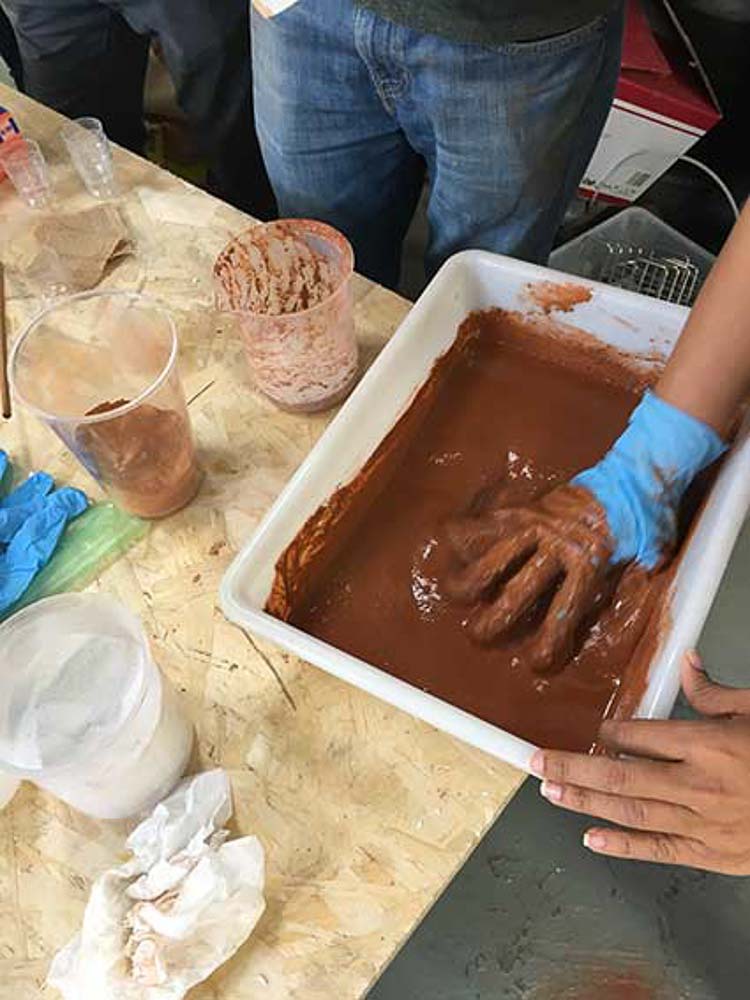
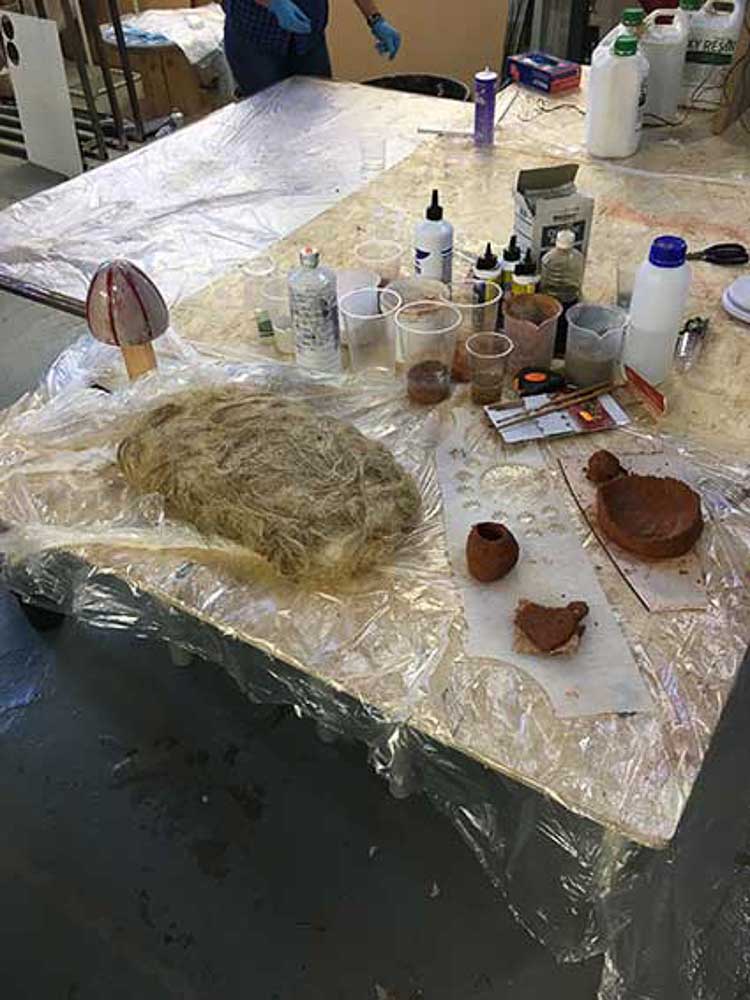
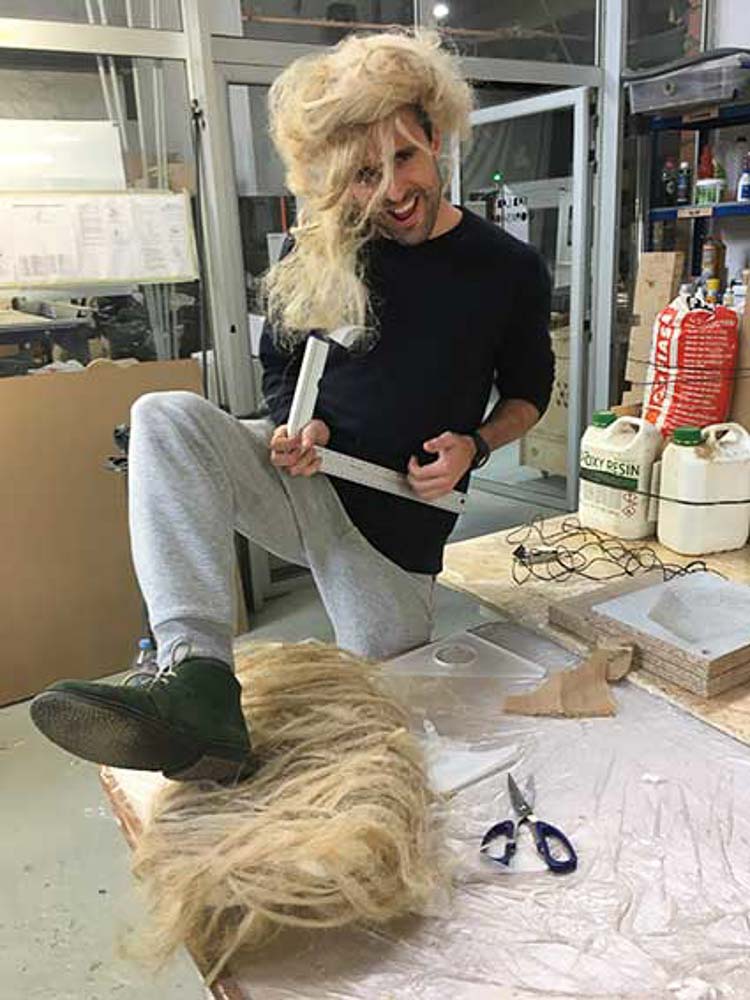
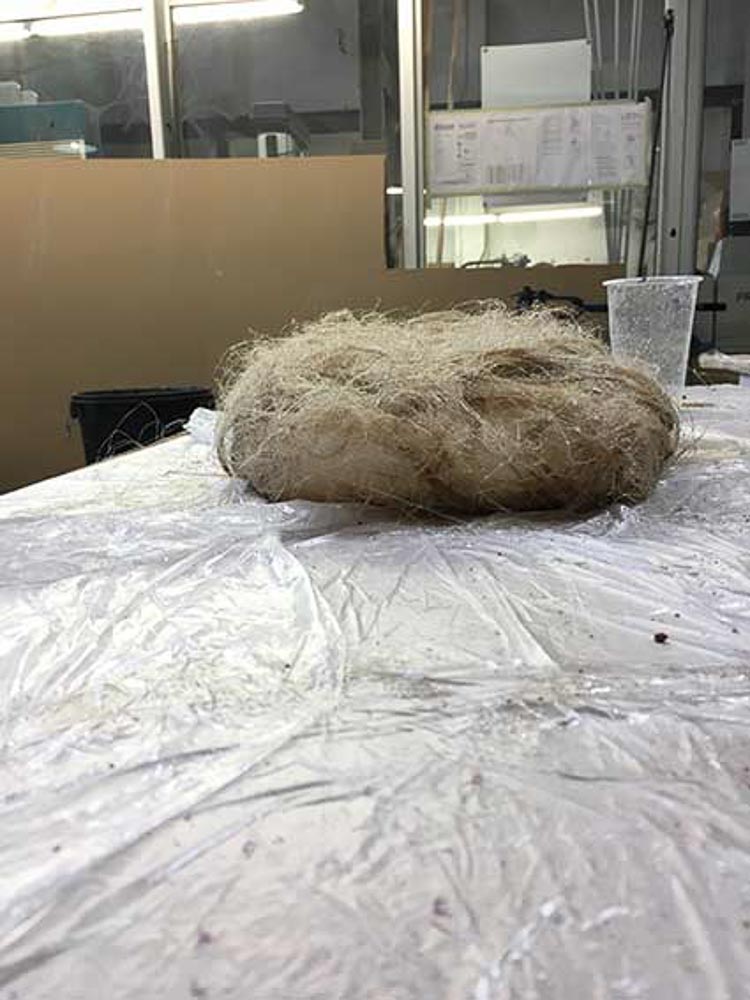
Then it was time to get messy! As we were working as a group we were all keen to get involved in the process. The idea was to use these natural hemp fibres and twist them to make several thin cords, then to make a weave layup over our board. Trying to focus the directional crossing of the fibres accross in the areas that require more strength and thinning out toward the tip and tail of the board.
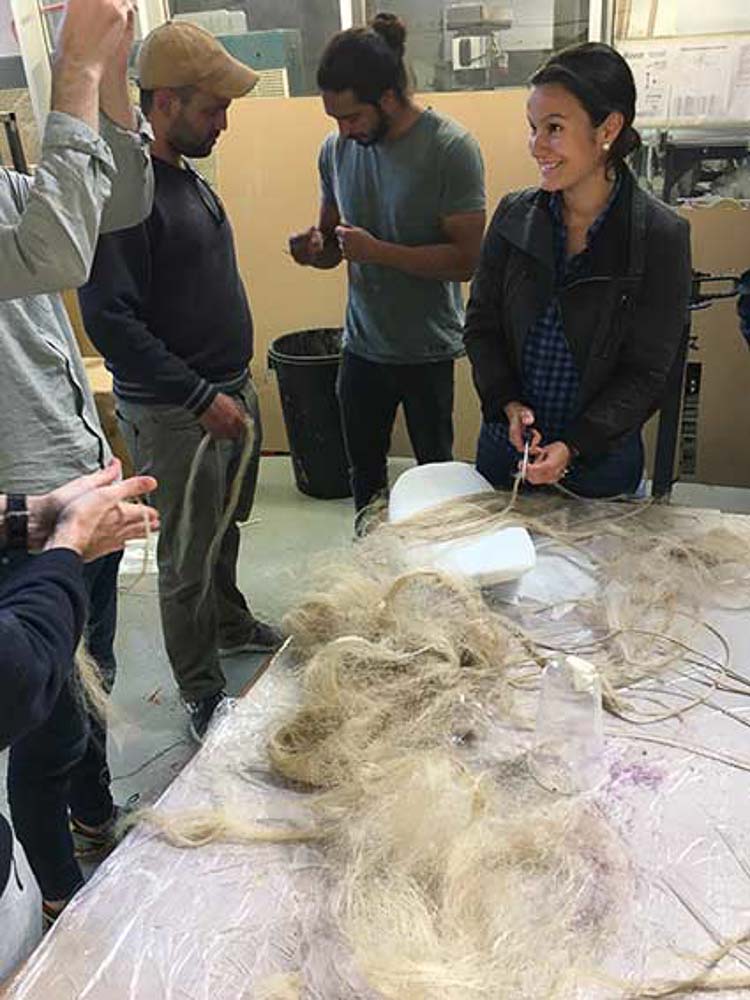
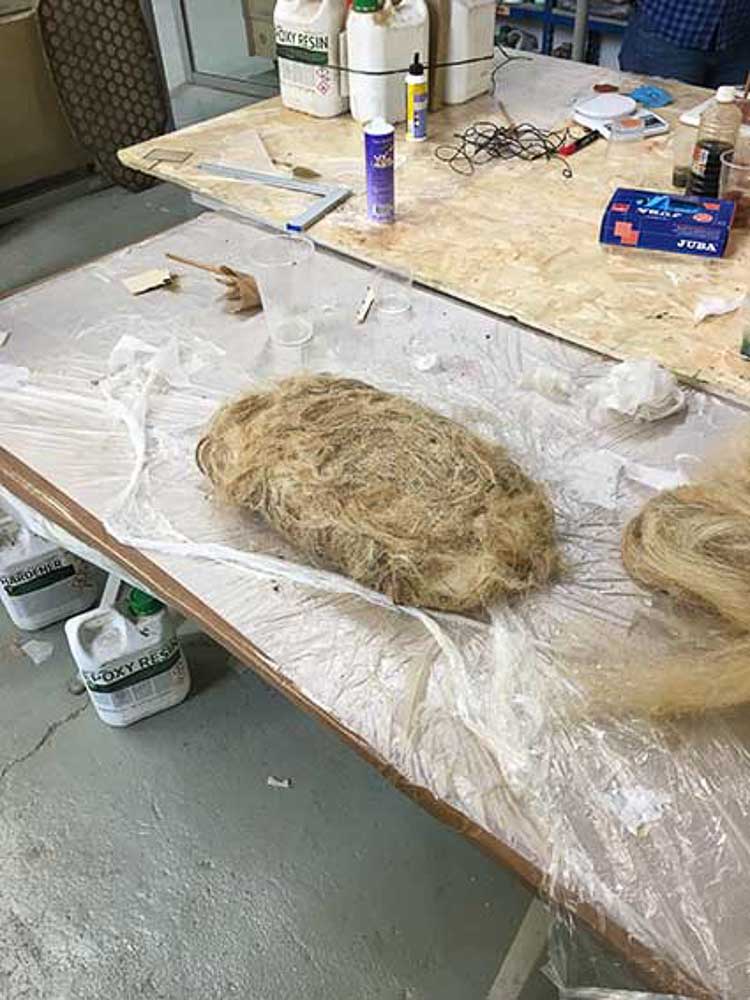
This was much more difficult than it sounds working with a fine but coarse material, then when the epoxy was added on top it was eceptionally difficult to apply evenly and keep it smoothed down flat oriented as it should be. As it was a demo and we were working quickly it became a bit of sticky epoxy mess before starting to exotherm quite badly! Even some faint whiffs of smoke coming from the foam core! We had to stop working as it began to stiffen. It certainly won't win prizes for the most hydro-dynamic of surfboards but we had fun and learnt a lot whilst making this test.
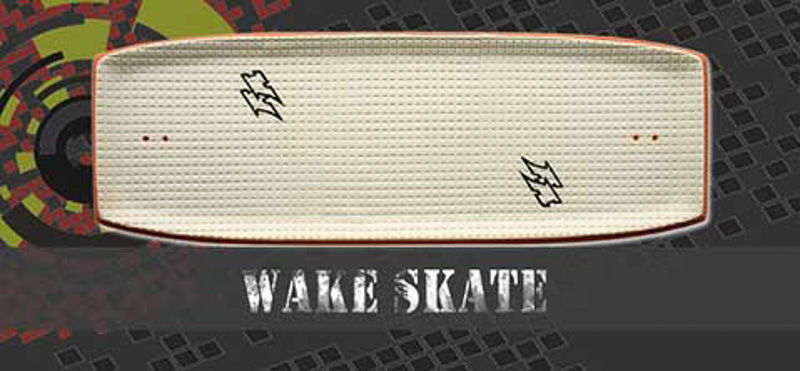
Now would there be time to finalise and make my Wake-Skate design?... Somewhere between a wakeboard and a skateboard, the wakeskate is ideal shape that can be molded as a laminate with wood, or plastic composite foam and glass-fibre laminate.
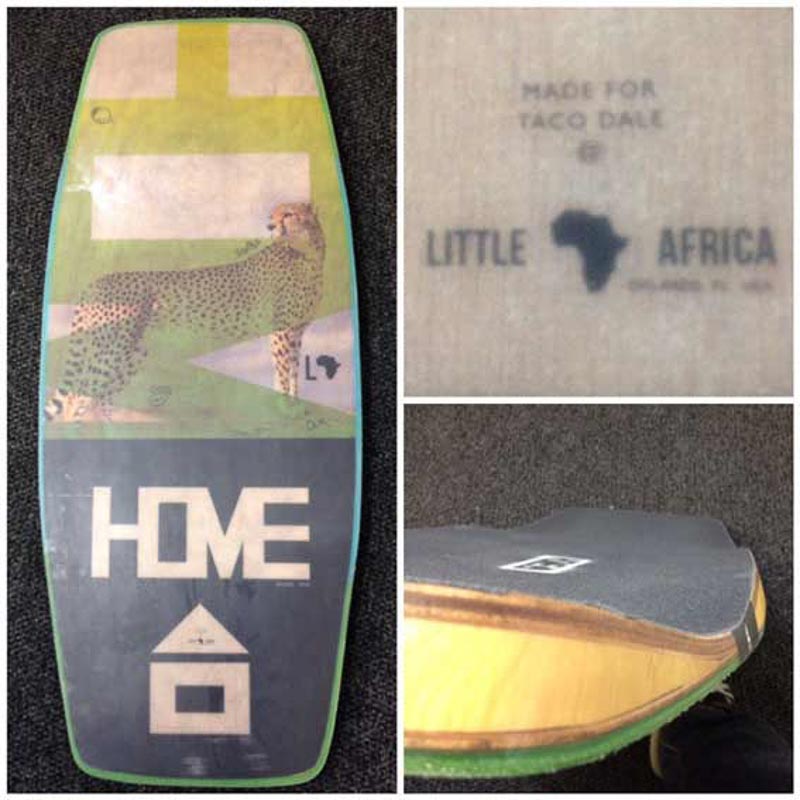
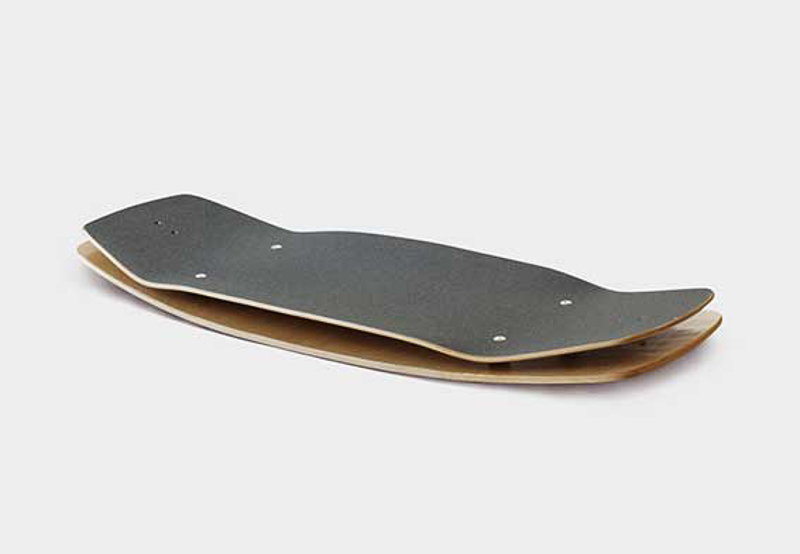
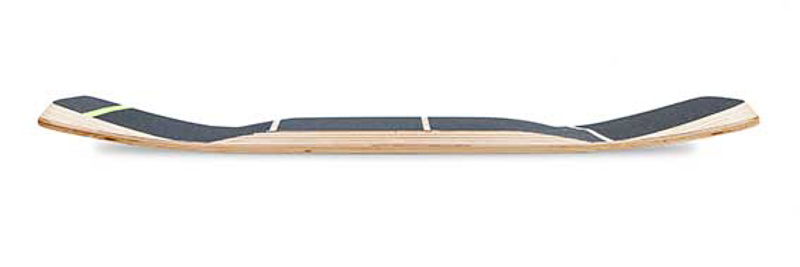
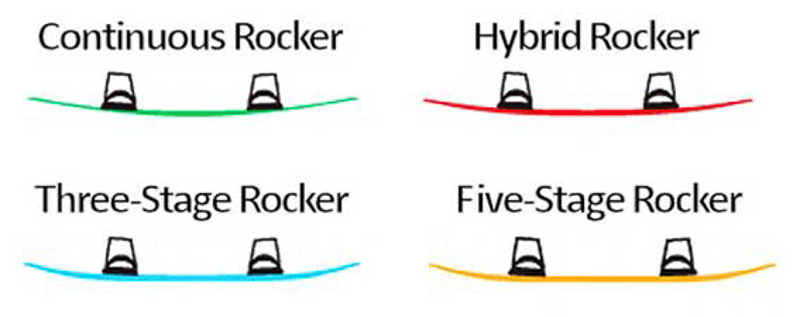
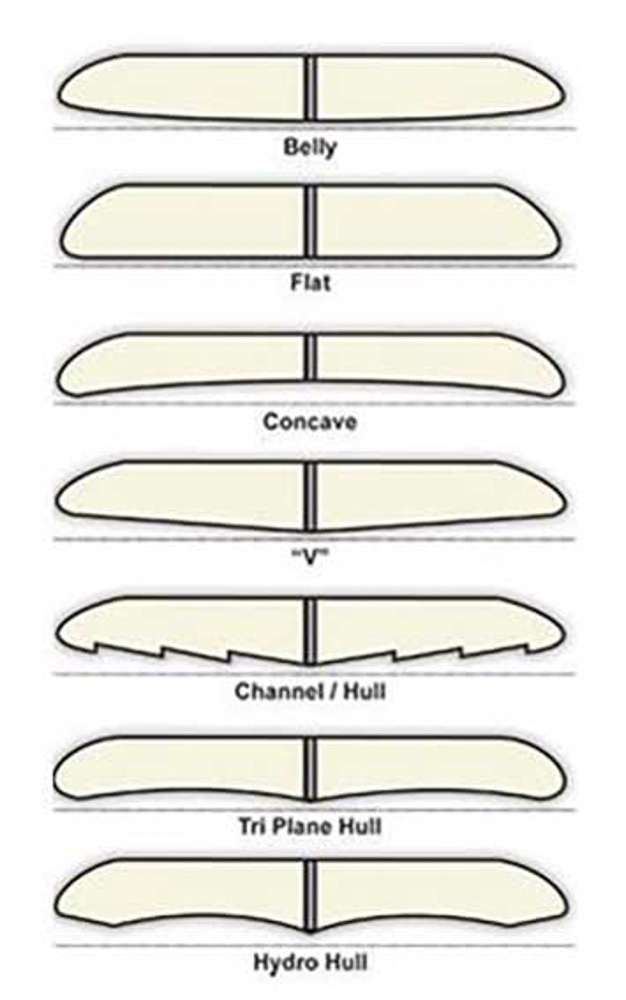
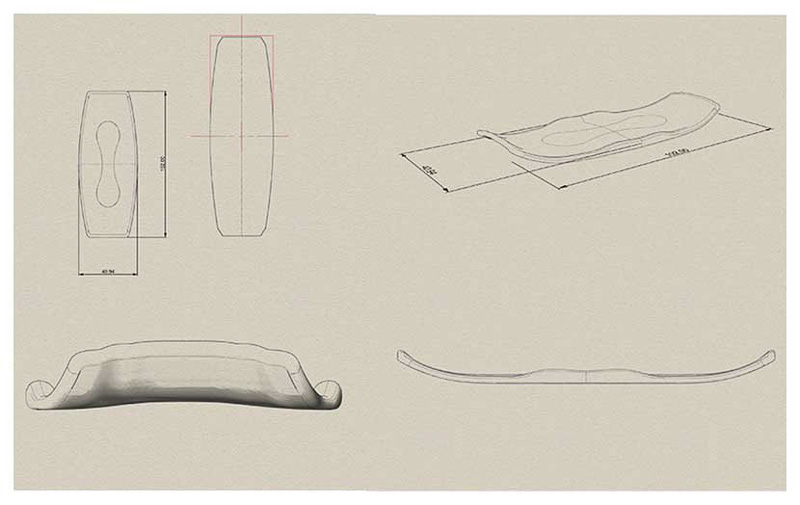
I used Rhino in order to design a what I deemed to be a reasonably well proportioned board, with a bit of rail profiling to make it intersting. As well as the length, width, thickness and weight of a board. Important things to consider are the 'rocker' which can be continuous or staged and relates to the curvature profile down the length to the tips of the board. Also rails, channels and scoops in the horizontal plane are often used in wakeboards add hydrodynamic traction and add strength and rigidity, often replacing any fins. A protective harder layer on the base or along the edges of the board also add to overall durability. commercially these are usually sintered on with heat in the mold.

I have been researching potential contruction methods here in the lab. A colleague had a go a laminating his long-board design on a foam block with plywood but regrettably with the thickness he used and not much pre-treatment his board failed at the bend. I was intending on using a foam core which I would mill to shape as a whole or in two halves with a potential a wooden central stringer section, like a surfboard - for added strength or flex. Then coat and bond in fiber and resin and press.
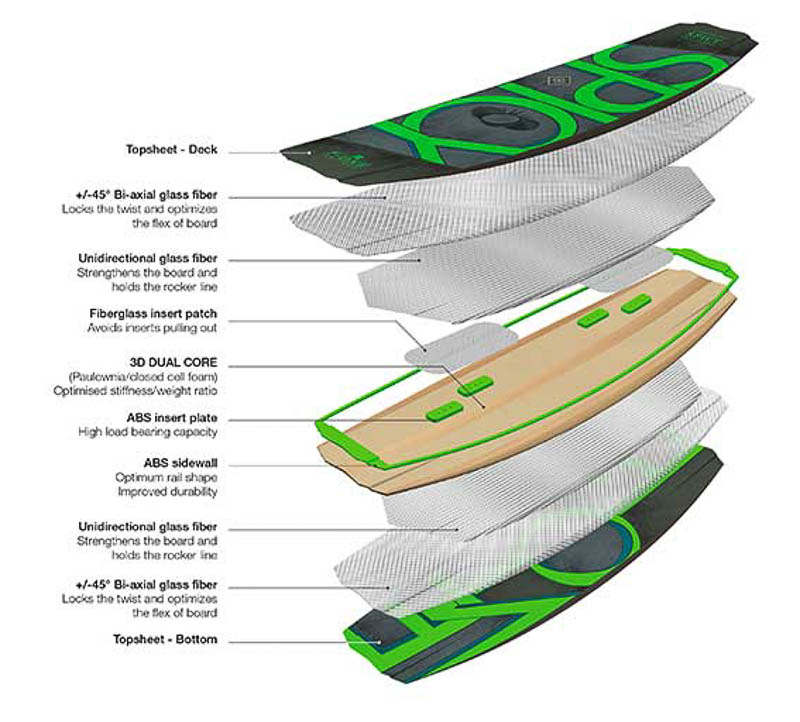
To achieve this I will need to mill a solid base profile block for my board, using this as a mold to then lay up the fibre sheets and resin layers onto, before placing the positive foam core section and repeat the lay-up on the top side, and use a vacuum bagging technique to cure it under pressure. Or I could even try a vacuum infusion process; to pull and infuse the binder into a dry lay up of the composite fibres whilst drawing the vacuum through the mold. If not I will use our vacuum table.
It would be better still if I could make a base block and a top block forming a two part mold in order clamp the composite layers together and achieve a better seal between the base and top faces and around edges of the board. With a two part mold clamping could also provide superior pressure than a vacuum. However, constructing two solid molds, in wood or even in foam board would end up quite a considerable material costs and machining time for making just one board.


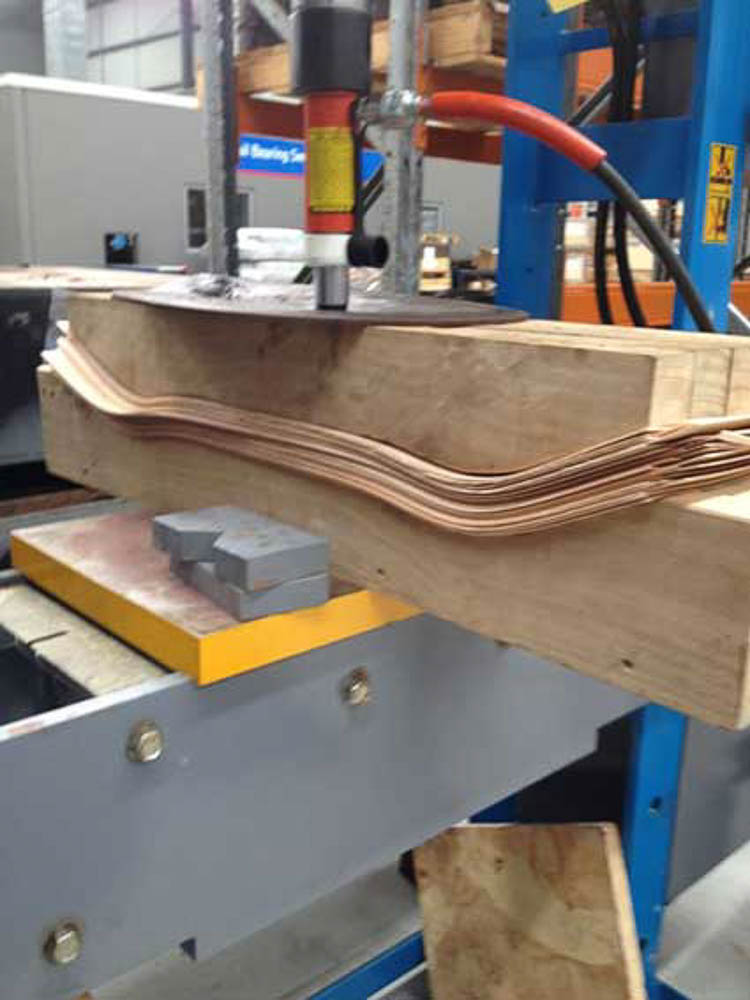
I purchased some balsa wood to potentially use for the stringer and central section. And I have also been on the hunt locally for thin wood laminate sheets. With the idea that whilst awaiting the order of more foam and with our experiences handling the epoxy in the surf-board test I might try to do a full wood board as a laminate. Despite scouring high and low at material stockists and hobby shops on the net I found it was very difficult to purchase anything locally, or in decent size sheets. Most being sold were a meter by 30 cm at the largest and were very highly priced. So somewhat detered I returned to the lab the next day empty handed. Ideally I wanted 2mm or thinner laminate layers in a good quality harder wood such as Birch - Abedul here in Spain, but this was going to be costly or impossible! These designs are from a series of 3D models created using Rhino.
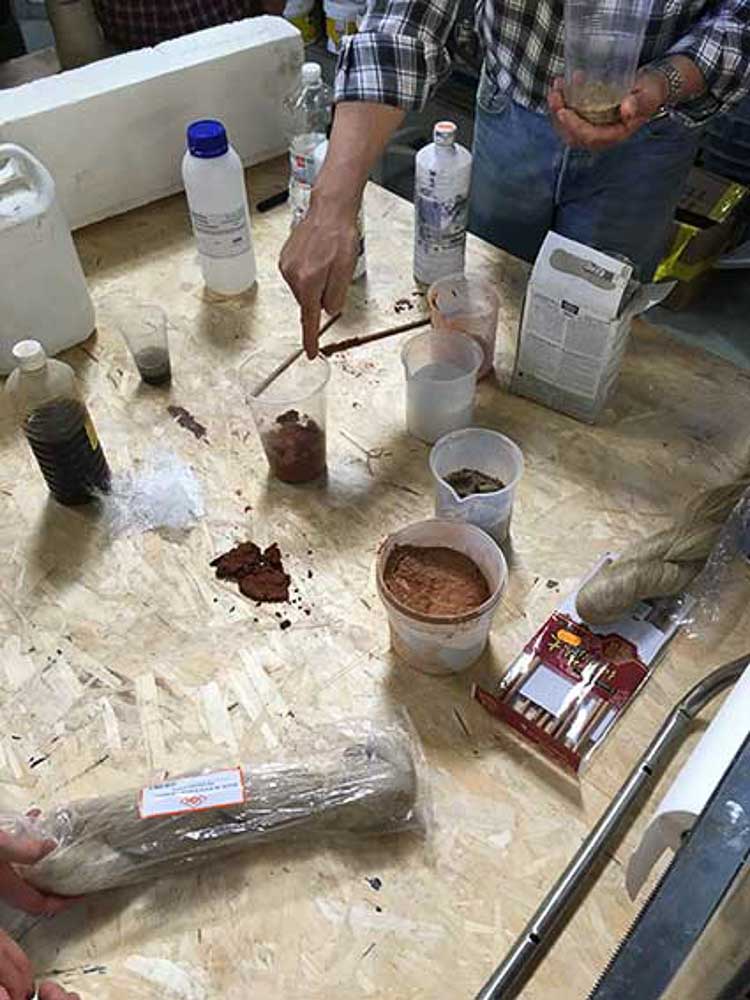
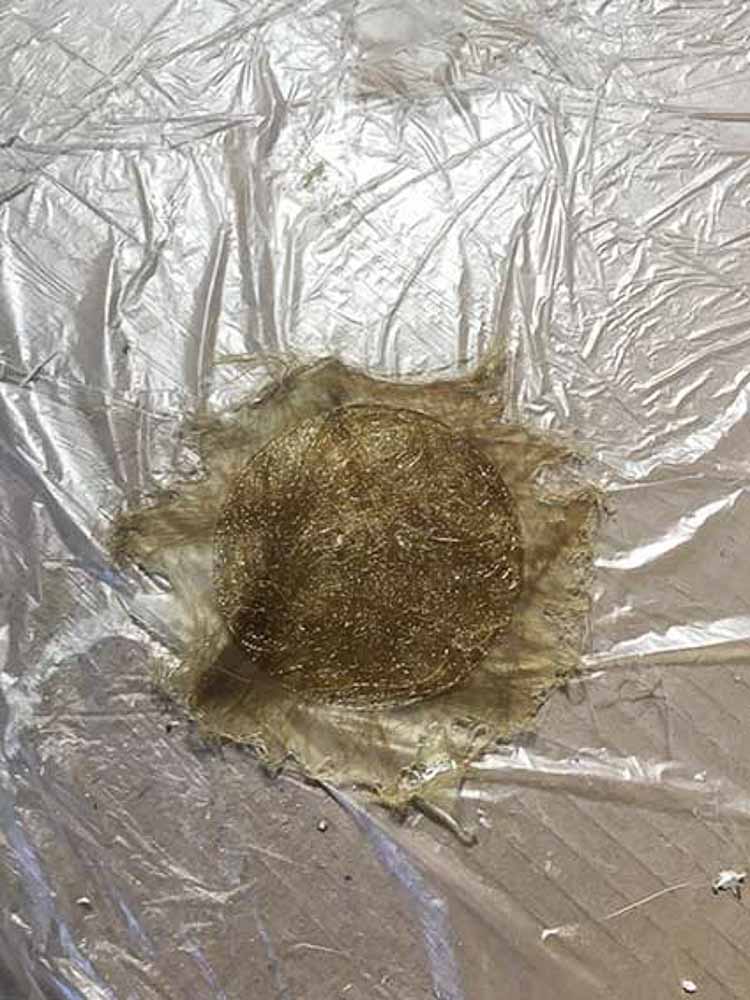
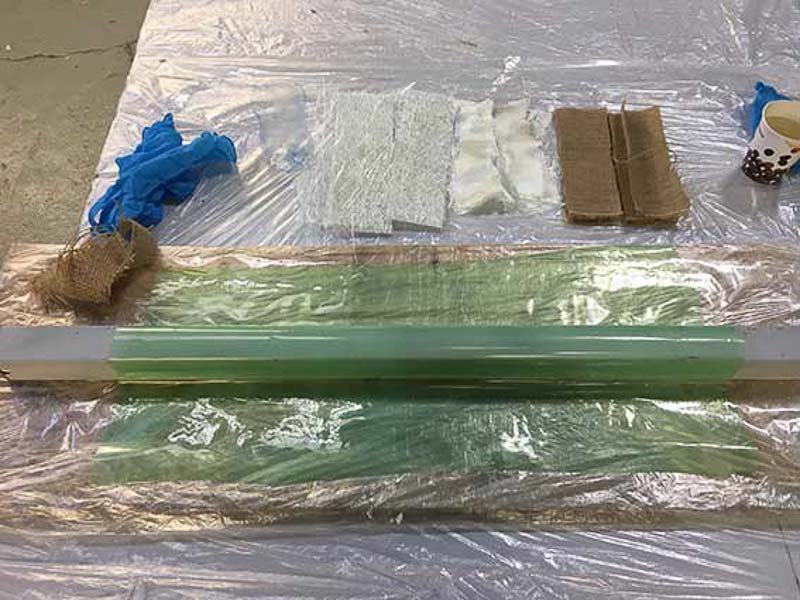
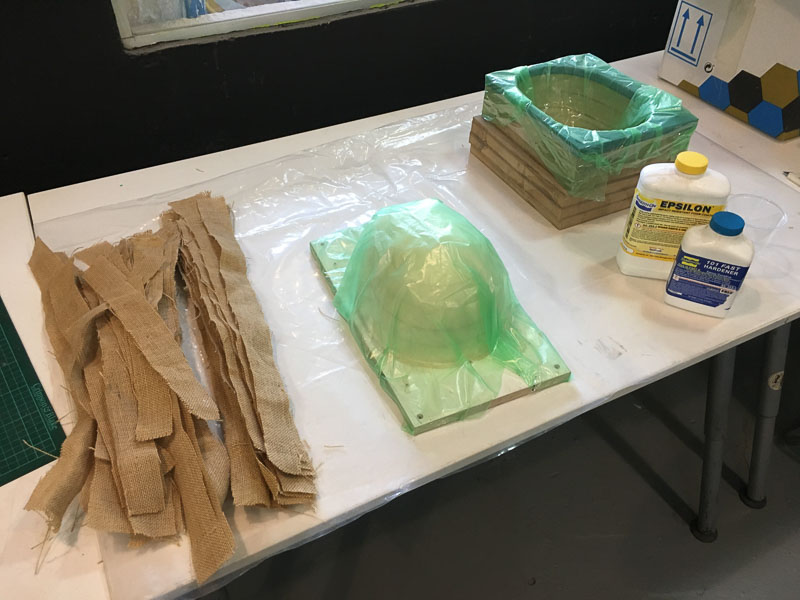
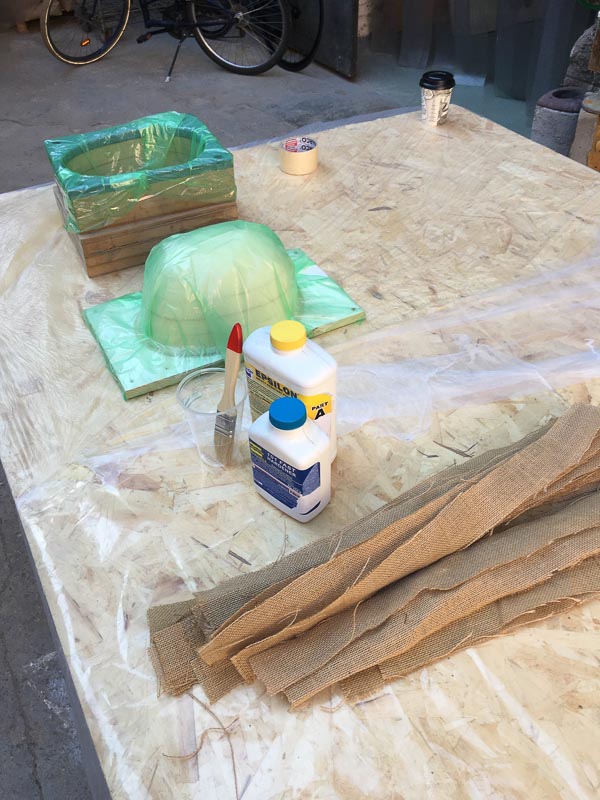
I did find a reasonably nice half board of 3mm plywood in the lab, I thought If I cut my blanks I would get three layers from this, one more would be ideal, perhaps I could make use of some off-cuts to add more rocker and rail sections. I was intending on soaking them to make them more supple before epoxy bonding again under pressure. I was also desperately trying to find enough wood to begin milling a base mold from. To my dismay, with my fingers at the wood stock! I was told that what I required was excessive and potentially the timber was being used for something else. And due to the large ammount of time I would now need to complete this board with any level success, I would rather wait until I have some suitable and available materials. Perhaps I can try to mill and then fiber-glass a board when more stock of foam arrives. But time is not on my side! For now I patiently resorted to more testing with some of these materials and processes. I came up with the following test samples using different grades of fibre-glass sheet and burlap sacking material. I molded these over a box section piece of steel that I found. As my bonding agent I wanted to test the difference between using Potassium Silicate and Water and a regular 2 part Epoxy resin, to see how comparable they are. The Potassium Silicate after being under vacuum as was the epoxy did not cure, as it needed the evaporative qualities of air drying and more time to cure. The final results were as follows.

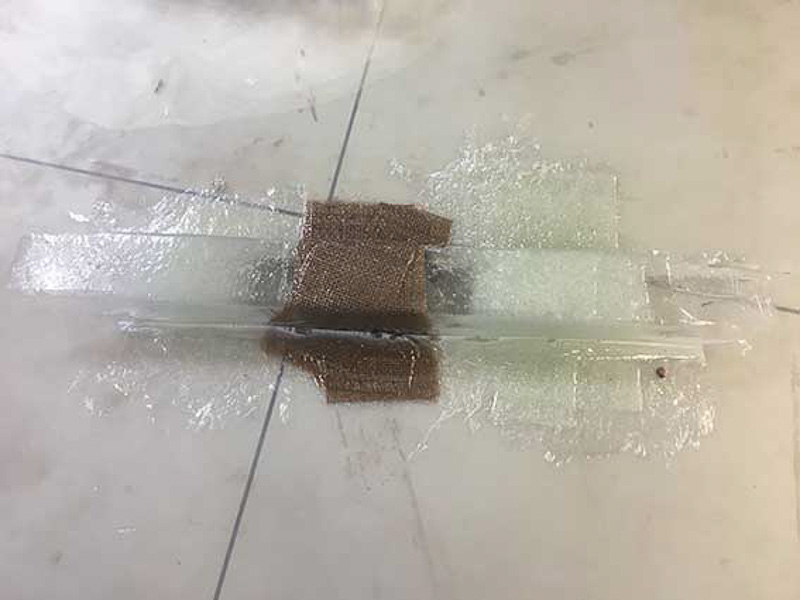
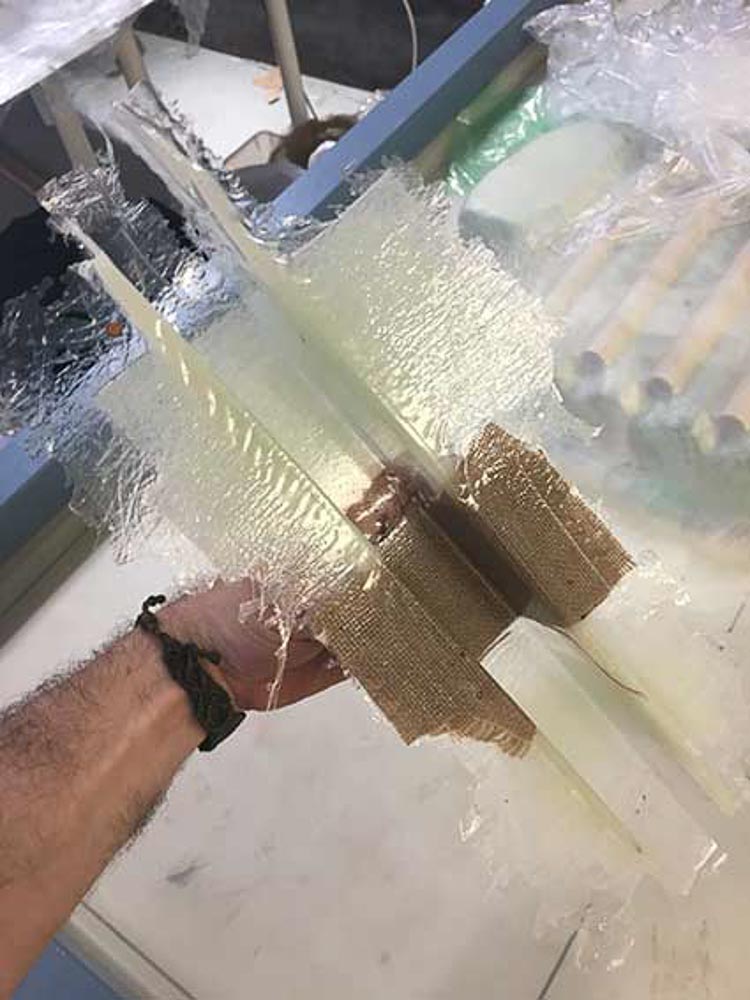
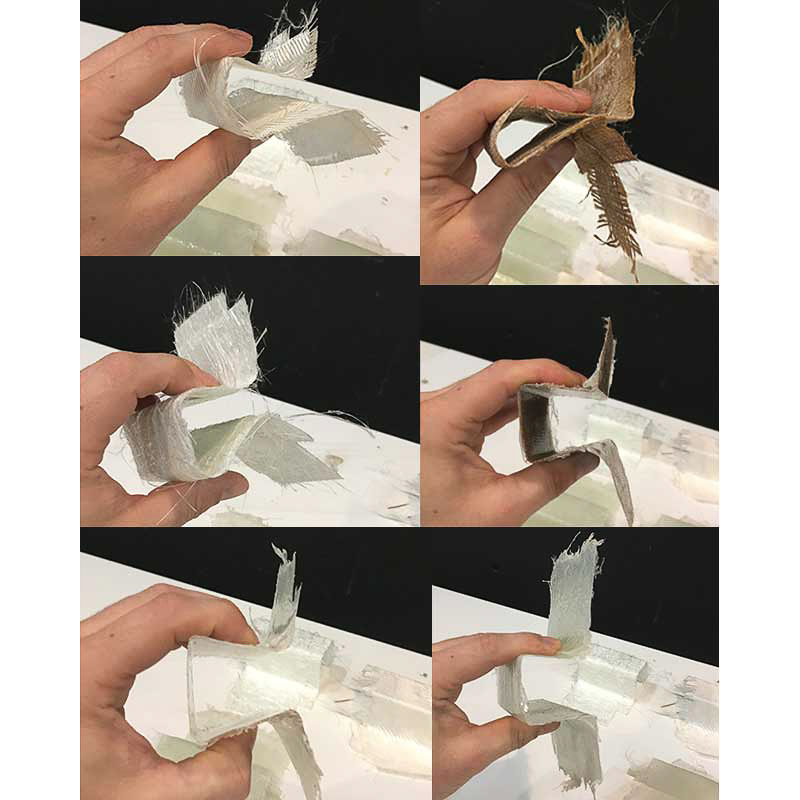
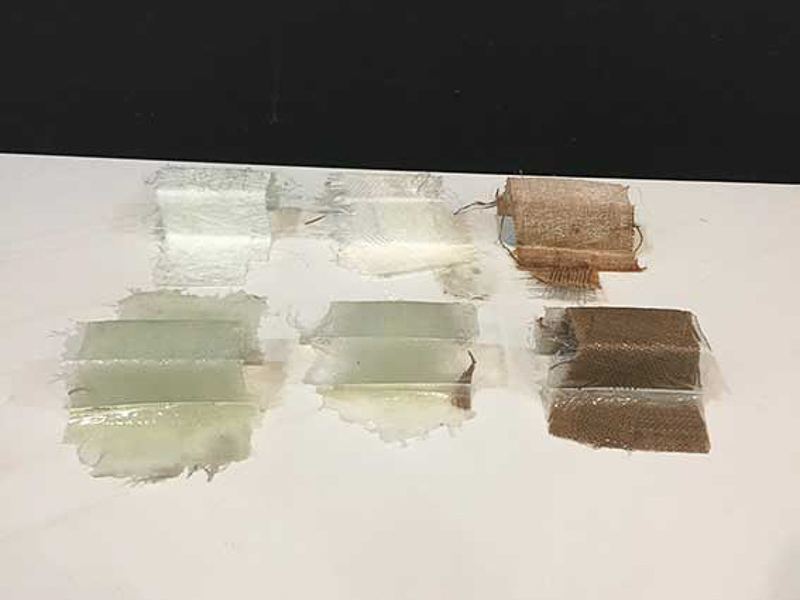
From these tests it appears that the epoxy is by far the tougher and most effective of the two, but with more time to cure and attention to making a better bonding matrices, I am sure the Potassium Silcate would have shown improvements.


I have not yet found the time to fully acomplish this assignment with 3D milling a mold of my own design. Although I have done a lot of testing and exploring the materials and processes. It would be amazing to realise my skate design but with constraints on material cost, and time available to me I decided to design something a little smaller and easier to achieve.
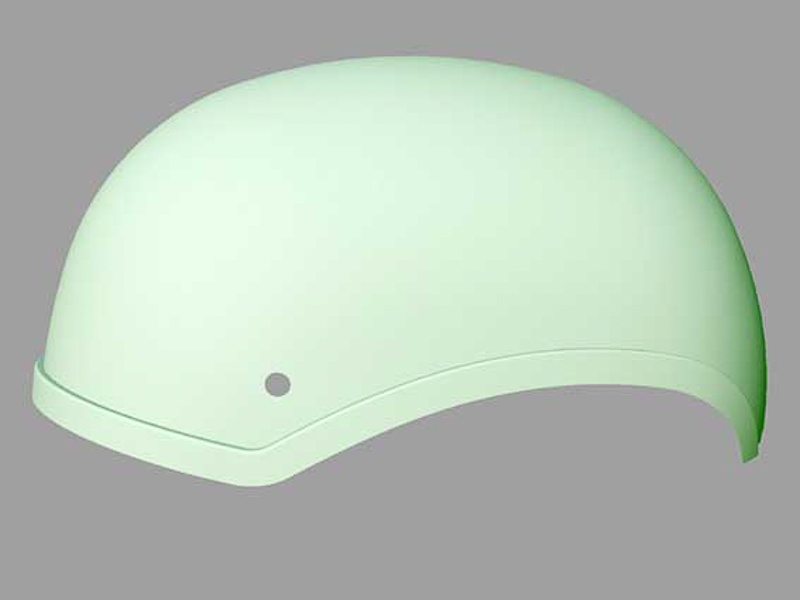
The designs I came up with to make a solid composite part are of a Tactical style Helmet. I hope I get the chance to set up for milling through RhinoCam get a mold made to then apply an epoxy with hemp or even glass fibre composite. Watch this space!...
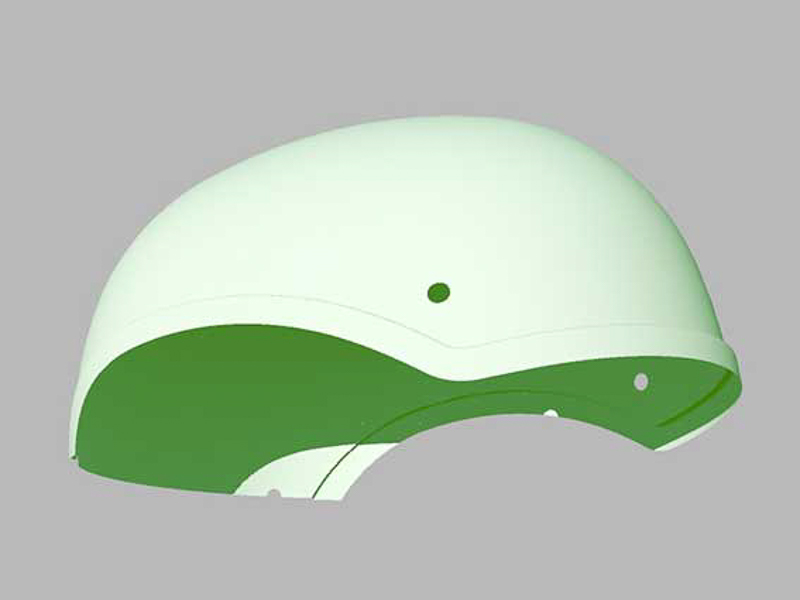
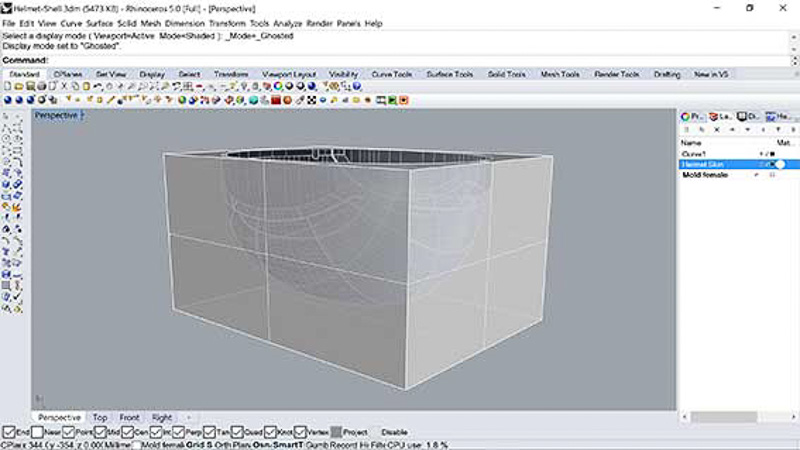
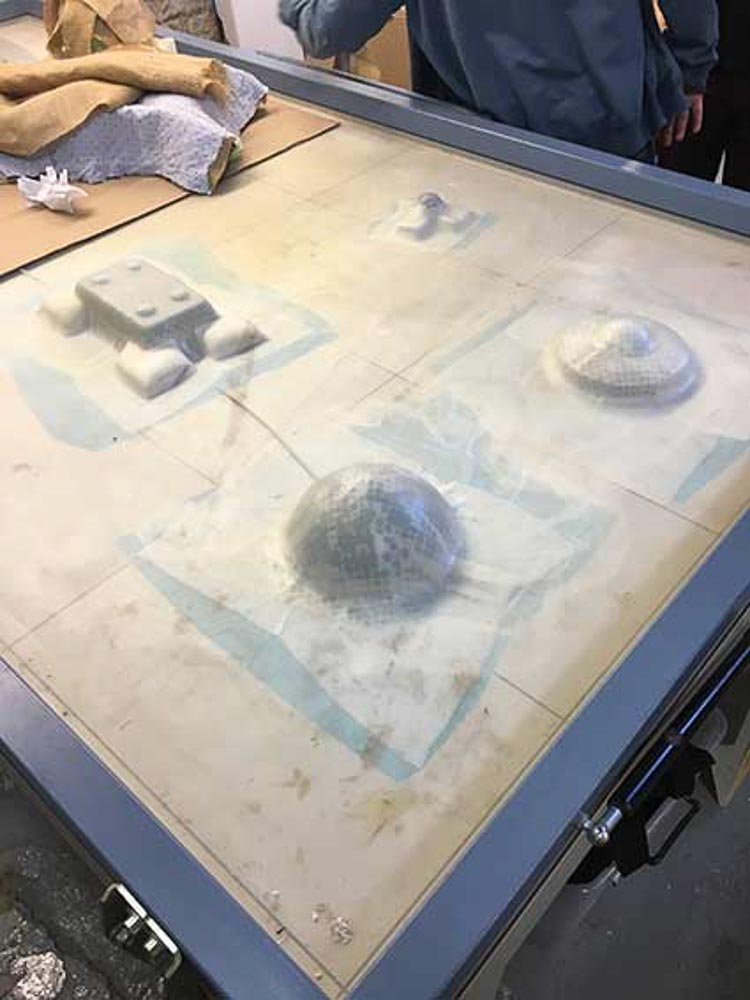
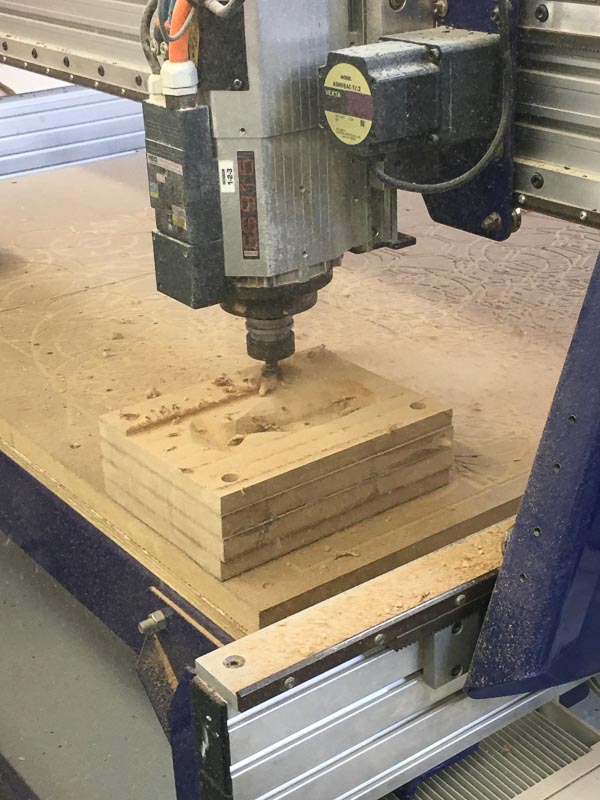
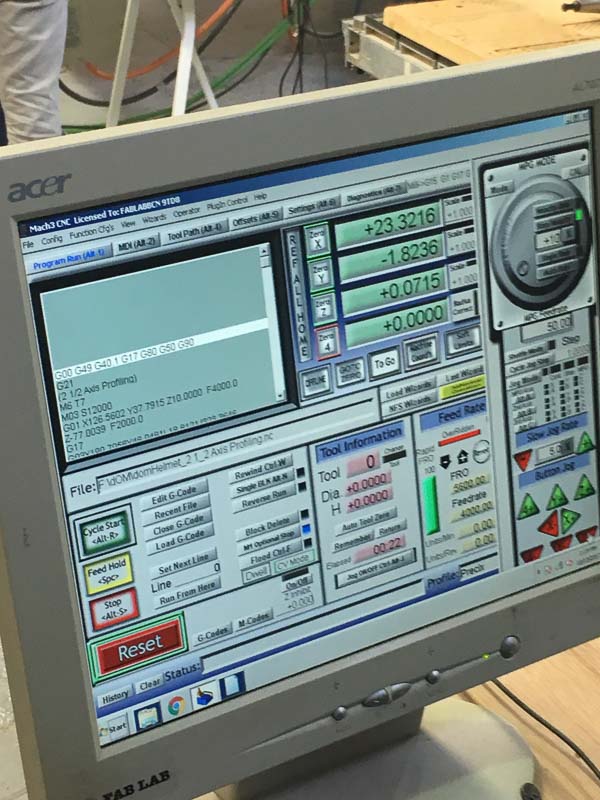
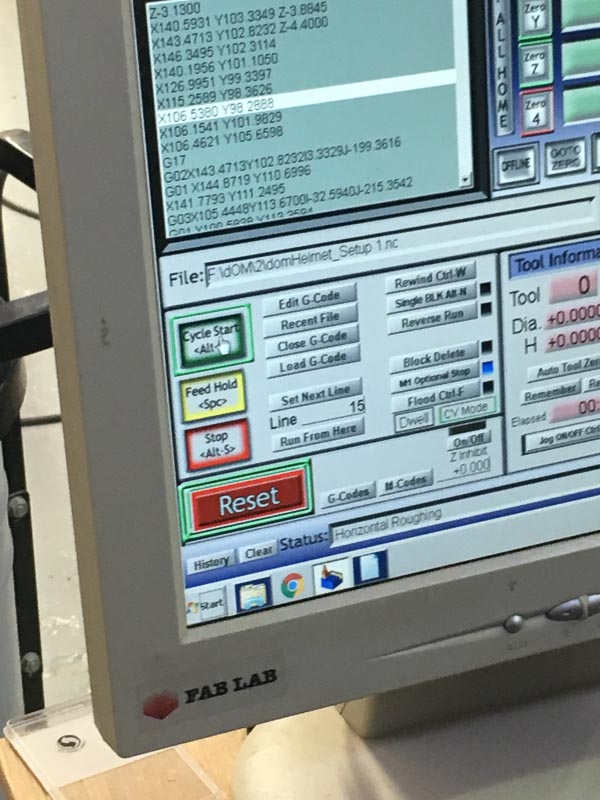
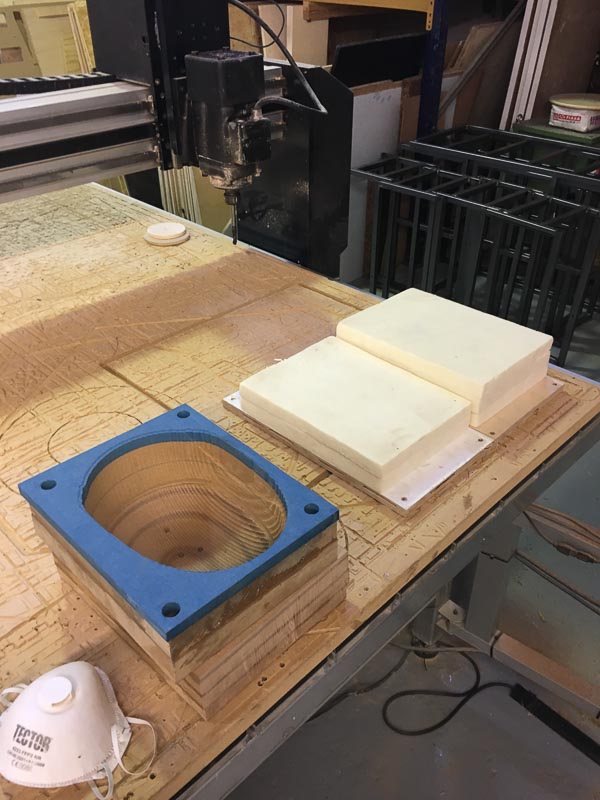
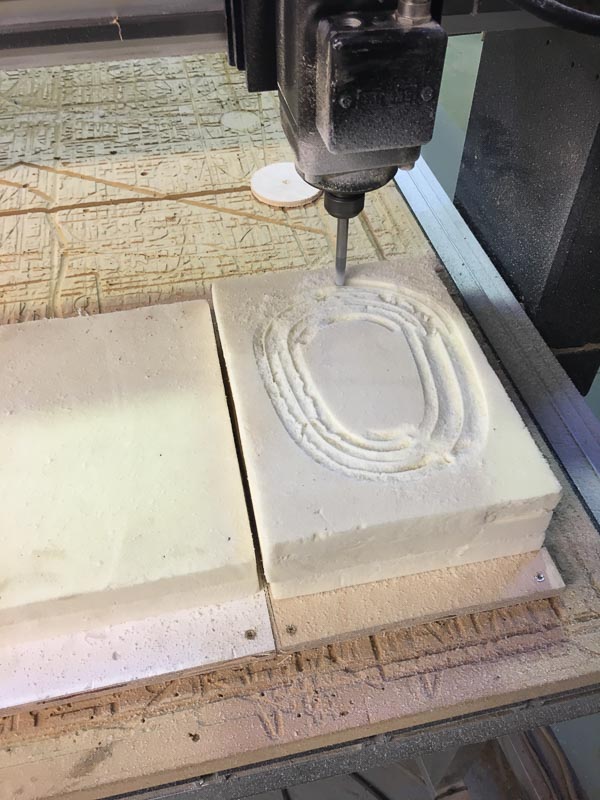
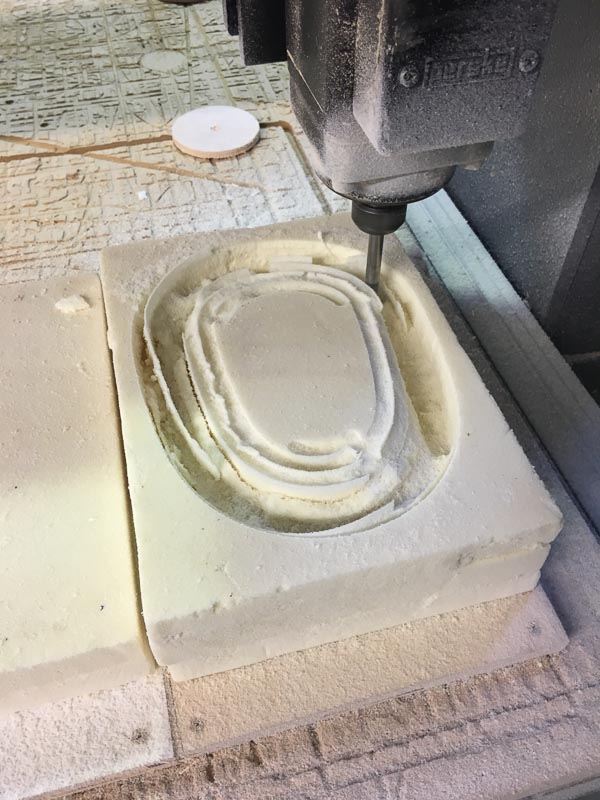
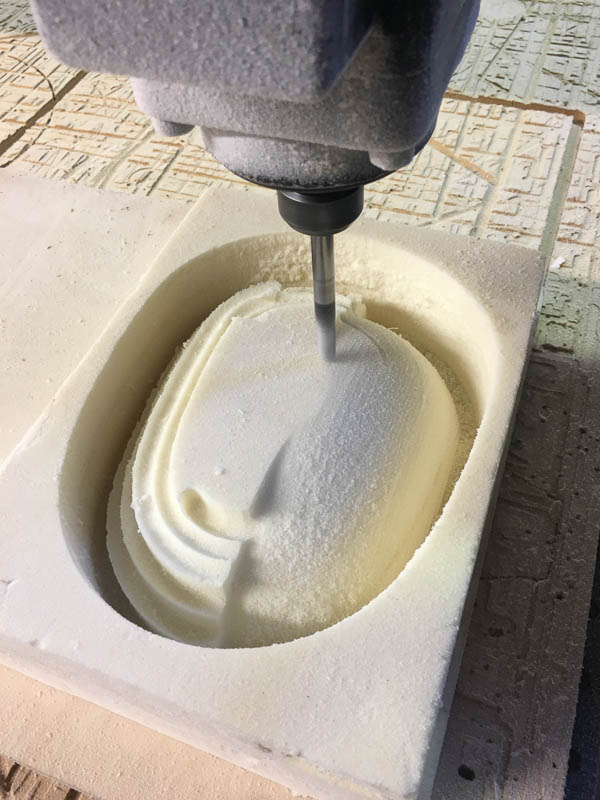
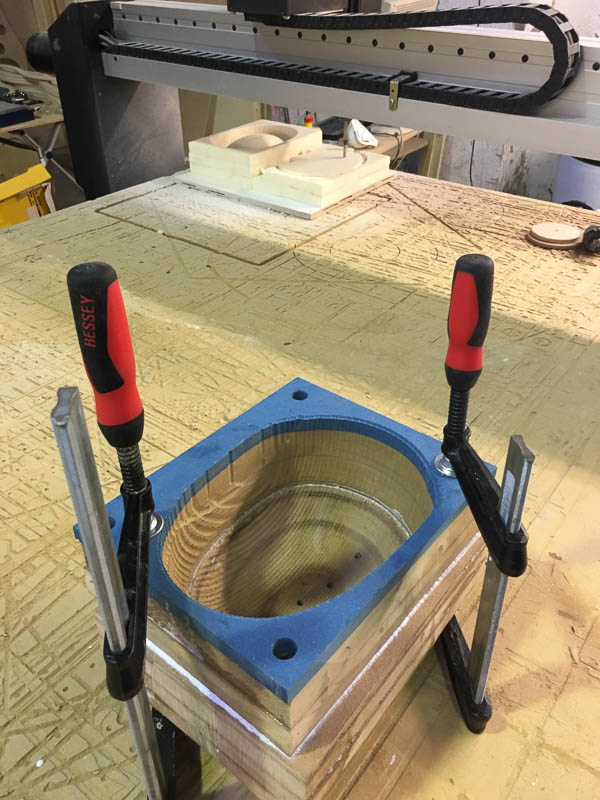
I have since revisited my composite mold to make the helmet part. As the cutting clearance on the ShopBot or the Pressix Table Mill was about 100mm max I had to split the male and female mold counterparts into two sections each, and then glue them together afterward, before finishing the mold for laying the composite. I reworked the files in Rhino until I was happy with the mold files.
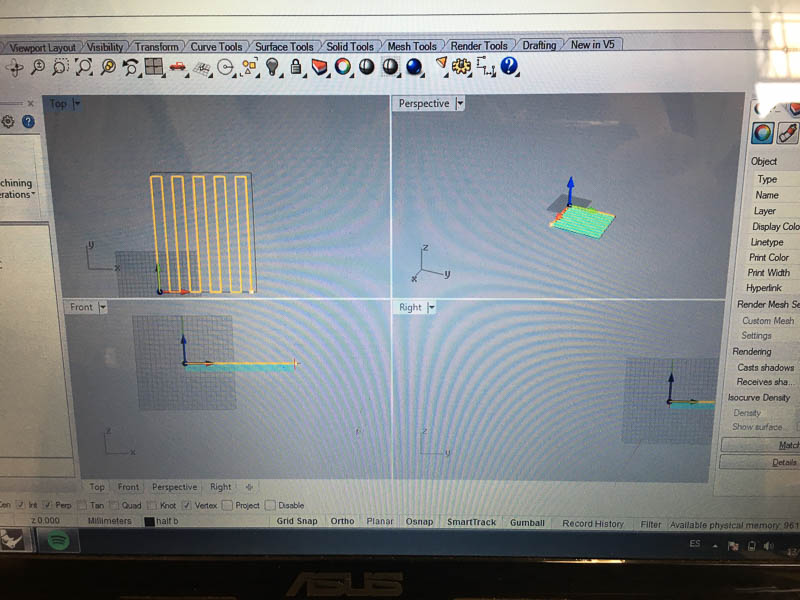
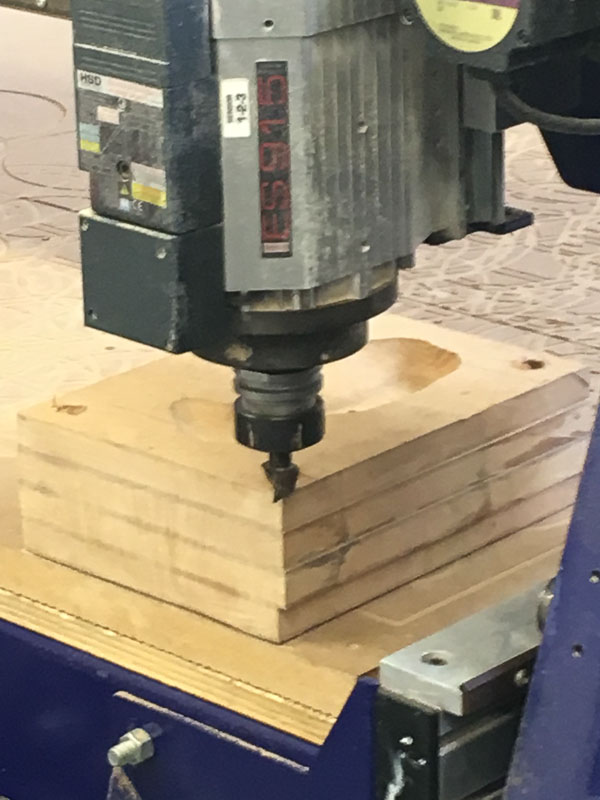
I had to prepare some blocks from offcuts and decided to use foam for the male plug part of the mold as it would propably be sufficient for my purposes. Then I drill and appropriately affix the blank blocks to the milling-table and using a 1/4" ball mill set up an operation using RhinoCam and a criss cross pattern to skim the surface flat and level to the appropriate height for our mold pieces. Then we use Rhino-Cam again to make the cutting paths and generate the g-code for a roughing and a finishing cut, as there are no cut-outs or pockets in the design. This was done firstly in a radial and then a linear manner.
The following pictures and video show this milling process to make the molds male and female parts:

I would be using a two part epoxy to saturate and lay on strips of ... to build up a few layers before sealing the two halves of the mold and as the vacuum is currently down I will use some G-clamps to provide sufficient force whilst the part cures. As we only have a limited supply of epoxies and hardener counterparts remaining with the epsilon ***X and 201 I intended to use,... from what I read on the data sheet pot life may be as little as 15 minutes, I will have to work very fast indeed.
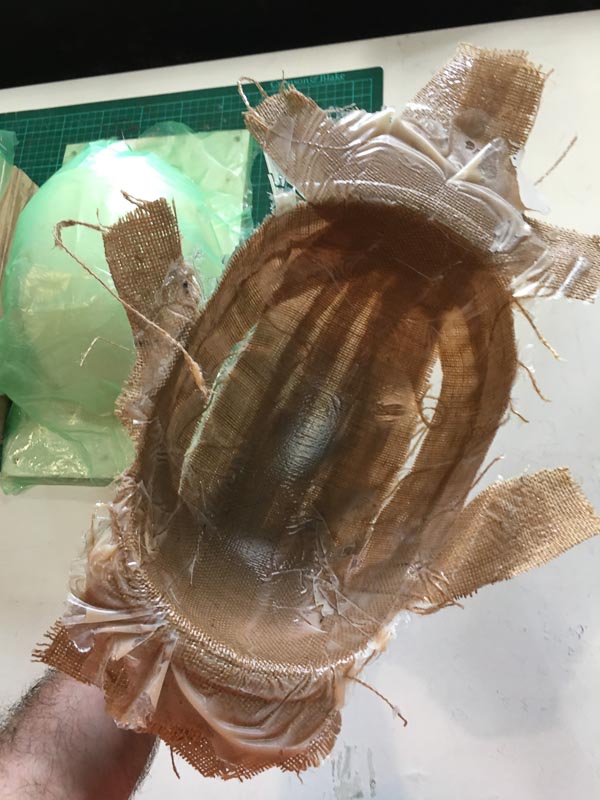
I did not want to destroy the surface of my mold on the first go, and as we had plenty of plastic backing to use as a layer between the mold halves and the composite layer. I took the process outside in precaution of any toxic fumes and wore appropriate face protection.
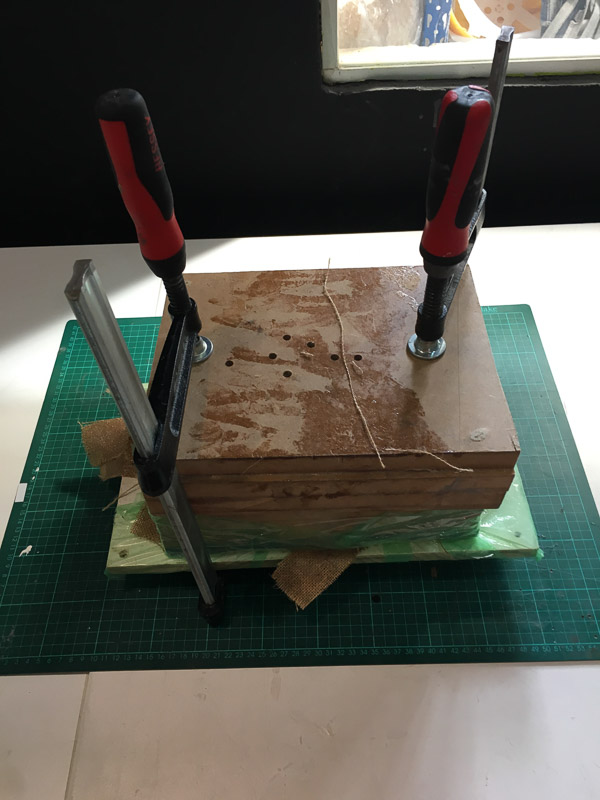
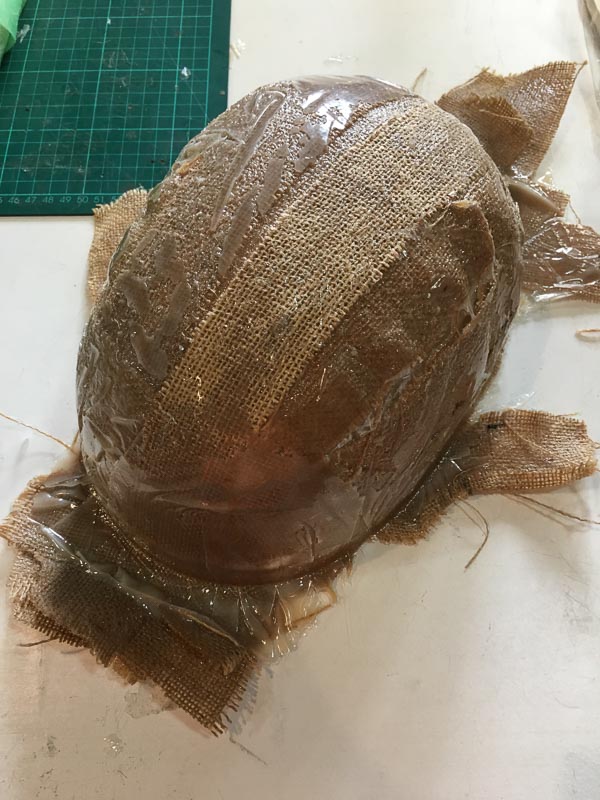
The final Outcome, was kind of as expected really. The ammount of epoxy I used was not quite sufficient to coat the strips I had cut, and I couldn't do this and lay it smoothly to build up enough layers before the pot life was up and it began to exotherm and cure. I did the best job I could once I had begun, I got a decent layering on but when I felt the epoxy begin to warm and go off and harden I thought I best get the mold together and see how it turns out anyway. In a future attempt I may well find some longer pot life epoxy to give me more time to work with and or ask for the aid the help of a second person to help with the lay-up. If time I may give this a go with a varnish or laquer and some kind of mold release to get more definition and try to get a smother more evenly laid and solid part.
For the time being though I enjoyed the process and happy that I got some results and enough to call it a success for my first composite part!