C-omputer A-ided D-esign
In this assignment I’m going to explore options of 2D amd 3D programms on the example ofthe visualisation of my final project.
2D Software
I work professionally as a graphic designer, so I know pretty well such tool as: Illustrator, Photoshop, Animate, Indesign. This ones are part of Adobe Softwares which are used by most of graphic designers. They are very well done, but close-sourced and paid. As alternatives for non-payed (but also less features) are Gimp and Inkscape. There is also growing competitor (paid but less than for Adobe Cloud) for Photoshop and Illustrator mad by Affinity, worth checking.
For create 2D sketch of my possible final project I’ve used Illsutrator and Photoshop. Shortly about current idea for final project: a wooden flat installation placedon the wall (like skeleton like-creature), on the top of it animation will be played (flowers covering the skeleton) from a projector (this will be triggered by some kind of sensor, still don’t know).
Workflow/ see the sketch below, numbers refers to the workflow steps
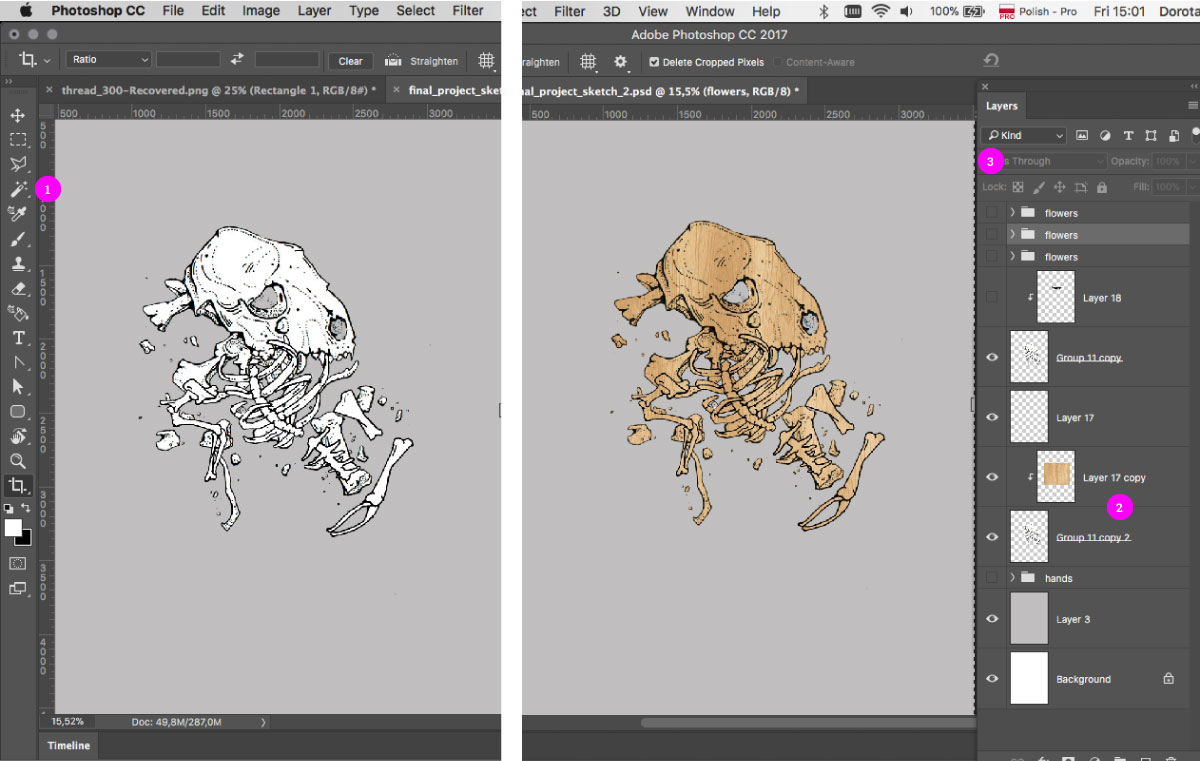
I love drawing and quite often I’m starting from a hand-drawn sketch. This one I’m scannng via app called CamScanner and bringing it to Photoshop.
Photoshop is a raster-based programm thus is made for working with bitmaps. Here after opening the scan i can cut out the background (by using the Magic Wand Tool (
1), fill it with plain colour, and e.g add a texture. Adding textures is super simple - place the iamge above the shape (in my case one layer above layerwith the skeleton), press alt and click on the border between the layers (2). This will mask the above layer to the layer below. You can add the layer mixing option in the window on top of layer panel (3).
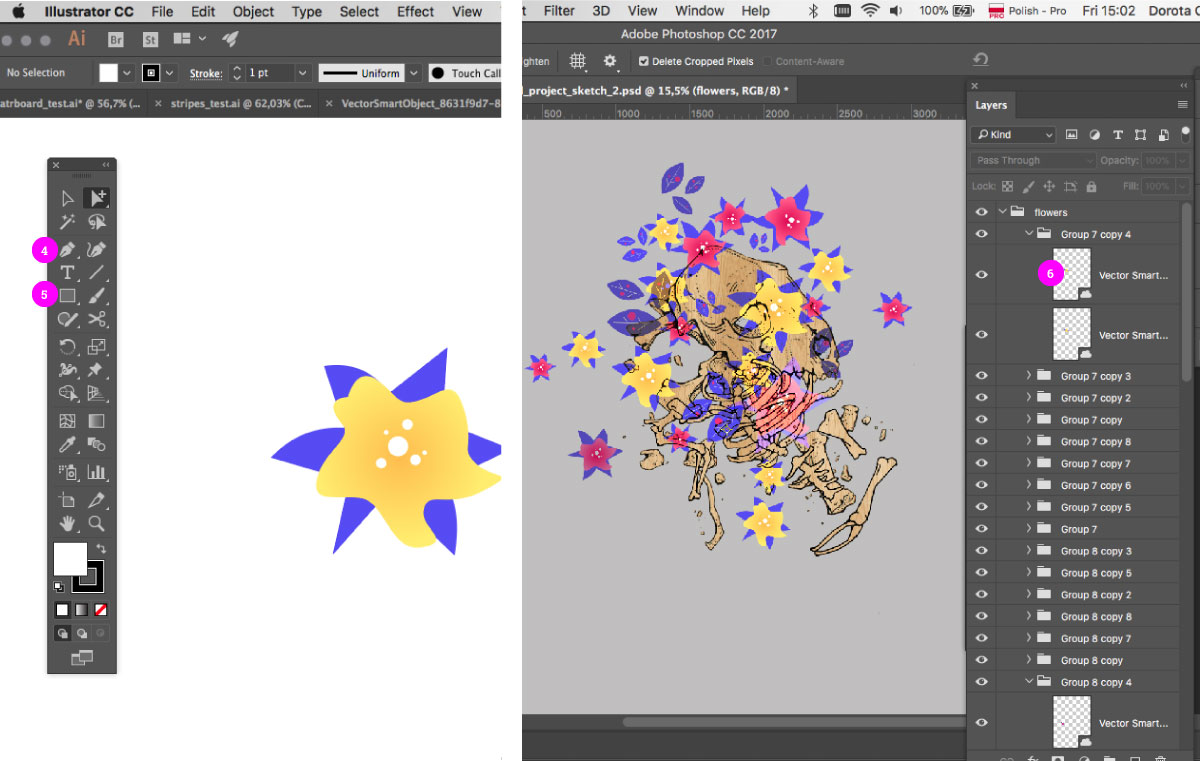
next, I would need some vector elements. For building the shapes Illustrator is much better (has very nice Path Tool (
4) and Shapes options (5). Here I’m creating the shapes of flowers. This onec I can placein Photoshop by simply copy-paste.What is cool in Photoshop, is that the vector shapes are linked with the original .ai files. Whenever I want I can double click on the thumbnail in the layer panel (
6), and edit the shape in Illustrator.
- Now I want to shortly symulate the animation. It will be simple: more flowers will appear,untill they willcompletely cover the skeleton. I’m going to create the gif loop by usingthe online tool Gifmaker. But first I’m creating four .jpg images with a sequence. I’m simply unrevealing 4 layers in Photoshop, each with more flowers.
And here it goes:
During last weeks I’ve also tried to work with Gimp. It have great advantage since it’s a GNU software. It’s good for basic operation like cropping image or changing the color mode. Though I’m so used to Photoshop that I’m always switching back to it.
3D Software
There are many programms, pretty a lot is open source. Make sense to go for some open source since one have a community support and programm will most probably constantly grow.
Some things that I’ve learned:
Mesh -A 3D mesh is the structural build of a 3D model consisting of polygons. 3D meshes use reference points in X, Y and Z axes to define shapes with height, width and depth. The polygons used are typically quadrangles or triangles; these geometric shapes can be further broken down into vertices in X, Y, Z coordinates and lines.
Programms based on meshes: Maya, 3D Studio Max, Blender
NURBS - Non-uniform rational B-spline. NURBS is a mathematical model commonly used in computer graphics for generating and representing curves and surfaces (like vectors).
Programms based on NURBS: Rhino, Fusion 360, Solidworks
Voxel - represents a value on a regular grid in three-dimensional space. As with pixels in a bitmap, voxels themselves do not typically have their position (their coordinates) explicitly encoded along with their values.
T-splines - are great for non rectangular modelling, and working on specific details.
For this assignment I want to model a relief - a crocodile skull which could be used in my final project (to place it on the wall as a part of illustration).

I started with Fusion 360, but for complete beginner is not easy e.g. to draw a complicated shape in sketch mode. Removing and re-adjusting the vertexes is pretty a struggle.
Later on I’ve found out that Fusion is great for more “industrial” models, I’ve also got addicted to parametric option (check Computer-controlled cutting assignment).
I cahenged to Rhino but pretty soon found out thet doesnt have T-splines function, so it’s hard to build non-regular, sculpture-like shapes. (Later on I learned that one can download a T-spline plug-in from Autodesk). Rhinno have a lot of functions with working with lines-paths (like revolve, extrude the shape following the path etc.)
The third try was Blender which seems the best for my skull challenge. It’s crazy complex and seems like one can do nearly everything there. Youcan also sculpt (aweome!) in Blender like in ZBrush. Blender has a huge supportive community: https://www.blendernation.com/
Blender
It was pretty a struggle…I saw this shape in my head so clearly but it was sooo hard to get there. Blender is a bit differently intuitive than Adobe Software that I’m usually working on. Shortcuts, mouse operation, menu reavealing…one have to change the mindset!
I feel pretty clumsy but really wanna model something. It will be one-side relief of a crocodile skull that can be a part of my installlation.
First some important things that I’ve learnt while trying out and attending the Blender Presentation:
Use mouse:
shift + middle mouse buttonfor moving without changing the perspective angleright mouse buttonto select
Shortcuts will make workflow much easier:
e- extruden- menu/window on the rightt- menu/window on the lefta- for selecting and unselecting allx- to deletez- to see wireframes
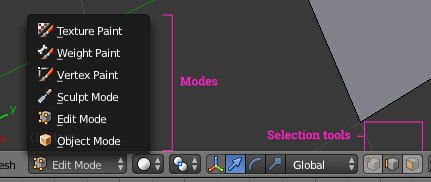
Modes:
There are different modes, which you can change in the bottom menu.
For me now two of them are important:
- Object mode - here you can add default shapes, make transformations of whole objects (scale, rotate etc..)
- Edit mode - here you can edit single objects. You can work either with
vertexes,edgesorfaces- for this you are choosing one of selection methods/tools.
Ok time to work…
I will start with settingup the default plane shape, which I’m going to “sculpt”, by subdividing the shape, and extruding the parts. The 3Ds shape will be based on triangular divisions.
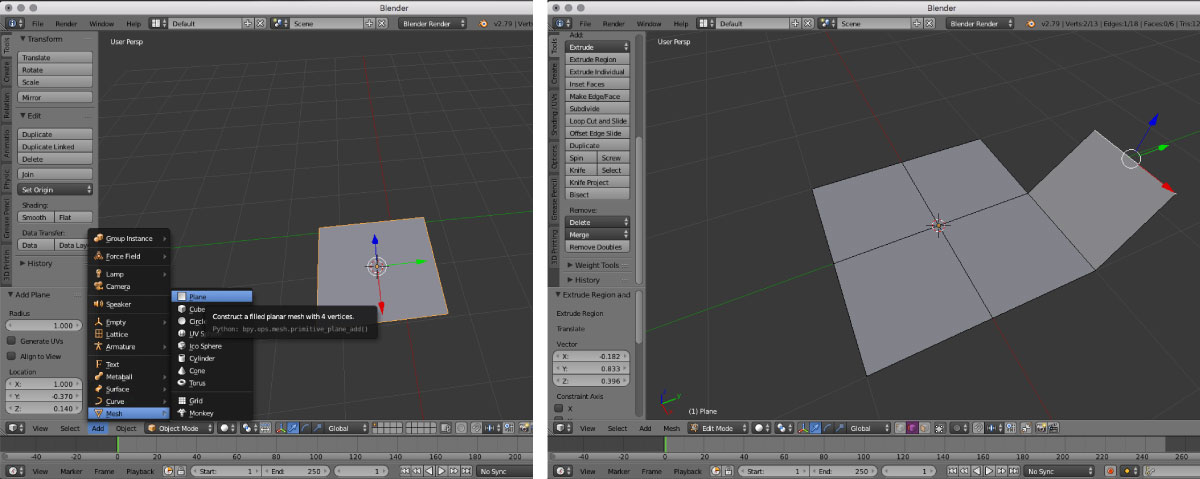
Editing mesh plane
- to start working with flat meshes
> object > add > mesh plane - select 3 verices, hit
f- for connecting them / making a face triangular - to subdivide the face (which is not triangular)
> mesh > face > triangulate faces subdivideto divide e.g. an edge
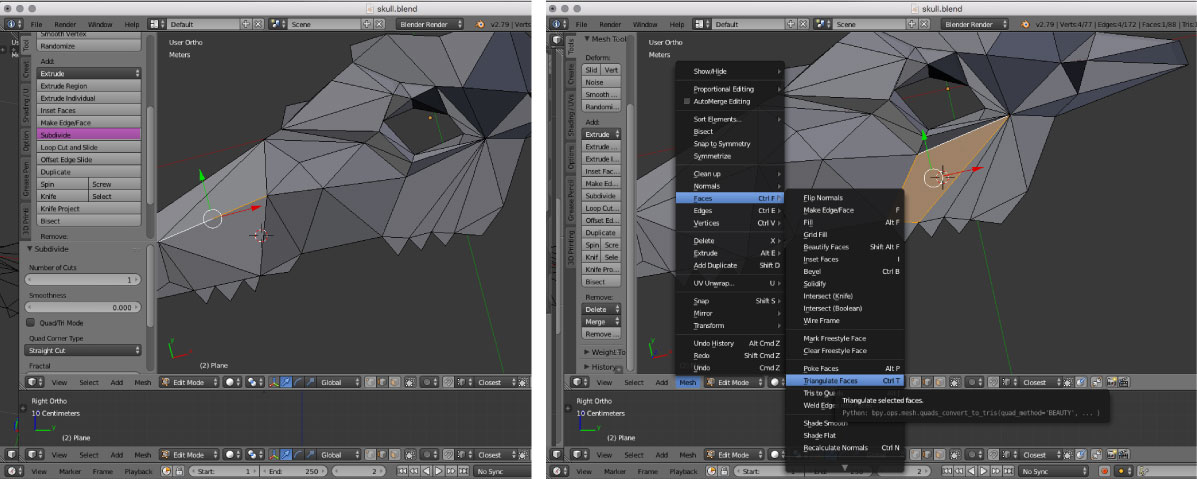
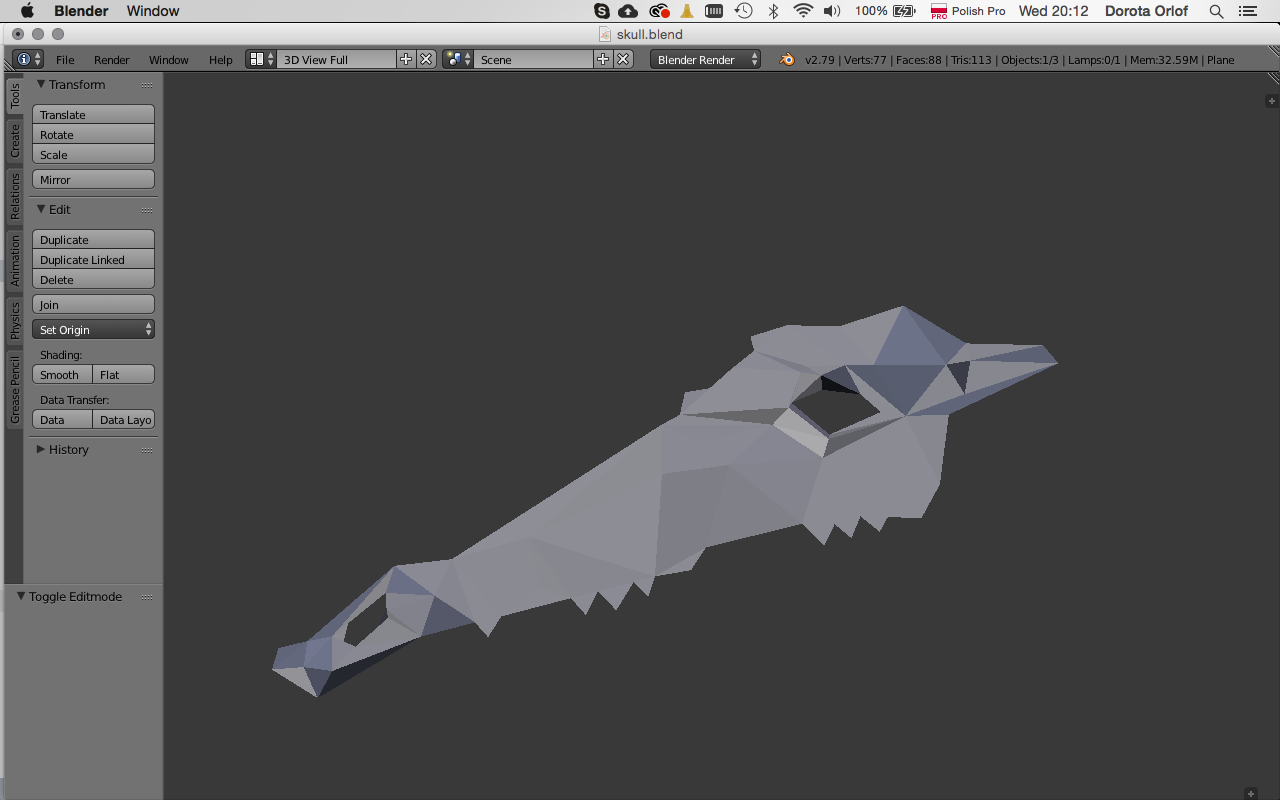
So I’m subdividing, triangulating, extruding…and at the end I’ve got a shadow of that what I wanted:) But it’s just a beginning of FabAcademy!
Files made during this assignment:
Final project 2D sketch / psd
3D skull / blend
3D skull / stl