Casting and molding
This assignment sounds really exciting since it requires more physicall angagement, more than just pressing a button. And getting dirty!
Designing the 3D model
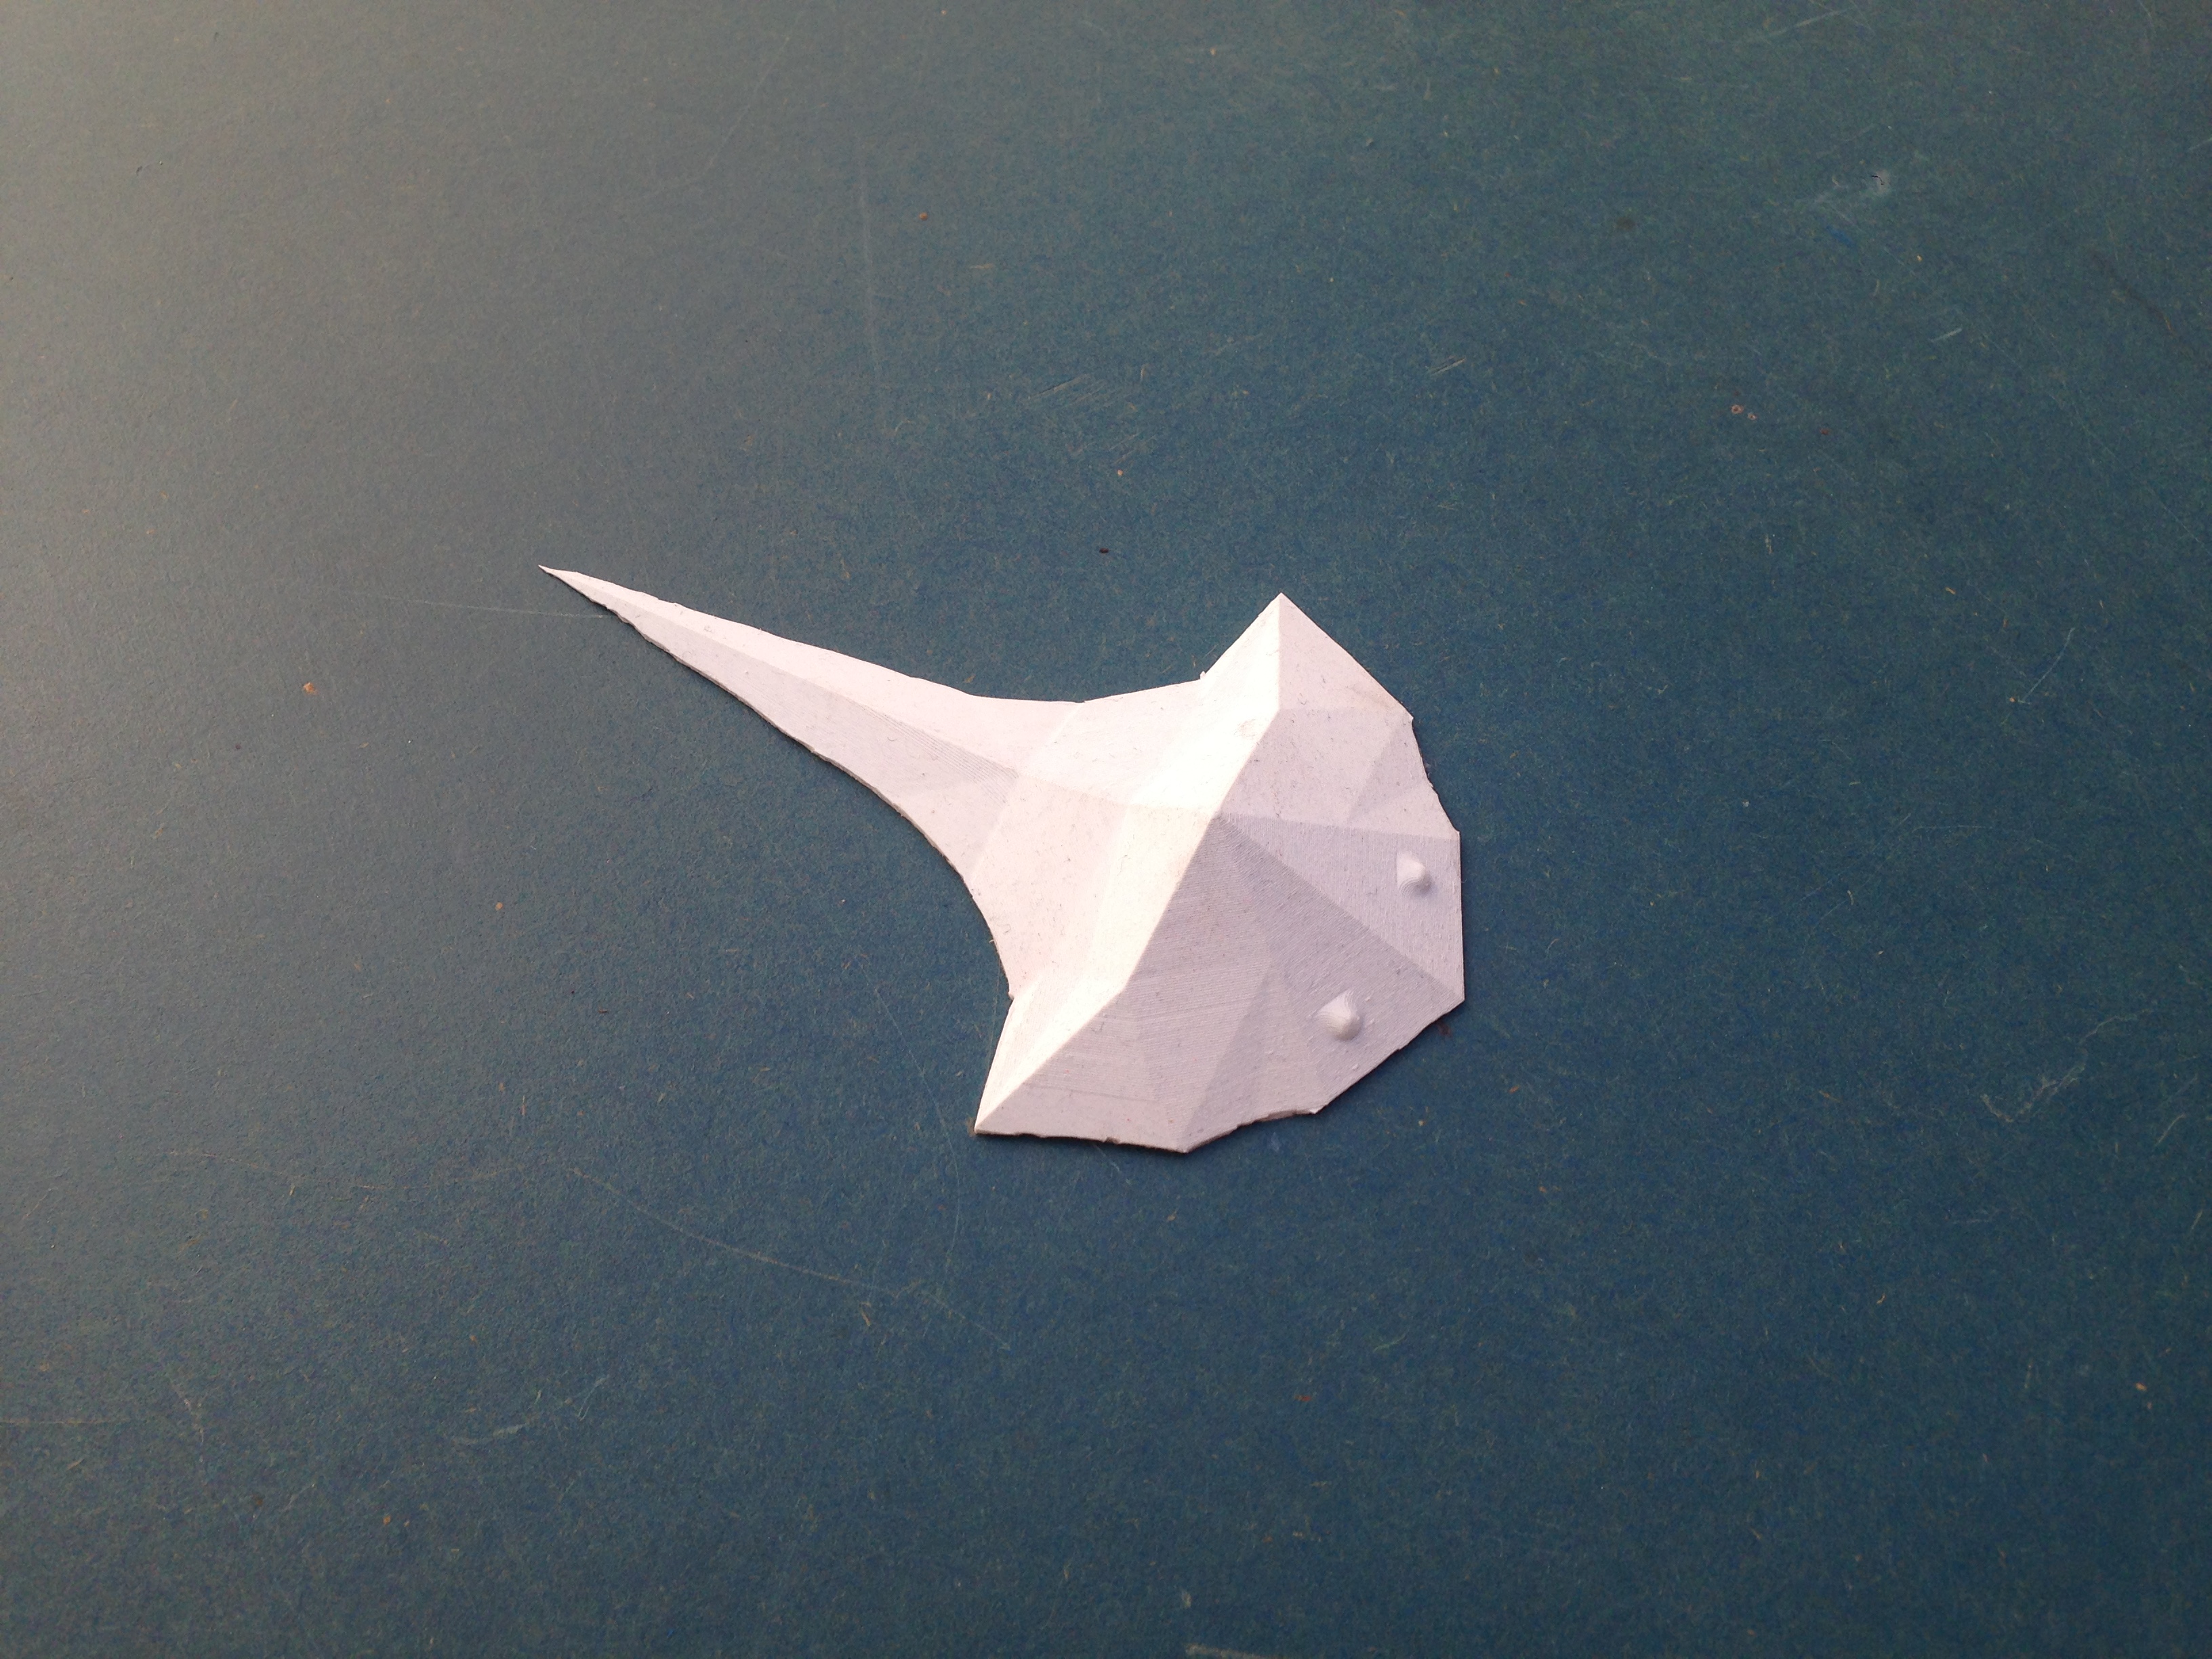
During this assignment I’m going to create a silicon flatfish. First I need to design a mold which is going to be milled in Wax.
To create a flatfish in Blender I was using similar strategy as during Computer Aided Design assignmant.
- to start working with flat meshes
> object > add > mesh plane - select 3 verices, hit
f- for connecting them / making a face triangular - to subdivide the face (which is not triangular)
> mesh > face > triangulate faces e- to extrude
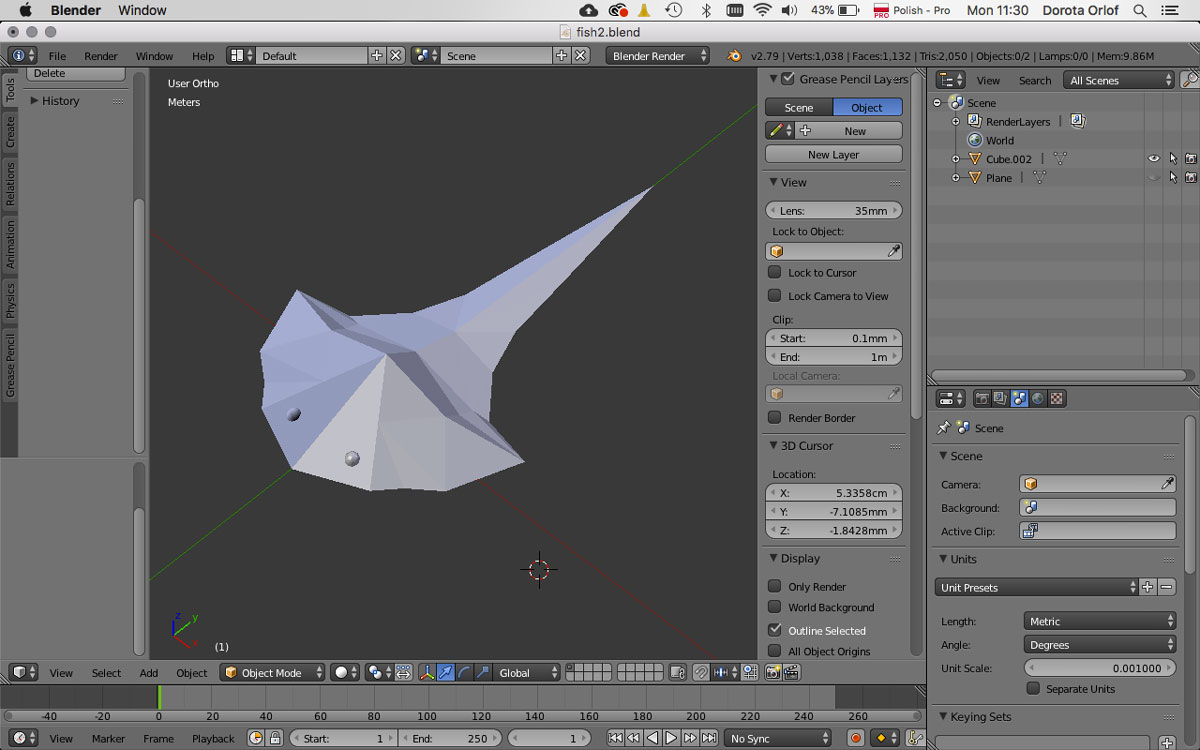
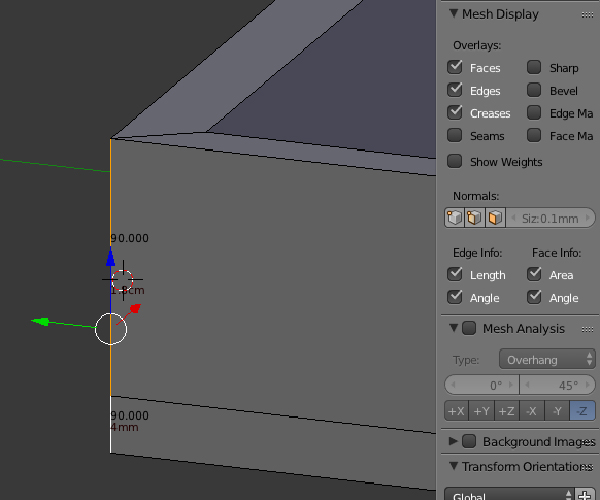
Than I’ve added flat plane which will be a base for thae bounding box. I’ve divided the plane and was extruding the parts up. By activating Mesh Display option I could check the dimensions.
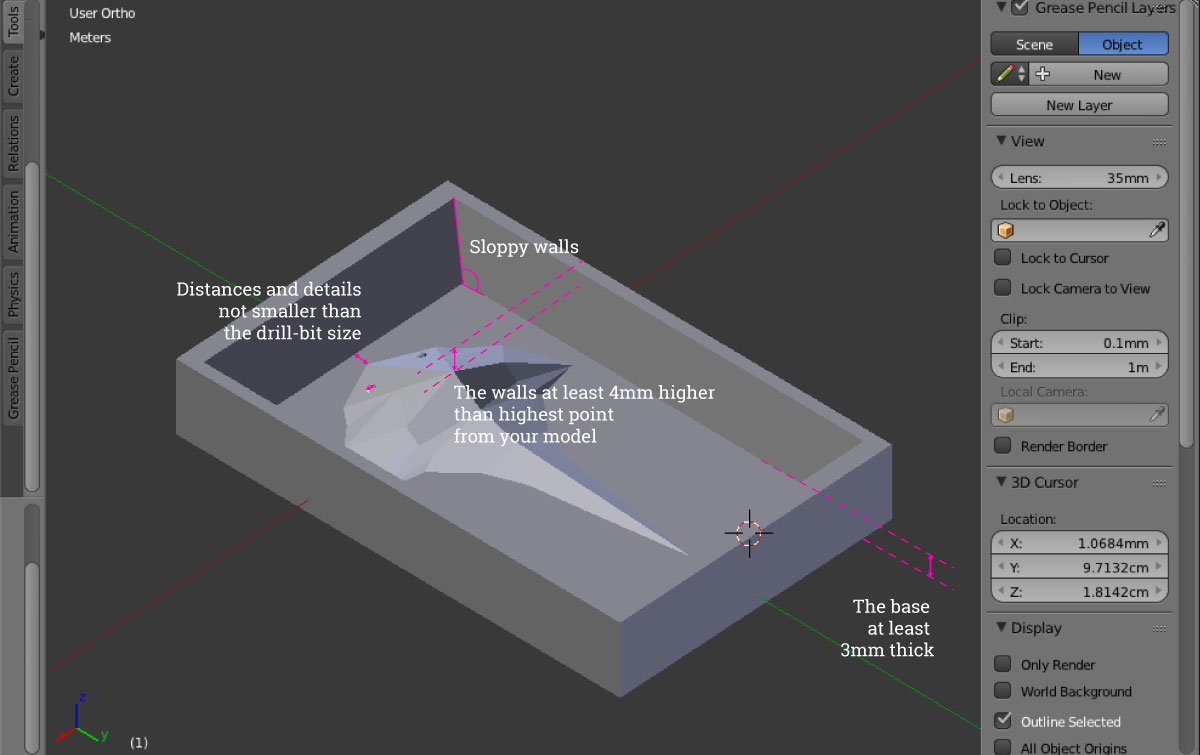
While designing I’ve took under consideration following criteria:
- to put the bounding box with a bit
sloppy wallsso the wax will run nicely down (I’ve put 112 degrees of an angle) - to leave the base at least
3mm thick - to make the walls at least
4mm higherthan highest point from your model notto make the details smaller than the drill-bit size(for examble distance between one element to another)
Preparing the file in Modela player 4 software
I’m openng my .stl file in Modela software. Here I’m going to set up the parameters for milling the wax.
I’m setting up the Material for Modeling Wax. Now I’m going to create two processes/strategies to run them one after another.
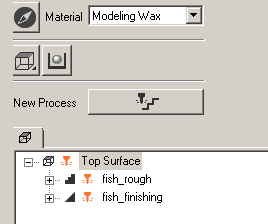
The processes are going to be: roughing and finishing. For both I’m going to use the squary drill size 3.175mm.
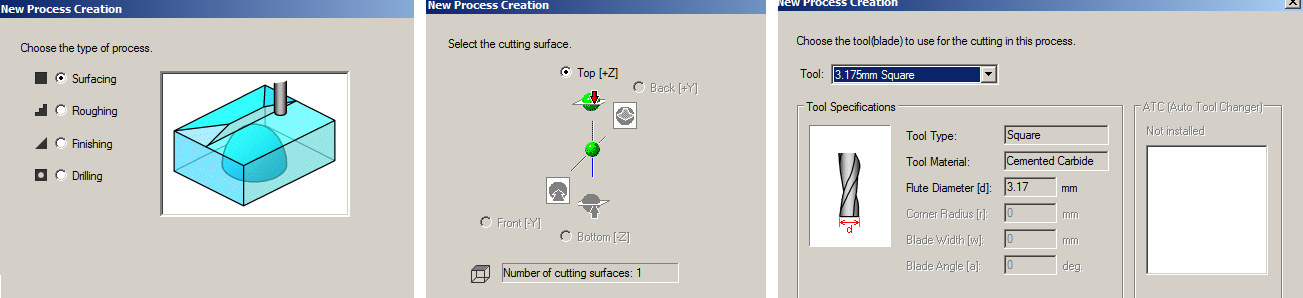
Roughing
XY Speed: 20 mm/sec
Z Speed: 15 mm/sec
Spndle: 7000 rpm
Cutting-in amount: 1.5 mm
Path Interval: 2 mm
Finishing
XY Speed: 30 mm/sec
Z Speed: 30 mm/sec
Spndle: 7000 rpm
Cutting-in amount: 0.1 mm
Path Interval: 0.1 mm
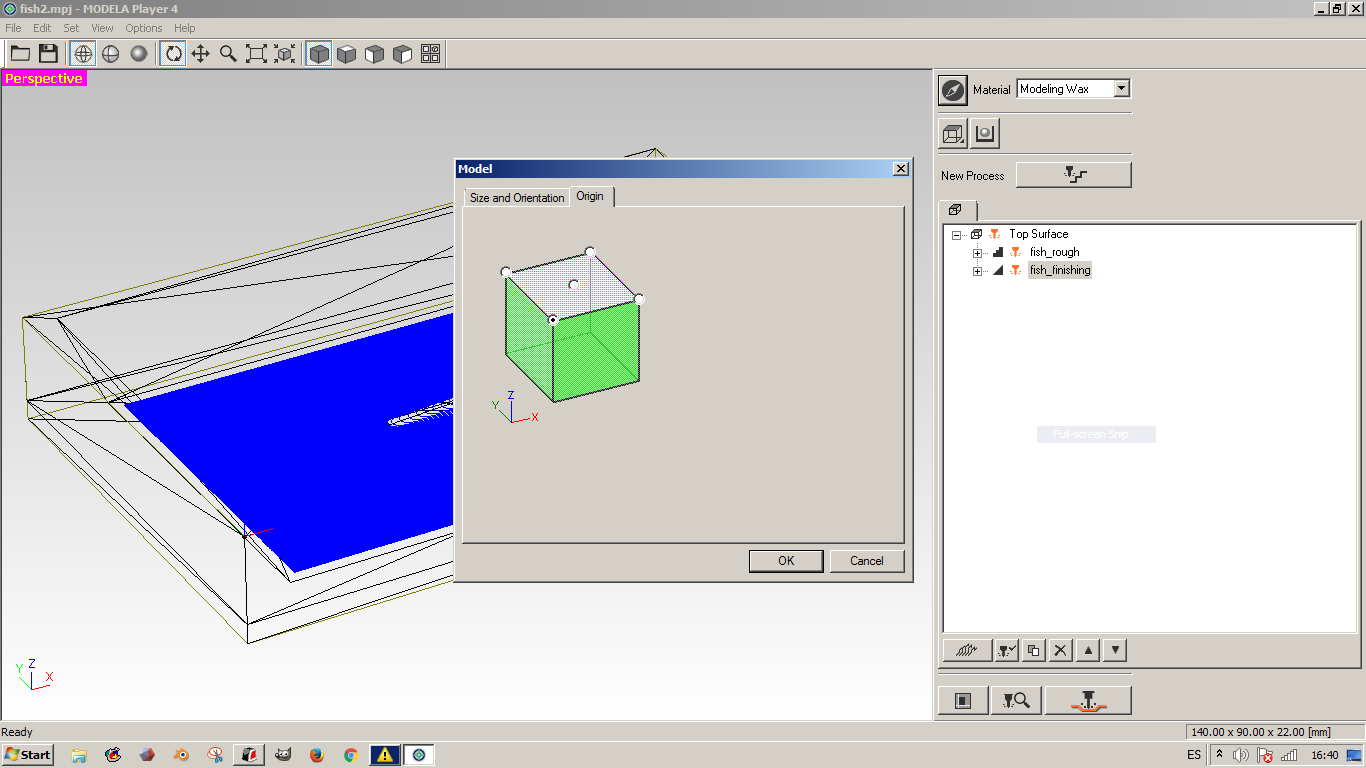
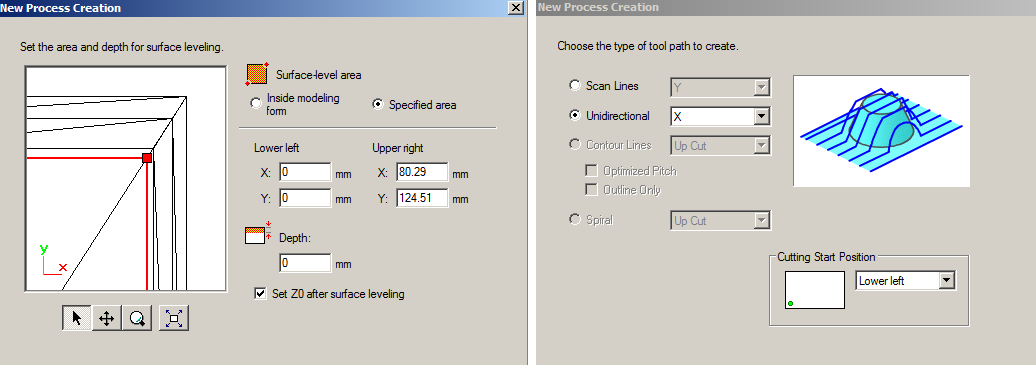
- One can specify the area of to be processed by dragging the
red outline. In my case the finishing process doesn’t have to be applied to the walls of the mold. - One have to set the
origin point, in this case Modela is starting from bottom-left. The origin point has to be on the top surface.
- There are options for
types of the toolpathto choose: following the axis z or y or contour. For roughing I’ve choosen axis, for finishing contour.
Now we have to save the file as .mpj in case we would like to modify the settings. The output file to be send to Modela is .prn. We generate each for roughing and finishing.
Milling the wax
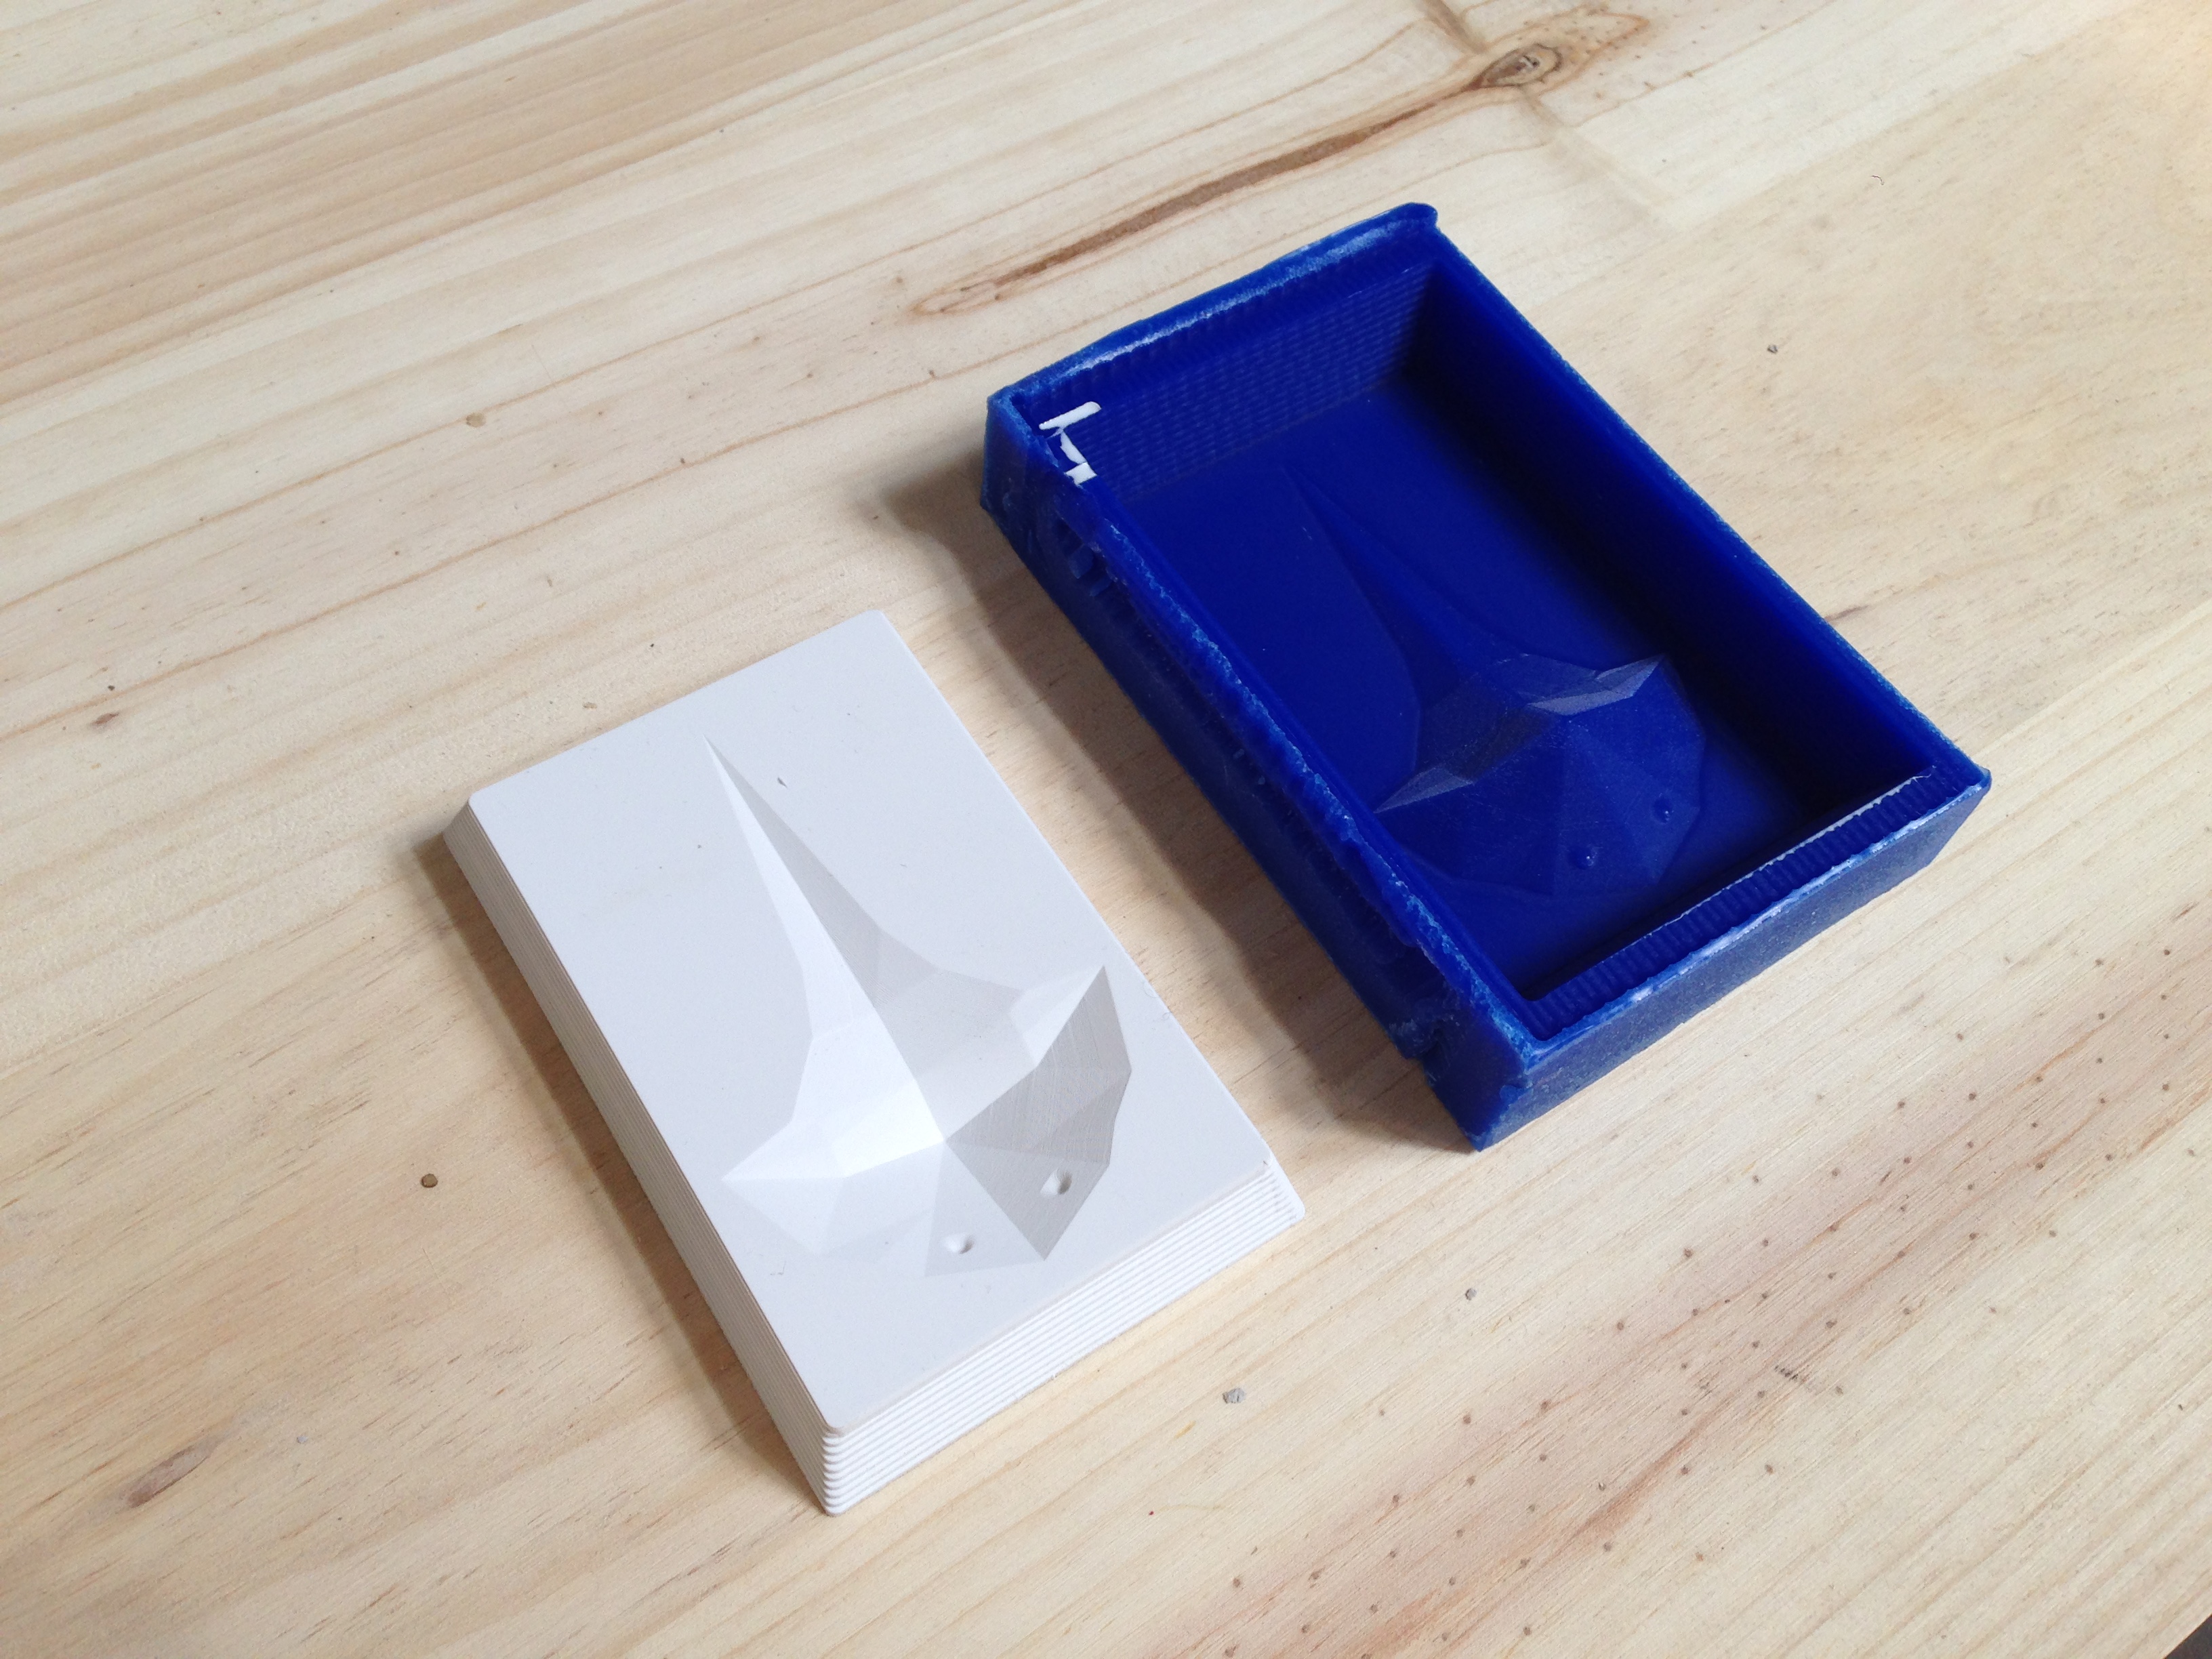
We are goingto milling our molds in bolcks of blue Ferris Wax.
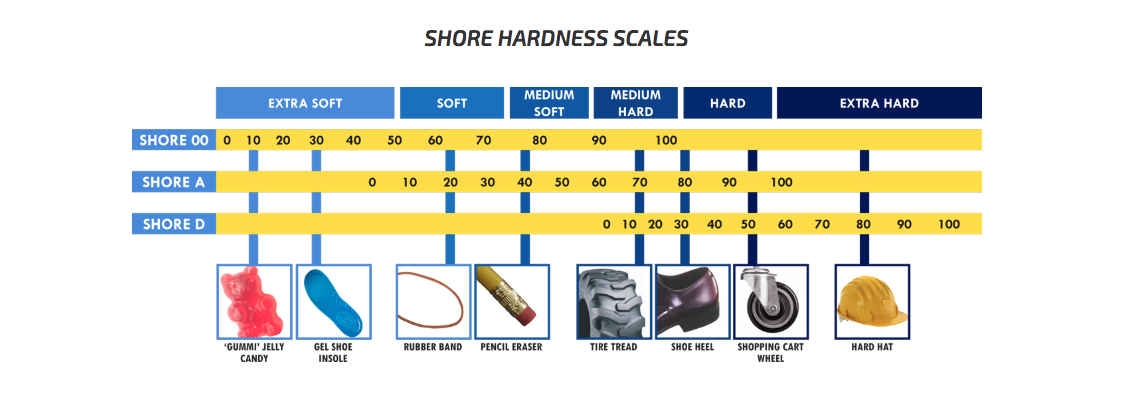
- The wax-block has dimension of 150mm x 100mm x 22mm
- Softening Point temperaure 227°F
- Hardness (Shore D) 52,which according to the scale underneath is hard
We place the wax by sticking it to acrylic plate by strong double-side tape.
We follow the steps with setting the x/y axis as it was in case of pcb milling.
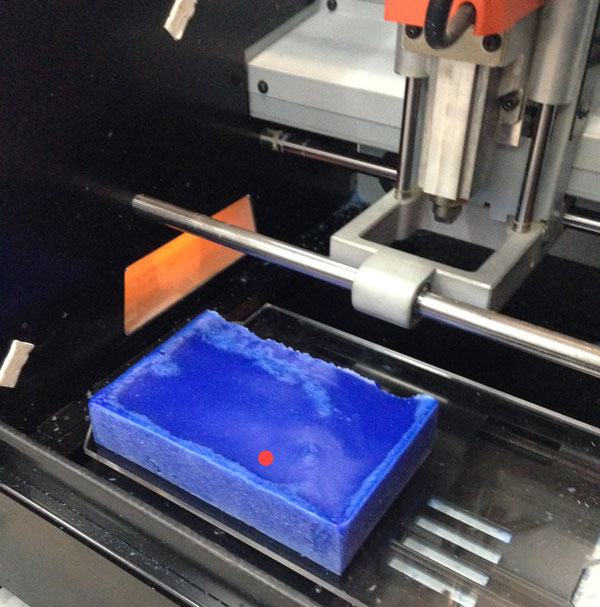
To set the z origin we followthe scenario known from PCB milling. Though this time, since the sufrace of the wax is not really flat - we should drop the tool in the lowest point of the wax block (red dot on the photo below).
More detailed information about setting upthe origins in VPanel one can find in Electronics Production assignment
After setting up the machne we load the jobs one after another.
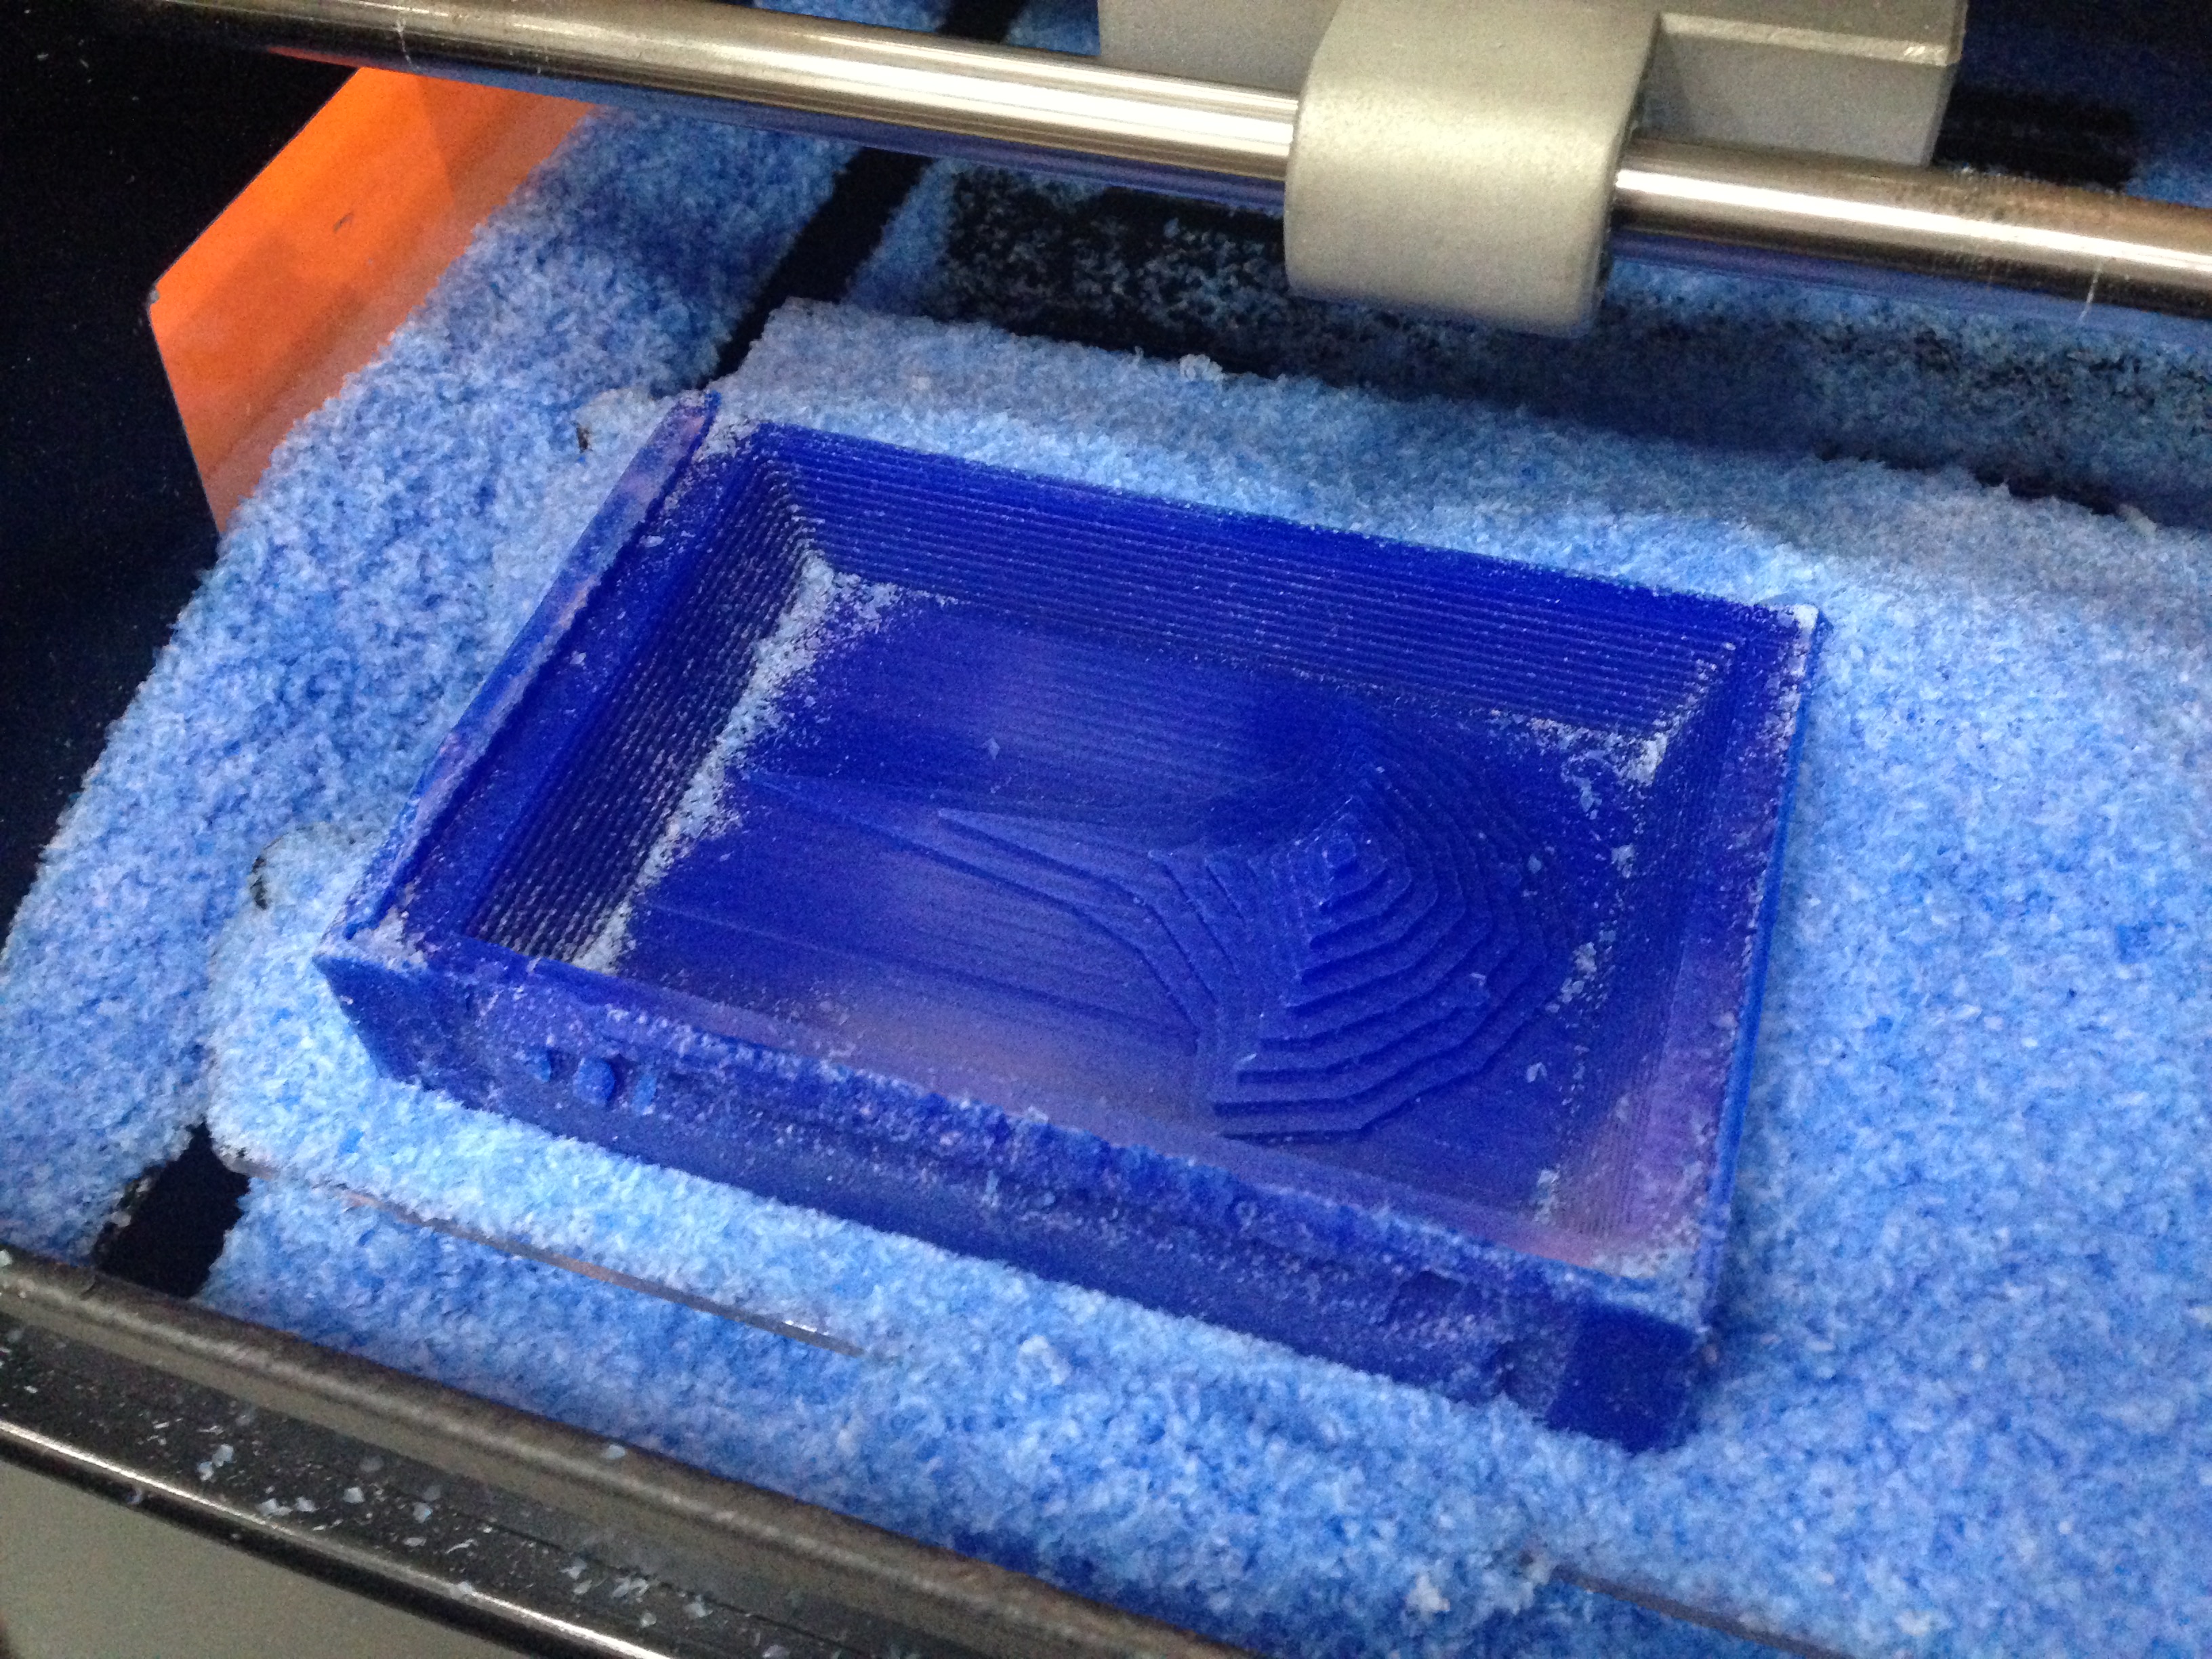
Look after roughing:
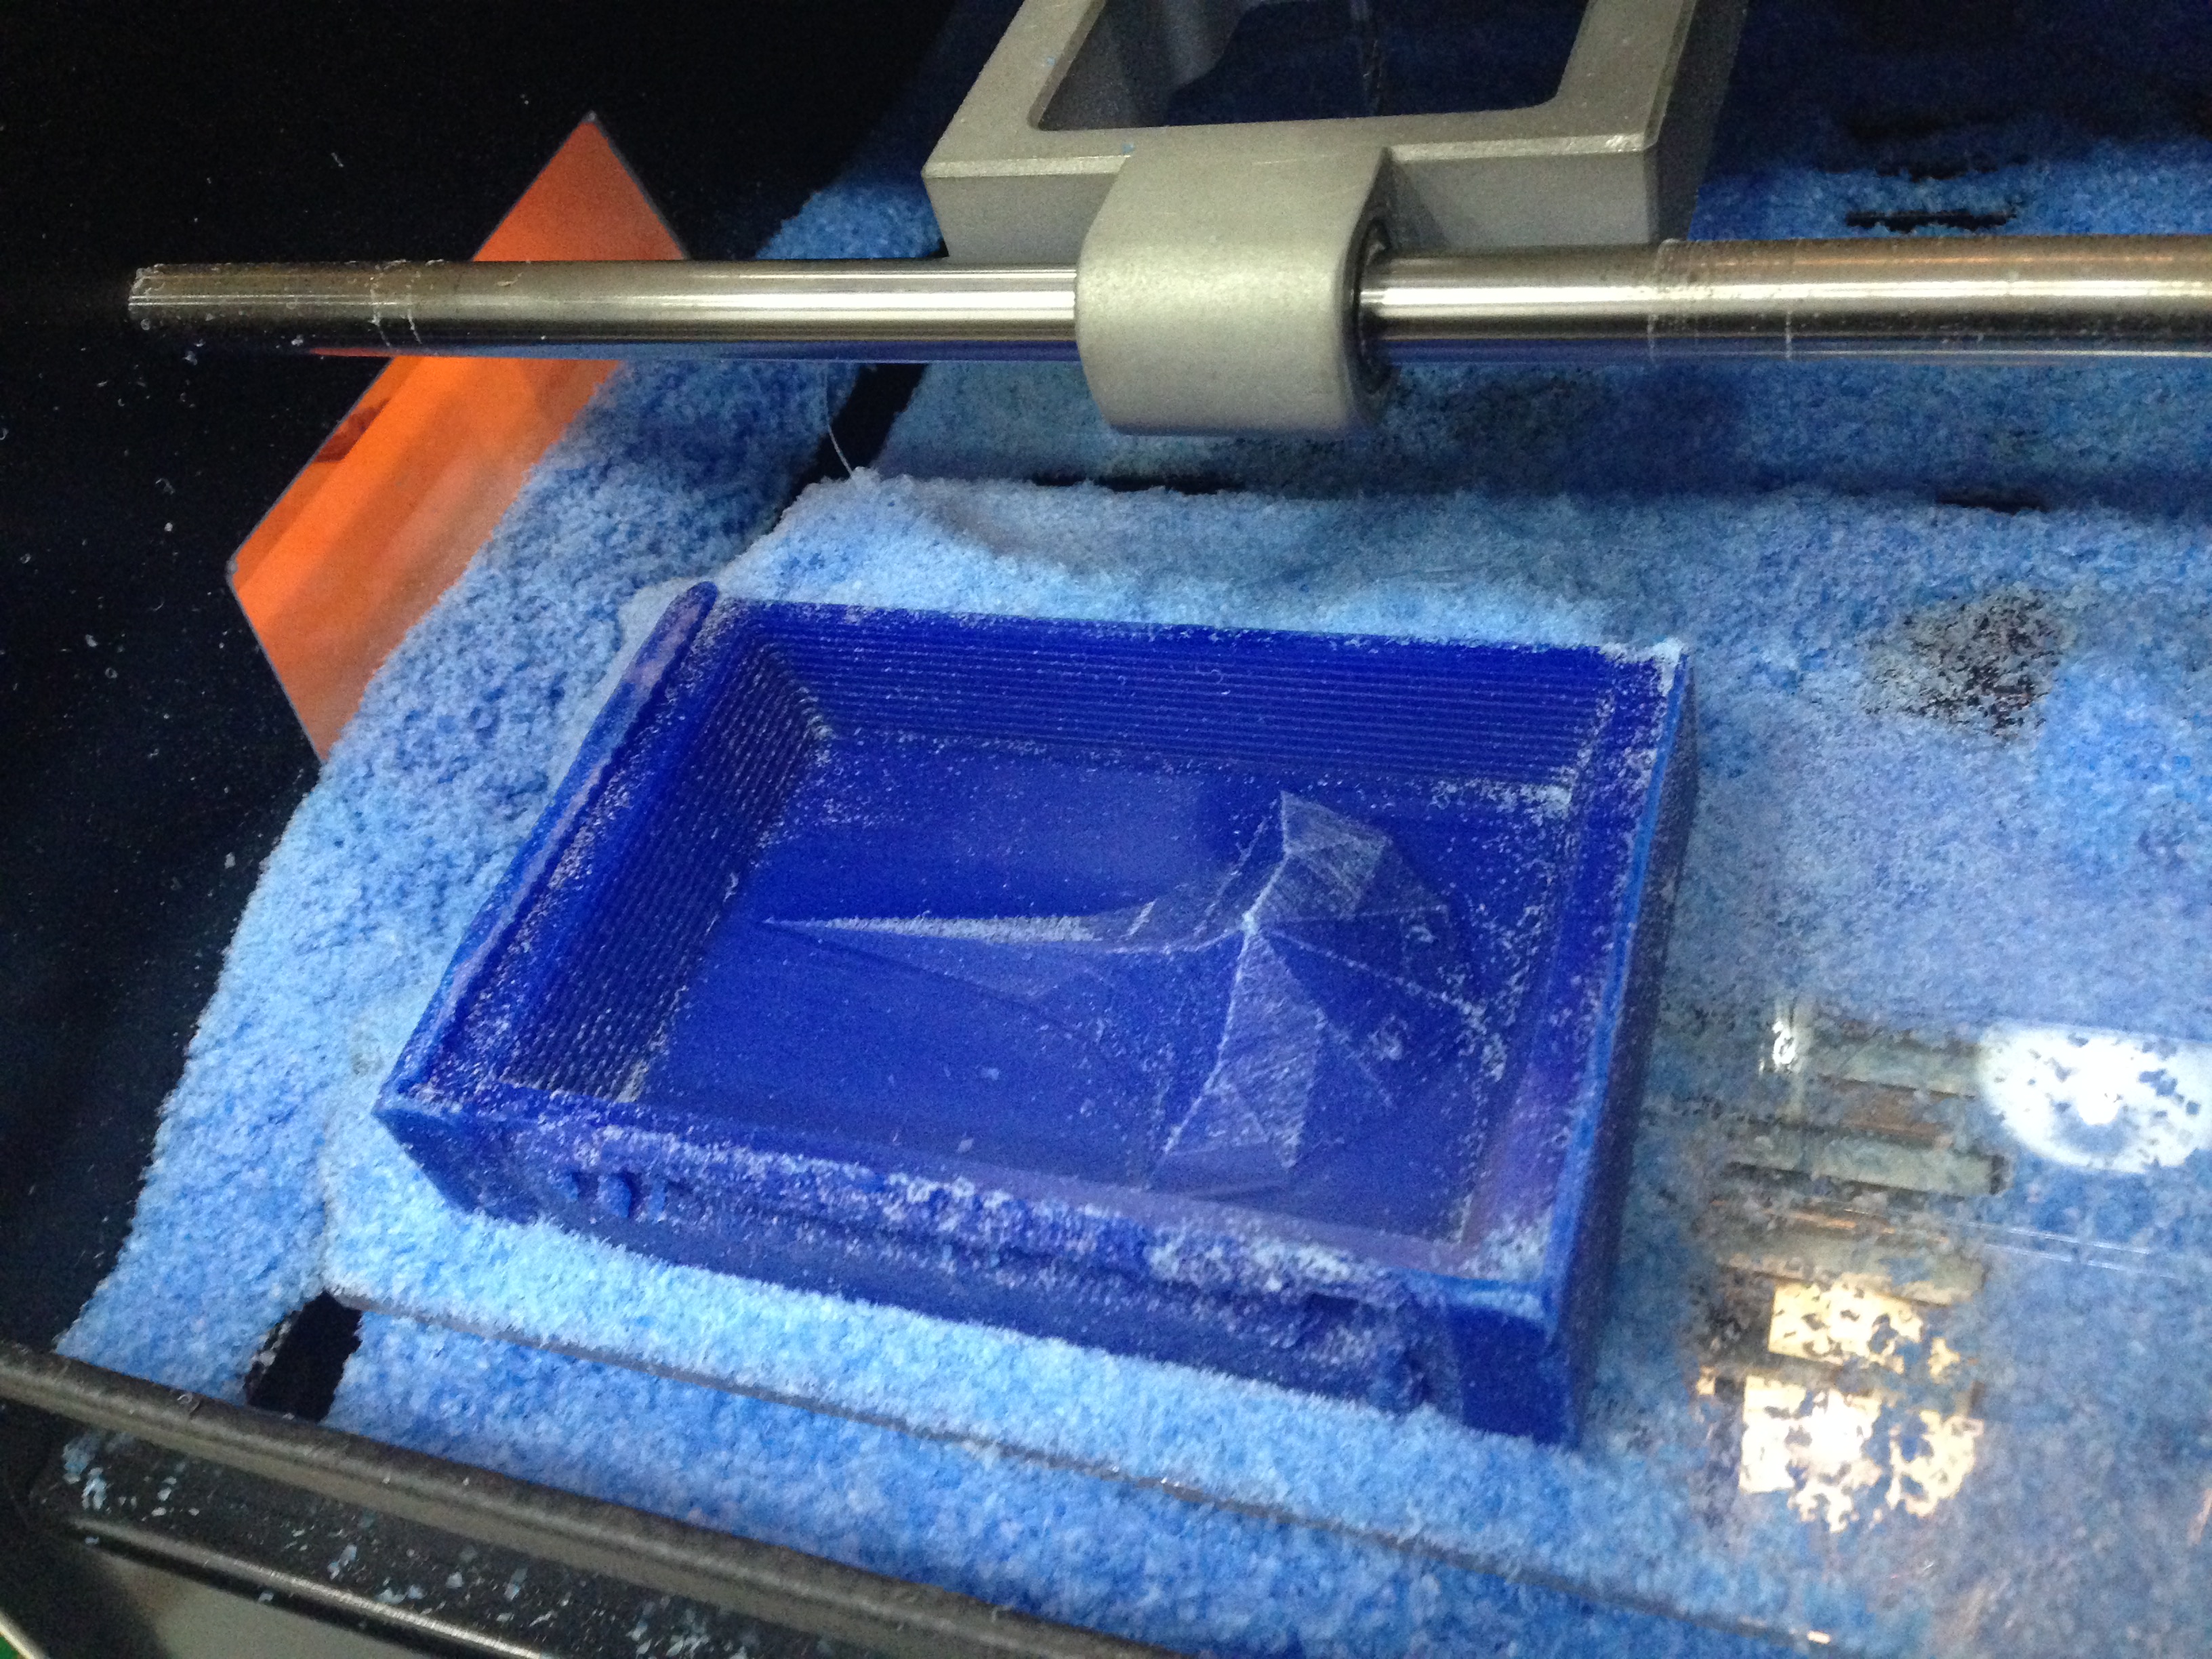
Look after finishing:
Now we clean the model with the air-pressure gun, and can process to molding the mold!
Molding the mold
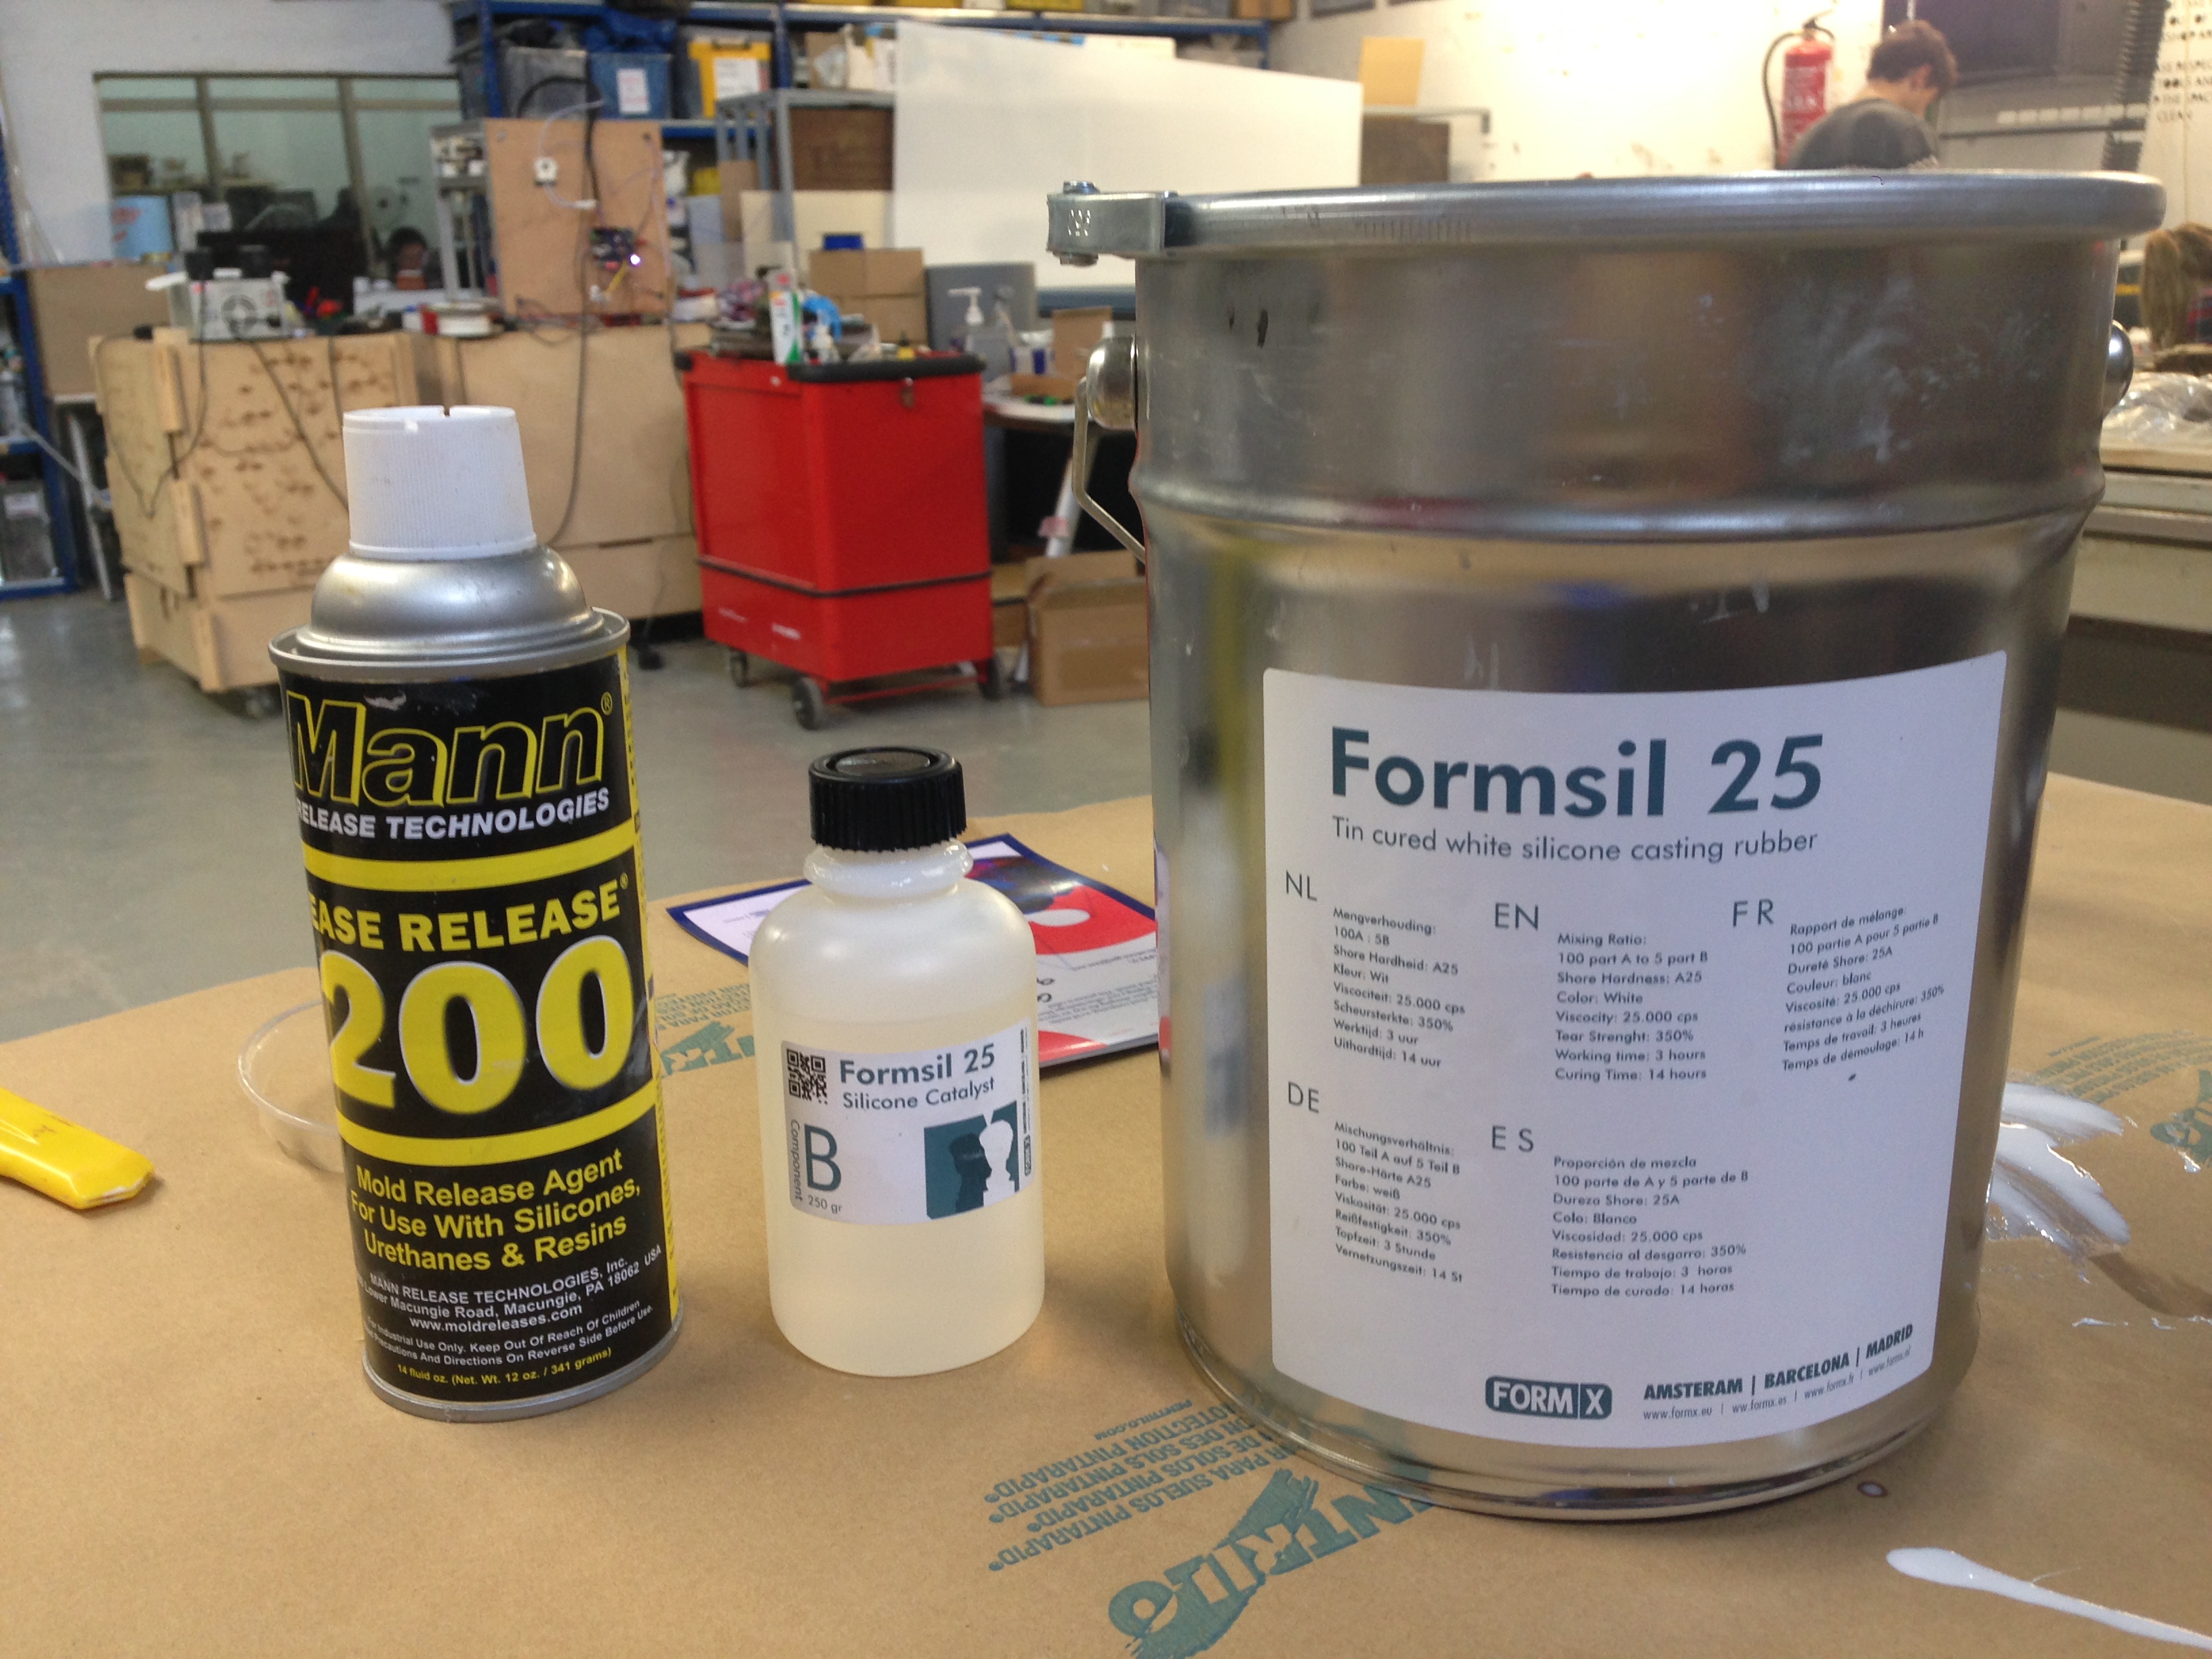
I’m going to prepare the actual mold from silicon. Silicone is known as one the best materials for molding, it’s easy to release and has high-quality surface finishes. It’s also pretty long-lasting.
I’m going to use is FormSil 25.
- the pot time is 3 hours (time to work with the material)
- curing time is at least 14 hours
- Mix Ratio By Weight is 100A:5B
Unfortunatelly the safety data sheet -‘MSDS’ and technical data sheet TDS seems not to be available online. Though is always good to use gloves and protective glasses while working whit silicone.
To prepare the right amount of silicone I have to measure how much water contains my milled form:
- I’m pouing water to the mold until it will cover the top and some extra space
- I’m putting water back to the plastic cup and to another plastic cup I’m pouring equal amount of silicon (a bit more since it will stay on the walls of the cup)
I konow that for 100 units of silicon I need 5 units of catalist. To measure that I’m weaighing the cup with silicon - calculating x 0.05 - zero-eing the scale - pouring the amount on the top of silicon to the cup.

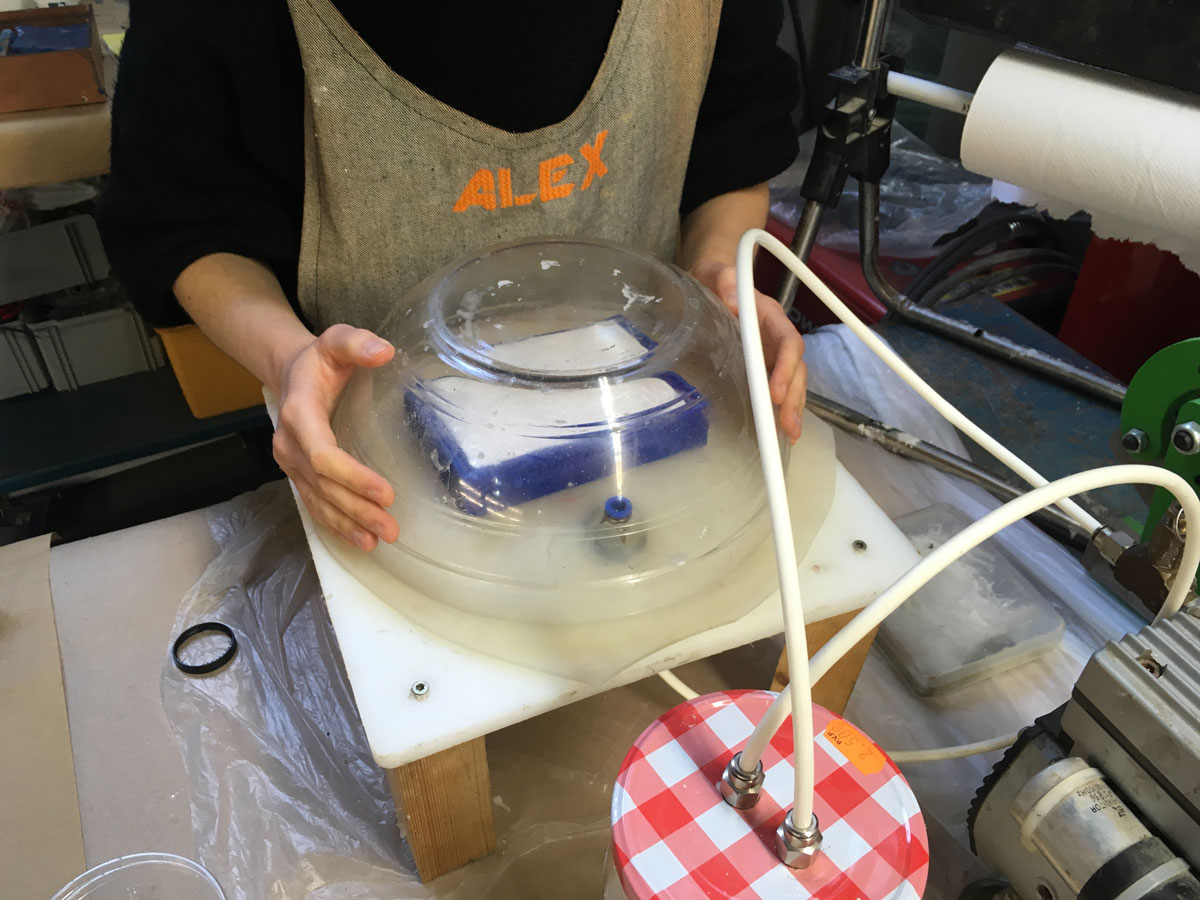
- I’m stiring the mixture for circa 10 minutes, and extracting the bubbles under the vacuum case.
- Than I’m pouring the mixture with a thin stream from up high to the mold. The thinnest the stream the less bubbles will appear.
- now it’s time to extract the bubbles from the form. I will do it for ca 10 minutes, when the bubbles will grow too big and one seas the mold is “getting out” from the form one have to decompress the case and compress again.
- next step is to leave the mold for a night and….
- take it out!
I would like to mold the actual object also from silicone. Since it’s going to be a flat-fish will be cool if the material will be a bit fluffy and elastic, so silicone fits pretty well. This could give the fish more biological feel. In the future I would like to try molding soft robots so now it’s like first step in playing around.
Next I’m pouring a silicon mixed with colour liquid pigment into my mold. To avoid sticking (I’m pouring silicon into silicon). I’m spraying a layer of Mold Release Agent for use with silicones. When I want to take it out it’s still not easy but works at the end. And here it is - a fluffy flat-fish.
I also would like to test the metal molding. For that I have to use another type of silicon which won’t melt in the oven. Its Mold MAx 60
- the material will withstand up to 560°F / 294°C
- curing time is at least 24 hours at room temperature (73°F/23°C)
- Mix Ratio By Weight is 100A:3B
I’m following the same steps to prepare the mixture and so on, just this time I’m wearing the mask since the silicon catalist seems pretty toxic.


Next step is metal casting!
During the Wildcard Week I’ve managed to test bioplastic as a molding material. More informations on the subpage of this assignmant.
Files made during this assignment: