Week 1: How to build this website
This week assignment is about… building this website!
If you’re reading this I hopefully managed to do it :)
Luckily I started this assignment already last week.
I consider myself already proficient with git, HTML and CSS, so I decided to take as a chance to explore how Jekyll works.
Building the Jekyll website
Jekyll is a static site generator that became very popular after Github started supporting it as a simple way to publish gh-pages.
Jekyll is a good option for building simple web sites like blogs. Instead of writing HTML and CSS it allows us to use a simpler Markdown syntax for writing and to choose between hundreds of reusable templates for styling your pages.
I started following the Quick Start tutorial from the Jekyll documentation
I setup a correct rvm/bundler environment (not in the documentation) and created my web site.
bundle exec jekyll new ilias-bartolini
And in few seconds you can get your site running locally
bundle exec jekyll serve --livereload --detach
It is important before publishing your site correctly to go through your _config.yml configuration file to set some of the necessary variables (eg. title, baseurl and url)
Pushed everything to our gitlab instance and got all pubished reusing the GitLab CI template for Jekyll like in the screeshot below. 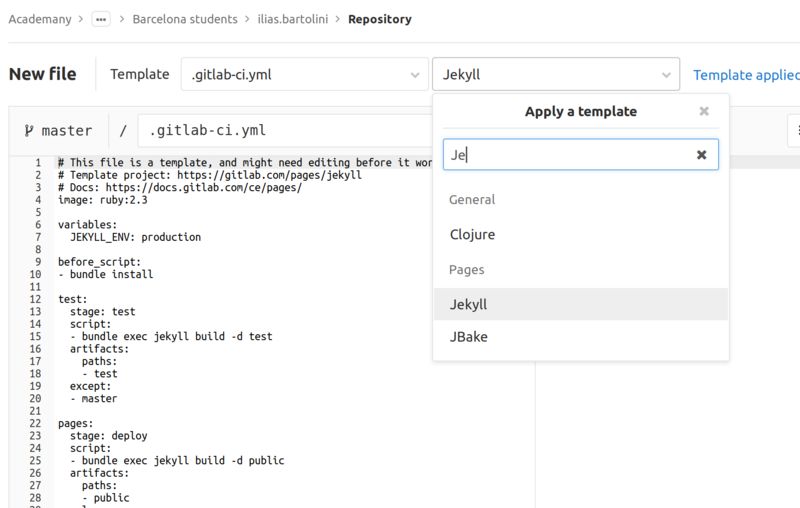
At this point you are ready to start writing your content just by adding some Markdown files in your _posts folder.
Now, your website might just look a bit ugly with the minimal template… isn’t it?
To take fully advantage of Jekyll you could reuse one of the existing templates.
You can find many of them on https://jekyll-themes.com/.
I recommand you to choose one that has a good popularity and good documentation.
For example for this FabAcademy website I’ve chosen the Hyde template for my personal blog I went for the Minimal Mistakes template.
Templates can be included in different ways: cloning/copying them or by adding them via a gem dependency. The second option is cleaner but gives you less control in case you want to adapt the templte and seems that had some restrictions in the past.
After choosing your template make sure to go through the additional configuration necessary for that.
In my case I added configuration for my social media link, ability to comments on the blog posts, I changed the image on the sidebar with one of my pictures (I’m very passionate about photography!) …and much more…
Oh, and the mandatory emojis support… ![]()
![]()
It is important at this point thinking about your content structure.
Each page in Jekyll can be represented under different collections, categories, tags and be displayed with a layout provided by your templates. For example I decided to organise my posts using tags, so I can add one or more to each post and I highlighted some of them in the menu (see: Weekly assignments, Updates, Final Project, etc..). Finally I created a separate single page for the About Me page.
Writing the content
As edito for the website I decided to choose with Atom that comes already packaged in Ubuntu/Linux.
It has a good support for markdown and a wide collection of plugins for web development.

For managing images I created a small script that helps me convert .png and .jpg files using Imagemagick
> cat ~/bin/fab_convert_assets.sh

#!/bin/bash
# Converts and compresses FabLab images assets for saving space

mkdir -p resized && \
mkdir -p _original && \
find . -maxdepth 1 -iname '*.[jp][pn]g' | \
  xargs -L1 -I{} \
    convert -resize 800 -quality 75 "{}" resized/"{}".jpg \
&& mv *.[jp][pn]g _original/
Publishing the content
As mentioned above the jekyll compiled result is published by GitLab integrated CI process.
What we need to do is to publish our sources in our personal student git repository.
Git is the currently most popular version control system used by software developers.
It’s goal is to help manage files history, support distributed changes by multiple people and manage conflicts.
The publication worflow is very common as shown in this terminal session below:
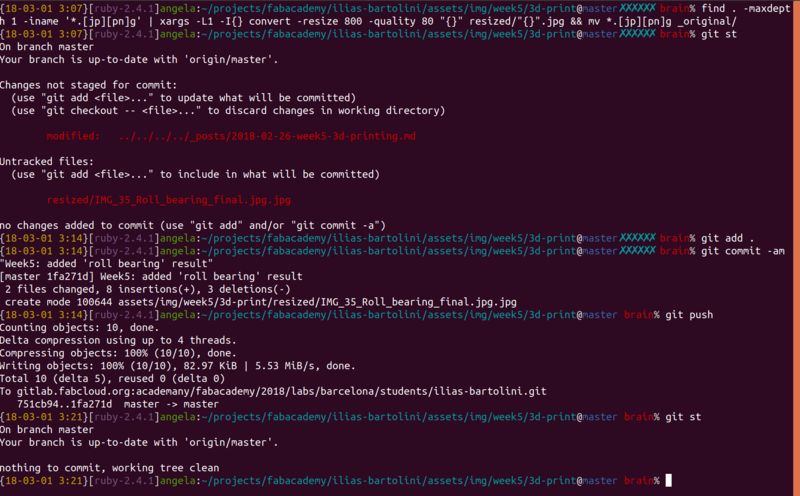
Here is what I’m doing step by step:
- First using
convertI run a command that compresses all my images. This ommand is a bit more complicated because it also archives the original ones in an ignored git folder and moves the compressed ones in another location. - With
git stI check if I have new files or changes - With
git add .I add the new files to the git staging tree - With
git commit -amI create a new commit in the history, adding new files (redundant in this case) and specifying a commit message - With
git pushI send the changes to the remote repository (GitLab)
If I was working with multiple people before git push-ing the changes I would have added more steps:
- With
git pull -rI get the latest changes from the remote server.-ris for rebase mode: there are actually different styles of doing this, some teams prefer to not use-rbut I find it usually better for small groups to keep a linear history. - Eventually I magage the conflict, edit the files and using
git addI mark the conflict resolved. - With
git rebase --continueI proceed in the rebase process and if no more conflicts are present I can then push.
Happy writing! ![]()