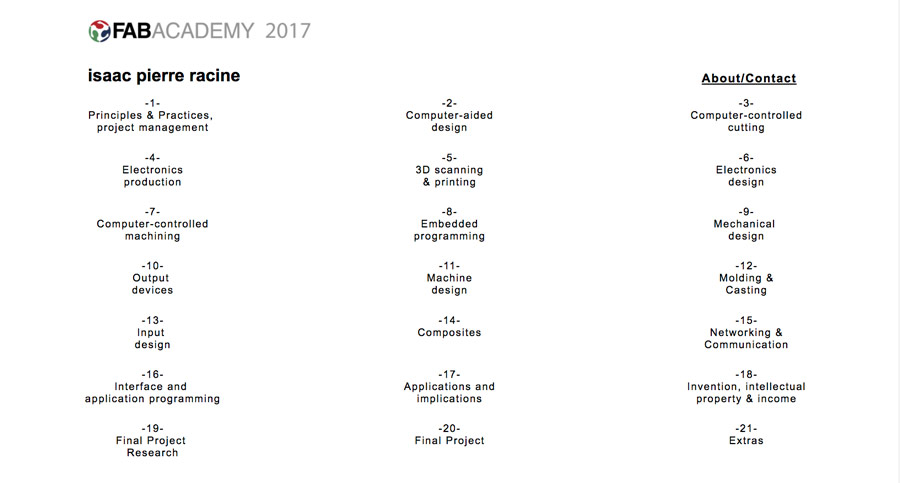
Assignment:
A_Describing you and your final project.
B_Build a personal website.
C_Work through a git tutorial
D_Notes on project and time management.
B_Build a personal website.
C_Work through a git tutorial
D_Notes on project and time management.
A_Describe you and your final project
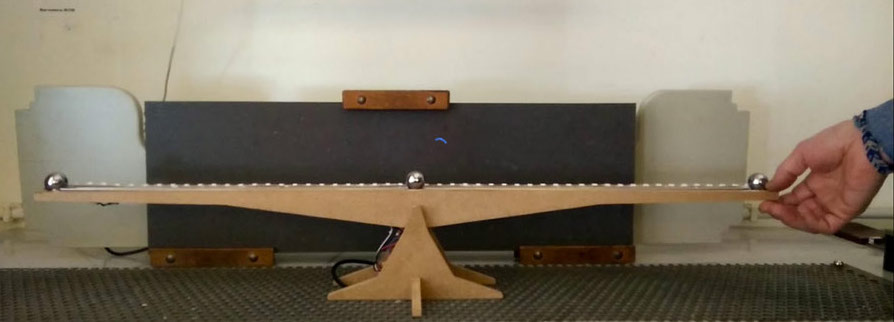
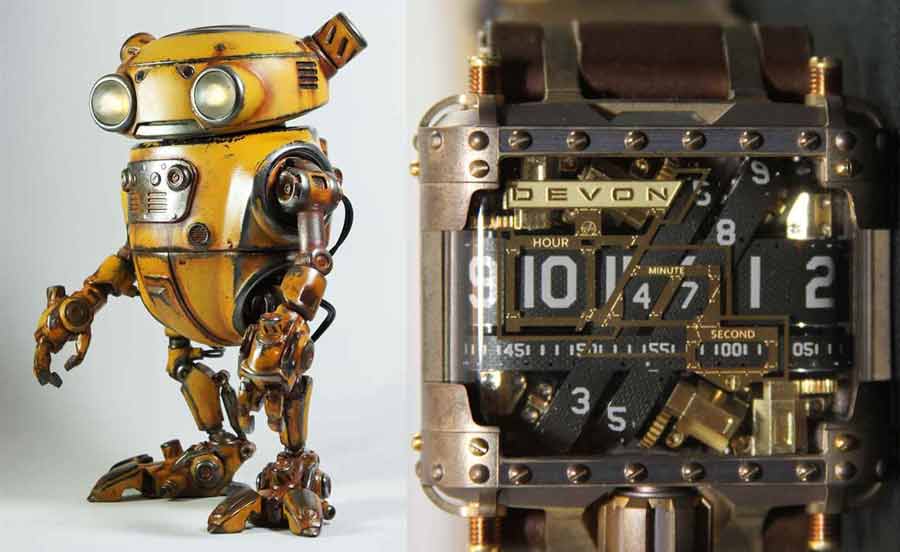
My final project is an interactiv scultpture called "digiTalog". It a representation in 4D of the sensation the experience of technology provokes in me - empowerment/vs/servitude. The duality is expressed by combining elements of analog and digital technology into an artifacts suggesting a "symetrical" relationship of control between the us er and the "machine".
In 2016 I started Fab Academy at the GreenFablab having no experience in electronics, coding, and new to most digital fabrication processes and software. Having to combine the studies with my freelance work I could only complete the first 5 assignments. Last year I started again and followed through most of the assignments but did not start working on my final project until the last weeks of the semester. I managed to present my project but to the cost of a few assignments that were left unfinished. This year I want to improve my skills in each of the processes, give a second layer to my documentation and bring my final project one step further.
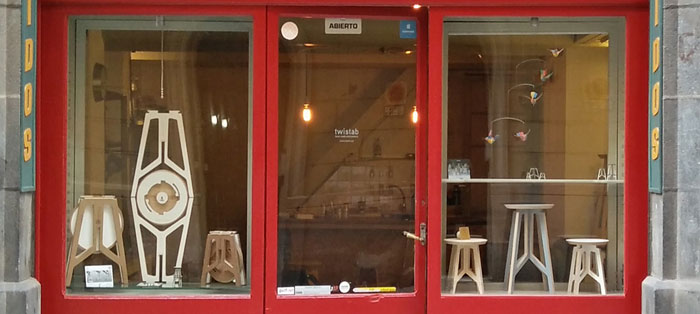
For this new itiration I will review some technical aspects of the design, develop the aesthetic and integrate the sculpture into an instalation for the window displays of my storefront studio.
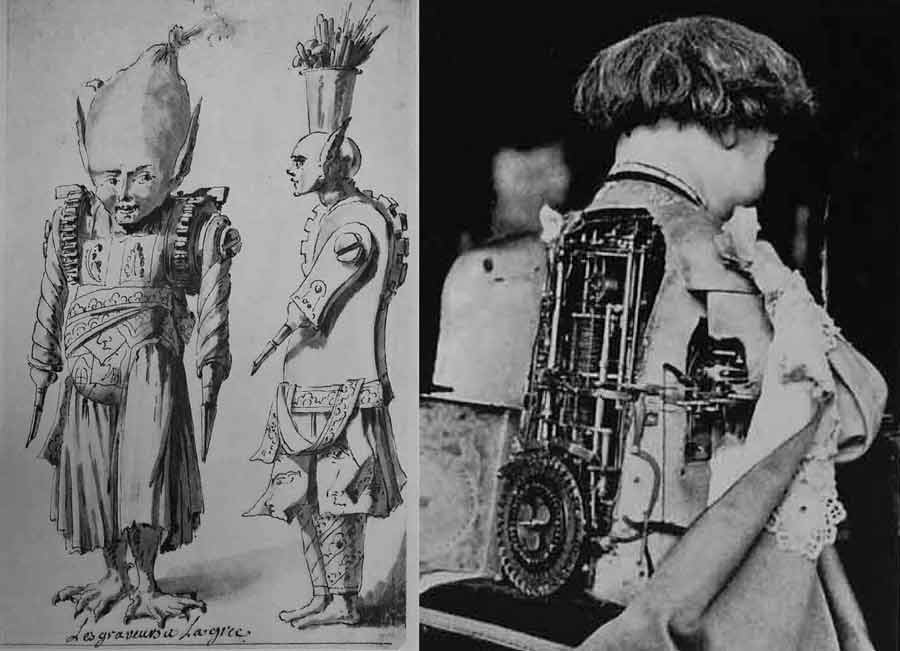
The influence of technology on humans expressed in early machine art sculptures as well as the powerful yet ironic mythification of technology of the Steampunk movement are both pertinent inspiration for this project.
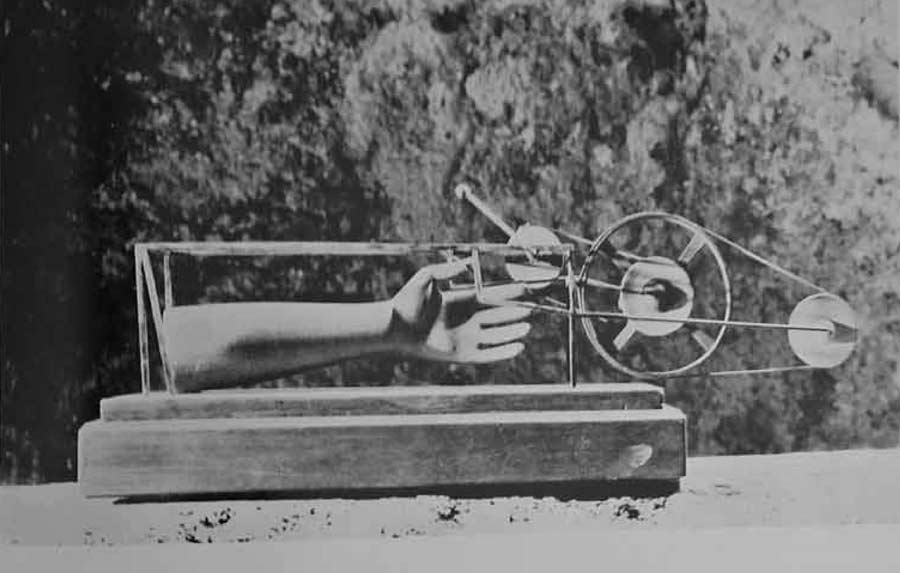
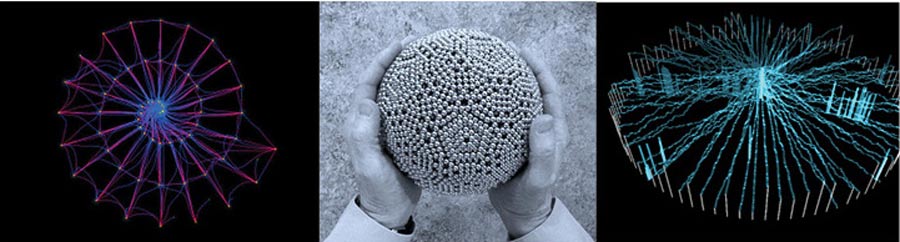
I am also fascinated by the idea of self powered artifacts, magnets, and materials and processes that seek to transcend the granted physical limitations.
Working free energy generator
Flyte levitating Light.
Bio-gravitics, hutchison effect, vibro-acoustics
Introduction to Magnetism and Induced Currents.
Window tap technology.
Steampunk movement.
B_Build a personal website
To approach building my website I refered to HTML Wikipedia page, the w3schools tutorials, and the Mozilla Tutorial. It gave me basic understanding of what are HTML, CSS, JAVASCRIPT, and gave me a chance to practice with web design workflow and syntax.
HTML (HyperText Markup Language) is the standard language used to create web pages and web applications. It describes and defines the content along with the basic layout of the webpage.
CSS is the body that standardize the web. It is a language describing the style of an HTML document and how HTML elements should be displayed.
JAVASCRIPT is a high level language used to make webpages interactive and provide online programs.
These 3 languages are the core technology of the world wide web content production.
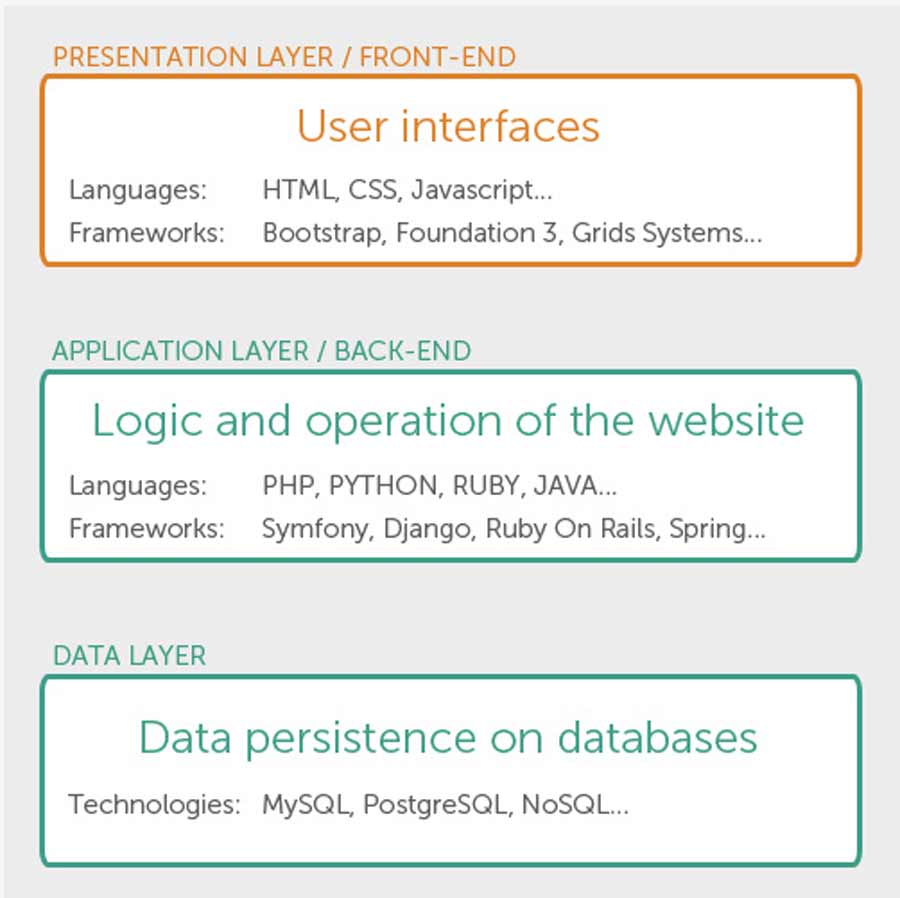
There are various strategies for building a website. I reviewed the the 22 best responsive frameworks. There are 2 types of frameworks. Front end and backend. The front end is the code directly related to the user interface and the backend deals with the application layer and data layer.
I looked also at the possibility of using a static site editor like Jekyll or HUGO. They are simple, blog-aware, static site generator for personal projects, organization sites and they are designed to work very efficiently with any Git platform. They are aslo perfect to write in Markdown language which has a much simpler syntax than markup HTML. I did quite a few tutorials and installed a Jekyll theme but I struggled to understand the workflow of linking with Gitlab. I joined another student who had experience with Hugo and managed to install and build a very basic test site using Atom but I realized to build a proper site I would anyways need to be more fluid with HTML and CSS so I decide to build my website using a HTML/CSS template.
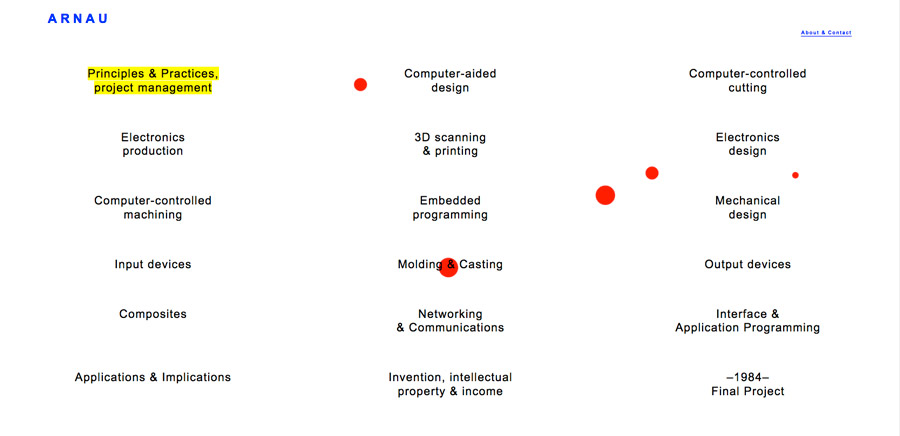
After researching Fab Academy website I decided to use the website of one of my last year's fellow student Arnau Tasies as a template and personalize it. I cloned the complete folder of Arnau's website onto my desktop and started adapting it using Brackets. It is simple to use and the interface is user-friendly. It also has an integrated "live preview" functions that shows the web page directly in the browser from the application.
I deleted the original content leaving the page in a template form and skimmed the style down deleting the processing and the javascript codes. I wanted to simplified my workflow as much as possible. Then I edited the CSS and the HTML to personalize the pages - changing the font, font colors and some structural elements.
It took me a long time and I went through a lot of debugging before i could get it more or less right and could start adding content. At last I got a structure and the basic skills to formally start this week's assignment.
A_Create an account in Fablab.io + create a Gitlab user
Git is an open source version control system - VCS. It is an application that tracks changes in computer files and coordinates work on those files among multiple people. It was originally created for source code management in software development, but it can be used to keep track of changes in any set of files. Indvidual users can work locally on a same project and use Git to avoid conflict when uploading changes to a master project. It also allows to branch, clone or fork a project. The fabacademy repository is located inside the Fablab.io repository which is hosted on the Gitlab platform. Gitlab acts as a back-end manager to which our computers sinchronize using Git commands (through Terminal). Each student need to install Git on its computer and configure a connection with the FabAcademy Gitlab repository.
For me this is all very news. Never made much use of terminal so I started with a few tutorials to get familiar with the basic command lines for Terminal.
Git documentation
Git book
Fab academy Git tutorial
Comand line Terminal Mac
I created an account on fablab.io and in Gitlab and configured my comptuter to push on the Green Fablab server in the Green Fablab repository.

A SSH key is a set of keys (one private and one public) that identify each computer - in other words it tells the server who my computer is - who I am. The public part of my computer SSH key has to be added on the Gitlab account so Gitlab and my computer con talk to eachother securely. Both public and private SSH key are stored in the home directory of my computer.
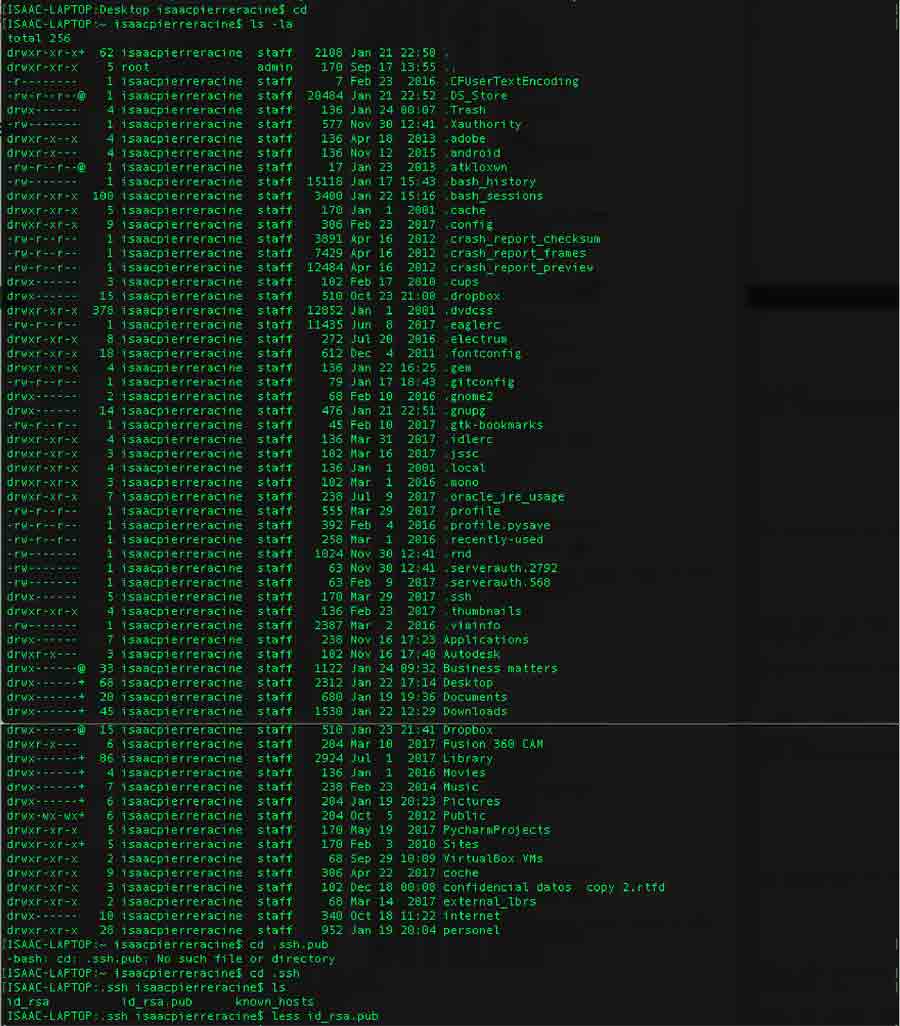
Using Terminal I located the ssh key on the home directory of my computer and added it to my Gitlab account:
ISAAC-LAPTOP:Desktop isaacpierreracine$ cd ls -la
Go to home directory and list all the files in the home directory (including the hidden files - The "-la" command line shows also the hidden files.)
cd .ssh
List the files on the ssh directory
The different ssh key files shows on the home directory. The id_rsa file is the private part of the key and the id_rsa.pub is the public.
ONLY THE PUBLIC PART OF THE KEY MUST BE ADDED TO THE GITLAB.
less id_rsa.pub
To see only the public ssh key
A new terminal window will open showing the public ssh key. Copy the key to the clipboard

The following screenshot shows the sequence of commands to get the public ssh key from the home directory.
Log in into the gitlab account
Open the profile setting
Click on the ssh key tab
Paste the key into the key window (the key name will come automatically)
Press Add key
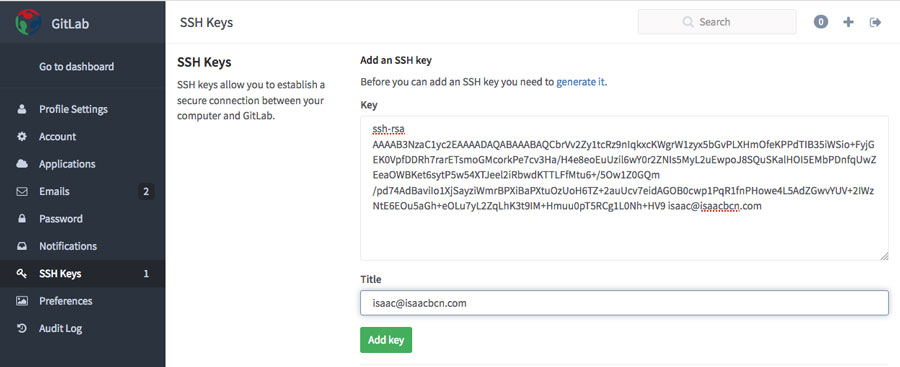
Also see this setting up ssh key tutorial to get instructions.
Now that Gitlab know my computer's SSH key (he can recognize me) I can configure my computer to syncronize with my Fab Aacademy student repository on the Fablba.io Gitlab. To do that I use Git to create a terminal configuration with the Fablab.io user and email address.
git config --global user.name "isaacbcn"
git config --global user.email "isaac@isaacbcn.com"
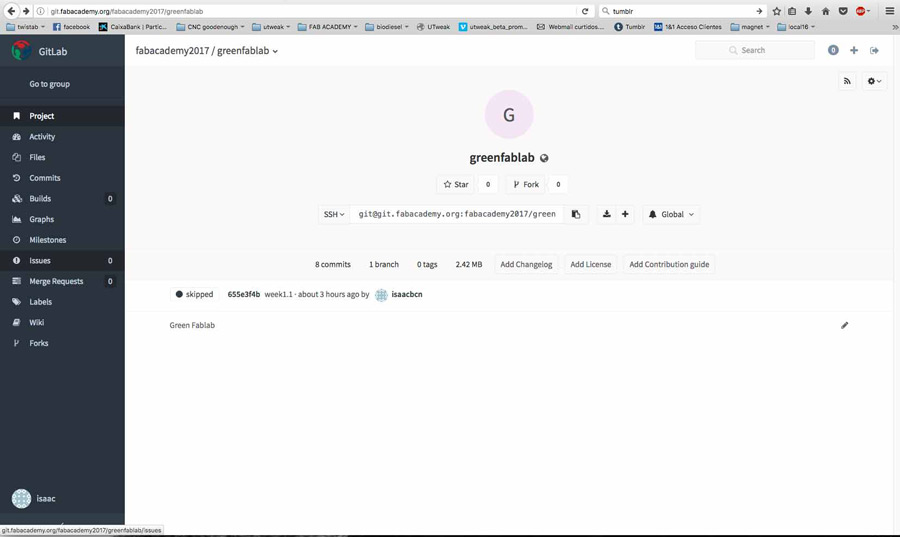
Now my computer has the permission to enter the Fabacademy repository that is located on the GreenFablab server. I created a folder on my desktop called "GreenFablab " and cloned my repository so I can push (upload) my files.
git clone git@git.fabacademy.org:fabacademy2017/greenfablab.git
This adds the repository of all the Fabacademy student of Greenfablab into my GreenFablab desktop folder. My student folder (identified with my student ID: 415) is where I will copy all updates done to my website.
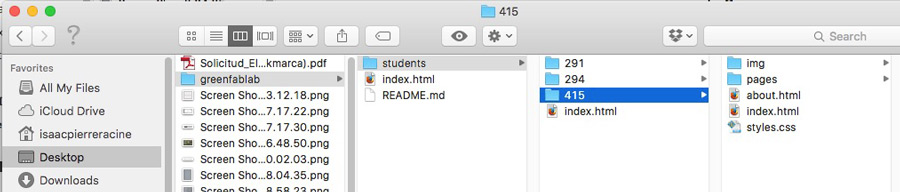
As seen in this last screenshot I have created a structure to store the content of my web page but I have not yet generated any content.
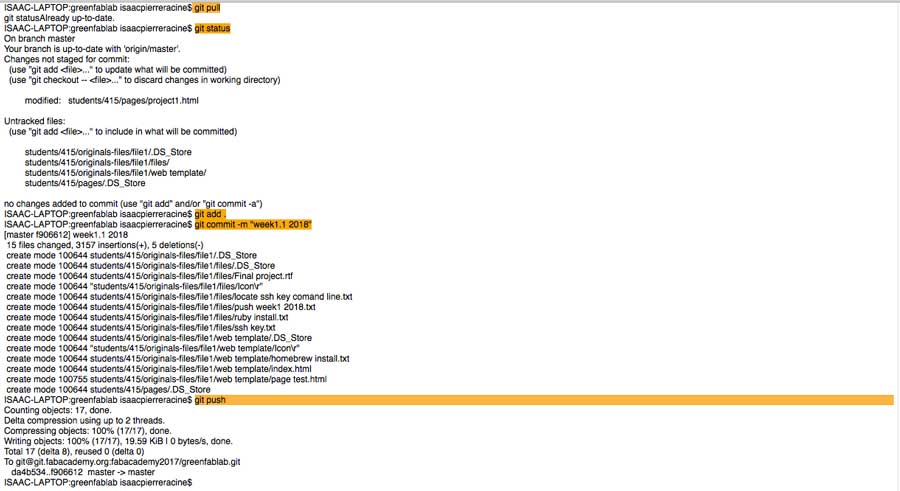
To uplaod content onto the repository we use terminal in the folowing sequence:
Go to folder linked to the repository:
cd ~/Desktop/greenfablab
git pull
Fetch and replay the changes from the remote master branch since it diverged from the local master
git status
Displays paths that have differences between the index file and the current HEAD commit, paths that have differences between the working tree and the index file, and paths in the working tree that are not tracked by Git. The first are what you will commit by running git commit
git add .
updates the index using the current content found in the working tree, to prepare the content staged for the next commit.
git commit -m "message"
Commits the changes to the repository - the "message" is a reference for git. If left blank it will pull exactly the same but there won't be no identifier. I use "week 1.0" for example for the week 1 first commit. The second time I commit for the same assignment I will use "week 1.1".... and so on. A date is a good reference also to use.
git push
update the web site to the repository.
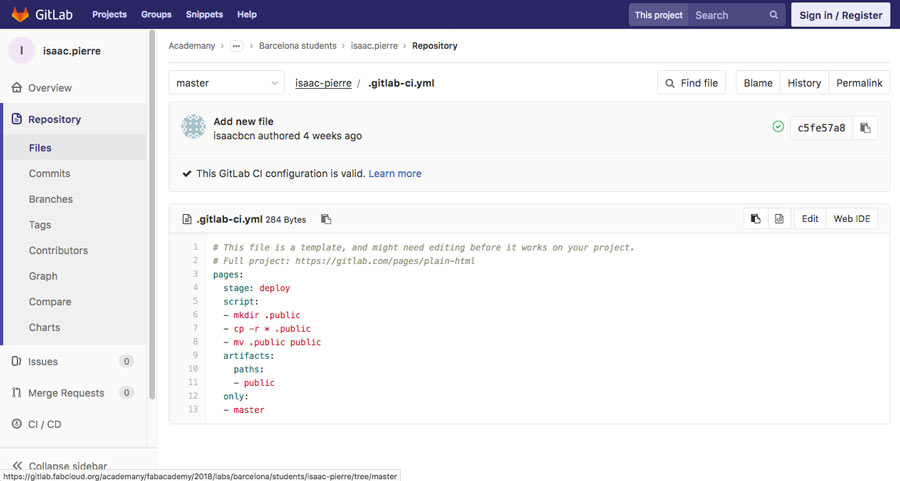
Once the websites files are pushed to Gitlab we need to tell Gitlab what to do with them - in our case to tell Gitlab to publish them in html format. To do that we need to add YAML file (.gitlab-ci.yml) in the root directory of our repository, and configure our GitLab project to use a Runner, then each commit or push, triggers the CI (continuous integration) pipeline. The .gitlab-ci.yml file tells the GitLab runner what to do. By default it runs a pipeline with three stages: build, test, and deploy. You don't need to use all three stages; stages with no jobs are simply ignored. The CI/CD services and the YALM file are well explained in this documentation Getting started with Gitlab CI/CD
For my gitlab repository to publish my website everytime I push I went to the Gitlab page and in the main page of my project - by my name next to the master combo box I pressed add a new file. Choose the .gitlab-ci.yml file from the dropdown menu. And select HTML from the next combo box next on the right. Press Ok, add a commit name (set YAML file) and commit the change.
Note: I add the YALM file to my Gitlab when I migrated my web site from the Greenfablab server to the master FabAcademy server (see next paragragh). Fiore Basile helped me with the operation and, though I understand the process and its function I did not have to chance to document the process of creating and commiting the yml file. Anyhow in the following screenshot we can see the yml file set on my repository.
Here is the terminal page of the first push I did this year.
Migrating to the Fab Academy Gitlab server (2018)
It took a few months (actually almost the whole semester) before I could get my website migrated to the main FabAcademy server. Until than it remained on the Greenfablab server that was no longer updated on the main server). The reason for this long delay is that it weas a special case and my instructor had published an issue on the master branch but Fiore did not have had the time to take care of it. In May Fiore came to Barcelona and I managed to steal a few minutes of his time to set my student repository and help me sync my local repository with the Gitlab FabAcademy master repository.
What he did was to create a new repository on the Gitlab server for my website (just like all the other students) and from than on I could proceed with pushing the datas (website) onto the master Gitlab branch. In the attached document we can find the sequence of the git command to copy my wesite from Greenfablab server and then merge, add, commit and push to the Fab Academy Gitlab.
Once I had completed the copy I realized the size was way too big and Gitlab refused to publish it. So I deleted the files week by week in the repository folder of my web on my desktop and committed the changes week by week until I managed to reduce it to 170mb.
See the link of week1-2018 push.
Project management
Th 2 project development principles mentionned in the lecture seem like very important to acquire. One of the reason I enrolled in Fab Academy is to acquire a methology and those seem very appropriate.
1- demand/vs/supply-side time management:
Frequently when I work on project, I just dedicate it as much time as possible. The supply-side approach works with time slot dedicated to a task and getting the task done within this time frame_ it means planning in advance and do your best while you do it.
2- Spiral development:
There is an analogy I uses all the time to describe spiral development. Always make shure you develop all the parts of a project to a same level - When painting a room, the best thing to do is give a first coat everywhere. Than the second coat. If you leave one wall unpainted while doing the 1st coat when you get to the second coat the workflow will suffer and you'll end up waisting time and energy.
One of my main objective is to implement this methodology. I have worked as a fee-lance all my life and while I am very methodic when I work professionally I am very chaotic qhen it comes down to my personal projects. I would like to use the fab academy to improve on that.
I have created an user account Trello project management pratform and started to learn how to use it. It will be helpful to organize my time, control deadlines, monitor tasks and progress with each assignment and more particularly with my final project. I also implemented a workflow to downsize pictures using photophop in order to respect the set limits of 100mb for the whole semester
Export-save for web.
Click in the fold down menu bar in the top right corner of the new window.
Choose optimize for web adn set it at 50k.
Set the picture size ( I use 900 width with the scaling proportion locked).
Save the file.
Conclusion
Intense week. I learn mostly about how much I have to learn. I find dificult trying to learn something that I don't understand conceptually. When it comes to git type of application I understand too litlle of the logic of computing and the languages to really get a concrete idea of the implication. And sometimes it paralyzes me. But that is part of the deal and I can only trust the process.