Attending the Fab Academy in Barcelona, I document each week of intense learning as I come across new digital fabrication techniques.
This documentation is as much a report of what I do as a reflection on why I do so, and will hopefully guide me back to Oceania to spread and make good use of the knowledge gathered along the path.
--- summary of the assignment ---
Mechanical Design - objective :
Make a machine, including the end effector, build the passive parts and operate it manually.
Machine Design - objective :
Automate your machine. Document the group project and your individual contribution.
what I did :
Away for 5 days for the Fabricademy bootcamp, I took part in the team effort by :
Once back, I pursued my assignment by designing, fabricating and actuating a machine.
download :
Learning outcomes :
02.05.18 / It is quite funny how insipring a night wide awake can be. A week ago, I was obsessed about diaphragm iris, and could not stop looking at how it is made, how it functions and possibly how to fabricate one in a lab. Well, it has become this week's theme now, and it has gone a little viral. Both Thais and Javi are keen to make it, and there is a big chance this will end up as a part of their final projects.
So together, from tomorrow onwards, we will fabricate it. I have thrown some of the best videos and references found during this sleepless night in a Google drive folder and tomorrow we will share tasks between the three of us :
I have a look at a design available on one of the website (small scale : 25cm wide) to determine how to get started :
I am considering building a prototype in cadboard very fast based on that. But that bothers me with this design is that it does not offers me the opportunity to learn about G-code, and I wonder : how to use this design and make good use of it to fabricate something a little more CNC-y? It comes together as I am flicking through some pictures :
This idea came to me while in class, so to ask Javi what he thinks about it by drawing the following sketch on my screen and shows it to him with no further explanations :
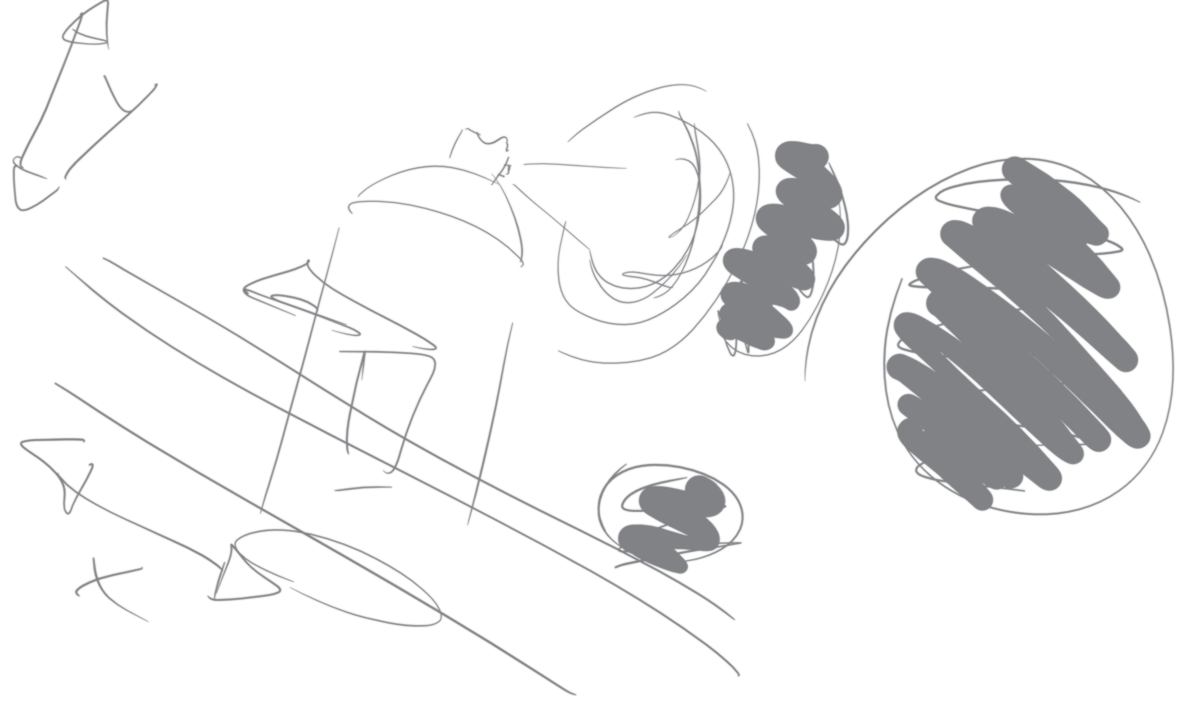
He looks at me and nods. I am baffled that he got the idea out of such a crappy sketch - it is going to be a good collaboration I guess. For the purpose of this website, let me cast some light on the idea :
I seize the opportunity to have lunch with Ferdi, who is currently building a CNC machine that he also designed - a full size milling machine. By doing so he is attempting to drop the cost of the price of CNC machine by an extra 50%. Here is what Fab Lab Soko, currently developping, looks like :

The laser cutter was assembled in a studio nearby, as well as the ultra-sturdy 3d printers and... an indoor swimming pool. Random. All pieces of furniture come directly from Opendesk, apart from this "greenbowl" from Space10. A small "GoodEnough" CNC machine was also built there and was used to cut pieces for the large one, which, apart from the sliding elements, is all built out of wood.
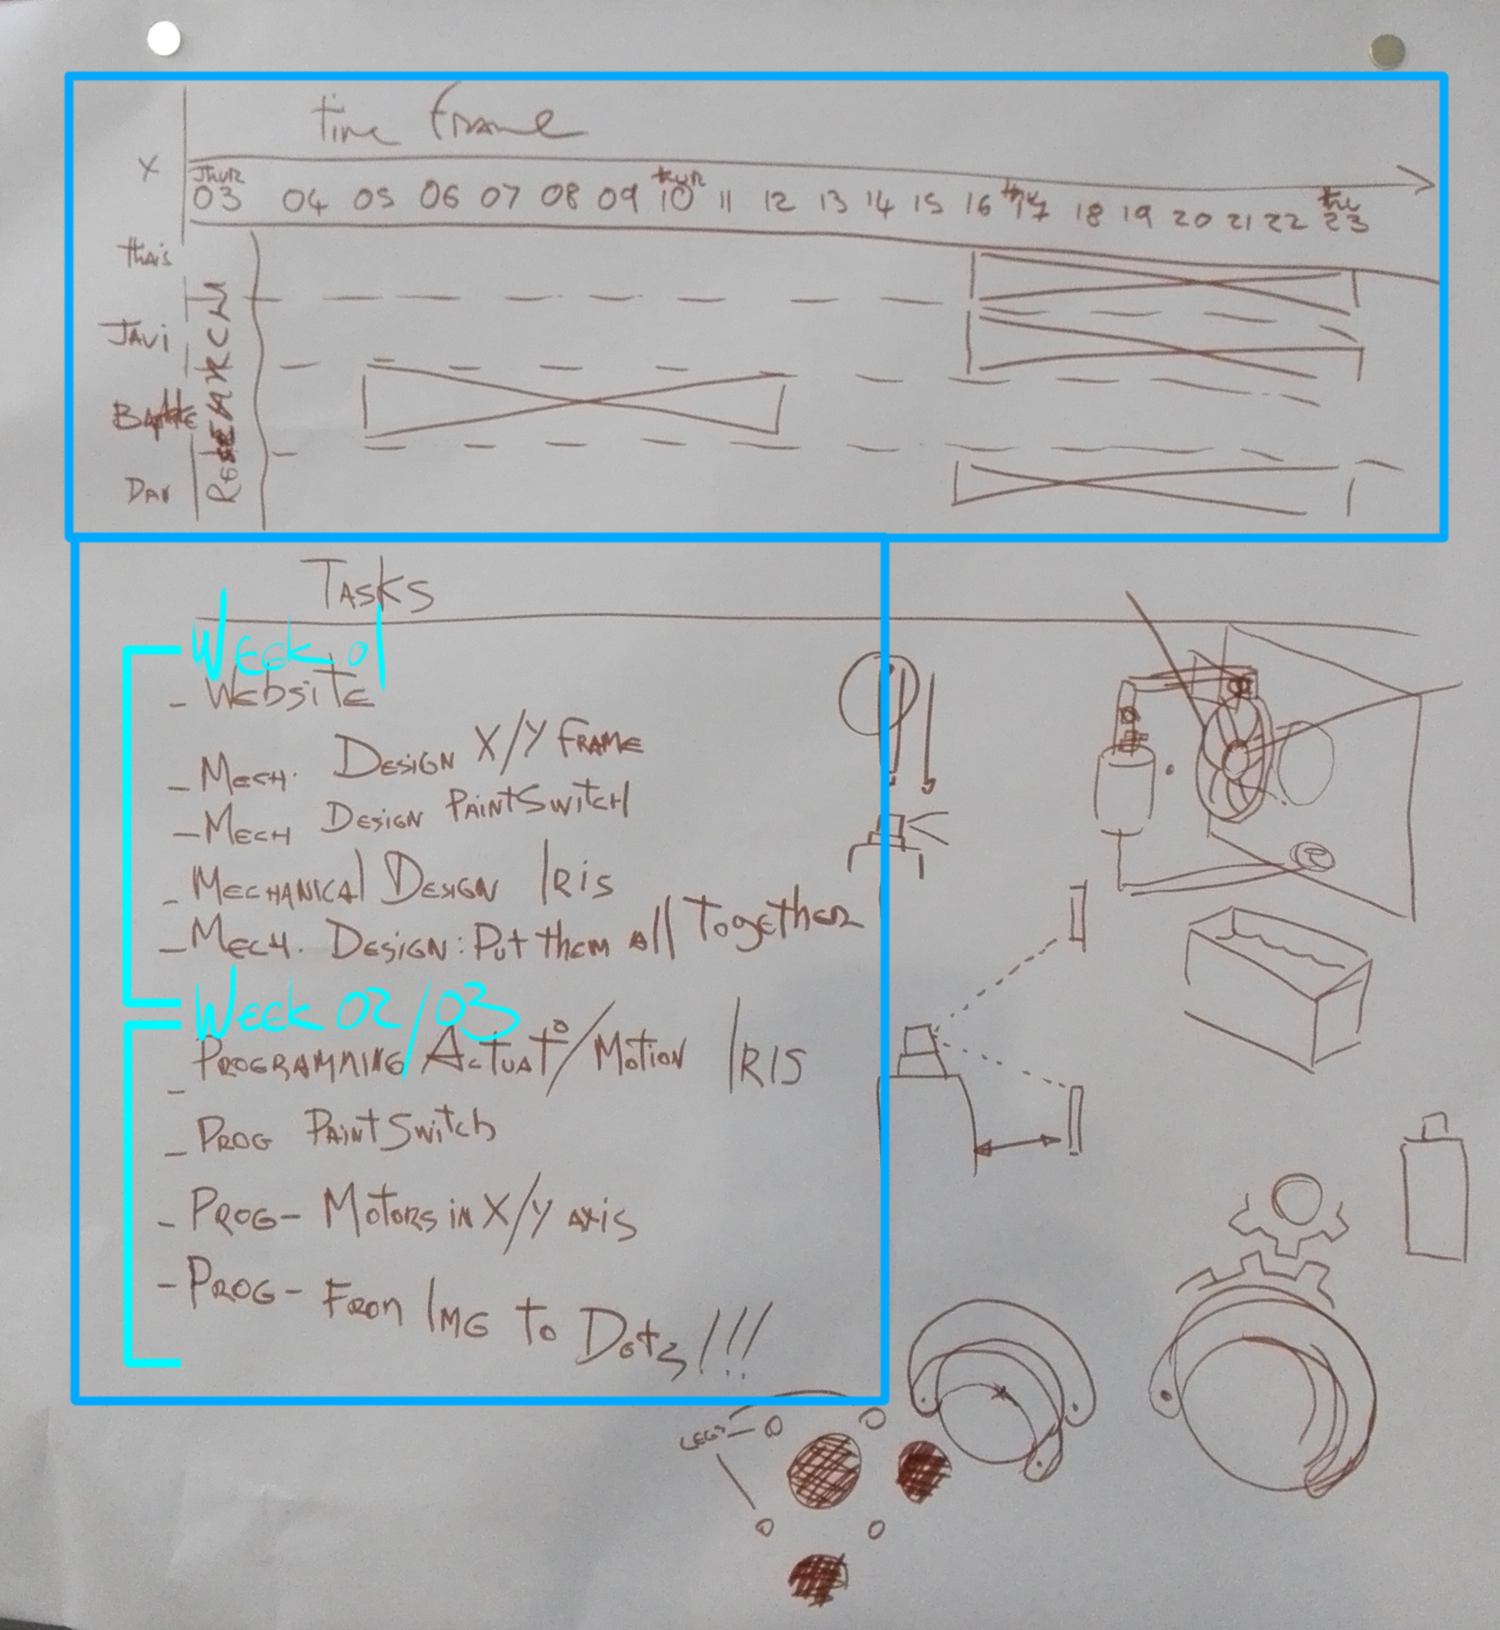
It is also time to lock in all assignments, one week at a time, so I get started, polishing week 01 and 02.
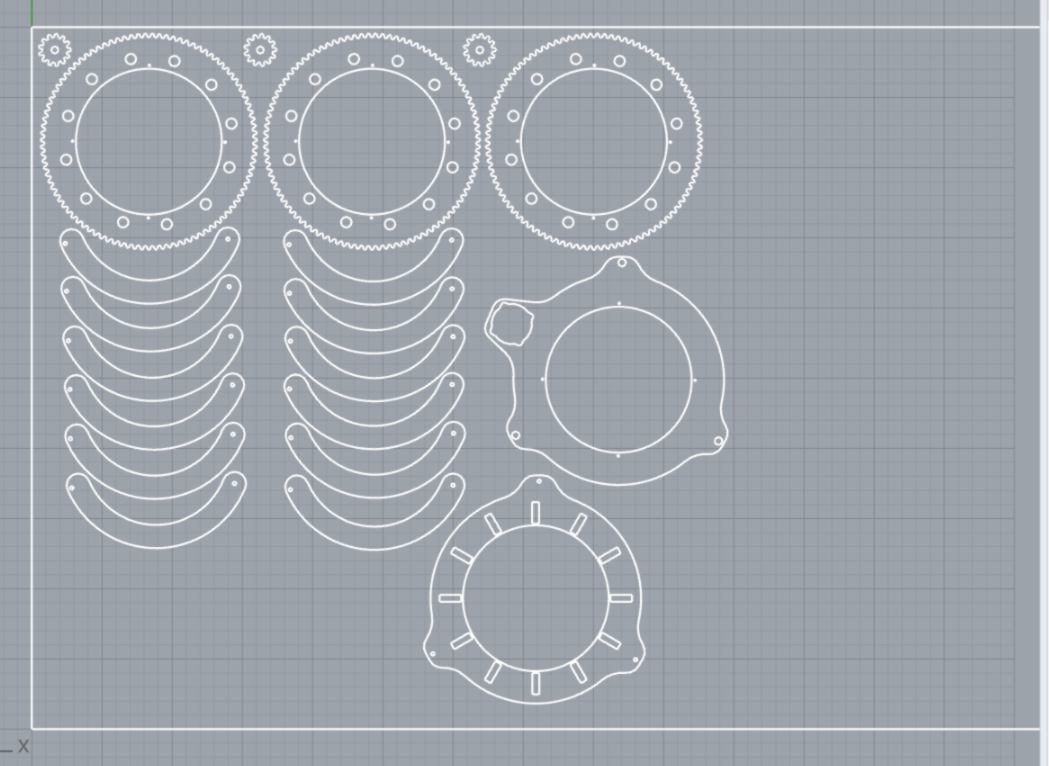
I prepare a rhino file ready for laser cutting for tomorrow. It is a modified version of the design found in my examples above :
03.05.18 / We set up communcation lines for our machine making group, creating a Whats App group. Before getting together I polish week 03, getting some practice on Inkscape.
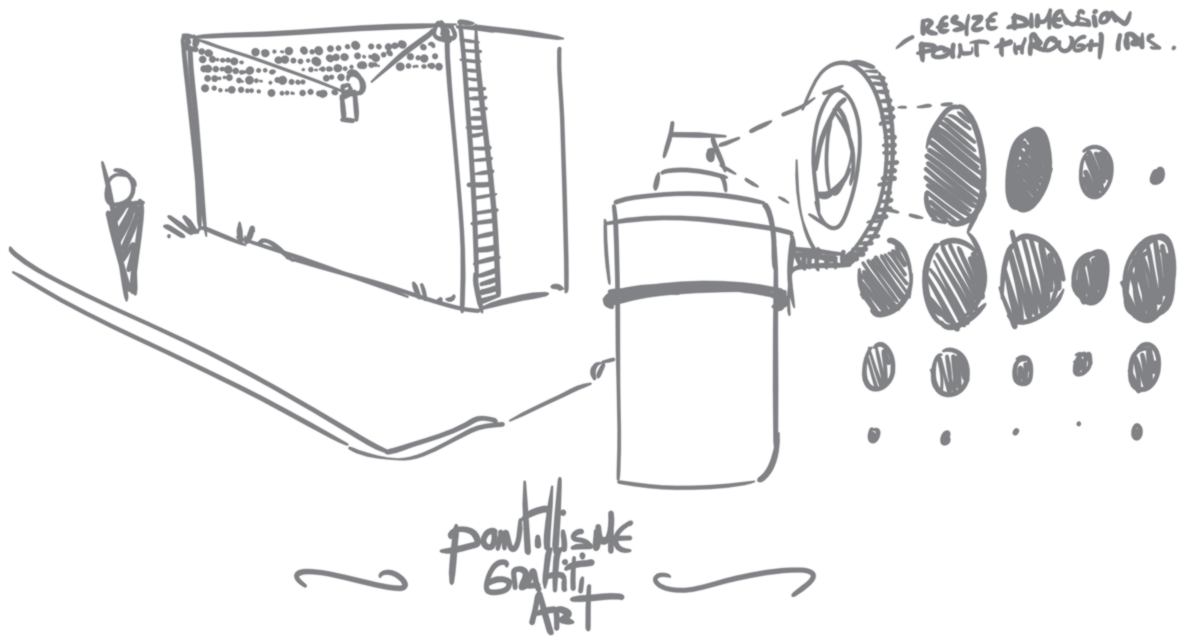
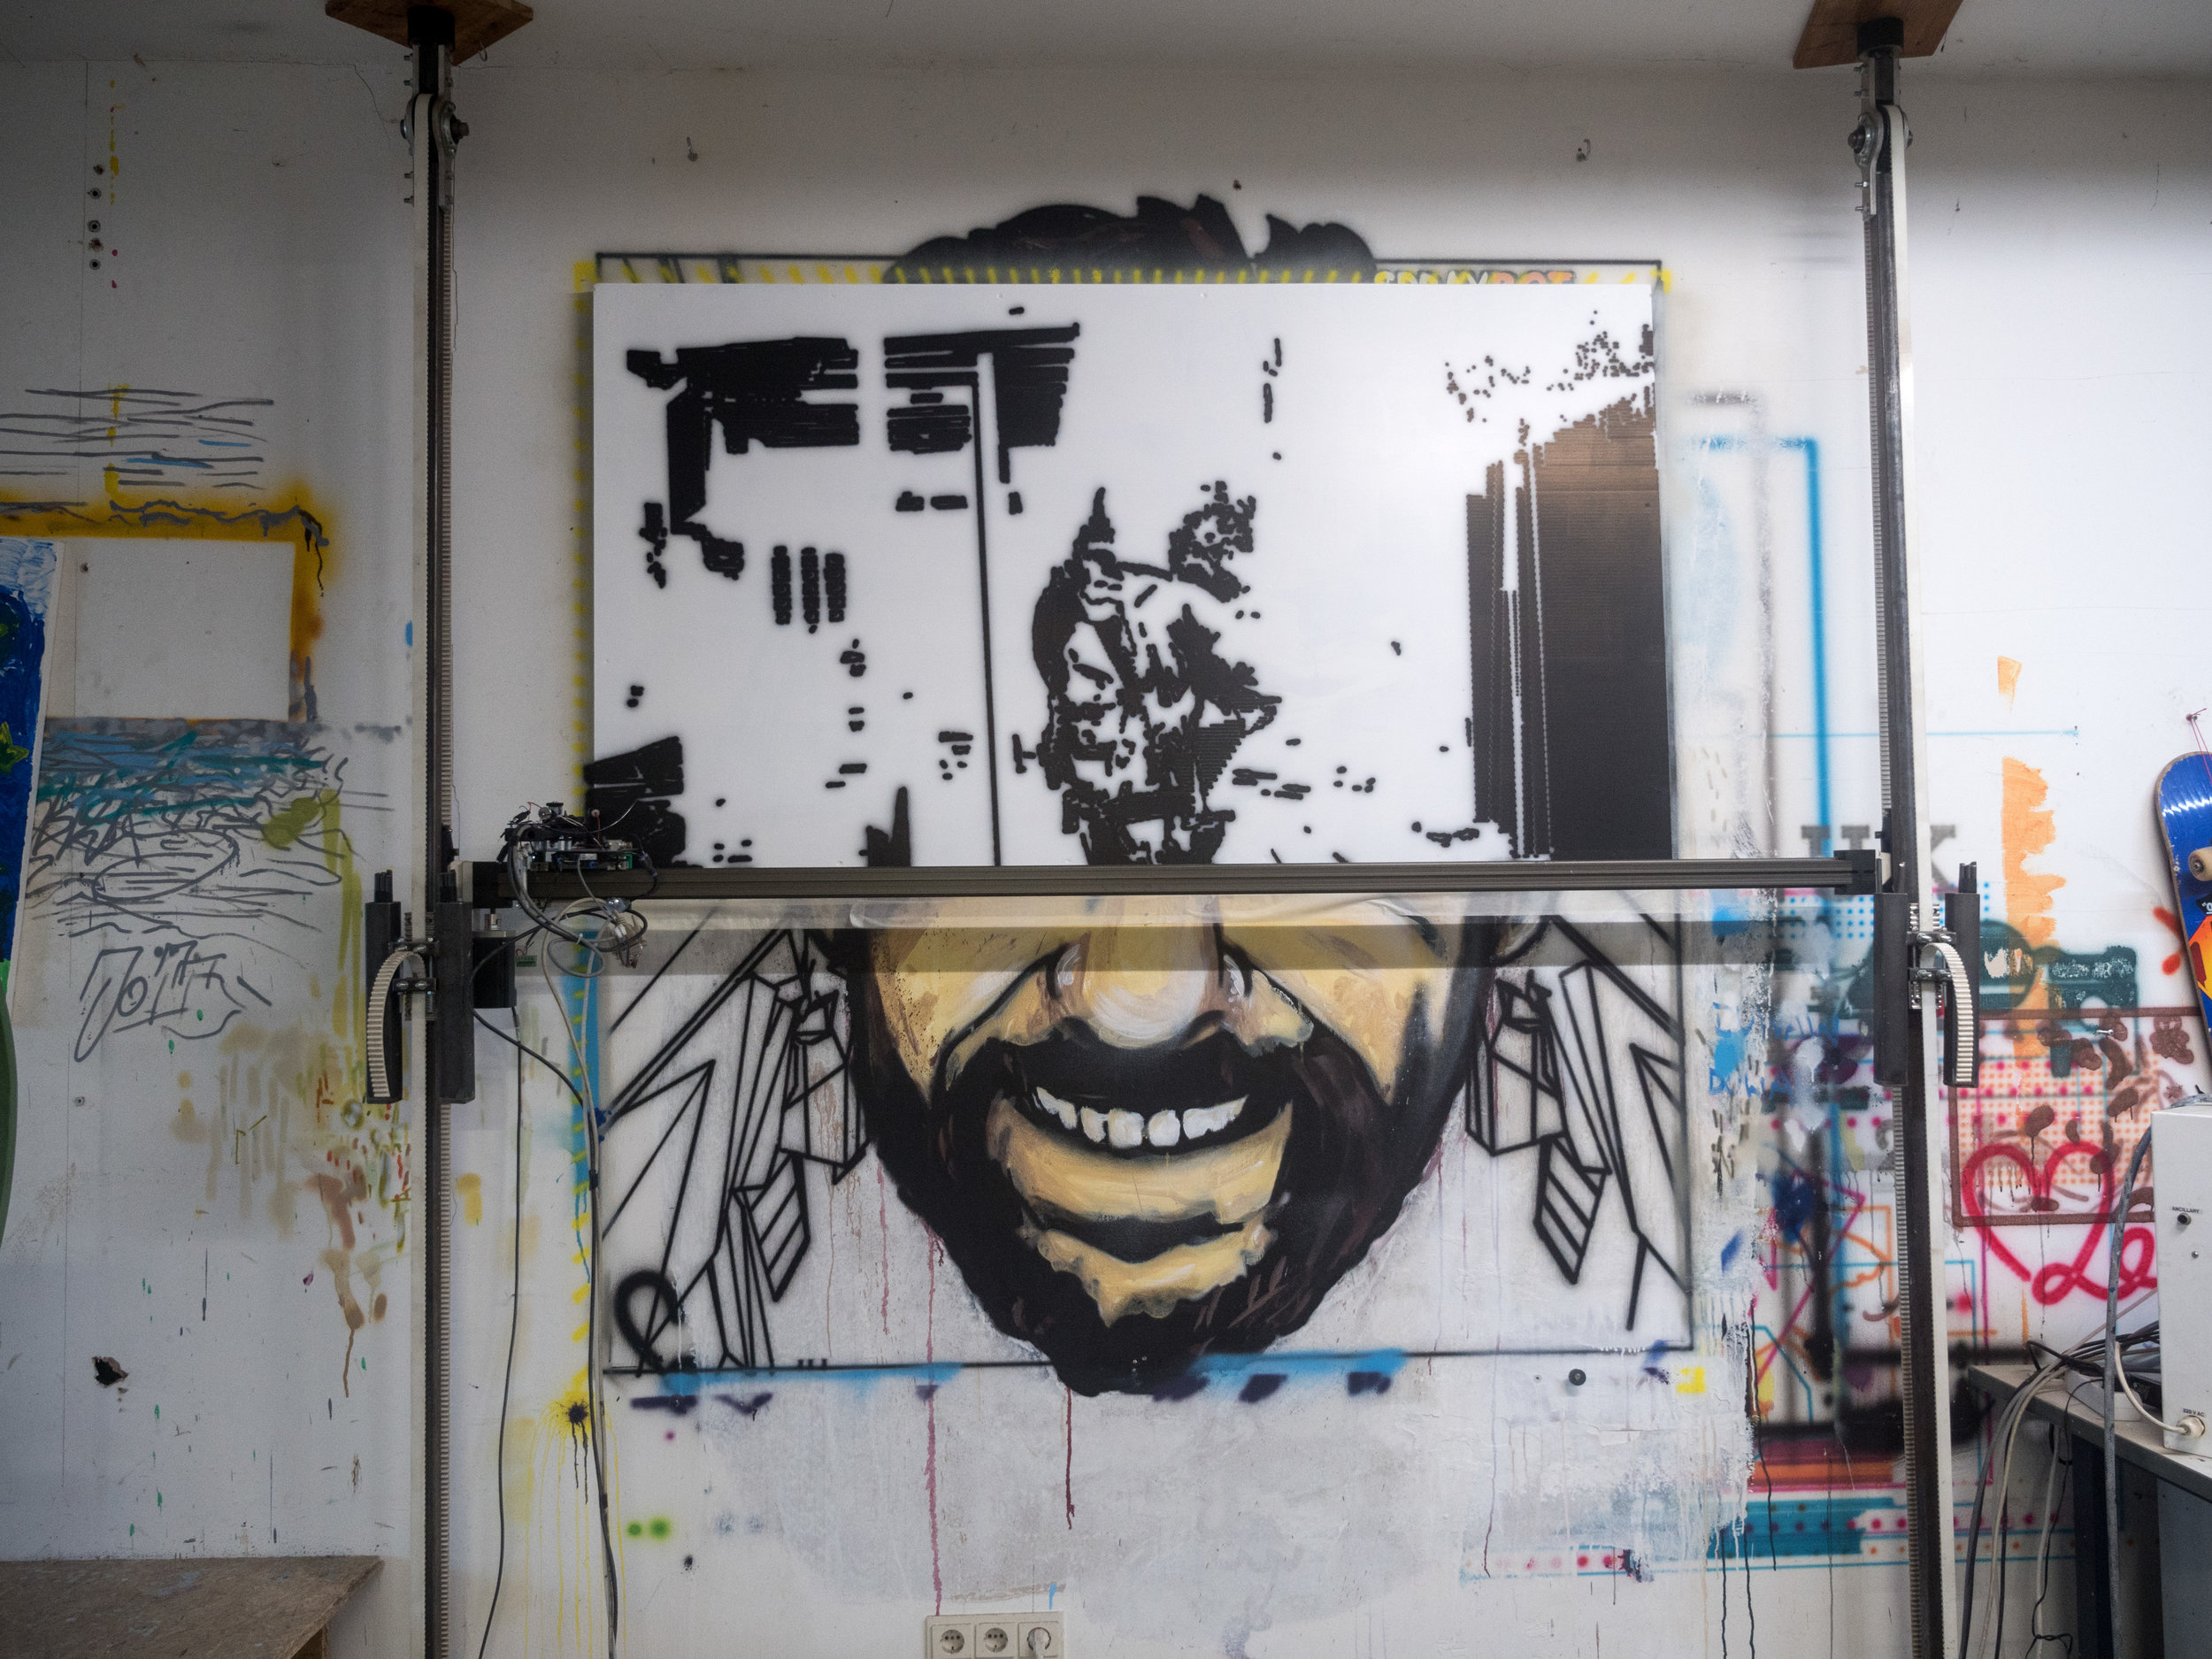
We then all gather around a white board and draft our next two-weeks project. Well in our case, since I am heading to Milan, I will keep working on it one week after they will be all done, which makes it a three-weeks project. Dan has joined us too. So it seems like everyone is happy about the spray machine, and here is our first draft :
We break down the tasks :
We also discuss type of material to be used according to the type of paint used, automatic washing system for the diaphragm (if necessary?), how the machine will be in contact with the wall without spreading the fresh paint over, using small wheel the size of the minimum distance between dots. We have a lot of research to do, so we agree on each reading about a specific topic - I am in charge of the actuator - and meet up in the morning to share our insights. I head to another room to work on my interface assignment.
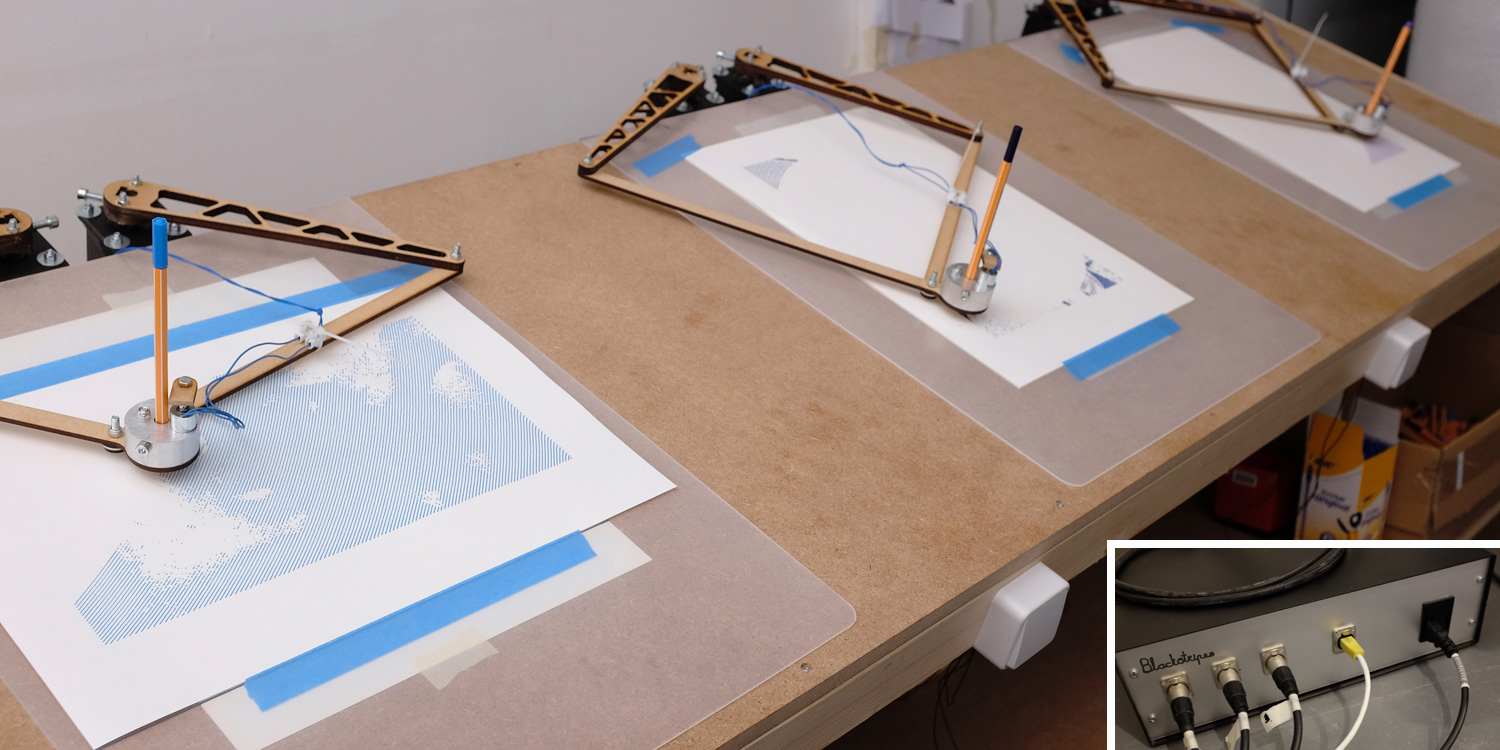
When I come back a few hours later, the situation has changed. With the arrival of a students part of our group who could not come earlier and the visit of a tutor, the concern about the complexity of the machine has been raised. Knowing I was focused on other things, they started brainstorming to simplify the system, while keeping the diaphragm in the design. The conclusion is the following :
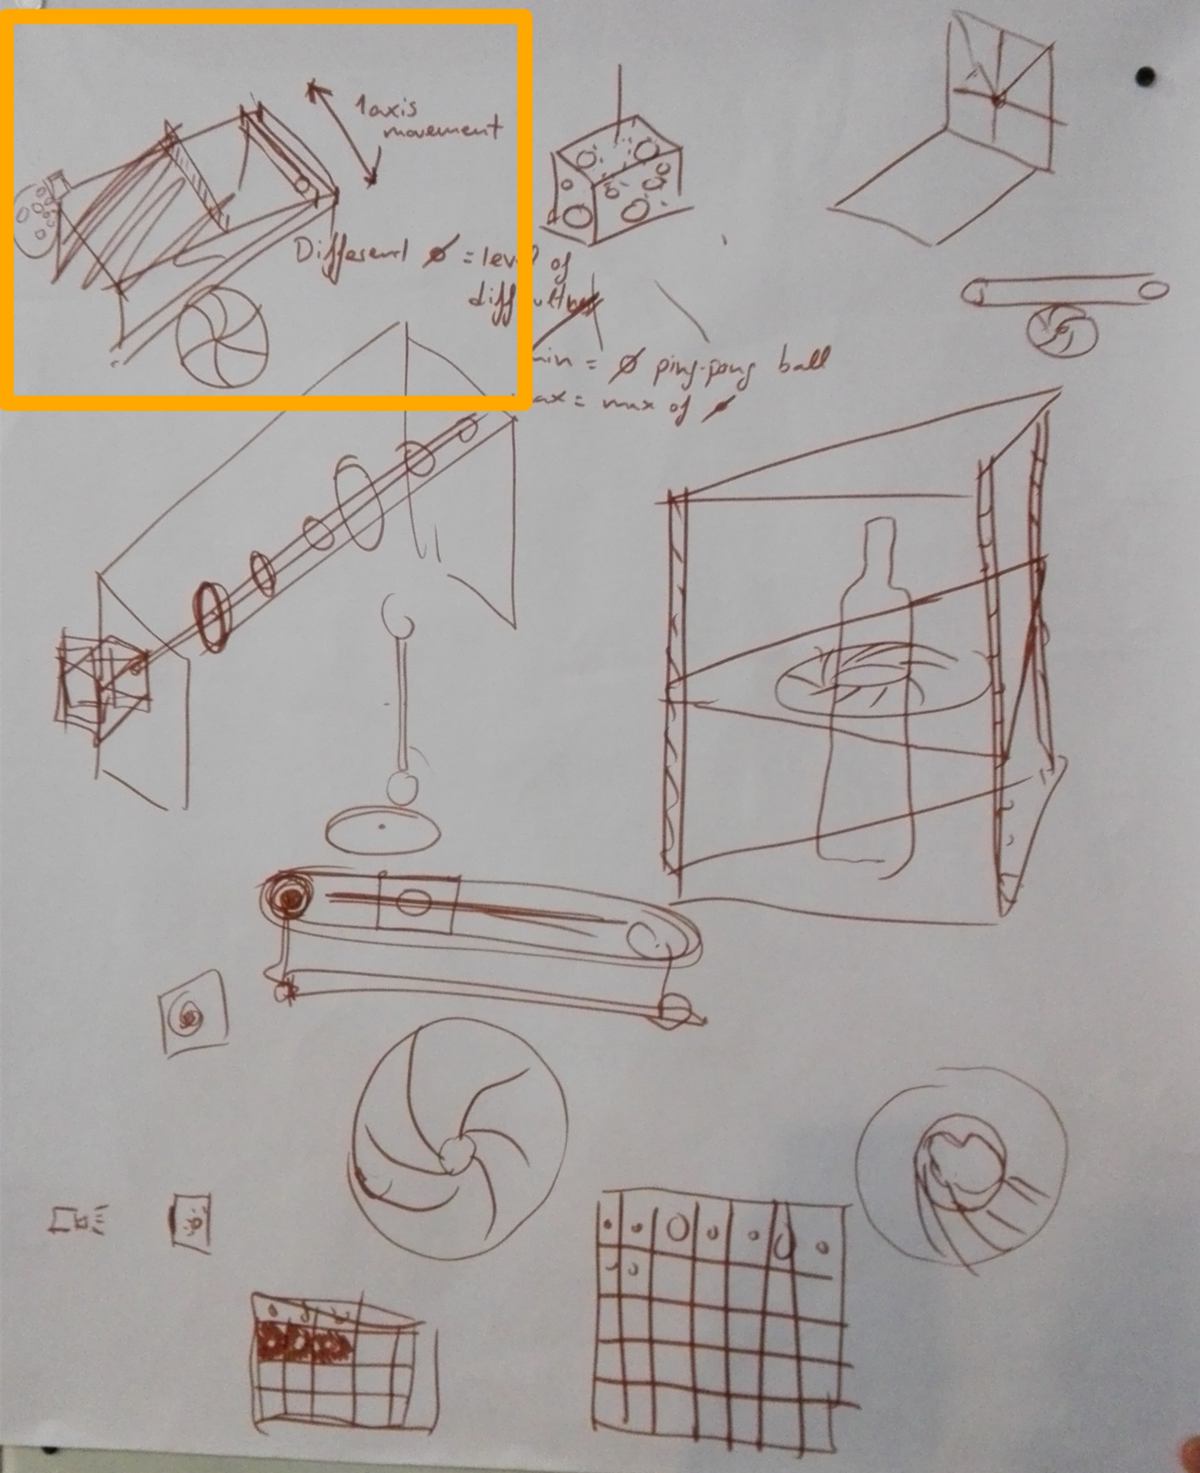
Can you see the ping-pong table in the left-hand corner? Indeed, we are going to fabricate a game! the goal is to aim at the iris with the ball, which will move on at least one axis.
I think that it is probably better to begin with a simple project which can become more complex afterwards. It is important that no one feels too overwhelmed by the task - it is a group assignment after all. And, well, it is a ping-pong table, so it is geeky enough, isn't it Kuka?
04.05.18 / I have done a bit of research last night and read about the scriboo drawbot. I also ran a Google search which returned images of many interesting designs :
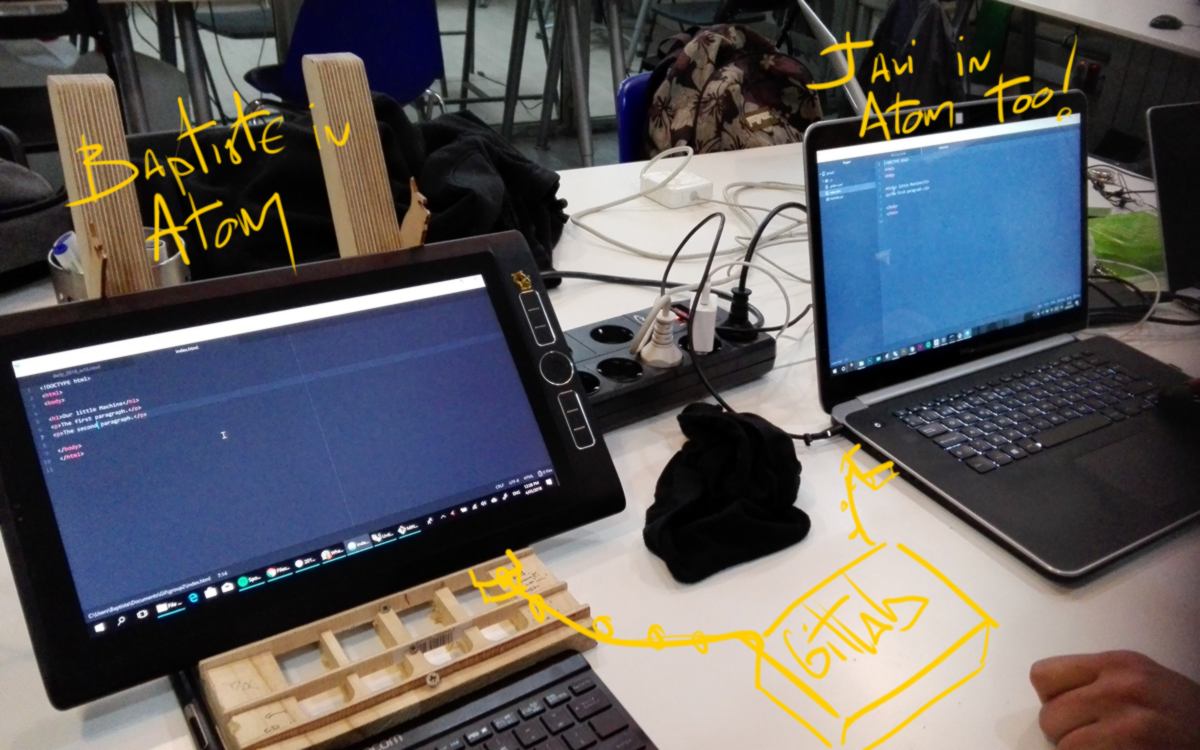
We separate the tasks : I am in charge of the website, Javi and Thais are doing the research and design of the diaphragm, and Dan will catch up when he comes in.
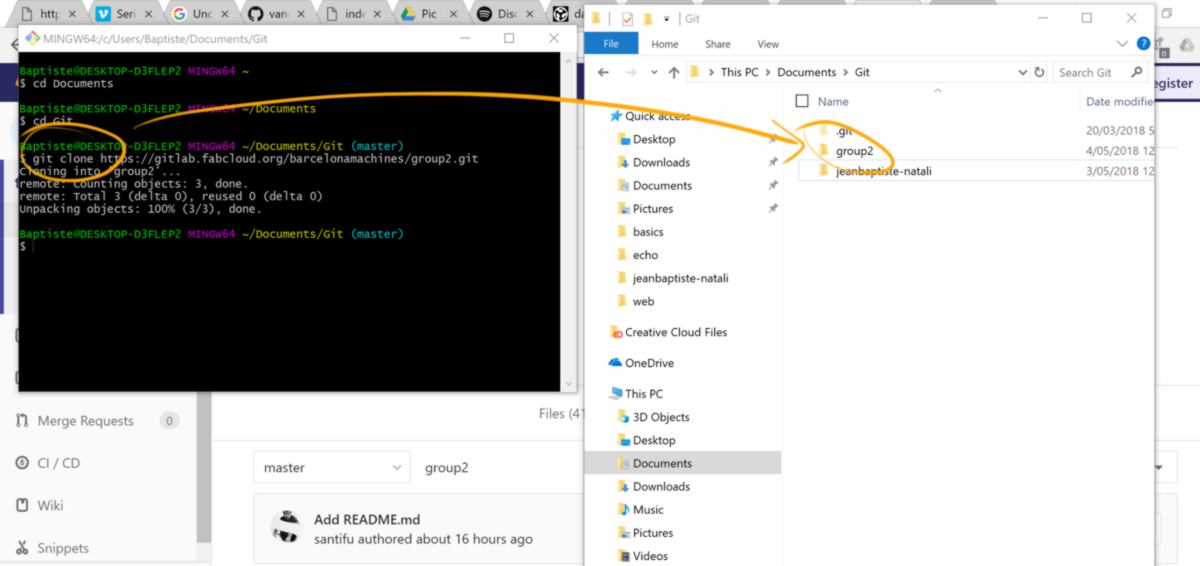
the first step to building the website is to set up the Gitlab. I clone the folder that my instructor has set up:
I then create a .yml file. this file will enable continuous implementation of several branches, version control and other features which facilitate collaboration. On the Gitlab web browser, I create a new file and specify the type as a .yml file. I then populate it, copying the .yml file that is currently on my personal fab academy Gitlab and pasting it:
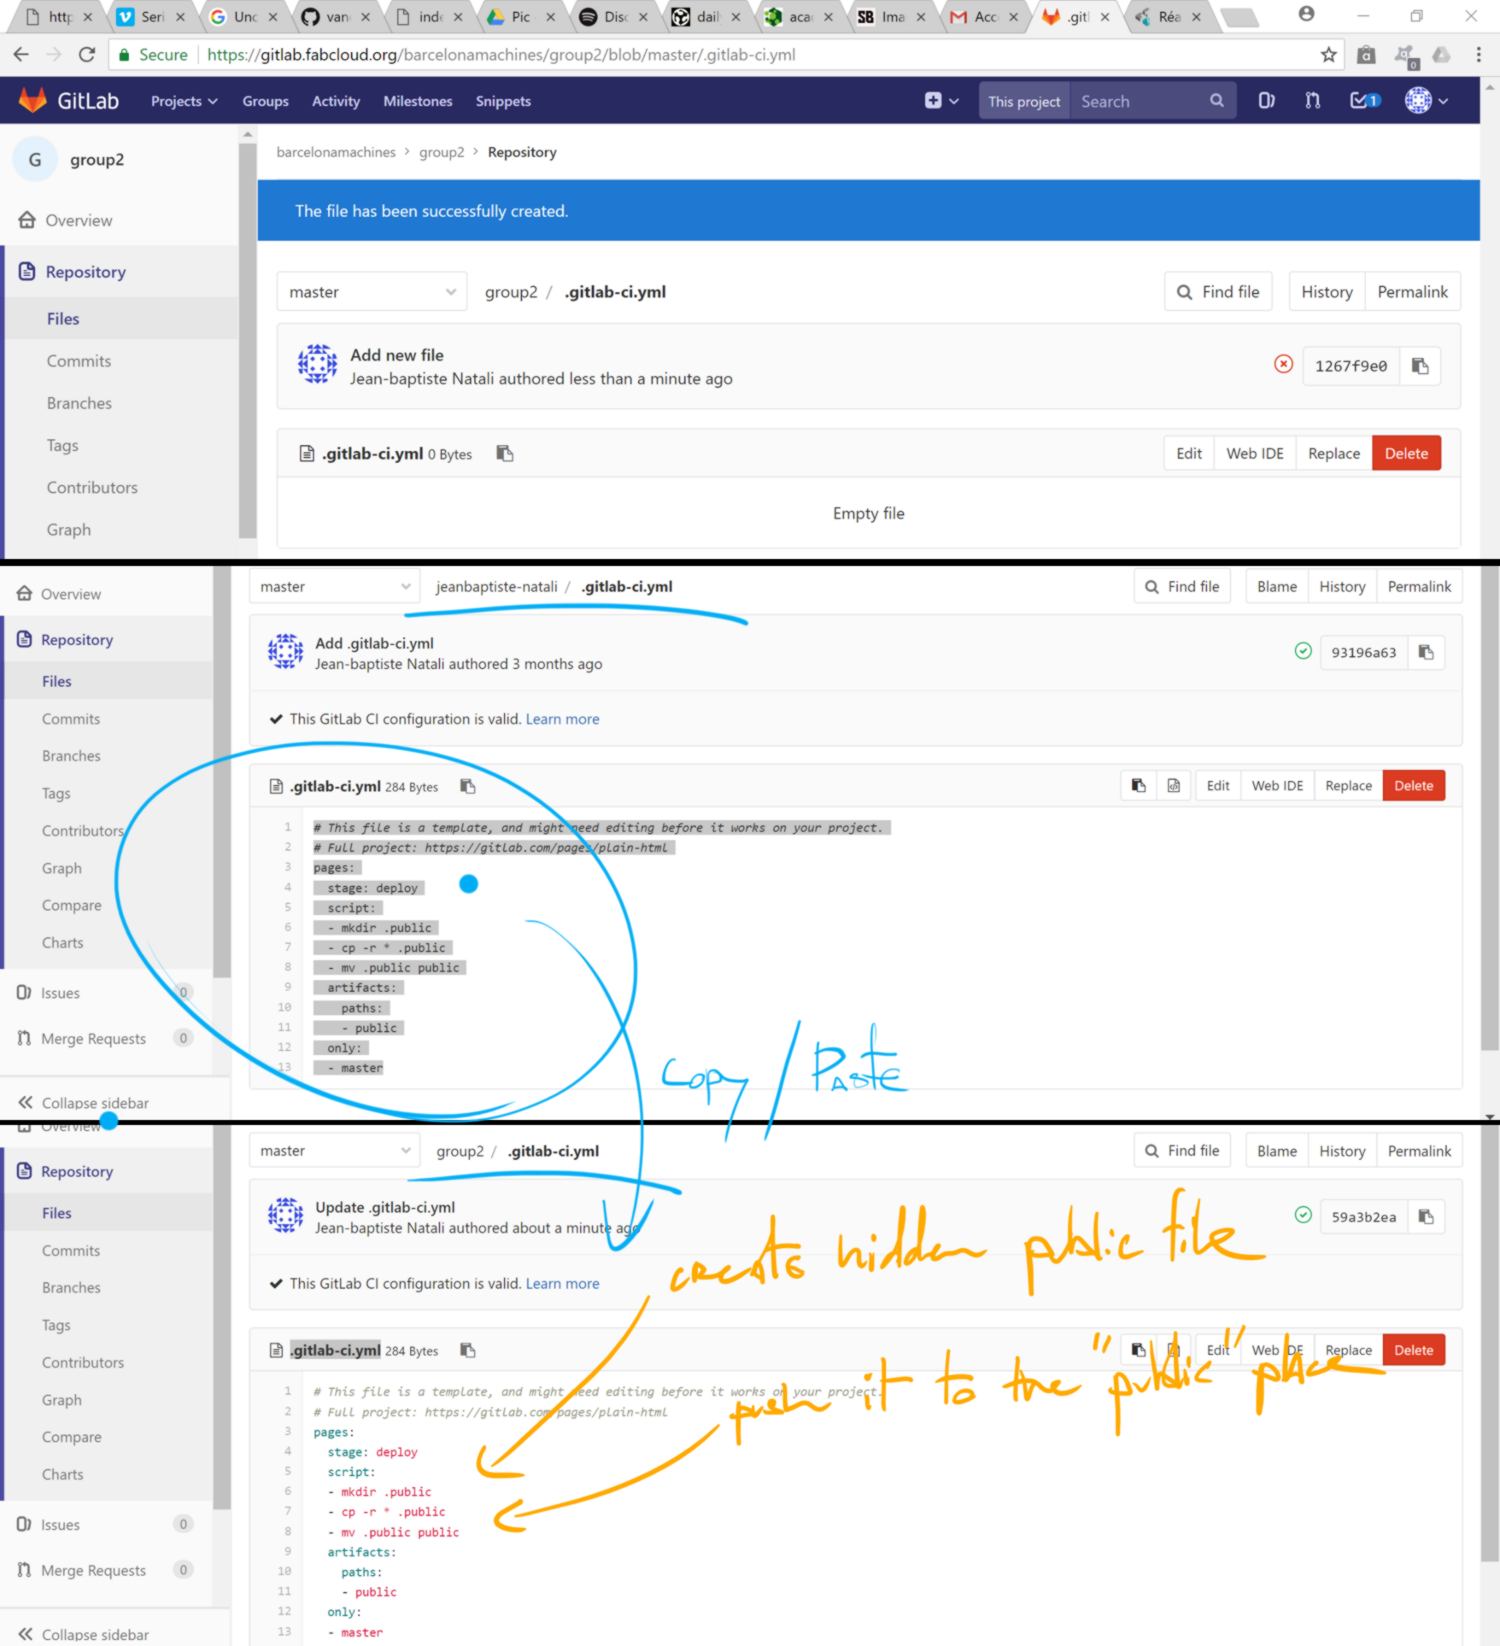
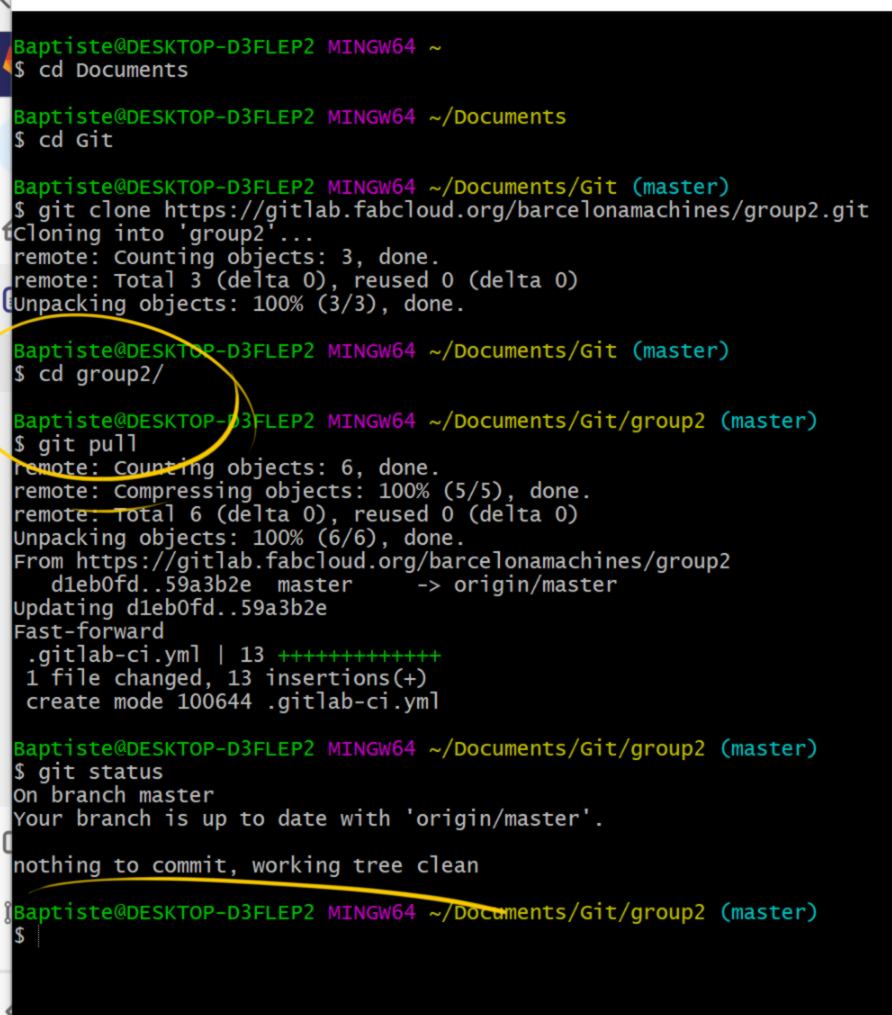
Then the whole team pulls the new files :
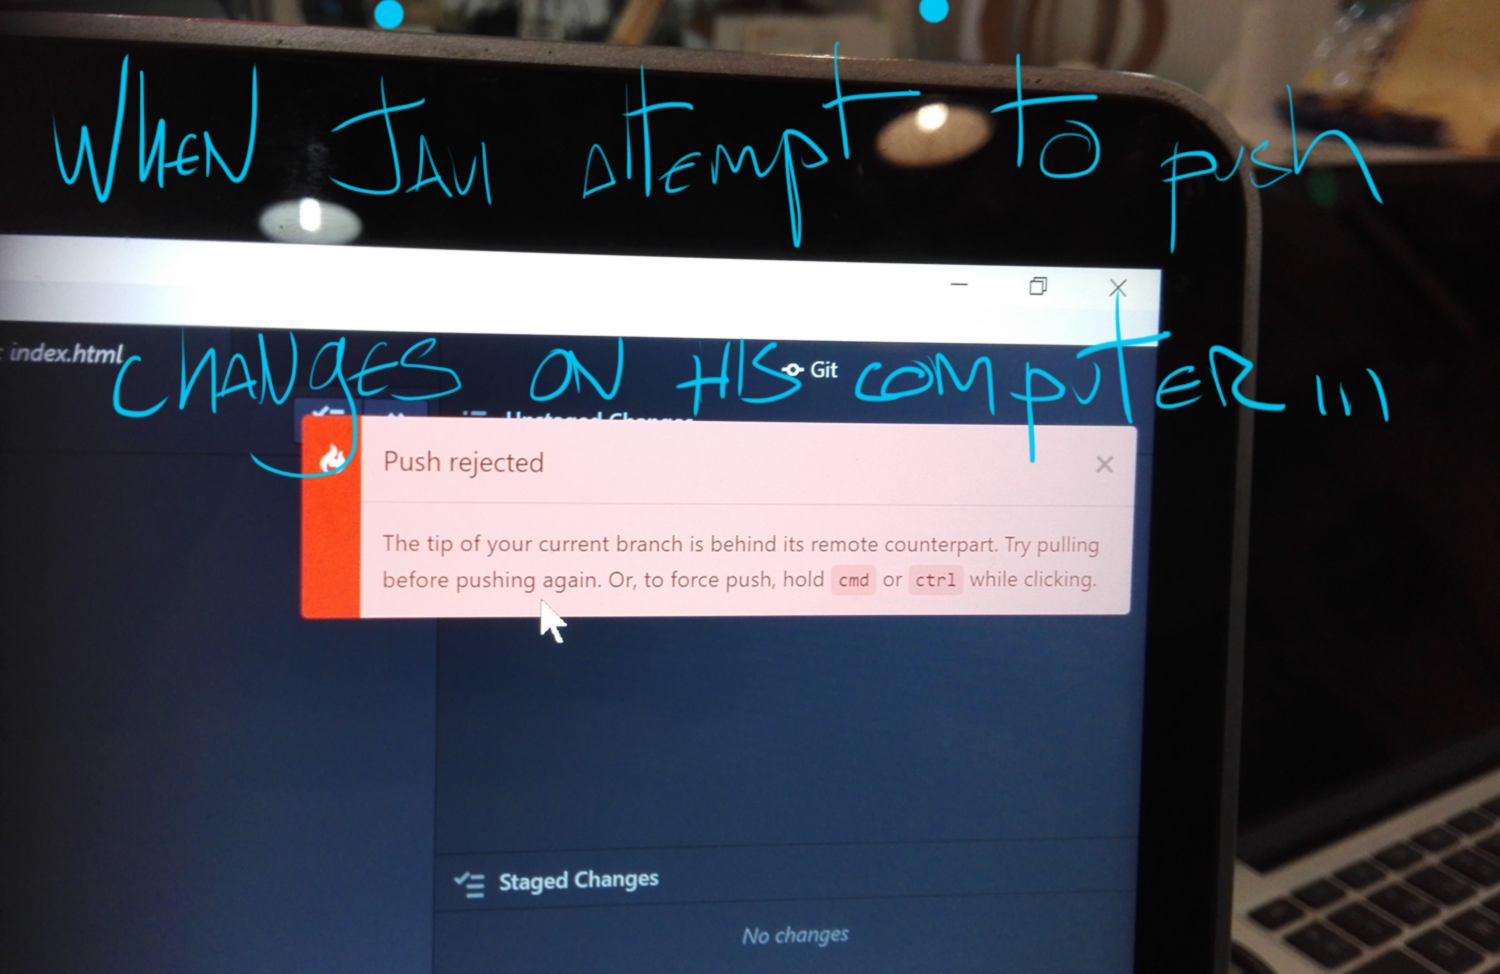
We are now testing the push/pull/merge options direclty in Atom. I will push a change in the index.htlm file, then Javi will make change without previously pulling the changes, and attempt to commit and push them :
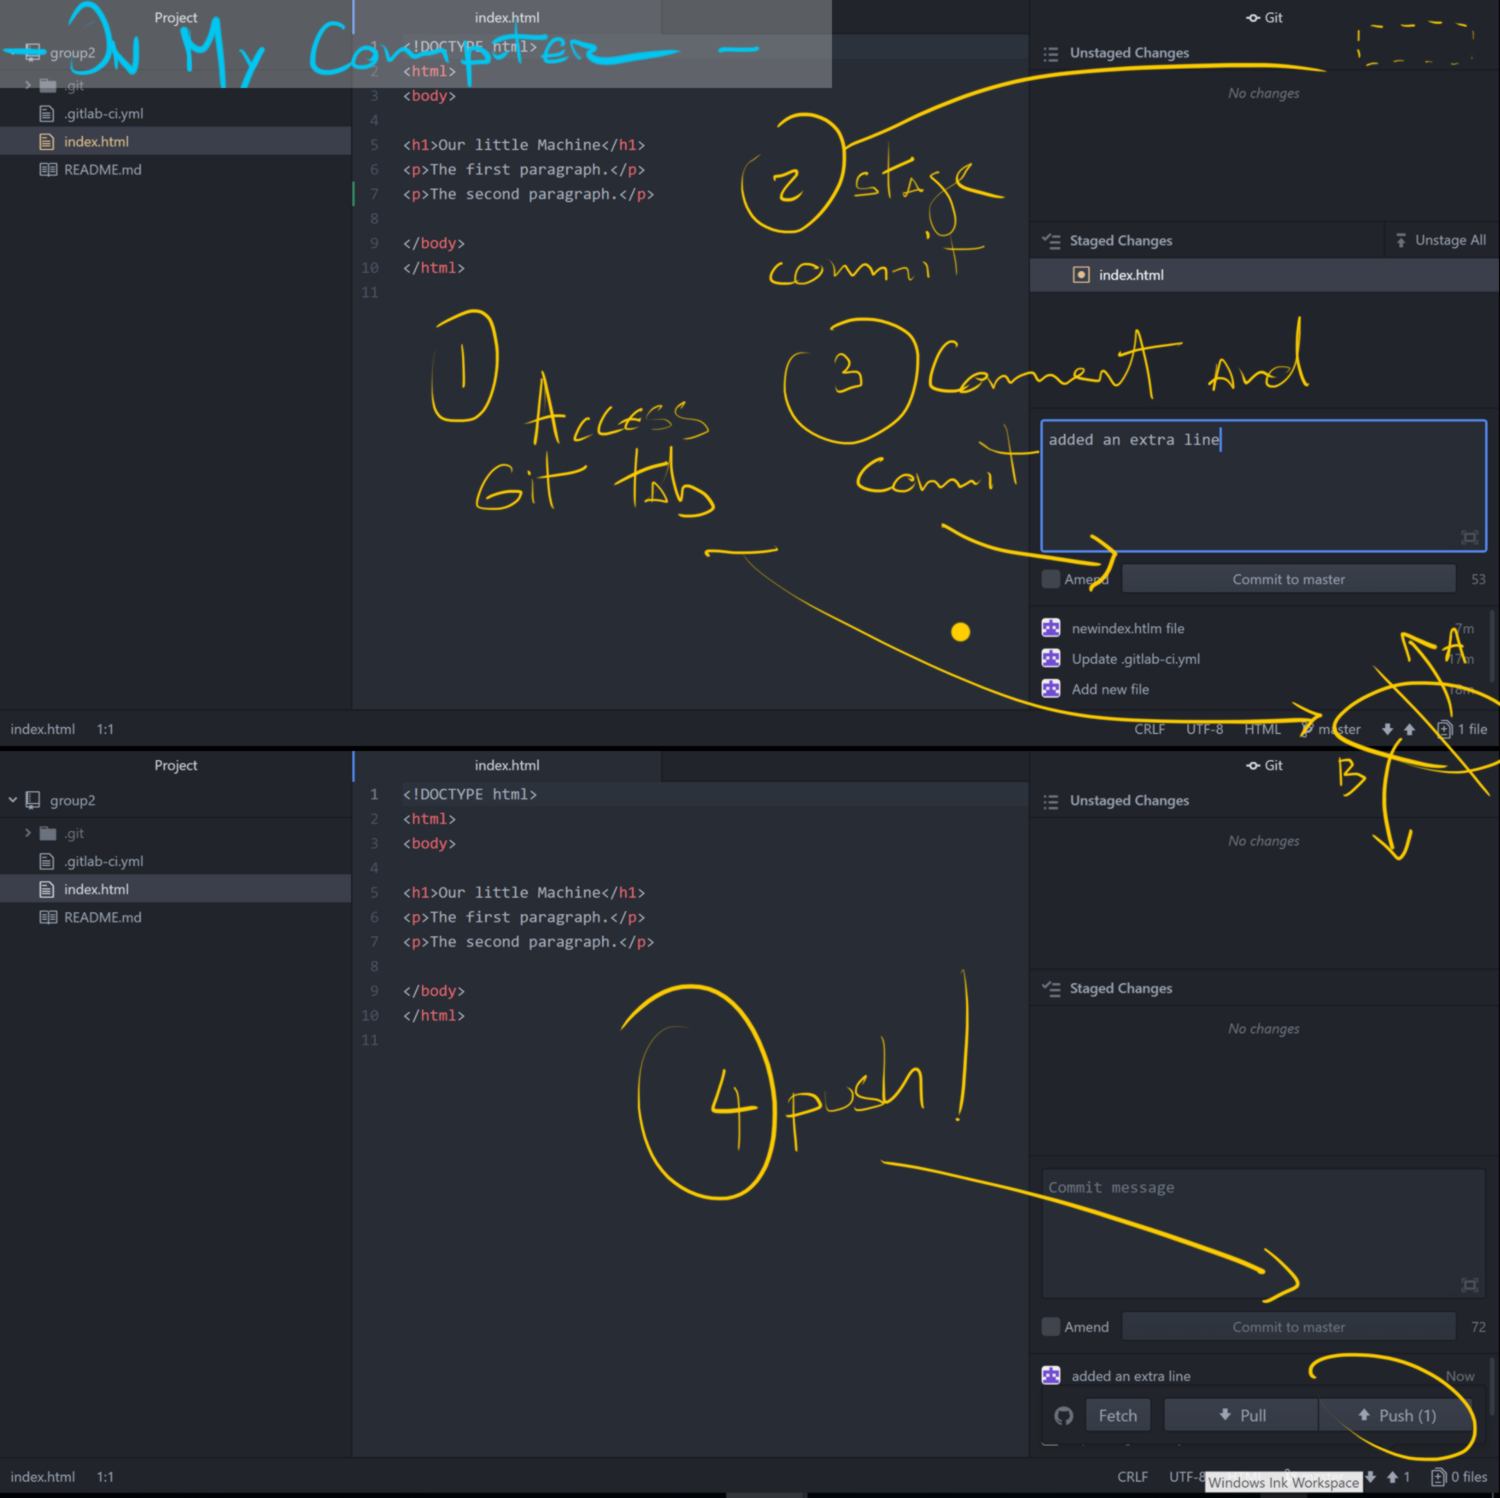
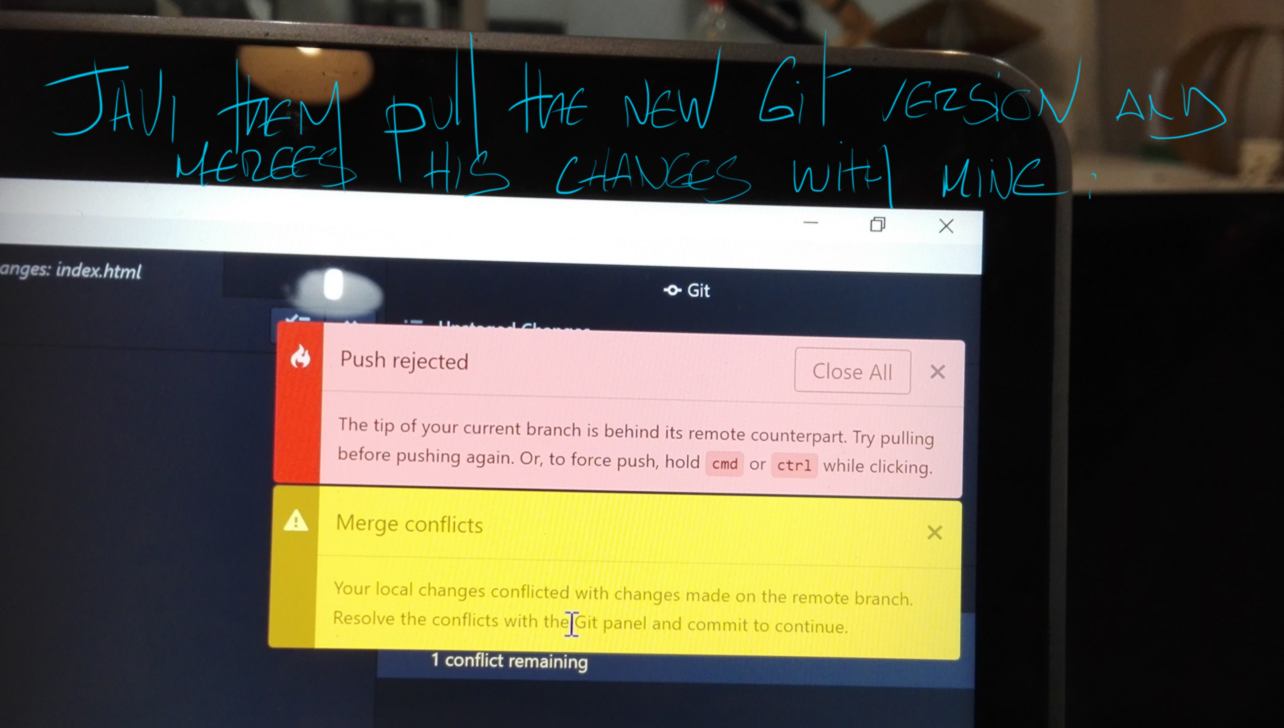
Javi then pull the new version and merges his line of code with mine. No work is lost, and all changes can be seen on the Gitlab web browser:
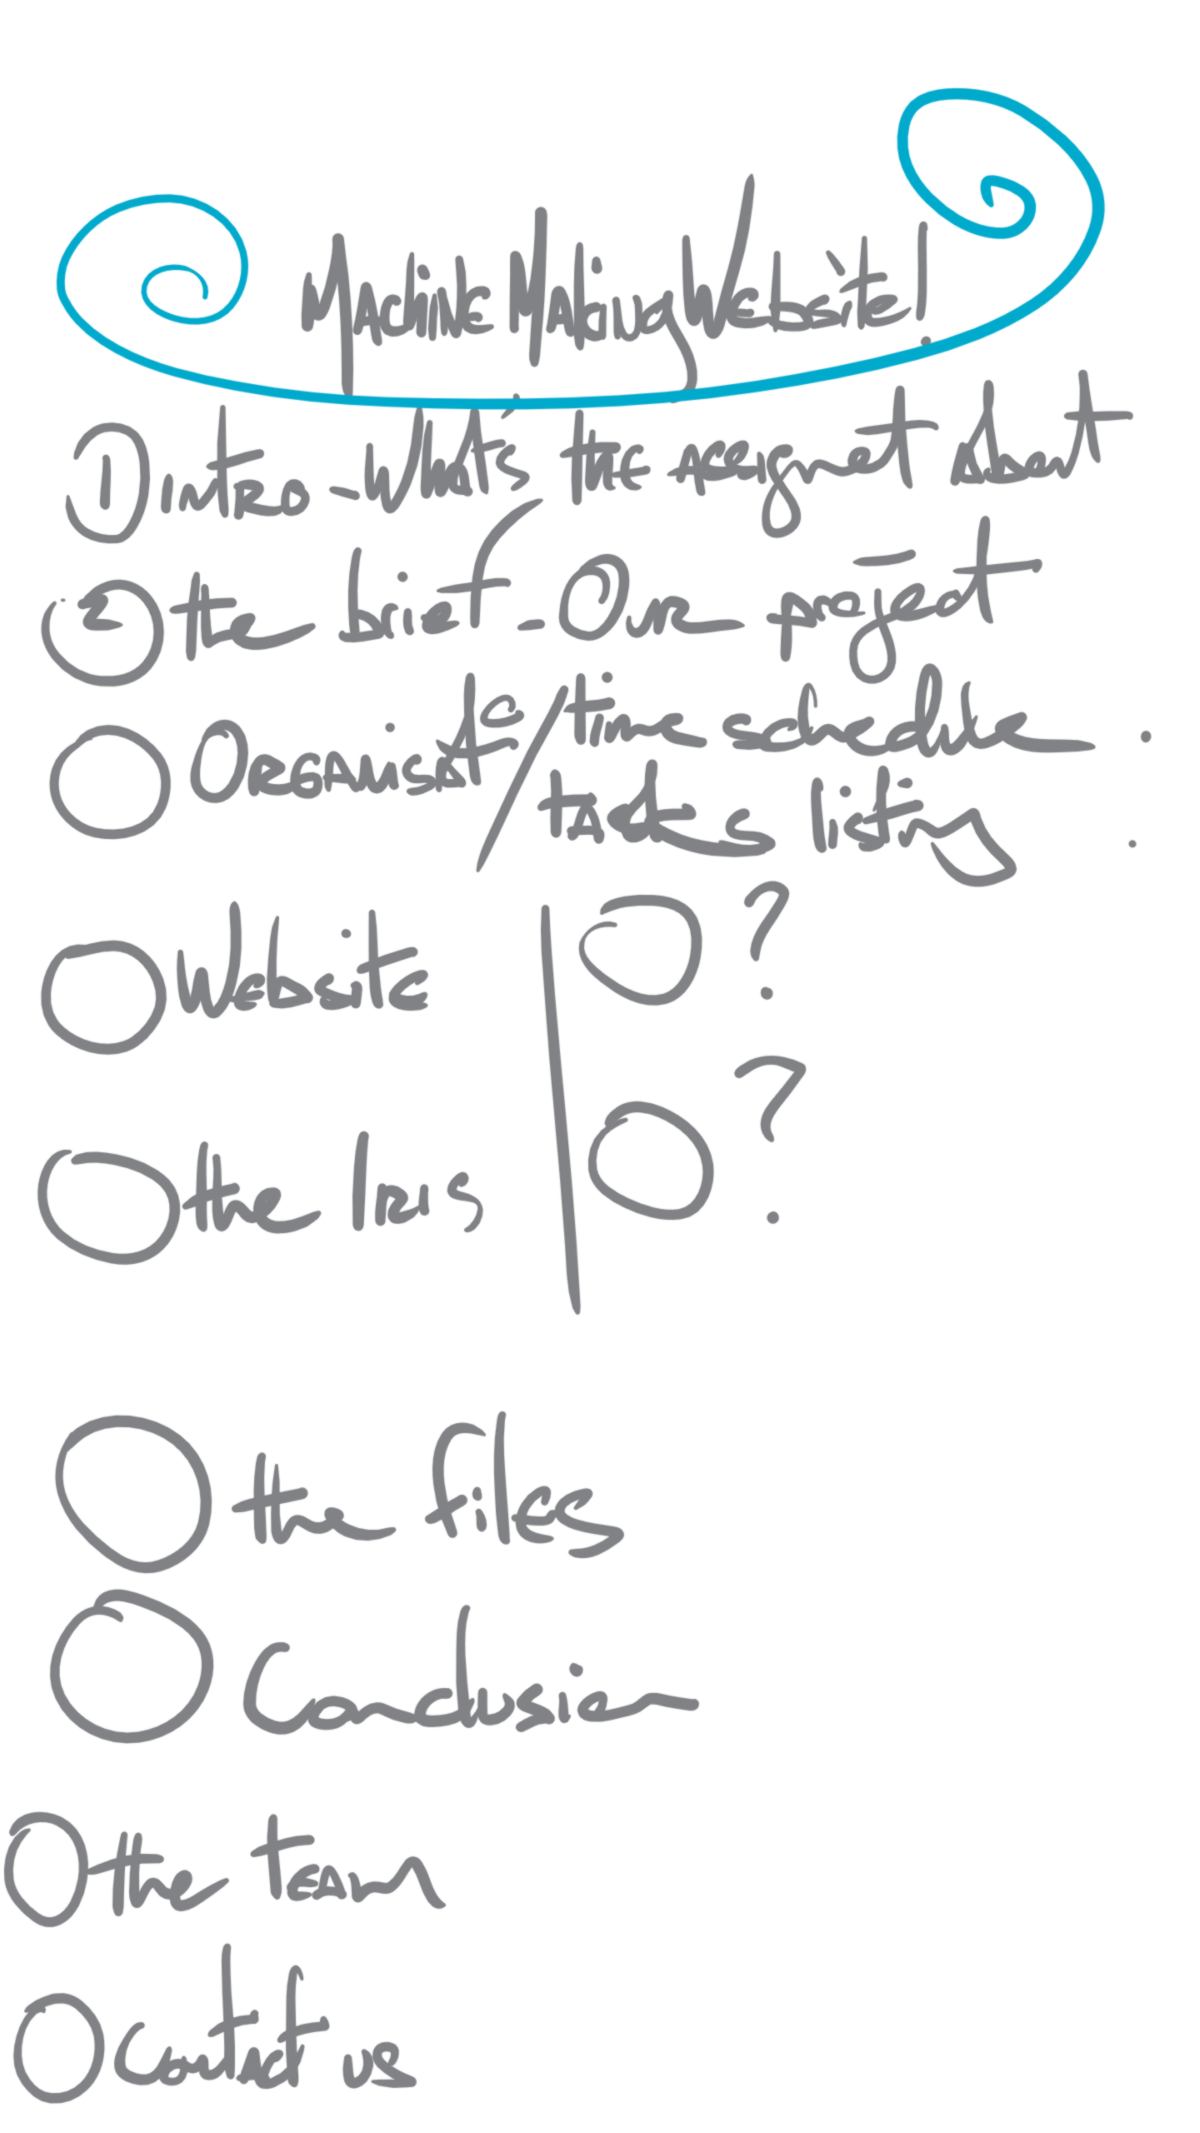
So now, I am going to make a website. Wow! Quick planification :
I built the website using the Fab Lab Auckland website as a base. I add a basic menu. With too many items, the nav bar looks too cluttered and the icons do not align with the text. I them make the "team" section, gathering pictures from the local fab lab Barcelona Gitlab. I make sure all links point at their respective fab academy websites.
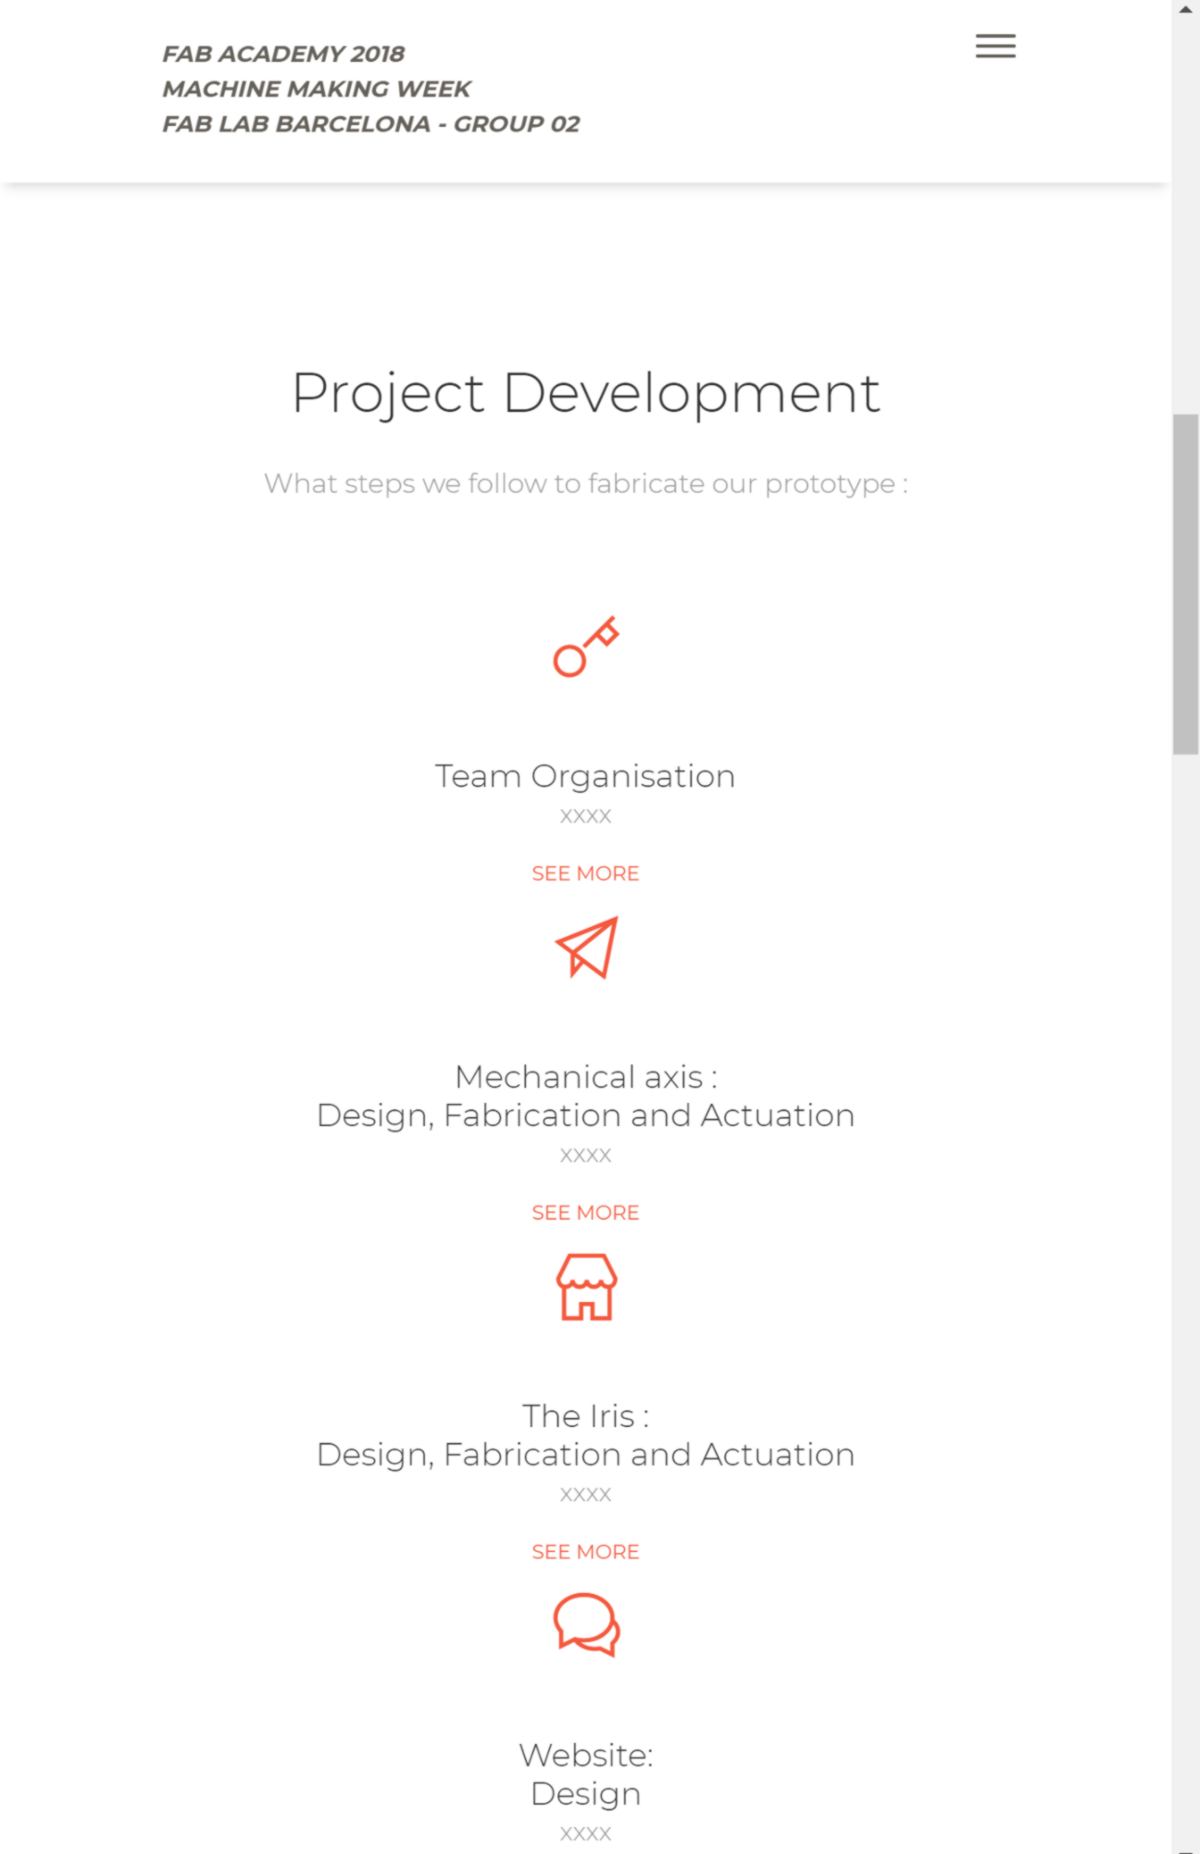
I built each section separately. I create a new css sheet to add extra style to capitalise section of paragraph, for instance. Quickly the landing page comes together :

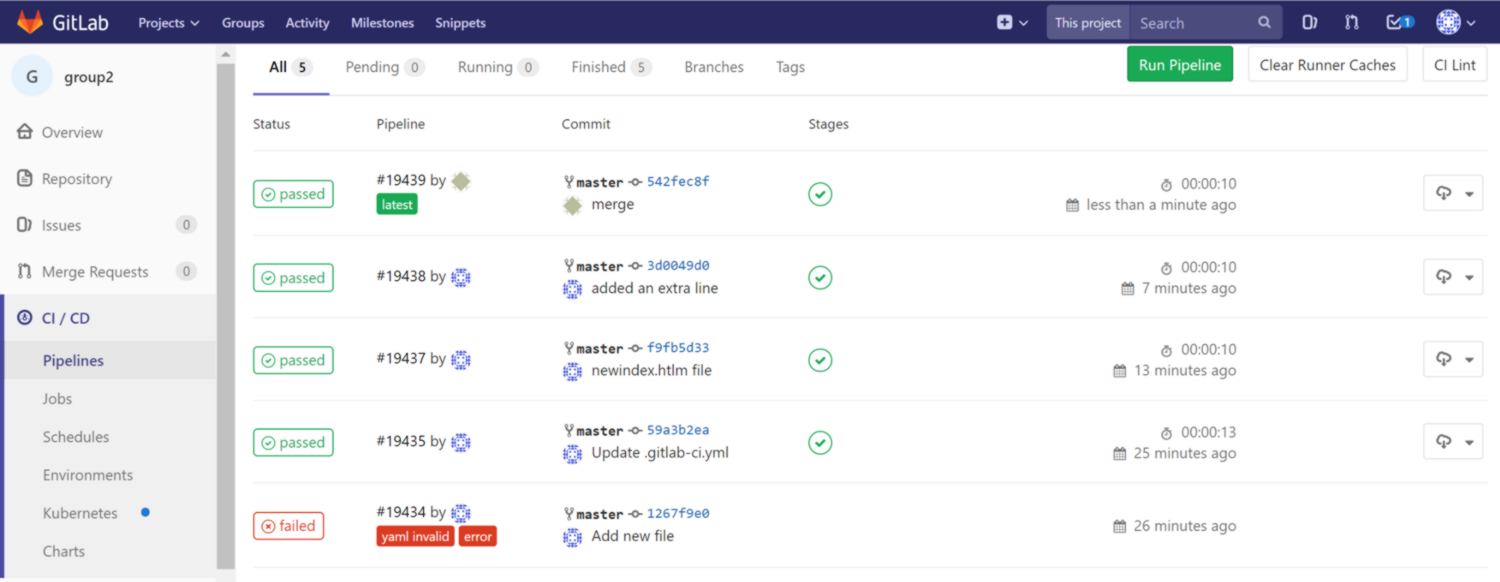
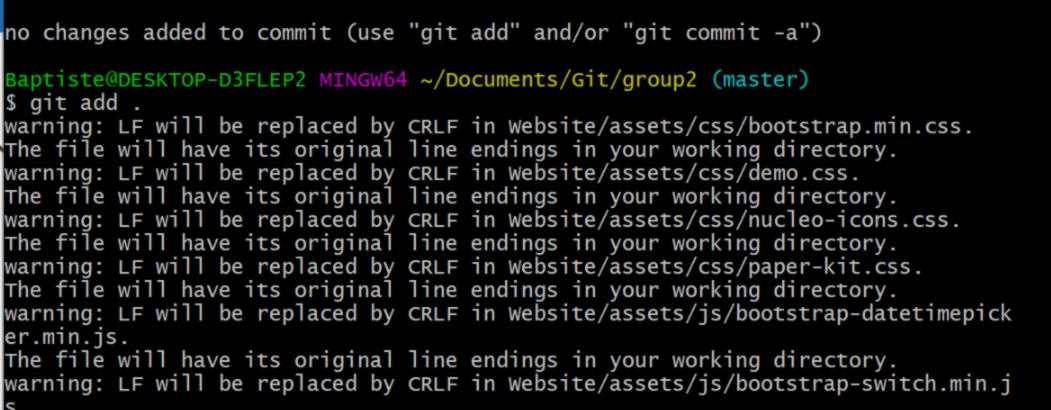
I push it to the Git repository but get a warning message :
It turns into a good lesson about cross-platform collaboration and its difficulties :
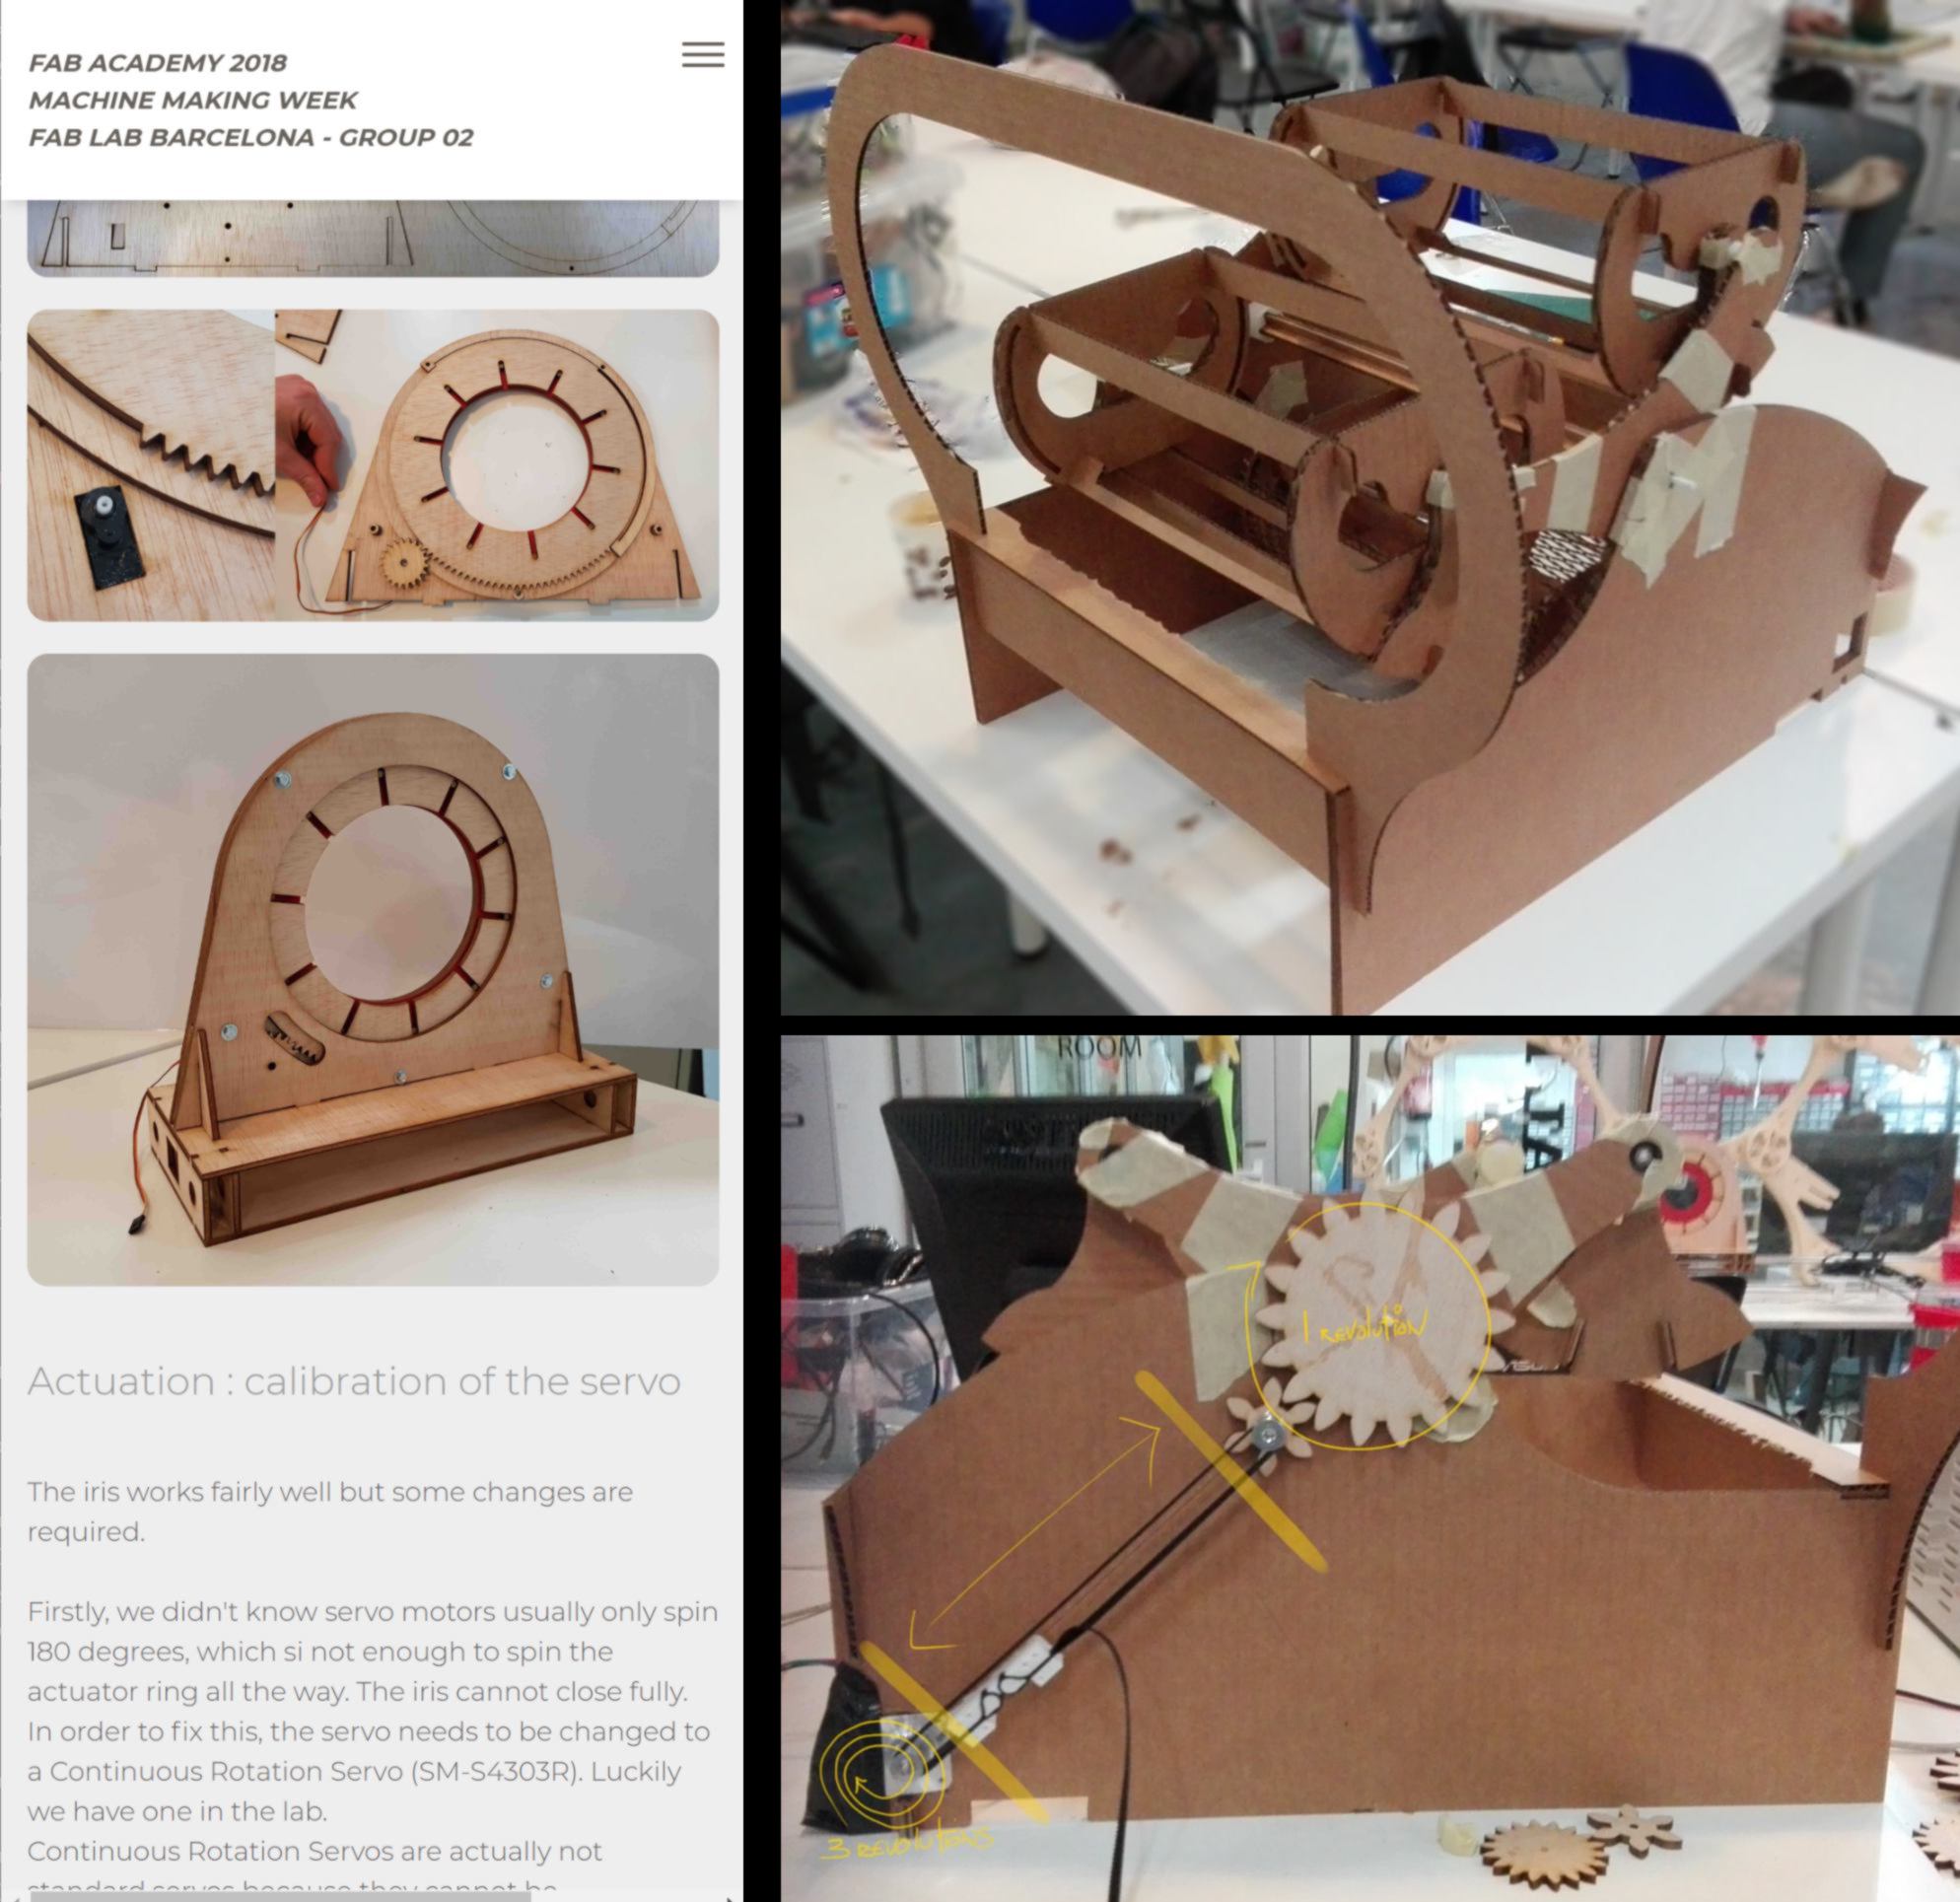
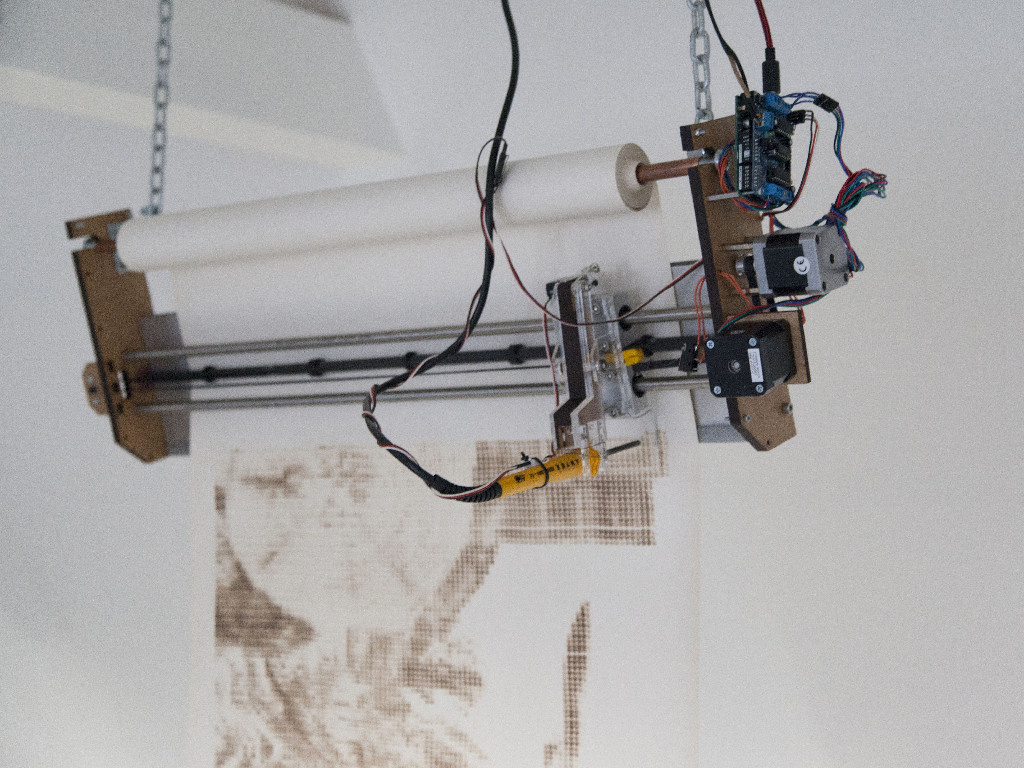
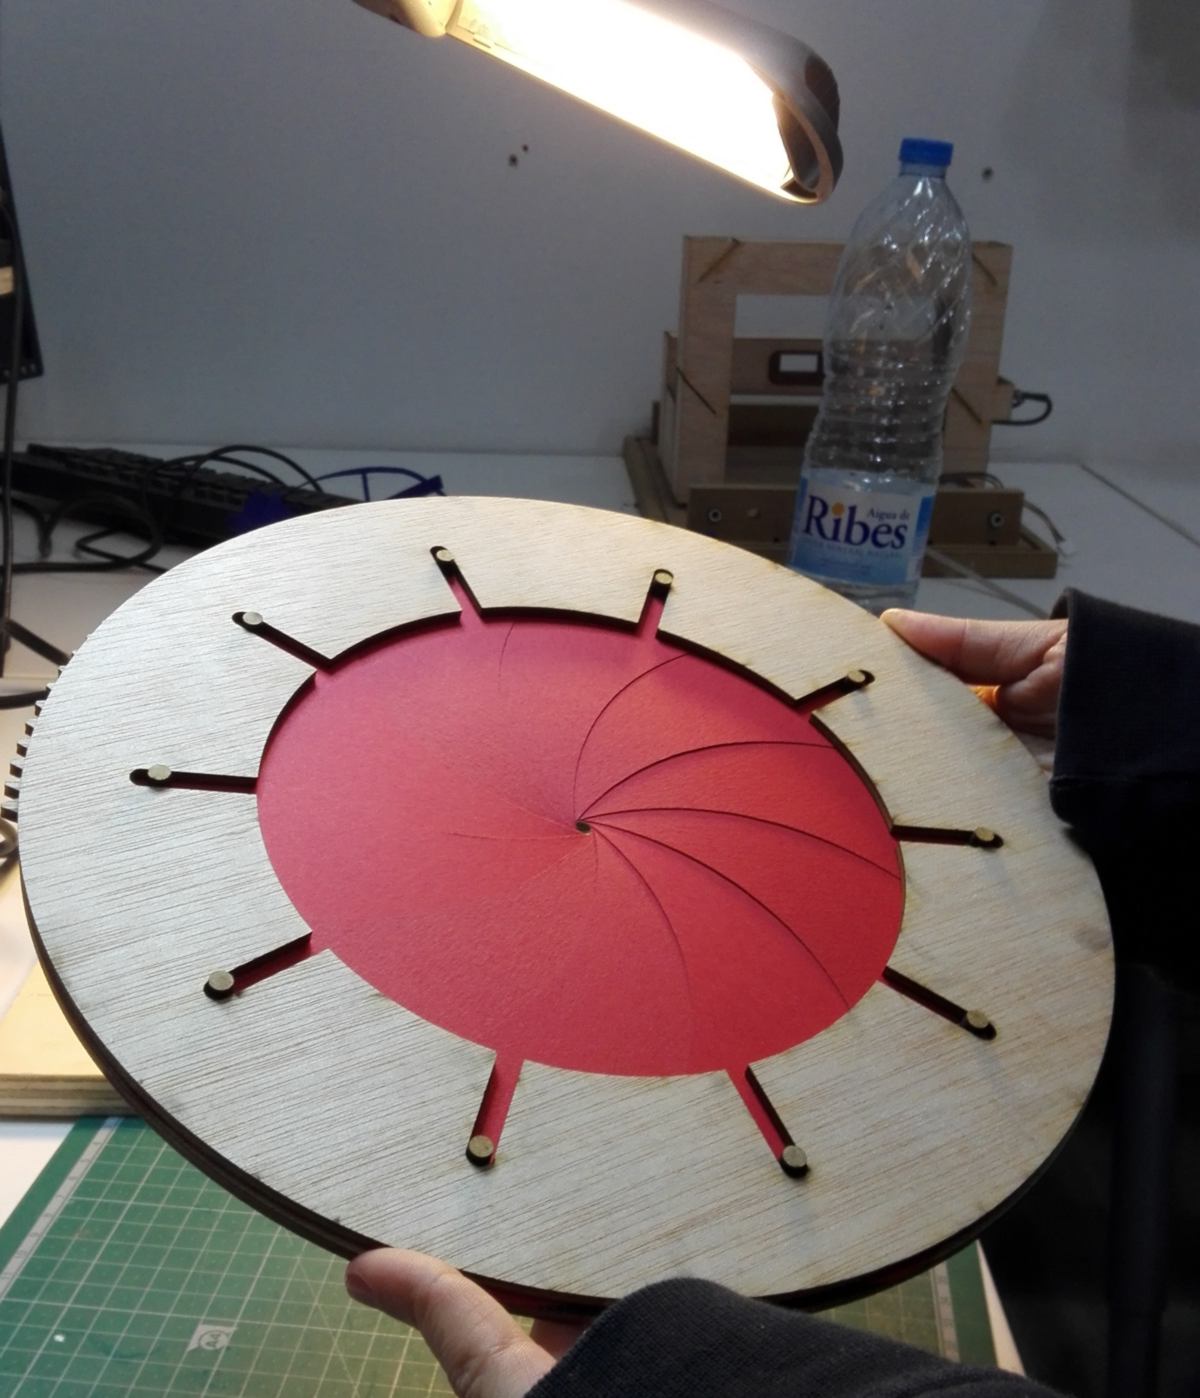
The website is pushed on the repo. and my side of the job is done. In the meantime the others have developed a first prototype for the Iris :
It definitely goes much faster to do some team-work.
05.05.18 / I am on my way to Milan for the Fabricademy Bootcamp. On my way, I get to re-think my final project. Stepping back and taking a good look at it, I can break it down into 4 different final projects:
By definition, the video tutorials and the digital interface are not fitting the requirement of the Fabacademy. I am left with two options. I am curious to dicuss that with Laura and the Opendot team tomorrow.
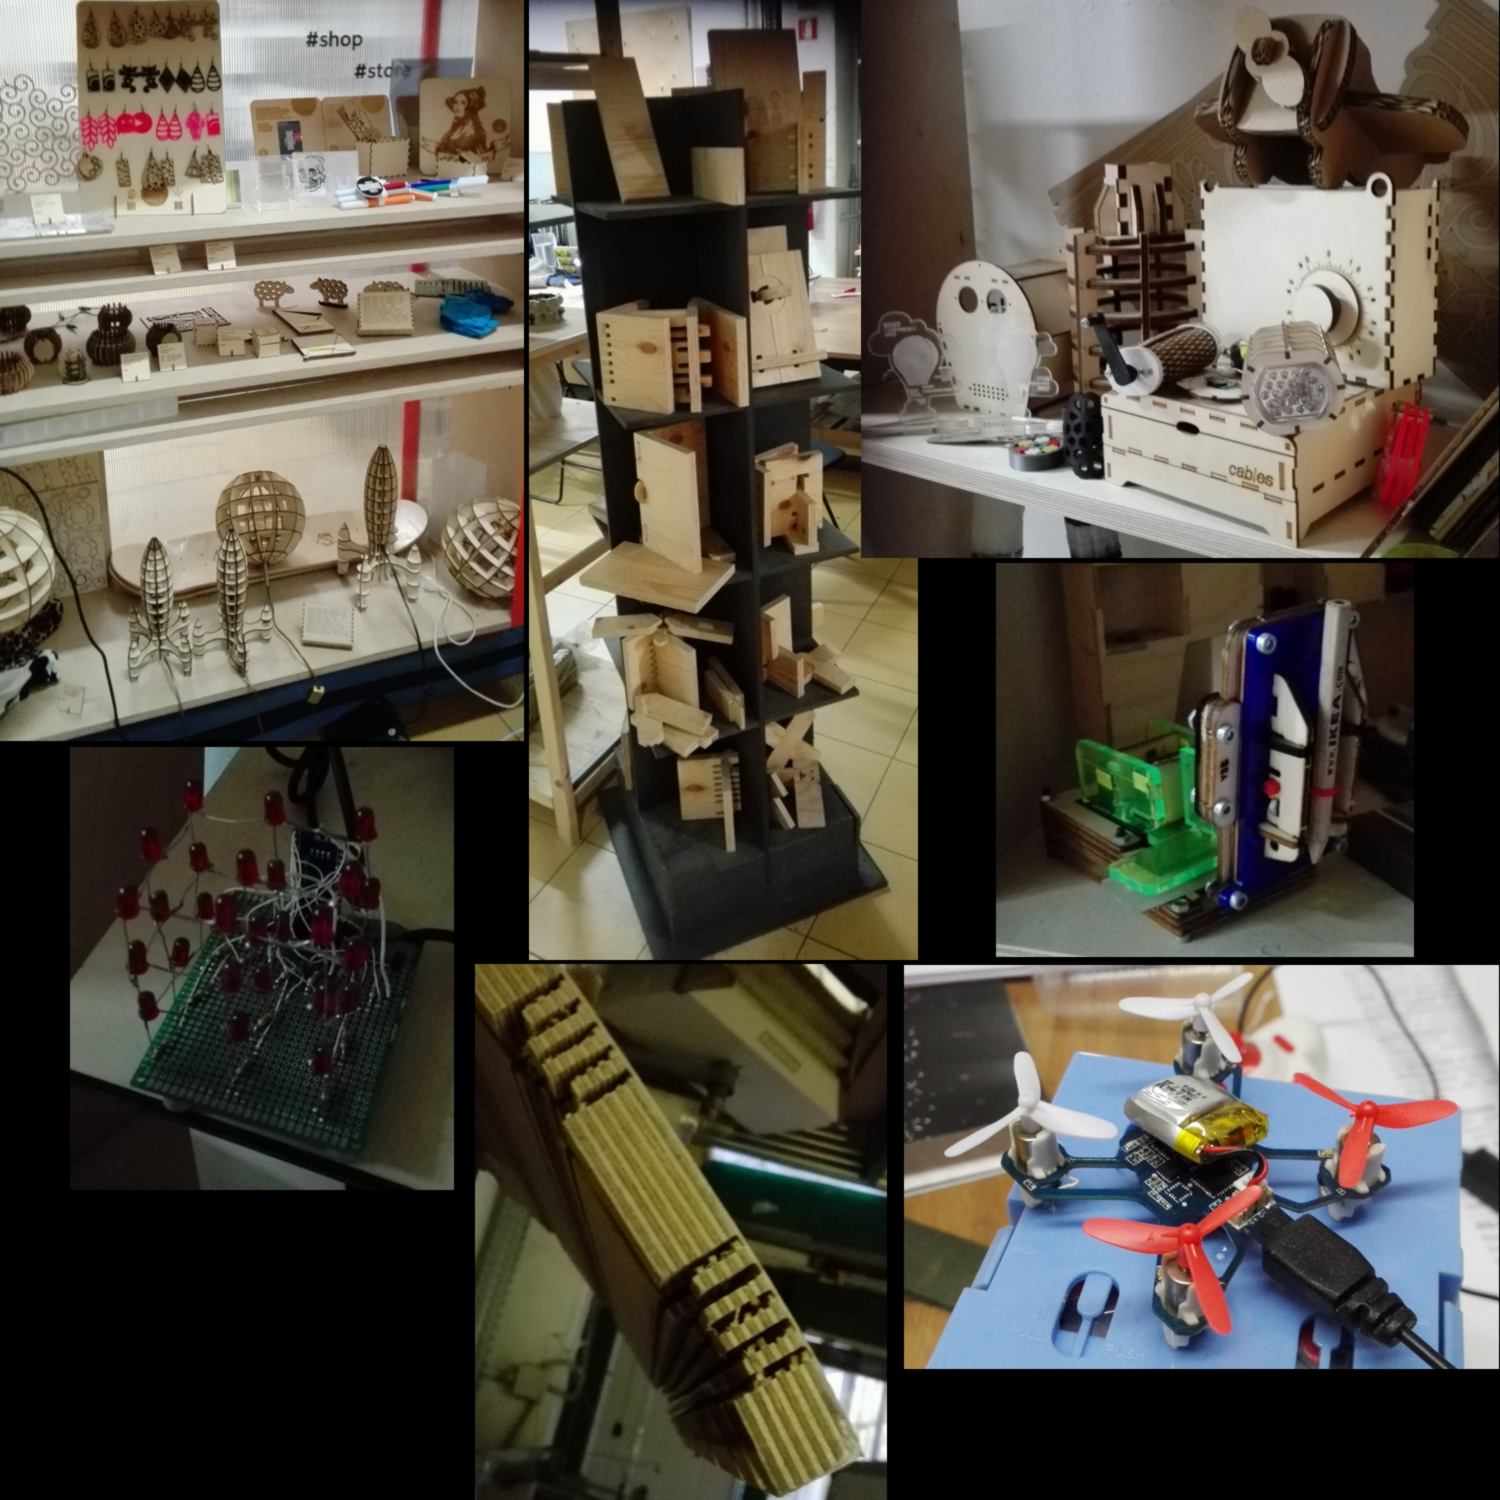
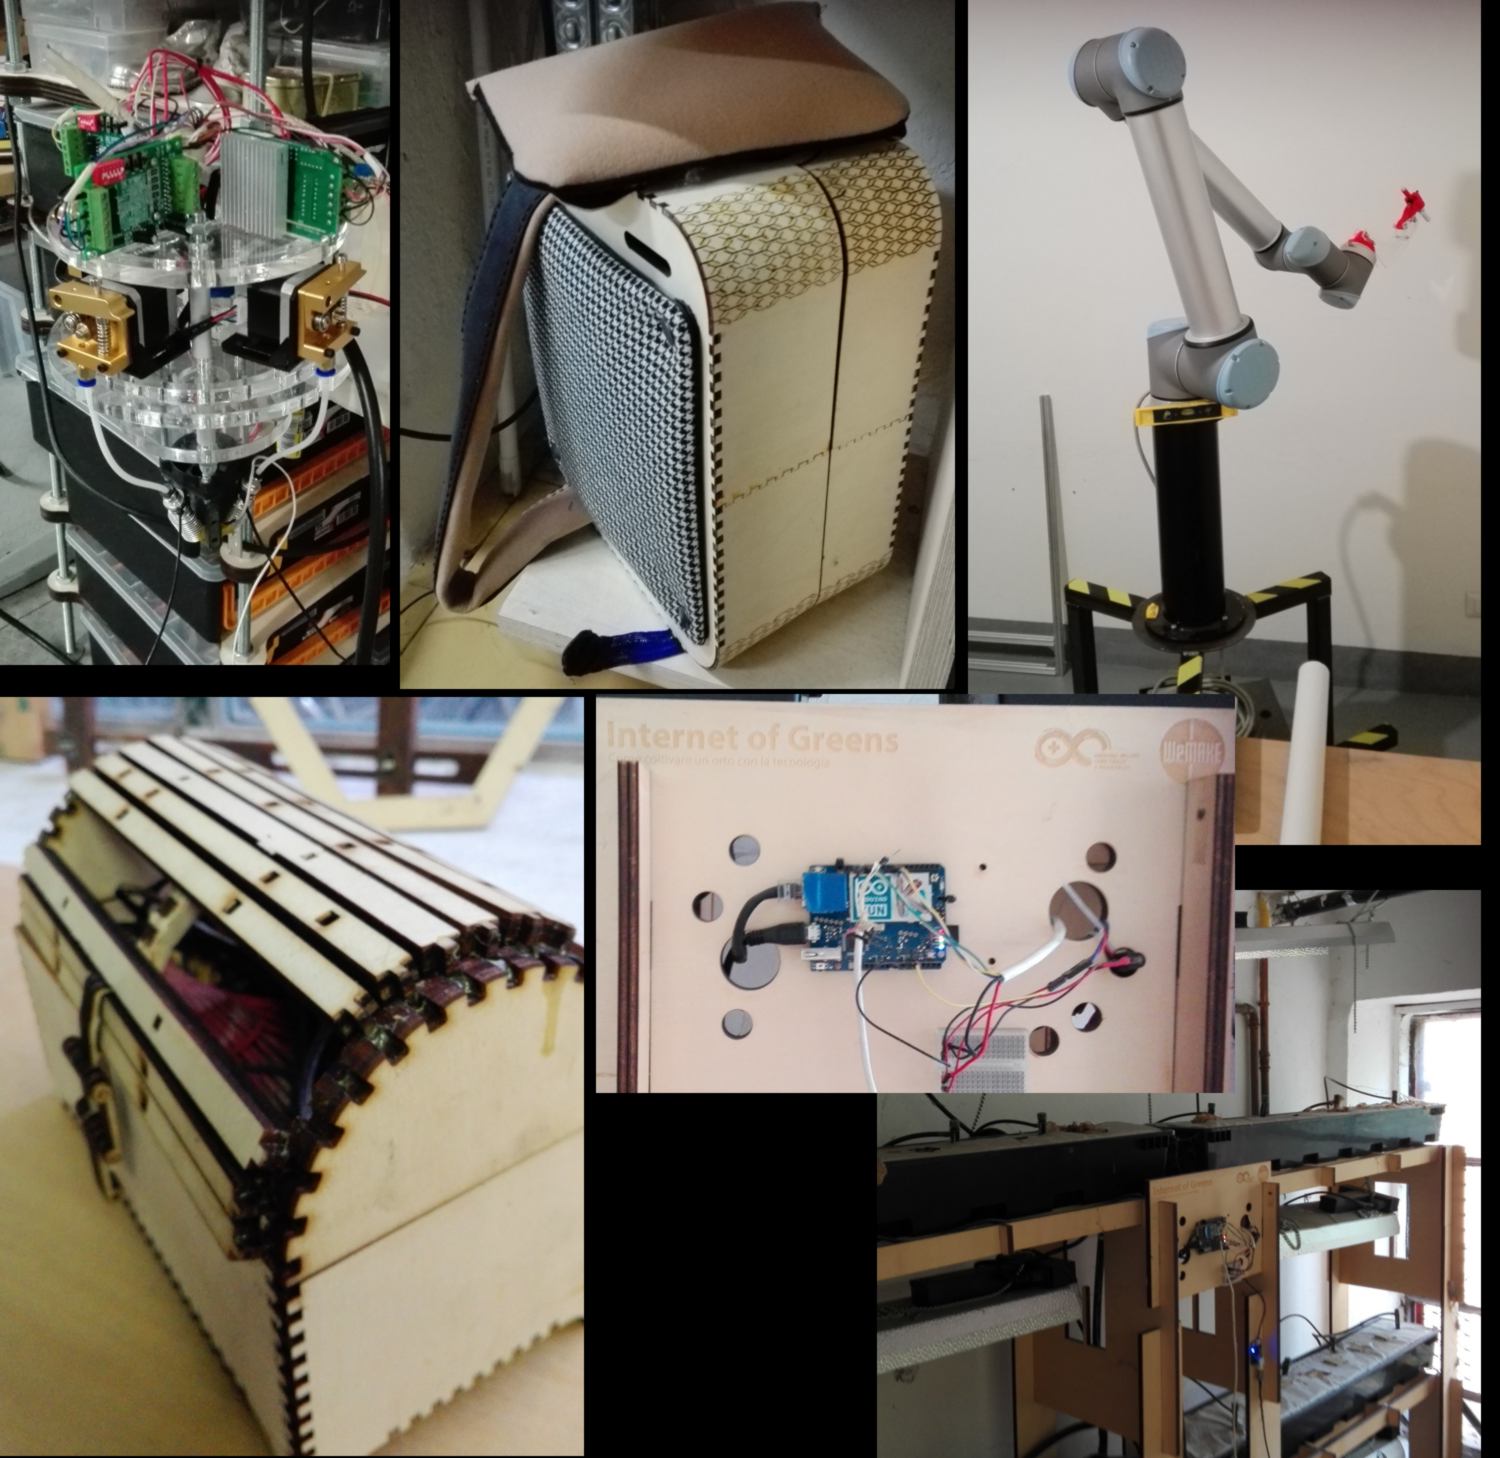
I finally make it to WeMake, the makerspace / fablab where the bootcamp will take place, where Anastasia greets me. Contrary to Fab Lab Barcelona, it is based on a membership system, and that brings a whole new layer of creativity. All instructables I have flicked through online have materialised here, filling shelves. It begins with the drawbot that I mentionned yesterday :
Then on top of the classic tools, I discover a plethora of Fabbed machines, covering many areas from PCB making to knitting :
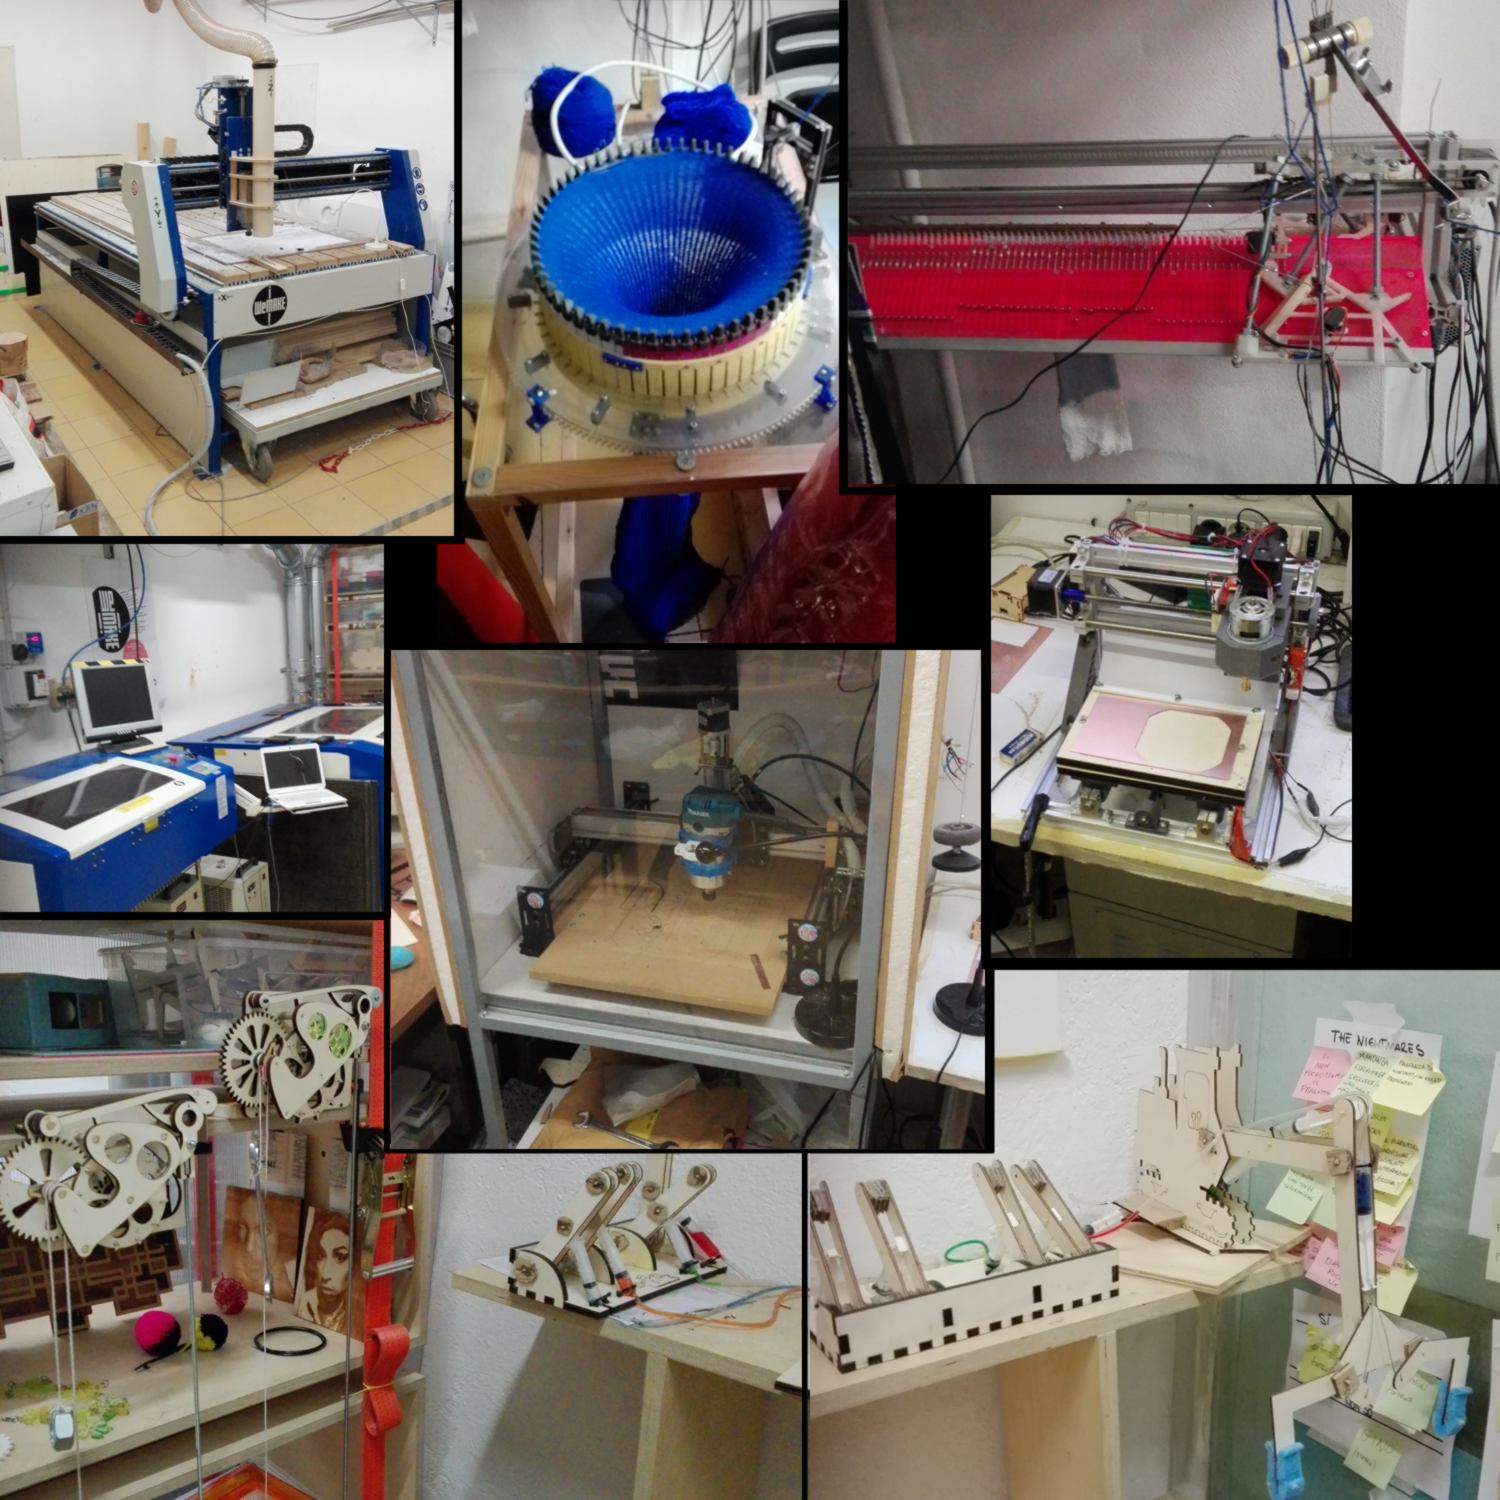
Everywhere projects, test-pieces and examples are laying around. It is a goldmine.
Tonight we will stay at the maker residency upstairs. I am looking forward to chat with Zoe, who runs the place.
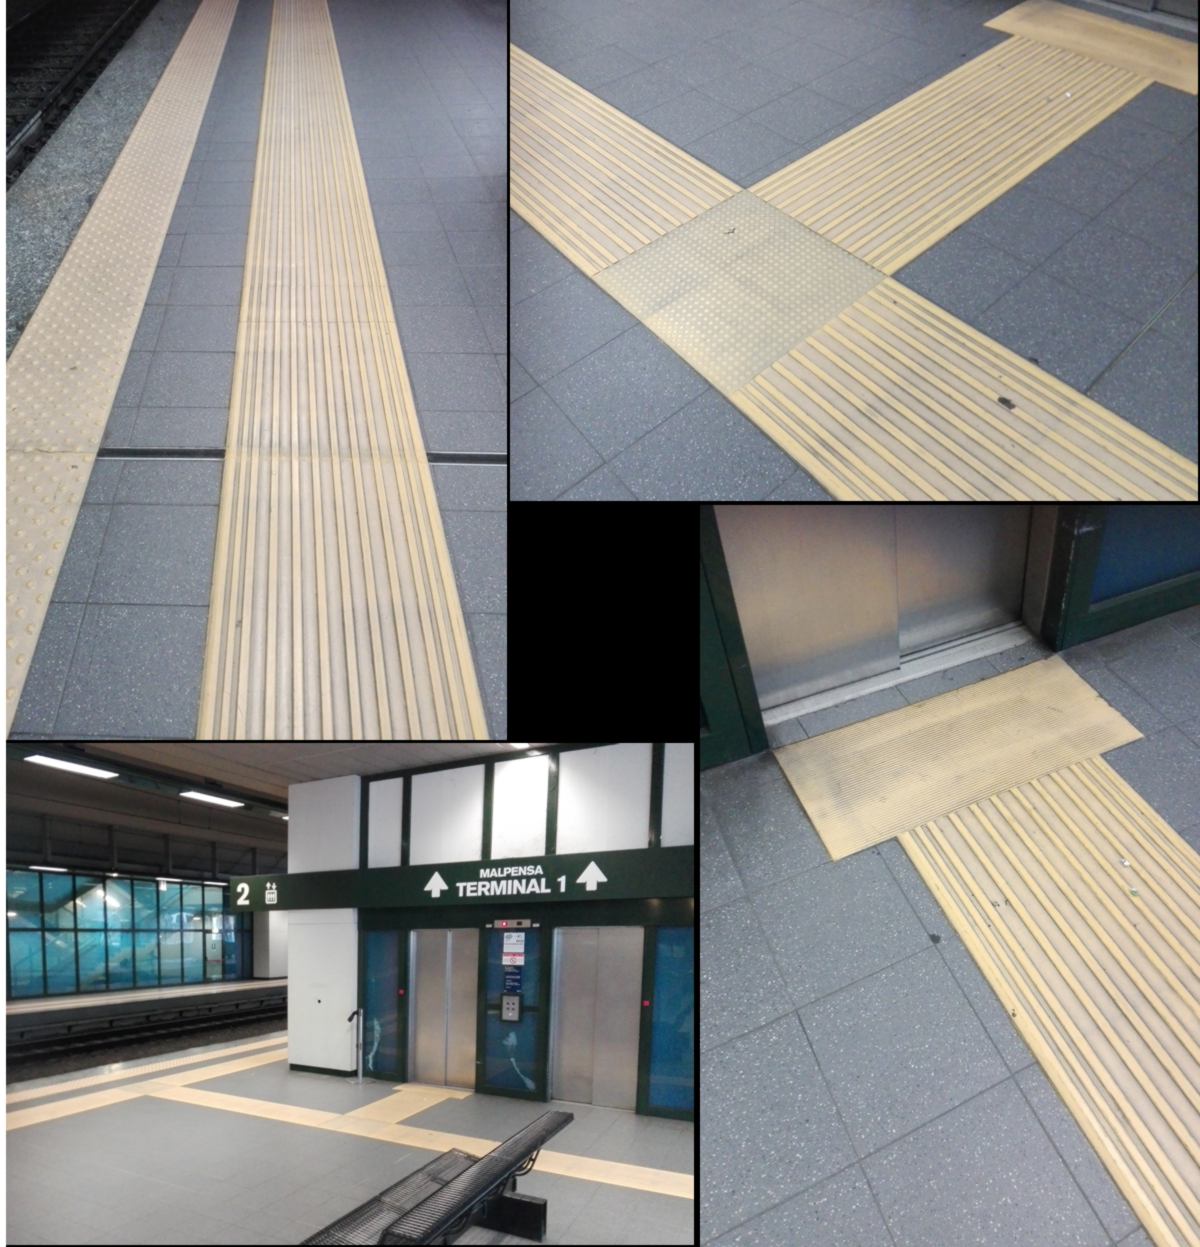
Just before I move on to tomorrow, I want to mention that while I was walking, I saw a design that is never seen by its users, for the simple reason that they are blind. At the train station earlier today, it tooks me a second to realise that there was a net of tactile information laying on the floor, each texture representing a specific element of a path : straight line, warning, intersection, and elevator. I am incredibly appreciative of the thoughts put into this inclusive design.
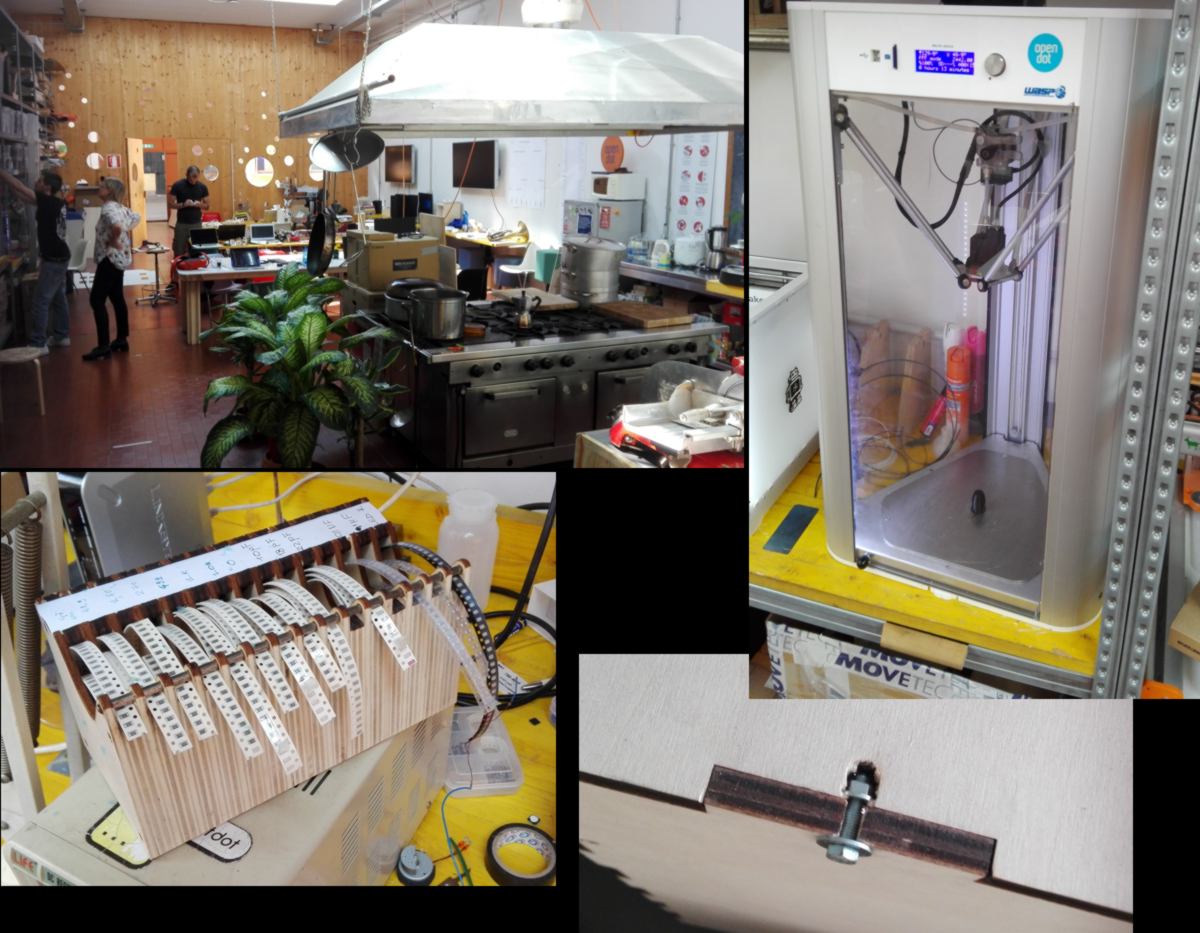
06.05.18 / Anastasia and I head to Opendot this afternoon , where I should meet up with Laura and Enrico about potential collaboration. Sadly Enrico, the brain of the operation is not there, but another surprise awaits me : Laura is not the only Fab Academy student working on the project : Francesco also works on one part of the project! He seems more specialised in electronics.
I get a guided visit of the place : A grat space, lots of natural light, and a gigantic kitchen :). the space was developed by the company dotdotdot, "a multidisciplinary design studio {...} in which experimentation is at the core of innovation" :
Opendot is known to have worked with therapeutic companies, re-designing object so people with disabilities have access to them - I oversimplify here, I recommend to flick through both dotdotdot and opendot websites. Also, here is a quick introduction to what will happen this week :
Laura begins to show me what they have been working on. I am particularly impressed by the online tools which enables tutor to package their tutorials quickly, making it available for all other tutors. I brief here about my project, breaking it down into these four sub-projects, fab academy projects by themselves :
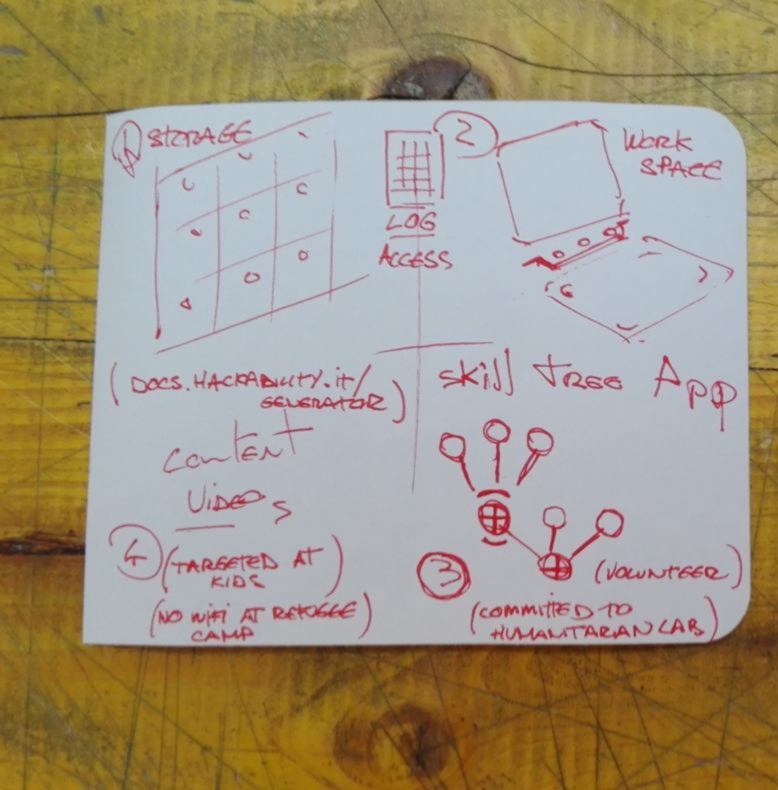
On many aspect, we are doubling the amount of work. For instance Francesco is developing an RFID system, and a storage system has already been designed.
On other points, their project is way ahead on mine : a whole set of icons has been designed, and a system to store tutorials, catalogue them and document them is in place. The important point is that, in this case, Laura and Francesco are executing the concept pitched by Enrico, therefore they have no space for modification. The question is whether I could add to their project, and do so in a way that fits the requirements of the Fab Academy.
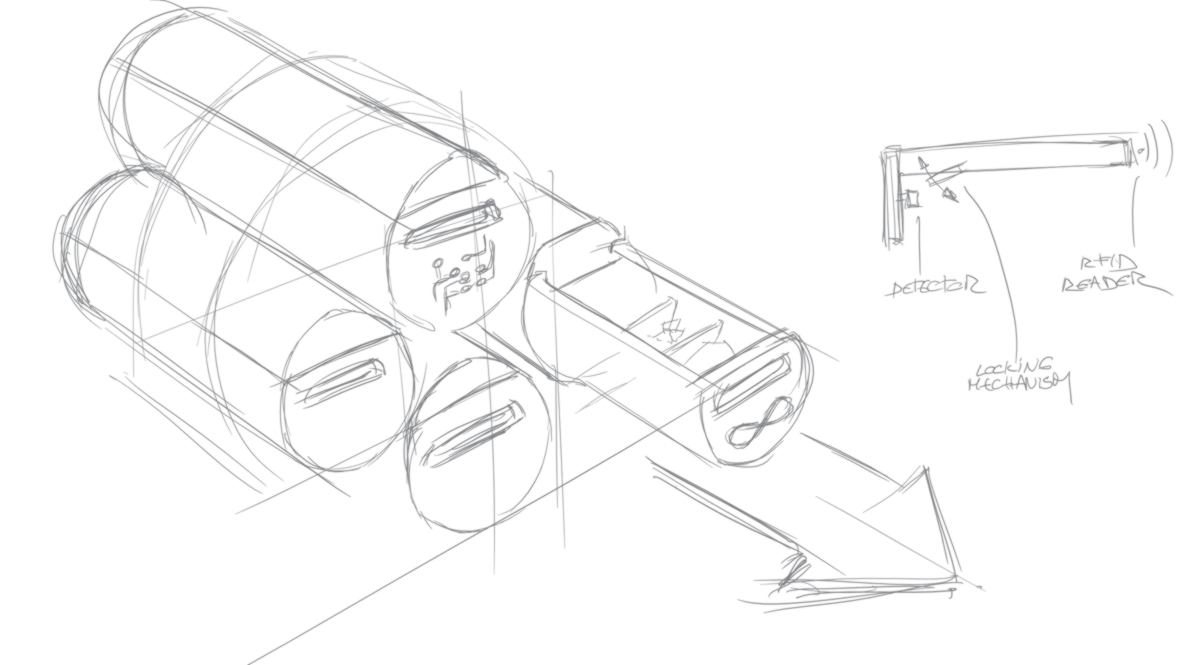
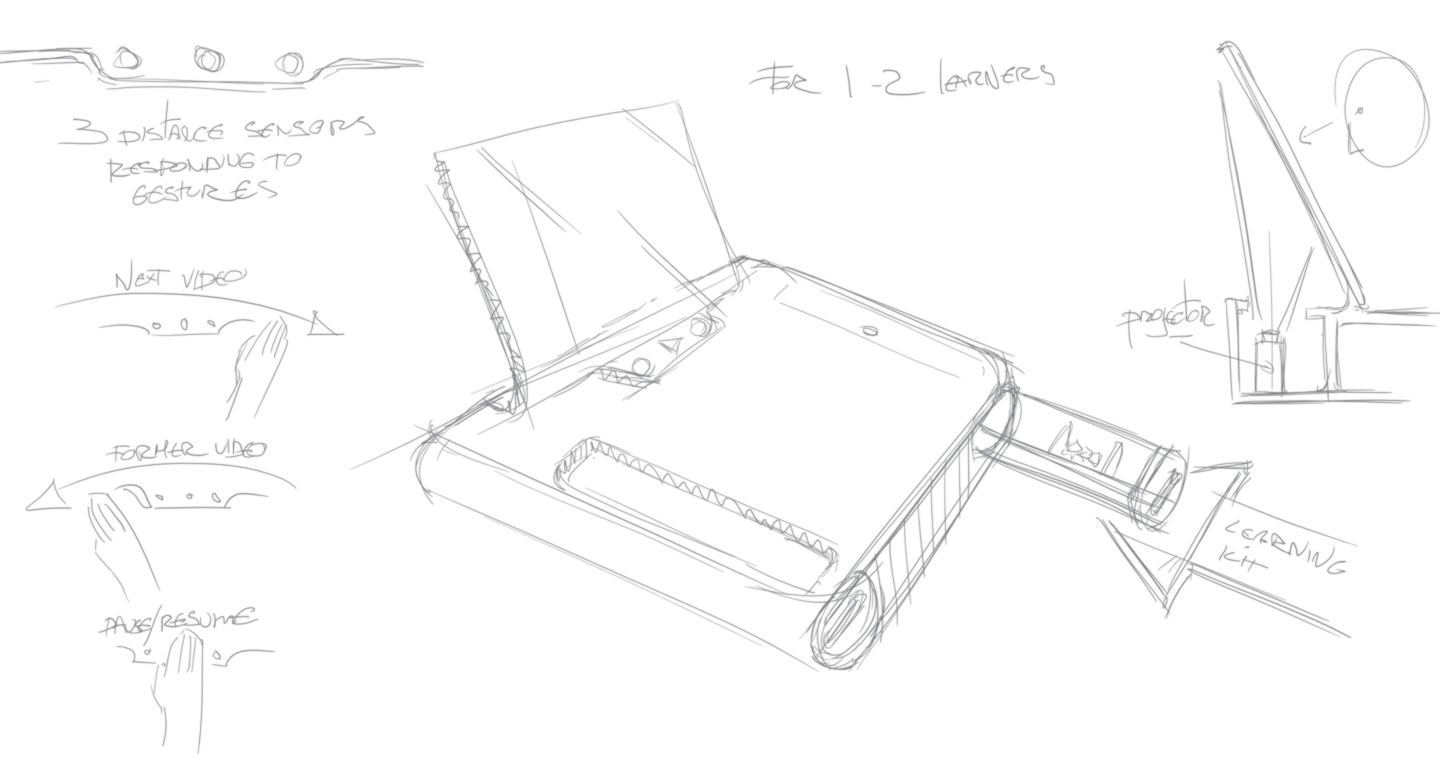
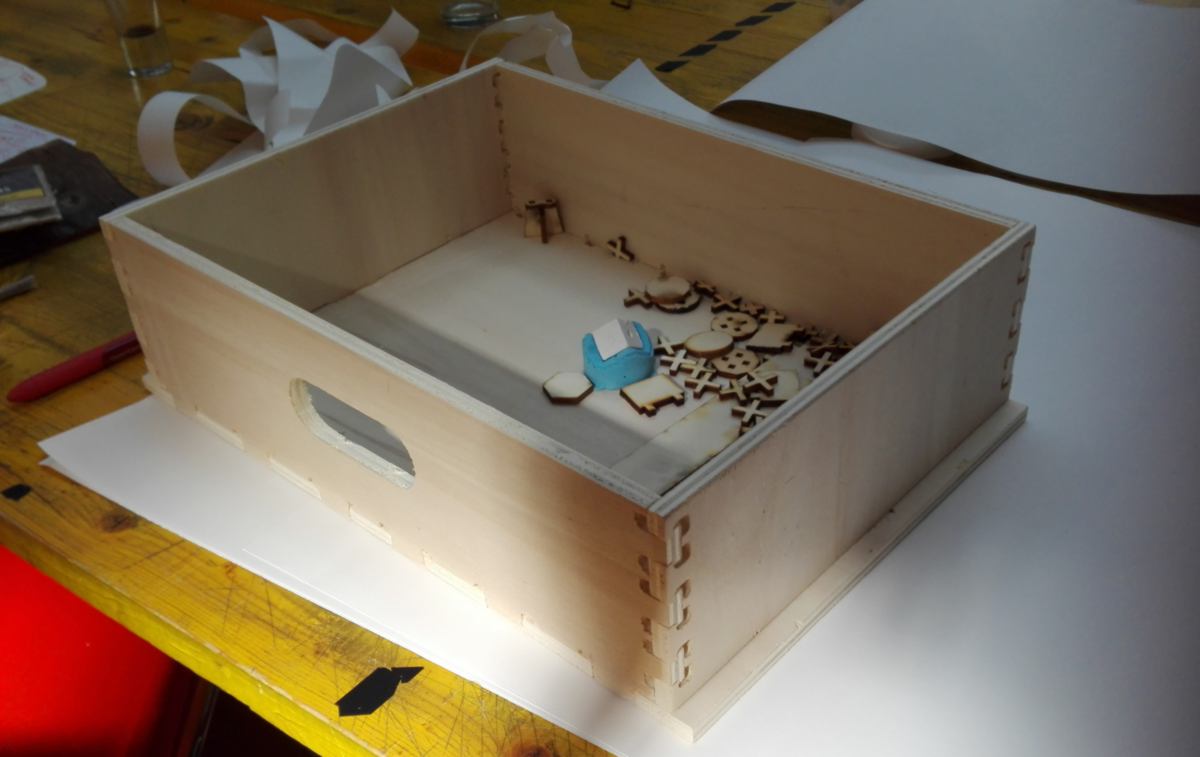
Since the fabkit is designed to train trainers, there is no direct, automated interaction between the interface, filtering the amount and difficulty of contents to the learners, and the learners themselves. There is also no locking/unlocking system for specific kit (the RFID card they design is aimed at the trainer and provides access for all kits.). Perhaps I could develop this part of the project, matching their design. I have a look at the learning kit they are using :

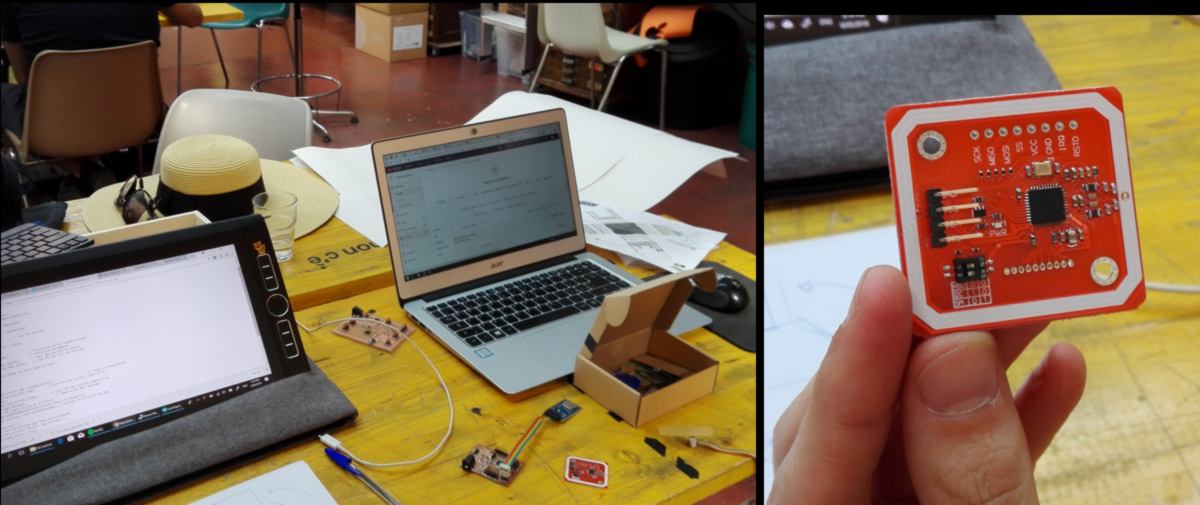
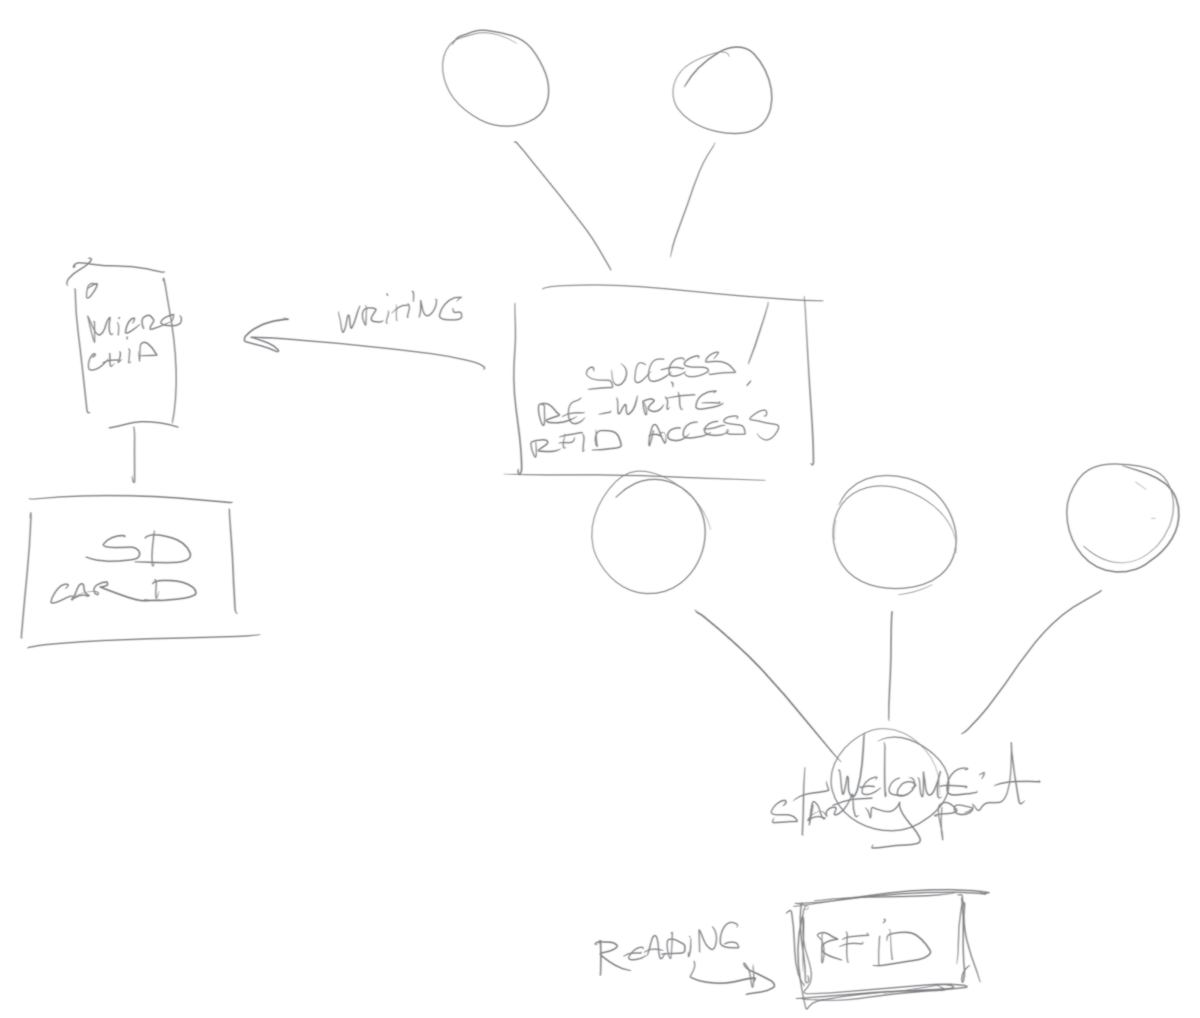
To tick off the "output" box of the final project, the interface could read/write the system controlling access to learning kit via the use of RFID card :
When it comes to interacting with the interface, the most obvious option and the one that many would find intuitive nowaday is to use a tactile screen. However I cannot use a pre-built tactile screen since it would not fit the requirement of the fab academy. So, I start looking at how to make a tactile screen which would be large and very cheap to make - possibly more resistant than commercial tactile system. I wonder if I could use a projector to project on a larger surface such a a glass or transparent acrylic panel, and find a tracking system for the fingers of the user. Instructables for this device exists.
I do not have much time to look into it deeper today. I also want to sleep on it since it is a big change of plan for my final project. I give it some times, and will meet with Fiore, Claudia and other makers here for the bootcamp. Many interesting conversation awaits me.