Wildcard Week
Week 17 - Wildcard week
Here you will find my work description during this seventeenth week
General info
Assignment
Design and produce something with a digital fabrication process not covered in another assignment, documenting the requirements that your assignment meets, and including everything necessary to reproduce it. Possibilities include (but are not limited to) composites, textiles, biotechnology, and robotics.
Class notes
The chaos
… in my head. What to do ? I am interseting in so many proposed topic that I cannot choose one. I am behing of the machine assignement and have to mill some parts. And to make things harder, my sister just gave birth to her son, and I need to go back to France a little bit earlier that usual.
Composites
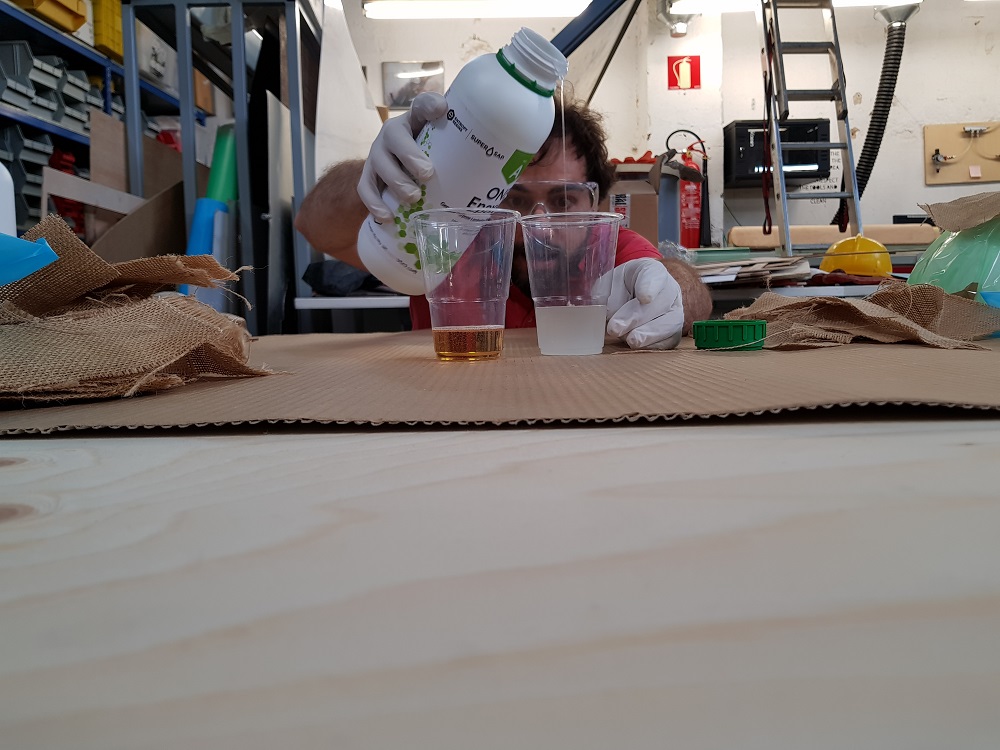
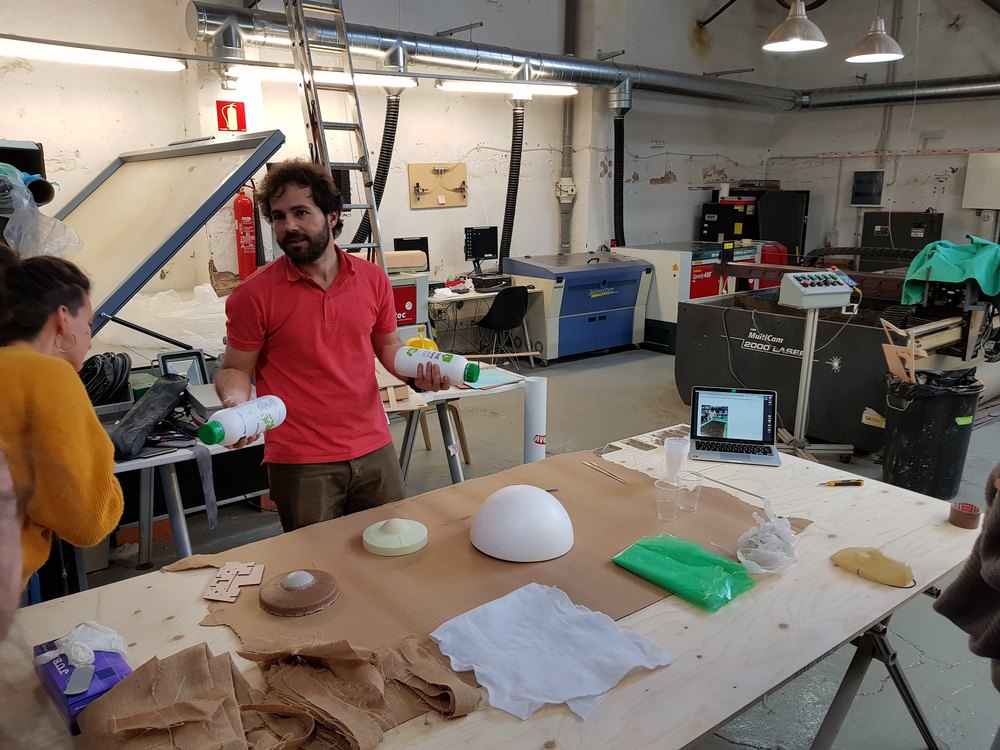
Santi proposed a demo of composites, the day after Clara a demo of soft robotics. I missed both of them. But I tried to follow what Santi said. And on the Friday he helped me to de an experimentation with composite. I used a moood ring (final project) milled in plywood a few weeks befor to evaluate the thickness of a composite shell. I was interrested on doing my own vaccum bag, and as I wanted to apply a force on both sides of the mold I had to use this technic to dry my composite mixture.
Let’s see that in action.
Santi’s composites demo - LEARM
Using hand made vaccum bag - MAKE
Let’s create a composite shell of a ring I realized during the CNC week.
.jpg)
.jpg)
To realize a vaccum composite we need several layers of material as explained here.
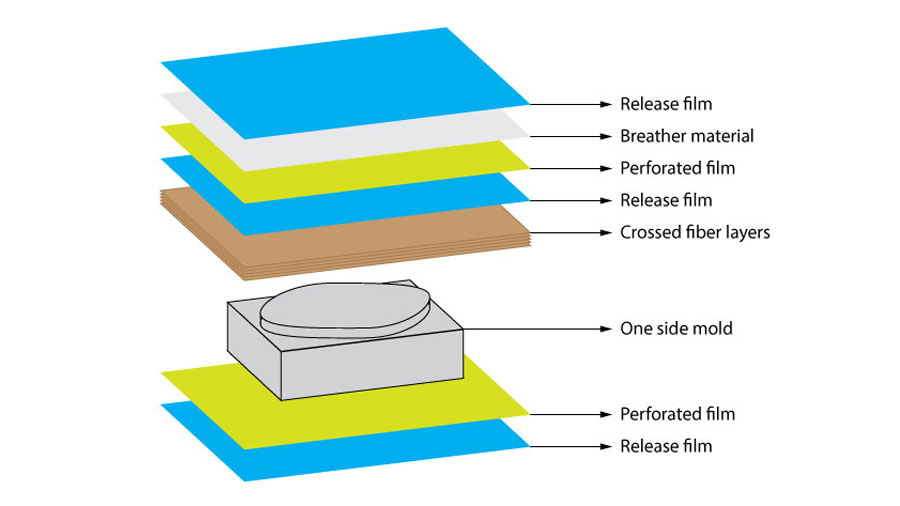
Before starting prepare all the setup, because after it will be a mess (sticky gloves).
.jpg)
.jpg)
.jpg)
.jpg)
.jpg)
.jpg)
.jpg)
.jpg)
.jpg)
.jpg)
.jpg)
.jpg)
.jpg)
.jpg)
.jpg)
.jpg)
.jpg)
.jpg)
.jpg)
.jpg)
.jpg)
.jpg)
.jpg)
.jpg)
.jpg)
Feedback - SHARE
What I learnt with this experiment :
- veccum cycle is important
- It’s hard to make a perfectly air proof vaccum bag
- Don’t let the vaccum always on
- Think about how you will demold your thing
- Find a way to mesure epoxy quantity you will use (I heard about using the weight of the material = the weight of epoxy - to try)
- Result is not as hard as expencted, probably due to vaccum leaks
- This plactic protection layer is usefully but a crap to remove
- the expoy shell cannot be as accurate as the orriginal model
- Use at leat 2 layers of fiber
Composite … again
I want to use the termo vaccum table that is in Fablab Bercelona. When I saw what Nico did for his assignement with the burlap, I find an excuse to 3D mill something using the high density foam and used that piece for thermo forming a composite epoxy burlap.
Designing a parametric 3D part
Let’s design a parametric 4 sides wave pattern with grasshopper
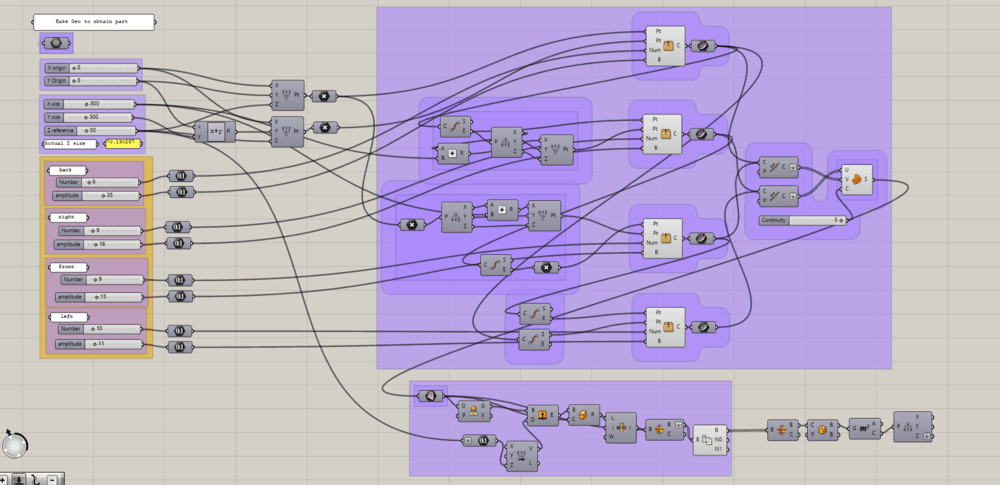
The design:
- define variables
- generate 1 paramatric curve

- duplicate to have the for side of the geometry
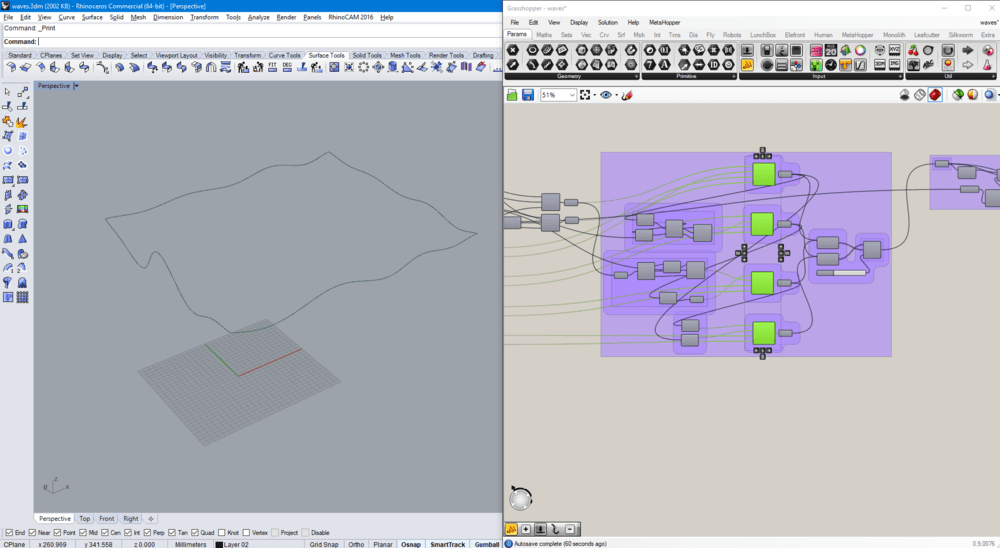
- Create the surface using the surface network tool.
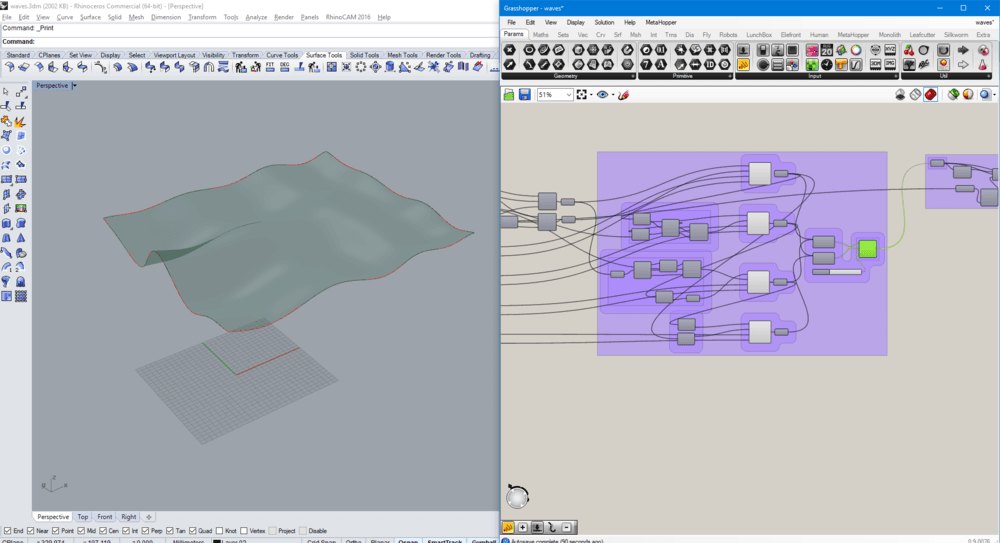
- project to the ground and we have the part we want to mill.
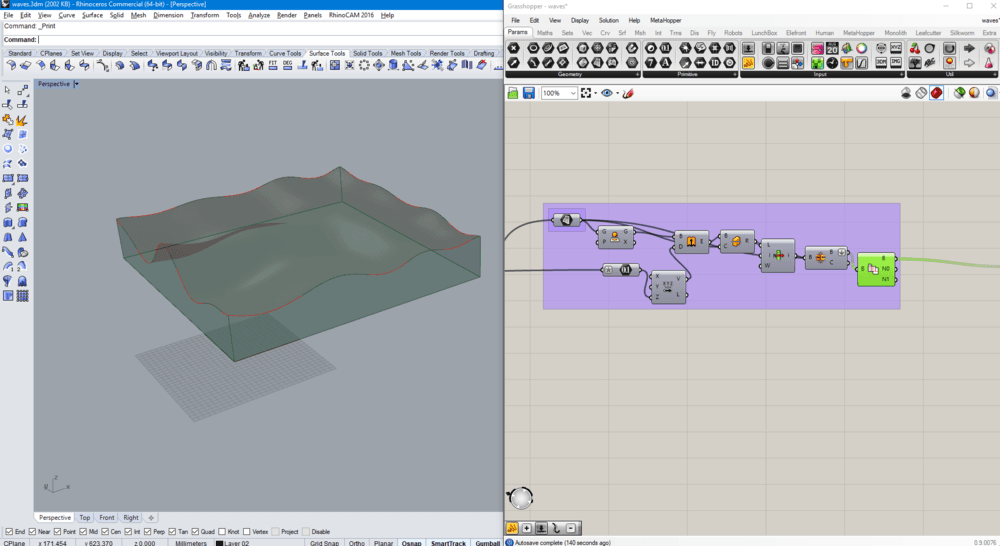
- bake the result and Voilà !
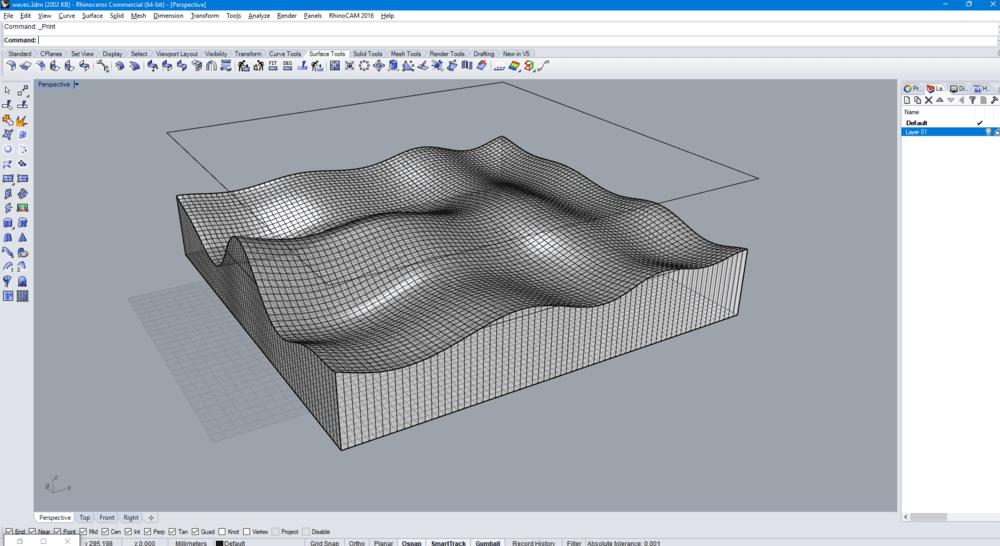
CAM - 4 stategies
The tool
Define the tool specifiactions
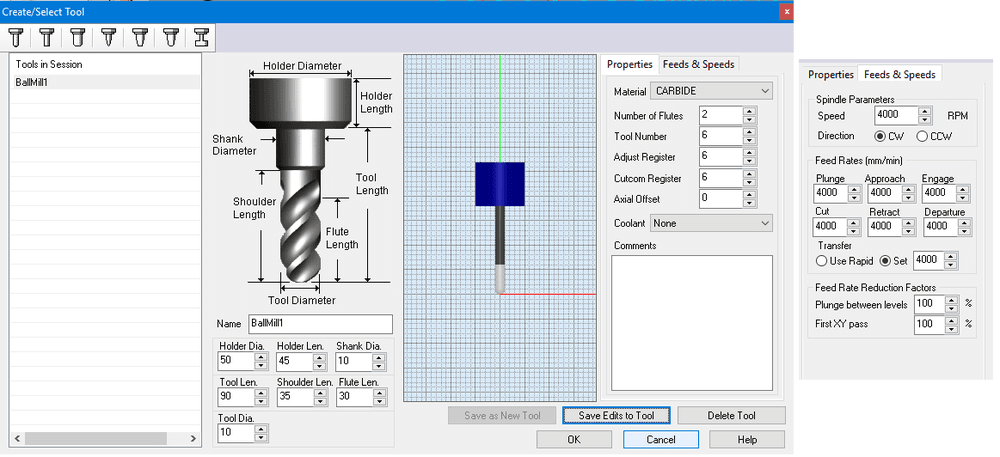
The 4 strategies
- 3D strategy: Horizontal Roughing (stepover distance 75%, stepdown Z 10mm)
- 3D strategy: Horizontal Finishing (stepdown Z 15%)
- 3D strategy: Parallel Finishing (stepover control 25%)
- 2D Axis Profiling (set curve to the top of the stock, total cut depth 80mm (stockis 100mm) but you can set bridges)
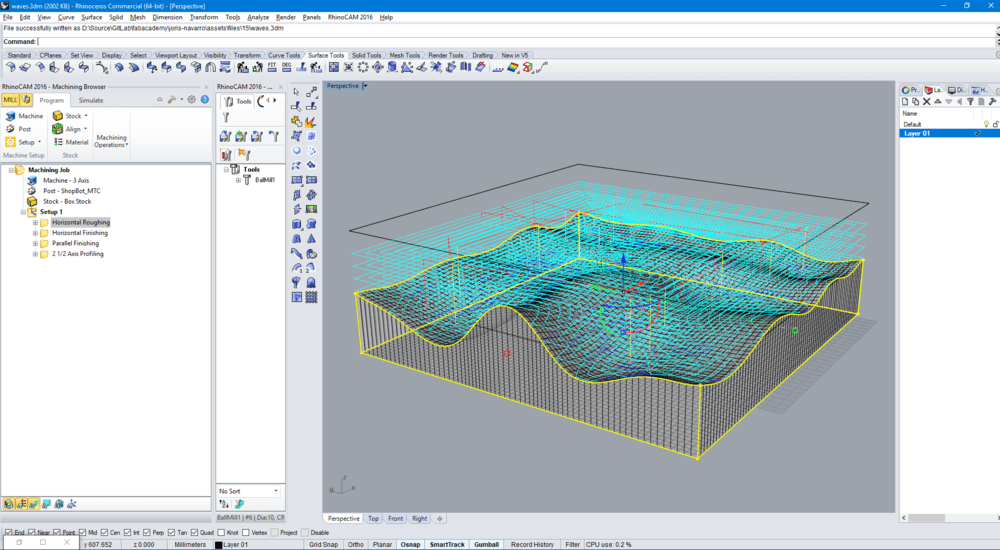
NOTE: In the barcelona shopbot, due to the length of the tool and the height of the stock, you have to set a clearance plane to “Stock max Z + dist 5mm”
This setting is not correctly set in the file you can download bellow.
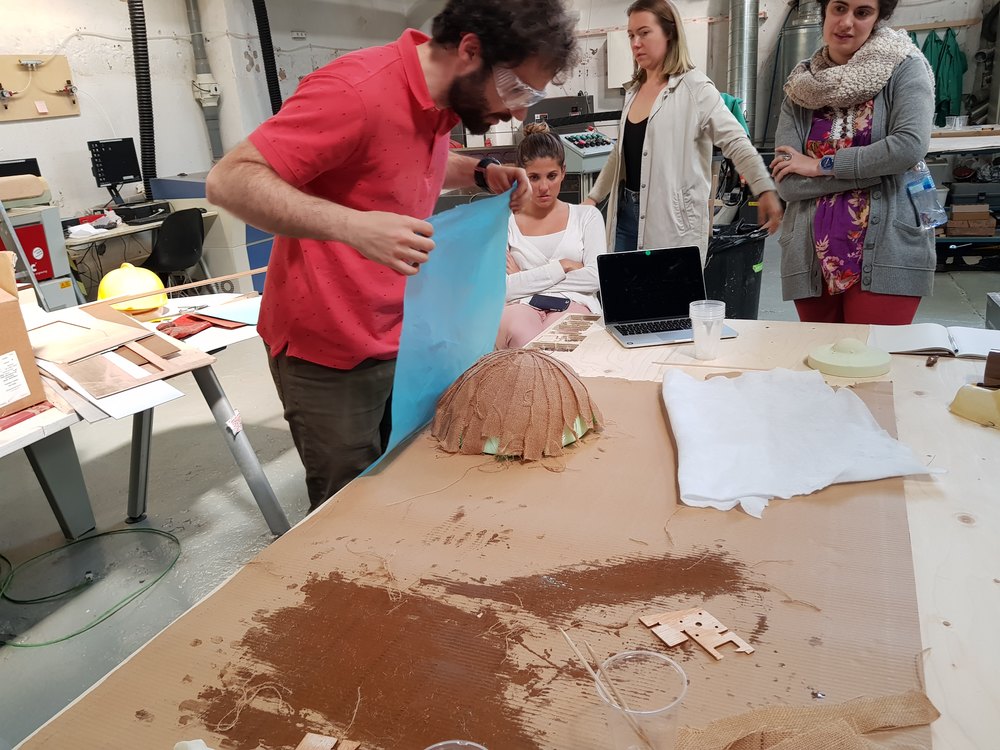
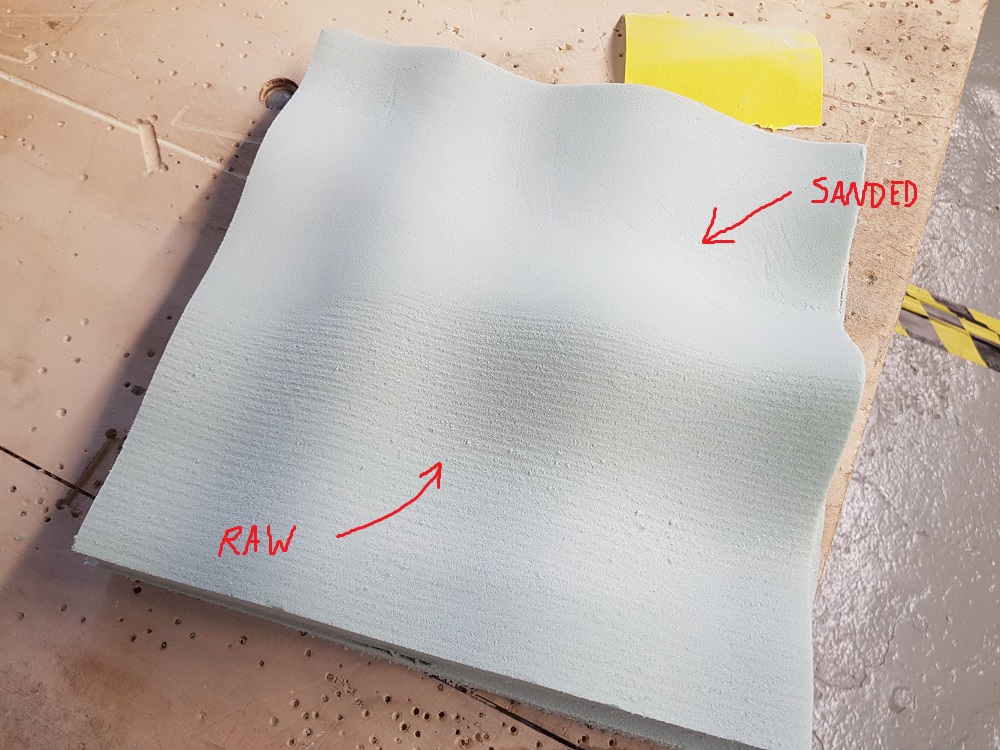
Sand it and here we have the part we will use for vaccuming our composite.
Now prepare the composite, I decided to use the burlap I mixed with the Bio-epoxy after I saw the assignment of @nico.
Prepare everything, you can see the layer I will put on the milled foam.
.jpg)
When ready prepare and mix the composites.
.jpg)
Apply on the Burlap using a piece of wood.
.jpg)
Put the protection layers, the breath layer in order shown previously.
.jpg)
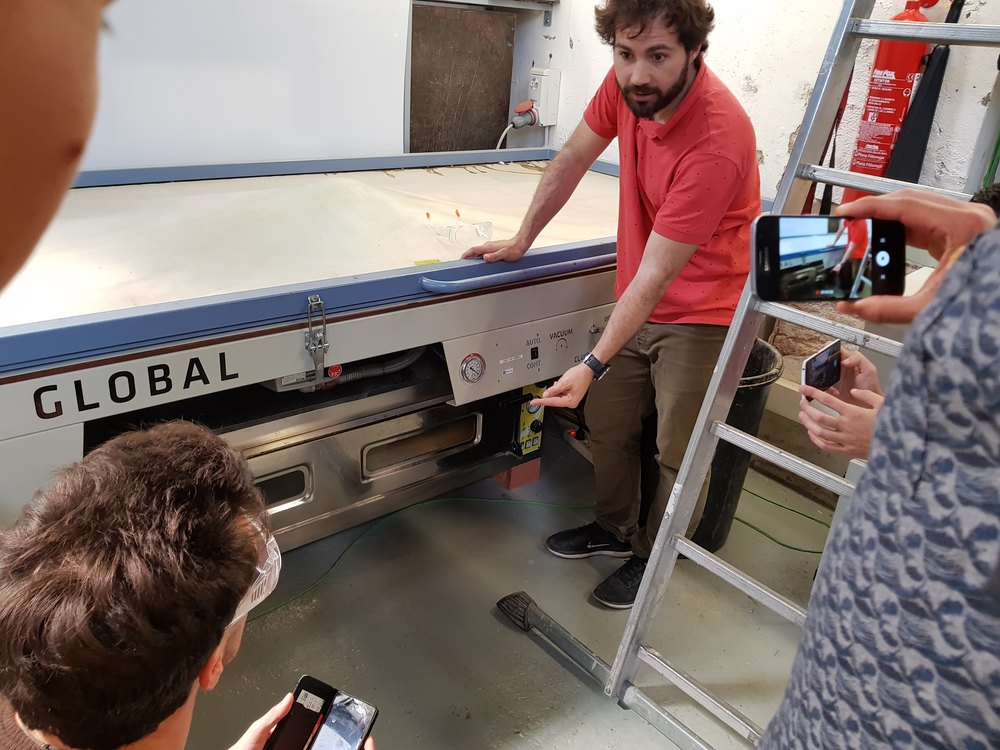
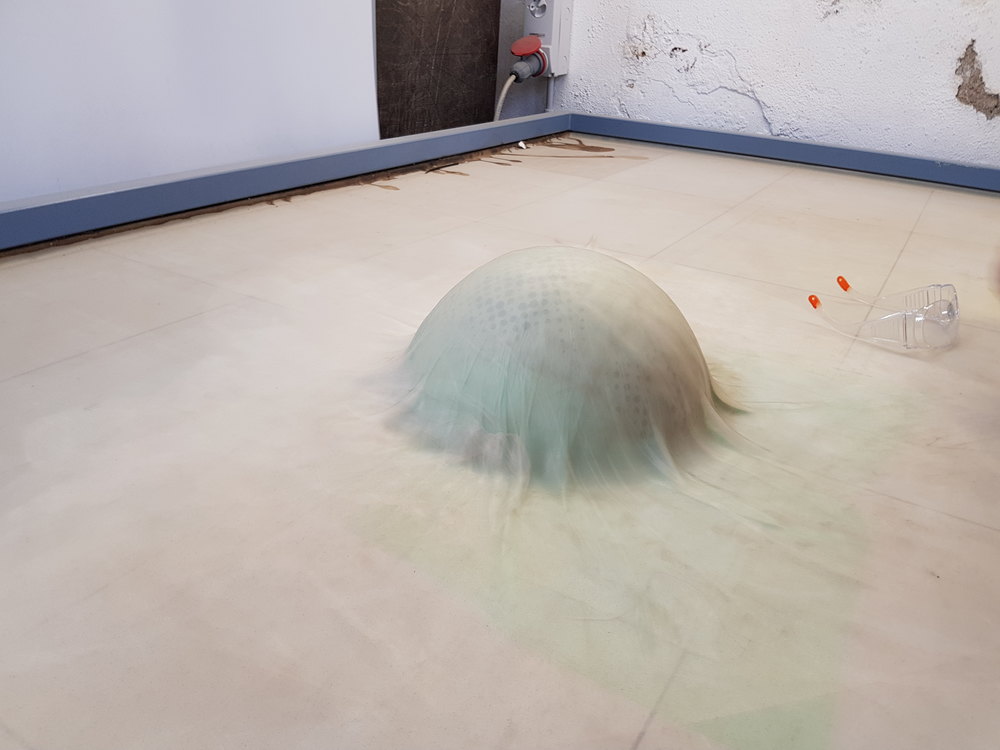
I used the GLOBAL GMP-S Vaccum press to apply a uniform force on the composite.
You can see the little dots made by the epoxy under the pressure of the vaccum.
.jpg)
this machine can run the all night because it has an automatic pressure control.
Sixteen hours later I can turn off the machine and get my treasure.
.jpg)
Once again I am pretty proud of the result.
.jpg)
Files to download
Stay in touch
Hi, I'm
Joris Navarro, from Perpignan (France), a proud dad, a fab director/manager, a teacher, a ceo, a FabAcademy student, but not only. Click here to know more about me.
Check my work for FabAcademy on FabCloud GitLab
@joris.navarro.
Want to say Hi ? Please send me a message.