3D Printing
![]()
Introduction
For the assignment we were asked to start using 3D printer. Since I had no previous experience with 3D printers(as well as almost all the tools from FabLab:), this was an interesting week for me. Many thanks for my groupmates Anke and Matthias for being so helpful and supportive.
In general, 3D printing nowadays is way more robust than some years ago, but 3D prints can still fail due to a variety of reasons. From simple things like a non-adjusted build plate to the temperature and humidity of the room. During this week I had an experience to learn how to operate a 3D printer and that get to know its limitations and sources for errors.
The main advantage of a 3D printer, in my opinion, is customization, which means that you are able to print any design no matter how complex it might be. So you are able to create objects that are encased in other objects and movable or even flexible parts. What is more, 3D printers are affordable, you can get one for just a 100 euros. Anyway, it has some disadvantages as well. For example, you are limited to size and cannot print something really big. What is more, it has some law and copyrights problem, since you can even 3D print a weapon.
3D scanner has basically the same problems, such as size limitation and accuracy, but still it is a quick and easy way to get the 3D model of any objects. As I understand from my experience with 3D scanning, it works much better with round objects or natural shapes. But for sharp corners or complicated multilevel figures it is hard to get a good 3D model.
Getting to know the 3D printer
We were asked to make a group assignment in order to "meet" the 3D Printer, test means printing a test design and check what worked and what did not. The relevant documentation and an overview of all 3D printers available at Aachen FabLab can be found here.
The 3D Printer v.1
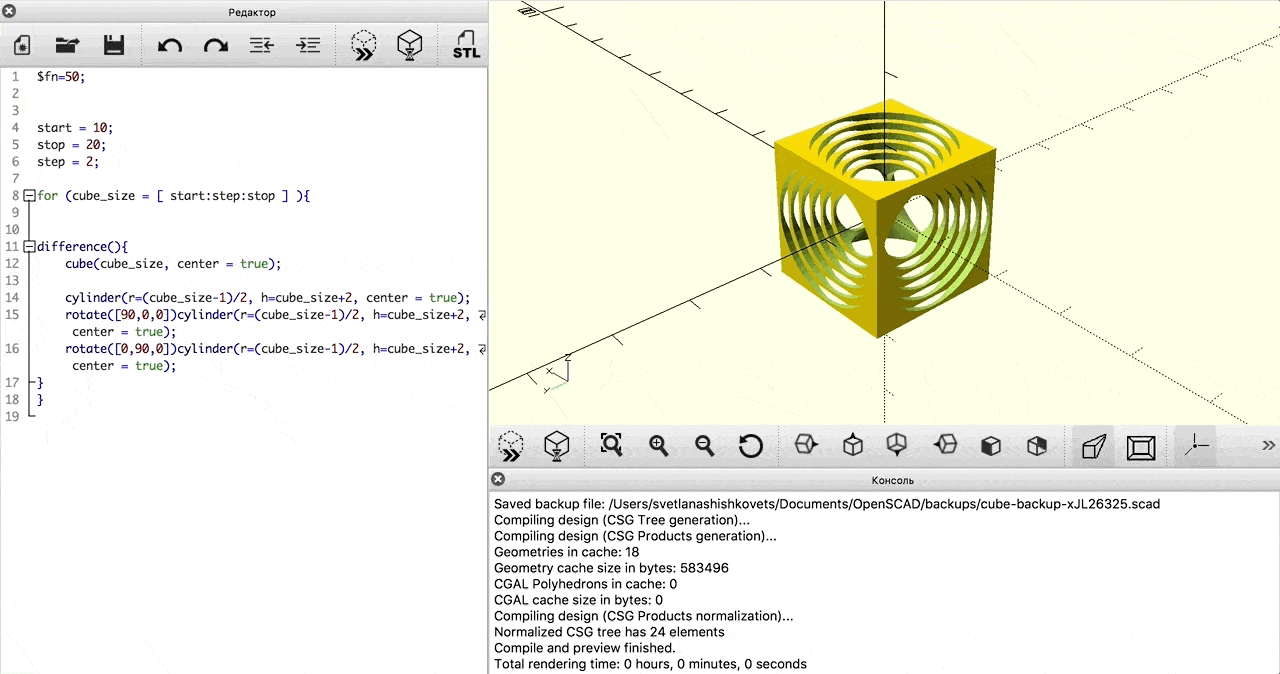
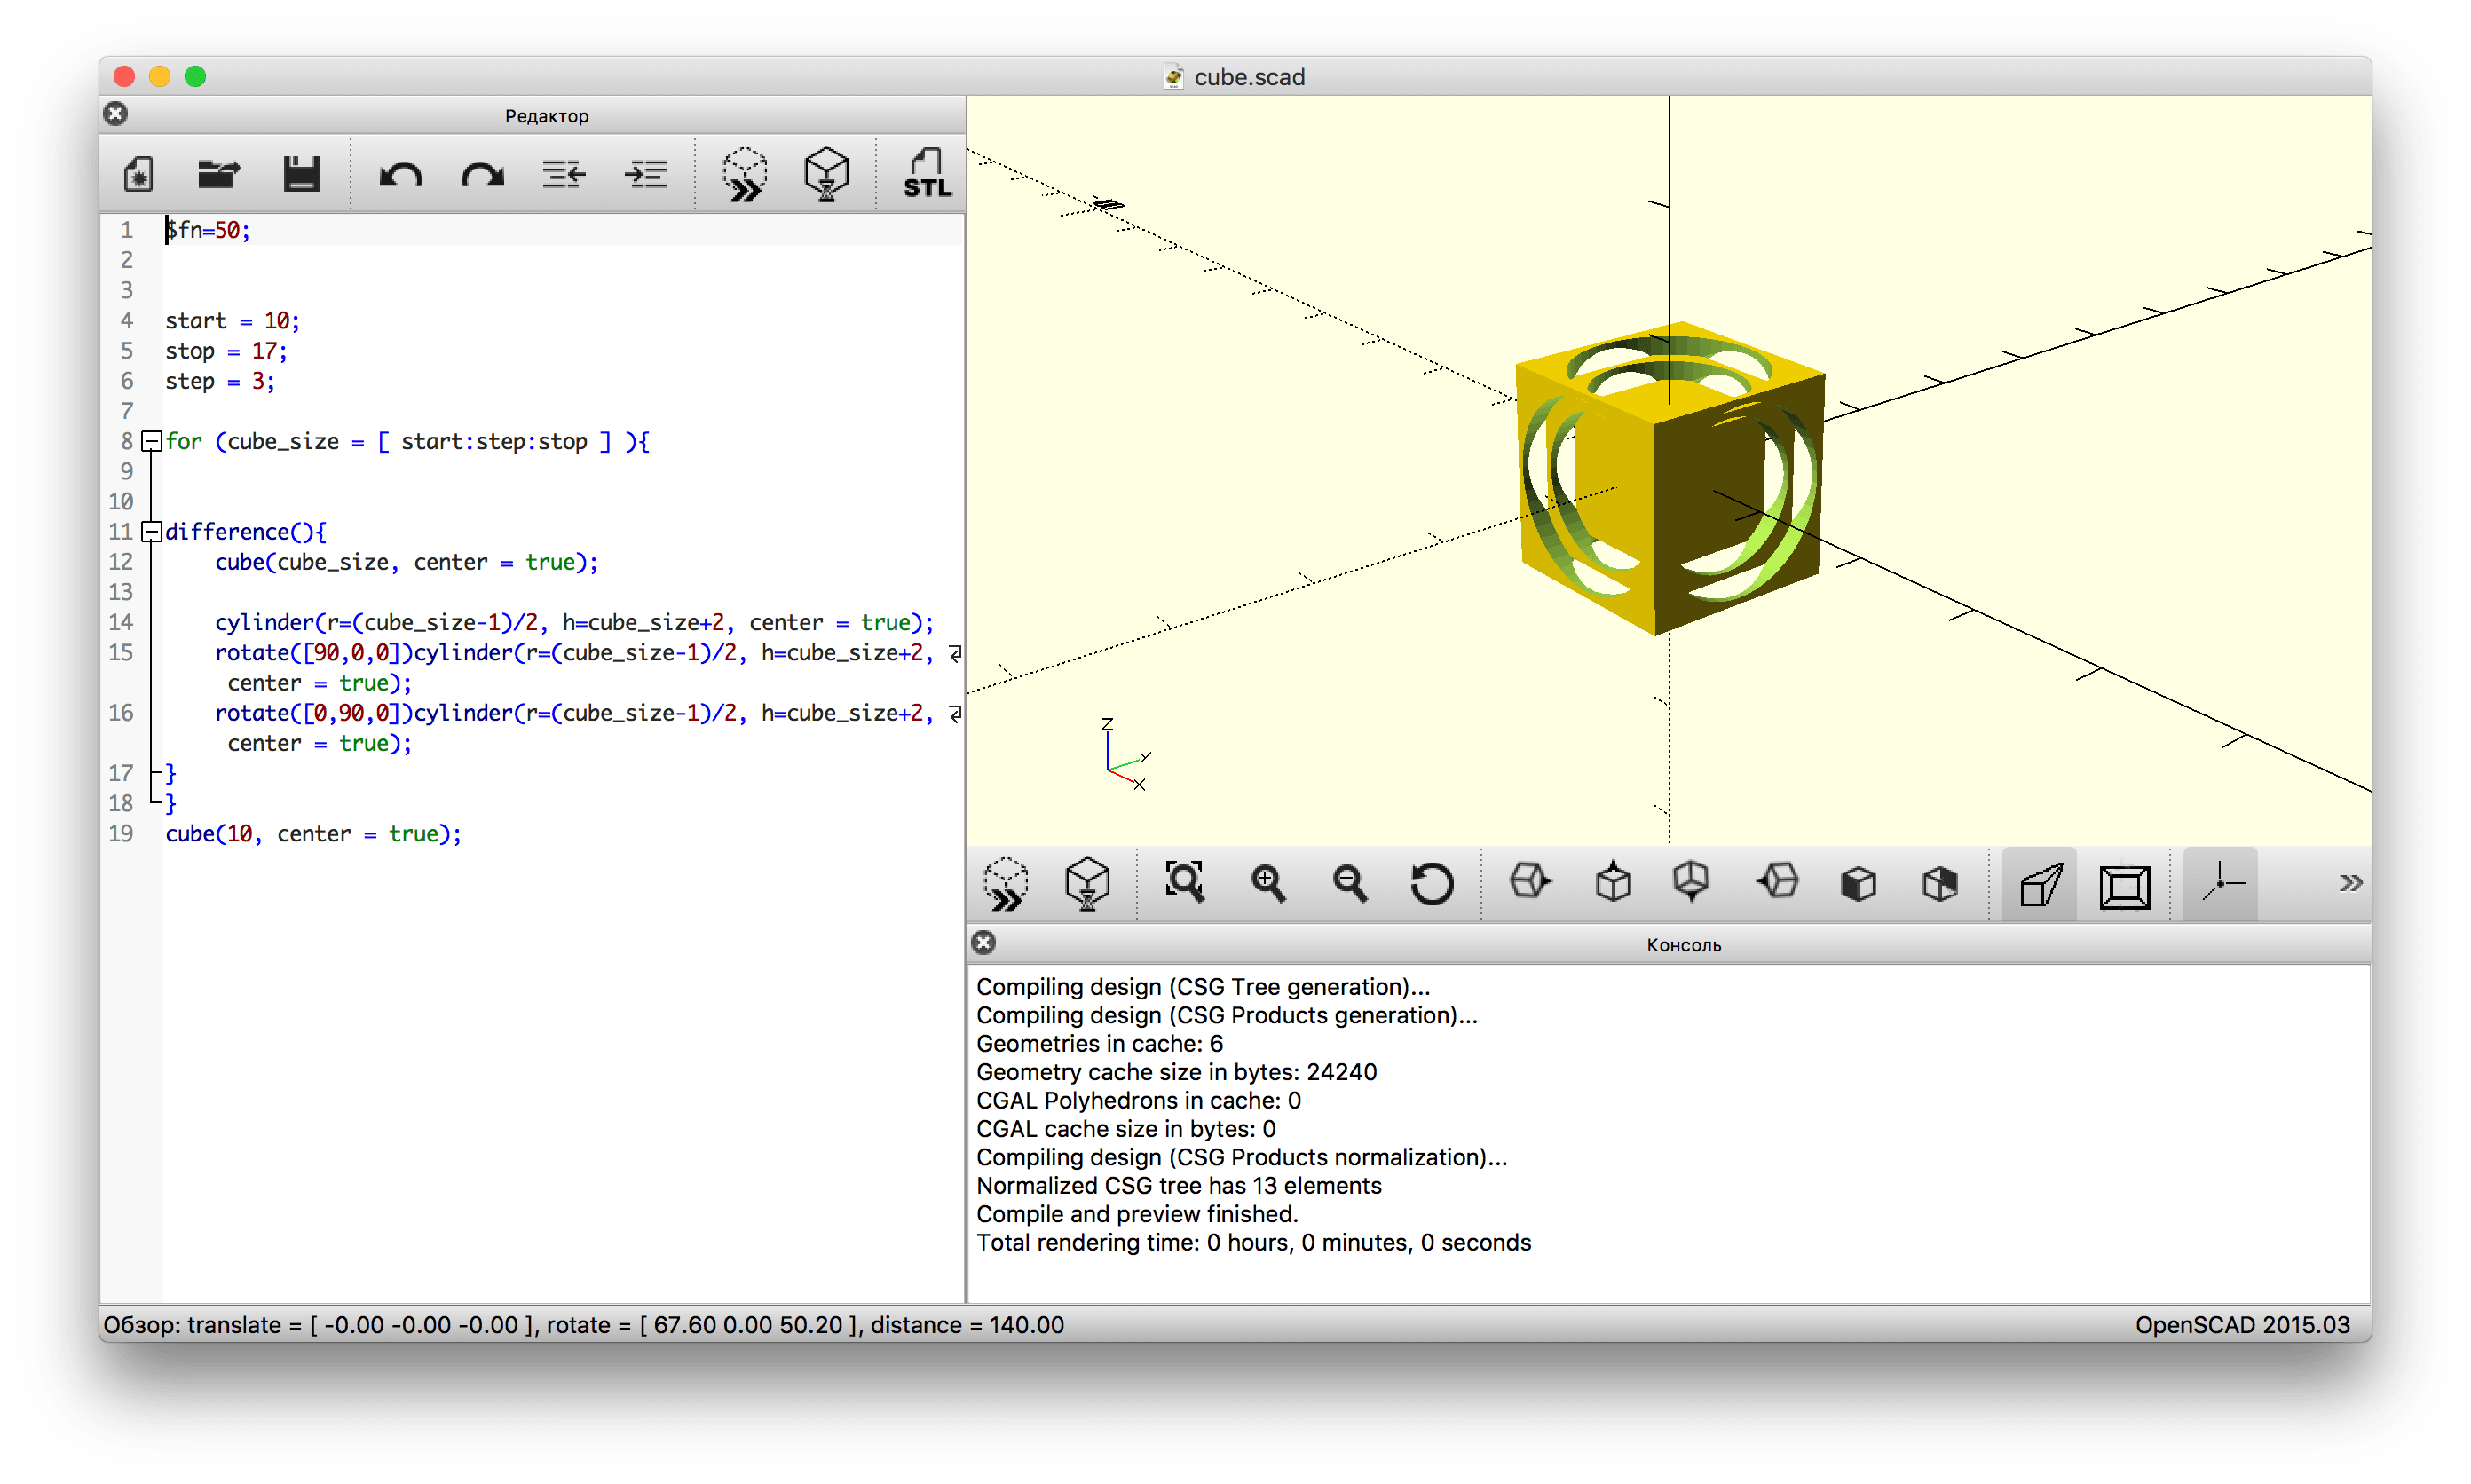
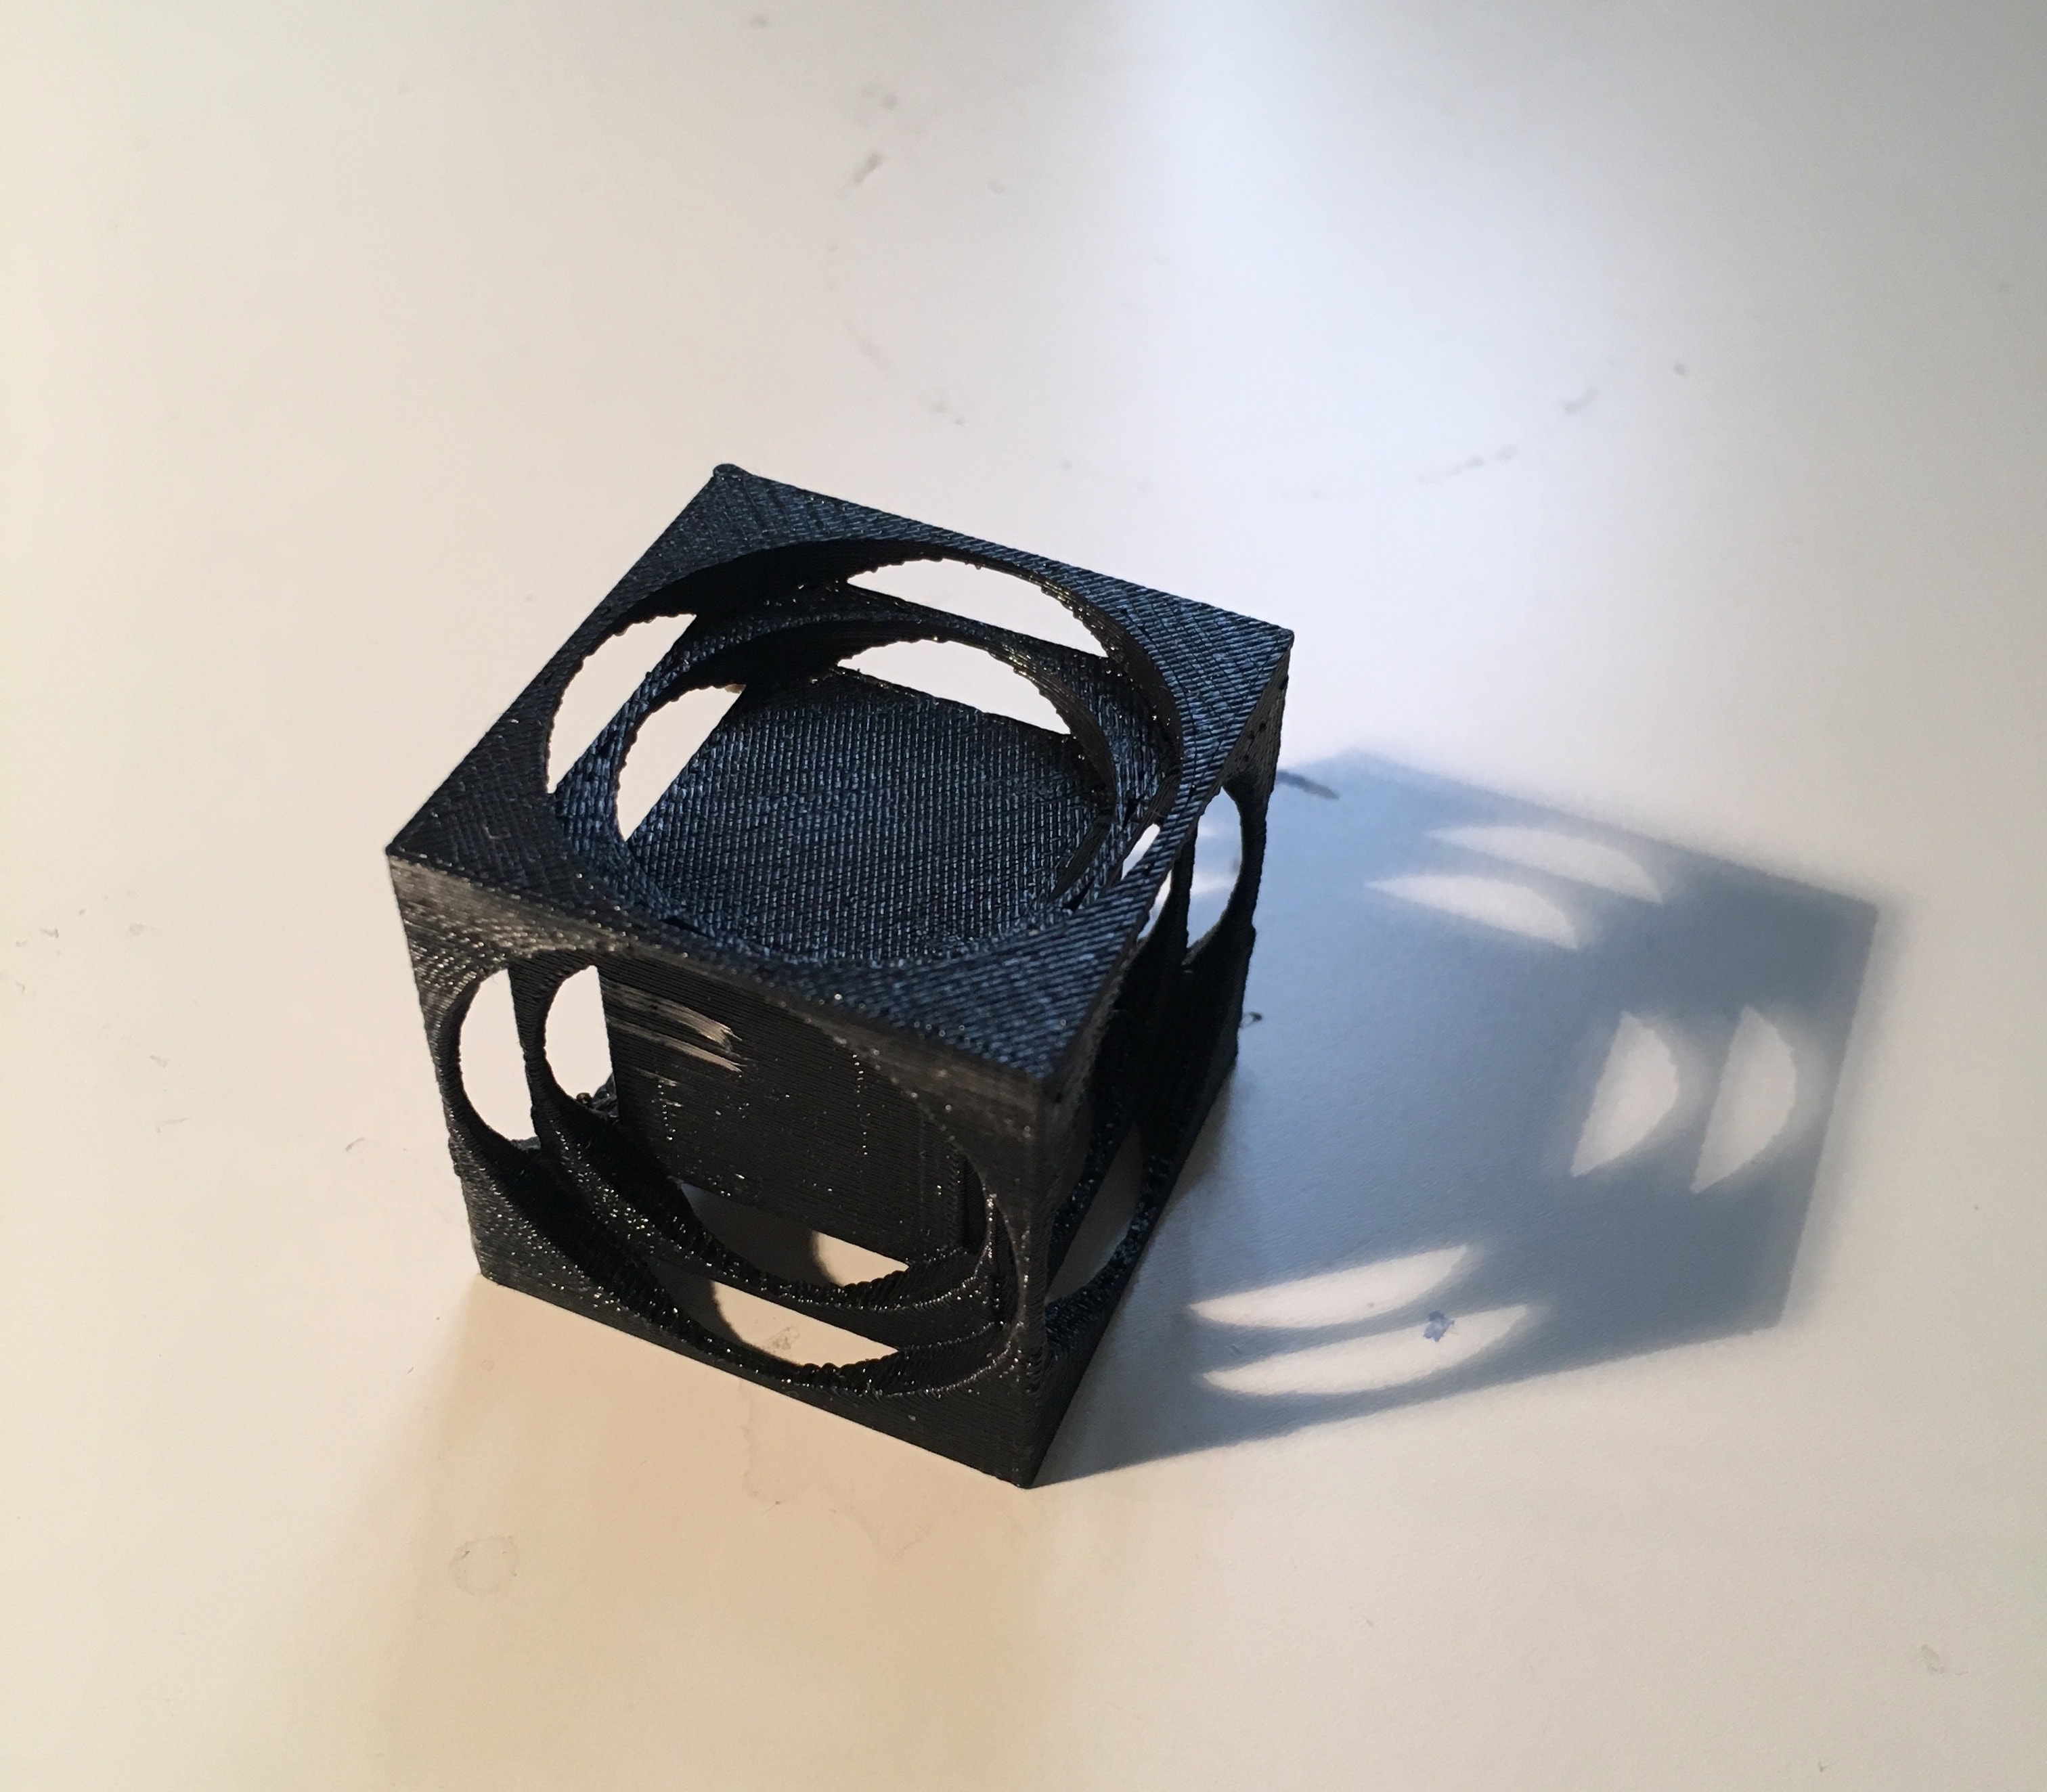
We were asked to 3D print an object from the 3D design week which was hard to make with subtractive manufacturing techniques. I wanted to make my design a bit more complicated, so I added a small sphere, that is less than a smallest radius of differences.
For printing I choose Ultimaker 3 Extended, because it is so modern, can be connected via Network, has a camera( provides you an overview of what is going on there), and, what is more important, was free at that moment :) So, my working steps was:
- Download a software Ultimaker Cura in order to "communicate" with 3D printer, which provides both easy to use print settings and the possibility of tweaking a number of advanced options.
- Connect to the printer via network
- Upload my design (I saved it in .stl format when I used OpenScad)
- Made general settings(size, material)
- Started printing(pressing "Print over Network")
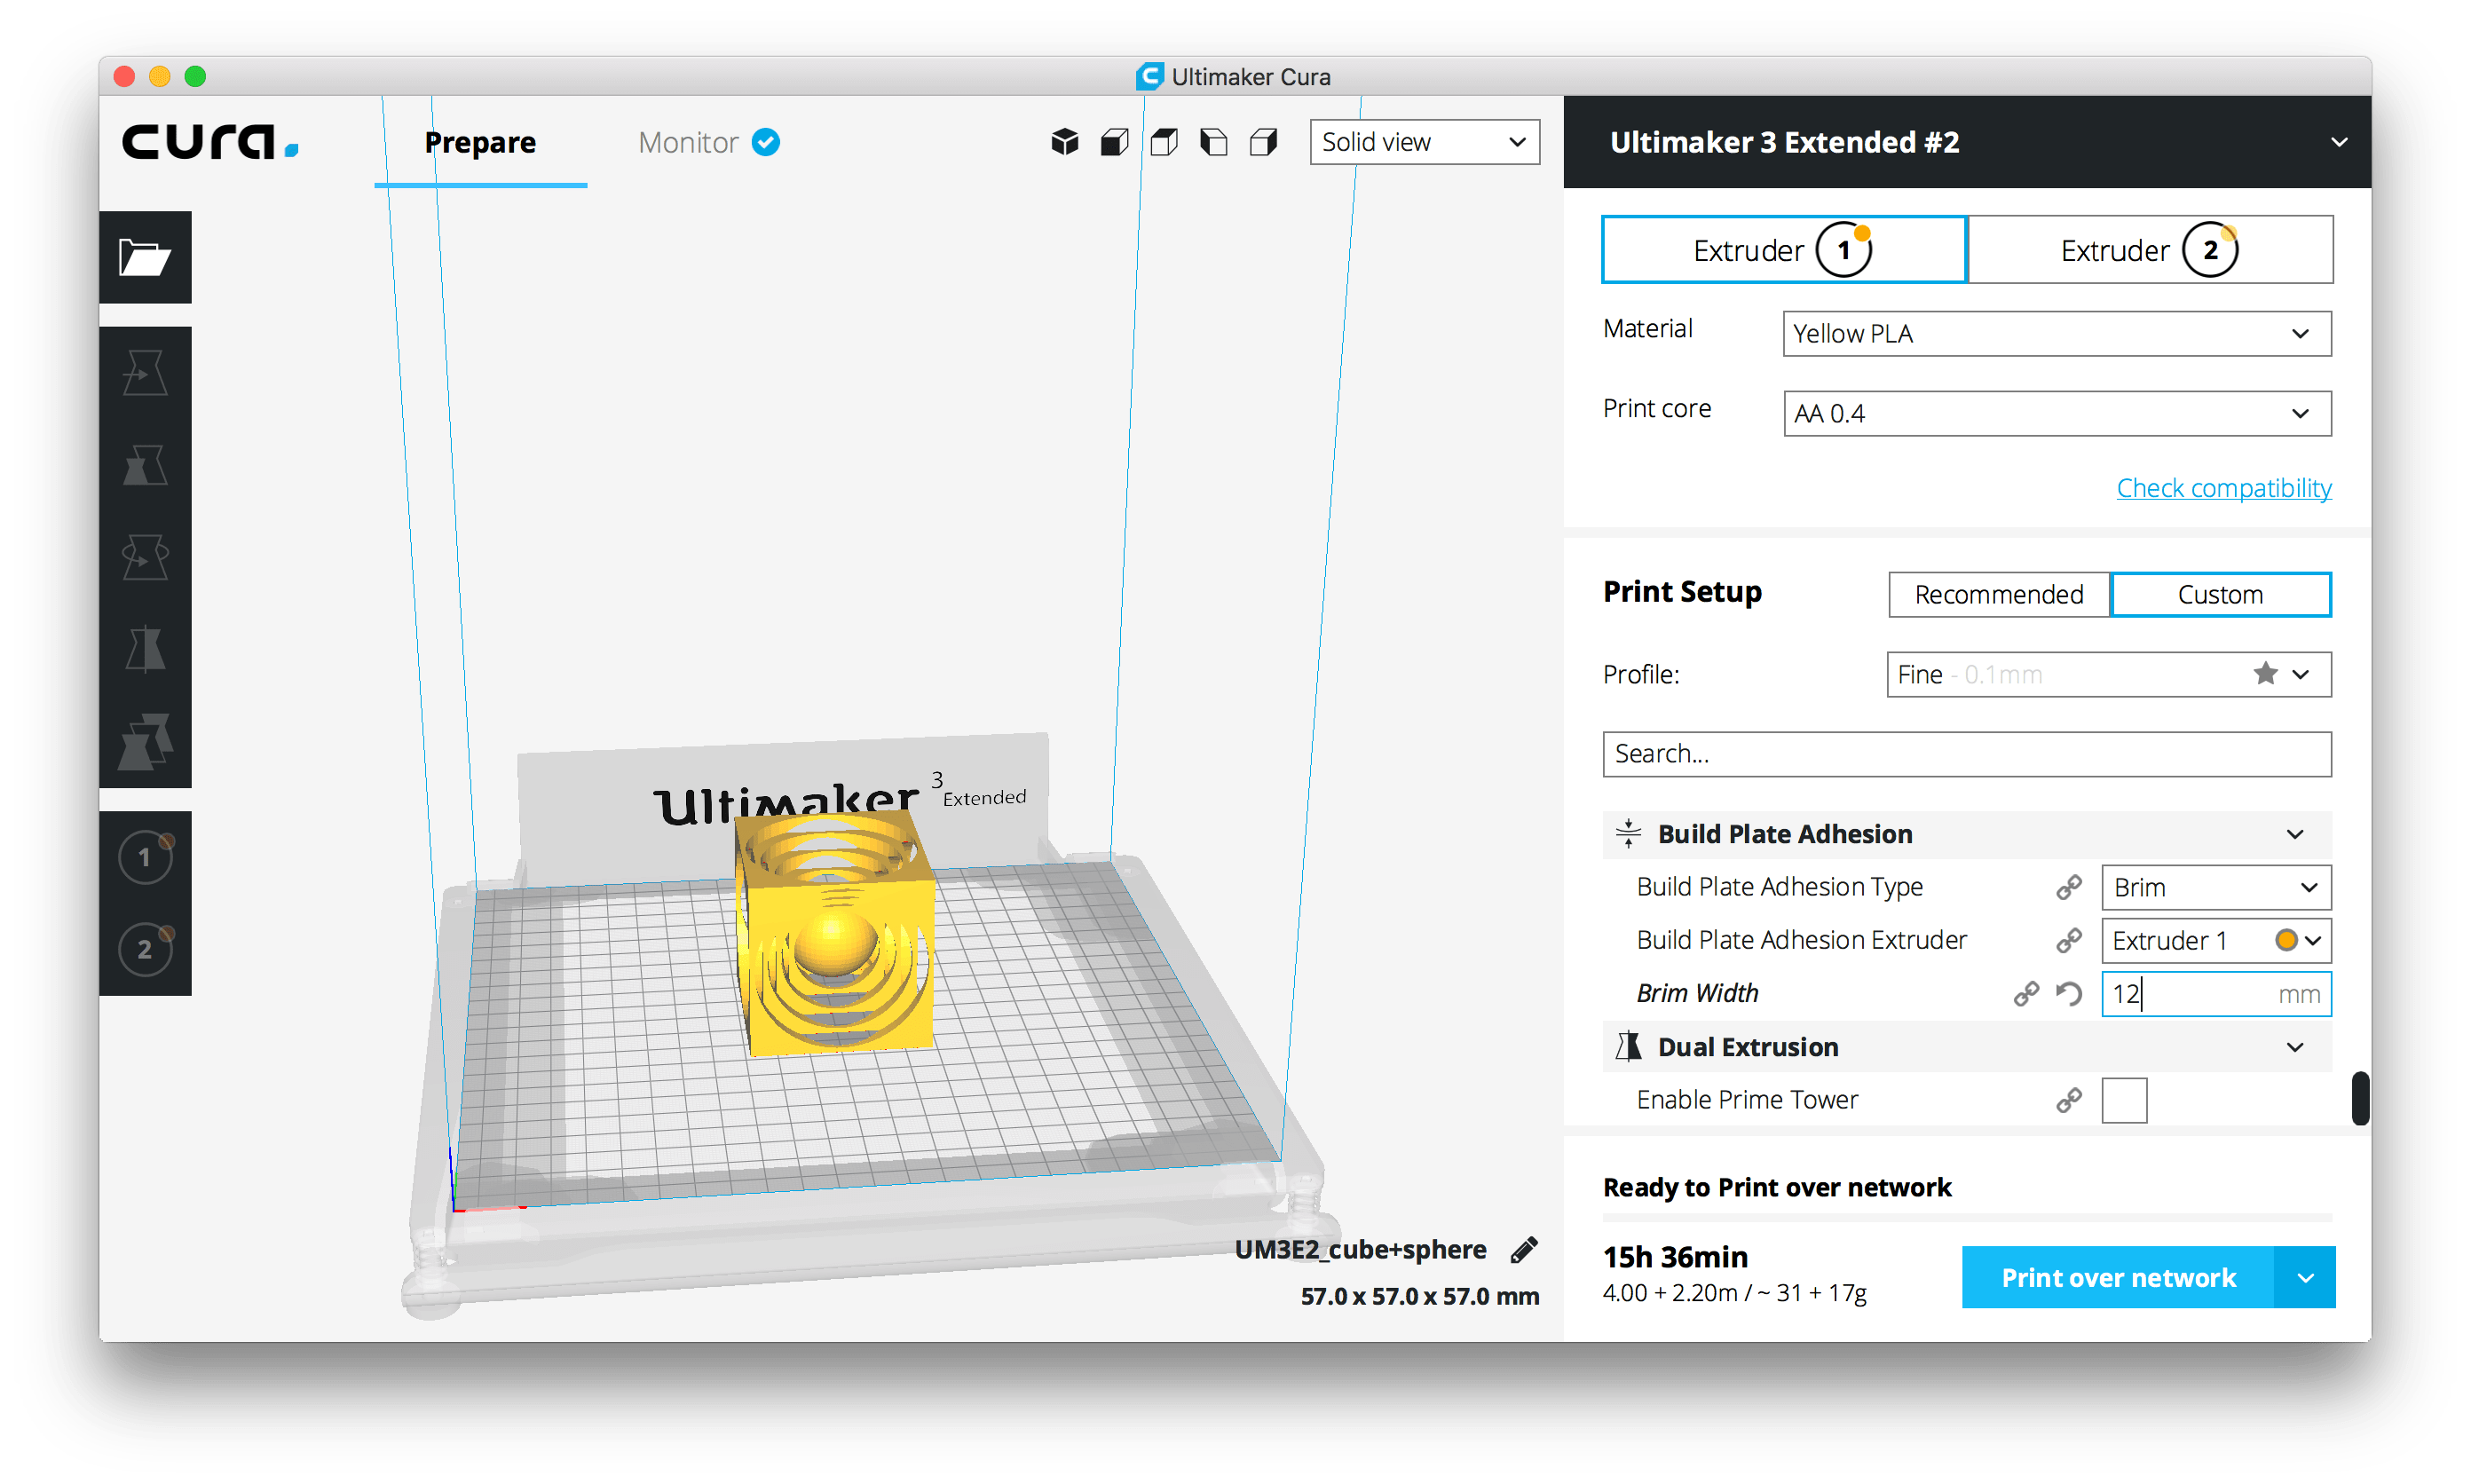
I really enjoyed the ability to look after my printing, but, unfortunately, you have to be in the same network, and, what is more, it would not help you if something would go wrong...
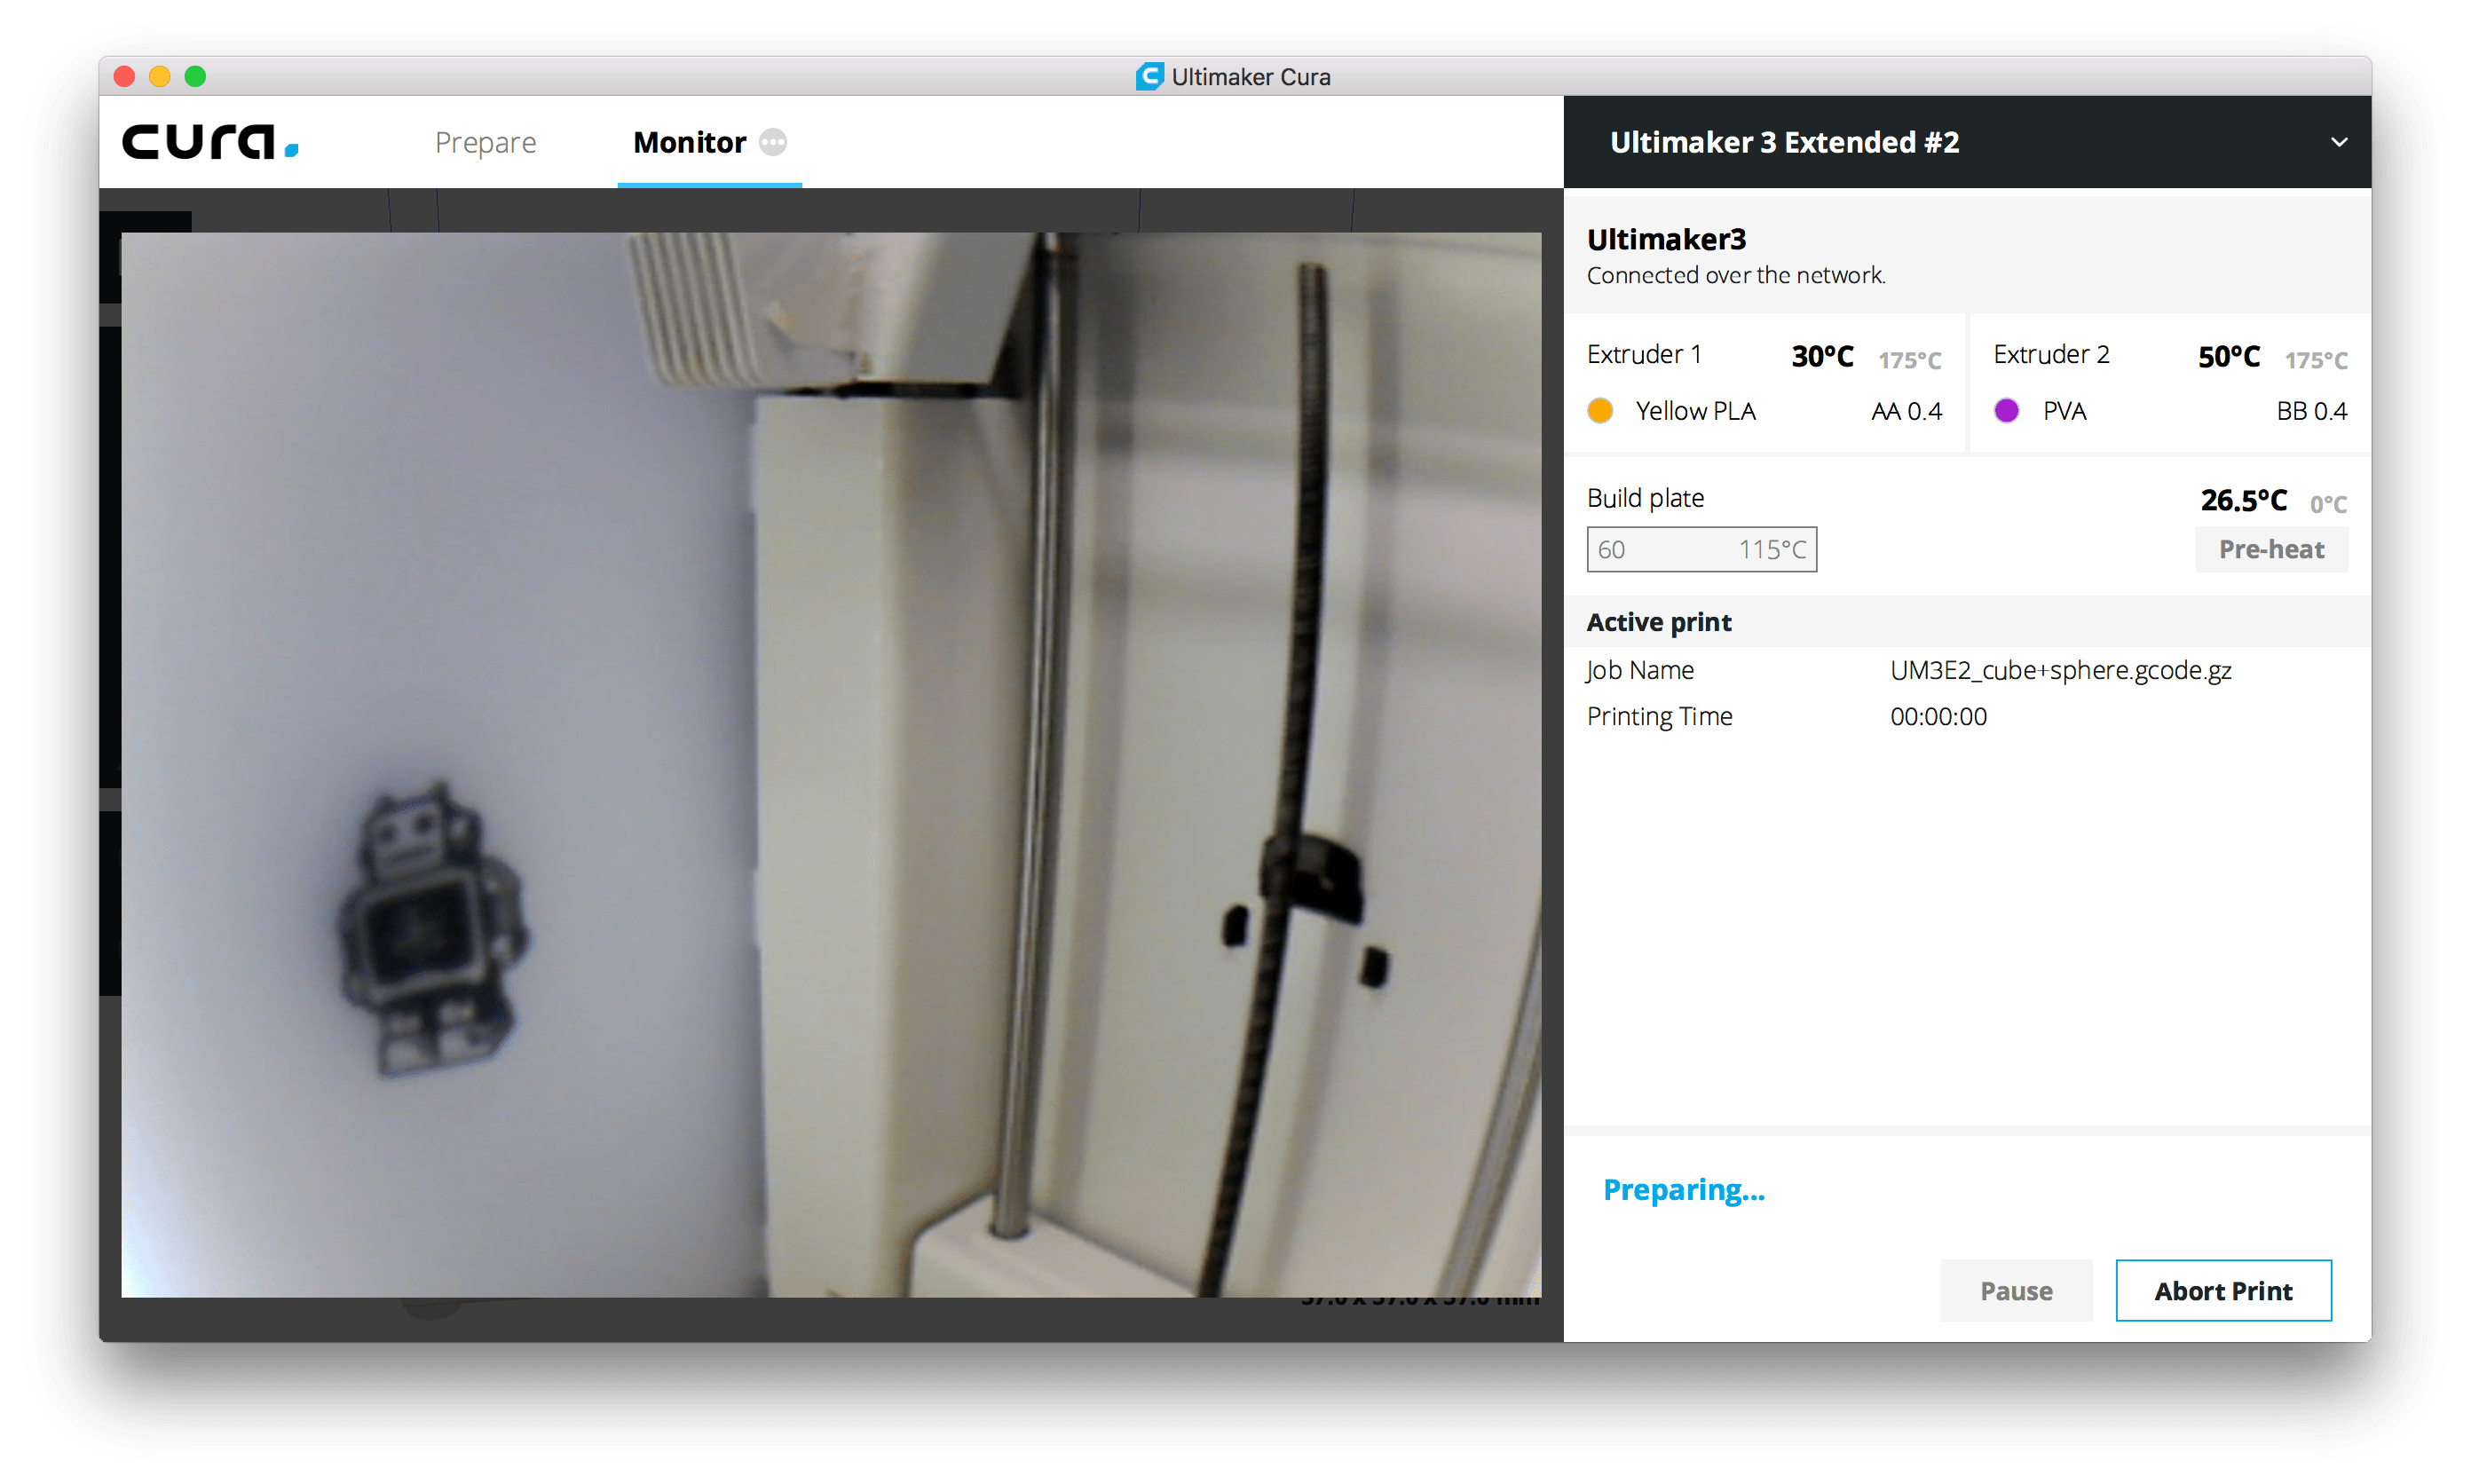
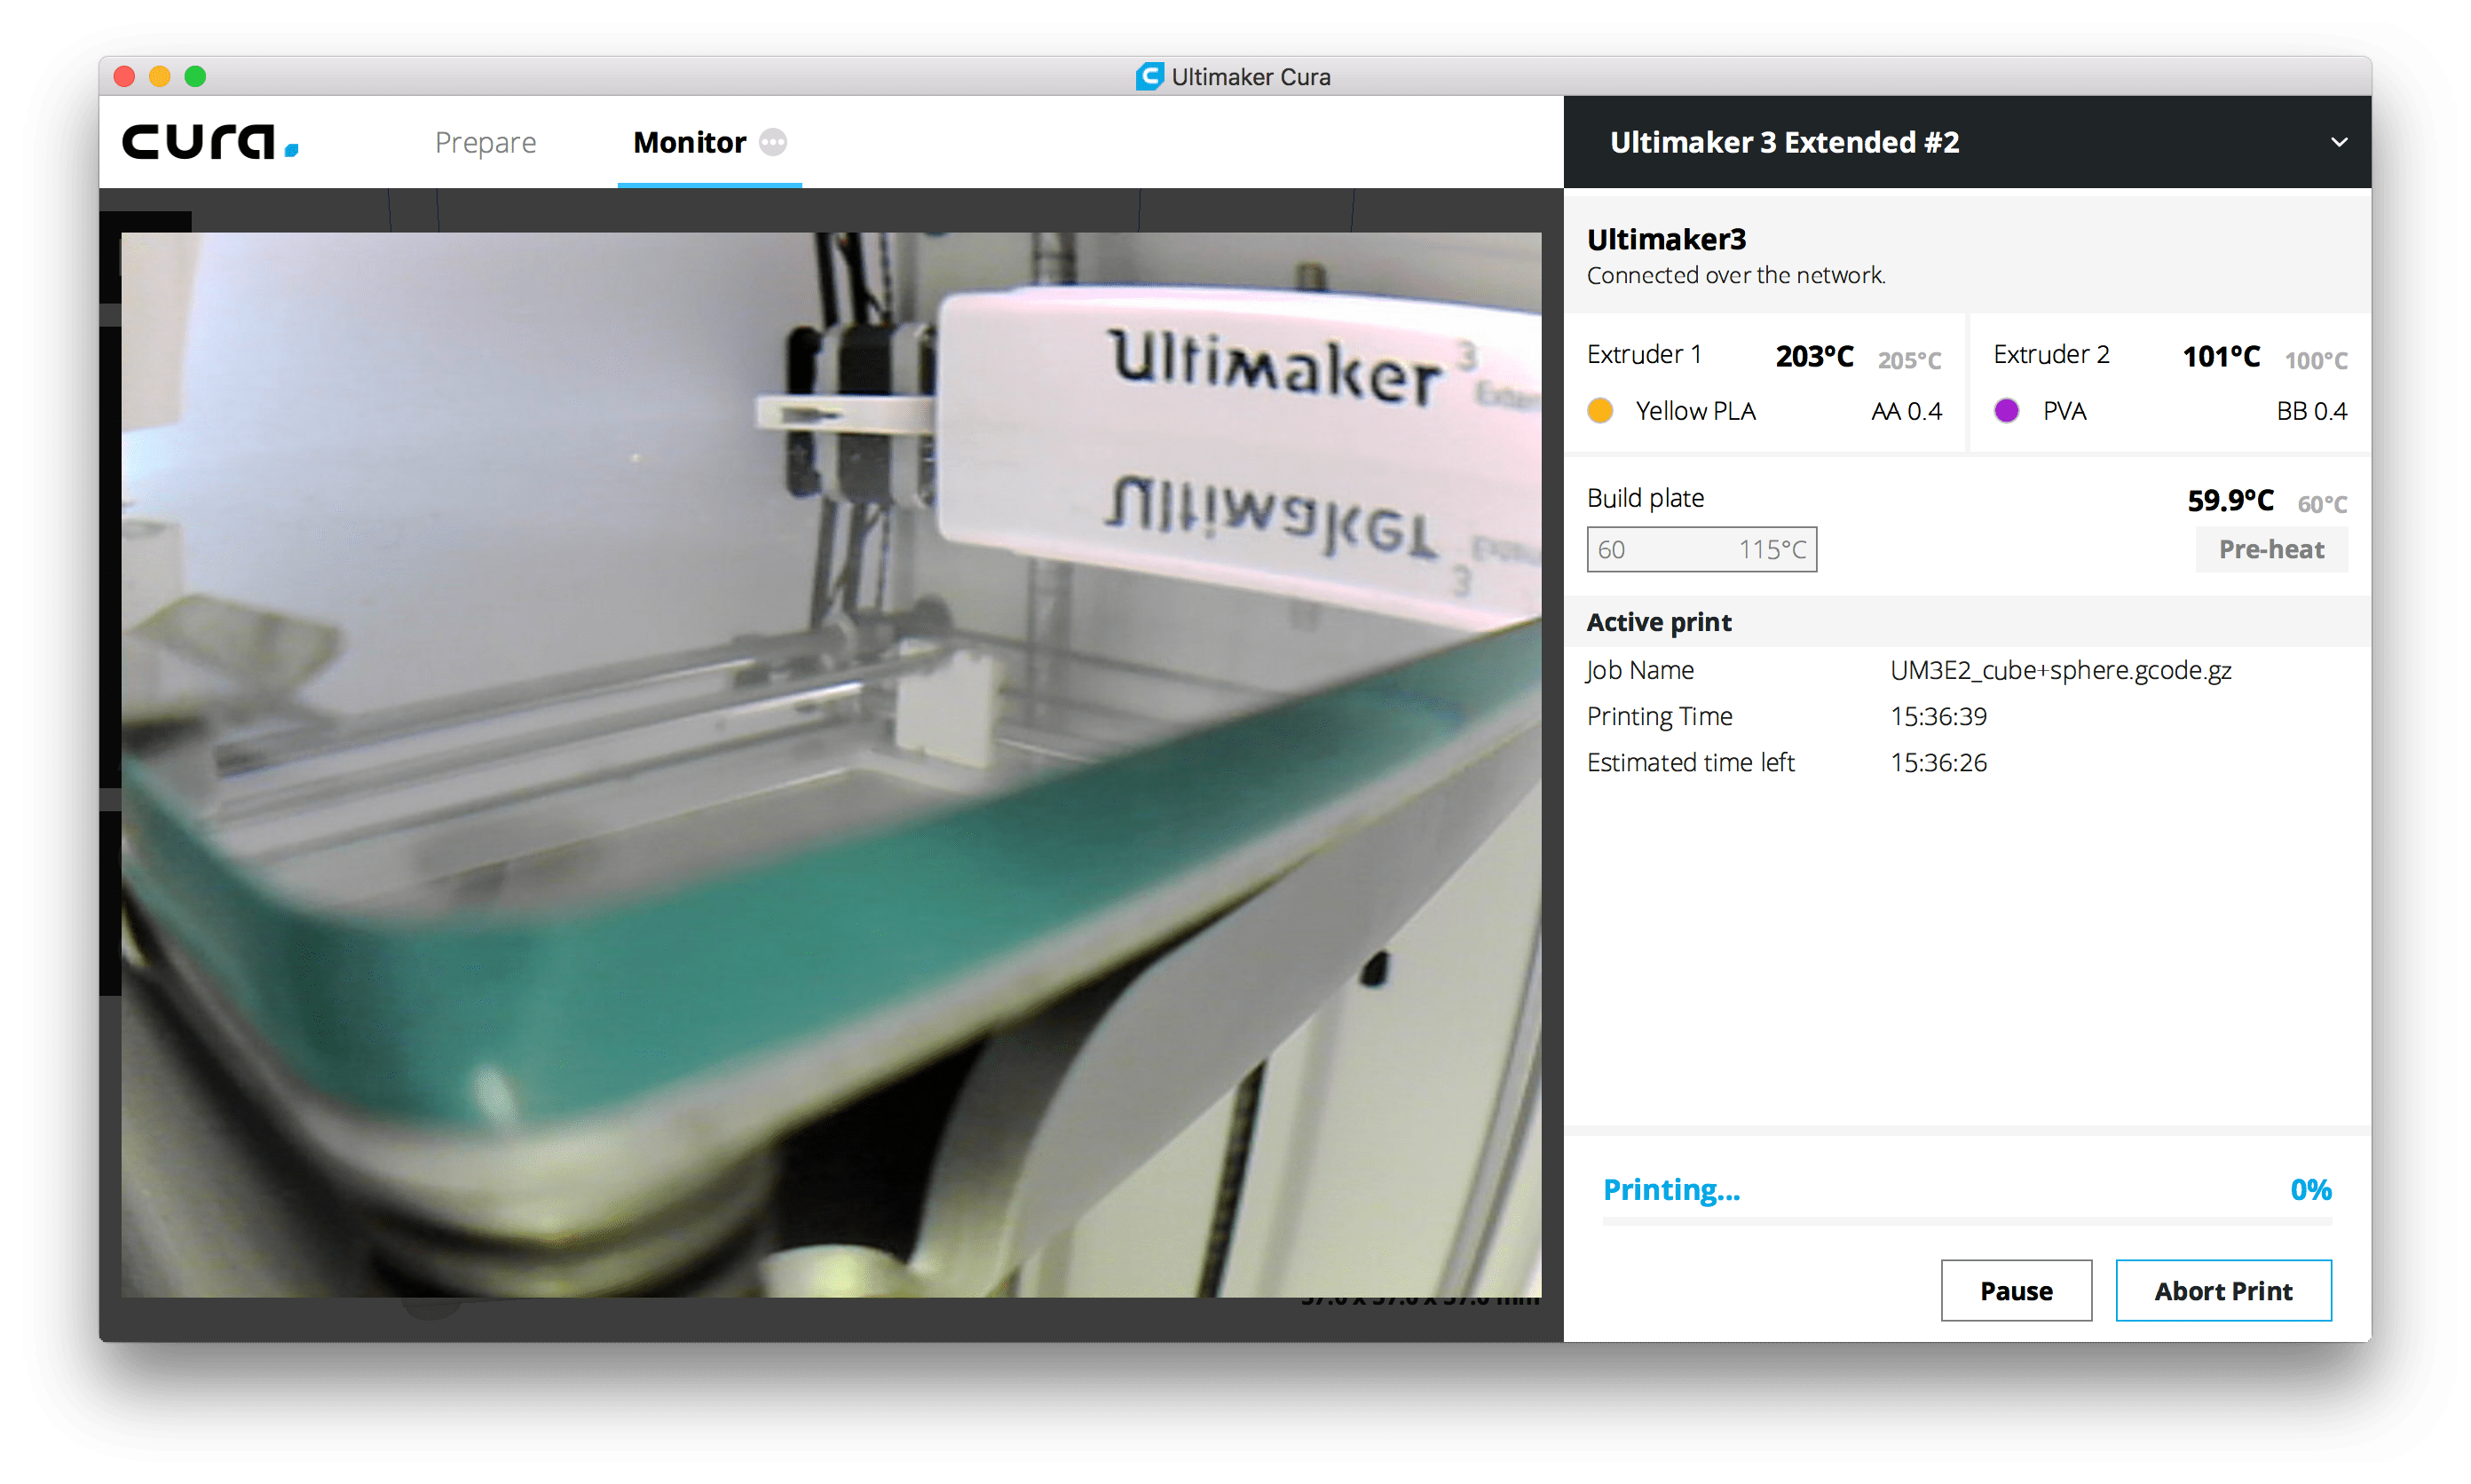
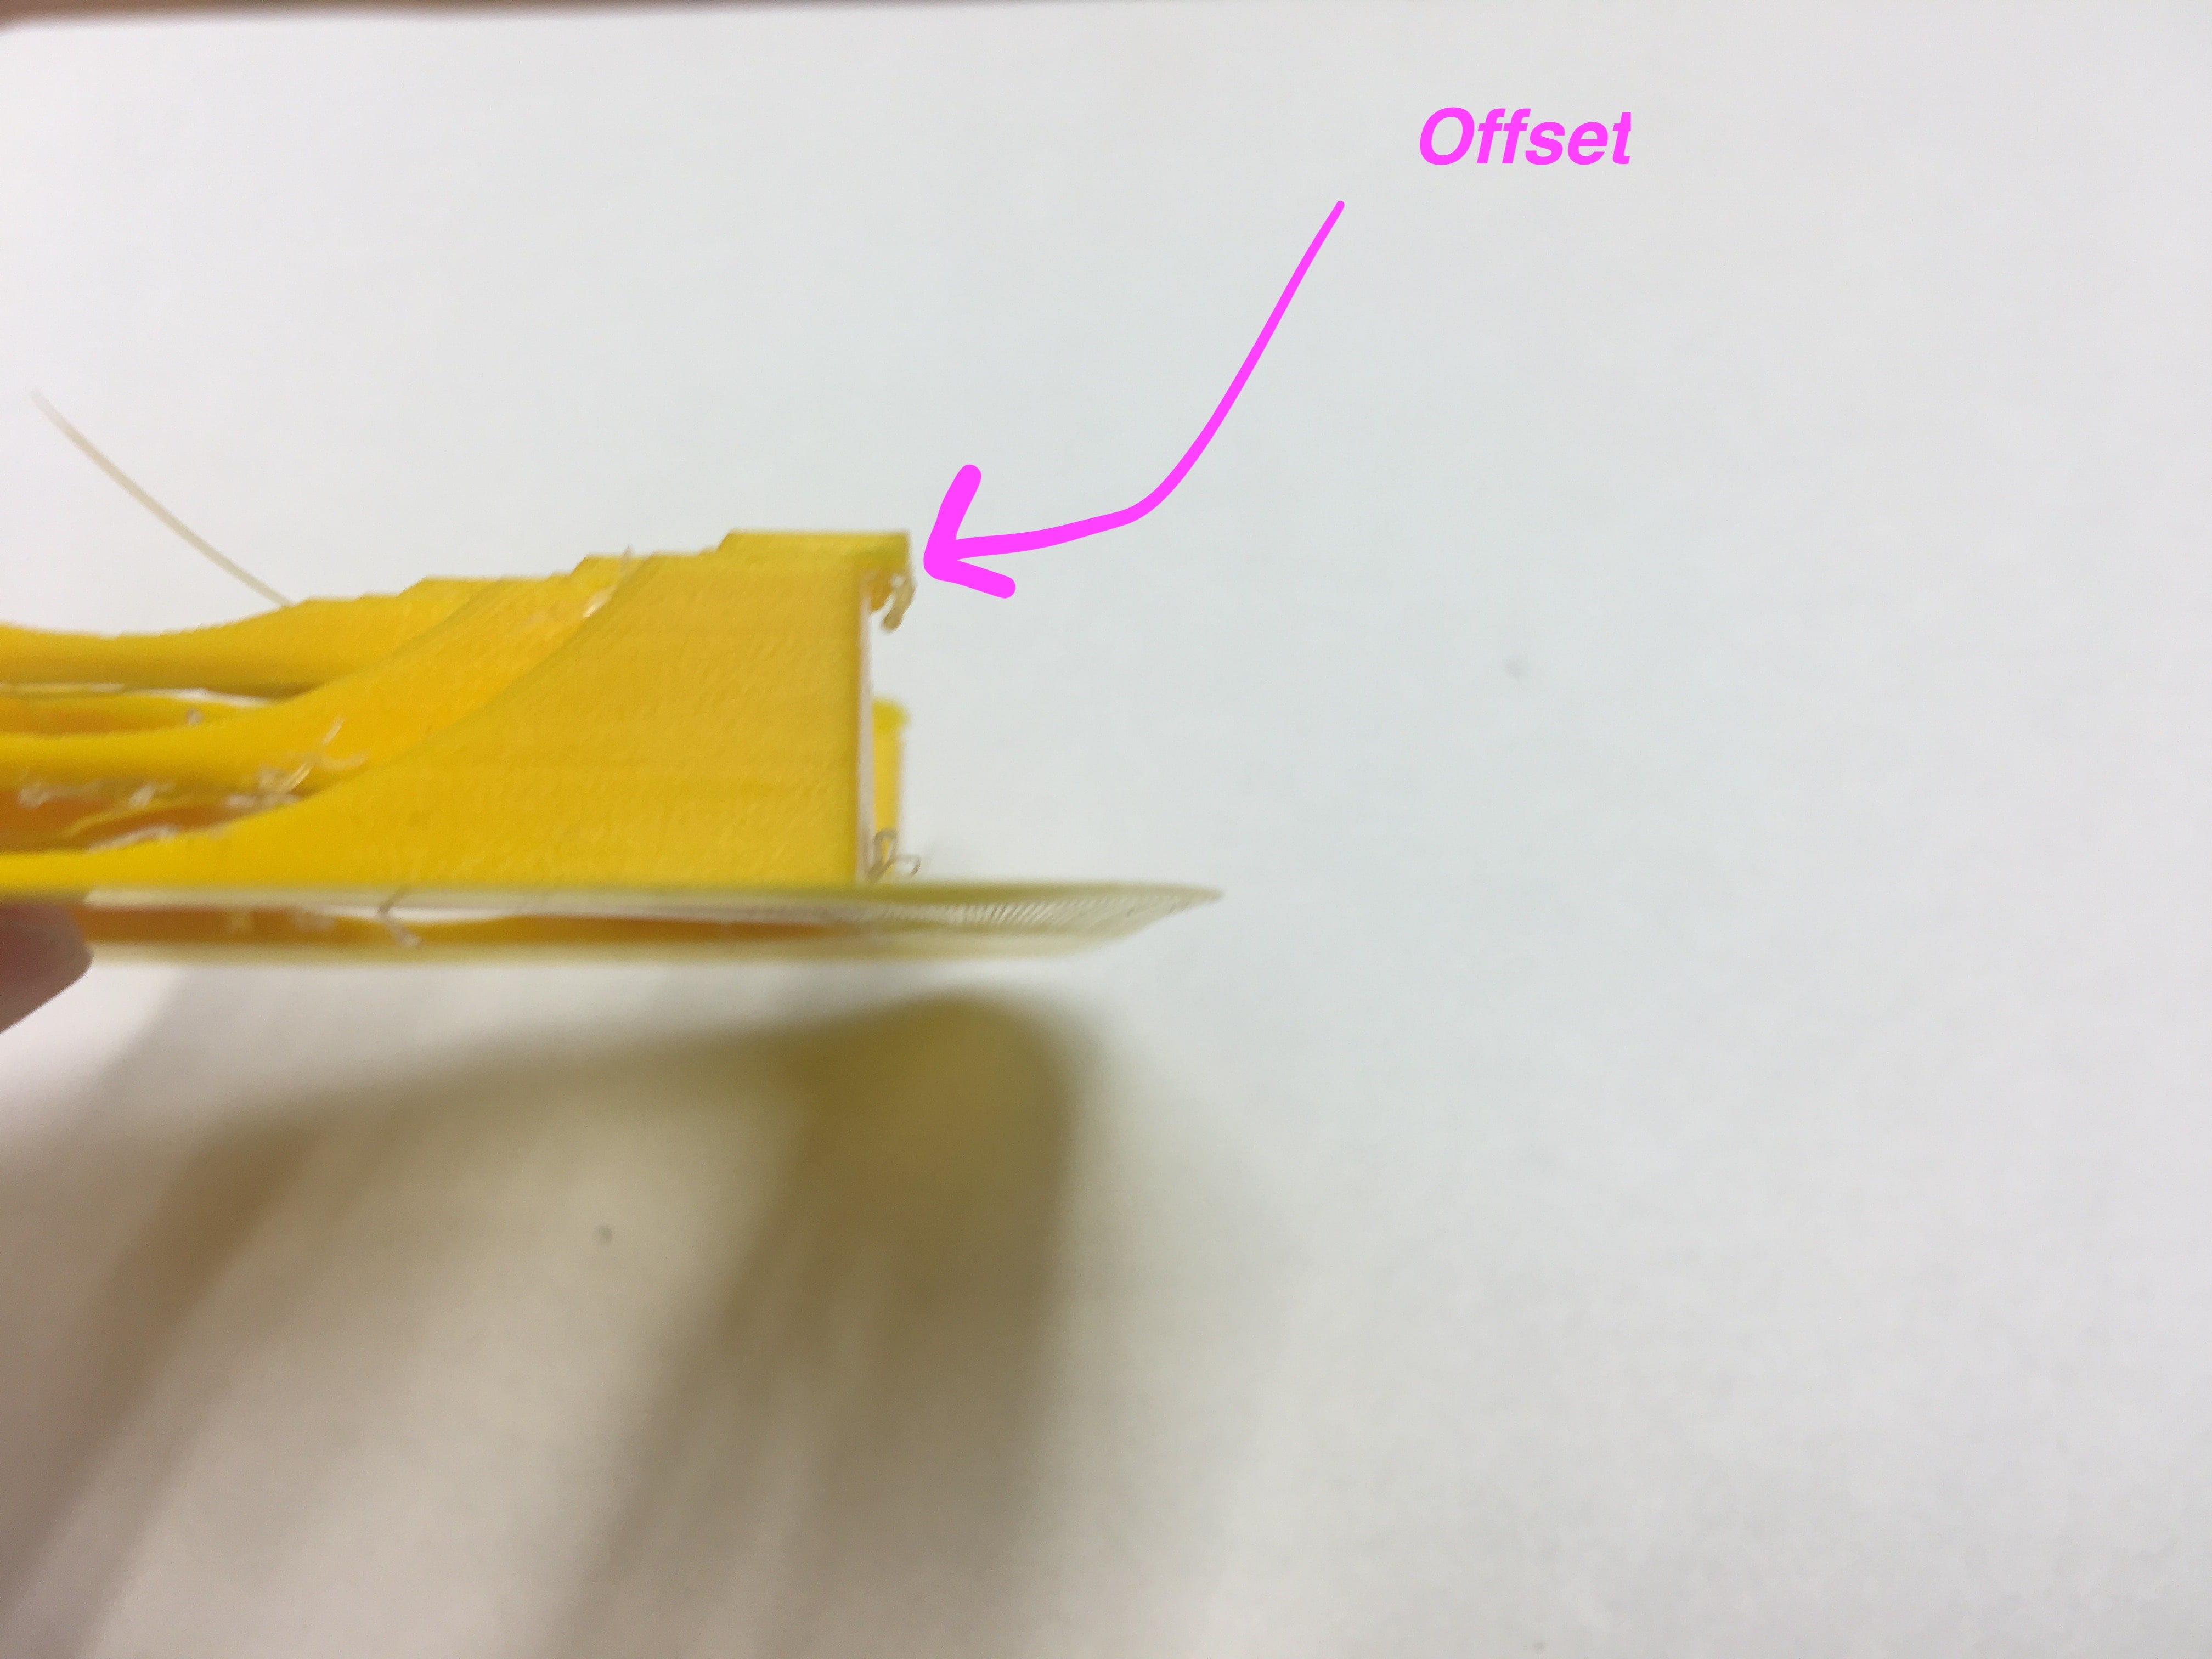
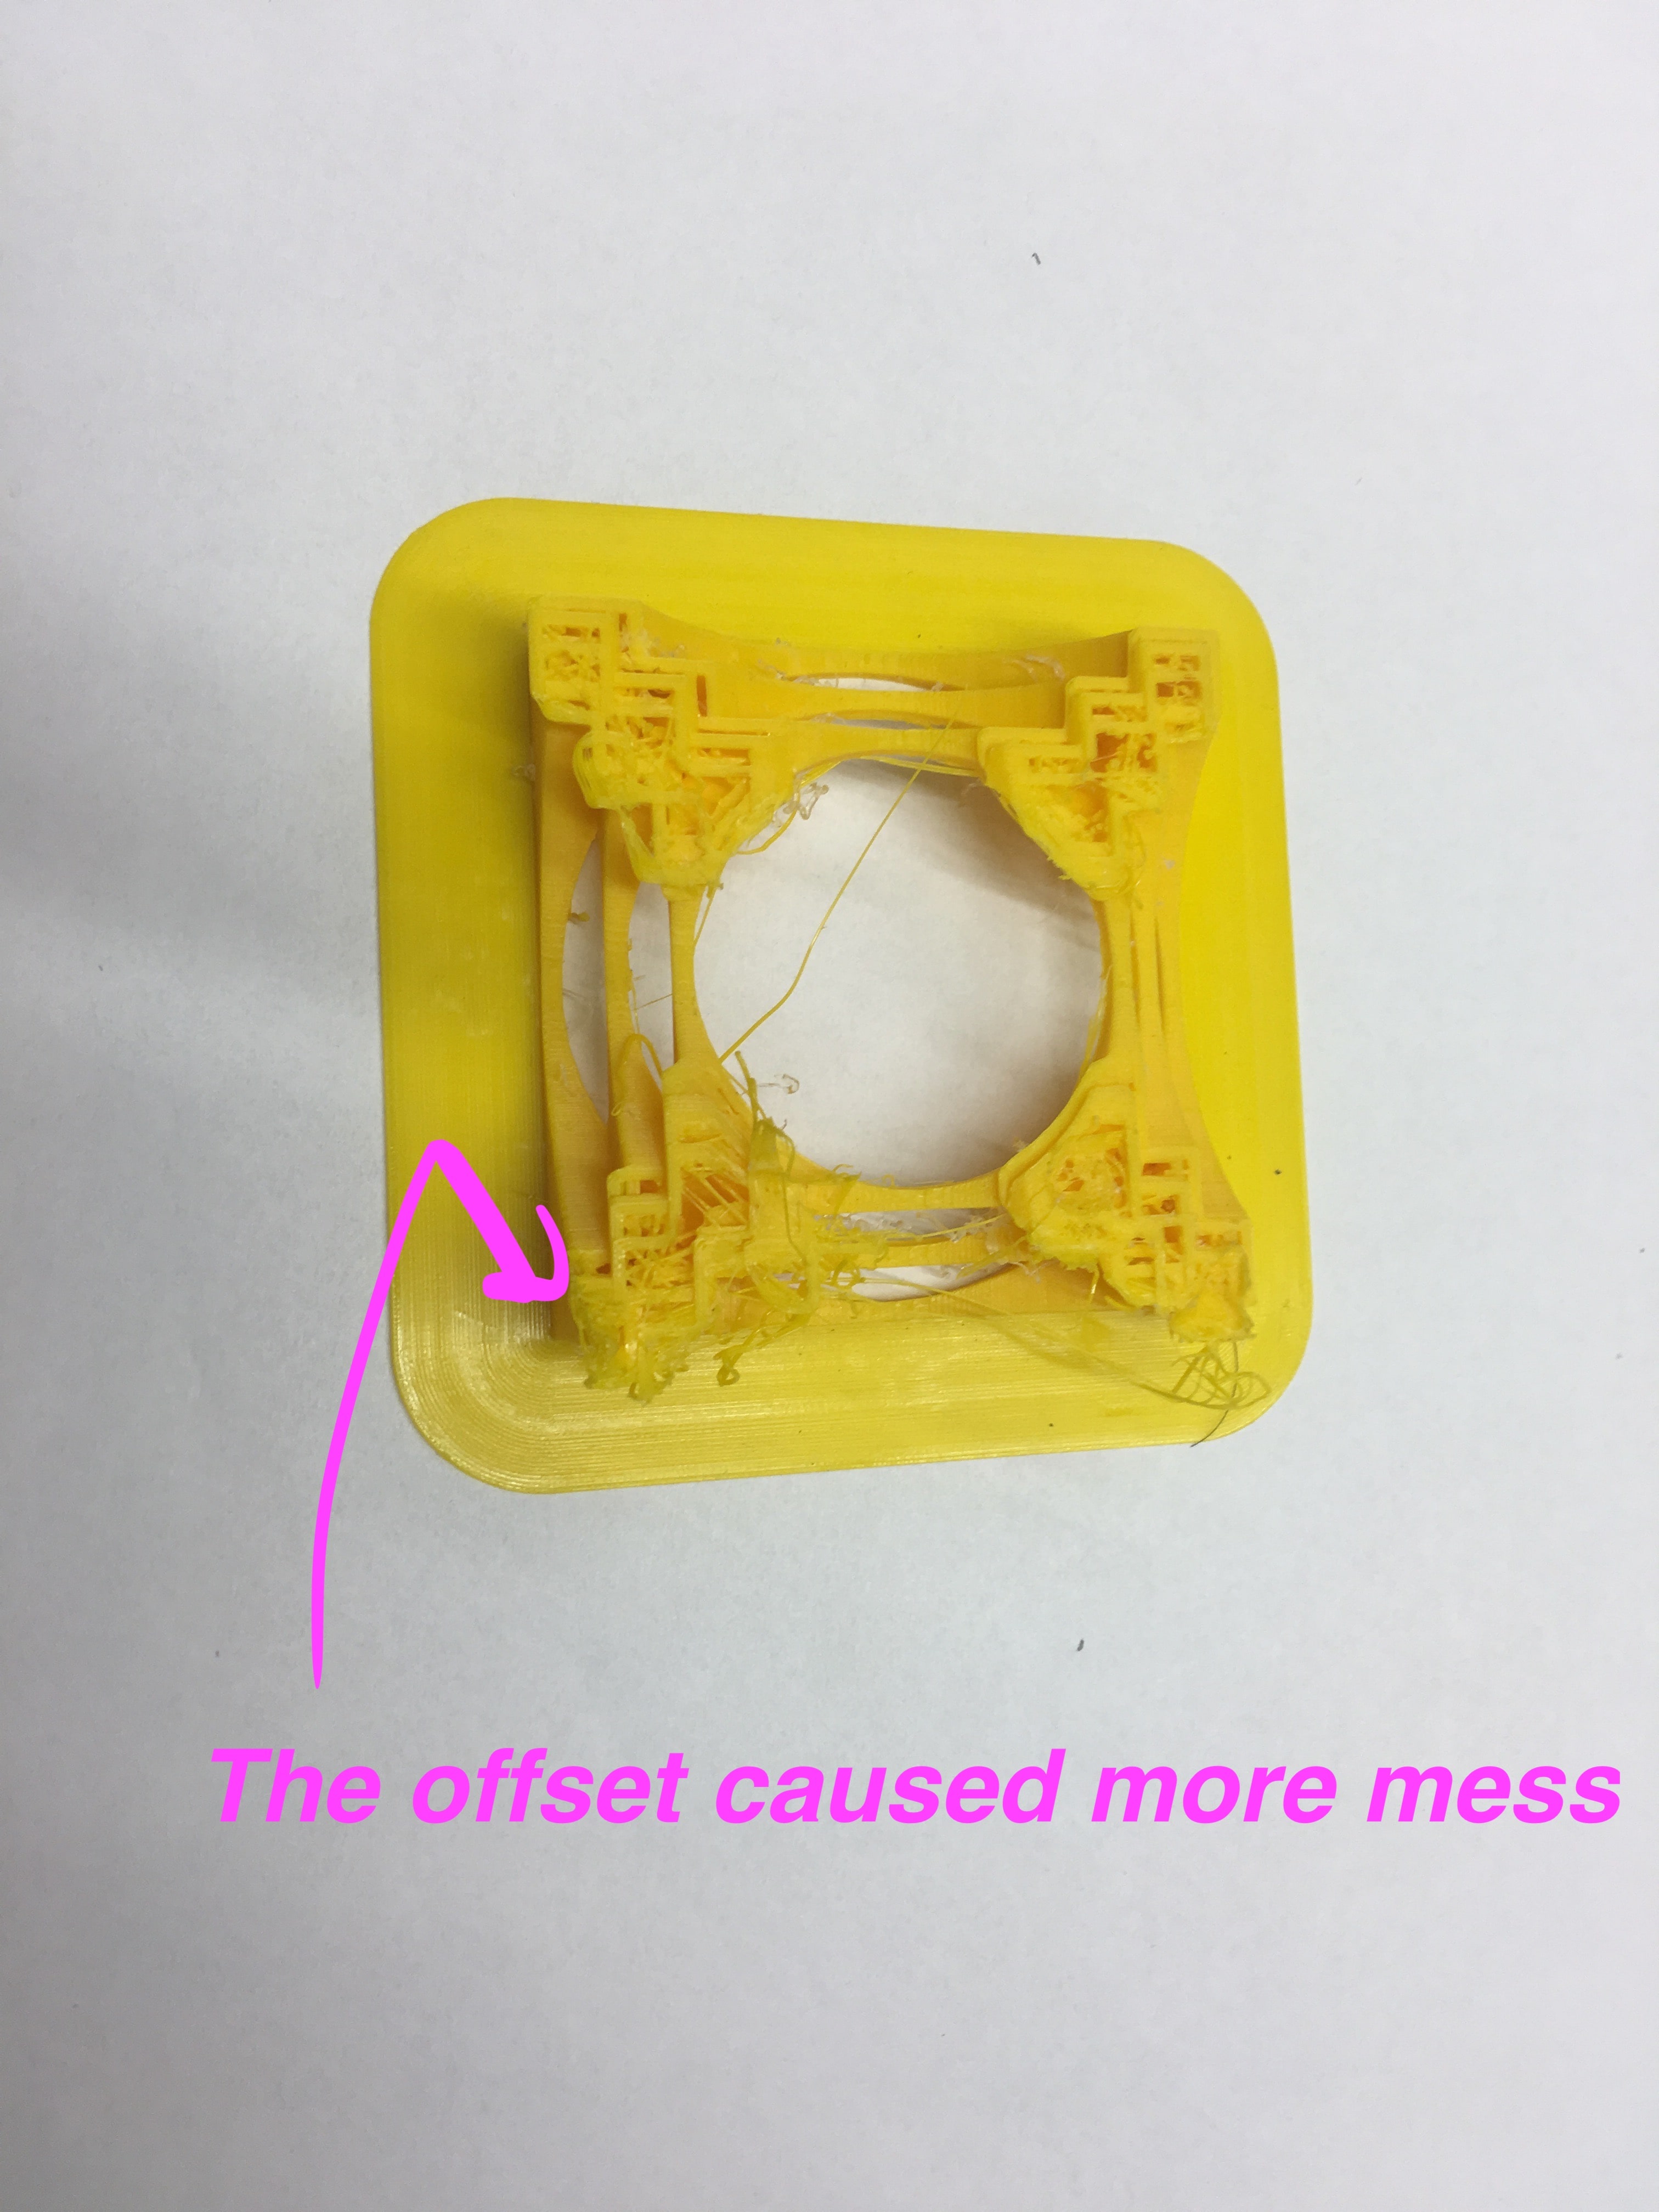
In my first design, the little sphere was floating in its "borders" and it had some "holes", so supports were absolutely needed. The nice thing about using this Ultimaker 3 is that you can use two different filaments and in my case the support filament was made from natural PVA which dissolves in water and would leave no trace. Unfortunately, this is also where the troubles began ... I had to abort my first printing attempt because the support material was not sticking to the cages' base and was balling up into a mess.
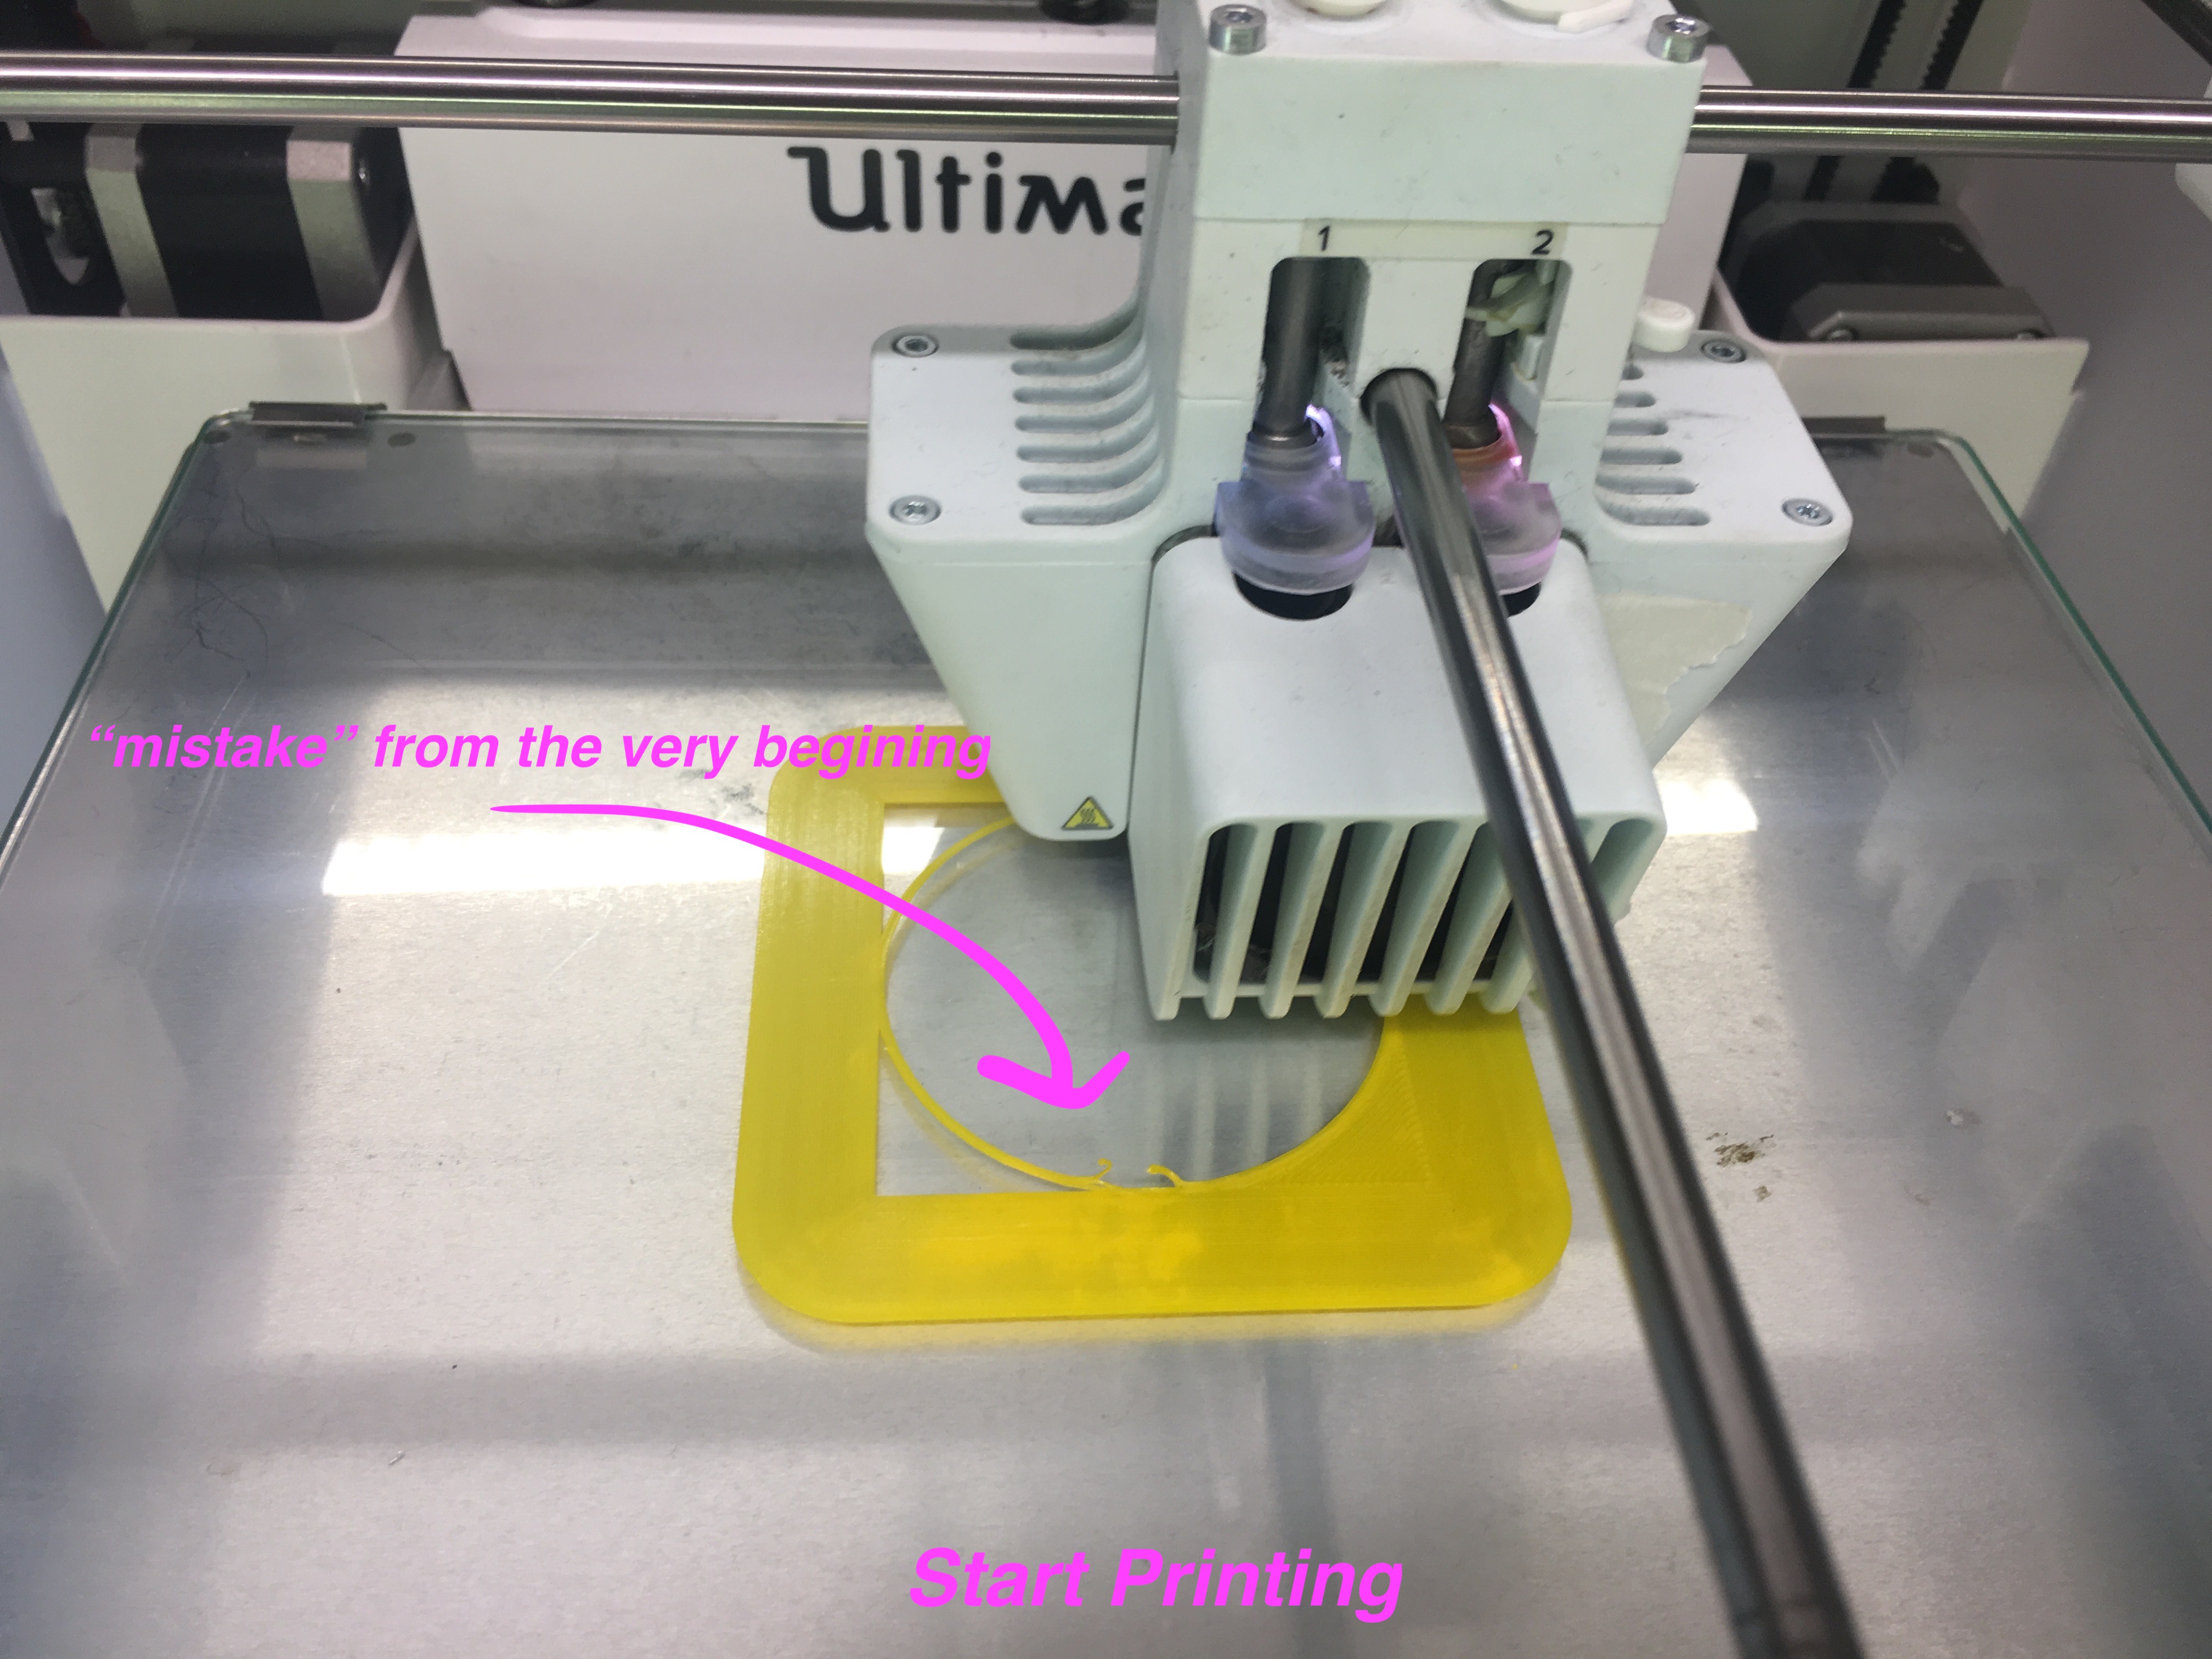

What is more, there was some extraordinarily phenomenon about offset of printing. All printers at our lab had it during that night. Not sure, but probably there was some electric racing, that caused the offset but did not turned off the printers.
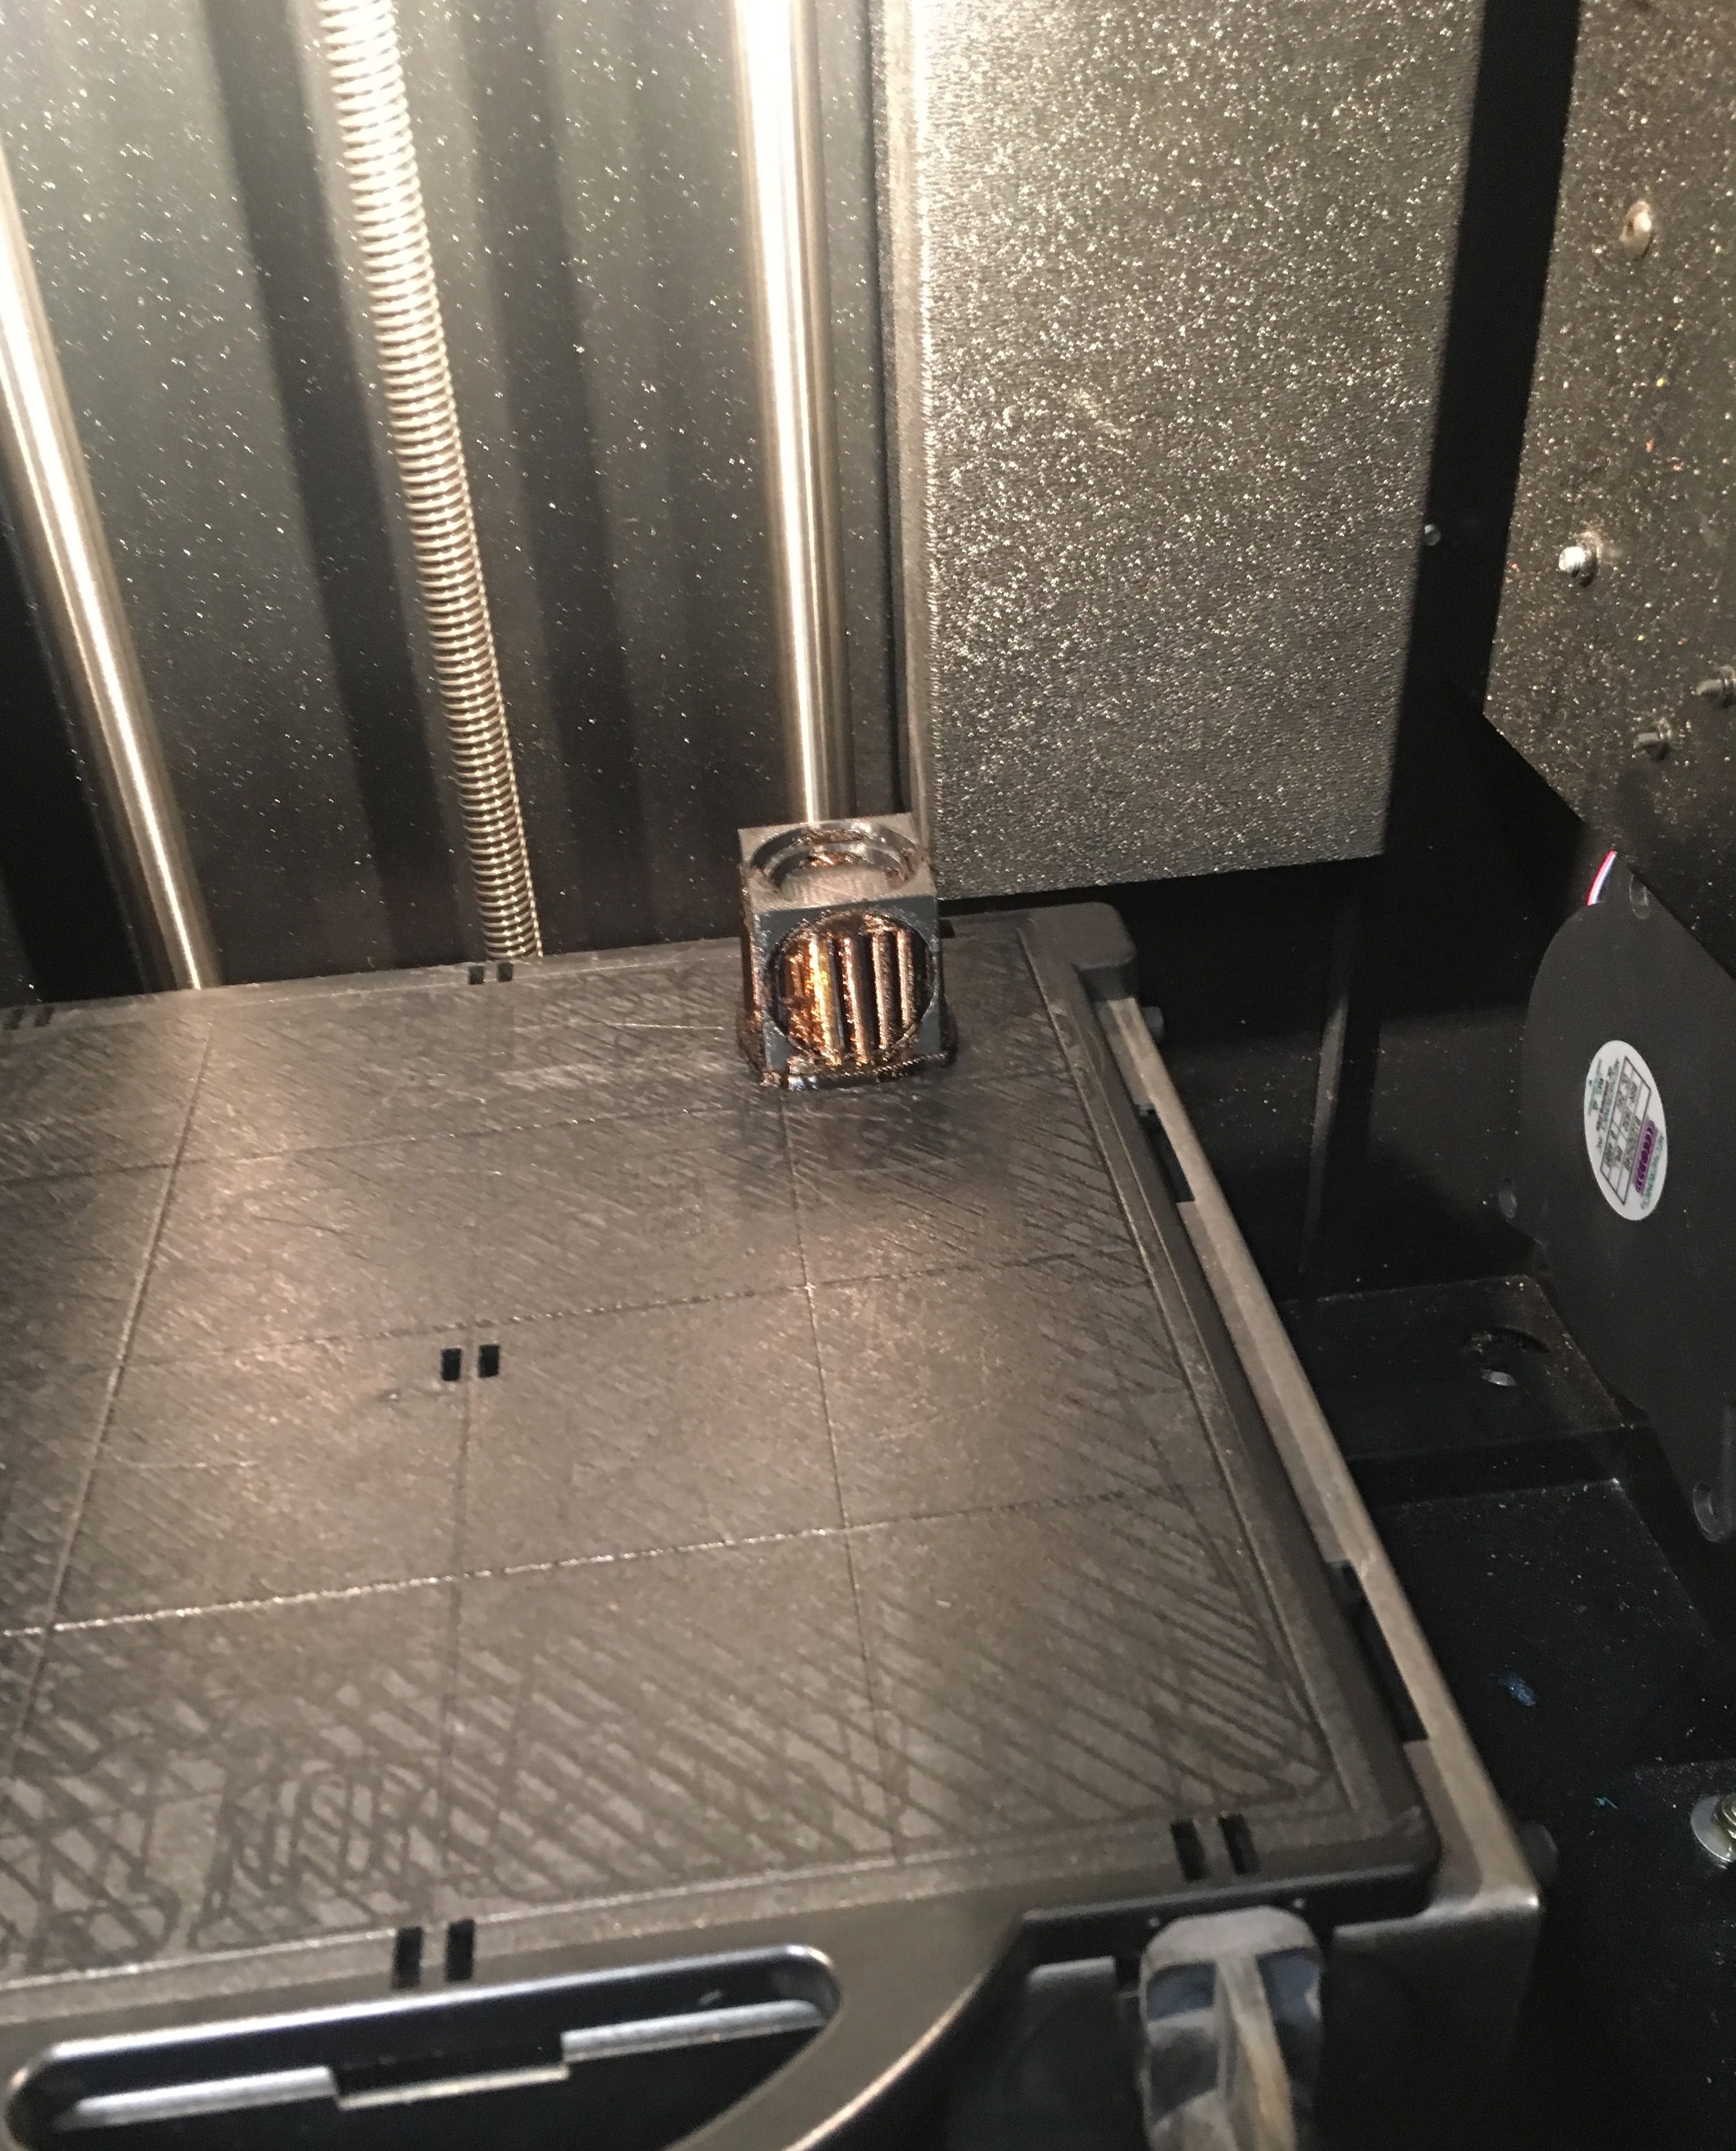
The 3D Printer v.2
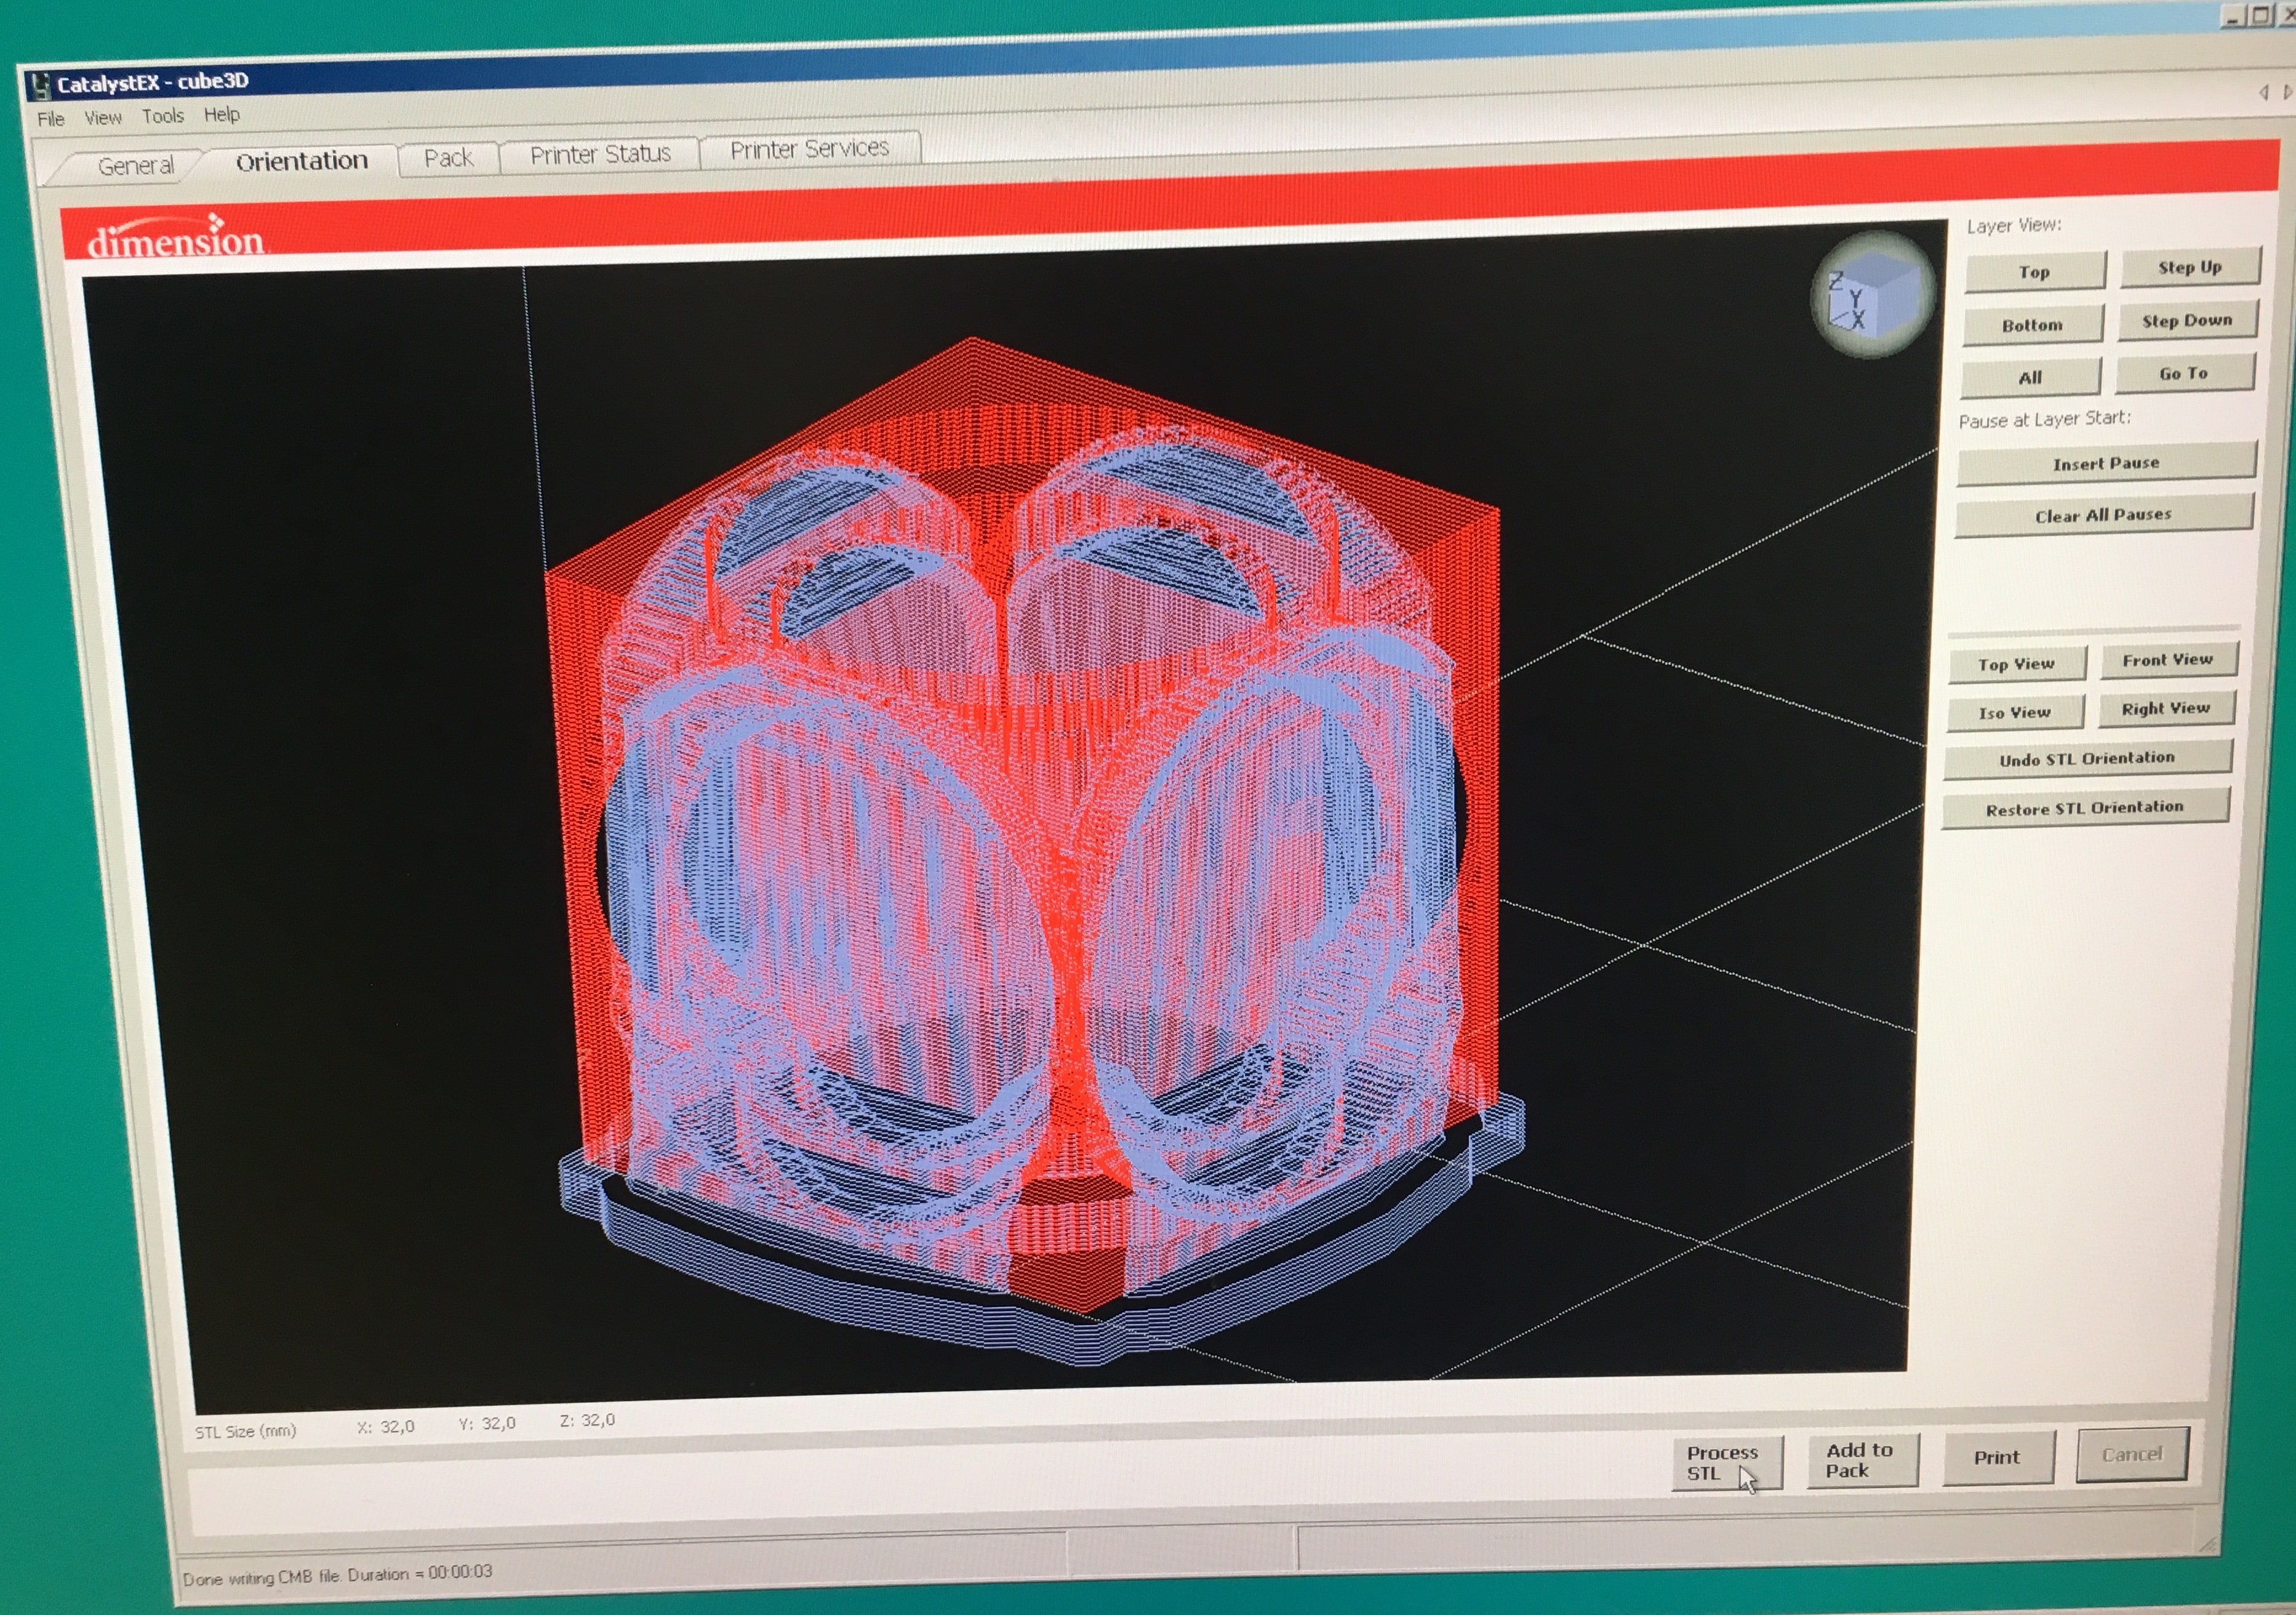
For my second try I decided to be a bit less ambitious and remade my design to be a bit less complicated. So, I made inner cube (not sphere) bigger, so it could stick to the "borders":
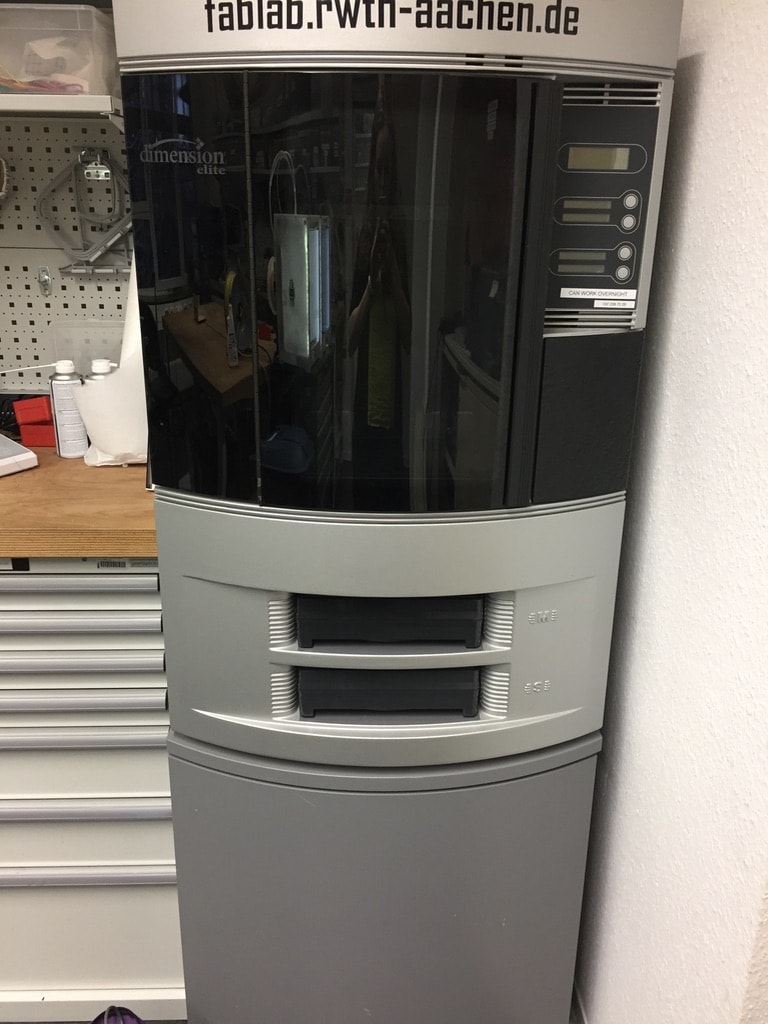
I also decided to use another 3D printer this time. I choose Stratasys Dimension Elite 3D printer , since it also has ability to use support materials and, again, was free at that time. All my printing steps are the same as in our Group Assignment.
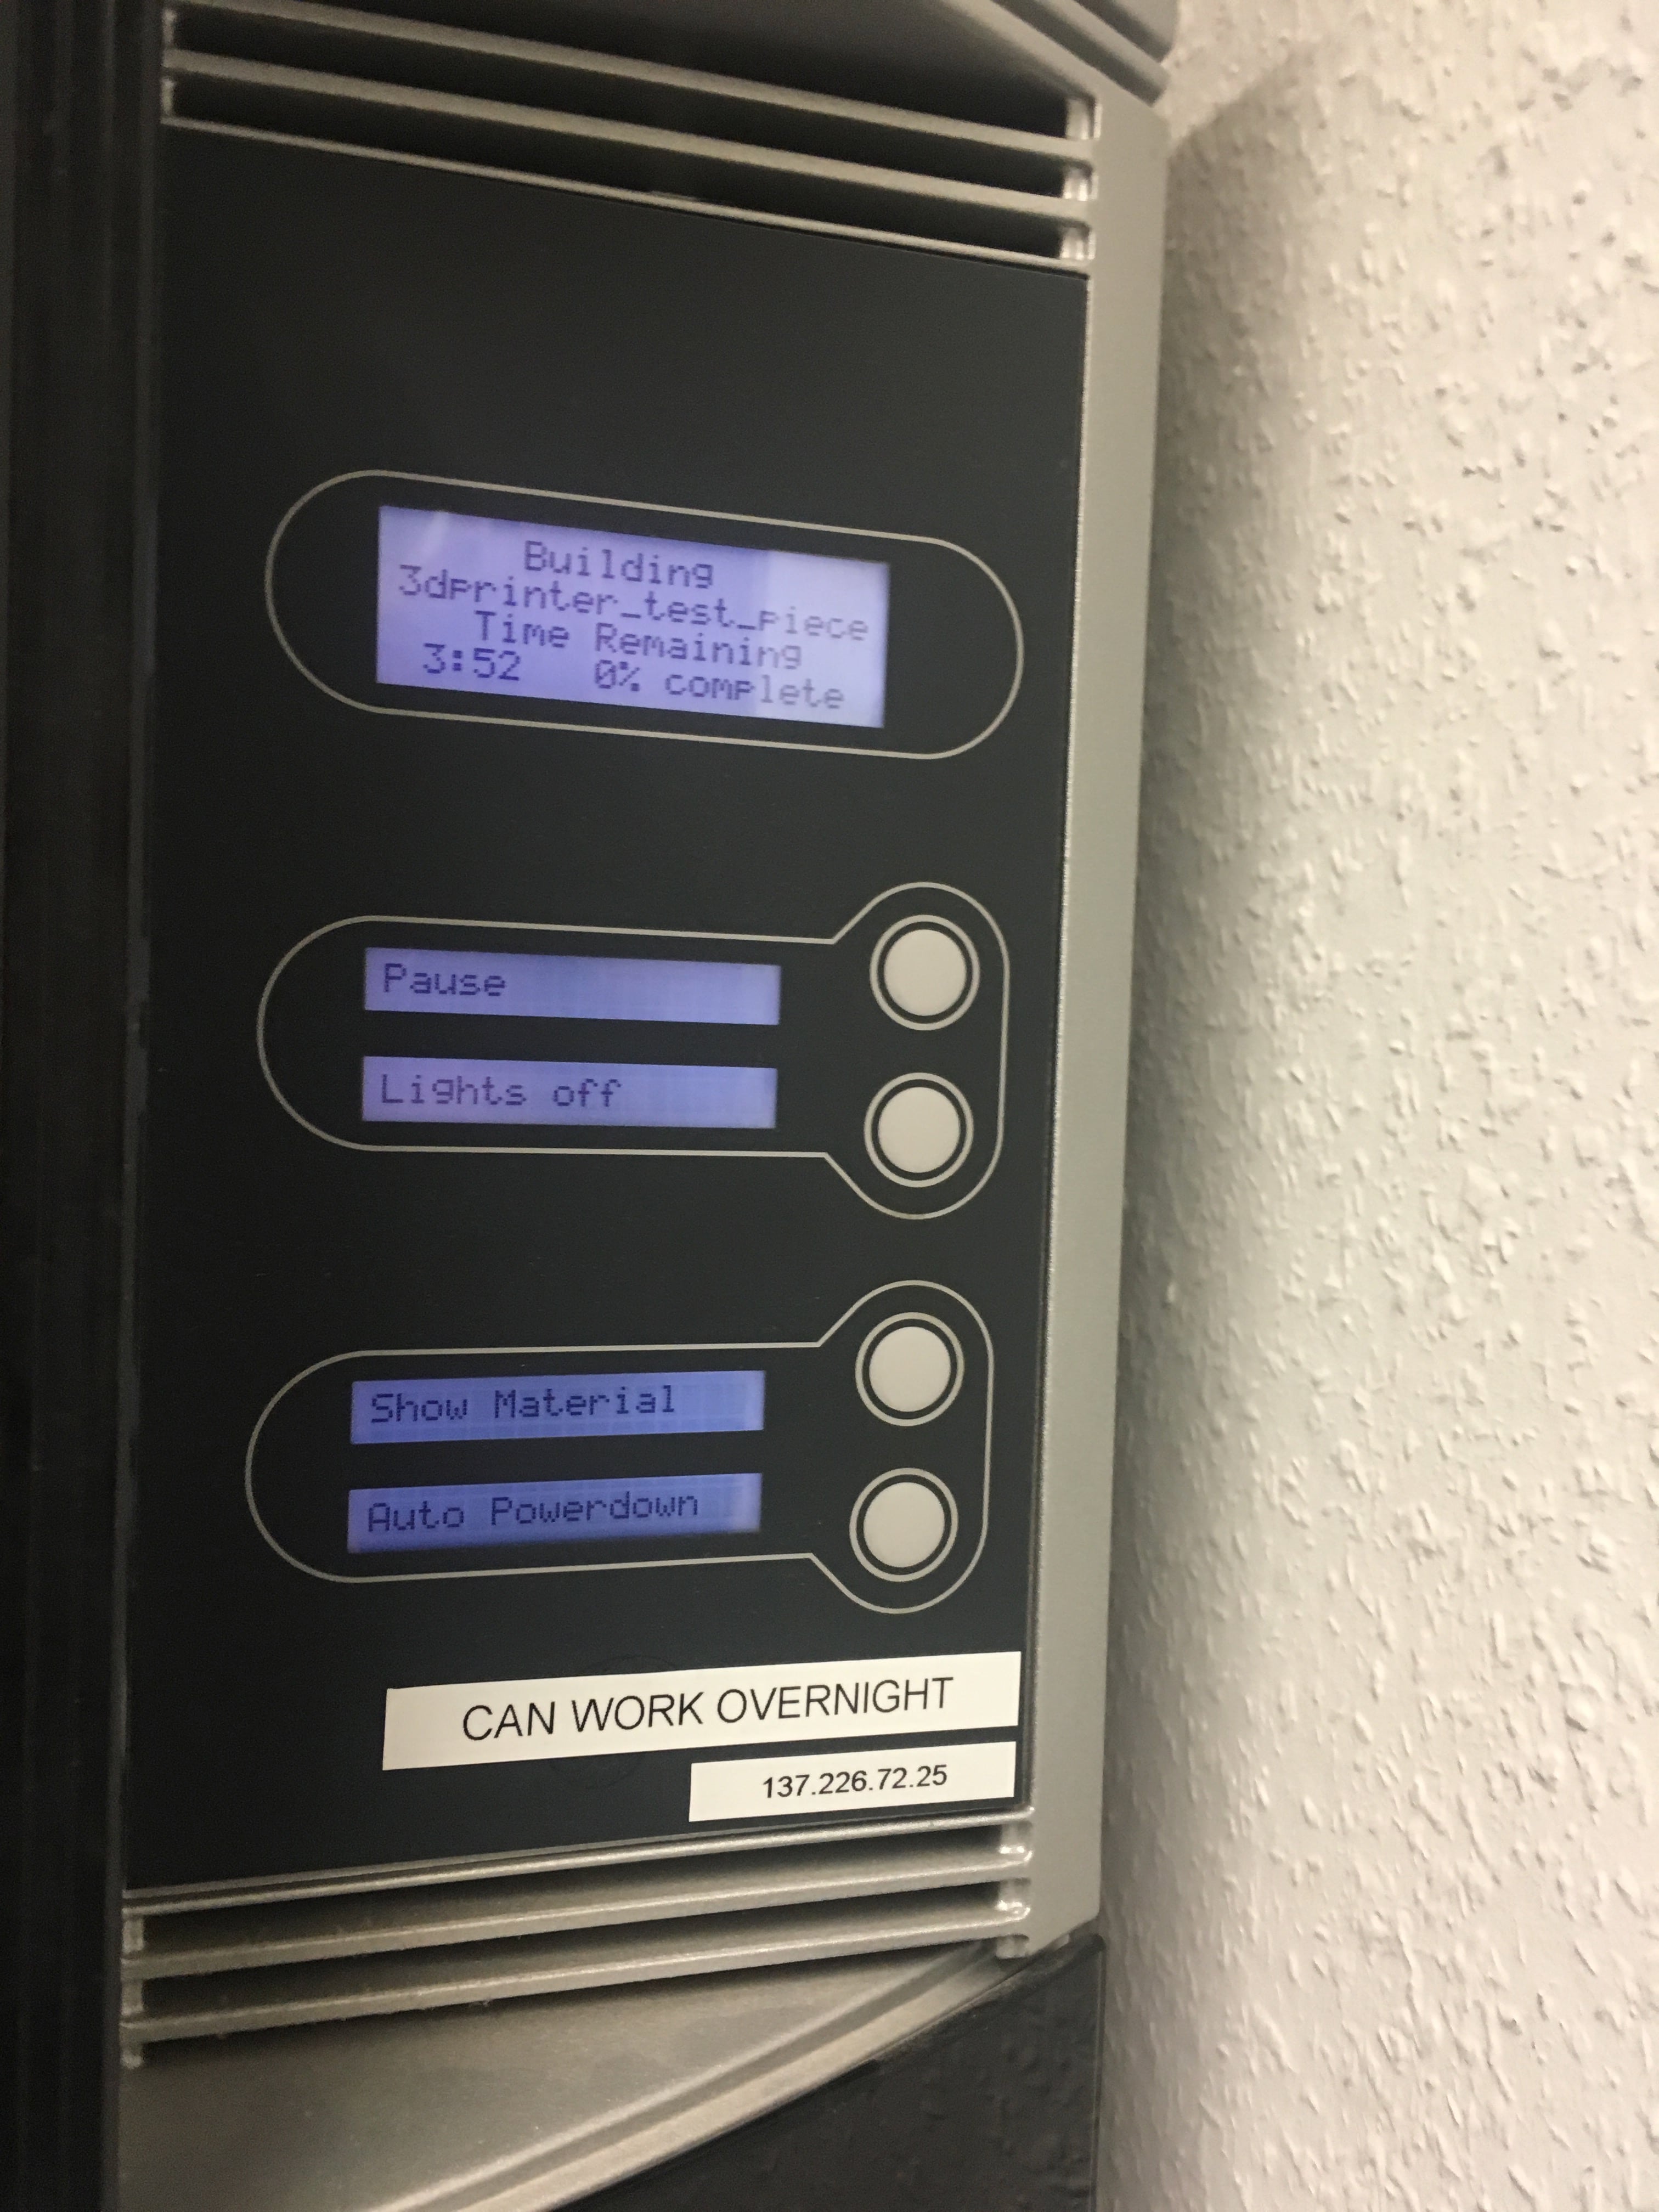
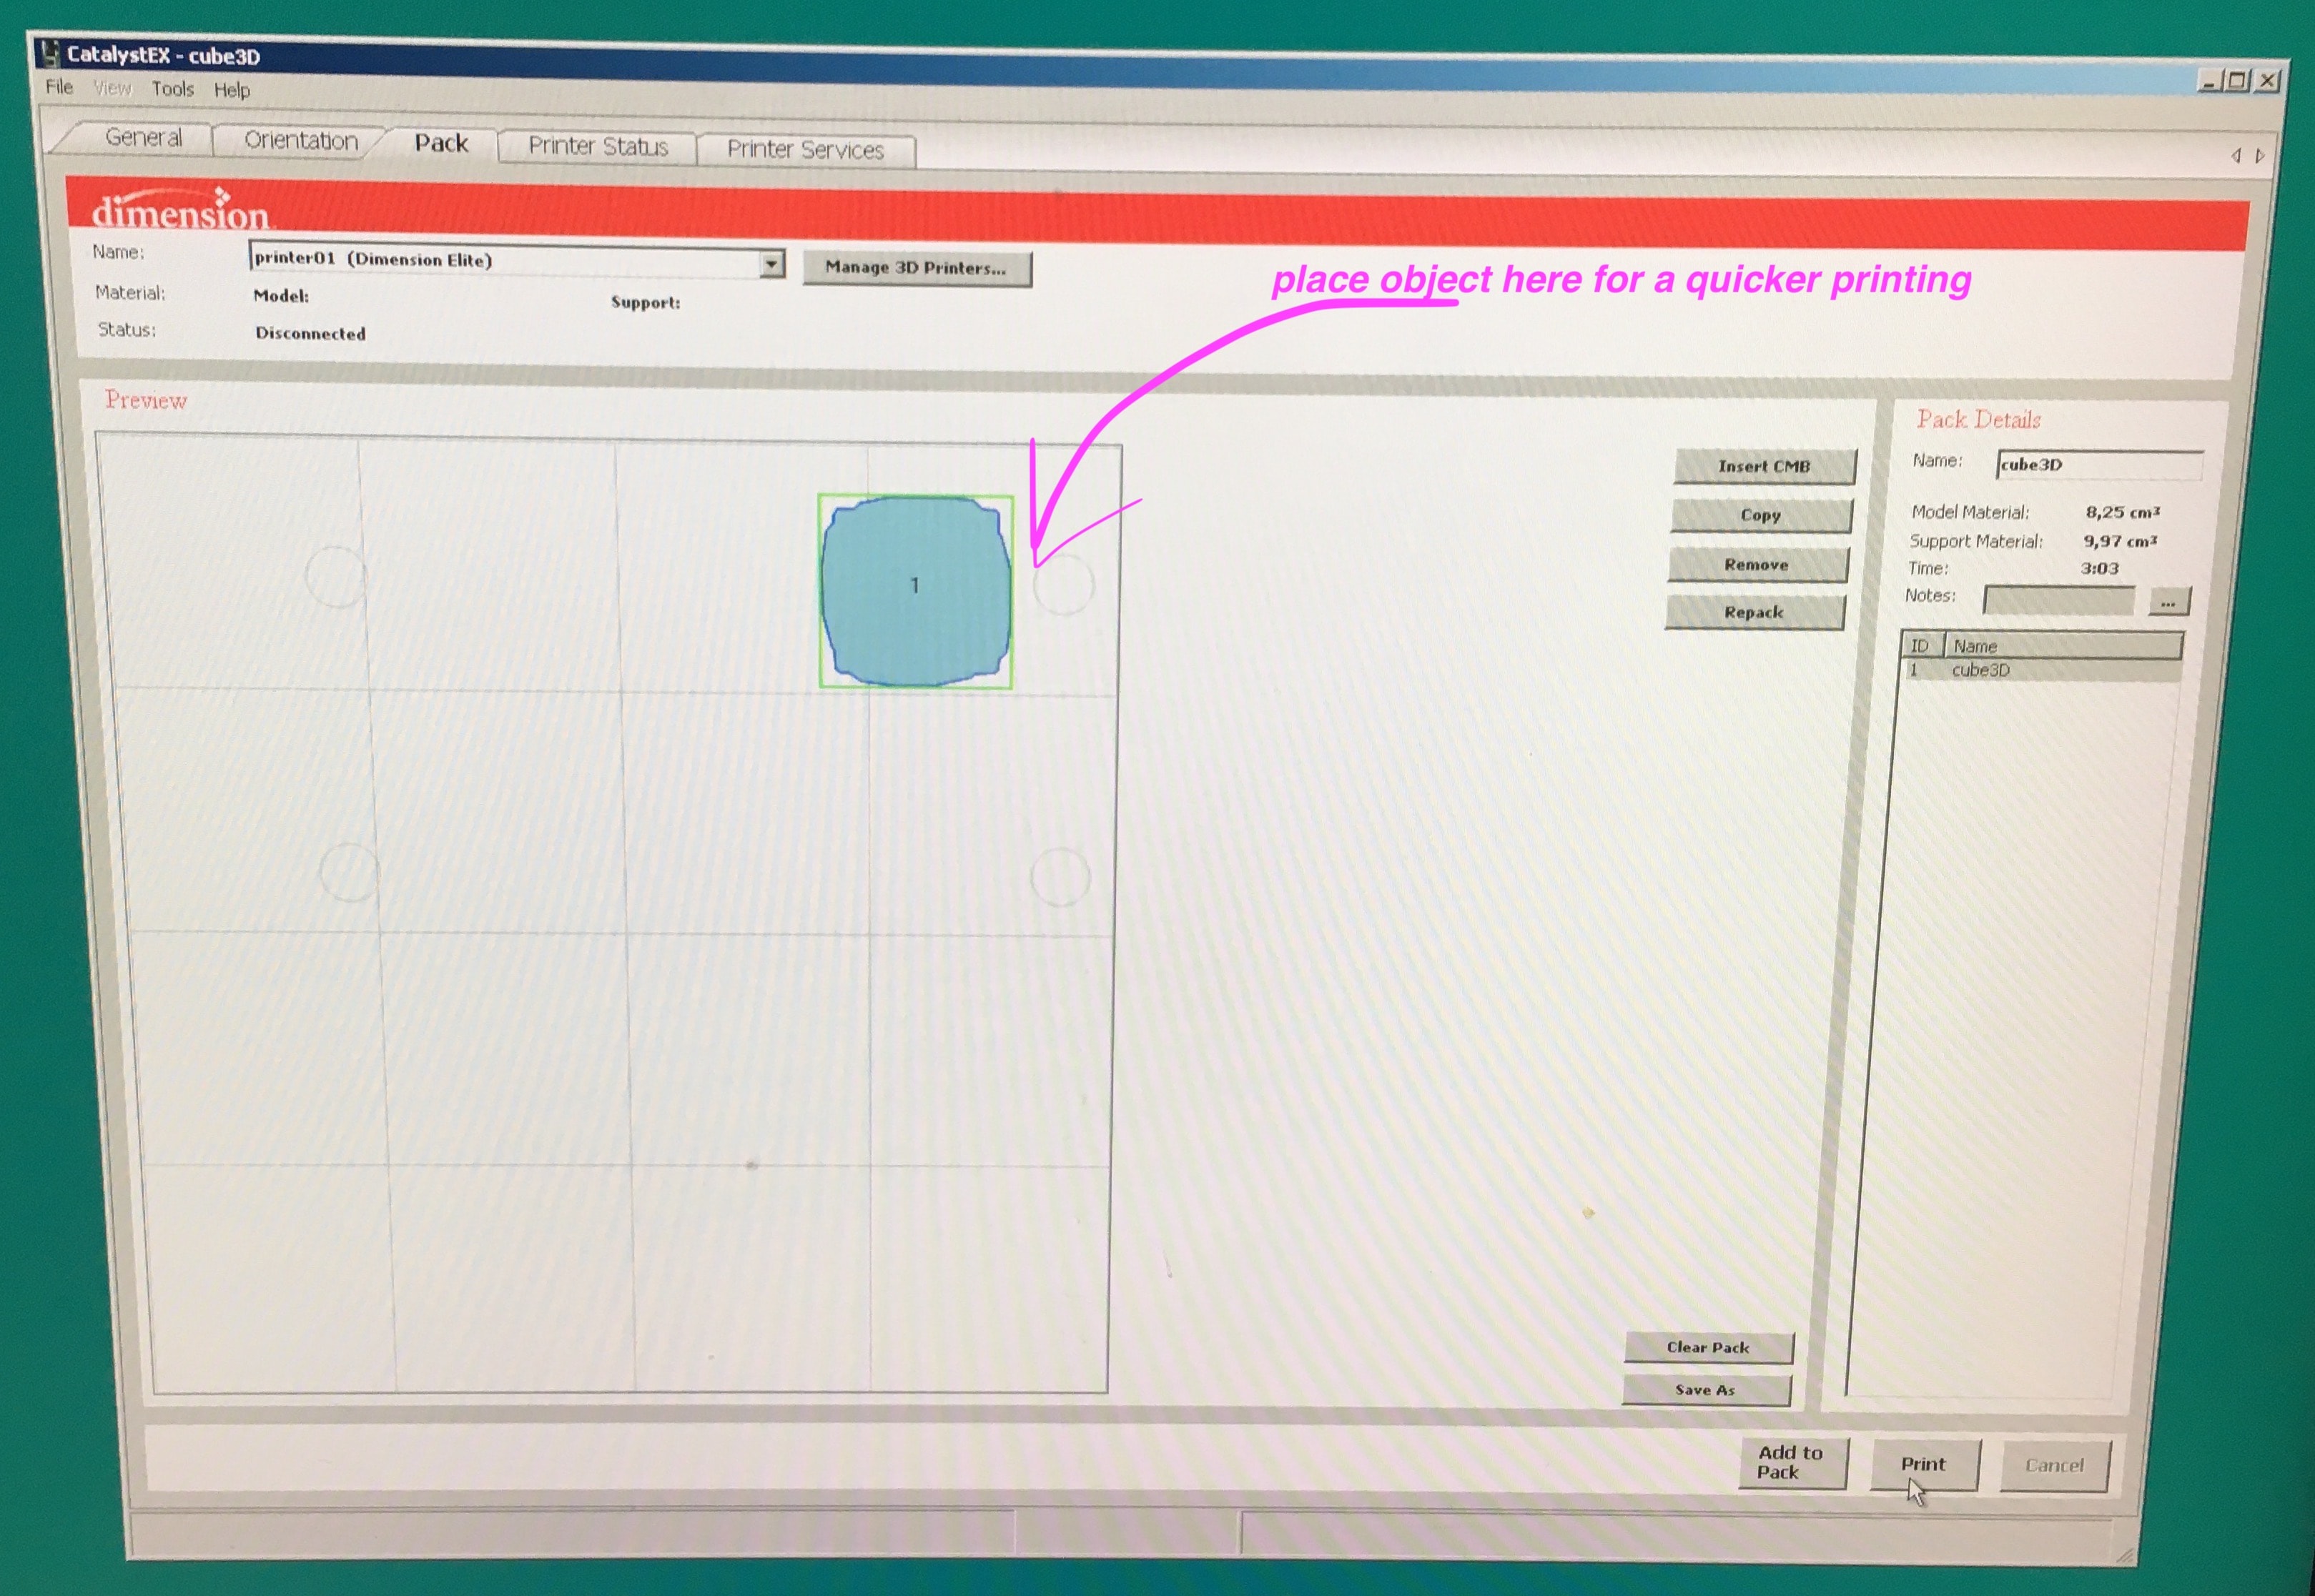
Just a few extra tips, I find out there. For example, since all printing starts from right top conner, it is a nice idea to put you object there. What is more, it also provides you information about you future printing and support material:
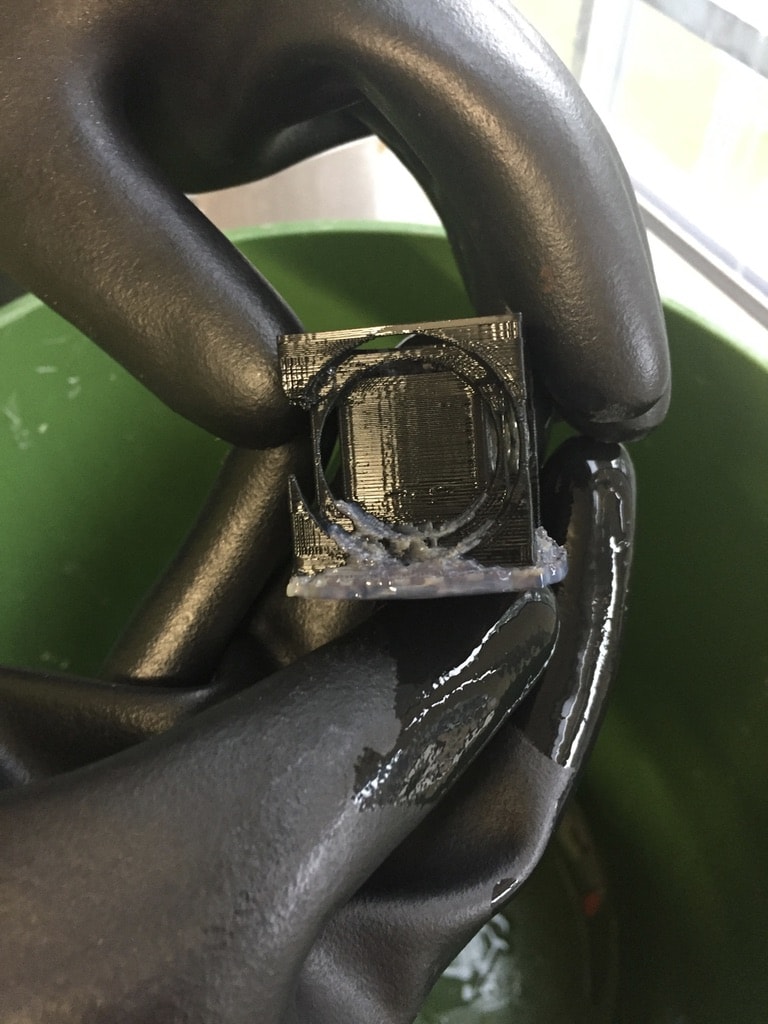
So, this time I was much more successful, but still not everything is ideal:


So, after I putted my printing into the vat of base and waited for a 24 hours, my printing looks like that:
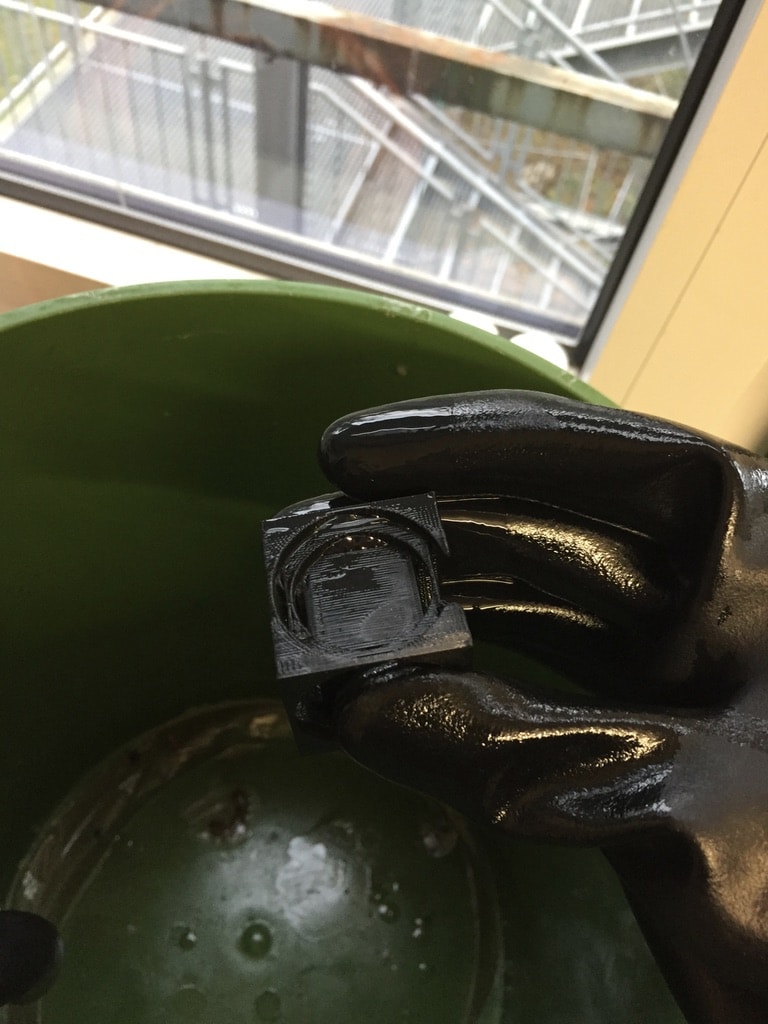
Since not all support material was gone, I had to wait extra 24 hours.
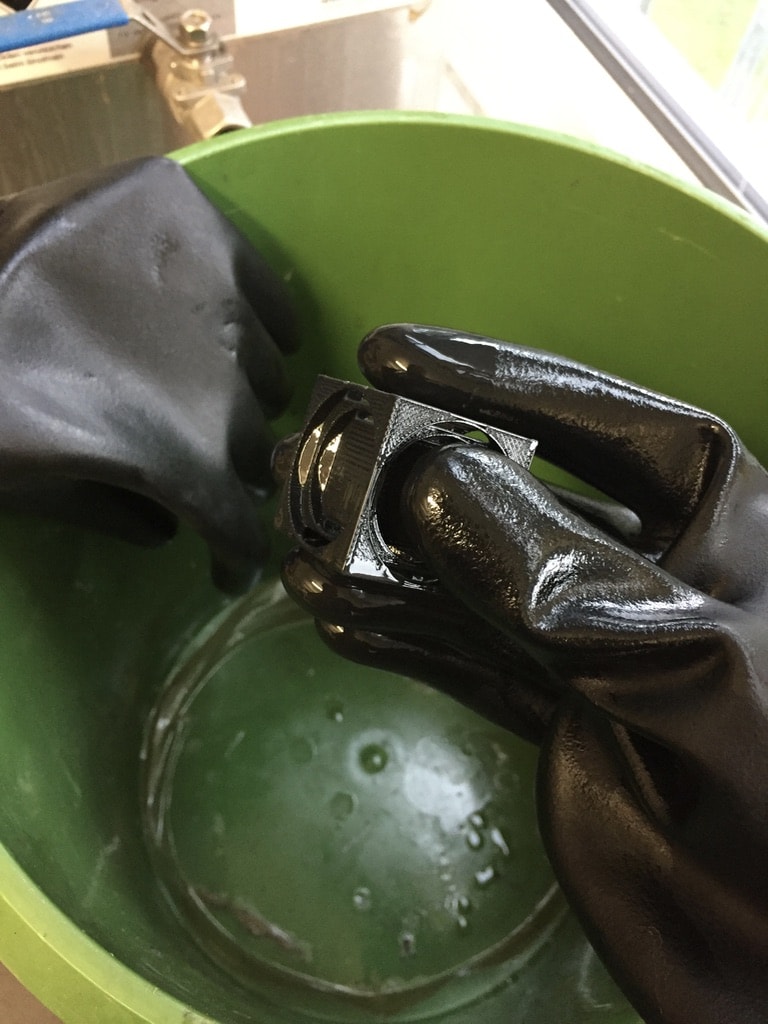
Now it is finished:
3D Scanner
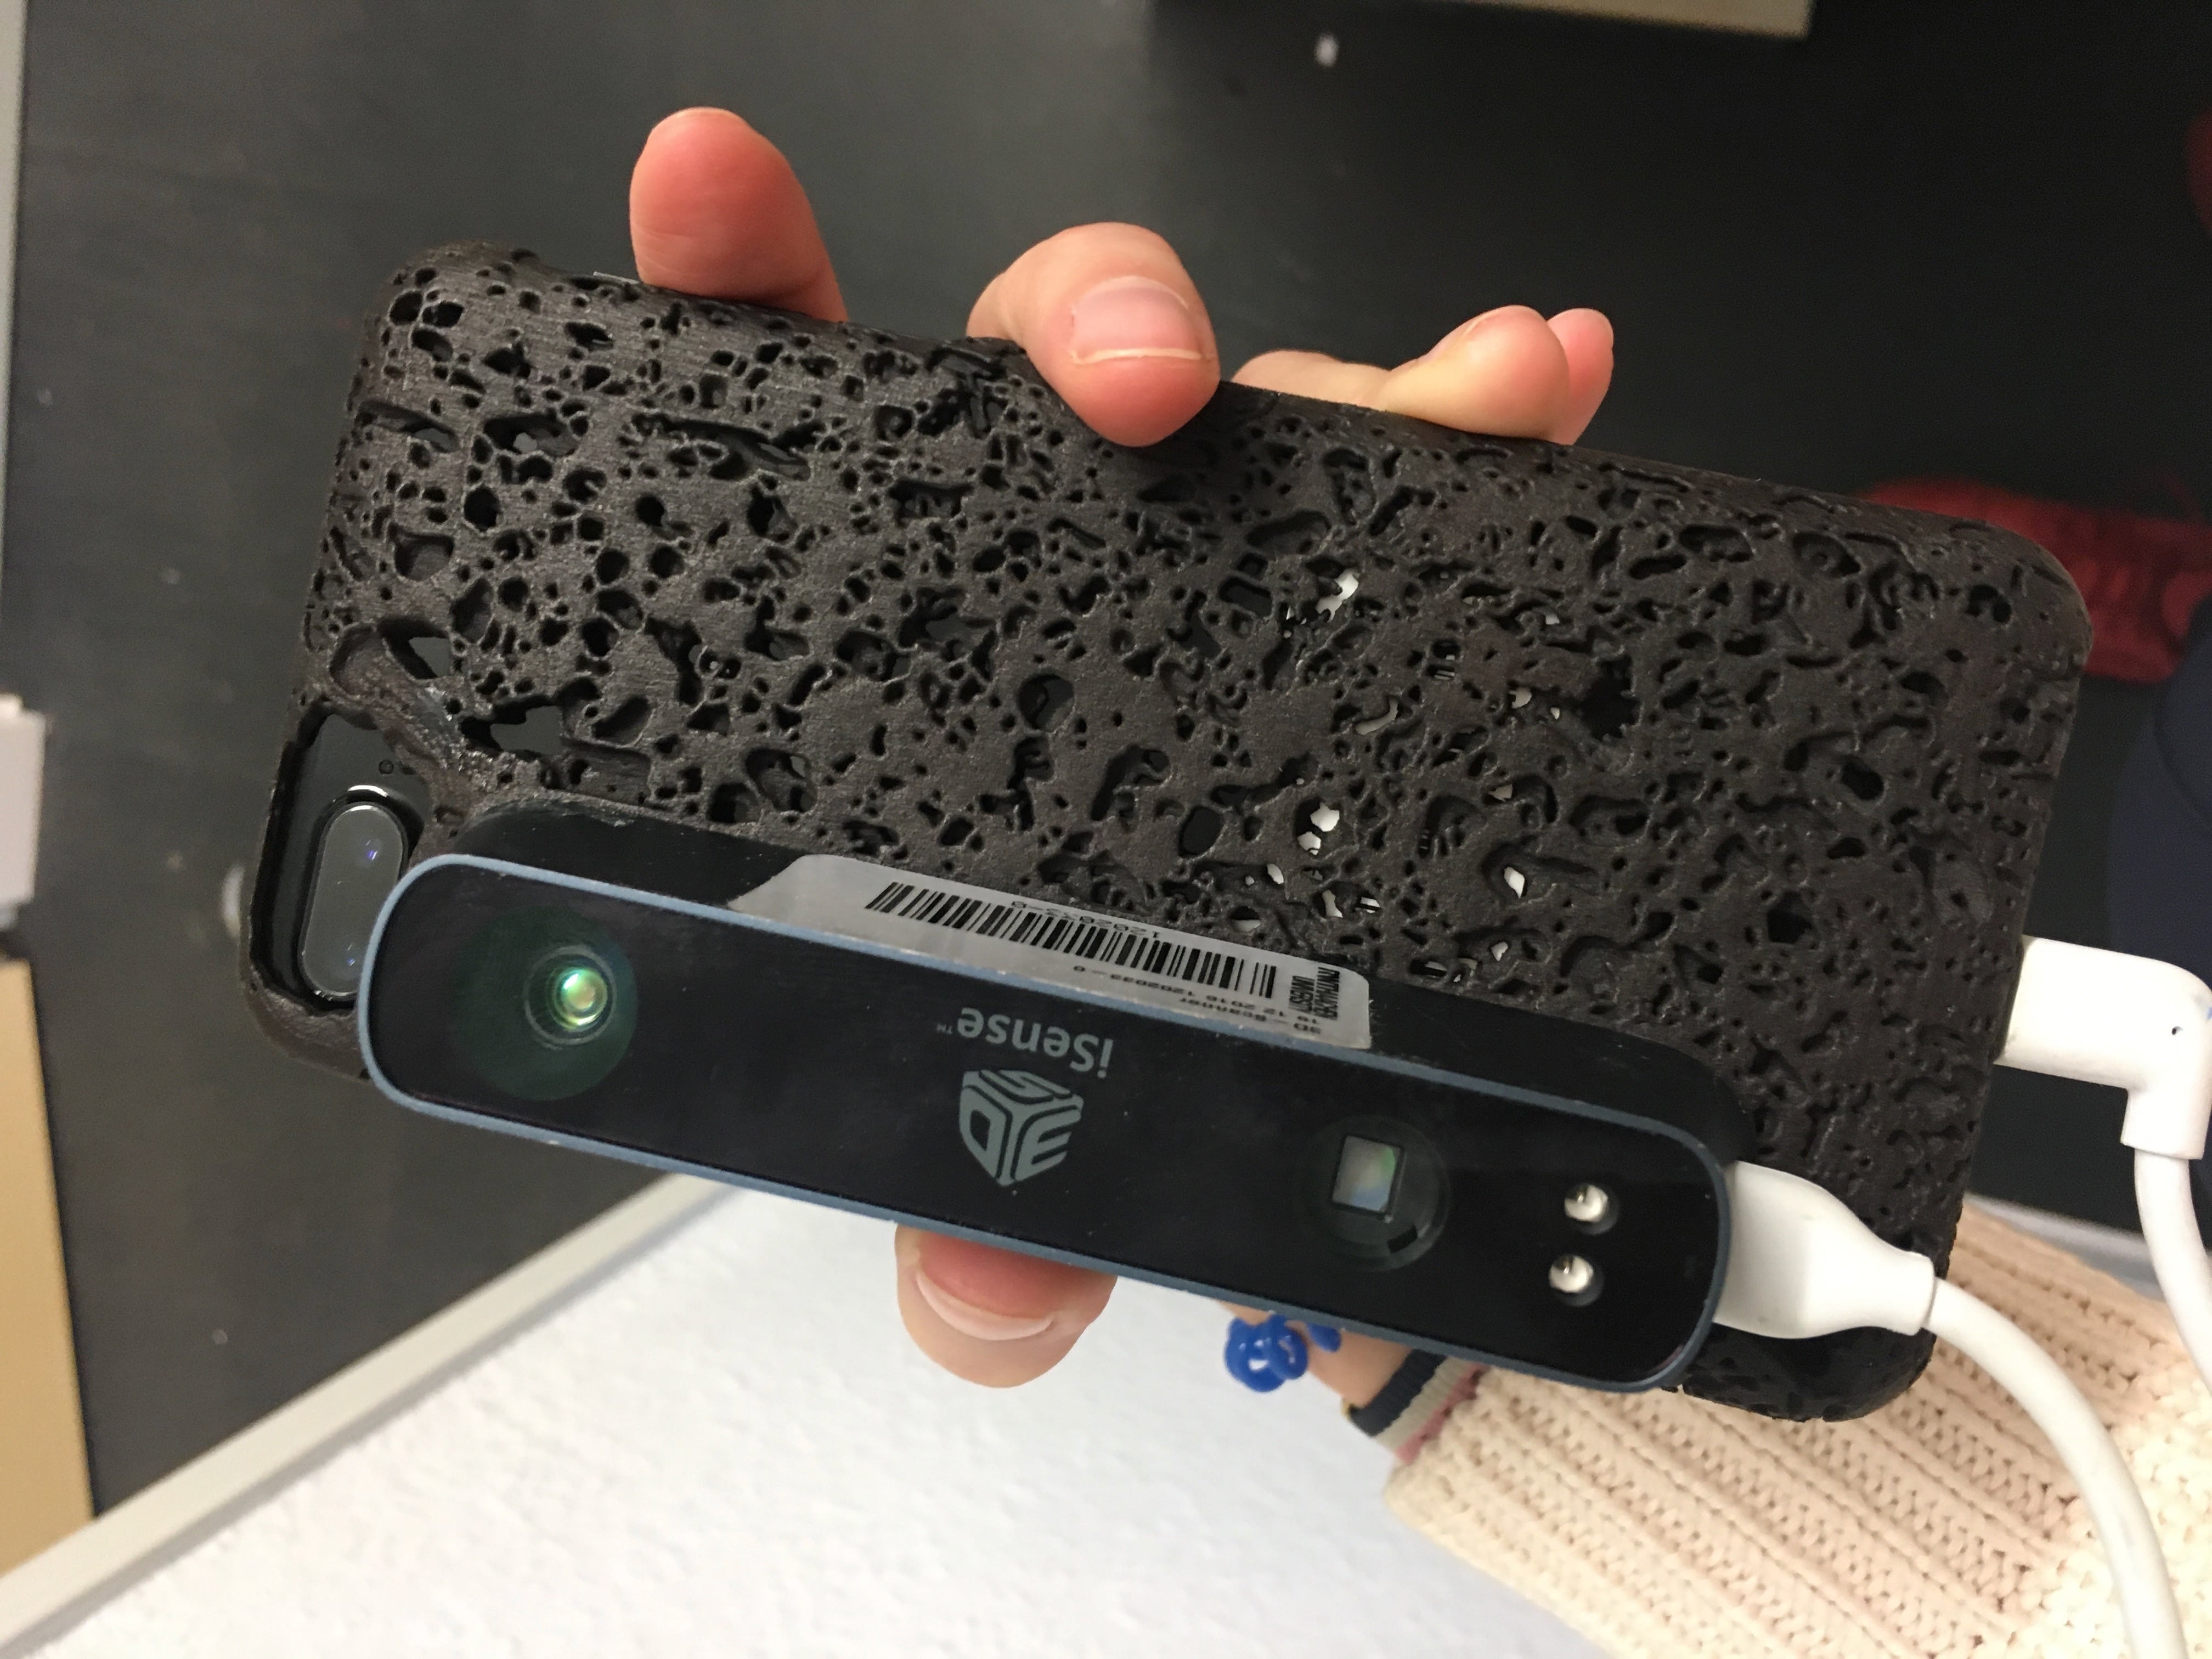
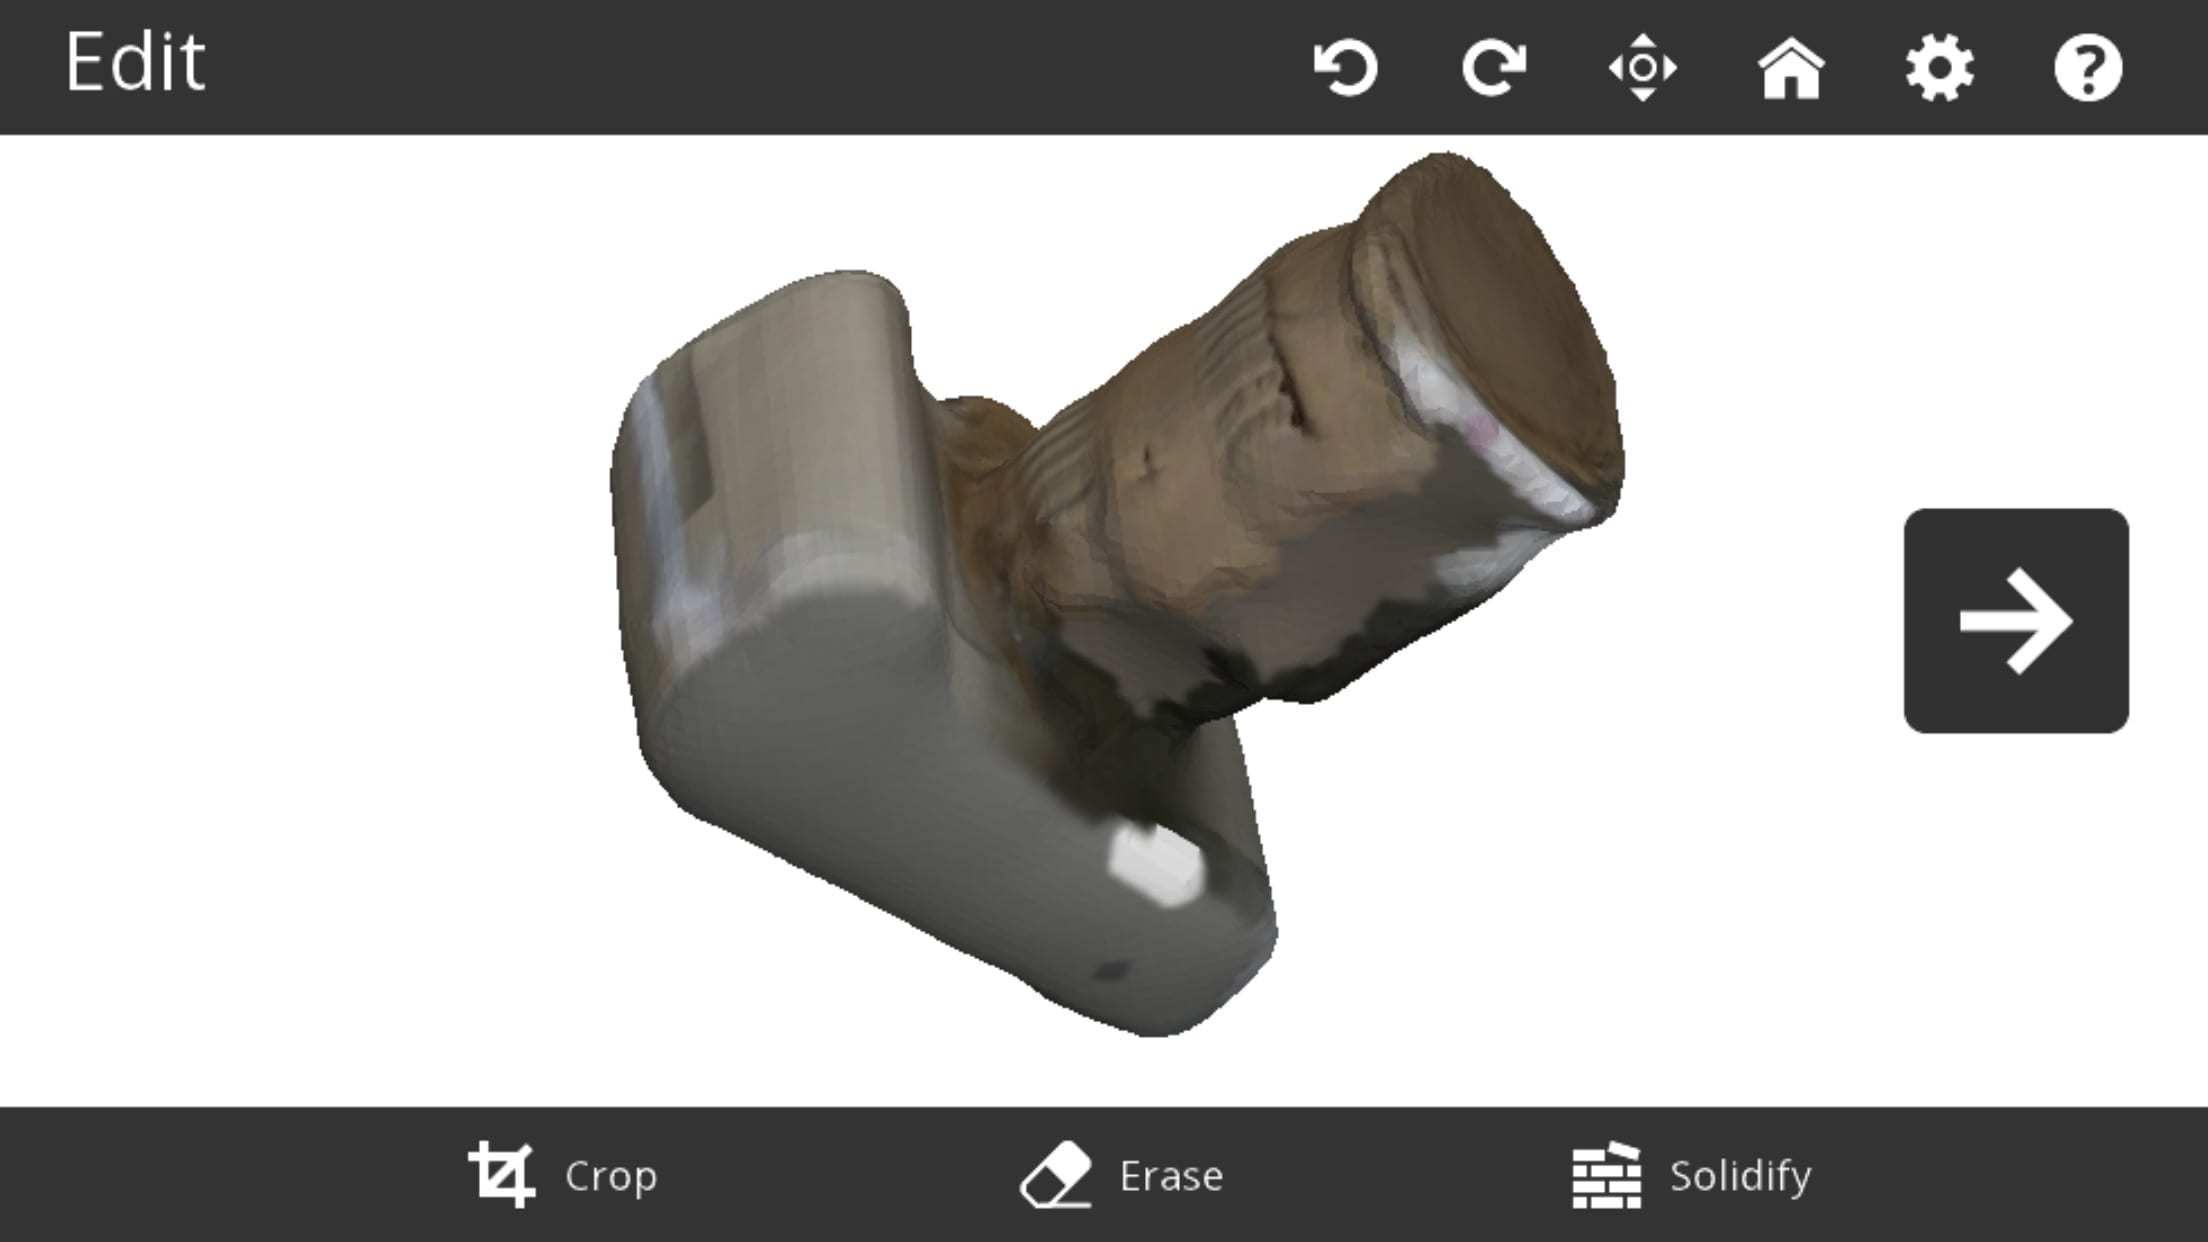
In our FabLab we have The FabScan, a 3D scanner, that is really easy-to-built and the price to make one is only 100 Euros. Unfortunately, during this week it was not available, so I had to use iSense. It goes together with iOS Application . So, basically I connected the external camera, download an App and the 3D Scanner was ready:
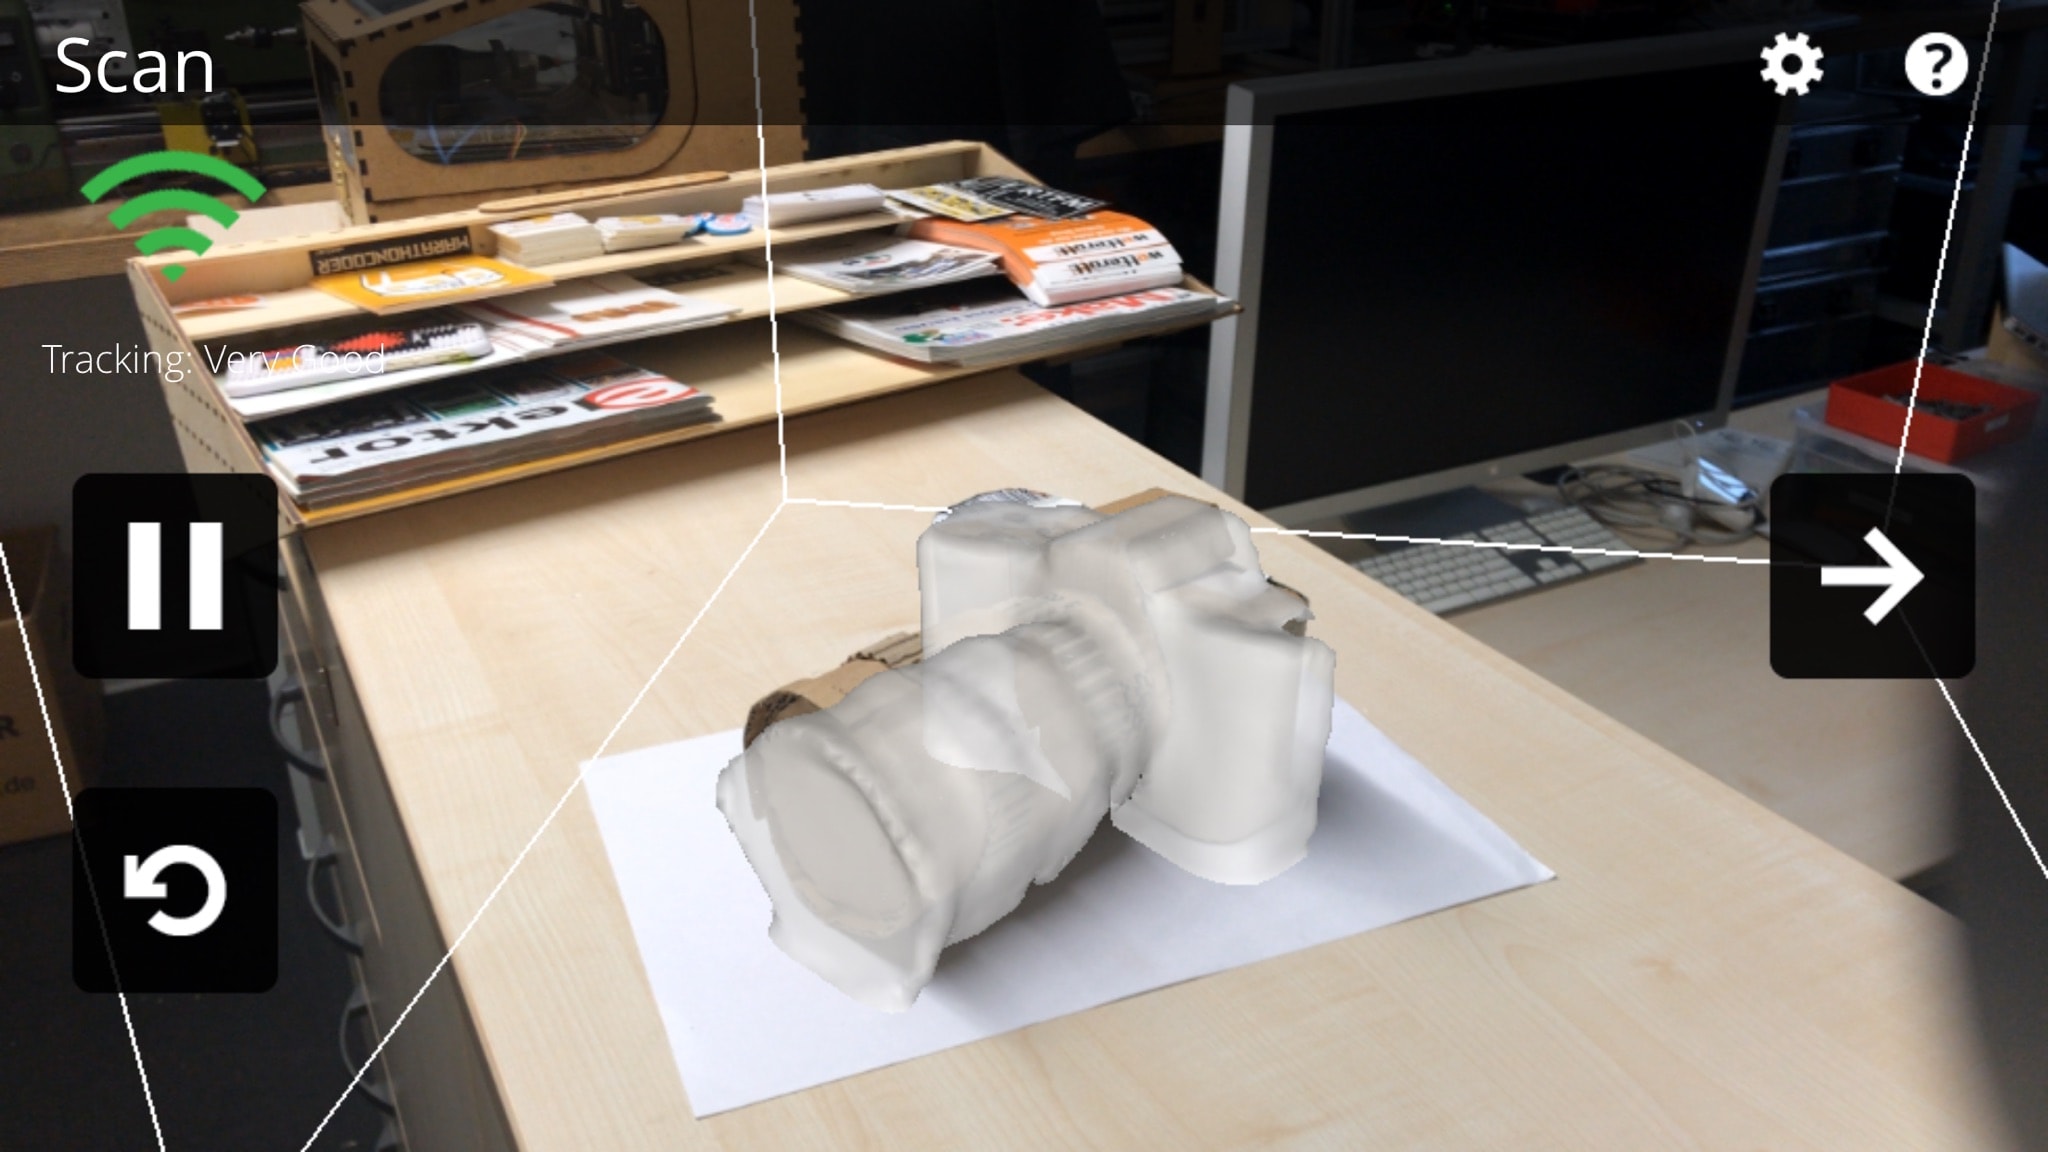
So, basically I just had to slowly turned around my object snd than 3D model would me made.
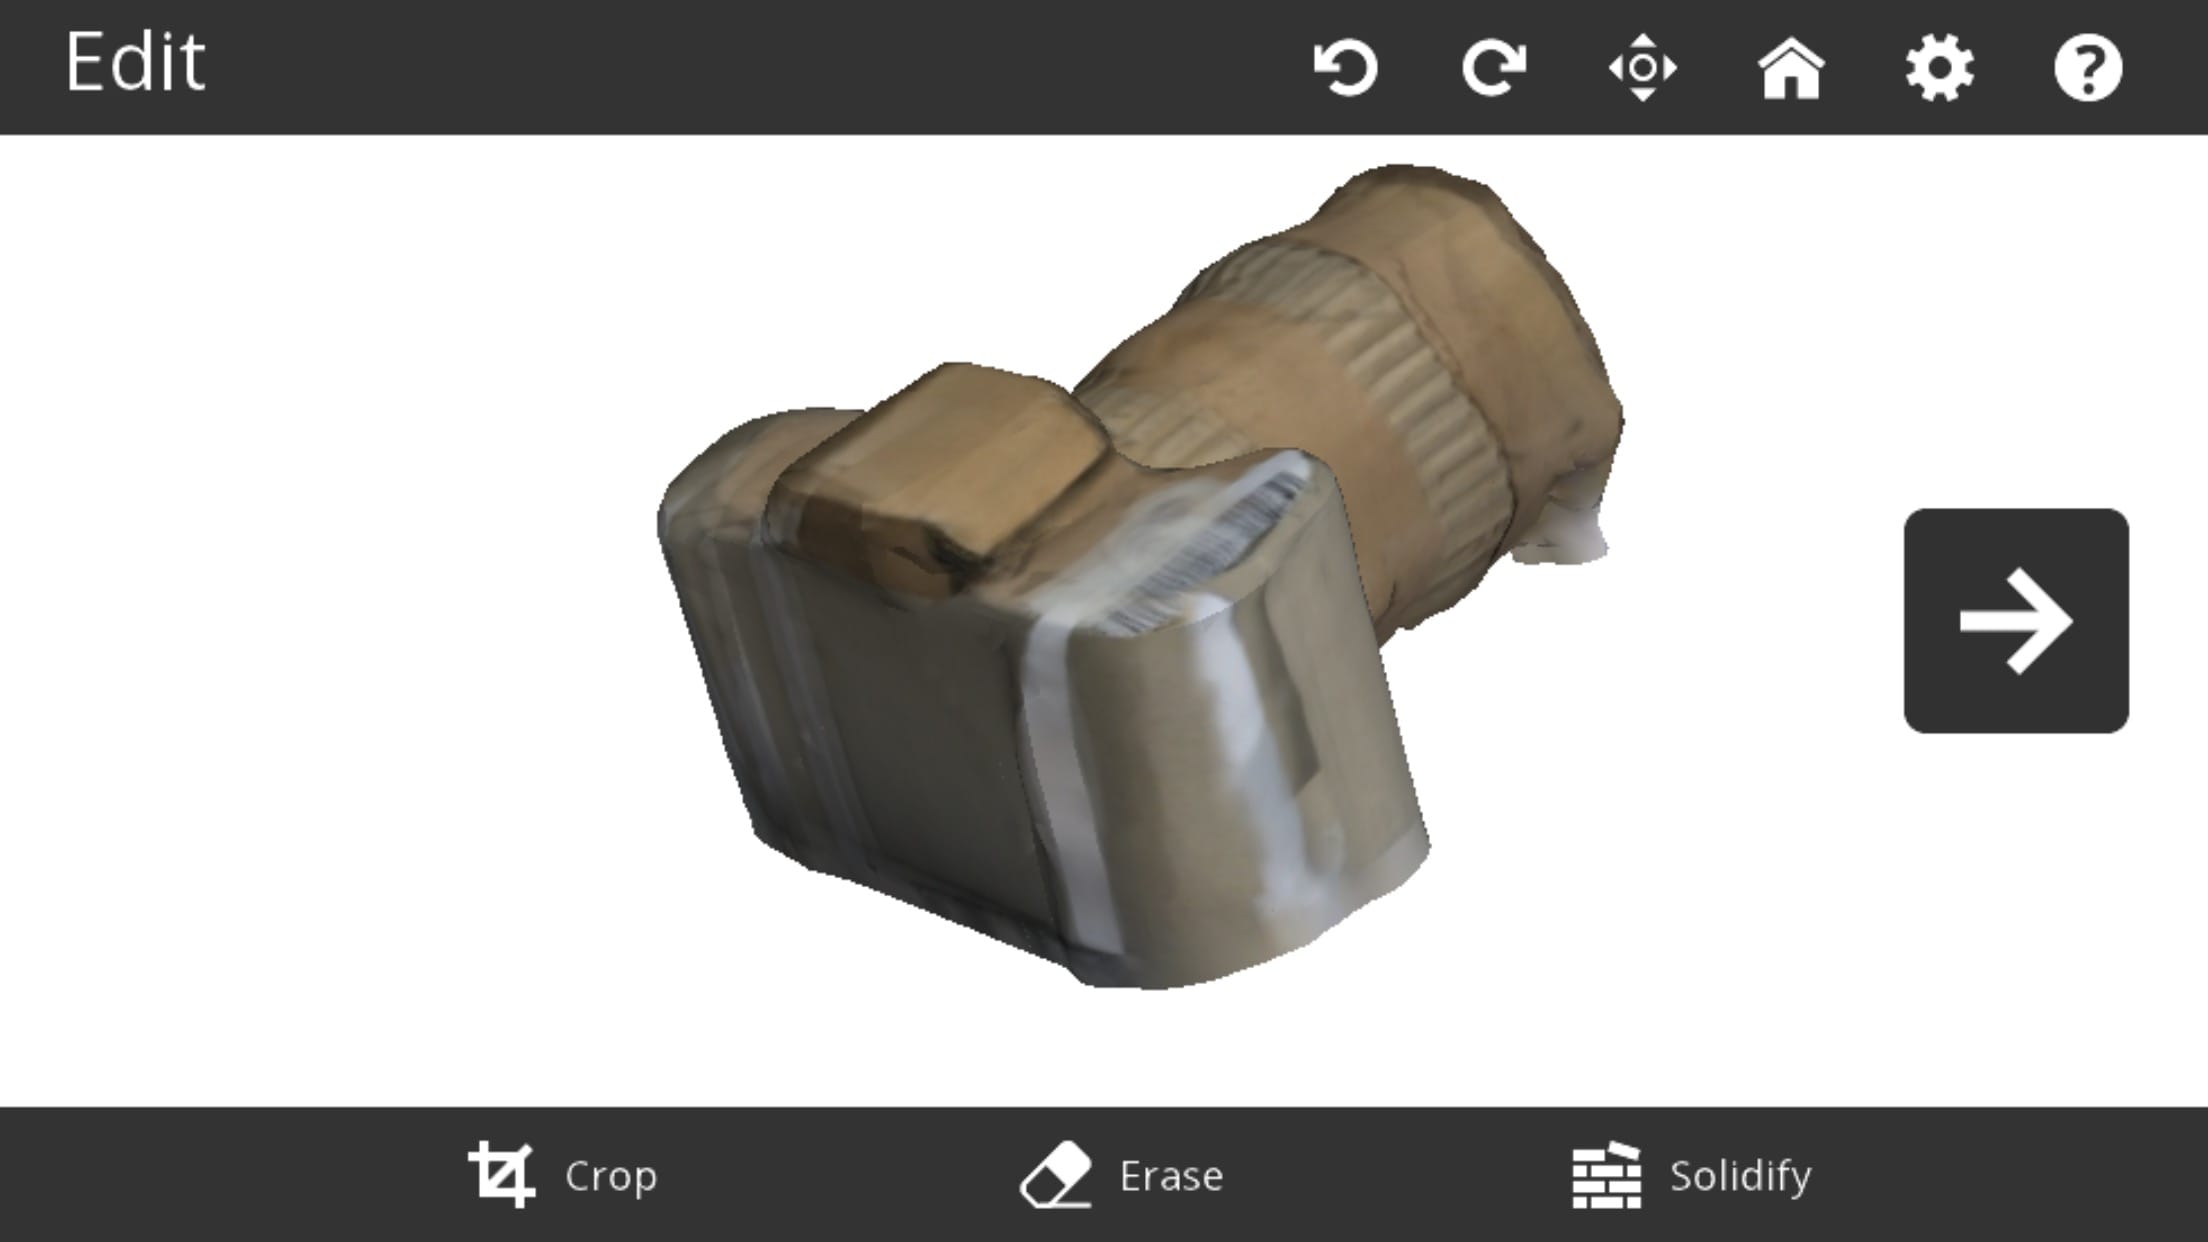
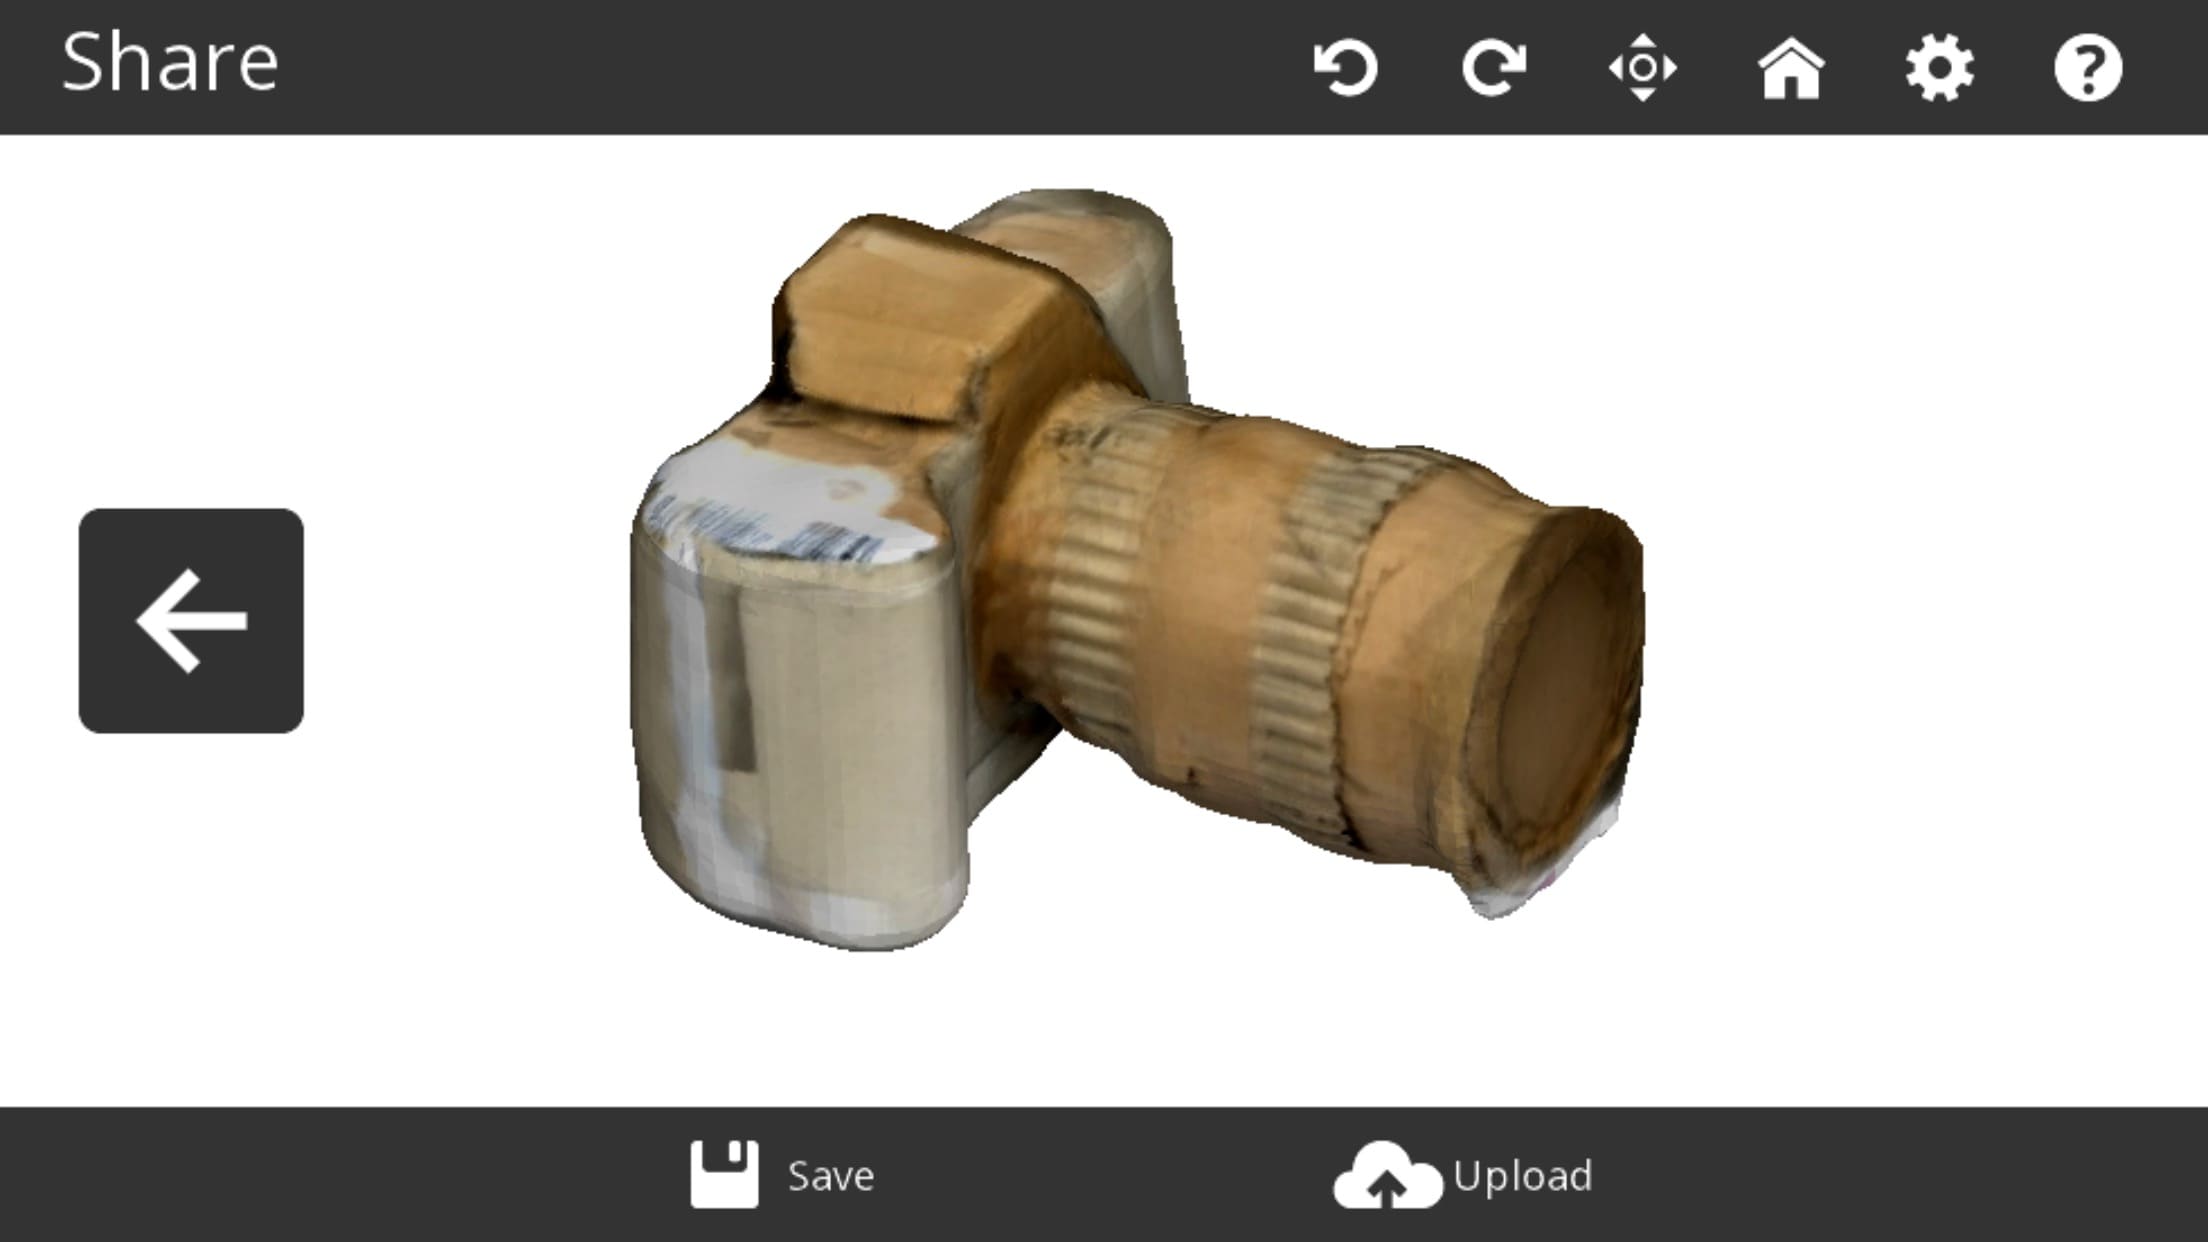
Then I edited my file, cut a piece from the lens and added a "bottom" and was able to share it.
P.S. getting 3D Model from iPhone was not so obvious. I had to connect it to computer, go to iTunes and find it there as an application files.
Files
Download .stl file for the first model
Download .stl file for the second model
Download .scad file of model(with sphere)
Download .scad file of model(with cube)