Week 2
Getting started with GIT ( Project Management )
GIT is a version control system for tracking changes in computer files and coordinating work on those files among multiple people. It is primarily used for source code management in software development, but it can be used to keep track of changes in any set of files. As a distributed revision control system it is aimed at speed, data integrity, and support for distributed, non-linear workflows. Git was created by Linus Torvalds in 2005 for development of the Linux kernel, with other kernel developers contributing to its initial development. Its current maintainer since 2005 is Junio Hamano.As with most other distributed version control systems, and unlike most client–server systems, every Git directory on every computer is a full-fledged repository with complete history and full version tracking abilities, independent of network access or a central server. Git is free software distributed under the terms of the GNU General Public License version 2.
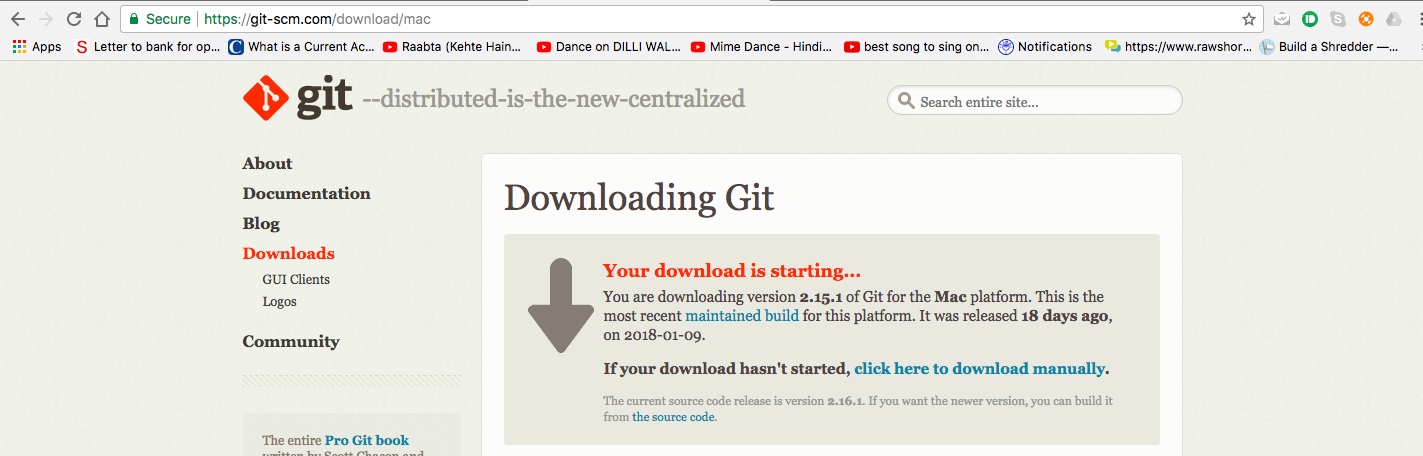
The very first step to get started with GIT is Installing GIT, Although i have read a lot of articles saying git is by default installed on MACs but it seems mine wasn't working. So I downloaded it.
I have downloaded Git for Mac from This Link ,Soon after the installation I started with some Vedio Tutorials for GIT.
Getting Comfortable with Command line & Setting up GIT repository
Command line seemed to me like a ghost in the beginning, but soon as you get comfortable with it, You'll realize its the coolest thing on the computer.... You'll feel like you are a hacker or something. Apart from this feeling it gives a greater access to your computer.
I started with this Video Tutorial on Youtube.
Here I am listing steps to setup your GIT repository
Step 1 : Install GIT
Step 2 : Get up your local identity
$ git config --global user.name "Rahul Gautam"
$ git config --global user.email "rahulgtm38@gmail.com"
Step 3 : Initialize GIT
$ mkdir myproject
$ git init
Now you can add your project files in this folder (myproject) and after setting up everything this folder will be in sync with your git account.
Step 4 : Cloning GIT Repository
$ git clone "http:// your git link from the gitlab"
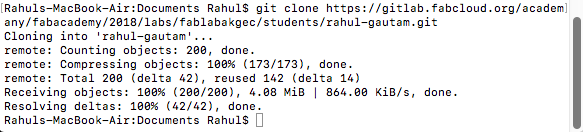
Now git would be cloning this folder.
Step 5 : Check Status
$ git status
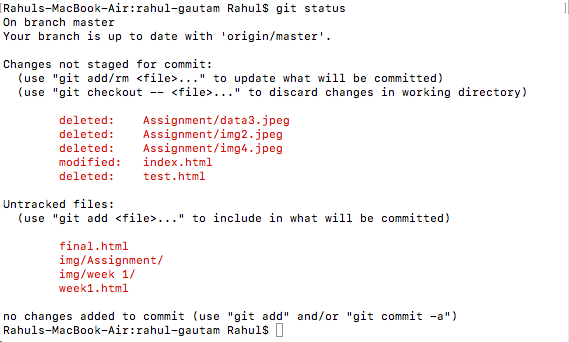
This command will be returning any untracked changes in the directory
Step 6: Adding untracked Files
$ git add xyz.txt

This command will be adding untracked files to the repository, letting the git know that this file was not present earlier, now add this.
Step 7 : Bringing Data to the staging
$ git commit -m "updation"
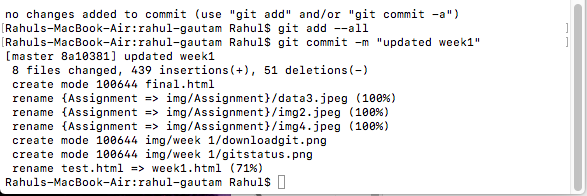
This command will be bring the untracked files to the staging area.
Step 8 : Pushing Data
$ git push
This command would be pushing the data from your local repository to the GIT repository
Now what if you want to fetch data from GIT ?
$ git status
$ git pull

Using this command you can download the data from the GIT onto your local repository.
So with this we have our git repository and now we can move forward with the Project development, without worrying about syncing the modifications we'll be making over time
My Exeprience with GIT
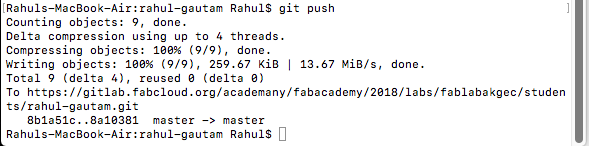
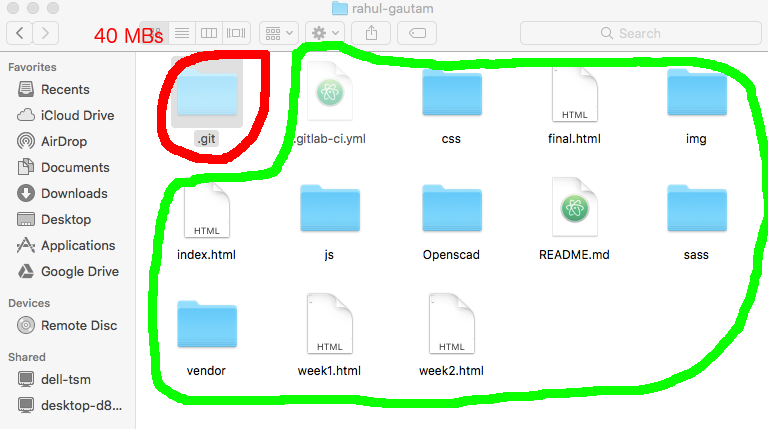
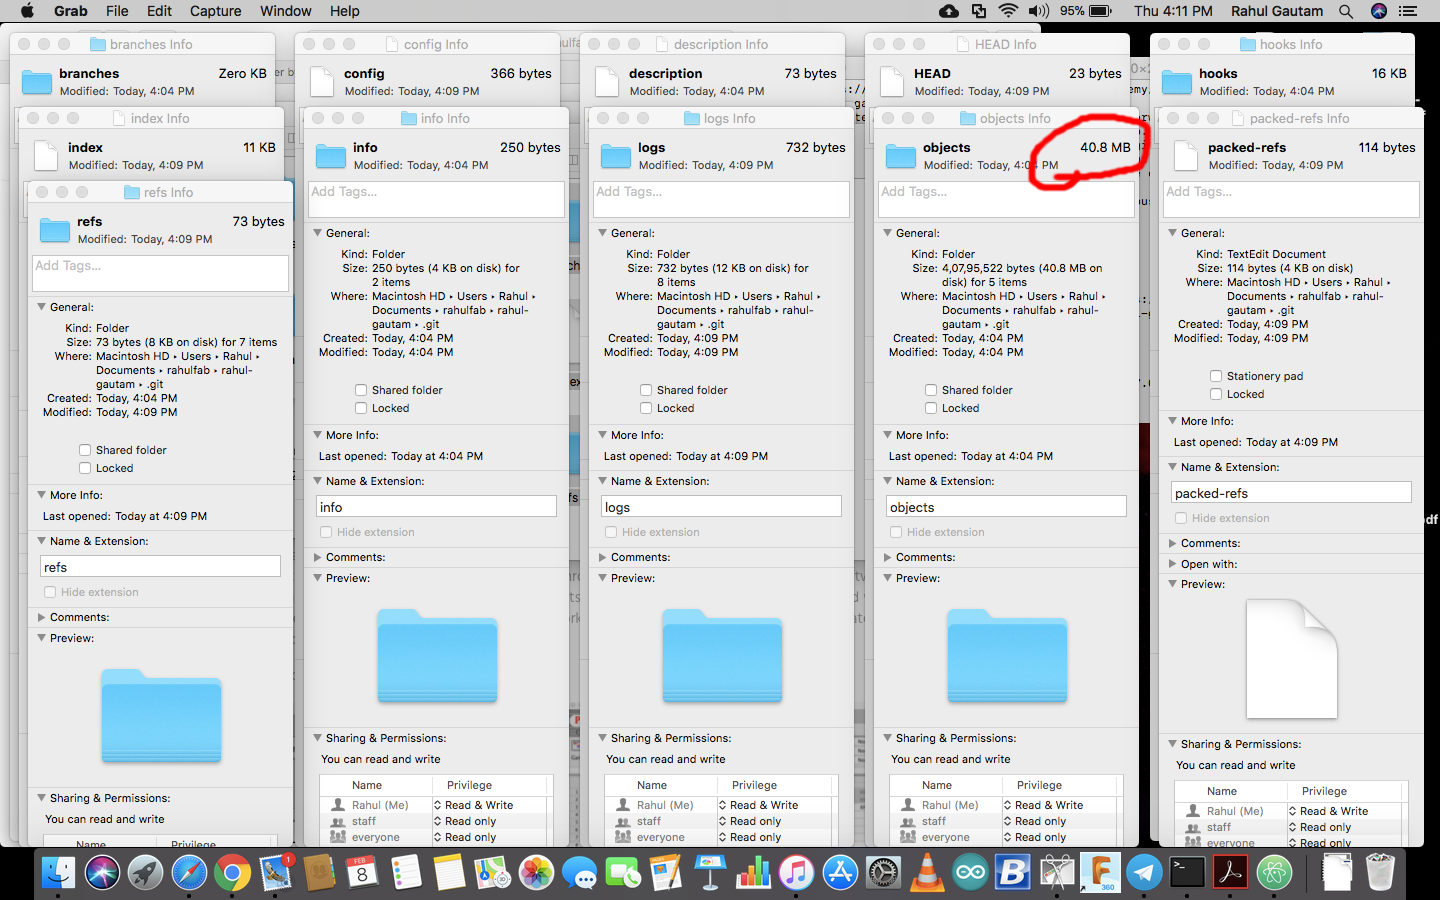
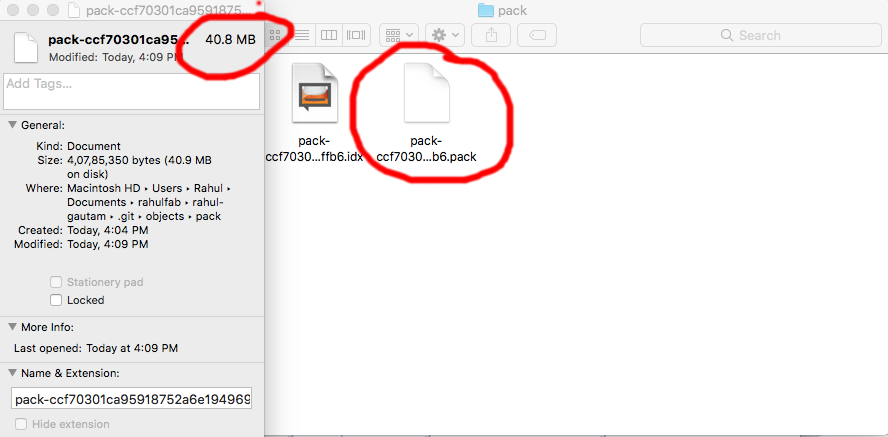
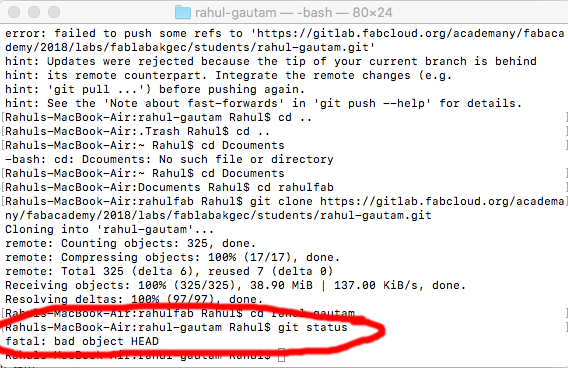
This was the issue I faced during my week 2 work i.e Computer Aided Designing. This week I made a GIMP file but by mistake I saved .XCF file within my git repo. So after my documentation I pushed new data and from here onwards my nightmare started. I was shocked to see my GIT repo. was showing 40MBs consumed, and we are allowed to have 100 MBs data only...... so What I did was, I tried my brains out to delete that one bulk file, which was eating off my GIT repo.
I am listing all the things which I tried.
Attempt 1
I tried to reverse engineer.......... silence ........... trolled badly by GIT.
What I did was I tried to look out for the files which is having the maximum size. Beacuse my complete useful data was only 10 MBs. I searched every folder but all in vain ..... then I tried to lookout in the hidden files (using cmd+shift+. You can see hidden files on mac)then I looked for sizes of all the folders in these hidden folders.Then I navigated through the folders and in the .GIT folder I found the folder which was occupying most of the space. I entered the folder and simply deleted the file which was consuming the space..... and then again tried to push the data ....... got the error : BAD OBJECT HEAD...
Getting Started with Project Libre ( Open Source Project Management Software )
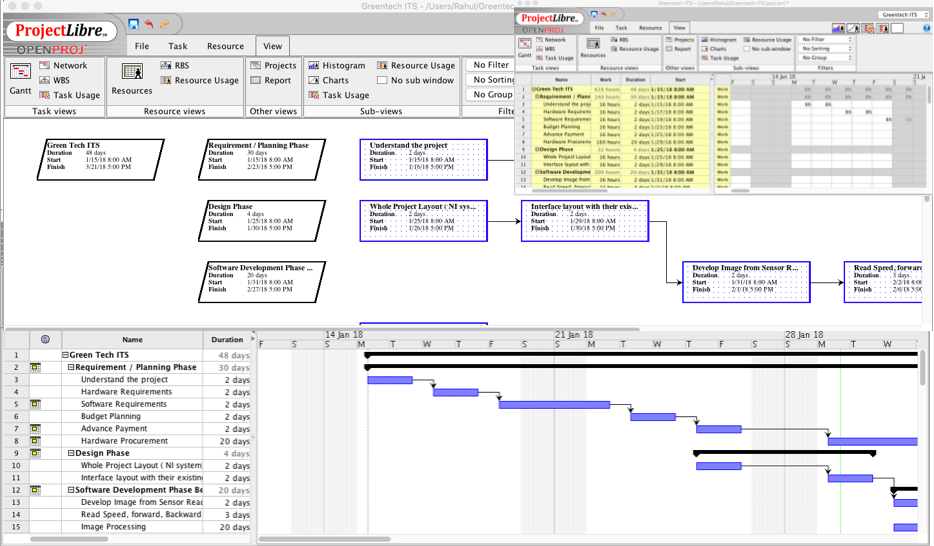
Project Libre is an open source project management software through which you can lay out time lines, Gantt charts, Budgets etc. Through this software a complete project layout can be made effectively and task assignment , Team management can be done through this. You can create WBS/RBS Charts (Work Breakdown Structure)(Resource Breakdown Structure) through this. Along with all this its a great software for freelancers as it can be used to calculate the number of hours spent on a particular project. Its an alternative to Open Proj. , Earlier I tried working with Open Proj. , its almost same as Project Libre but the problem which I faced while working with Open Proj. was, you can not create a PDF file of your project layout. So, I decided to move on to Project Libre.
Here I am Sharing few screenshots of one of my project plans.
Website Designing
This Week our assignment was to create a website to showcase our work and progress thoroughout the Program. To be very frank I didn't know any thing about website development. So, I started with some vedio tutorials on Basic HTML Commands.
Well after going through basic HTML Vedios, I got to learn that actually website desiging is not programming/coding, it's just about programming a page to be displayed in a specific way.
There are a 2 ways you can start with :
> You can start from scratch ( Time consuming + Frustating + You'll learn a lot)
> You can start with a template ( Less time consuming + More Frustating + You can focus on content rather than designing )
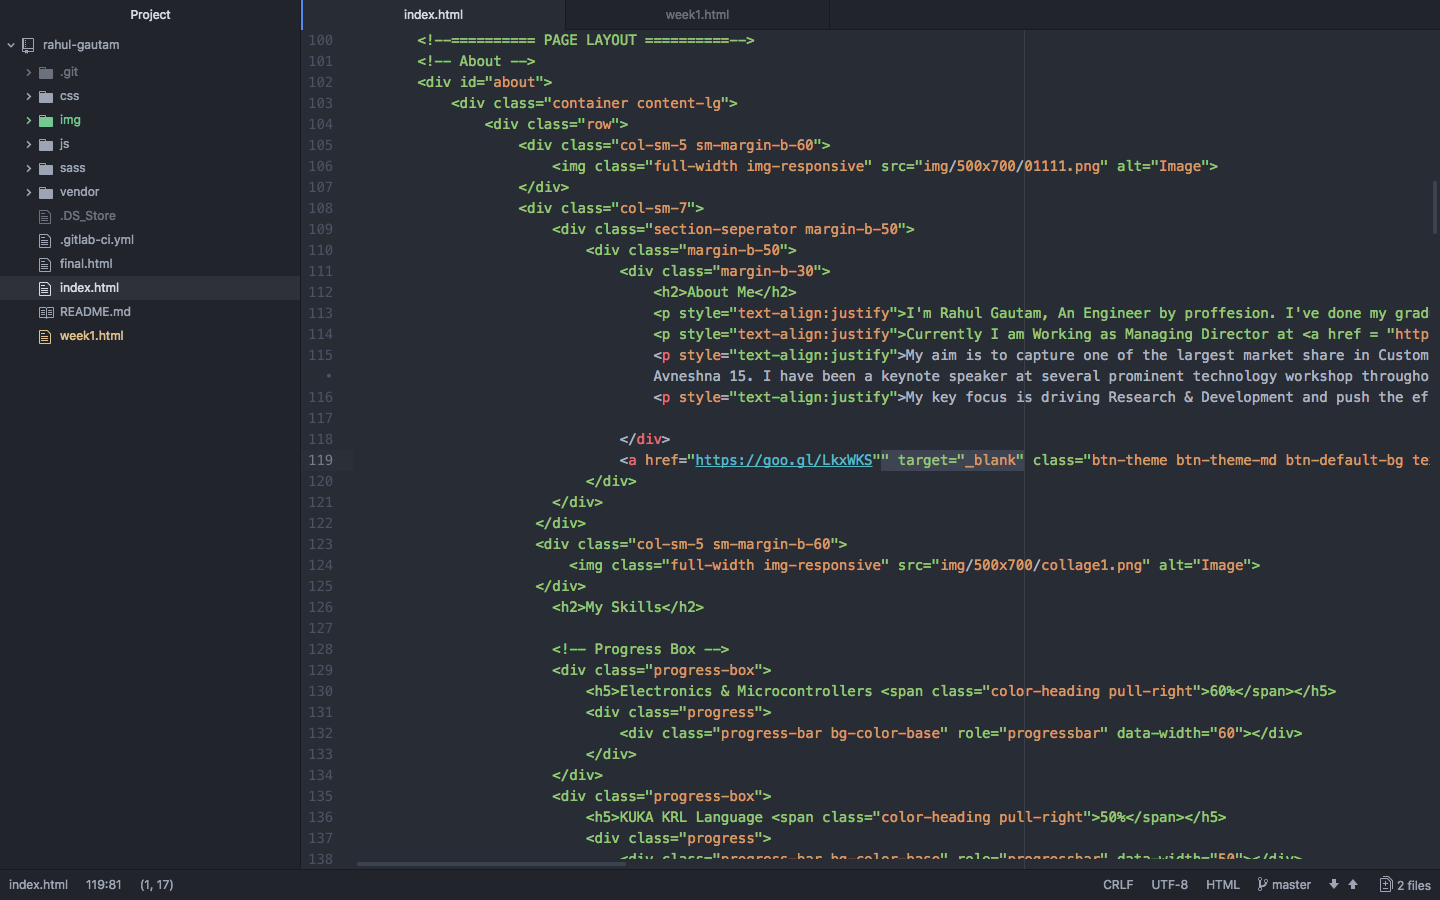
I choose to get started with a Boot strap template. There are hell lot of templates available online which you can use for free. I downloaded my template from Keenthemes. To edit HTML Code on MAC I am using Atom( Plain Text Editor)
Little feedback about ATOM editor.... Its frusatating.... Everytime you open it it'll show up a welcome guide. If you dont like it, You can also switch to Sublime Text.
Experience While Designing
At the starting it was quite frustating...., I wasn't able to change the size of the pictures, Put in Logo of a particular size, Indent the content on a particlar side, everything seems to be annoying, but going through all the folders of the template I got to know everything is defined in a seperate sheet ( Style Sheets ), Animations are due to CSS files, Size of the pictures are defined in seperate classes and the whole page was divided into seperate rows and colums. I tried to locate them all looking at the main index.html page, Gradually I had control over the theme and I was able to mould it in my way. A lot of reverse thinking is required in this approach. It can be frustating for some.... but results are cool.
Getting Started with Jekyll
My instructor (Mr. Puneeth) introduced me to jekyll and asked me to explore it. I didn't knew anything about jekyll so I started with a Video Tutorial on Youtube. From the video it looked its so easy to get started, but it was quiet annoying for me, Beacause I was unable to install jekyll on my computer. It has a lot of dependencies over ruby, xcode, GCC, ruby gems, make. You'll have to install them all before installing jekyll. The good part was a lot of things come preinstalled on MACs but still I needed to install GCC and XCode. After that Jekyll was Installed via $ sudo gems install jekyll .
It was easy to create a project with jekyll ( $ jekyll new Proto). A new project named Proto would be created in the directory. Now to start your local server just enter $ Jekyll serve .

Experience while working with jekyll
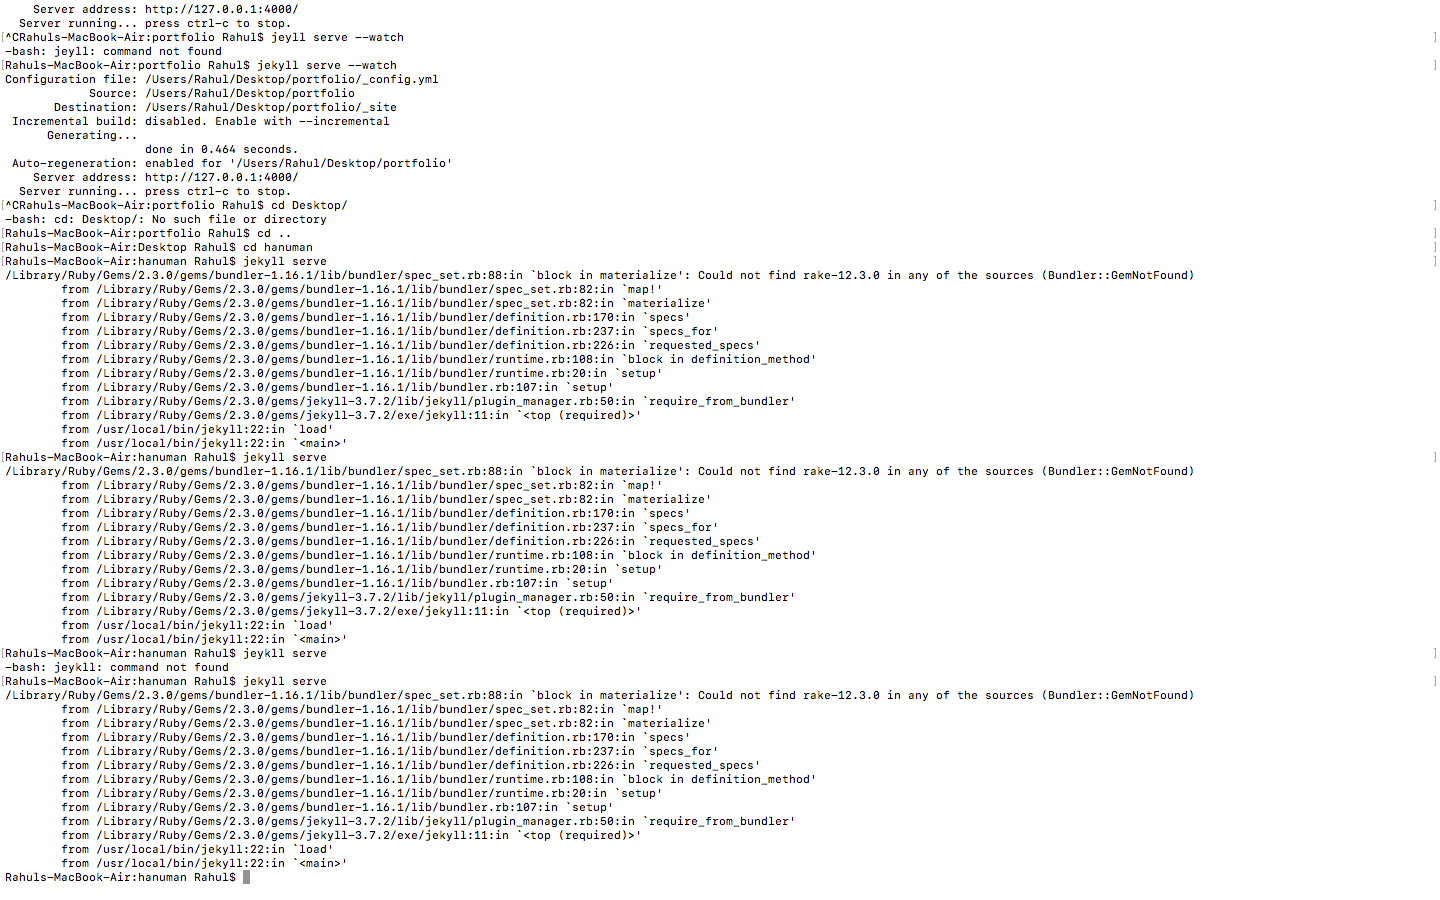
I am pretty much clear I am not comfortable with jekyll as it is having a lot of dependecies on different files. The Problem I faced was, I was trying to change the content but everytime I do some changes in the file, the server would crash and it wont start again untill I revert back the changes.
I also tried to start working with one another Jekyll template , But again I faced a similar problem of dependencies. I figured out it needs RAKE to be installed on system. Rake is a similar utility like MAKE. The theme I downloaded was requiring RAKE. I installed RAKE onto my computer but still there was some thing missing. I am sharing screen shots of the same

Conclusion
I choose to design my website using HTML as it was much more easier and convenient to use than Jekyll
Contact Me
I am happy to talk you through any projects or run live demos to see how they look like.