FABACADEMY
MOLDING AND CASTING
Welcome to my week 10
Molding and Casting
Learning Outcomes:
Types of Molding:
1. Machinable Wax
2. InstaMold
3. Rubber Moulding
Types of Casting:
1. Hydro Stone
2. FlexiWax
3. Aluminium
Hardware and softwares used for this assignment :
Hardware :
Materials:
Softwares :
Brief
- Molding is the process of fabricating by shaping pliable or liquid materials in a rigid formwork.
- Casting is the process of pouring a liquid material into a mold to achieve a desired shape when the liquid cures.
- In this post I will focus on making a silicone mold from milled MDF and then casting other materials, such as Epoxy into the mold.
My Assignment:-
I idea is to Embed my photograph in that locket
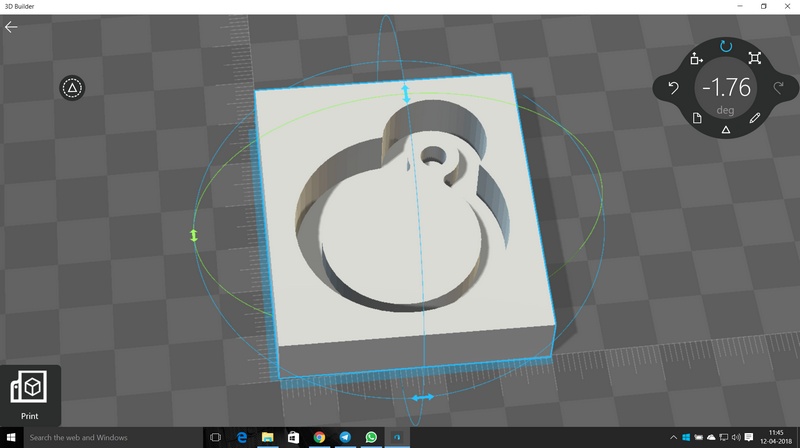
So I designed this in solidworks.
You can download my design files here
After design my files steps: -
- I used modela player 4 software for milling my design.
- I opened my file in modela player 4
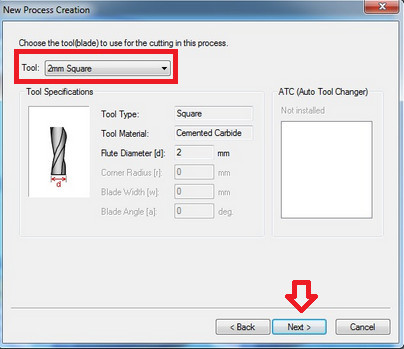
- And started new process of Roughing .
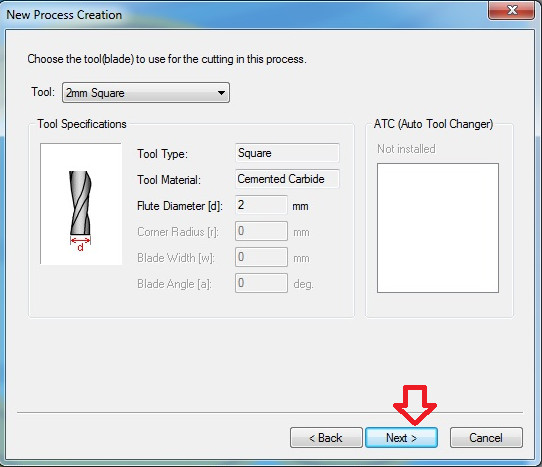
- so I selected 2 mm tool bit which i used for Roughing and Finihing. and then I clicked on Next
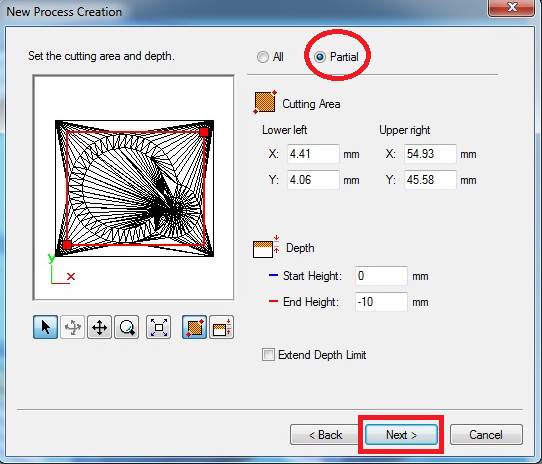
- And then set the cutting area and depth.
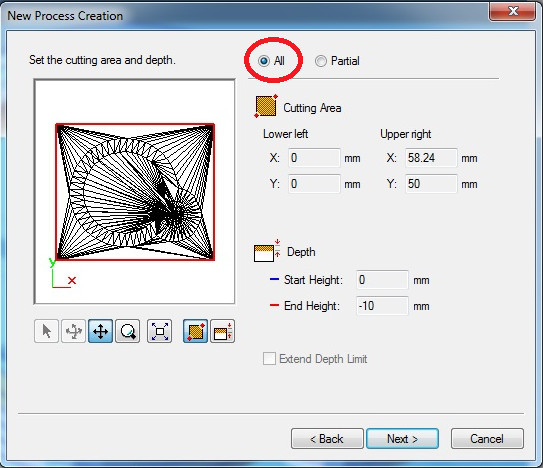
- Click on partial to edit the settings. I did not change the settings. click on the next.
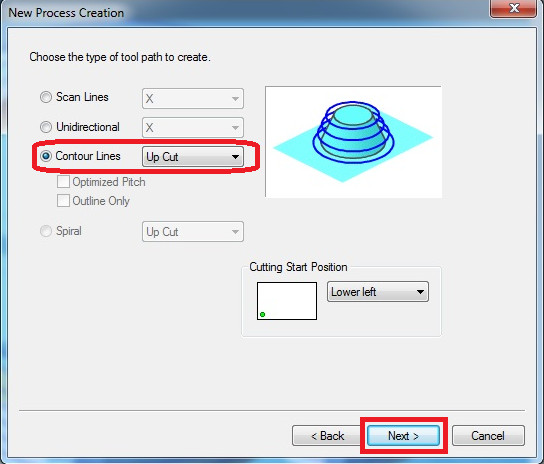
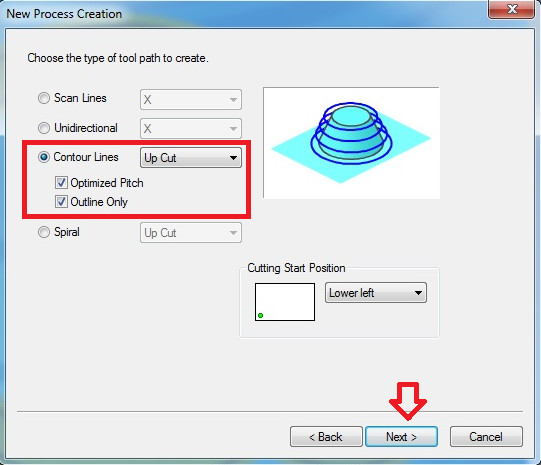
- And then choose the type of tool path to create. I choosed contour lines. and clicked on next
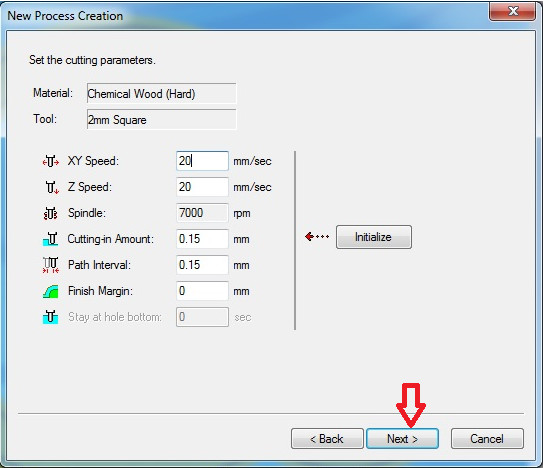
- And then I choosed MDF material. If you want you can change parameters. But I used default settings. clicked on the next.

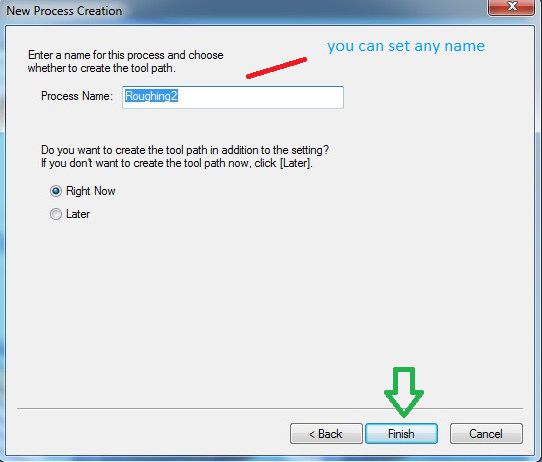
- And the you can change the name and finish the process. in this way you can set tool path of roughing.
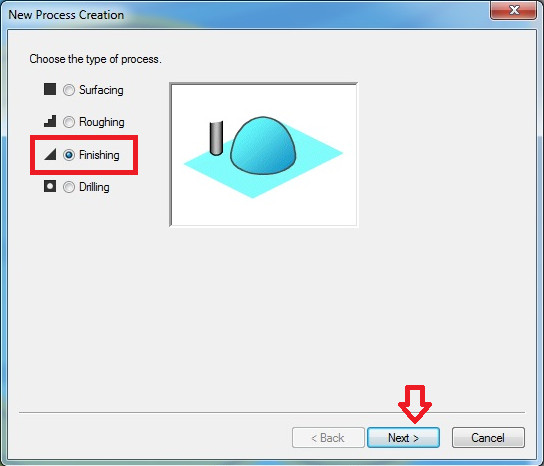
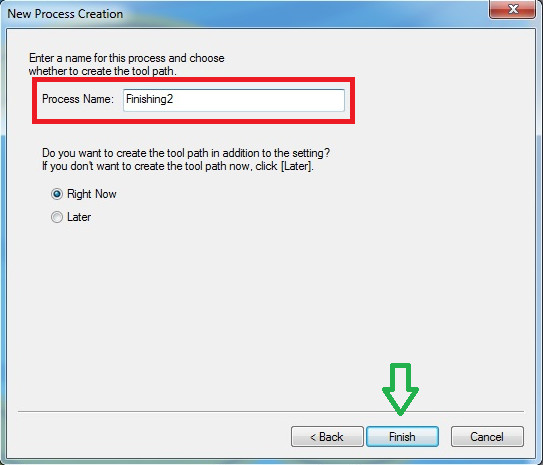
- Now its time to set tool path of finishing.
- Again start a new process of finishing. click on next.
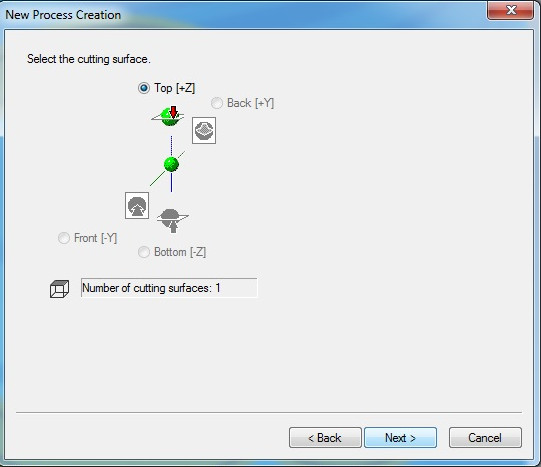
- Select the cutting surface
- I use 2 mm tool bit for finishing.
- so I set the depth -1. and clicked on next.

- Choose the tool path. Clicked on next.
- Set the cutting parameters.
- And then you can change the name and to finish the process. In this way you can set tool path of finishing.
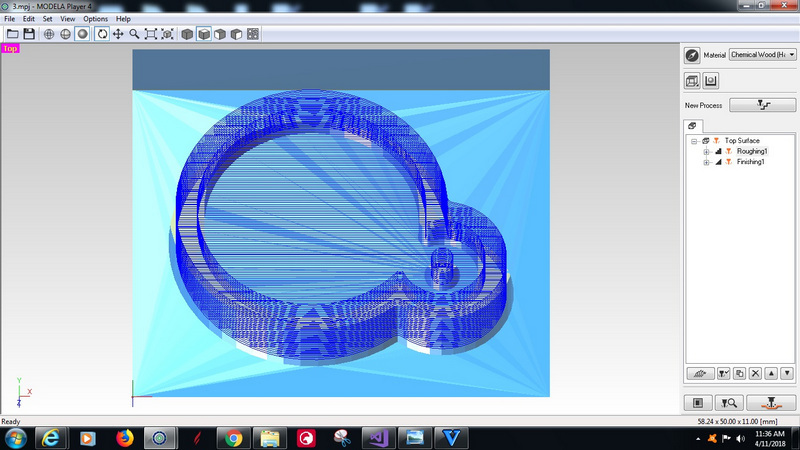
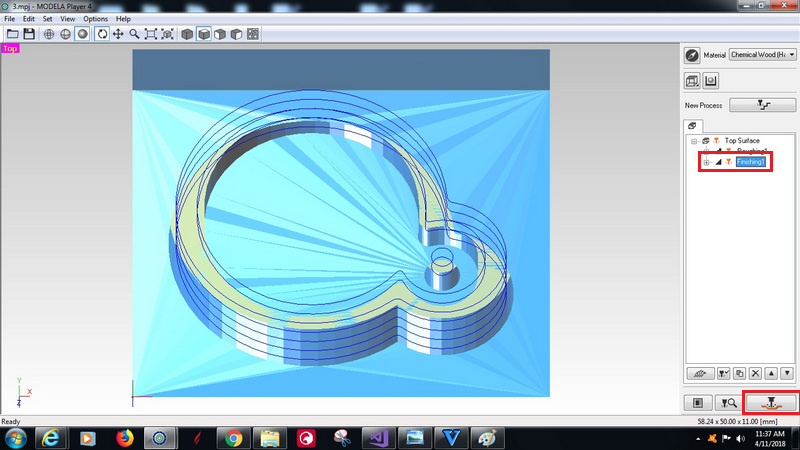
- So it looks like this in Roughing
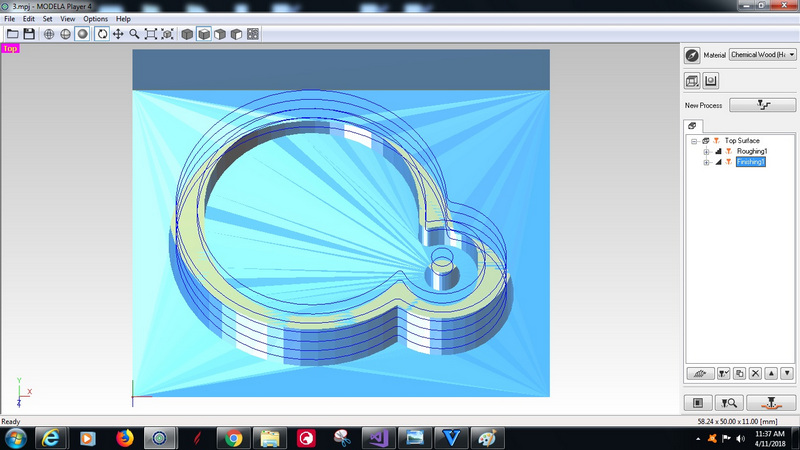
- So it looks like this in Finishing
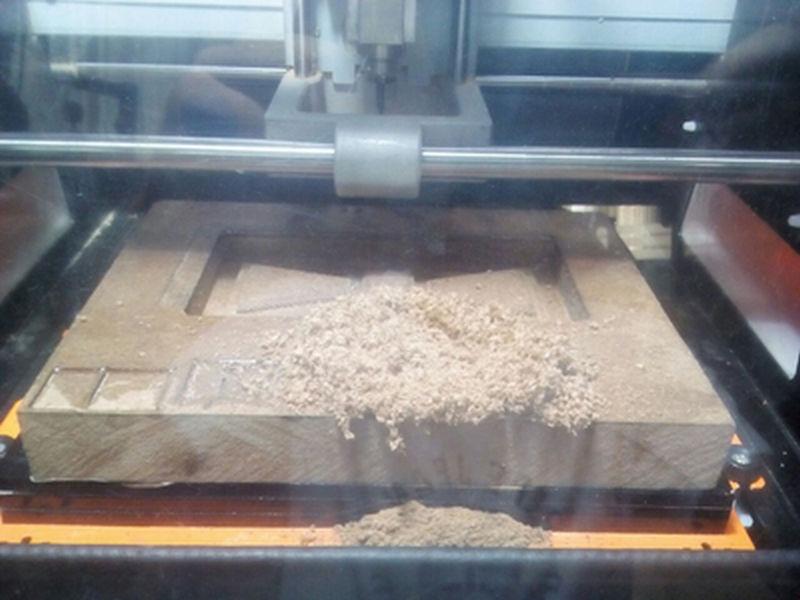
- And its time to mill my disign.
- For milling I used SRM- 20 (MONOFAB) so as I explained in the Previous Assignment (Electronics production). so set the origin and directly print from the modela player 4 software.
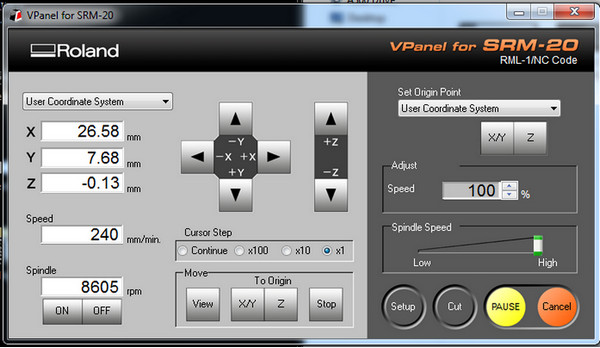
- Just select the Roughing. And click print.

- Just select the Finishing<. And click print.
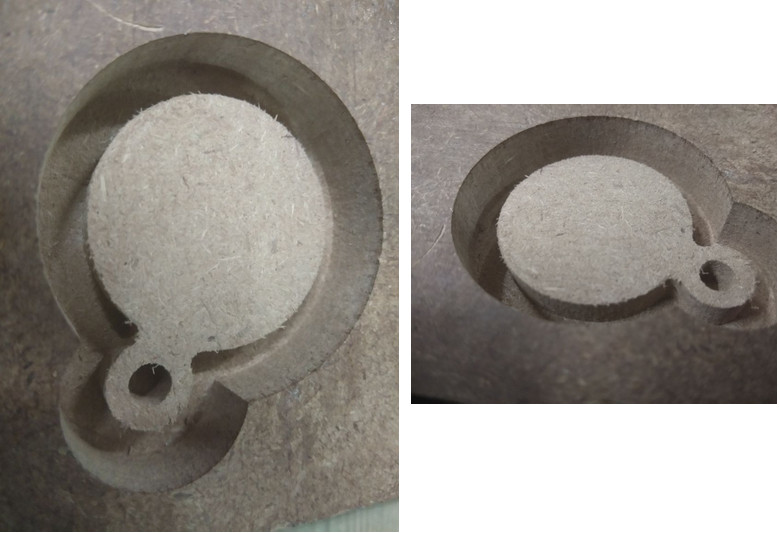
- After print this looks like this .
- molding and casting
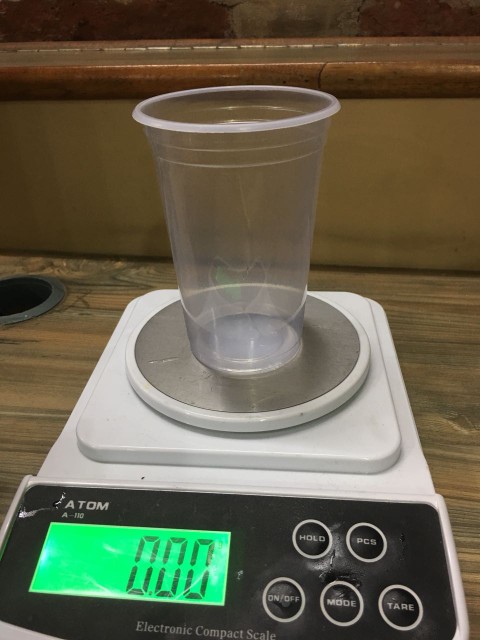
Small scale for mixing the Silicone and the hardener
Curing agent propotions, 40-50 ml in 1kh of slicone. I would recommended 50ml.
 Pouring the silicon into the mould after mixing well with the help of plactic spoon:
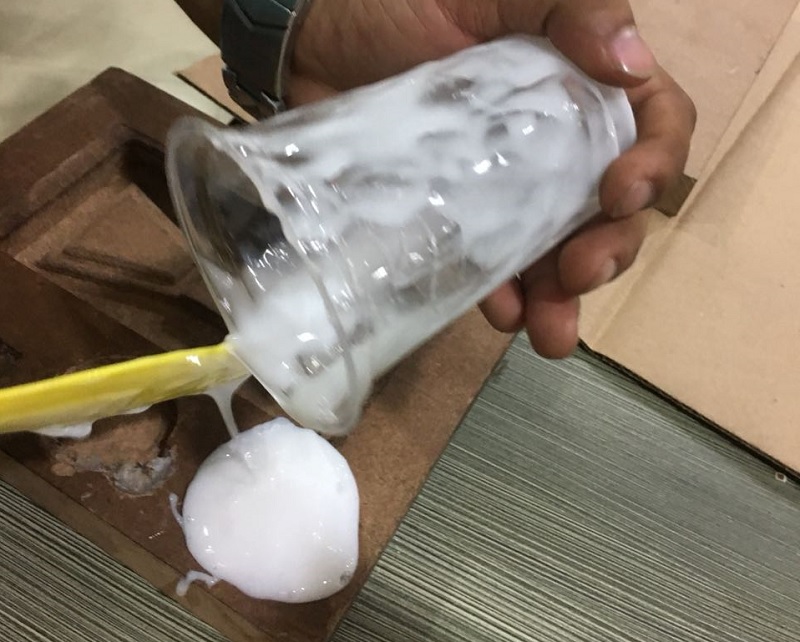
I pored alot of silicon but be carefull when your poring on the mold. There should not be any boobles in the silicon rubber.
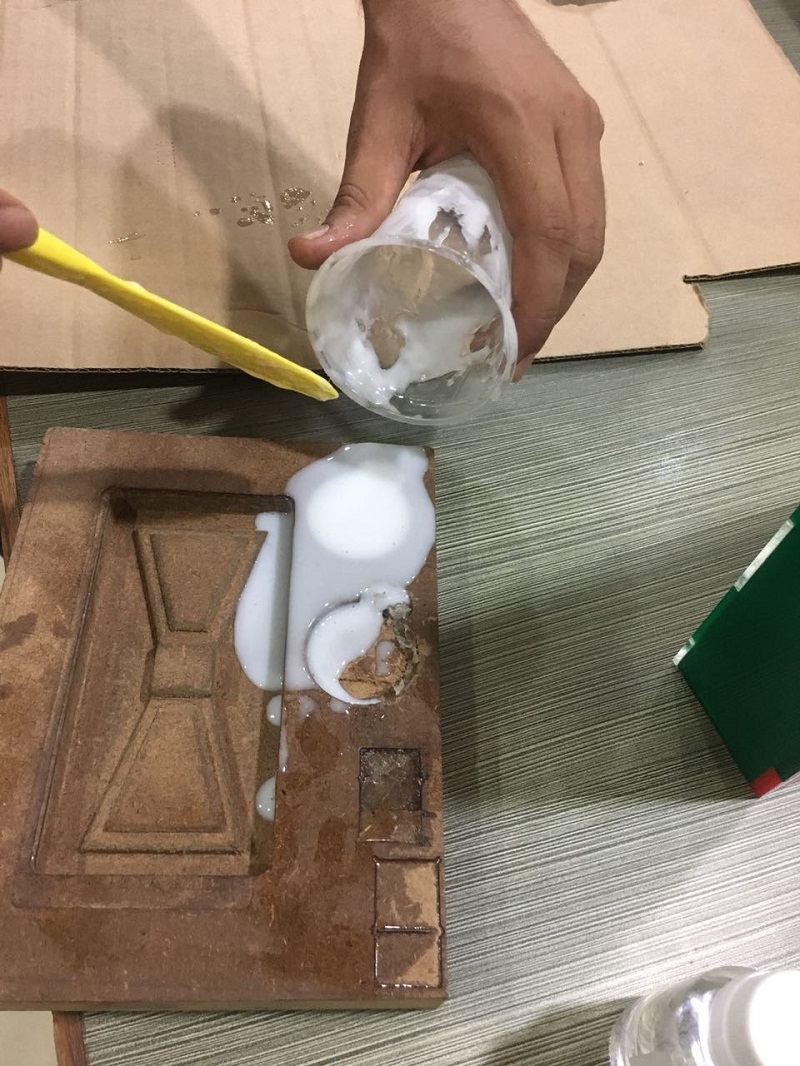
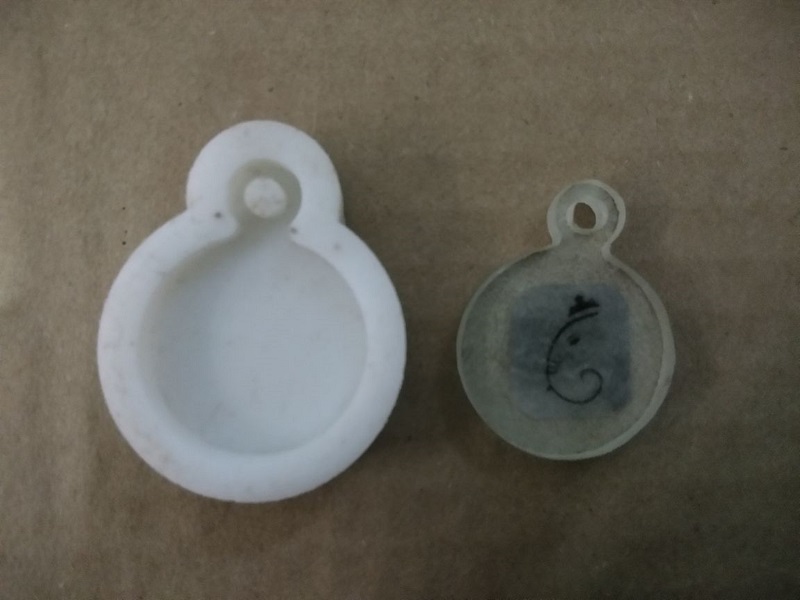
After drying the silicon I removed from the wooden mold. this is the mold which we caled as negitive. Thats why we get positive product from the negitive.
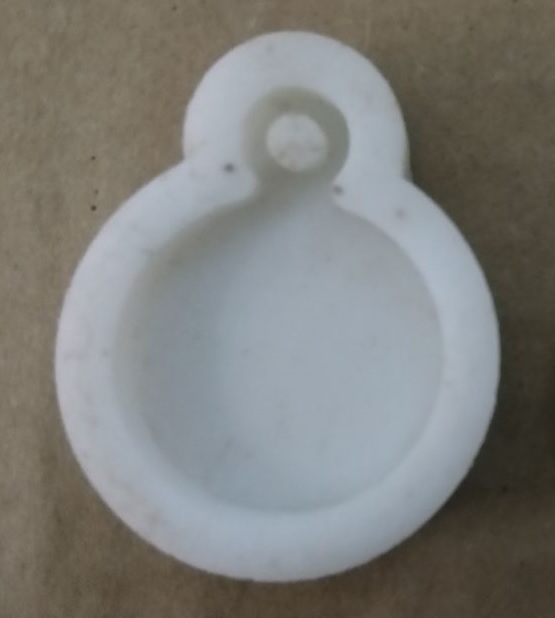
I cutted boundaries of silcon mold..
And I started making casting of Epoxy.
Befor started casting of epoxy I wanted to embedded pic in between the epoxy..
So I have download the lord ganesha pic from the google and imported in paint and resized the pic..
So for the exact picture I just converted the MM into Pixels because I dont know the exact Pixels. I know thw mm thats why i converted the mm into pixcels.
So this is the pixels (69.921259843).

And then I started Casting.
Material needed for Epoxy casting.
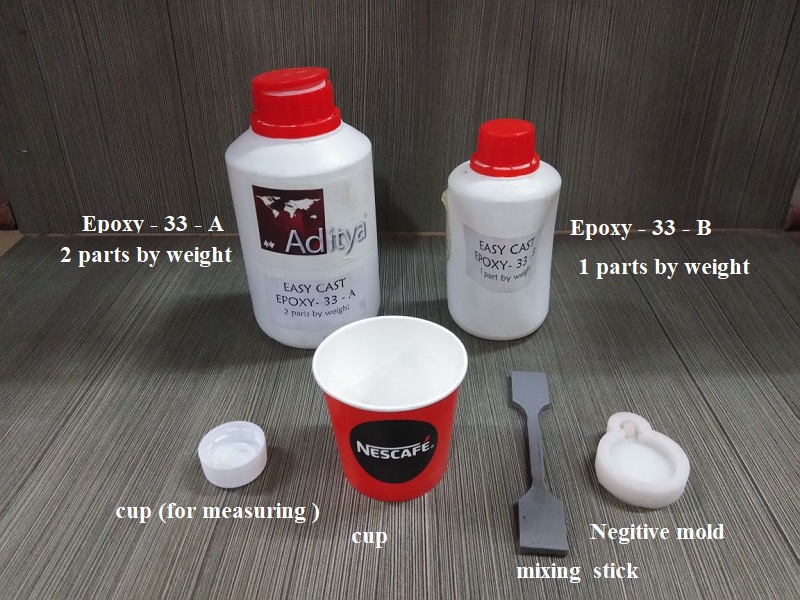
Process
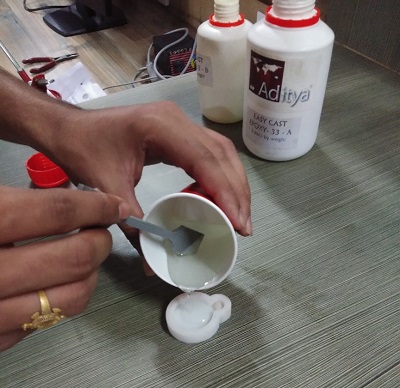
I took 2 parts of Epoxy-33-A and mixed with 1 parts Epoxy-33-B. And mixed with a stick.
2 parts of Epoxy-33-A
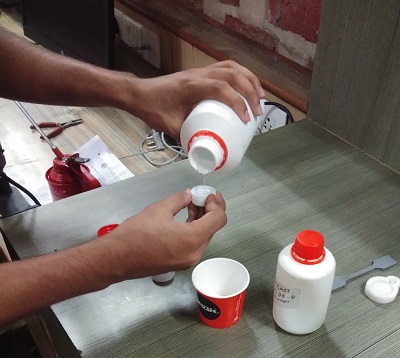
1 parts Epoxy-33-B
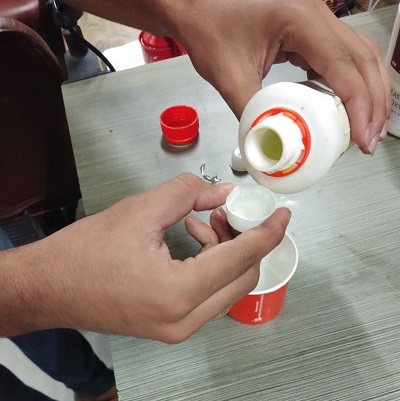
So I mixed alot
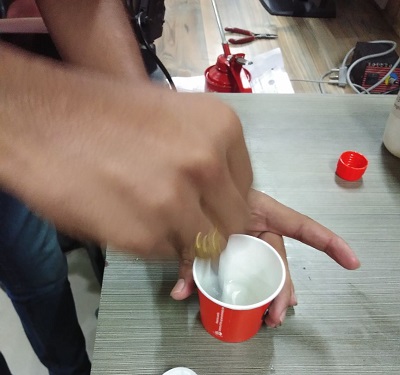
After mixing poored into the silicon mold.
Then I embedded the photo of lord ganapathi in between the epoxy .
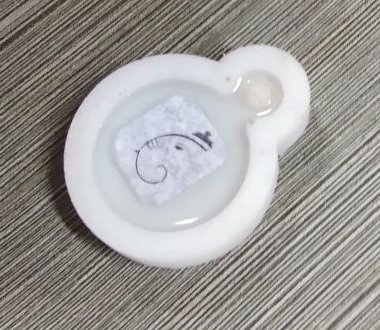
this is just an experiment of keychain so you can embedded an color photo of any thing.
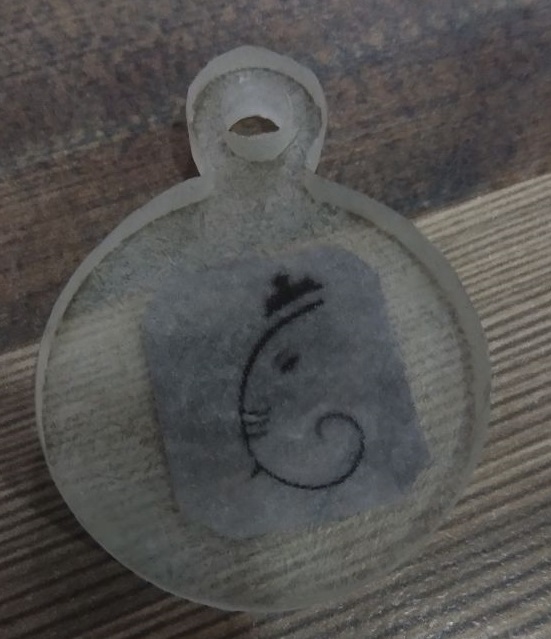
The Epoxy take around 12 hours to dry and get storng.
Finally it looks like this.
You can download my design files here
I pored alot of silicon but be carefull when your poring on the mold. There should not be any boobles in the silicon rubber.
After drying the silicon I removed from the wooden mold. this is the mold which we caled as negitive. Thats why we get positive product from the negitive.
I cutted boundaries of silcon mold..
And I started making casting of Epoxy.
Befor started casting of epoxy I wanted to embedded pic in between the epoxy..
So I have download the lord ganesha pic from the google and imported in paint and resized the pic..
So for the exact picture I just converted the MM into Pixels because I dont know the exact Pixels. I know thw mm thats why i converted the mm into pixcels.
So this is the pixels (69.921259843).
And then I started Casting.
Material needed for Epoxy casting.
Process
I took 2 parts of Epoxy-33-A and mixed with 1 parts Epoxy-33-B. And mixed with a stick.
2 parts of Epoxy-33-A
1 parts Epoxy-33-B
So I mixed alot
After mixing poored into the silicon mold.
Then I embedded the photo of lord ganapathi in between the epoxy .
this is just an experiment of keychain so you can embedded an color photo of any thing.
The Epoxy take around 12 hours to dry and get storng.
Finally it looks like this.