$ git config --global user.name "aditya"
$ git config --global user.email tarigoppula1@gmail.comFABACADEMY
Project Management
Welcome to my week 2
Project Management
Learning Outcomes:
1. BUILDING A WEBSITE:
USING:Windows 10 , Asus Laptop
This is the second week of Fab Academy and it starts from understanding what do we plan to do in our whole Fab academy journal, to understand how do we update our experiences through GIT and also to develop our personal website and Final project plan.
1. CONCEPTS
I first went through the WEEK 2 of Fab academy module properly to go through the concepts mentioned and which are required to learn for this week.
2. TOOLS
There are many tools you can use for making your website.
As simple as Notepad in your system, in which after typing HTML code , you have to save it in .html format.
Other Tools which i explored are as follow:
FUNCTIONS: Live view, helps you view changes immediately, Quick edits( well you will never remember the tags used in HTML like br for bracket etc etc while you code. So when you type br, it gives you options what it stands for and also shows other tags starting with b giving you exposure to new tags like it did to me.)
I got to know about this tool much later but when i did i liked it and may be i will be using this one in future.
3. HOW I DID IT?
After several tries I Changed my template because it had some coding suggestions with codes, which confused me further as im new to website making. and it was 2am at night so i decided to start fresh the next morning.
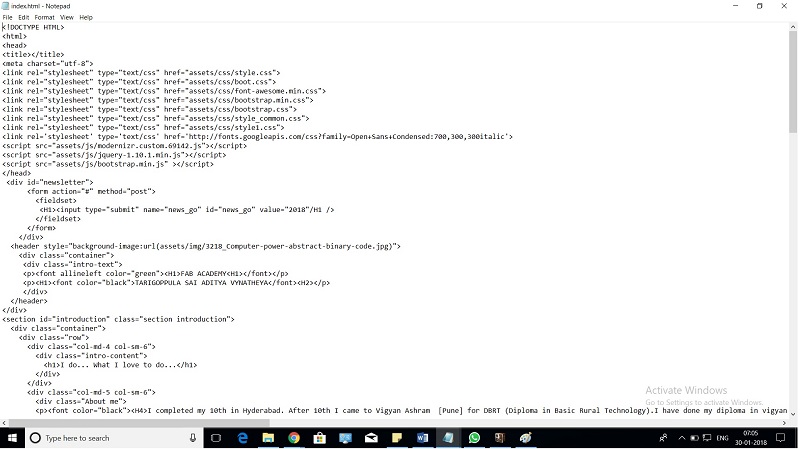
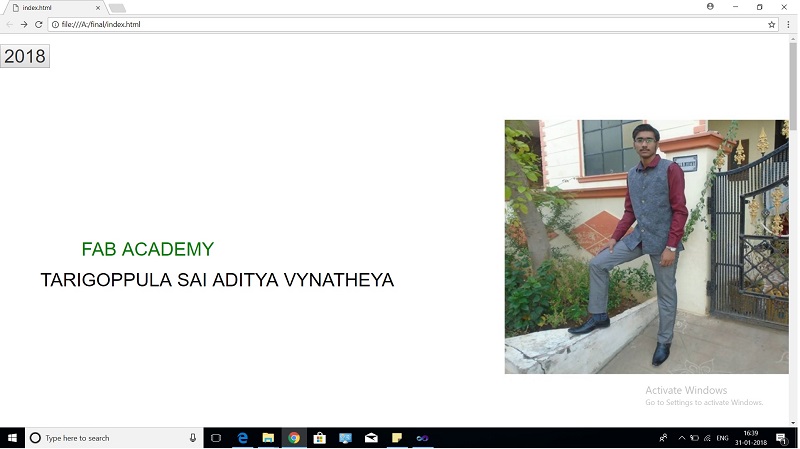
I started html, took boostrap codes and Css from my previous editings and started coded. I made my own sketches and photoshoped them to make my website look personalised.

Finally Thats how it looked.
I. Text edit
II. Image Insert and resizing
III. Tabs
IV. Navigation bar
V. Linking my text to other pages
VI. Header and Footer
VII. Progress bar
VIII. Fonts
IX. Background
X. Margins
XI. Folder Management because I ended up making multiple copies every time I improved or edited.
References:
HTML & CSS
2. First Date with GIT
USING: Asus laptop I have downloaded the git for windows.
What is GIT?
Git is a free and open source distributed version control system designed to handle everything from small to very large projects with speed and efficiency.
If you plan to maintain parallel, largely shared but permanently somewhat different lines of the same product, use Git. Many VC software exist, the most popular are Subversion, Mercurial and GIT. Each has his strength and weaknesses. The most used worldwide is GIT and even we in Fab academy will be using GIT.
GIT vs MERCURIAL
Fab Academy was earlier Mercurial. But we will be using GIT.
So it makes it essential to study the difference between the two. I have gathered some information over it by interacting with earler fab academy students like our instructors and by searching online.
If you plan to maintain parallel, largely shared but permanently somewhat different lines of the same product, use Git. Many VC software exist, the most popular are Subversion, Mercurial and GIT. Each has his strength and weaknesses. The most used worldwide is GIT and even we in Fab academy will be using GIT.
So it makes it essential to study the difference between the two. I have gathered some information over it by interacting with earler fab academy students like our instructors and by searching online.
Why GIT
This is the main thing to remember about Git if you want the rest of your learning process to go smoothly. Git has three main states that your files can reside in: committed, modified, and staged. Committed means that the data is safely stored in your local database. Modified means that you have changed the file but have not committed it to your database yet. Staged means that you have marked a modified file in its current version to go into your next commit snapshot.This leads us to the three main sections of a Git project: the Git directory, the working tree, and the staging area.

The basic Git workflow goes something like this:
-You modify files in your working tree.
-You stage the files, adding snapshots of them to your staging area.
-You do a commit, which takes the files as they are in the staging area and stores that snapshot permanently to your Git directory.
Source: READ MORE ABOUT GIT
Installing GIT Our instructor (Mr.Puneet) explained us how to use. After that, I tried installing GIT. Following steps were taken for the same:
STEP 1 : Before downloading learnt some common git commonds.
I've listed them here for a quick run through.
-> git init
-> git add
-> git push
-> git pul
-> git clone
-> git status
-> git config
-> git remote
I've listed them here for a quick run through.
-> cd a:
-> cd ..
-> cd
-> fabacademy
-> git init
-> git config -- global user.name"Aditya"
-> git config -- global user.email"tarigoppula1@gmail.com"
-> git clone https://gitlab.fabcloud.org/academany
fabacademy/2018/labs/fablabakgec/students/tarigoppula-saiadityavynatheya.git
STEP 1 : cd a:

STEP 2 : cd ..

STEP 3 :fabacademy

STEP 4 :git init
git-init - Create an empty Git repository or reinitialize an existing

STEP 5 :My Identity
The first thing you should do when you install Git is to set your user name and email address.
This is important because every Git commit uses this information, and it’s immutably baked into the commits you start creating you need to do this only once if you pass the --global option, because then Git will always use that information for anything you do on that system.
If you want to override this with a different name or email address for specific projects, you can run the command without the --global option when you’re in that project.:
Many of the GUI tools will help you do this when you first run them.


STEP 6:git clone https://gitlab.fabcloud.org/academanyfabacademy/2018/labs
/fablabakgec/students/tarigoppula-saiadityavynatheya.git

Git has a number of different transfer protocols you can use.
The previous example uses the https:// protocol, but you may also see git:// or user@server:path/to/repo.git, which uses the SSH transfer protocol.
Getting Git on a Server will introduce all of the available options the server can set up to access your Git repository and the pros and cons of each.
After this if you Modified the html pages or you added some thing then its easy to push the local pages to clone
Git Bash my Folder
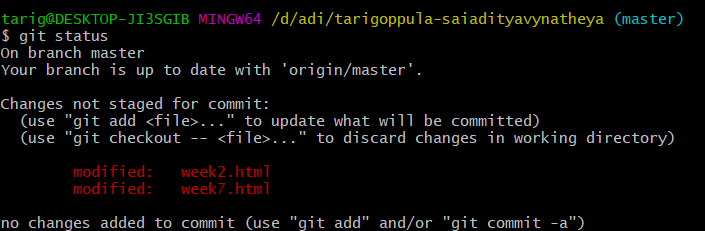
STEP 1 : git status
STEP 2 : git add .

STEP 3 :git commit -m "update"

STEP 4 :git push origin master

The first thing you should do when you install Git is to set your user name and email address.
This is important because every Git commit uses this information, and it’s immutably baked into the commits you start creating you need to do this only once if you pass the --global option, because then Git will always use that information for anything you do on that system.
If you want to override this with a different name or email address for specific projects, you can run the command without the --global option when you’re in that project.:
Many of the GUI tools will help you do this when you first run them.
STEP 6:git clone https://gitlab.fabcloud.org/academanyfabacademy/2018/labs /fablabakgec/students/tarigoppula-saiadityavynatheya.git
Git has a number of different transfer protocols you can use.
The previous example uses the https:// protocol, but you may also see git:// or user@server:path/to/repo.git, which uses the SSH transfer protocol.
Getting Git on a Server will introduce all of the available options the server can set up to access your Git repository and the pros and cons of each.
After this if you Modified the html pages or you added some thing then its easy to push the local pages to clone
Git Bash my Folder
STEP 1 : git status
STEP 2 : git add .
STEP 3 :git commit -m "update"
STEP 4 :git push origin master