☢ Group 1 ☢ Group 2 ☢ Group 3 ☢
Determining the settings for the kerf test
Even though we were doing other tests to characterise the laser cutter, we still needed some basic settings to be able to run the kerf test (in the interest of saving time). I read through the laser-cutter log book, which listed Waag Society members' successful and unsuccessful cuts, what the material was, and what the parameters were. I read through until I found some numbers of 3mm-plexi, 3mm-cardboard, and 3mm-MDF. I then created a test template in LaserCut5.3 of a simple 1-cm^2 square, and tested each of the settings for each material.
Each of the tested settings were successful. They were:
- Acrylic, 3mm. Speed: 20. Power: 100.
- MDF, 3mm. Speed: 40. Power: 100.
- Cardboard, 3mm. Speed: 150. Power: 90.
This was my absolute first time using a laser cutter. Some observations:
- Always make sure the ventilation is on until you're done!
- In LaserCut5.3, TAB or click out of fields or else the value doesn't stick. :-/
- Always engrave before cutting, or else things move.
- When you receive the error "read soft-dog error. Please retry." Keep retrying until it works.
- If you redo a cut without touching anything but moving the laser head to a new location, check the depth again, because your material might be bowed in the new location.
Cutting observations
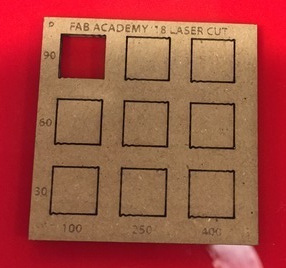
In our 3x3 grid, only the setting of speed: 100 and power: 90 made a cut, but for our kerf test we used speed: 150 and power: 90. The first unsuccessful cut was with speed: 250. So the speed threshold for cutting at power 90 is somewhere in between 150 and 250.
Kerf observations
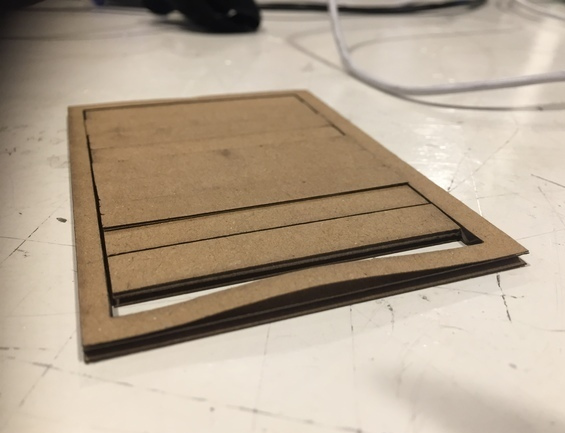
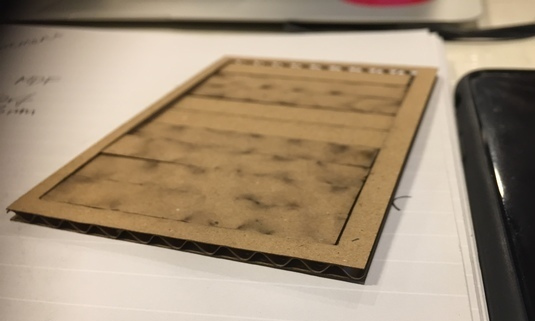
Our first cardboard kerf test cut the cardboard strips in the direction of the corrugation. This meant that, when pressed up against each other, the edges of the cardboard strips were overlapping. We recut it so that the strips were cut lengthwise perpendicularly to the corrugation, giving that long side a firmer edge. Note: think about what you want your cardboard pieces to do, and cut in the correct orientation!
Engraving observations
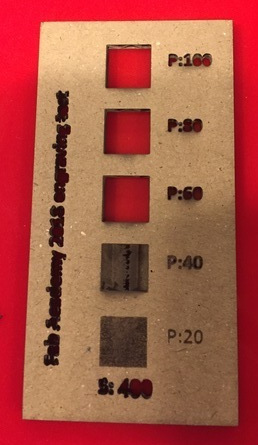
Speed 400 power 20 looks just fine.
Kerf measurements
Measuring cardboard is difficult! We used a digital caliper for measurements. And it's hard not to use to much force. Cardboard is quiet sensitive for pressure.
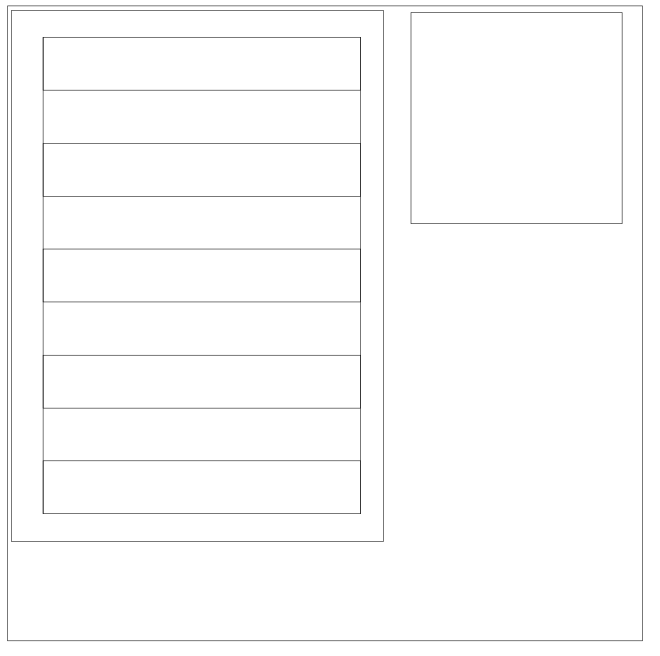
For the design we used inkscape. Because of export/import problems (resizing) a bigger square was used around the actual parts, measuring 120x120mm, as a reverence. Once imported in LaserCut (the program that is used to send the file to the lasercutter) we checked the dimensions again and adjusted them to the actual size. Then this square was removed.
The design for the kerftest is a square of 4x4cm. The second is a pattern (see above) that is cut in cardboard on the laser cutter. By sliding all the cut pieces to one side of the frame and inserting the caliper we were able to determine the total material lost. Divide that by the number of cuts and you have the material removed by each cut.
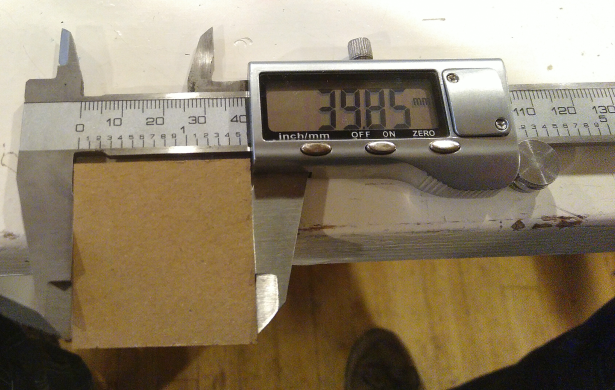
As said it's hard to measure cardboard. As seen above on the 4x4 square there is a kerf of (40-39.85)/2 = 0.075mm.
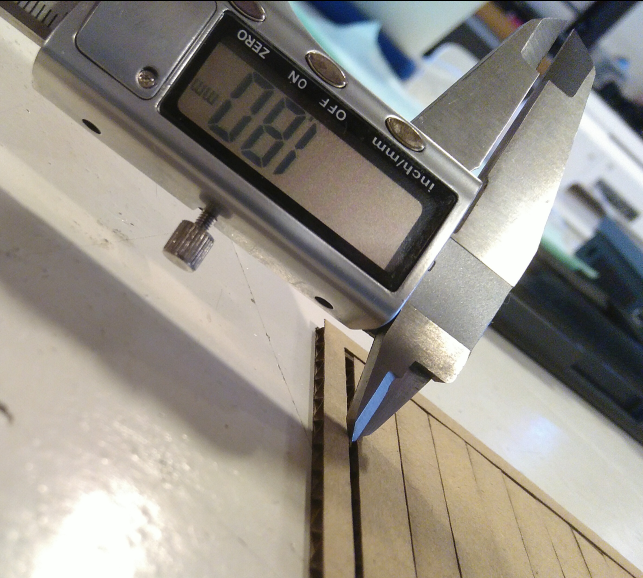
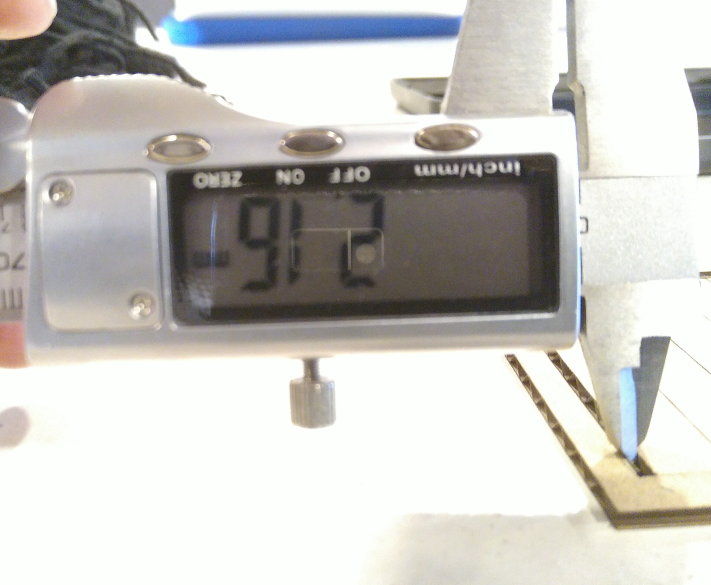
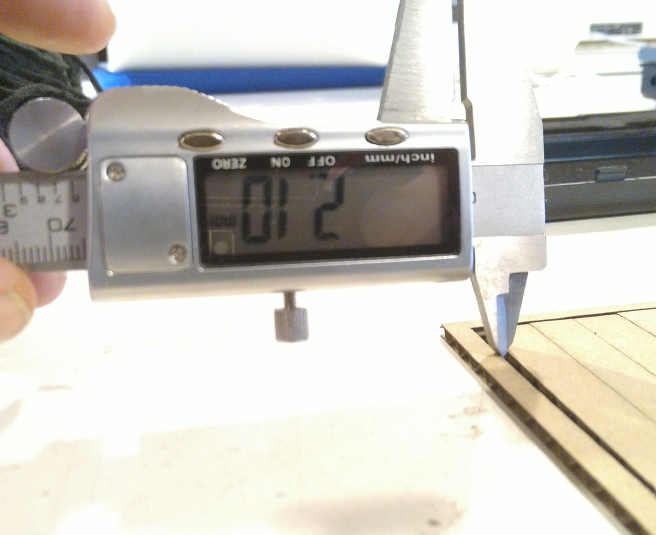
The pattern should be more precise. The kerf is measured 3 times. At both corners and in the middle. One corners give a 2.10mm kerf, the other 2.16mm. In the middle the kerf was 1.8/10 = 0.18mm. And that is probably because we didn't want put to much pressure on the cardboard. So it looks save to use both corner measurements for accurate. So the outcome of this kerf measurements are (2.16+2.10)/2 /10 = 0.213mm.
Conclusions
Kerf: 0.213mm
Cutting: Speed somewhere between 150 and 250, power 90.
Engraving: Speed 400 power 20 is good.