

🎶 🎶 🎶
Files: Here
Assignment requirements
The first checklist
Design a machine (mechanism + actuation + automation), including the end effector, build the passive parts and operate it manually.
The second checklist: Learning outcomes
- Work and communicate effectively in a team and independently
- Design, plan and build a system
- Analyse and solve technical problems
- Recognise opportunities for improvements in the design
The third checklist: Has your group
- Shown how your team planned and executed the project
- Described problems and how the team solved them
- Listed future development opportunities for this project
- Included your design files, 1 min video (1920x1080 HTML5 MP4) + slide (1920x1080 PNG)
Let's go
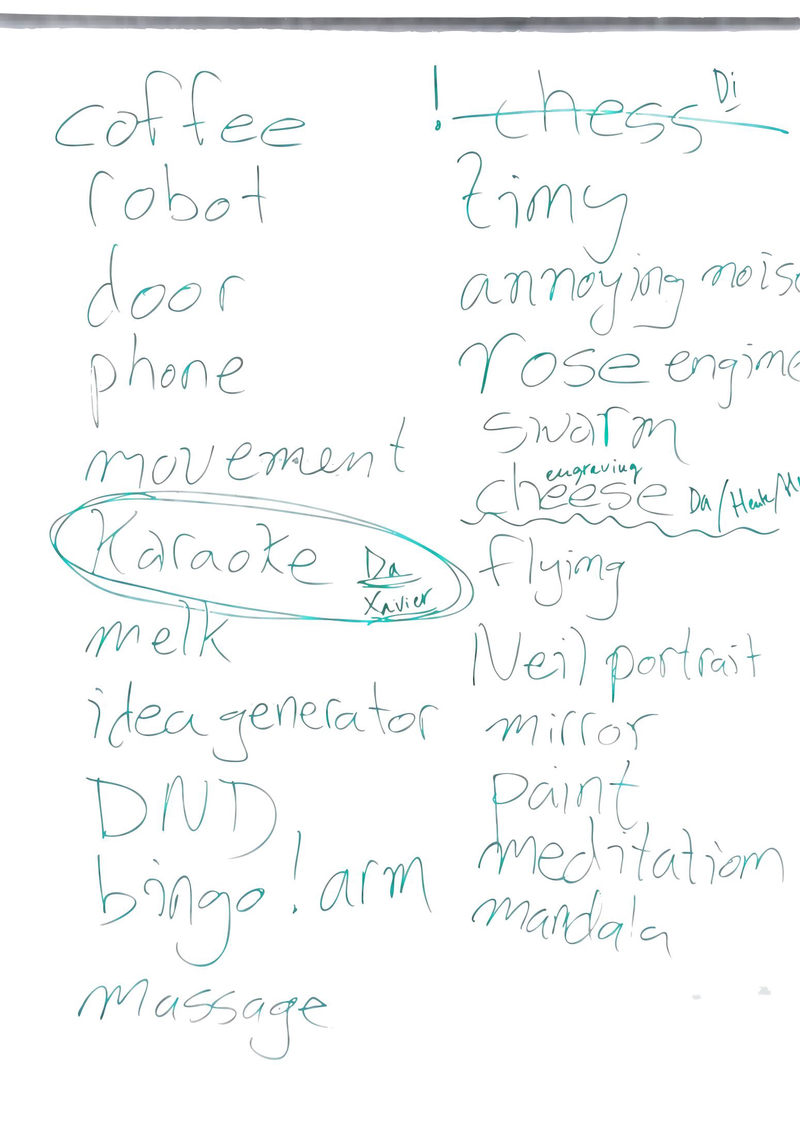
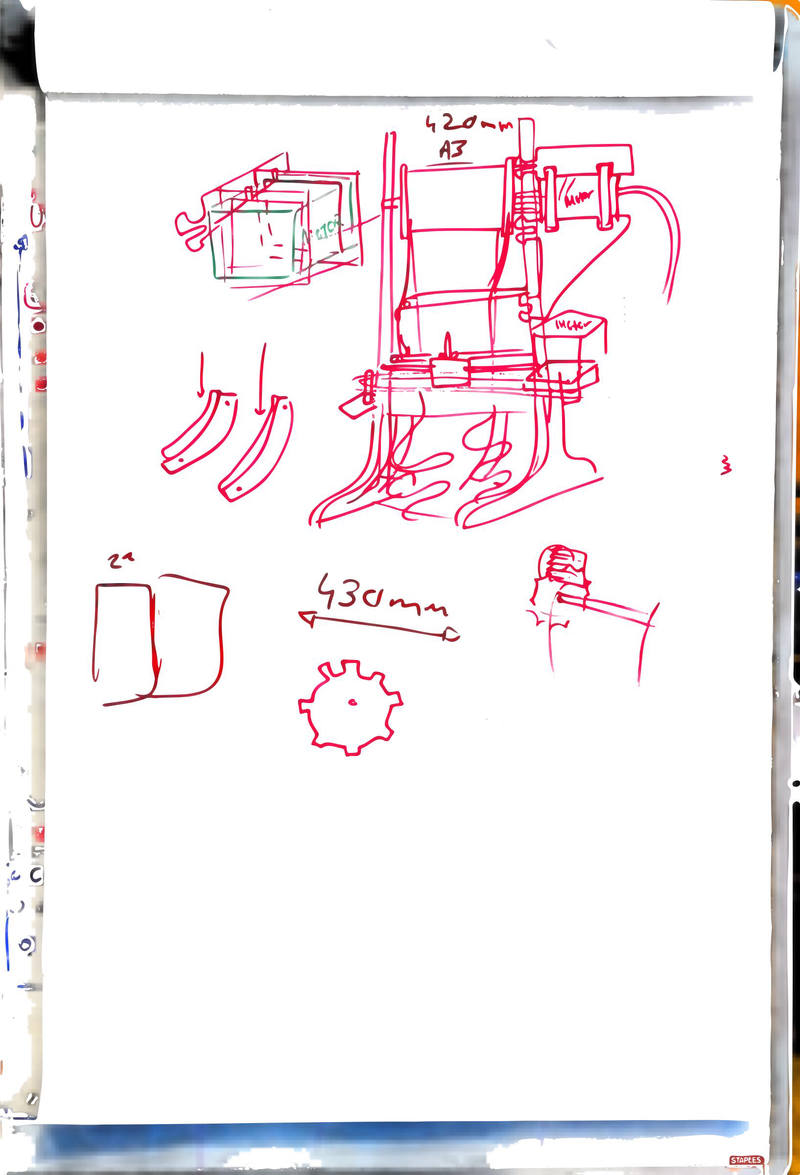
The task is to work in groups and build a working "machine". We chose an "analogue" 🎶 karaoke machine 🎶. That is, a machine that displays lyrics for a karaoke song without a screen. After much discussion, we settled on a form where a scroll of lyrics is slowly unwound (or rewound), and a hand on a horizontal axis points to the word to sing.
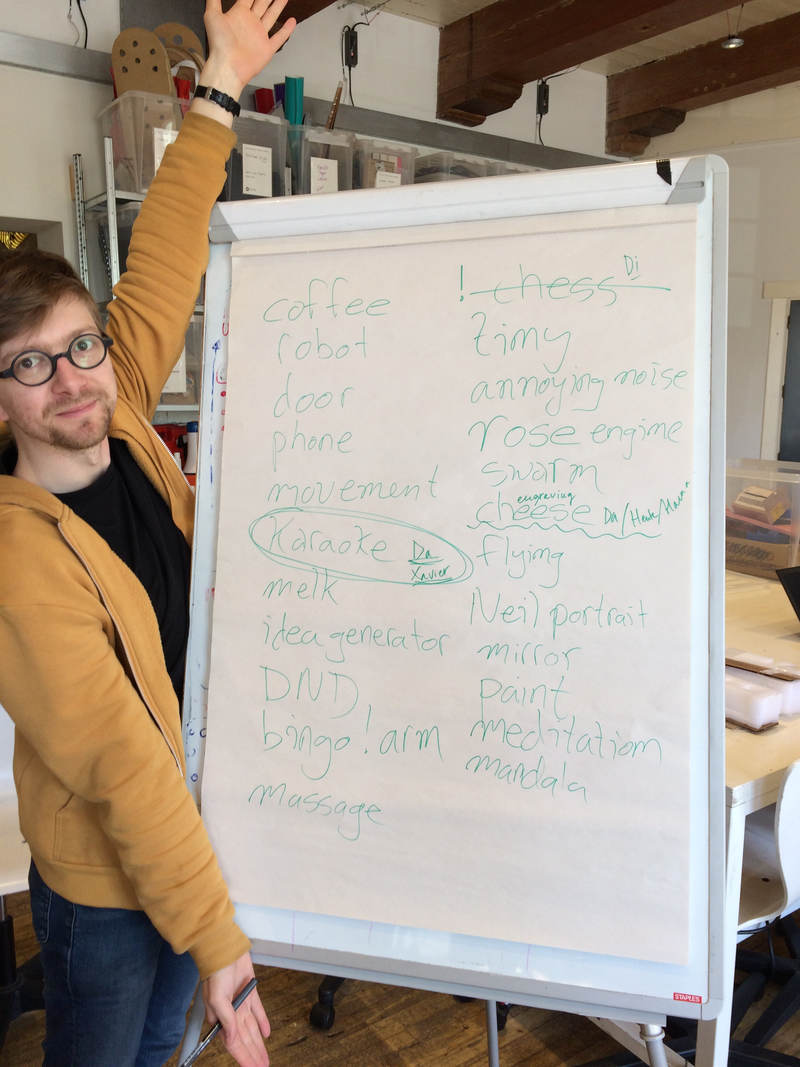
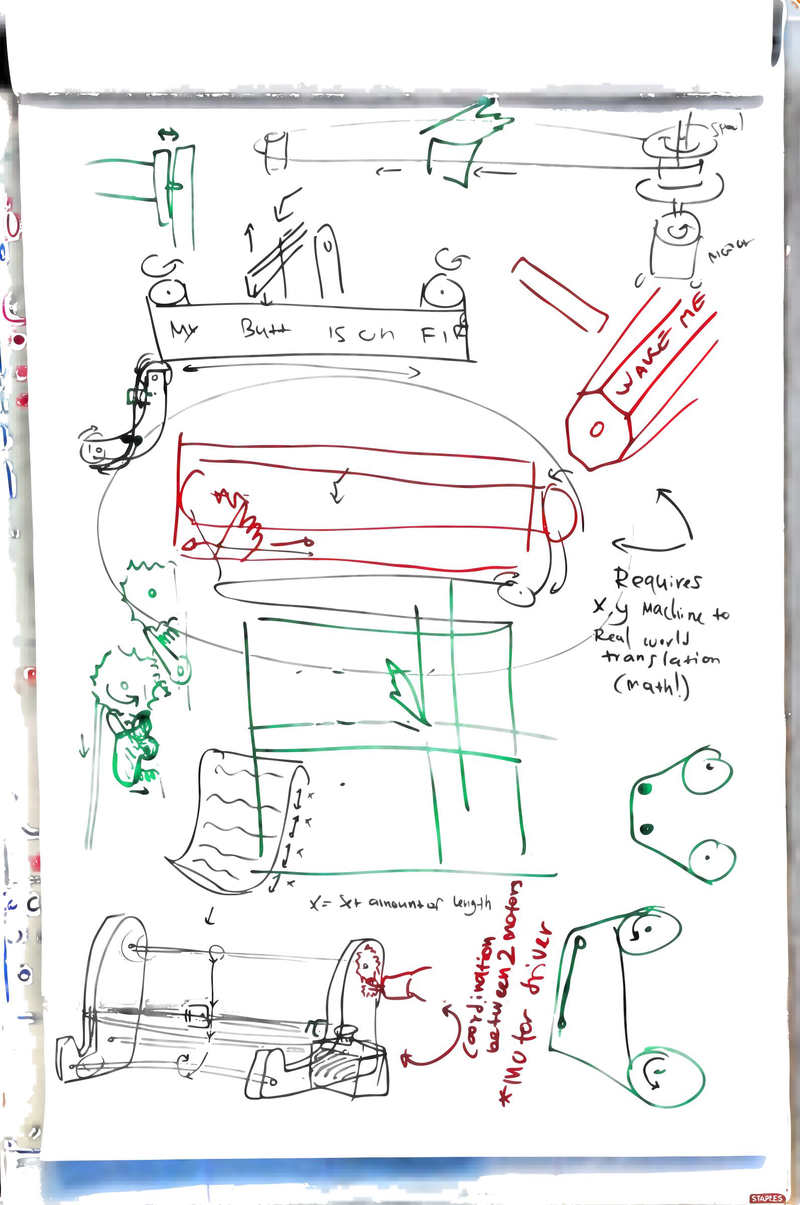
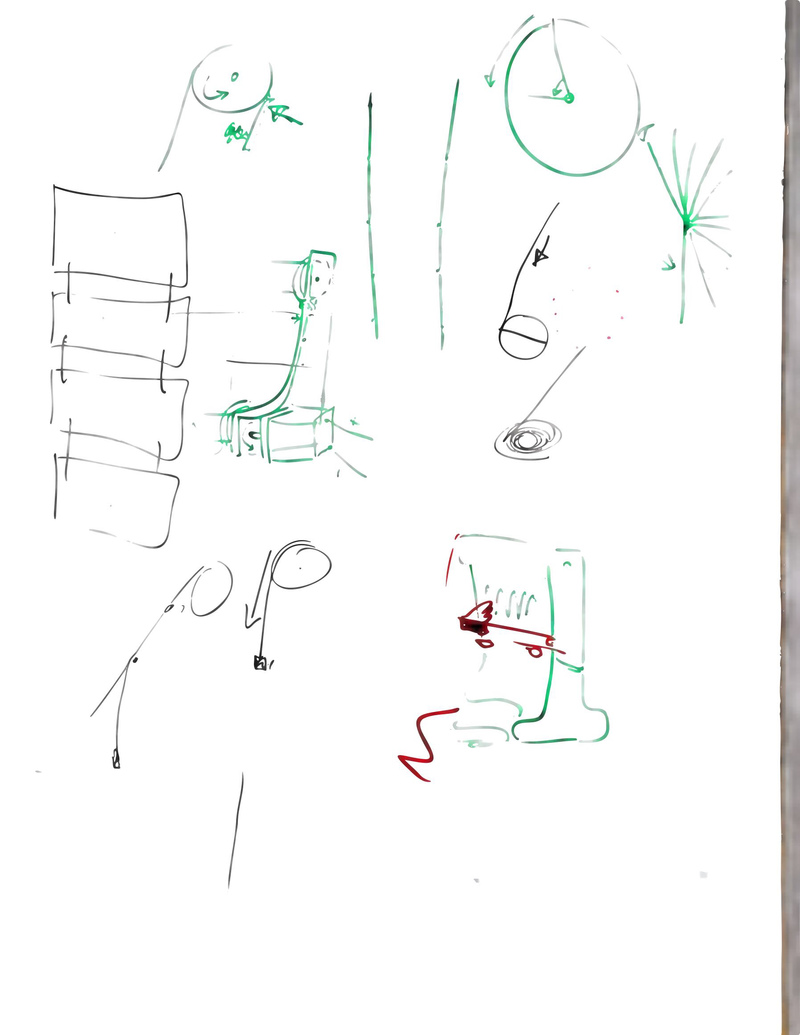
Here are images of the keywords that everyone created for generating ideas, Xavier looking adorable, and our form sketches from discussing the design.
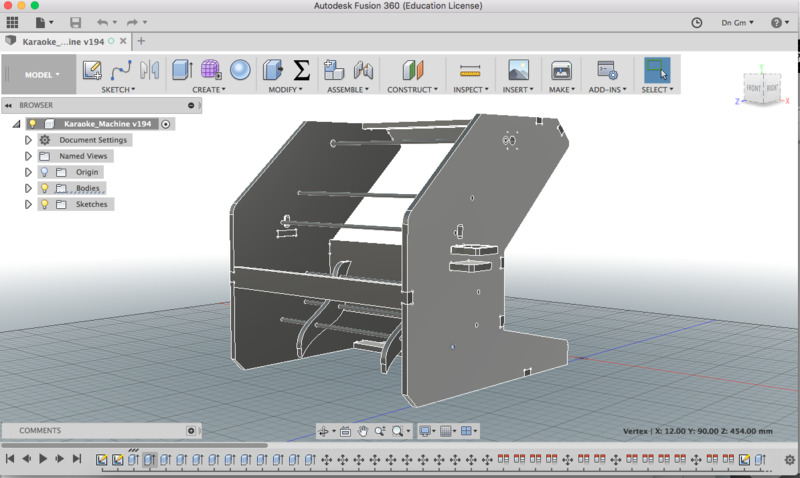
We divided tasks. Our scheduling put pressure on our availability. David was only available until Friday, Xavier would be working separately in Brussels, and Dmitri would be working later. Dmitri has a good feel for the form, so he was tasked with designing the frame of the machine, David would design the pointing mechanism, and Xavier would construct based on Dmitri's designs, at his lab in Brussels. We all use Fusion 360, so we would make use of its sharing abilities.
Here is the public link for the design.
Dima made the form. See here:
The Hand
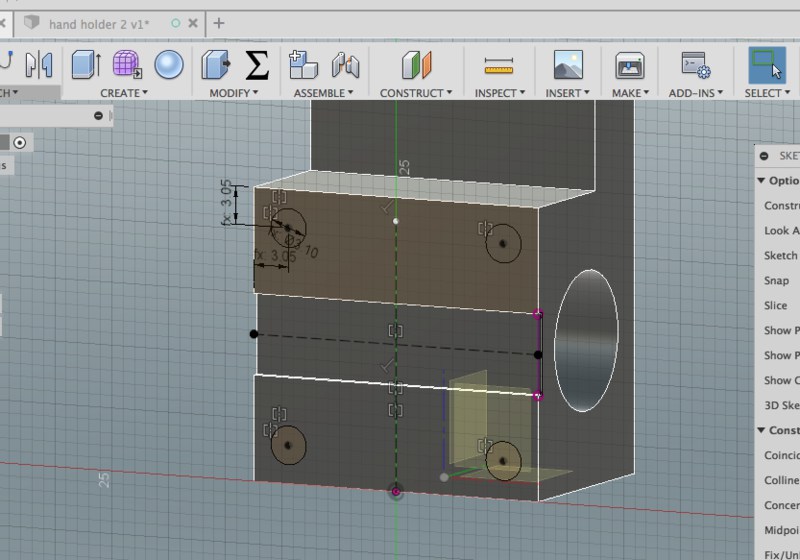
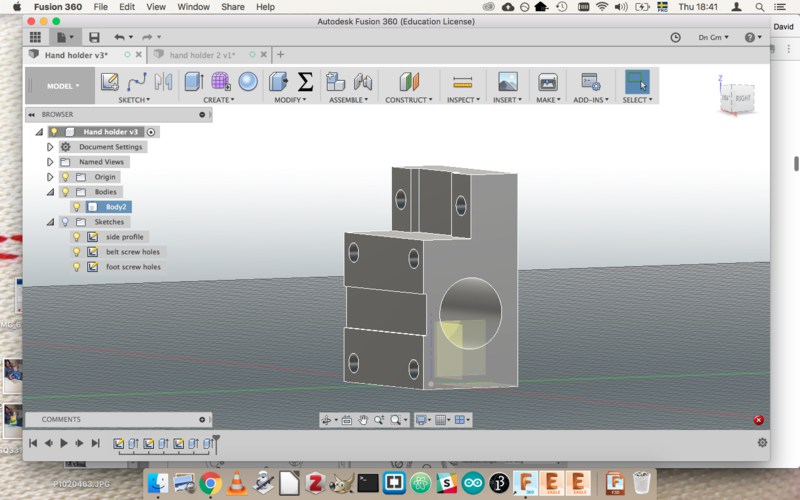
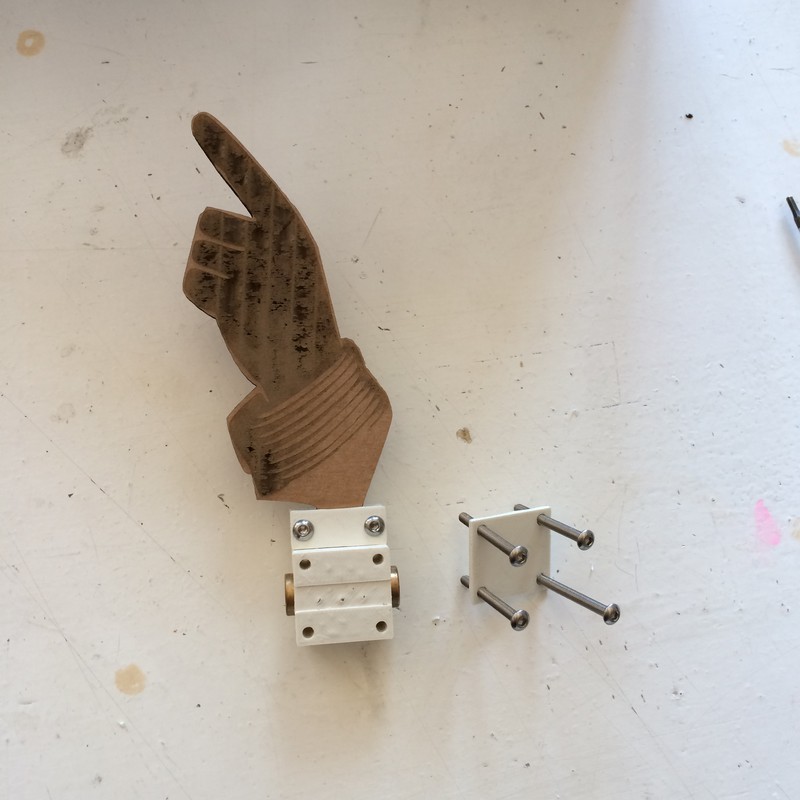
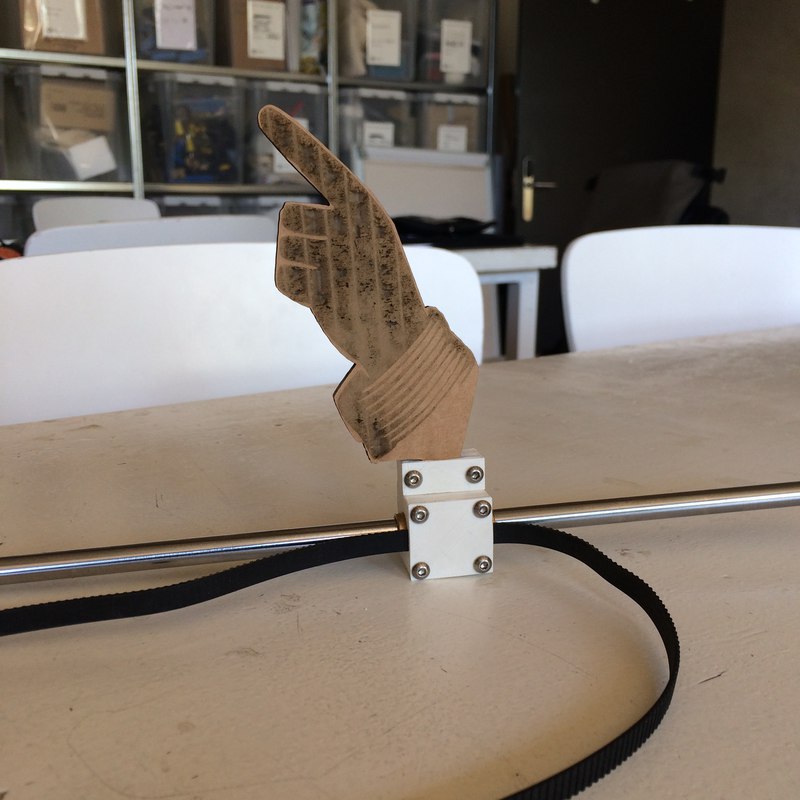
We determined that the hand module would run along a horizontal bar, pulled by a belt controlled by a motor at the edge of the machine. David examined a similar mechanism from an Ultimaker, and designed a new part according to our needs.
Some things: we have access to 6mm timing belts, also known as B300MXL or GT2 belts. David determined that we would have a changeable hand, with a length of 10 cm from base to fingertip. The module would clamp to the belt, and also clamp in the base of the hand. There would be nothing fancy like flexure clips. We would use screws to squeeze the components into place. After all, we weren't building anything that required precision or was going to be under any real stress.
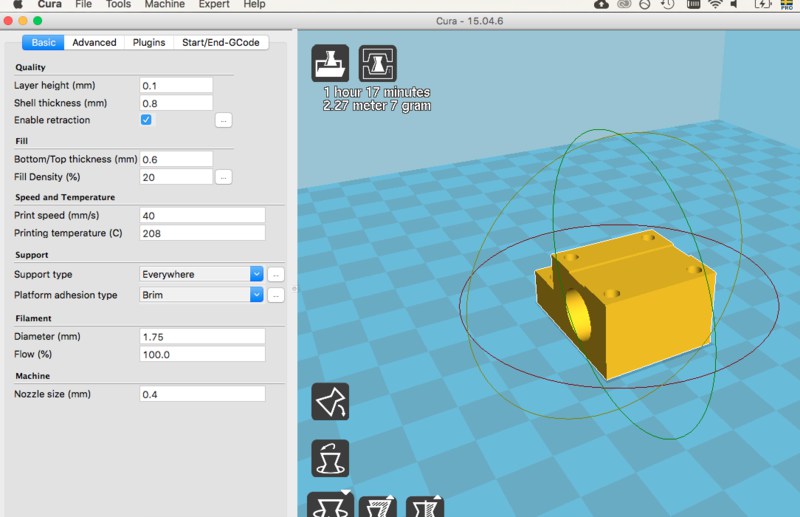
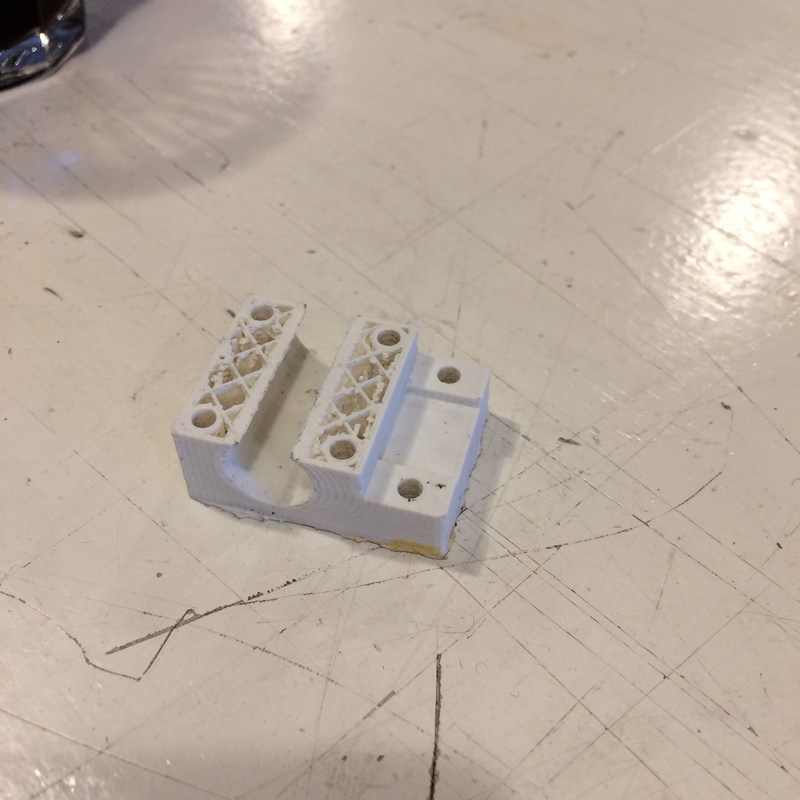
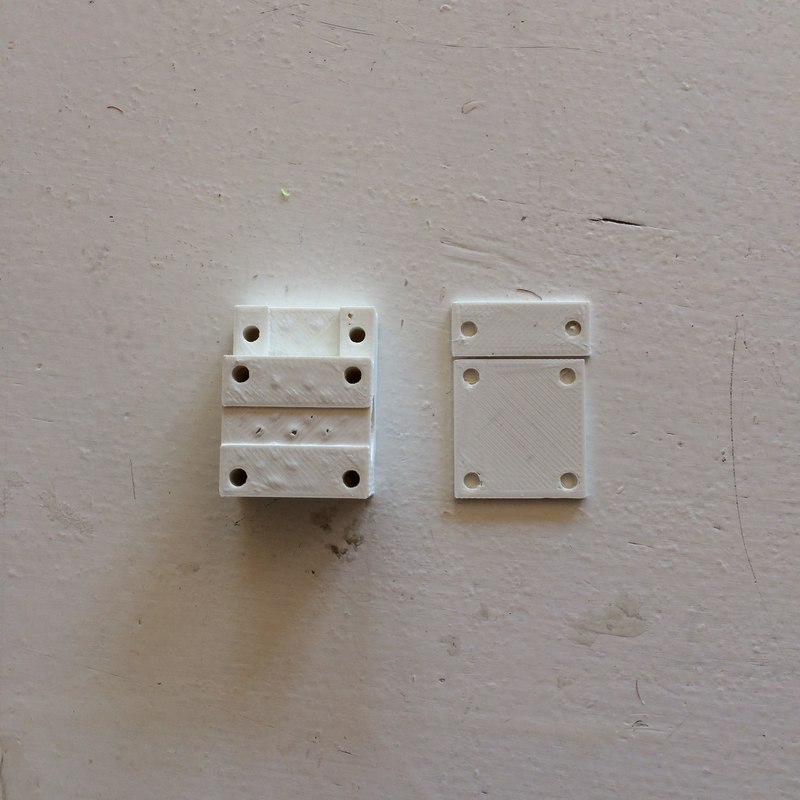
I printed the part on the Printrbot Metal Plus in PLA, using the default settings (layer height .1mm, shell thickness .8mm, speed 40). The result of the first print was fine, so I didn't see any need to alter and reprint. The hand clamped in as expected, though the screws screwed into the plastic, which worked well enough that I didn't use nuts to secure the screws. And the linear bearing fit in just great.
Here are some photos of the parts being designed, printed, and together with a test hand in cardboard. The aborted print there had to be stopped because I had to leave the lab to go home (there's a lesson there about time management and starting digital-fabrication jobs).
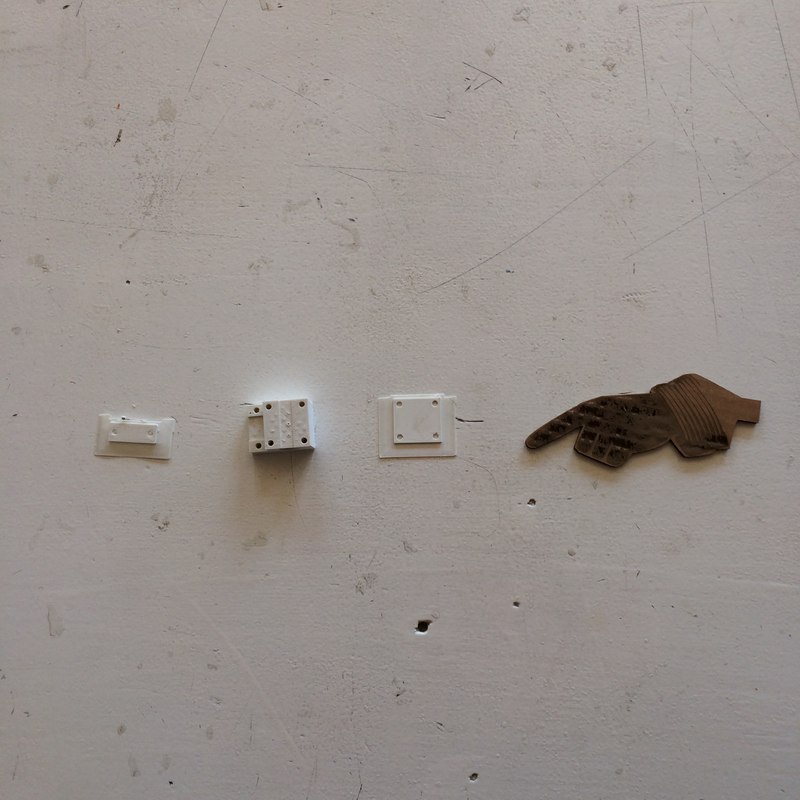
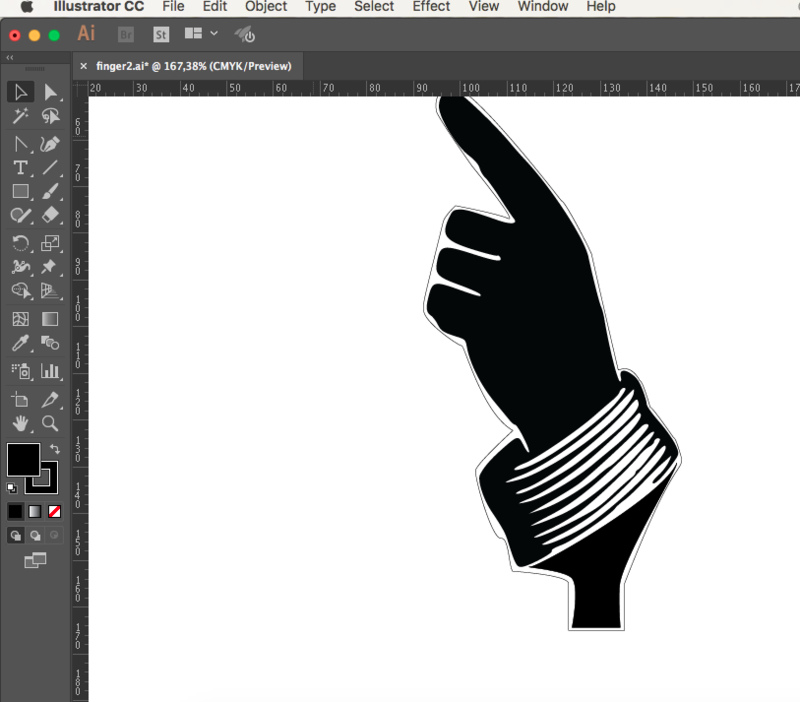
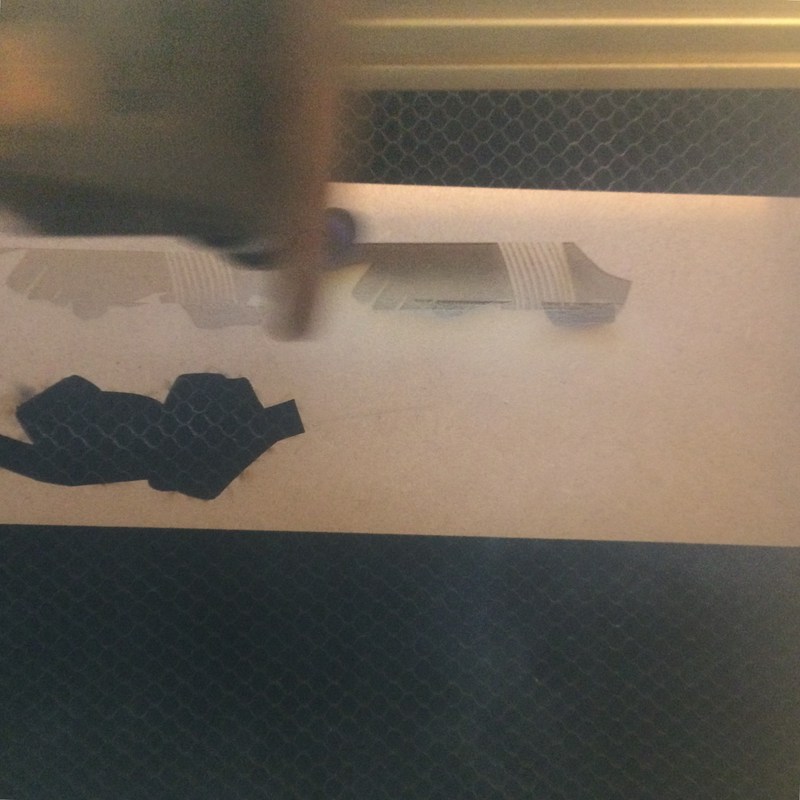
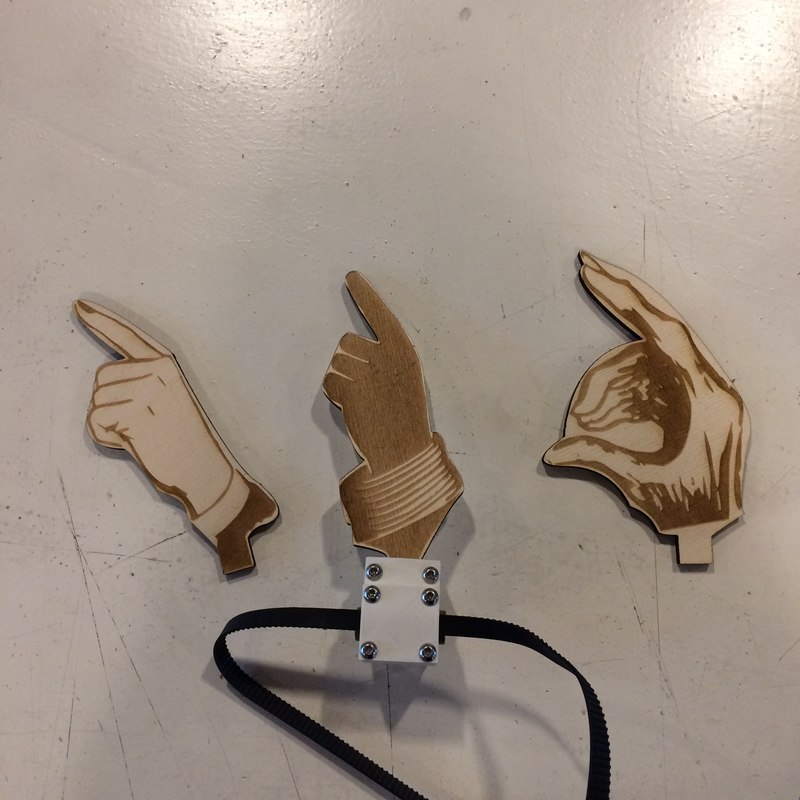
The hand would be laser-cut out of MDF or plywood. David used free SVG files of pointing hands, added a base tab to them in Illustrator, and cut them out on the laser cutter. After some experiments, it turned out that etched plywood had a greater contrast, so plywood was used instead of MDF. Three hands: a lady's hand, a man's hand, and a monster's hand. Monster hand from here, and man's and lady's hand from here
While laser cutting, David kept having an problem where midway through etching the pattern would "glitch", producing a shifted pattern with a hard horizontal edge across it. I could not find the cause of this, but restarting the computer and the laser cutter made the problem go away. Here is a picture of editing the hand in Illustrator, the laser-cutting problem, and all three hands with the mount.
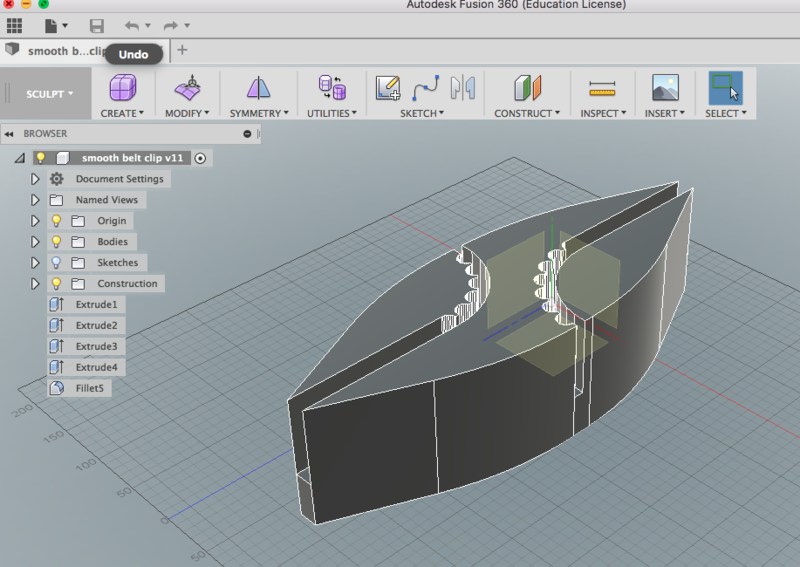
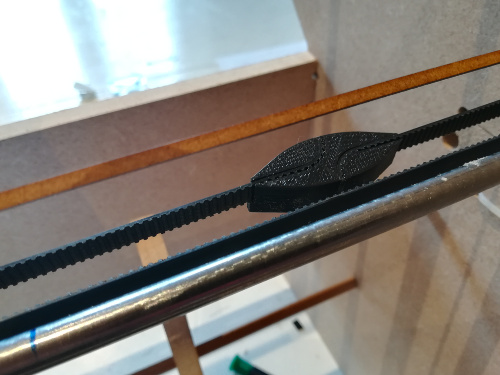
I downloaded a belt clip from Thingiverse to attach the two belts together. I printed it using our Printrbot Metal Plus in PLA using the default settings (layer height .1mm, shell thickness .8mm, speed 40). In the video from the group page you'll see that the belt clip kept catching on the hand mount. To fix the belt clip that kept catching on the hand mount, I redesigned the file in Fusion 360 to include tails on either side that would guide obstructions around the clip. I printed it as I printed the original clip. See the design here, and the actual printed clip:
I also uploaded my modification to thingiverse, maybe it will be of use to someone.
Xavier's part: CAM and milling
I waited for the files,That Dima was making.
I went to Brico,
To buy two 12mm sheet.

1220X600mm baby
MDF ! The cheapest !
I'm making a Karaoke, Baby!
Finally, I went to my Fablab,
To cut the damn thing.
I prepared all the files,
Using Fusion360...
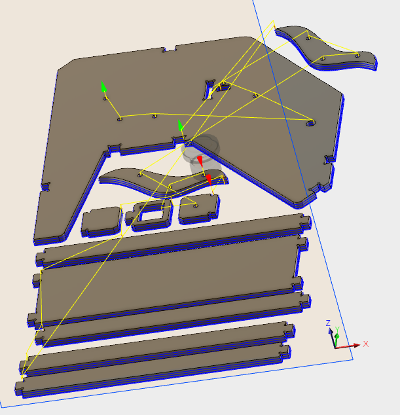
I made the nesting,
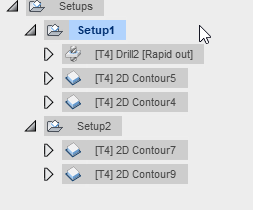
I divided into 2 files
2 setups, 2 sheets,
And using the 2d contours tool.
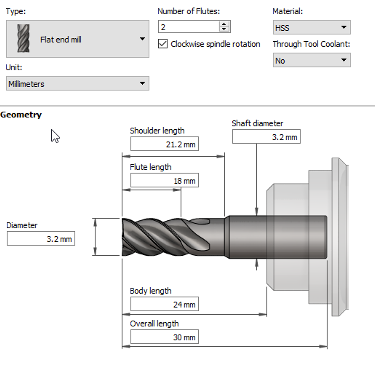
Cutting, with 3.2mm bit
18000rpm spindle speed
1000 mm/min cutting feedrate speed
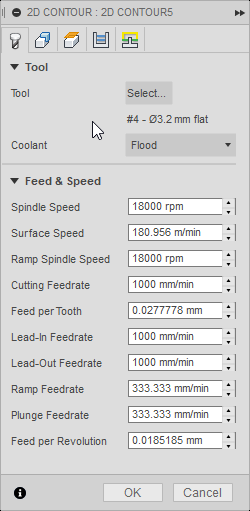
I'm making a Karaoke, Baby!
But I had some issues,
Someone change the bits.
The tool compensation,
was wrooooooooong !
The machine ! Milled too far away!
It's took me 4 hours to solved!
But finally, I made a Karaoke !

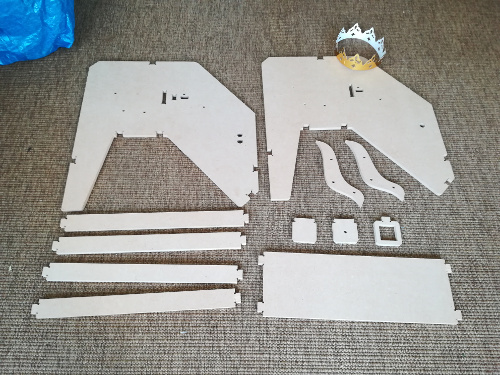
Assembling
So Xavier bring back the machine disassemble and we had to assemble it.It's quite easy to assemble in theory but holes for rods was a bit too tight. We have to send it a bit.
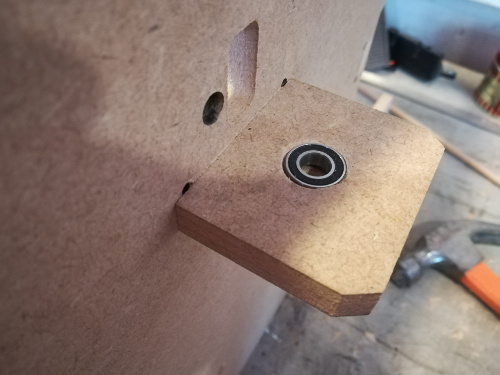
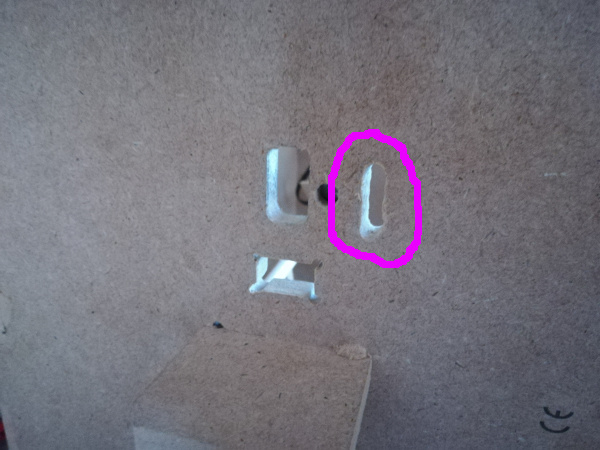
We screwed the motors and place the litlle stands:
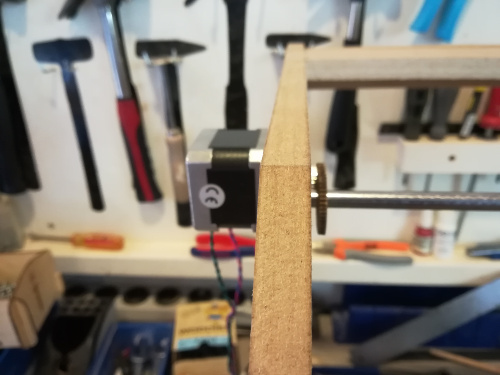

As can see above, we place a bearing to maintain the other gear for the belt:
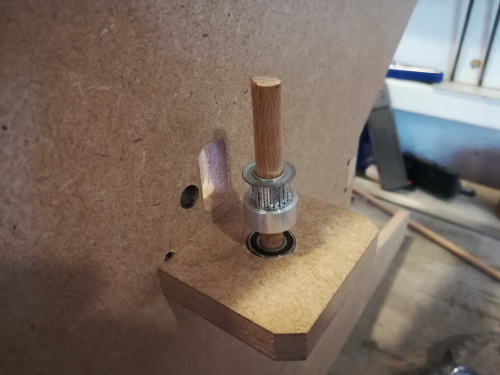
We first try to use laser cutted MDF gears but it was to smooth, so we made this lovely gear system:

Final test:
Second week: Machine design
We divided the tasks. David would provide the basic motor code, Xavier would solve problems between the motors and the machine (making sure it behaved the way it was supposed to) and Dima would do final finessing of the code and automation.Xavier
Some improvementsDavid printed a new belt holder, the first one was touching the carriage and the mechanism sometimes stuck because of that.
I've installed it on the machine:
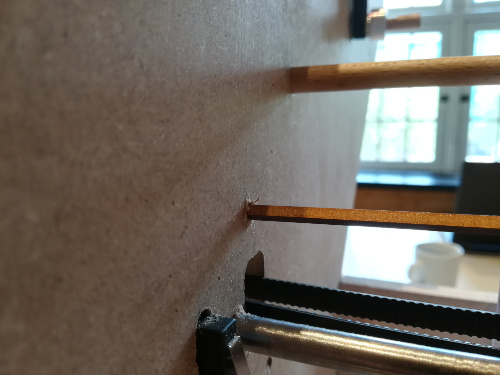
After installing the belt, we saw that it was impossible to strech it in a good way. It was because one of the holders was floppy.
I reinforced it by drilling 2 holes in the machine and bend the stand with a collar:
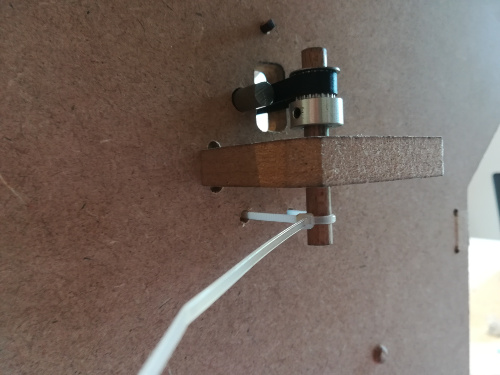
Now the belt is tense.
The carriage with the pointing hand (I cut a new one pointing in the right direction btw) didn't stay in place. I model and cut a 3mm mdf rod to maintain the hand against the paper.
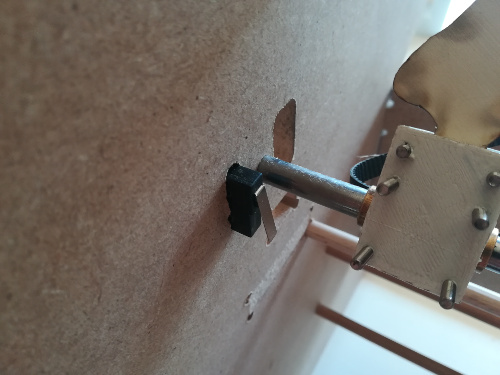
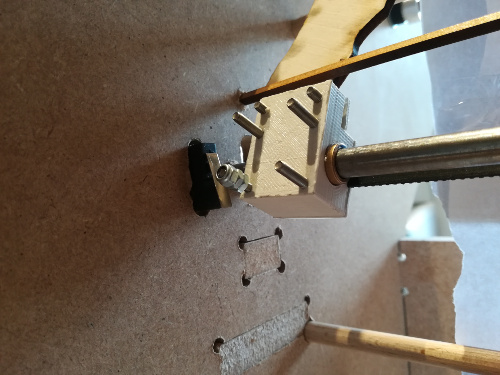
Install an end switch on the machine
We forgot to plan an end switch for the timing axis. So with a drill I managed to make a hole on the machine to stuck it.
End switch dimensions: 20x10x6mm
I put the end switch and screw some nuts on the carriage's threaded rods to improve the contact.
First timing settings
David succed to get the stepper motors working. So now time to calibrate it.
I had to find how many centimeters the carriage will travel during one revolution. So I took the carriage, mark a starting point, we launch one revolution, mark the stopping point.
During one revolution, the carriage travels 4cm. There's 200 steps per revolution so now it's pretty easy to calculate how many steps you need for each time.
D = Distance to travel
S = Number of steps
S = (200xD)/4
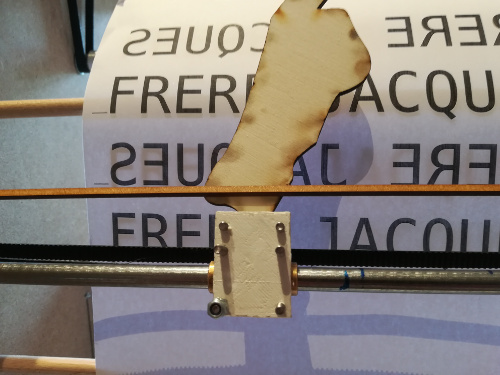
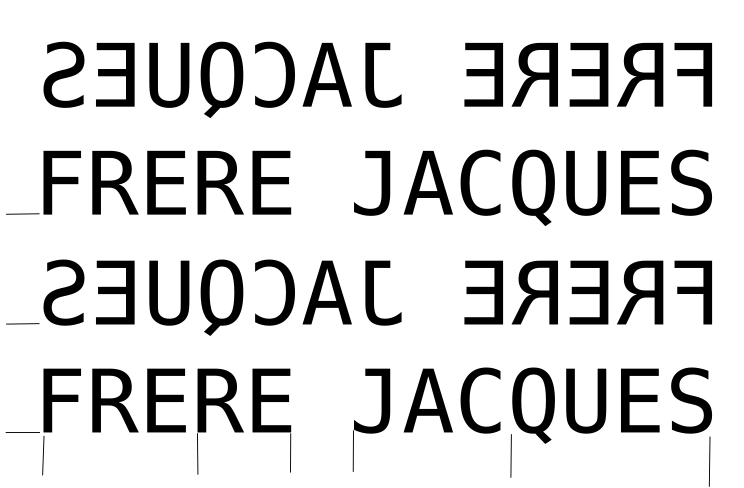
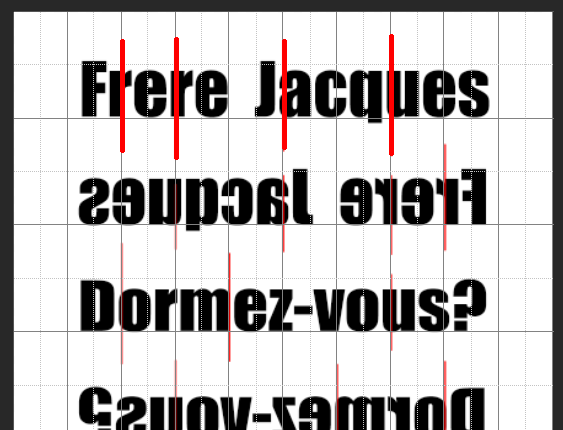
We decided to use Frère Jacques as a test song because it's simple 4/4 beat song. I designed a A4 sheet with the first verses:
Frère Jacques
Frère Jacques
Frère Jacques
Frère Jacques
I use a monospace open-source font, Déjà Vu Sans Mono, to simplify timing calculation.
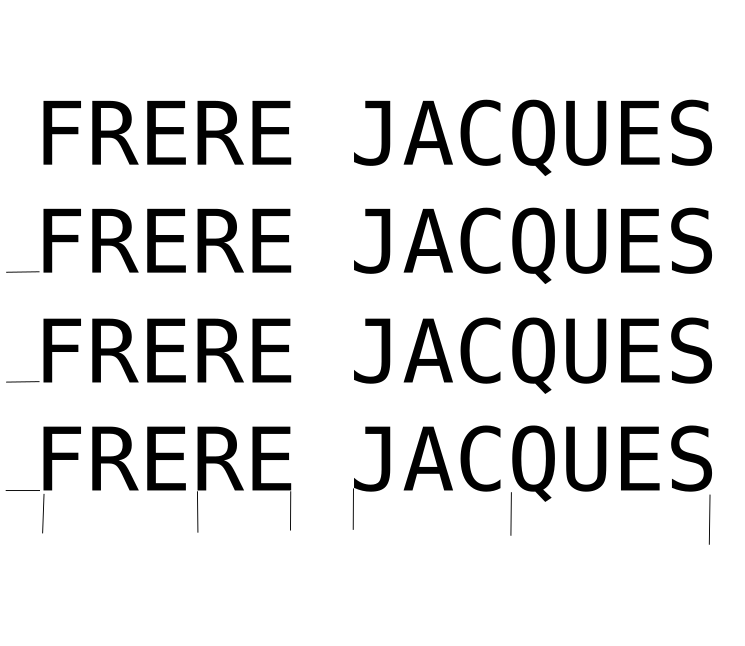
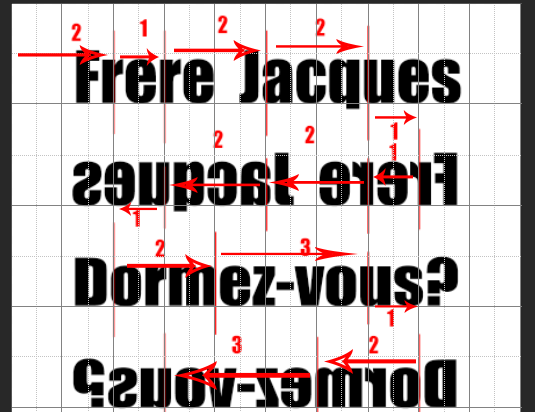
So there's 3cm between each line. So we have to move the paper down using 150 steps (200x3/4).
And for the timing I mesured 4,4cm between each. So 220 steps.
We've installed the paper and make the homing pointing the first word in the first line:
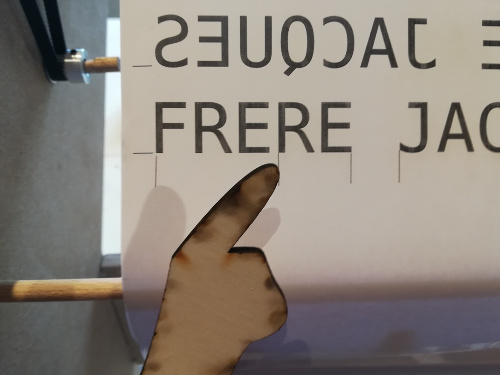
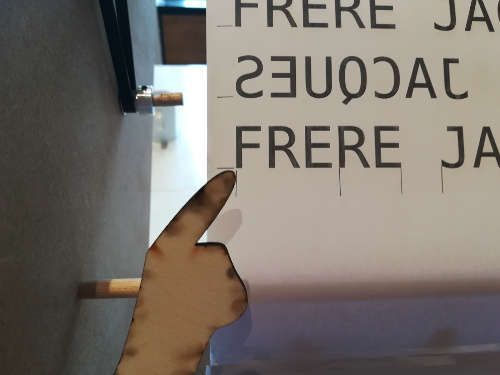
David code this and here's the first result:
We can see all the problems who will be resolve later but most important thing: the motor isn't fast enought when is coming back !
We found a funny solution: each 2 lines, the words are displayed in reverse. Like this, the carriage didn't have to coming back.
Here's the first final result (with homing):
David talks…
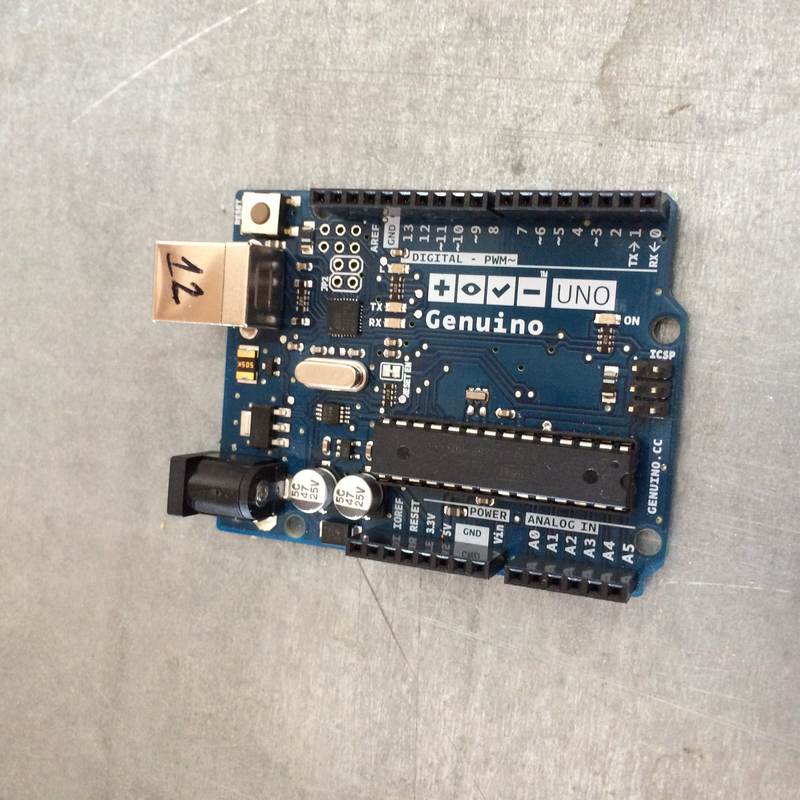
Because I was away from the lab, I couldn't make a new board, so I abandoned the boards I made and used an Arduino and a breadboard.
The raw code that I was using, from Emma, wasn't working. The motor was kind of pulsing, but not turning much. Because I was using an Arduino, I thought I might as well dive in to try the stepper library. The stepper library works. Imagine that. I tried playing with the RPM setting, but setting it to numbers higher than the original 120 seemed to break the code. So stick with 120.
Also, the .rotate(degrees) notation didn't seem to work. But the stepper.move(steps) did work. I don't think it will matter for us whether we tell it to move steps or degrees, since we'll be calibrating by hand and correlating the numbers to how much the roller or belt will move. I would include a copy of the code here (based on the stepperdriver library examples) but it is copyrighted under the MIT licence and I don't have the time to figure out what obligations I have if I want to share the code. Good job.
… a little later…
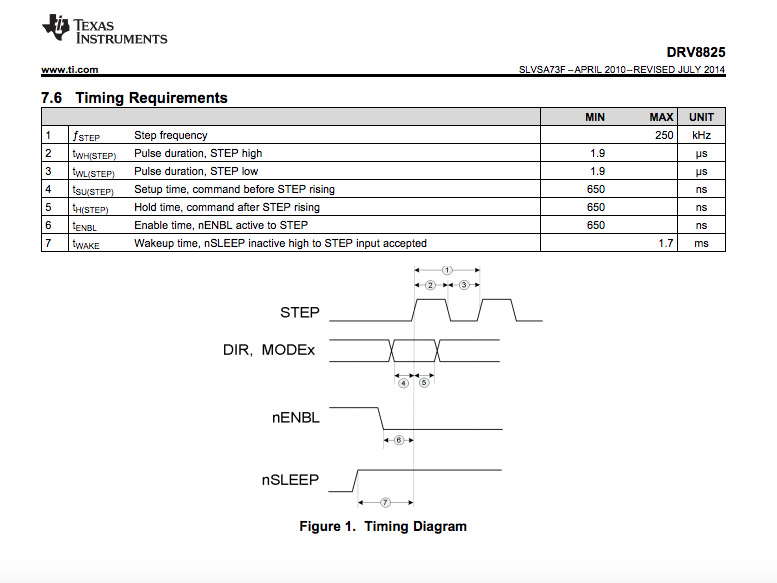
I just got Emma's original code to work. I moved the timing between the pulses from 30us to 500us. Testing the limit of this let me go down as low as 450us. Emma suggested that the short timing works for microstepping, but because there is a greater distance to travel for full steps, that short timing doesn't work. This doesn't quite correspond to the information on the datasheet, which says that the timing pulse should be 250 MHz, and the pulse high and low times only need to be 1.9us. I'm not quite sure there's anything I can do about this. See here:
I started to redesign a new board, and then found out that Emma was supplying us with an Arduino and a motor shield with motor drivers, the same as I had used in the previous week. Now that the code works, I can adapt it for the motor shield. I changed the pin numbers to correspond, according to the shield's specifications. The code looks like this at the moment:
/* Fab Academy Karaoke machine
 *  David McCallum, Xavier Klein, Dima Paley, 2018
 *  sintheta.org
 *  Code adapted from http://aconcaguasci.blogspot.nl/2016/11/arduino-cnc-shield-control-stepper.html
 */


// Motor stuff
const int ENABLE = 8 ;

const int  motorX_DIR   =  5;  //Direction pin
const int  motorX_STP    = 2;  //Step pin

const int  motorY_DIR   =  6;  //Direction pin
const int  motorY_STP    = 3;  //Step pin


//Input
const int endstopPinX = 9;
const int endstopPinY = 10;


//Driver Timing
int delayTime=30; //Delay between each pause (uS)


void setup(){

  serial.begin(9600);

  pinMode(motorX_DIR, OUTPUT); pinMode(motorX_STP, OUTPUT);
  pinMode(motorY_DIR, OUTPUT); pinMode(motorY_STP, OUTPUT);

  pinMode(ENABLE, OUTPUT);
  digitalWrite(ENABLE, LOW);

  pinMode(endstopPinY, INPUT_PULLUP);

  zeroMotor();    // zero the motor to the edge

}

void loop(){
  motorTest();
}


// move the motor until the endstop is reached
void zeroMotor() {
  int zeroingStep = 1;    // how many steps to take while looking for the 0
  int zeroingDelay=1;    // number of ms between steps

  while (digitalRead(endstopPinY) == HIGH) {            // if the button isn't pressed, move the motor 1 step
    step(false, motorX_DIR, motorX_STP, zeroingStep);
    delay(zeroingDelay);
  }
}


// Spin each half a turn, twice, and then backwards
void motorTest() {

  step(false, motorX_DIR, motorX_STP, 100); //X, Clockwise
  delay(1000);
  step(false, motorY_DIR, motorY_STP, 100); //X, Clockwise
  delay(1000);
  step(false, motorX_DIR, motorX_STP, 100); //X, Clockwise
  delay(1000);
  step(false, motorY_DIR, motorY_STP, 100); //X, Clockwise
  delay(1000);


  step(true, motorX_DIR, motorX_STP, 100); //X, Clockwise
  delay(1000);
  step(true, motorY_DIR, motorY_STP, 100); //X, Clockwise
  delay(1000);
  step(true, motorY_DIR, motorY_STP, 100); //X, Clockwise
  delay(1000);
  step(true, motorX_DIR, motorX_STP, 100); //X, Clockwise
  delay(1000);

}
The karaoke machine control was done by an Arduino Uno with a CNC motor shield. See them here:
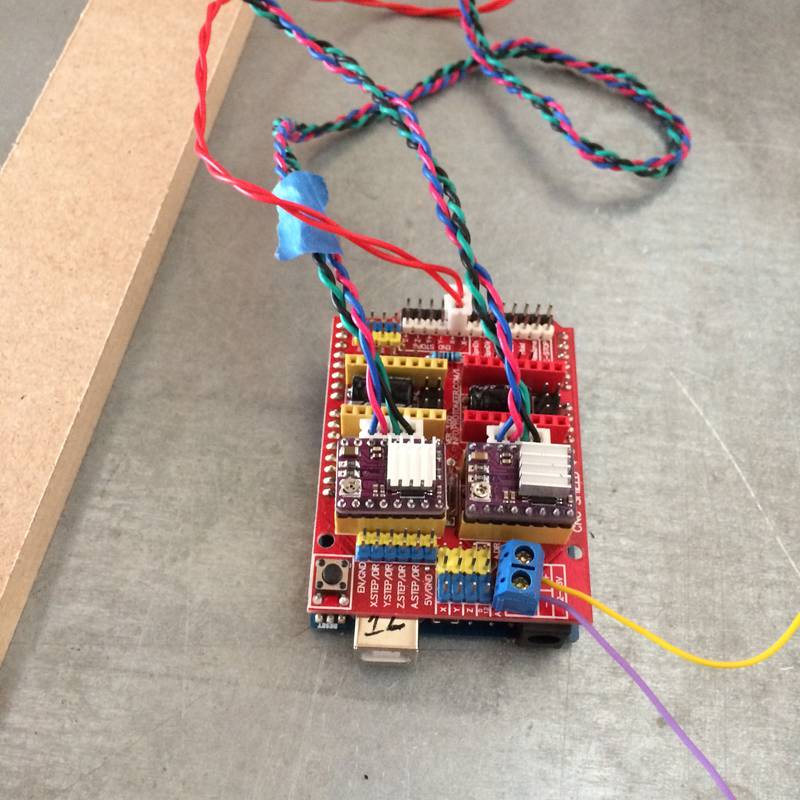
The shield has space for four motor drivers. You can see that we have two plugged in (the purple units). The twisted wires plugged in just beside the drivers are the wires to the motors. The purple and yellow wires leading offscreen are leading to a power supply, powering the motors. The shield has each driver's STEP and DIR pins wired to specific pins of the arduino. The microstep options that are normally selected by connecting to pins on the motor driver (M0, M1, and M2 in the schematic above on this page) are set by using jumpers on the board.
When I arrived at the Waag the next day Emma gave us the motor shield and an Arduino. I set the current limits on the motor drivers, but had problems setting it for anything other than a single shield. When I tried to measure on other shields, the voltage measurement from VREF simply would not change. After consulting Emma, she suggested that the power supply was not set to supply enough current, so I bumped the current supply to 1.2A, and it worked.
Eventually, both motors worked. They moved. We did a test of moving the hand motor one full turn and measuring the distance travelled. 4 cm per 200 steps. So 50 steps, one-quarter turn, per cm. To test, we pulled the hand all the way to the left and made the motor turn 1000, and sure enough it arrived almost at the centre of the bar.
I guessed that this travel distance was the same for the scroll motor, since it was using the same size gears, and we are talking about linear distance from a rotating motor. It turned out to be true. We tested lyric lines of 3 cm, and 150 steps was the right amount to turn for each line of lyrics.
The final code is not terribly different from the source code. There is still the step() function, and we can specificy which motor, and how many steps. At the moment, you specify the steps, not the distance or anything like that. I would have liked to have done it kind of like gcode, where you tell it what coordinates to go to and it would interpolate. I think Dima's working of the code did something similar.
Xavier attached the end stop to the left side of the machine, so that the hand mount would trigger it. I created a function to repeatedly move the motor until the button was triggered. It worked on the first try (yay!).
Here is the final code, as it was sent to Dima for finessing:
/* Fab Academy Karaoke machine
 *  David McCallum, Xavier Klein, Dima Paley, 2018
 *  sintheta.org
 *  Code adapted from http://aconcaguasci.blogspot.nl/2016/11/arduino-cnc-shield-control-stepper.html
 *
 * For both X and Y, 50 steps per cm
 *
 *
  *//


// Motor stuff
const int ENABLE = 8 ;

const int  motorX_DIR   =  5;  //Direction pin
const int  motorX_STP    = 2;  //Step pin

const int  motorY_DIR   =  7;  //Direction pin
const int  motorY_STP   = 4;  //Step pin

const int endstopPinX = 9;

//Driver Timing
int delayTime=450; //Delay between each pause (uS)

int musicPulse = 300;     // music timing pulse for the frere jacques functions


void setup(){

//  serial.begin(9600);

  pinMode(motorX_DIR, OUTPUT); pinMode(motorX_STP, OUTPUT);
  pinMode(motorY_DIR, OUTPUT); pinMode(motorY_STP, OUTPUT);

  pinMode(ENABLE, OUTPUT);
  digitalWrite(ENABLE, LOW);

  pinMode(endstopPinX, INPUT_PULLUP);


  goHome();         // zero the motor to the edge

  delay(2000);      // pause

  frBackwards() ;   // Play the song


}

void loop(){

}


// The basic move function
void step(boolean dir, byte dirPin, byte stepperPin, int steps){

  digitalWrite(dirPin, dir);

  for (int i = 0; i < steps; i++) {
    digitalWrite(stepperPin, HIGH);
    delayMicroseconds(delayTime);
    digitalWrite(stepperPin, LOW);
    delayMicroseconds(delayTime);
  }
}


// Move the motor until the endstop is reached
void goHome() {

  while (digitalRead(endstopPinX) == HIGH) {            // if the button isn't pressed, move the motor 1 step
    step(false, motorX_DIR, motorX_STP, 1);
    delayMicroseconds(delayTime);
  }

  step(true, motorX_DIR, motorX_STP, 50);

}


// play Frere Jacques with alternating lines moving backwards (because the motor couldn't rewind fast enough)

void frBackwards() {

  step(true, motorX_DIR, motorX_STP, 185);
  delay(musicPulse);

  for (int x = 0; x < 2 ; x++) {
    step(true, motorX_DIR, motorX_STP, 215);
    delay(musicPulse);
    step(true, motorX_DIR, motorX_STP, 220);
    delay(musicPulse);
    step(true, motorX_DIR, motorX_STP, 220);
    delay(musicPulse);

    step(true, motorY_DIR, motorY_STP, 150);
    delay(musicPulse);


    step(false, motorX_DIR, motorX_STP, 220);
    delay(musicPulse);
    step(false, motorX_DIR, motorX_STP, 220);
    delay(musicPulse);
    step(false, motorX_DIR, motorX_STP, 215);
    delay(musicPulse);

    step(true, motorY_DIR, motorY_STP, 150);
    delay(musicPulse);

  }


}


// Try Frere Jacques forwards for 4 lines
void fourLinesFR() {


  for (int x = 0; x < 4; x++) {

  step(true, motorX_DIR, motorX_STP, 185);
  delay(musicPulse);
  step(true, motorX_DIR, motorX_STP, 215);
  delay(musicPulse);
  step(true, motorX_DIR, motorX_STP, 220);
  delay(musicPulse);
  step(true, motorX_DIR, motorX_STP, 220);


  step(true, motorY_DIR, motorY_STP, 150);

  step(false, motorX_DIR, motorX_STP, 935);

  }

}
And here is our lovely machine in action! (again, before Dima's finessing)
Dima
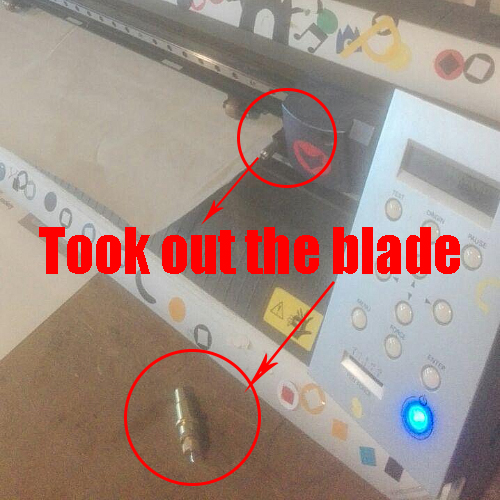
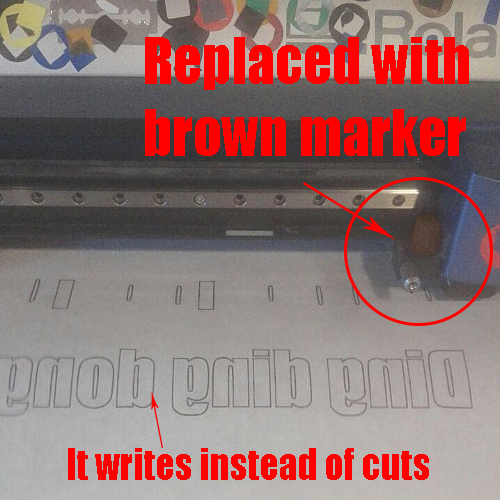
Printing the lyrics using the vinyl cutter
At the lab, Emma gave me a big roll of very wide paper to print on using the vinyl cutter. Imported it into the Illustrator we have at the lab, and printed it using our vinyl cutter by attaching a marker to it instead of a knife.
I set the page settings to be 299mm x 5000mm (the 5000mm is just for a bit of extra length to play with, and just opened my SVG in another file. I then:
Copy pasted it into my main page, which is 299mm x 5000mm
Resized it to be 297mm in width (maintaining the proportions)
And drew a rectangle around it too (a long one) just to be able to print a long rectangle as well.
Then I just sent it to print.
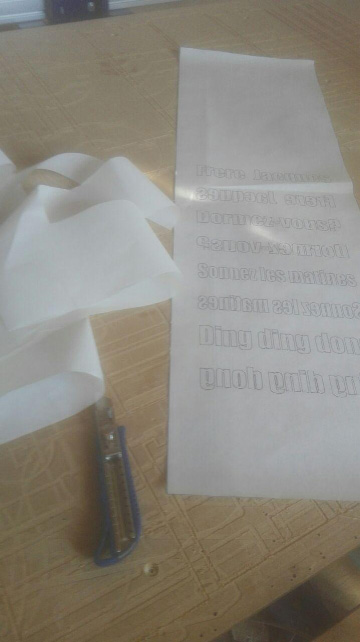
I used this rectangle as a marker to cut out the correct shape from the wide paper.
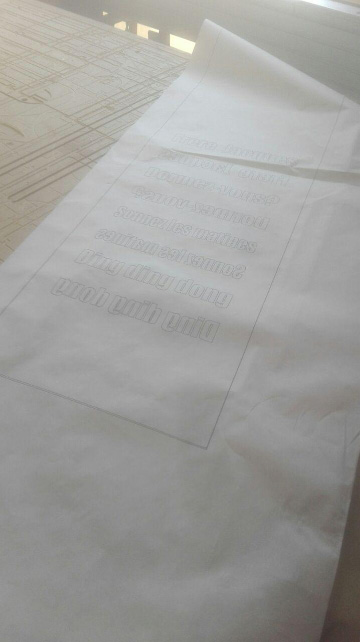
Here it is printing:
Here is the printed sheet:
And after I have cut out the rectangle I printed to resize the paper:
 The SVG file by which the song was printed
Software and timing
I split the A3 sheet into 10 equal parts horizontally.Since A3 is 297mm, 29.7cm, and since 50 steps (in the code) move 1cm, it's accurate enough to use 150 steps per 3cm.
So the paper was divided like this:
And then I mapped how many steps (each step is 150) between each part:
So in the code, this is expressed with this variable:
int step_size = 150;
    void full_beat(bool dir, float val){
      step(dir, motorX_DIR, motorX_STP, int(val*step_size));
    }
The value is float, so you can say "0.5 steps" to run it for 1.5cm, or 1 step to run it for 3cm, etc.
Next is the pause.
Frere Jacque has a fairly consistent beat, and the song rhythm moves according to this beat. The song is sang at either the exact speed of the beat, at twice the speed of the beat, or at half the speed of the beat, depending on each part of the song.
Because the beat is consistent, it was expressed in the code also as a modular, easy to use function:
int musicPulse = 150; // music timing pulse for the frere jacques functions. This is the beat!
    void empty_beat(int val){
      delay(musicPulse * val);
    }
I set the variable to 150 because I'm using the half-beat as the base point.
So in the actual code itself, you'll see it like this:
    full_beat(true,1);  // Moves the hand motor one step (3cm) to the right
    empty_beat(2); // Pauses the hand motor for 2 halves of a beat of the song
The space between each line is approximately 7cm, so the line roll step size has it's own variable:
int line_step = 350; // The size of each step up or down
    void line(bool dir, float val){
      step(dir, motorY_DIR, motorY_STP, int(val*line_step));
    }
I already pre-set how many steps to take with a pre-determined variable:
int line_roll = 1; // How many "line_step" steps to take up or down
line(false,line_roll);
Basically this way, setting up the song to run is much more simple, with the code just looking like this:
        line(false,line_roll); // Roll up the paper one line
        empty_beat(2); // Wait for one full beat (two halves of a beat)
        //fre
        full_beat(true,1); // Move the motor one step to the right
        empty_beat(2); // Wait for one full beat
        //re
        full_beat(false,1); // Move the motor one step to the left
        empty_beat(2); // Wait one full beat
        //ja
        full_beat(false,2); // Move motor two steps to the left
        empty_beat(2); // Wait one full beat
        //cque
        full_beat(false,2); // Move motor two steps to the left
        empty_beat(2); // Wait one full beat
There are instances in the code where the amount of steps the motor is moved is 0.5, or 1.5, etc.
The song is also documented in the code - that is, the part where it should go "Fre" is commented, the part where it should go "ja" is commented, the part where it goes "cques" is commented, etc, so that calibration and tweaking is easier to do.
You can work on this code alongside with the machine, tweaking it, adding pauses, changing beats, etc, it's completely modular and only a few parameters need to be changed each time you wanna make a change.
The result:
Full code:
  /* Fab Academy Karaoke machine
 *  David McCallum, Xavier Klein, Dima Paley, 2018
 *  sintheta.org
 *  Code adapted from http://aconcaguasci.blogspot.nl/2016/11/arduino-cnc-shield-control-stepper.html
 *
 * For both X and Y, 50 steps per cm
 *
 *
 */


// Motor stuff
const int ENABLE = 8 ;

const int  motorX_DIR   =  5;  //Direction pin
const int  motorX_STP    = 2;  //Step pin

const int  motorY_DIR   =  7;  //Direction pin
const int  motorY_STP   = 4;  //Step pin

const int endstopPinX = 9;

//Driver Timing
int delayTime=450; //Delay between each pause (uS)

int musicPulse = 150;     // music timing pulse for the frere jacques functions. This is the beat!
int line_roll = 1; // How many "line_step" steps to take up or down
int step_size = 150; // The size of each step to the left or right
int line_step = 350; // The size of each step up or down
int initial_step = 3; // The size of the initial step to take from the start position


// The basic move function
void step(boolean dir, byte dirPin, byte stepperPin, int steps){

  digitalWrite(dirPin, dir);

  for (int i = 0; i < steps; i++) {
    digitalWrite(stepperPin, HIGH);
    delayMicroseconds(delayTime);
    digitalWrite(stepperPin, LOW);
    delayMicroseconds(delayTime);
  }
}


// Move the motor until the endstop is reached
void goHome() {

  while (digitalRead(endstopPinX) == HIGH) {            // if the button isn't pressed, move the motor 1 step
    step(false, motorX_DIR, motorX_STP, 1);
    delayMicroseconds(delayTime);
  }

  step(true, motorX_DIR, motorX_STP, 50);

}

// This is a function to wait for a beat (or two beats, ore more)
void empty_beat(int val){
  delay(musicPulse * val);
}

// This is a function to move the finger motor left or right
void full_beat(bool dir, float val){
  step(dir, motorX_DIR, motorX_STP, int(val*step_size));
}
// This is a function to move the paper roll motor up or down
void line(bool dir, float val){
  step(dir, motorY_DIR, motorY_STP, int(val*line_step));
}

// This is the full song function
// play Frere Jacques with alternating lines moving backwards (because the motor couldn't rewind fast enough)
void frBackwards() {
  //initial step to the start of the page

  //fre
  full_beat(true,initial_step);
  empty_beat(2);

  for (int x = 0; x < 1 ; x++) {
    //re
    full_beat(true,1);
    empty_beat(2);
    //ja
    full_beat(true,2);
    empty_beat(2);
    //cque
    full_beat(true,2);
    empty_beat(2);

    line(false,line_roll);
    empty_beat(2);
    //fre
    full_beat(true,1);
    empty_beat(2);
    //re
    full_beat(false,1);
    empty_beat(2);
    //ja
    full_beat(false,2);
    empty_beat(2);
    //cque
    full_beat(false,2);
    empty_beat(2);

    line(false,line_roll);
    empty_beat(2);
    //dor
    full_beat(false,1);
    empty_beat(2);
    //mez
    full_beat(true,2);
    empty_beat(2);
    //vous
    full_beat(true,3);
    empty_beat(4);

    line(false,line_roll);
    empty_beat(2);
    //dor
    full_beat(true,1);
    empty_beat(2);
    //mez
    full_beat(false,2);
    empty_beat(2);
    //vous
    full_beat(false,3);
    empty_beat(4);

    line(false,line_roll);
    empty_beat(2);
    full_beat(false,1);
    empty_beat(1);
    //son

    full_beat(true,1);
    //nez
    empty_beat(1);
    //les
    full_beat(true,1.5);
    empty_beat(1);
    //ma
    full_beat(true,1.5);
    empty_beat(1);
    //ti
    full_beat(true,1);
    empty_beat(2);
    //nez
    full_beat(true,1);
    empty_beat(2);

    line(false,line_roll);
    empty_beat(2);
    full_beat(true,0.1);
    //son

    full_beat(false,1.1);
    //nez
    empty_beat(1);
    //les
    full_beat(false,1.5);
    empty_beat(1);
    //ma
    full_beat(false,1.5);
    empty_beat(1);
    //ti
    full_beat(false,1);
    empty_beat(2);
    //nez
    full_beat(false,1);
    empty_beat(2);

    line(false,line_roll);
    empty_beat(2);
    full_beat(false,0.1);

    full_beat(true,0.6);
    //ding
    empty_beat(2);
    //ding
    full_beat(true,2.5);
    empty_beat(2);
    //dong
    full_beat(true,2.5);
    empty_beat(2);

    line(false,line_roll);
    empty_beat(2);
    full_beat(true,0.1);
    //ding
    empty_beat(2);
    //ding
    full_beat(false,2.6);
    empty_beat(2);
    //dong
    full_beat(false,2.5);
    empty_beat(2);

  }
}


void setup(){

//  serial.begin(9600);

  pinMode(motorX_DIR, OUTPUT); pinMode(motorX_STP, OUTPUT);
  pinMode(motorY_DIR, OUTPUT); pinMode(motorY_STP, OUTPUT);

  pinMode(ENABLE, OUTPUT);
  digitalWrite(ENABLE, LOW);

  pinMode(endstopPinX, INPUT_PULLUP);


  goHome();         // zero the motor to the edge
  delay(5000);
  frBackwards();
  goHome();
  line(true,7*line_roll);


}


void loop(){

}
Conclusion!
Our final end goal was to have the machine respond to standard karaoke files. There is a CD+G format, which is MP3s with lyrics/timing information. We aimed for a manual composition of a single song, but it would be great if a CD+G file could be fed to a plotter to create the scroll lyrics, and to the karaoke machine for the timing and playback.
We would like to have synchronised the machine with music. David tried to do this on Wednesday morning, but the timing of the scroll rolling added extra time between the lines and there wasn’t enough time to fix this.
The mirrored lyrics was a funny kludge to get around having to rewind the hand. One fix for this would be to have two hands, taking turns point out the line of lyrics while the other one rewound back to the beginning.
We don't think it would take too much work to achieve what we would like. If we just had a few more week…
Font: Manifont