The process!
For 3d scanning, I have made an attempt with 20 pictures of Nour to make a model, using photogrammetry - AutoDesk's ReCap 360 photo. The model, from just 20 pictures, came out disturbing, and it was actually hard for my spouse to keep her pose for a long time, plus walking around her in a furnished living room at a sensible distance was kind of hard.
.jpg)
.jpg)
.jpg)
.jpg)
.jpg)
.jpg)
So I changed my strategy. Using my beautiful Sony Alpha 7, I attached a vintage wide angle (24mm) lens to allow to capture a wider area from a closer distance.
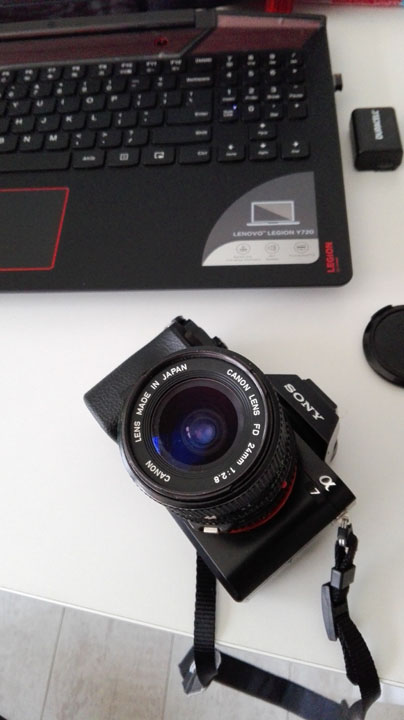
Instead of pictures, I will take a short video, and will use a Python script to read the video and dismantle it into individual frames, which I can then use as pictures in the photogrammetry software being used.
As for what to film - I decided it's to be my guitar sitting on a chair.
I recorded a video of it, walking around it and filming from (some) variety of angles.
I then transferred the video to my computer, opened up Anaconda (the IDE I use with Python), and typed the following script. Note - the script itself contains explanations on what and why is being done, and is also part of the documentation.
Running the code I got all of this (and much more):
.jpg)
I actually ended up getting 2016 images in total, so I did what we call in Hebrew a "seleczia" and kept only 299 images of the whole bunch.
Firing up Recap Photo:
.jpg)
I click "Object":
.jpg)
Browse for my pictures folder and select them all:
.jpg)
Click the 'Create' button:
.jpg)
Aaaand I am told I can only use 100 photos.
So it's back to the folder and remove 199 more photos, and am now left with 100, just right for the project. Doing all the same steps again, I click the 'Create' button in Recap, and no error this time. I get to name my project:
.jpg)
And it sends my images to be uploaded to the cloud, where they will also be processed into a fancy model.
.jpg)
One thing to note - using a wide angle lens produces a lot of lens distortion, so most of the pictures vary slightly in how the guitar looks in them - it is a little bit stretched here, a little bit blow up there, I'm hoping that with 100 images the model will come out just fine even if they are not all exactly right, but this is something that I am going to see for certain only after the model finishes it's processing.
To note - the model processing itself takes a very long time.
Some time later
The model is ready!
After downloading and opening it:
.jpg)
.jpg)
Looks ok, right?
NO!
.jpg)
.jpg)
.jpg)
.jpg)
.jpg)
.jpg)
.jpg)
This is horrendous! :D Absolutely hideous.
Terrible. Terrifying even. A lesson in the sensitivity of photogrammetry.
I'm going to try one last scan, of a shoe. Using my phone.
.jpg)
20 shoe pictures. They say "keep it simple stupid", here's hoping this will be a normal model.
Creating the model, I called it "SHOEpls" to express my emotions.
After the model finished rendering on the cloud, I opened it, and…
.jpg)
.jpg)
.jpg)
.jpg)
.jpg)
.jpg)
.jpg)
.jpg)
It's perfect. It looks great! Finally. This shoe was definitely the most consistent thing I've taken pictures of, or rather - taken pictures of the most consistently.
Now to make a few mesh adjustments, because I guess I should? So in the model view window, I click the Export button and export it as OBJ. I got these cool looking maps:
.jpg)
.jpg)
And here it is in MeshMixer:
.jpg)
It's a real AutoDesk happy family of products!
It's actually quite wonderful.
So, a few adjustments just to demonstrate.
Meshmix > Heads > Cow head:
.jpg)
Beautiful.
Sculpt > Brushes > Attract:
.jpg)
.jpg)
Ah, so I need multiple objects. So this puts multiple objects together. Okay nevermind, instead the brush "Robustsmooth":
.jpg)
.jpg)
Nothing happens.
Brush > Flatten!
.jpg)
Ah, beautiful. Finally.
.jpg)
Bootiful! More!
Inflate:
.jpg)
It is so bootiful!
Shaders! Star Stamps!
.jpg)
.jpg)
This is definitely the model I was going for, all from the very beginning.
3D Scan file - in rar archive:
3D Scan OBJBack home 3D Print