Discovering Composites
Composite fabrication is used in many industries and applications, such as car production, playgrounds, water parks and many other. This process is used when we want to achieve a certain design with no need to use metallic or plastic material, usually big parts that are customized and not mass produced. Using the composite technique, you can reach any design you want, achieving high strength that sometimes could be more than normal steel, while controlling the weight of the body. Technically when using the composite technique, you are in full control of the characteristics of the final product, controlling many variables such as the epoxy used and the fibers used, and the direction it is layed in. Using composite material such as fiber glass or carbon fiber, along with a binding epoxy resin material, will achieve the final design we need with the properties needed.
There are many different types of composite processes, among which are :
- Open Molding In open molding, raw materials (resins and fiber reinforcements) are exposed to air as they cure or harden. Open molding utilizes different processes, including hand lay-up, spray-up, casting, and filament winding.
- Closed Molding In closed-molding, raw materials (fibers and resin) cure inside a two-sided mold or within a vacuum bag (shut off from air). Closed-molding processes are usually automated and require special equipment, so they’re mainly used in large plants that produce huge volumes of material—up to 500,000 parts a year.
- Cast Polymers Molding Cast polymers are unique in the composites industry: they typically don’t have fiber reinforcement and are designed to meet specific strength requirements of an application. Cast polymer molding is used to produce parts of any shape or size.
Material Used for composites
There are many material that go into the production of a composite. Among which are the following:- Resin The primary functions of the resin are to transfer stress between the reinforcing fibers, act as a glue to hold the fibers together, and protect the fibers from mechanical and environmental damage. Resins used in reinforced polymer composites are either thermoplastic or thermoset.
- Reinforcements The mechanical properties of FRP composites are dependent on the type, amount, and orientation of fiber that is selected for a particular service. Fiber reinforcements carry load along the length of the fiber to provide strength and stiffness in one direction.
- Additives & Fillers Additives are used in composites to modify materials’ properties and tailor the laminate’s performance. When added to the resin, fillers can improve properties including water resistance, weathering, surface smoothness, stiffness, dimensional stability and temperature resistance.
- Core Core materials are used extensively throughout the composites industry to fabricate stiff and yet lightweight composites products. Core material is “sandwiched” between fiber reinforced laminate skins to significantly increase stiffness and flexural strength while reducing warpage of flat surfaces.
- Surface Finishes Surface finishes are mainly used for UV protection, corrosion resistance and aesthetics. They can be molded in process or secondarily applied coatings and support the long term appearance of composite products.
In this section, we will learn on how to prepare a Mold and use it to Cast a certain object using the composite fabrication process.
Assignment
We had an Individual Assignment this week.- Individual Assignment The individual assignment was mainly to read the safety data sheet (SDS) and technical data sheet (TDS) for the resins that I're using. In addition, I had to design and fabricate a 3D mold (~ft2) and produce a fiber composite part in it, with resin infusion and compaction.
- Epilog Fusion M2 120 Watts was used for laser cutting in this assignment. This Epilog Fusion M2 uses the CO2 Laser Technology to cut and engrave. The laser source is guidged by 2 axis (X and Y) that guide the focal point of the laser where cutting will occur.
- Fusion 360 was used for 3d modelling in this assignment.
- AutoCad was the main software used for 2D design. I used it to design in 2D and set the dimensions i want to use in the 3d model.
Machines Used
The main machines used in this week's assignment is the laser cutter. The list of machines we used are the following:Software Used
The following software were used for the Design part in this week's assignment:1- Individual Assignment - Reading Safety Data Sheet and Technical Data Sheet
In the individual assignment, we had to read the safety data sheet (SDS) and technical data sheet (TDS) of the epoxy resin that i will be using.
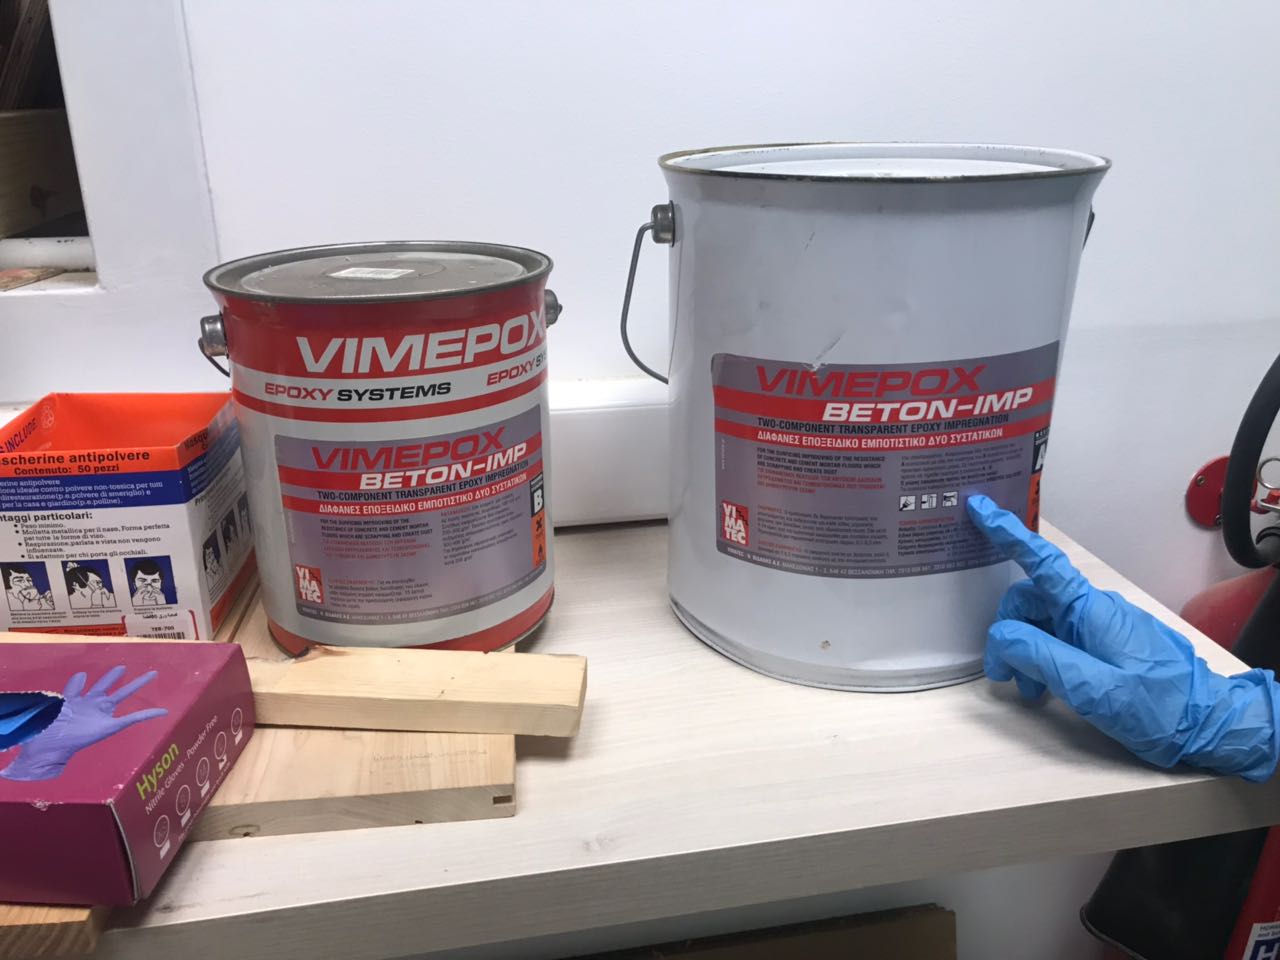
I was using the VIMEPOX BETON-IMP, which is a Transparent two-component epoxy impregnation agent.
You can download the data sheet of VIMEPOX BETON-IMP from the following
Link
SDS and TDS
The following is a summary of the Technical Data Sheet.
- Compoistion: Two-component epoxy system
- Component A: Transparent solvent based epoxy resin
- Component B: Transparent solvent based hardener
- Mixing ratio: A:B = 3.44:1 by weight
- Specific gravity of mixture: (A+B): 0.92 kg/l
- Mixture viscosity: 45 mPa.s at 23 degrees celsius.
- Pot lifeL about 10 hours at 20 degrees celsius
- Can be coated: after 10-24 hours(priming)
- Final strengths: After 7 days at 20 degrees celsius
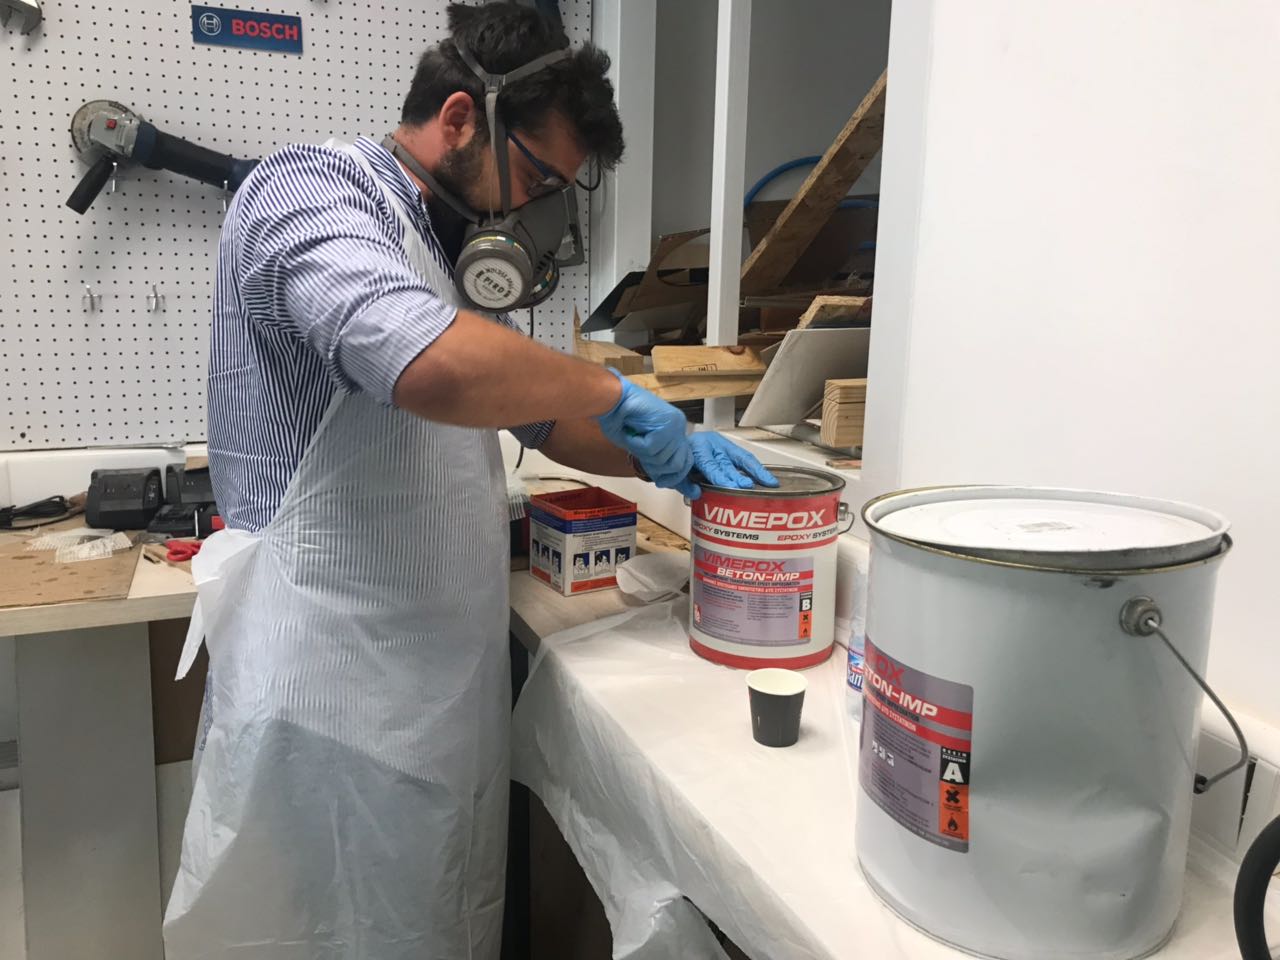
Always use safety products when working with epoxy resin. Always wear gloves, apron, coveralls, boots, chemical goggles.
VIMEPOX BETON-IMP contains solvents. Make sure that the room is well aired when using it. The hardeners used in epoxy systems are corrosive materials and therefore the persons using them must take protective measures:
The following are the safety warning for both material:
- wear plastic gloves and protective goggles.
- Avoid eye and skin contact.
- If contact of the resin, the hardener or their mixture with the skin occurs, wipe the material away using a napkin and then wash with soap and water (you may add 2% vinegar).
- Use with ventilation. In case of ill effects, remove to fresh air
- In case of contact with the eyes, wash with plenty of water within the first 10-15 minutes and then visit an ophthalmologist.
- VIMEPOX BETON-IMP is absolutely harmless for your health after hardening.
2- Individual Assignment - Design and Produce a Composite Part
In the individual assignment, we had to design an fabricate a 3D mold, that will be used to produce a fiber composite part. To achieve that, i had to design a certain shape that i want to achieve in the end. However, i couldn't think of something related to my final project that could be casted. So i decide to make the hull of a boat, that i could use later, knowing that its summer time.
So the first step was to design the hull of the boat i have in mind.
Next i had to slice this design into pieces of thickness 5mm, which is the thicknes of the MDF board i will be using. Those peices combined will constitute the main frame or skeleton of the boat hull.
After that, i extracted the sketches of the different pieces in DXF form, to be used for laser cuttinge
Finally after cutting the different pieces and assembling everything together, the next step was to lay the composite material I am using on top of the main frame and applying epoxy resin with it, to achieve the final shape i had in mind.
.
Step 1 - Designing the Boat Hull and the Frame
So i started by building the design of the hull for my boat. I used the loft function to connect various patterns i drew to form the final shape of the boat hull.
Next I sliced the design into different pieces of 5mm thickness, that would form the skeleton of the body.
The video below represents how i reached my final design i used in this week's assignment.
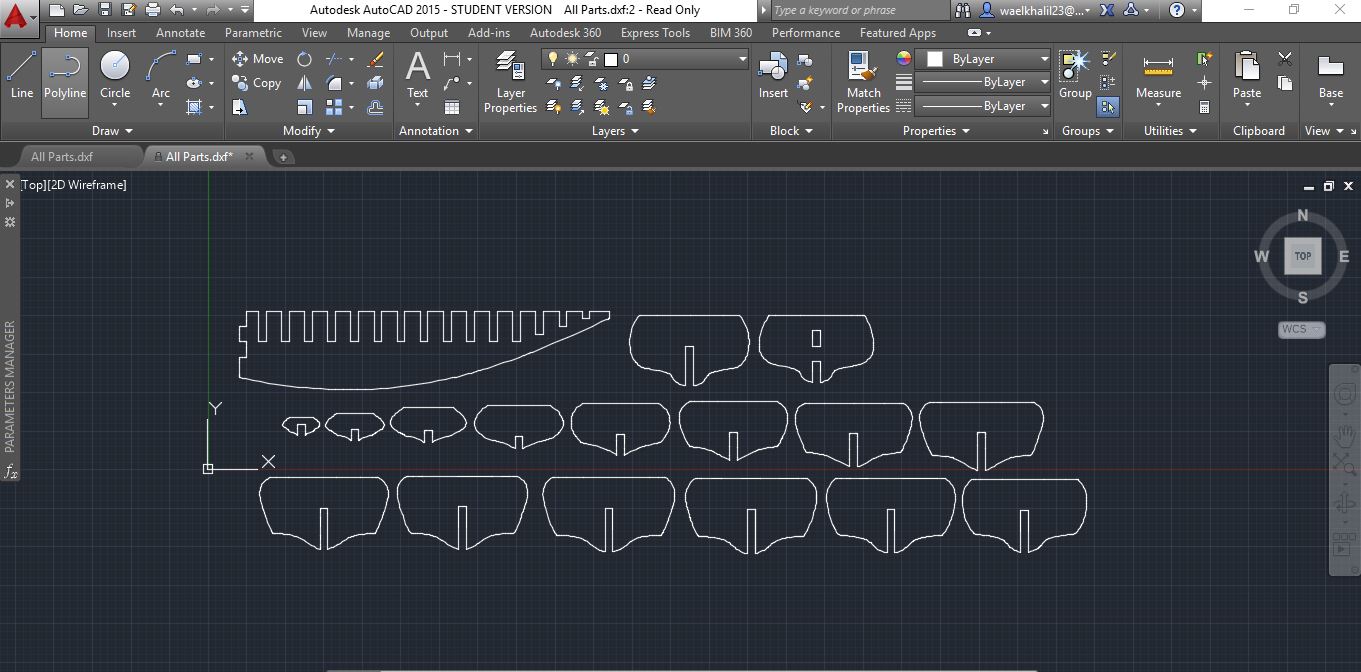
Step 2 - Extracting the 2D sketches for Laser Cutting
After finalizing the 3d design, the next step was to produce the 2d vector file that will be used to laser cut the different parts of the frame.
To do that, i extracted the sketches of the different pieces one by one, and saved them in DXF file.
After that i combined all sketches in one autocad file to be used for laser cutting.
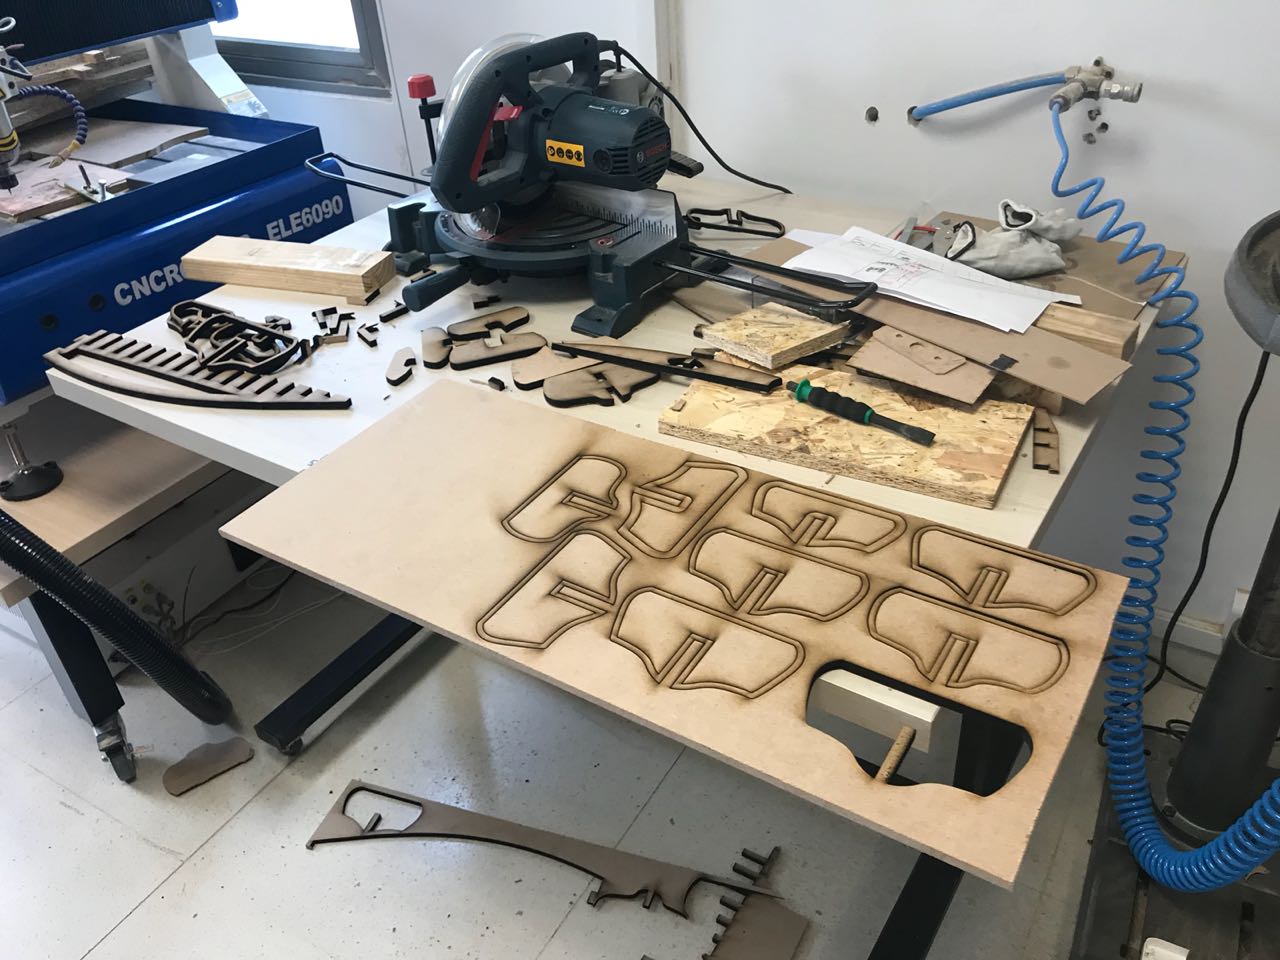
Step 3 - Laser Cutting the Pieces
Once the 2d vector file were ready, the next step was simply laser cut the parts.
I used an MDF board of thickness 5mm to build my frame. So i used the following settings for cutting: Power 100; Speed 8. Keep in mind that i was using the Epilog M2 120 Watts laser cutter.
The video represents how the parts were cut on the laser cutter.
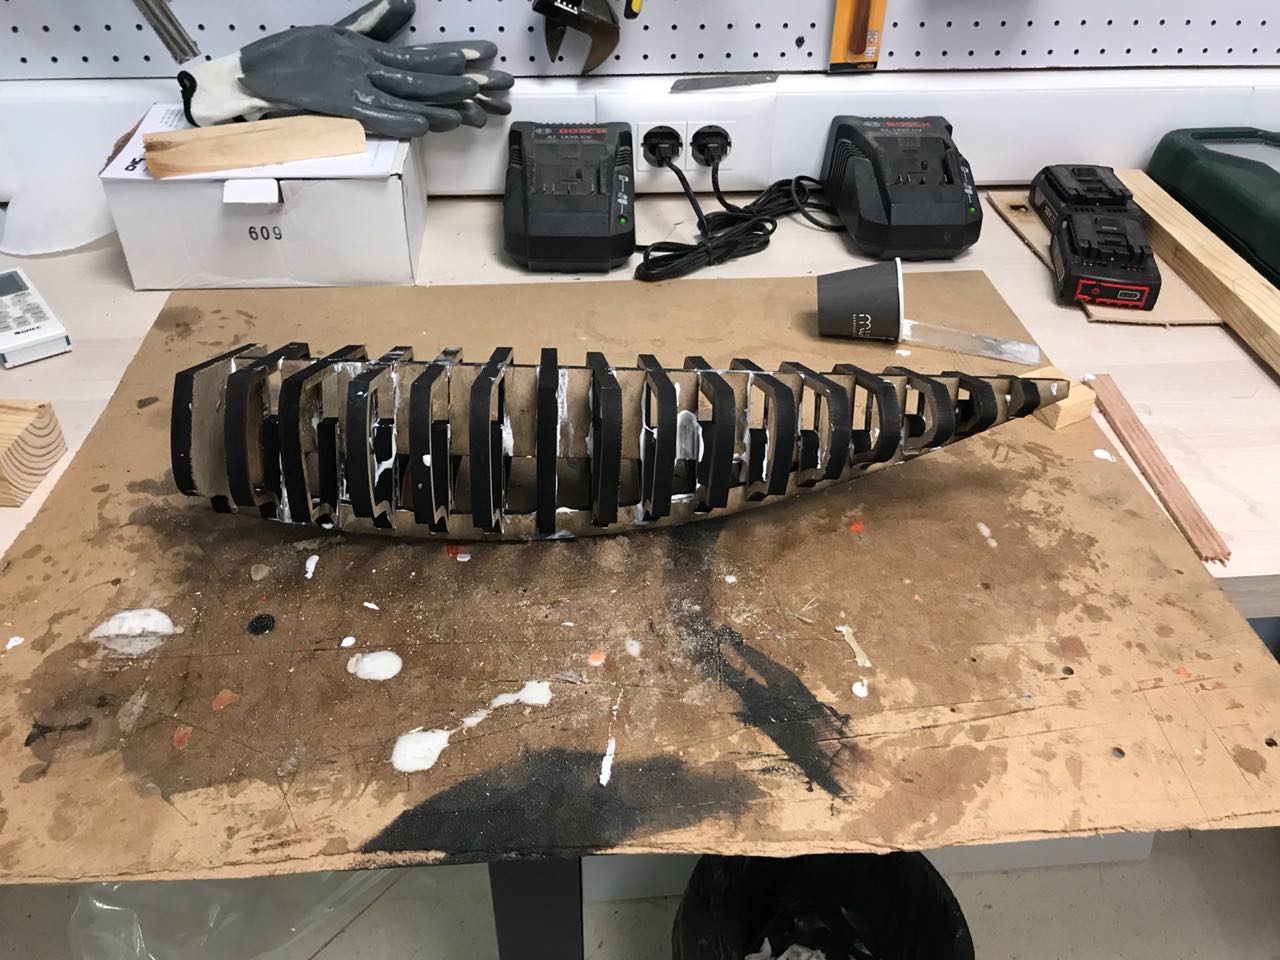
Step 4 - Assembling the Frame
After cutting the parts, I worked on assembling the different parts to form the frame of my boat.
The picture show the final shape after assembly.
Step 5 - Preparing the Epoxy Resin Mixture and the Material Used
After assembling the main frame, the next step is to prepare the material i wil be using to produce the final shape.
I used the following material:
- VIMEPOX Beton-IMP which is a Two-Component transparent Epoxy Impregnation.
- Fiber Glass Sheet that has a 5mm x 5mm net
- Women's Collant Nofurther details about that. It is a flexible and perforated cloth material that contracts to take the shape of the frame it is covering
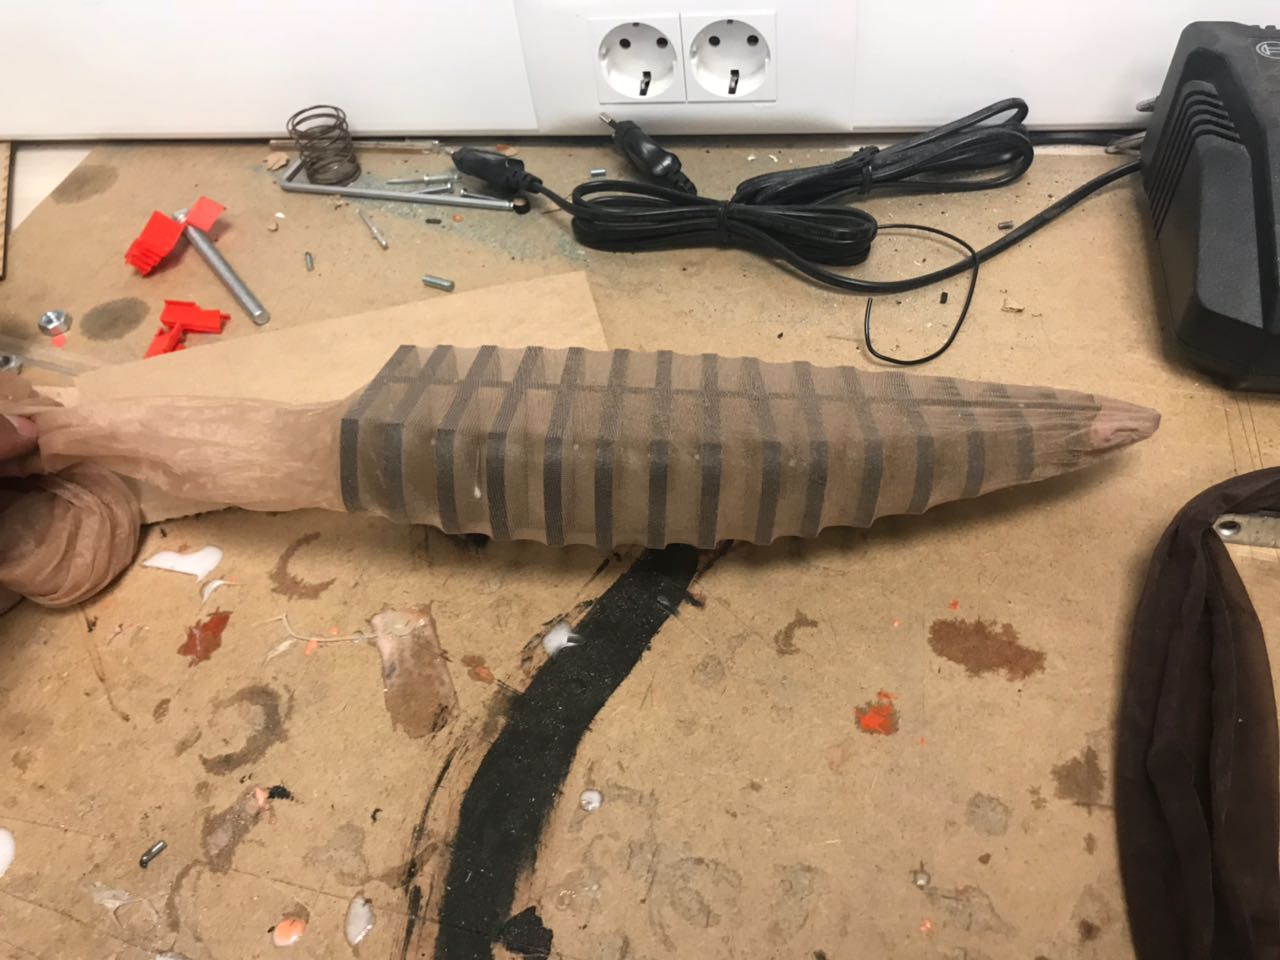
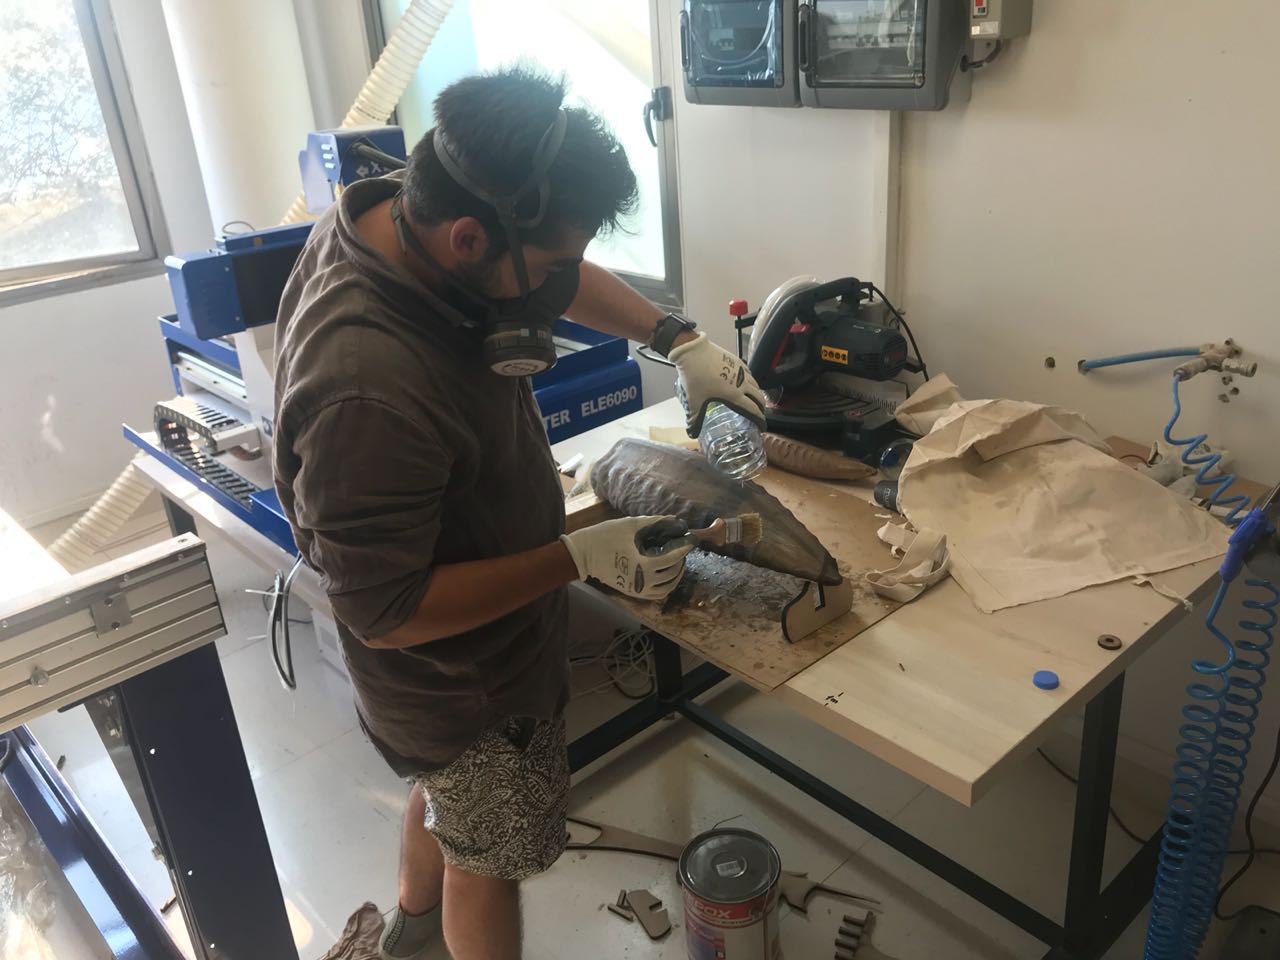
Step 6 - Laying the Composite Material and Producing the Final Shape
After preparing all the material and mixing the epoxy resin I am using, the next step is to start laying the material on top of the frame.
The first layer I used was the womens sockings, which contracted and took the shape of the frame. Next i started laying the epoxy resin on top of the sockings using a painting brush. After that, i layed a layer of fiber glass. However this layer was a bit tougher than what i needed, and it was hard to keep it stuck on the frame, so I used a cotton thread to fix it in place. After that i blushed the whole layer wth epoxy resin. An then the same procedure was used. More layers of women's sockings and fiber glass was used, in addition to epoxy resin was layed. However, I waited for 15 mins between each layer to give the epoxy a little time to cure and become sticky.
Step 7 - Curing
Once all the material is layed on top of the mold, and the resin is applied on the material, the next step is to put it asside and wait for it to cure.
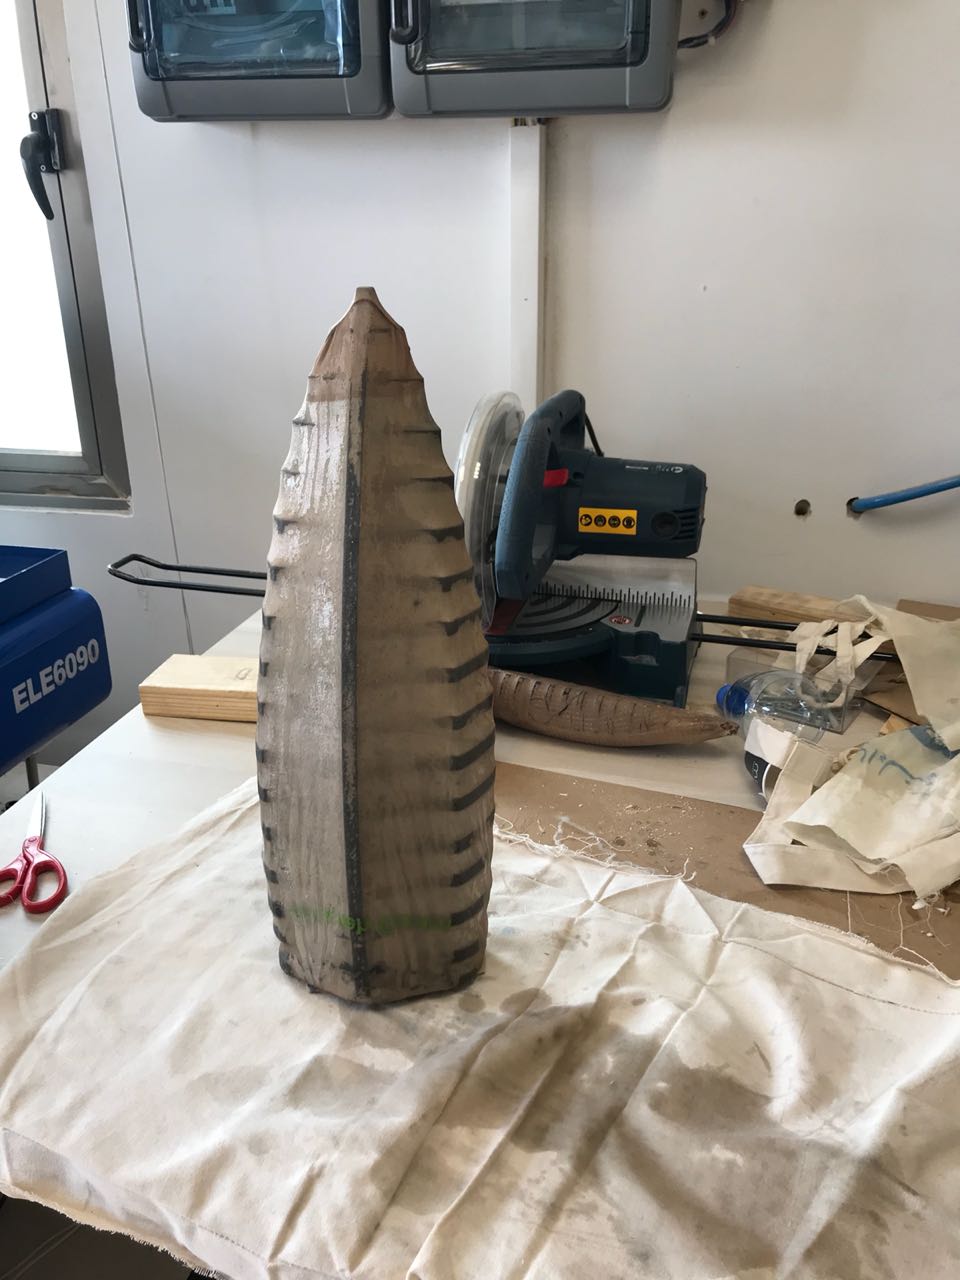
Step 8 - Final Touches
After the part cured, I removed all the additional parts that were not meant to be, mainly the knots of the womens sockings. I removed them using a cutter. After that i kept it to cure for a week to achieve that final strength i need. I am planning to add a colorfull fiber at the end to make a nice colorfull finishing for the boat.
Scaling it UP
.jpeg)
After recieveing some comments from te evaluator, i decided to scale it up. The same design was used but on a bigger scale. However, i used different material this time, beacuse the fiber glass i chose the last time was not a good idea.
Step 1 - Designing the Boat Hull and the Frame
The same design was used in this part of the assignment. However it was scaled up. The last design had a total surface area of 162,708 mm2 approximately 1.75 ft 2. After scaling it up, the new surface area is 1,171,088 mm2 which is approximately equal 12 square foot.
You can download the original 3d design from the following LinkStep 2 - Extracting the 2D sketches for Laser Cutting
The same Autocad drawing extracted the last time was used. However some changes have been made to make the boat lighter and hollow from the inside. Saying that, the design was edited as shown in the picture below
You can download the original Autocad design from the following Link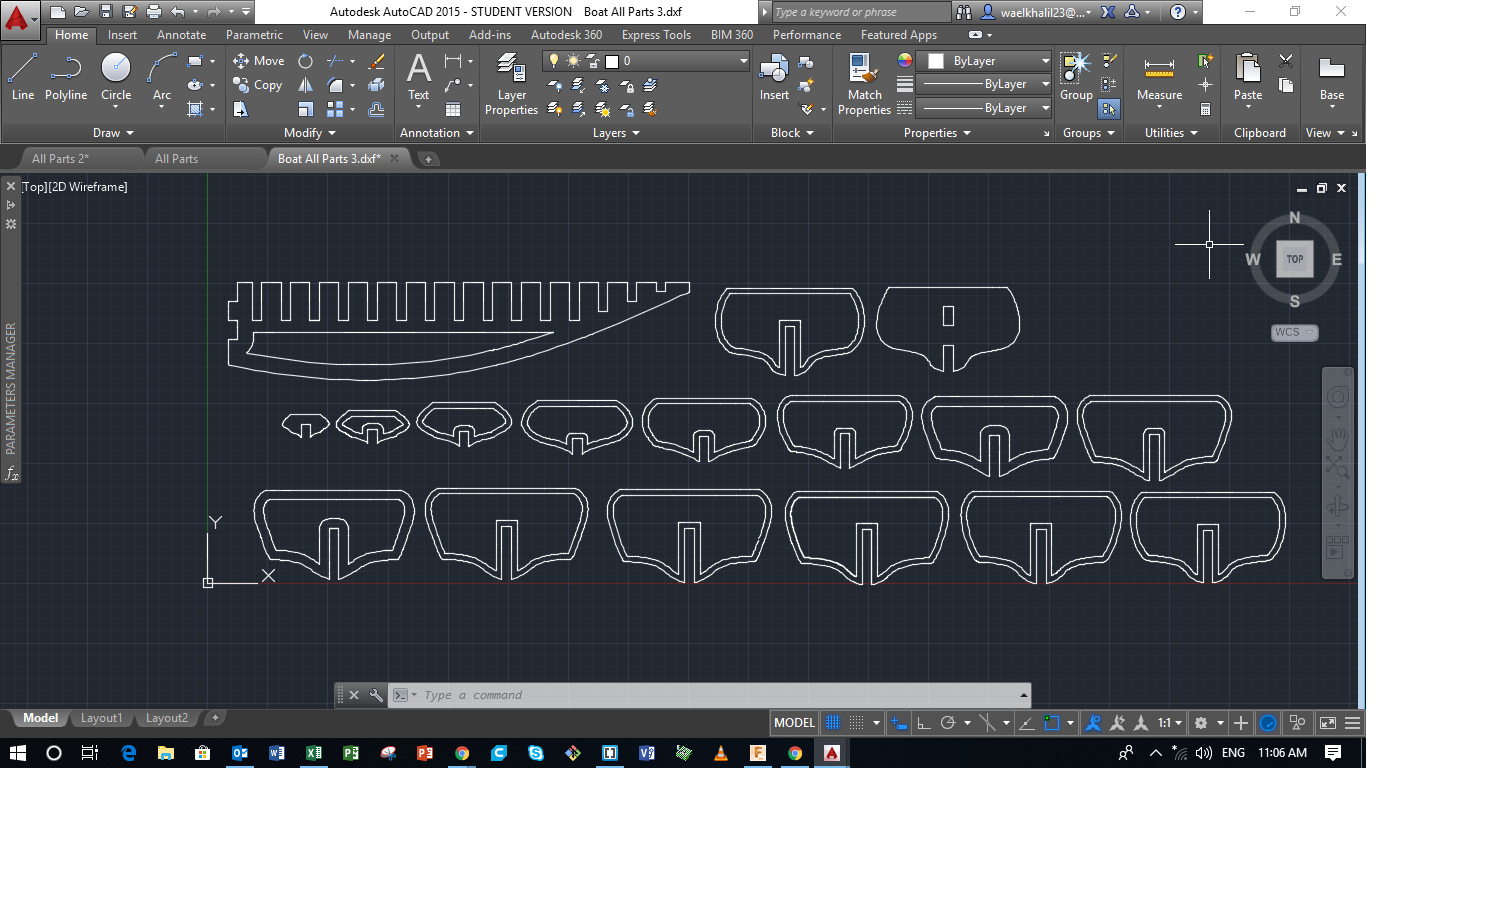
Step 3 - Laser Cutting the Pieces
Once the 2d vector file were ready, the next step was simply laser cut the parts.
I used an MDF board of thickness 10mm to build my frame. So i used the following settings for cutting: Power 100; Speed 4. Keep in mind that i was using the Epilog M2 120 Watts laser cutter.
THe image shows the various laser cut parts.
Step 4 - Assembling the Frame
After cutting the parts, I worked on assembling the different parts to form the frame of my boat.
The picture show the final shape after assembly.
Step 5 - Preparing the Epoxy Resin Mixture and the Material Used
After assembling the main frame, the next step is to prepare the material i wil be using to produce the final shape.
I used the following material:
- VIMEPOX Beton-IMP which is a Two-Component transparent Epoxy Impregnation.
- Canvas bags which is a cloth material that is flexible and tough at the same time
- Women's Collant Nofurther details about that. It is a flexible and perforated cloth material that contracts to take the shape of the frame it is covering
.jpeg)
Step 6 - Laying the Composite Material and Producing the Final Shape
After preparing all the material and mixing the epoxy resin I am using, the next step is to start laying the material on top of the frame.
The first layer I used was the womens sockings, which contracted and took the shape of the frame. Next i started laying the epoxy resin on top of the sockings using a painting brush. After that, i layed a layer of canvas. After each layer of canvas, sockings were used to keep the fibers tight on the skeleotn mold. After that i blushed the whole layer wth epoxy resin. An then the same procedure was used. More layers of women's sockings and anvas was used, in addition to epoxy resin was layed. However, I waited for 15 mins between each layer to give the epoxy a little time to cure and become sticky.
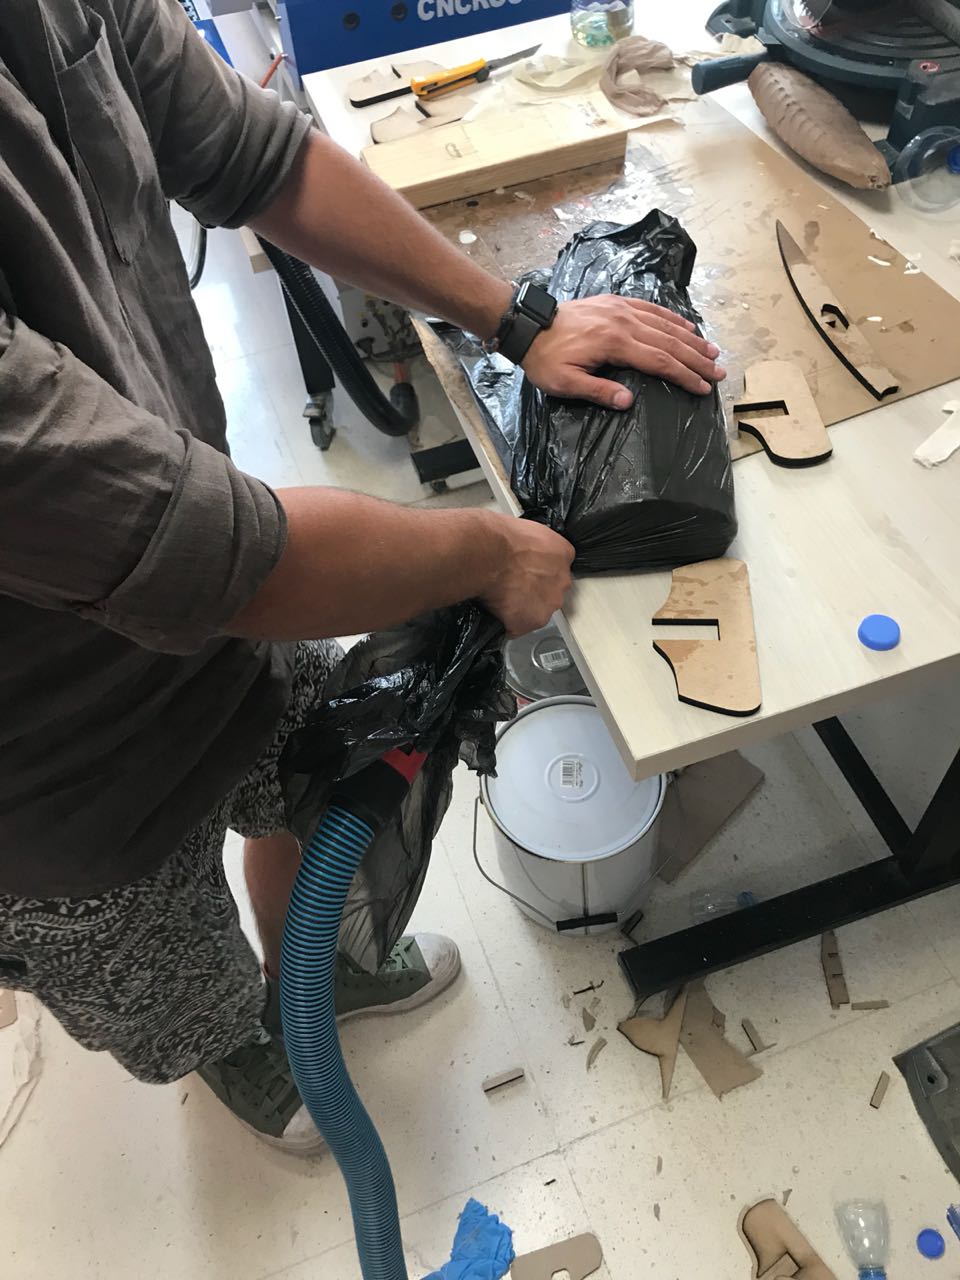
Step 7 - Vacuuming
Once all the material is layed on top of the mold, and the resin is applied on the material, the next step is to put it asside and wait for it to cure. But before doing that, i placed it inside a plastic bag and vacuumed it to preserve the final shape I need.
Vacuum bagging (or vacuum bag laminating) is a clamping method that uses atmospheric pressure to hold the adhesive or resin-coated components of a lamination in place until the adhesive cures. The effectiveness of vacuum bagging permits the laminating of a wide range of materials from traditional wood veneers to synthetic fibers and core materials.
Vacuum bagging offers many advantages over conventional clamping or stapling techniques:
- Even Clamping pressure which achieves good bonding, by delivering firm and evenly distributed pressure over the entire surface of the part
- Control of resin content by removing excess adhesive in the laminate, achieving a high fiber to resin ratio.
- It helps reach a custom shape of the mold easily
- Efficient laminating because all of the materials in the laminate are wet out and laid up at the same time, vacuum bagging allows you to complete the laminating process in one efficient operation.
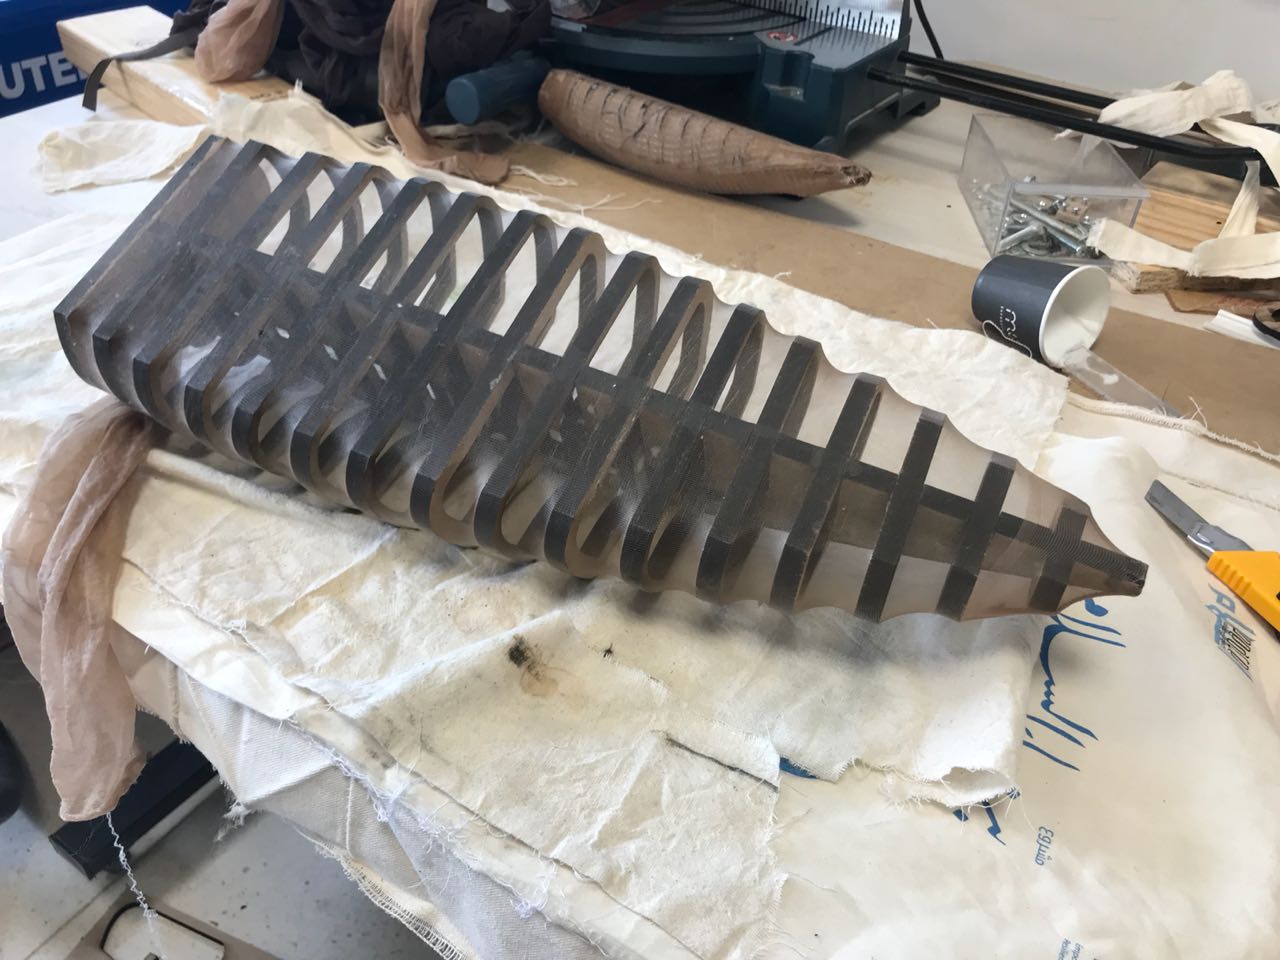
Step 8 - Curing and Final Product
After curing, i removed the part from the plastic bag and it looked great.
I then removed all the additional parts that were not meant to be, mainly the knots of the womens sockings. I removed them using a cutter.
YOu can see the final product in the image below.
.jpeg)
