01
03
05
week 01 | computer-aided-design
06
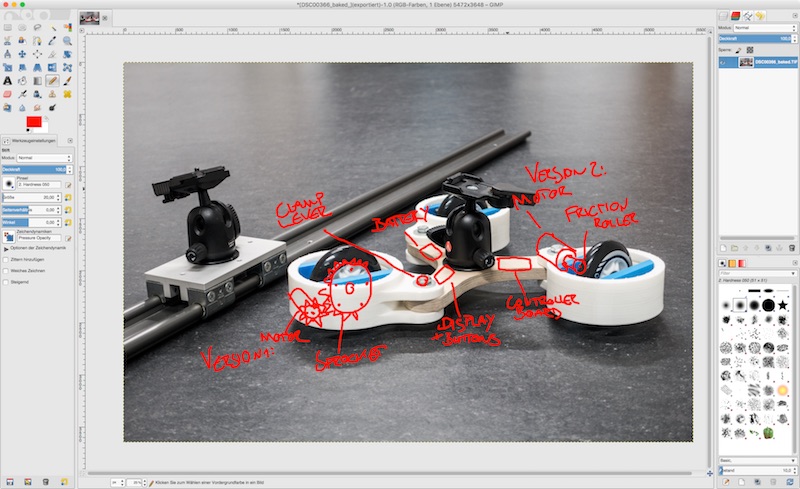
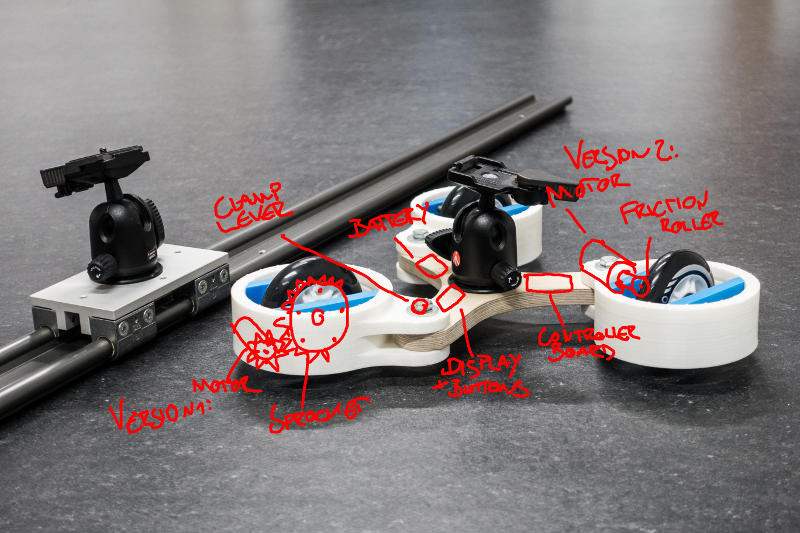
I started the weekly assignment - testing different CAD programs, from open source to professional - with gimp.
07
Gimp: My normal computer is a OSX based system, so I tested the OSX pre-compiled version of Gimp. I took the chance to draw a simple sketch of my final project with a Wacom tablet on an existing photo. After the problem that Gimp can only handle 8-bit and not 16-bit files, it was simple, fast and after some adjustments (I don't like the normal Gimp GUI with several windows) it was easy to use. After using Gimp, I tried to convert some RAW photos from my camera - normally in this case my Photoshop would boot, but Gimp opened instead and told me that it can't open these files. Gimp replaced my standard program assignment - that was a bit frustrating.
08
09
10
11
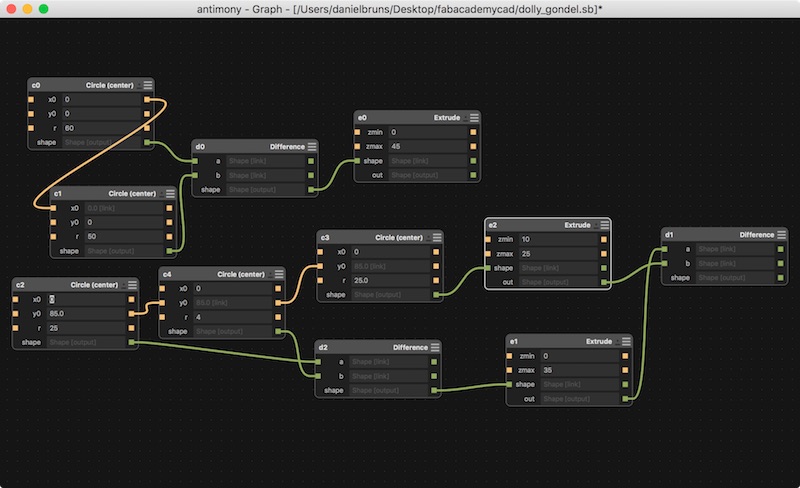
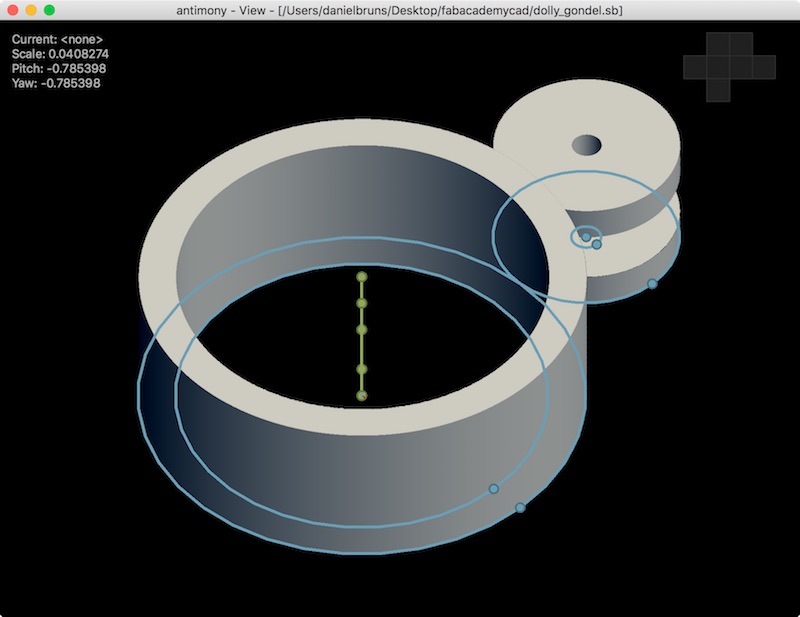
Antimony: As seen in Boston at Fab11 and recommended by Neil, my next choice was Antimony. I chose one of my existing skater dolly parts and tried to build it (but I failed making some curves). Antimony includes a very intuitive GUI and is simple to learn. There are not several hundreds of buttons with really small icons. Just add some boxes, and a lot of links between them - that's it. Neat.
This could be a good choice of people without any CAD experience because there is nearly no familiarization phase to work with it.
12
Download my Antimony model file
13
14
As you can see, I had some trouble to connect the different cylinders together. The over all experience with Antimony was very positive, as this is a absolutely simple and easy program.
15
16
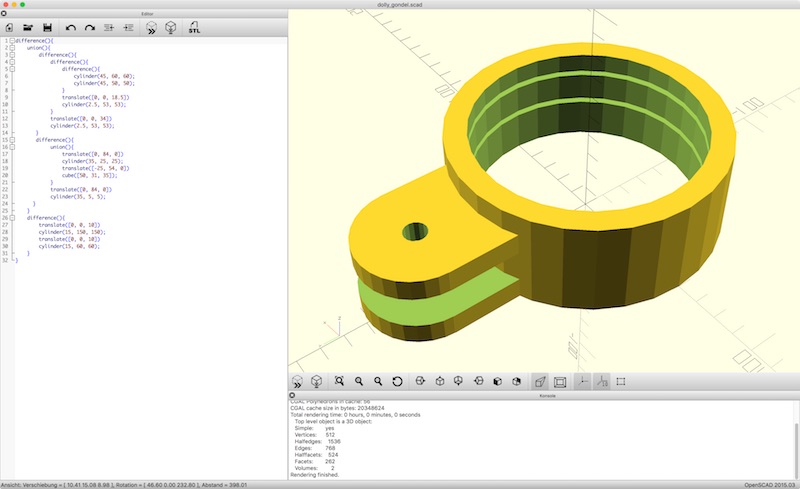
OpenSCAD: My next choice was OpenSCAD. I heard a lot but never used it by myself. The first moment was a bit confusing, because there was no real guide or point to start with.- I searched a bit and found the OpenSCAD cheat sheet. With this little help, I tried to build the same part as in Antimony. After the first 15 minutes, I had a lot of fun with this program. My result is a lot better than it was in Antimony but I lack the second time to build the curves the right way. That's a real codingmonkey program :)
17

18
Source code from OpenSCAD:
					difference(){

   					 	  union(){

       					 	   difference(){

         			  			    difference(){

               						     difference(){

                  						       cylinder(45, 60, 60);

                   						      cylinder(45, 50, 50);

              						     }

               						     translate([0, 0, 18.5])

                					     cylinder(2.5, 53, 53);

           						    }

           						    translate([0, 0, 34])

           						    cylinder(2.5, 53, 53);

       						   }

      						   difference(){

           						    union(){

                					     translate([0, 84, 0])

               						     cylinder(35, 25, 25);

               						     translate([-25, 54, 0])

               						     cube([50, 31, 35]);

            					    }

           						    translate([0, 84, 0])

           						    cylinder(35, 5, 5);

      						   }

    					  }

   						  difference(){

        					   translate([0, 0, 10])

        					   cylinder(15, 150, 150);

       						   translate([0, 0, 10])

       						   cylinder(15, 60, 60);

    				  }

				}
19
Download my OpenSCAD model part
20
21
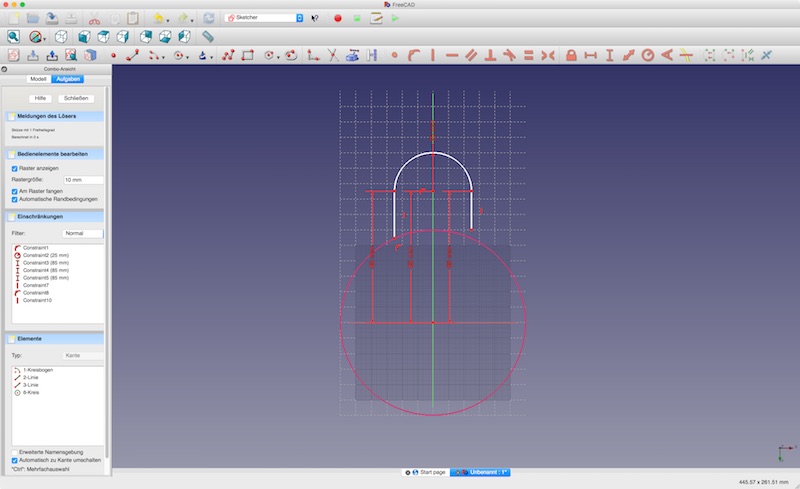
FreeCAD: Oh, I tried this one on OSX and it failed completely at - in my view - a absolute unusable GUI/program.
Every time I tried to select two items, the contextual menu opened. Every single time. The render engine is absolutely incorrect. The lines were only correct rendered as long as the corresponding sketch is opened. After closing the sketch, lines which should touch each other, were parallel. Every person who uses volumetrical mechanical CAD time-by-time, knows the problem of open lines in sketches. This is the moment when you search the needle in a haystack to fix your not or absolutely weird extruding model. The GUI crashed several times and my parts were gone.
I don't like it and won't recommend it to any other person.
22
23
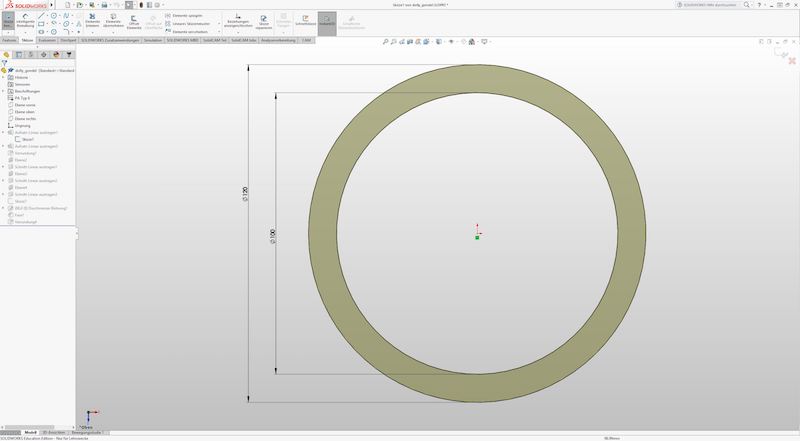
SolidWorks: This is the professional program
we use in the Institute of Mechanical Engineering at our university - and here at FabAcademy. The Institute of Energy Systems and Energy Management - where I work - uses Autodesk Inventor instead. After working for several years with mechanical CAD programs like NX, Inventor, Catia or SolidWorks, there was no real problem to build the part for me.
These professional programs are not really intuitive like Antimony, but after a more or less longer familiarization phase, they show their full potential of effectiveness.
I rendered my part in SolidWorks also.
24
Download my SolidWorks model part
25
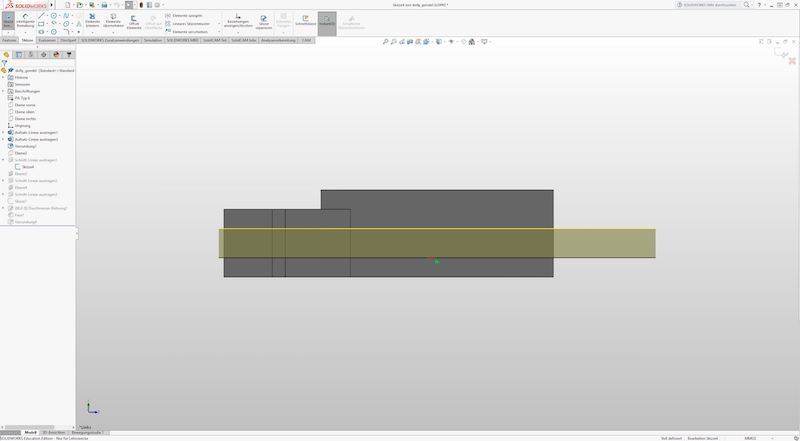
To generate a volumetrical 3D model in SolidWorks, the first step is to draw a 2D sketch, to extrude it. As I chose the same part as for the other programs, I had to make a cylinder first.
26
27
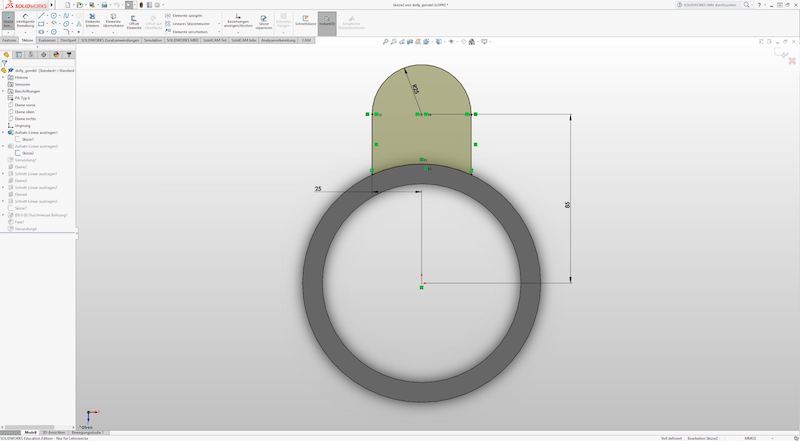
Following the first extrusion, I had to draw a second 2D sketch, to extrude the smaller part of my model.
28
29
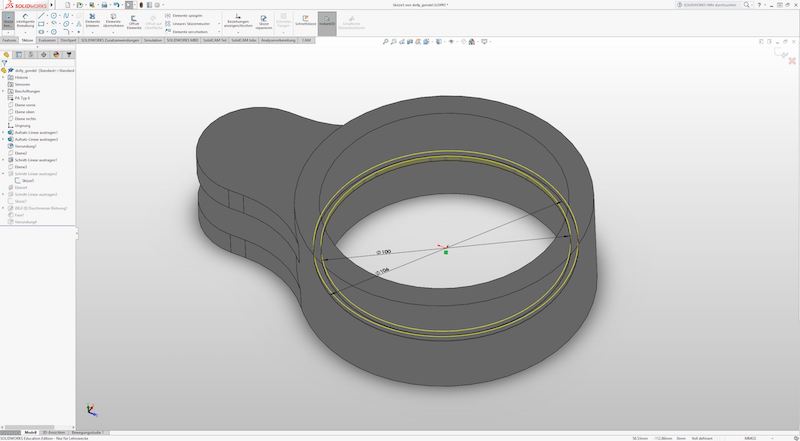
To mount this part onto the mainframe, I needed a slot, where both parts were pushed in together and secured through a screw. This was also made with the extrusion operation, but into the other direction - this means: instead of adding material, the operation cuts material away.
30
30
As the edges will be stressed a lot while using the system and to avoid the notch effect, I rounded the edges a lot.
31
32
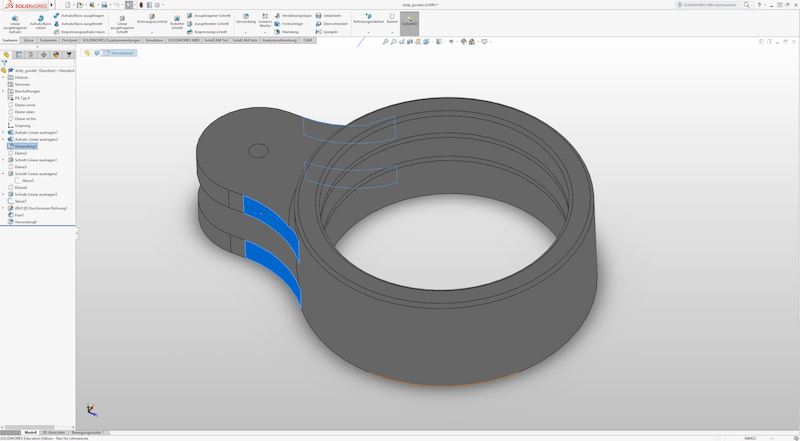
To secure and turn the wheel, the model needed 2 slots on the inner side, where the corresponding flutes will join. This was also made with a 2D sketch and the cut operation.
33
34
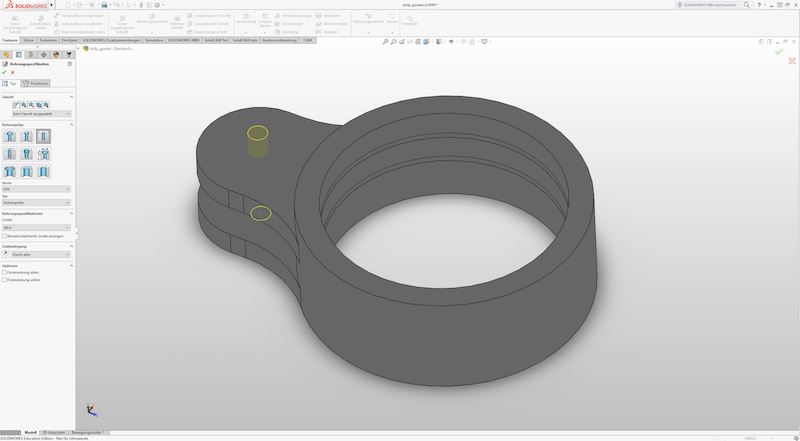
Last but not least, the screw hole had to be drilled and the upper edge must be rounded. To drill a hole, a point must be set into a 2D sketch, where the drill operation drilled a hole. I rounded the upper edge, because it shouldn't be sharp.
35
36
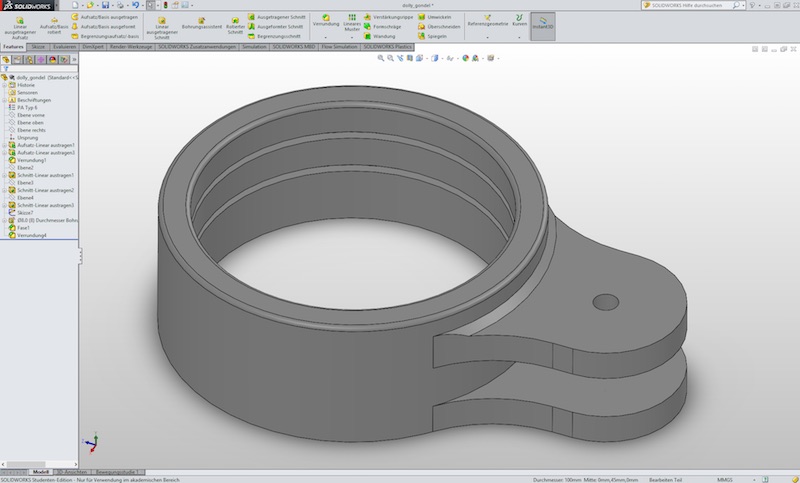
This is the finished part with some more chamfers and rounded edges.
37
38
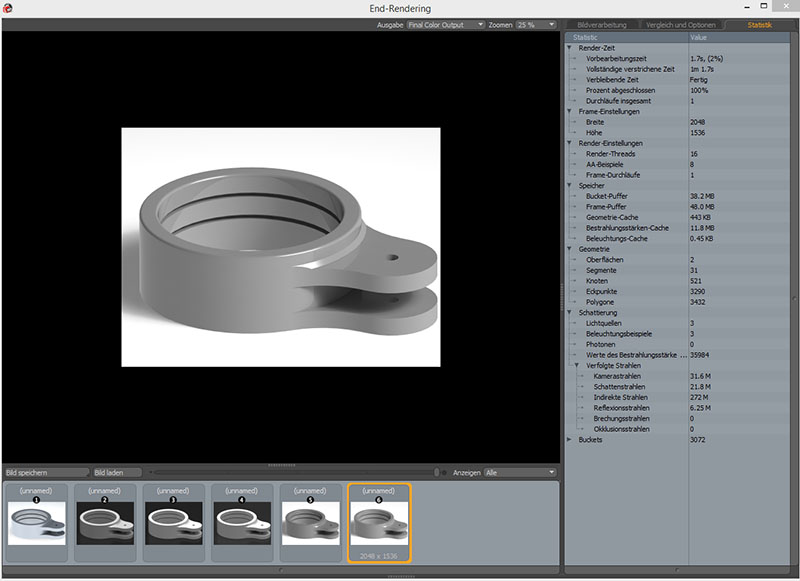
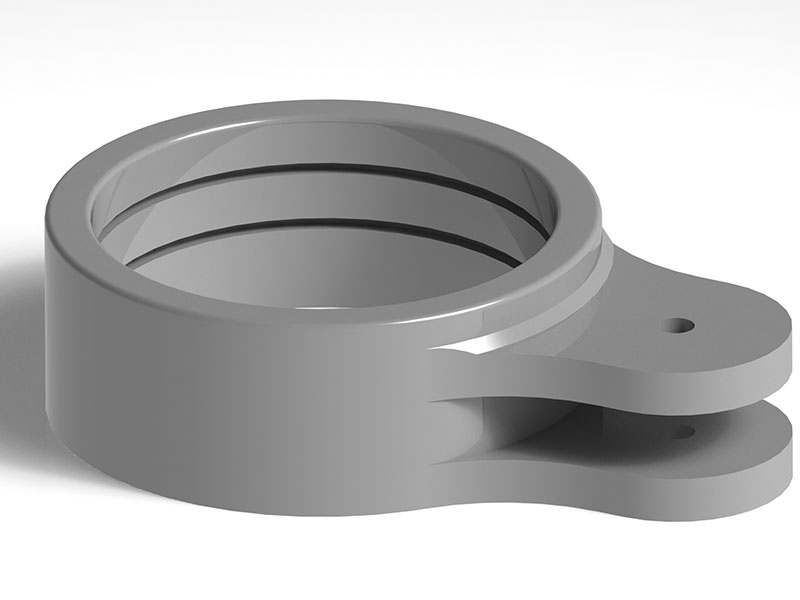
The last part of this weeks assignment was to render a finshed part. I used the integrated SolidWorks Renderengine, as this is a very powerful tool.
First, there were a lot of configurations to set, like resolution, lightsources, background etc..
39
40
After trying some different options, I decided myself to use a simple white background and 3 lightsources, to get a rendering with soft shadows. This took some minutes, but the result is great.
41
42
A really good opportunity to use a professional program without a long familiarization phase is the new Fusion 360 from Autodesk. This program is even available for OSX. Give it a try!

This work by Daniel Bruns is licensed under a Creative Commons Attribution-NonCommercial-ShareAlike 4.0 International License.