Task:
GROUP assignment:
- test the design rules for your 3D printer(s)
INDIVIDUAL assignment:
- design and 3D print an object (small, few cm) that could not be made subtractively
- 3D scan an object (and optionally print it)
Test the design rules for your 3D printer
Test: Wall Thickness
RHINO
The wall thickness tests were printed with an Ultimaker 2+.
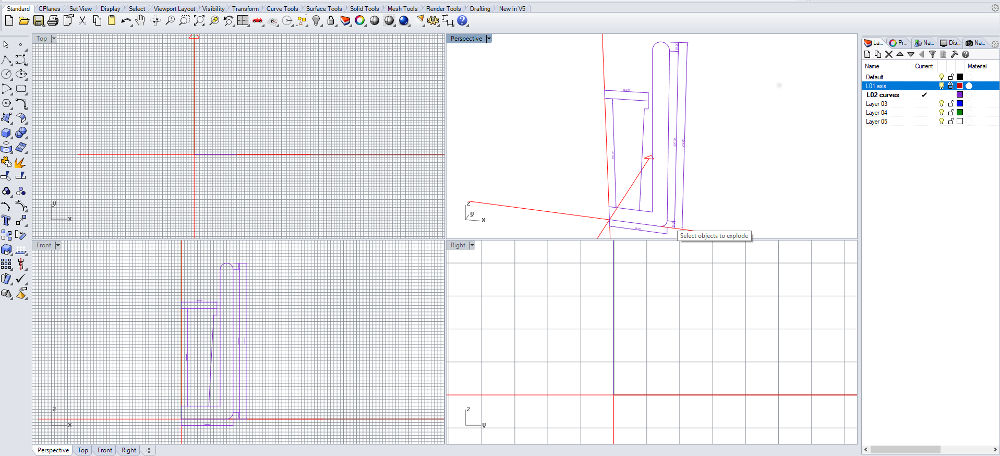
But first I create the 3D geometry in Rhino with the commands Box (Solid), Boolean Union and then check if the volume has holes with
>Analyze >Mass Properties >Volume
If Rhino shows the volume in the command line, there are no errors (holes) in the geometry. Export the geometry as an STL file for Cura.
Description of the 3D geometry:
Units in mm
Base-plate with the size 25x40x1.5 mm
Thickness of the Walls: 0.3/0.4/0.5/0.6/0.7/0.8/1.0/1.2 mm
Height of the walls. 10 mm
 Rhino
Rhino CURA
Cura is a 3D printer slicing application. You can use this software with many 3D printers.
In Cura, you open the STL file and check the Print Setup. For the first print test I choose the layer view, standard nozzle 0.40 mm and the Profile Normal 0.15 mm.
You can see that Cura doesn’t “print” the thin walls (0.3 and 0.4)and won’t export them as a GCode file. .
For the second print I choose the smallest nozzle 0.25 mm. Cura doesn’t have a problem with the wall thickness and “print” all the walls.
I exported both Print Setups as GCode files and saved them in a SD card.
Recommendation: the wall thickness should be a multiple of the nozzle diameter. The most common nozzle diameter is 0.4 mm. The recommended wall thickness is 0.8 mm.
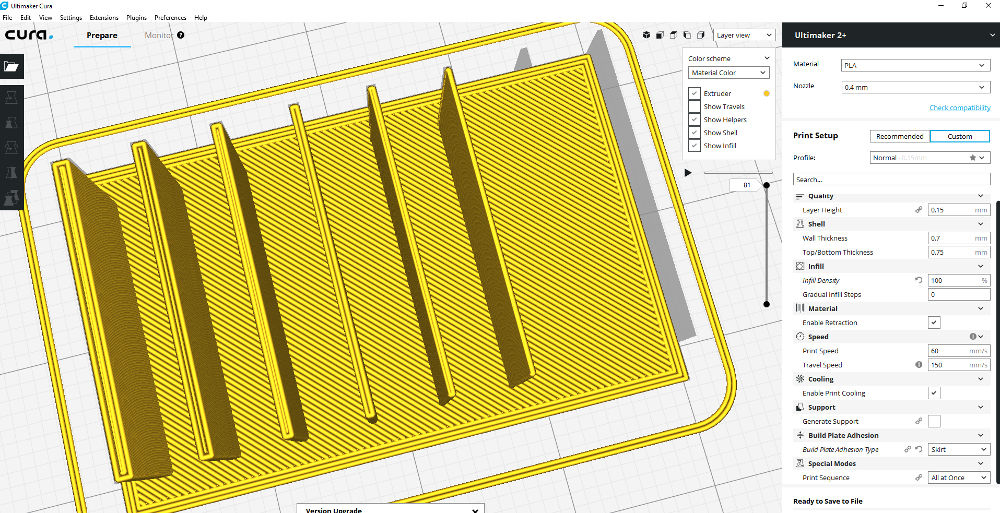 Cura, 0.40 nozzle
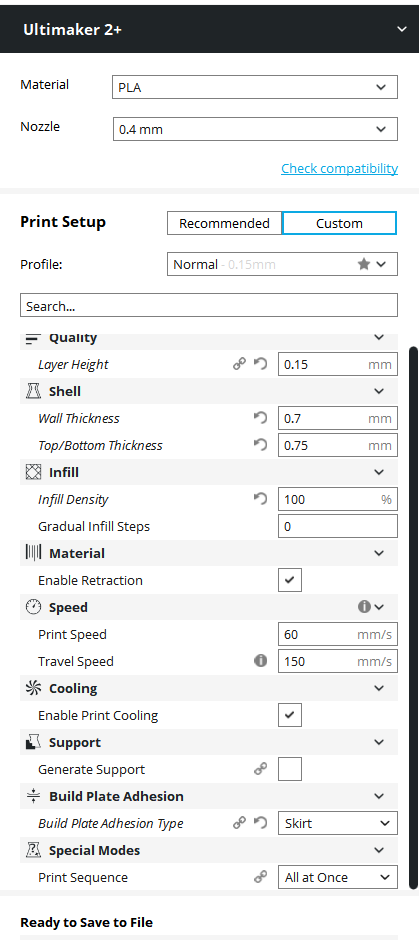 Cura, 0.40 nozzle
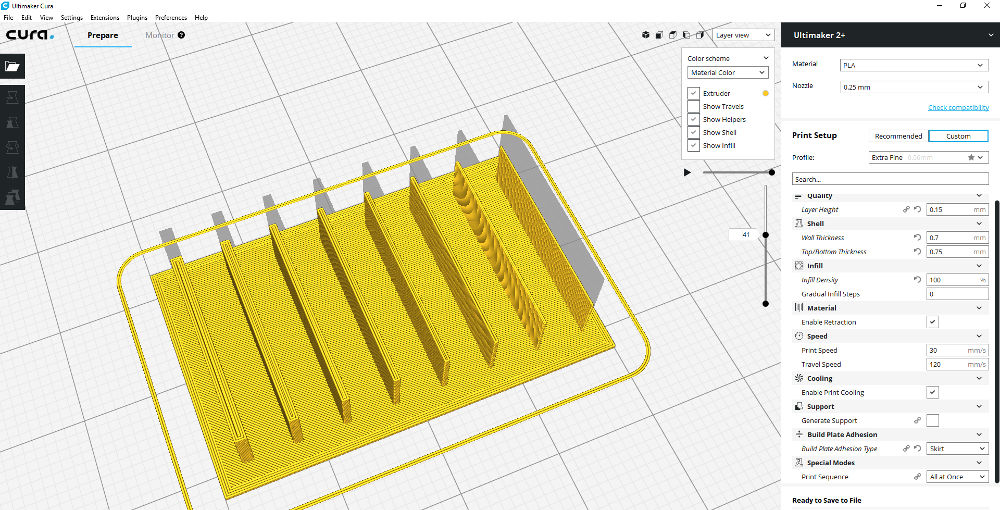 Cura, 0.25 nozzle
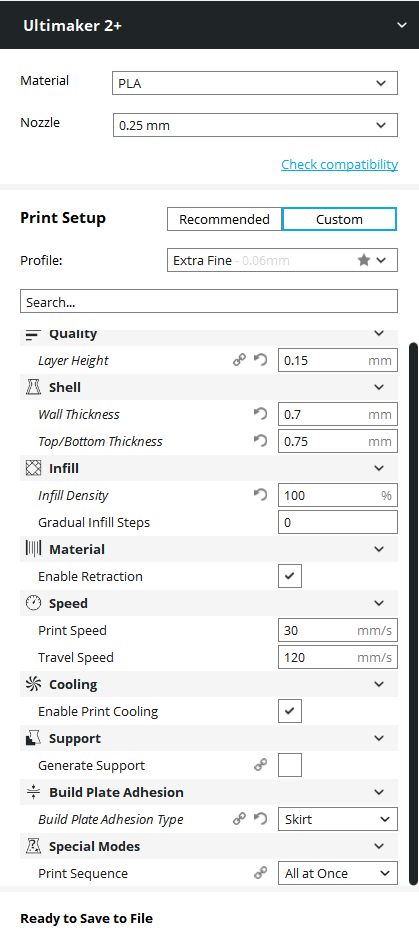 Cura, 0.25 nozzle
 START PRINTING
Preparing the Build-Plate:
I put a thin layer of glue stick on the Build Plate of glass. This will keep the print in place and allows to remove it easily. As next step I put the build-plate back to the Ultimaker and do the maintenance steps shown in the display to re-level it.
Start:
You have to insert the SD card and select the print. The printer has to preheat for a few minutes till it starts printing….
For the second print with the nozzle 0.25 the layer doesn’t stick on the glass plate. My instructor explained me, that there isn’t enough space between the nozzle and the glass plate. I can change this easily without stopping the print with the level screws under the build-plate.
Note: Check if the first layer sticks on the build-plate. If not, perhaps you have to level the plate with the screws on the front.
Remove the piece:
You have to wait until the plate has cooled down to remove the print. Perhaps you have to remove the glass plate from the printer.
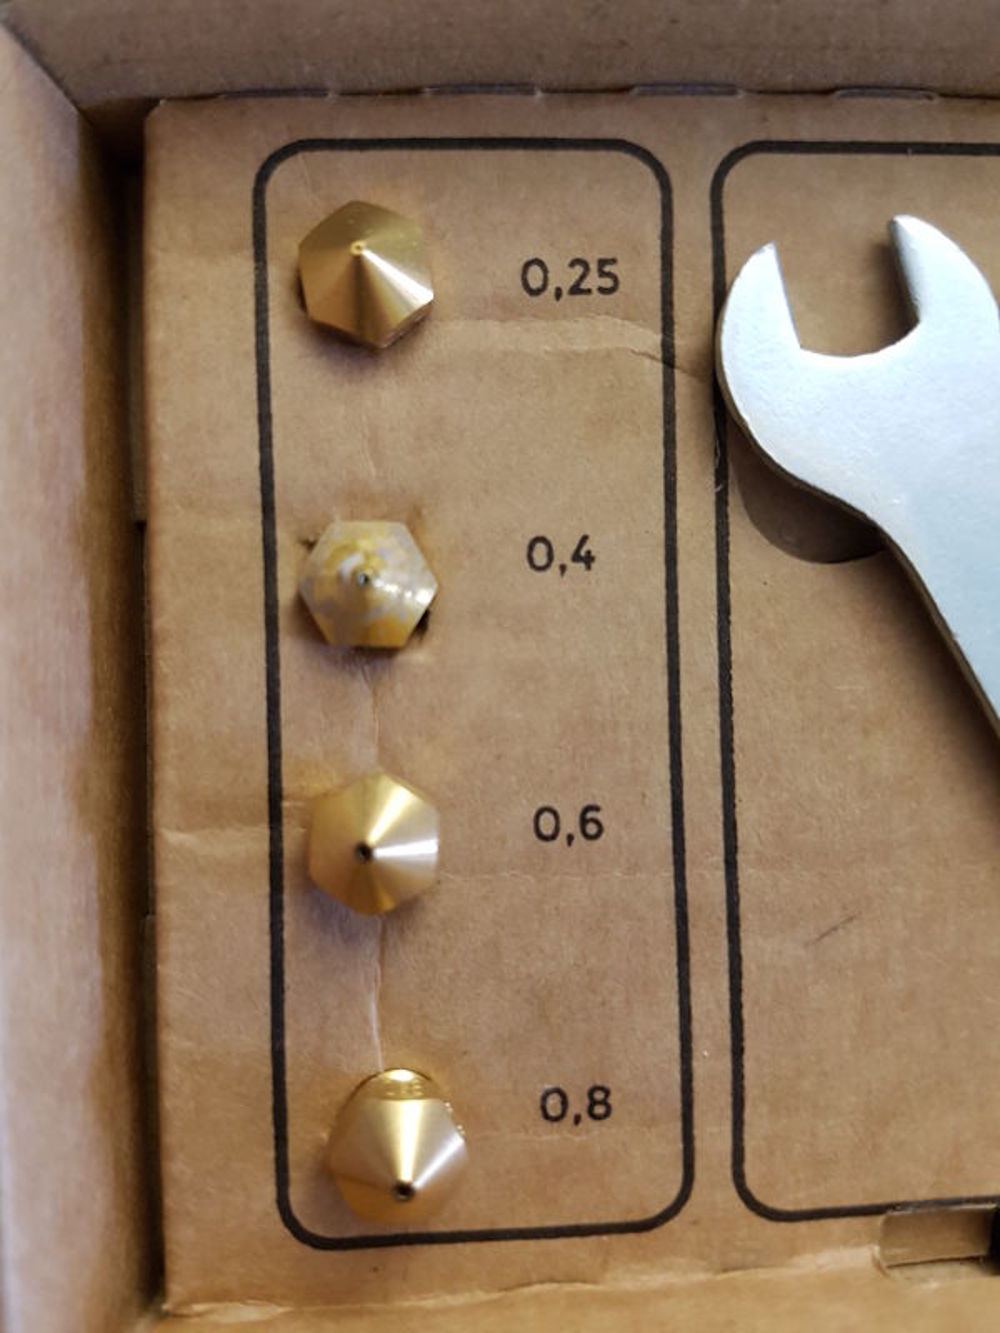 Nozzle diameter
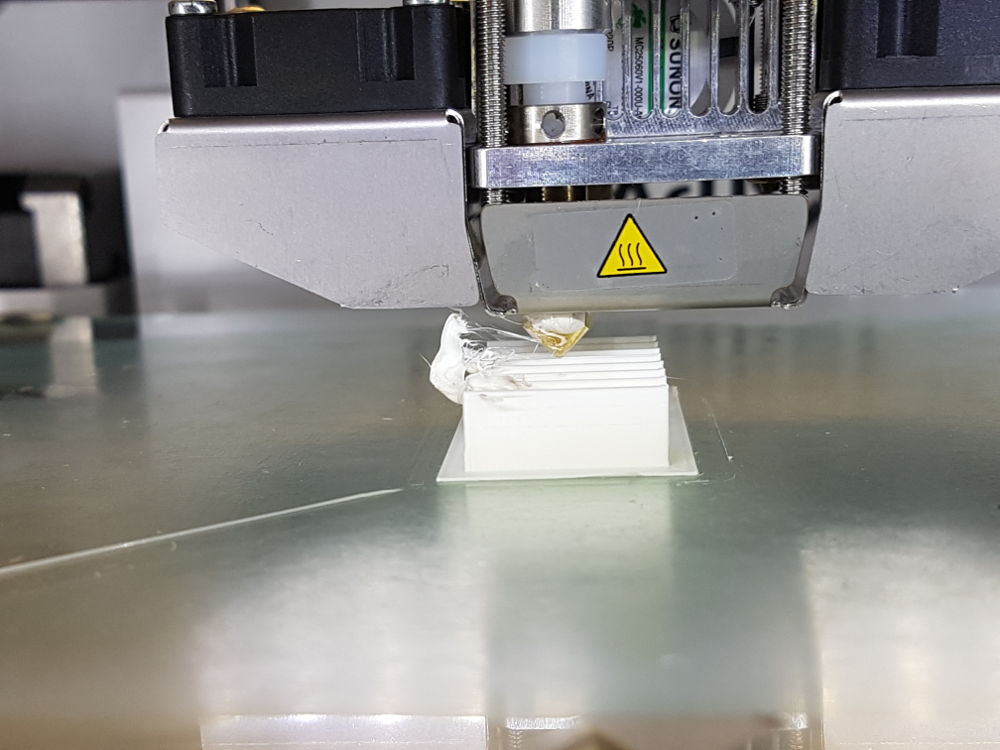 Ultimaker, print process
 TESTS for the WALL THICKNESS | CONCLUSION
With a 0.40 nozzle you can’t print walls with a thickness smaller than the nozzle diameter. Cura will not recognize and export them as a GCode file.
These walls break easily because they only have one or two layers of material.
(The 0.5 mm wall printed with the 0.4 nozzle broke easily.)
Another observation is that the test with the 0.25 nozzle was not stable.
Recommendation: the wall thickness should be a multiple of the nozzle diameter. The most common nozzle diameter is 0.4 mm. The recommended wall thickness is 0.8 mm
 Nozzle 0.4mm
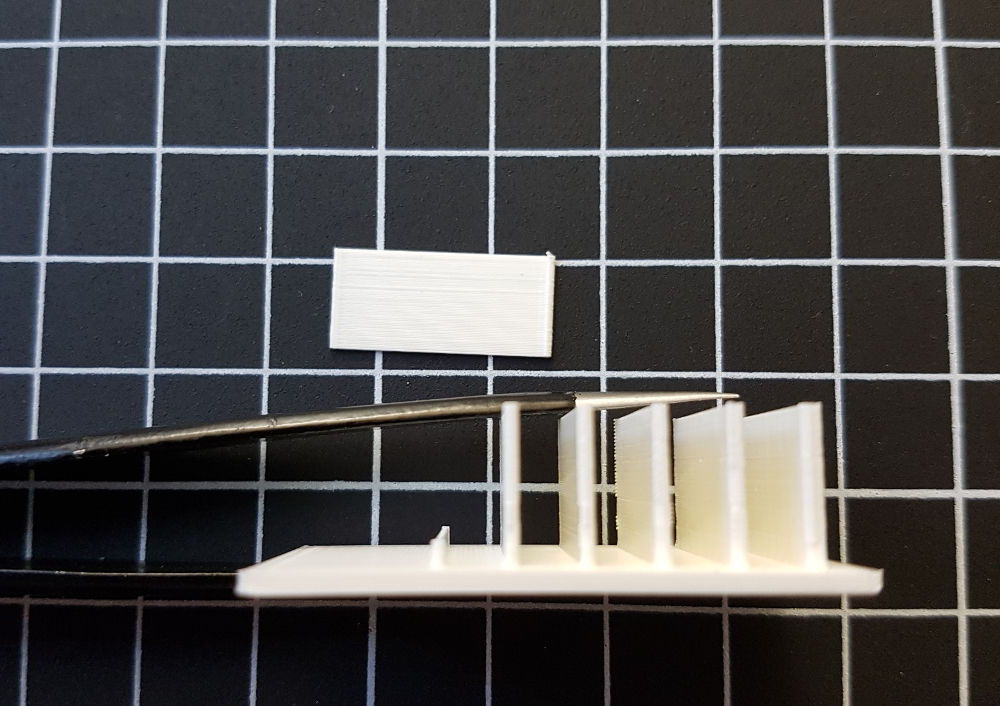 Nozzle 0.4mm
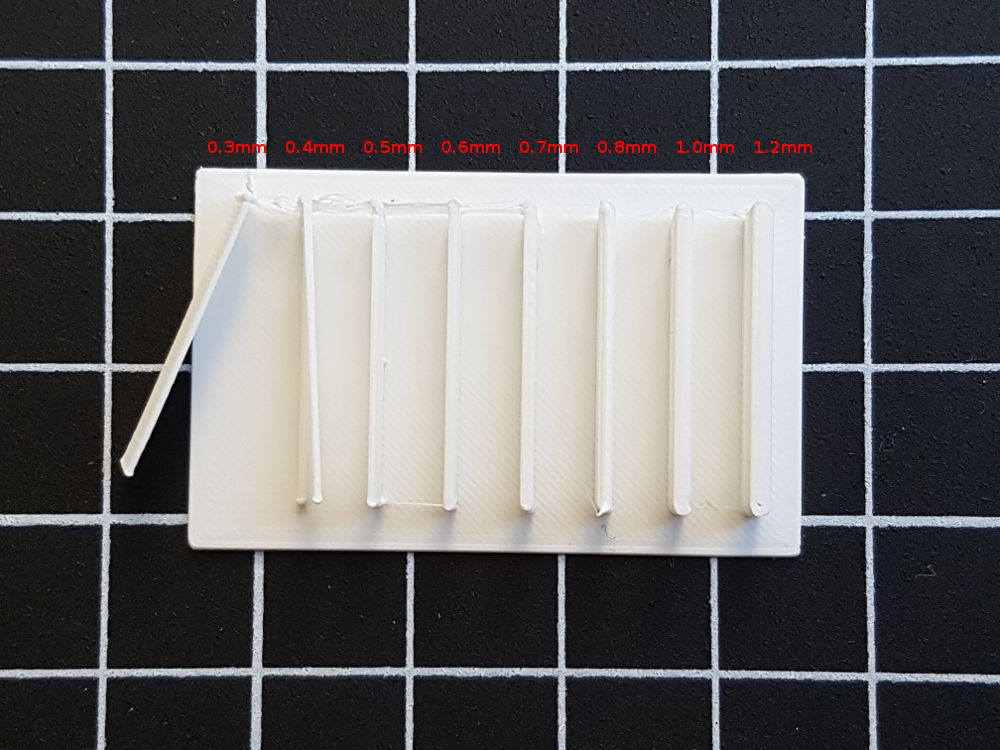 Nozzle 0.4 mm, GCode for 0.25mm
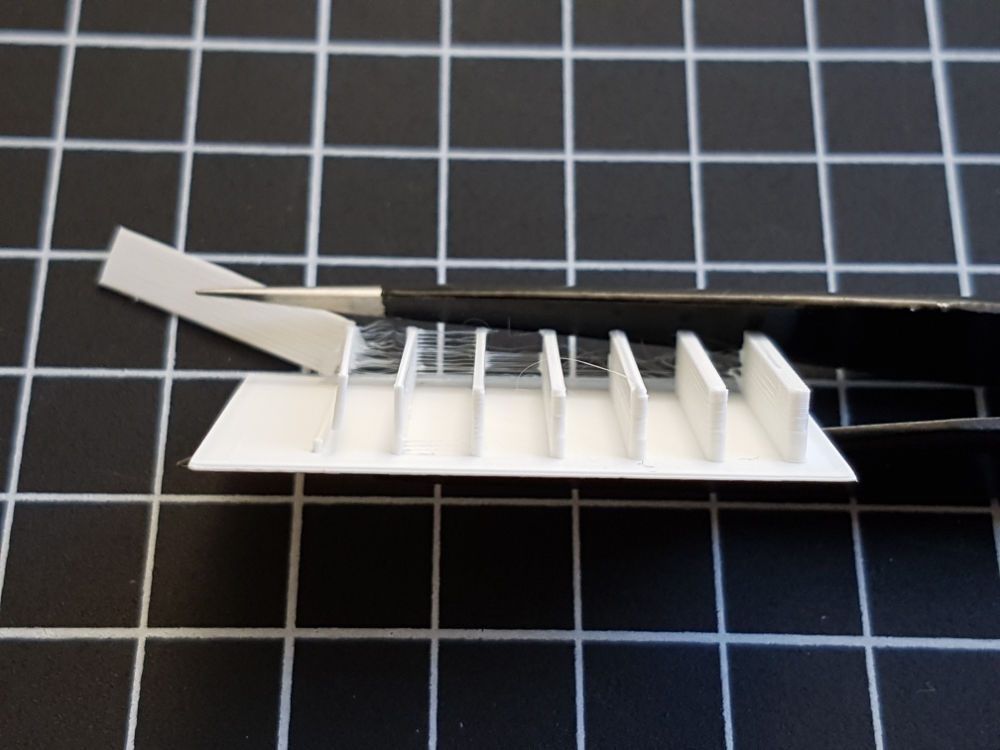 Nozzle 0.4 mm, GCode for 0.25mm
 Nozzle 0.25mm
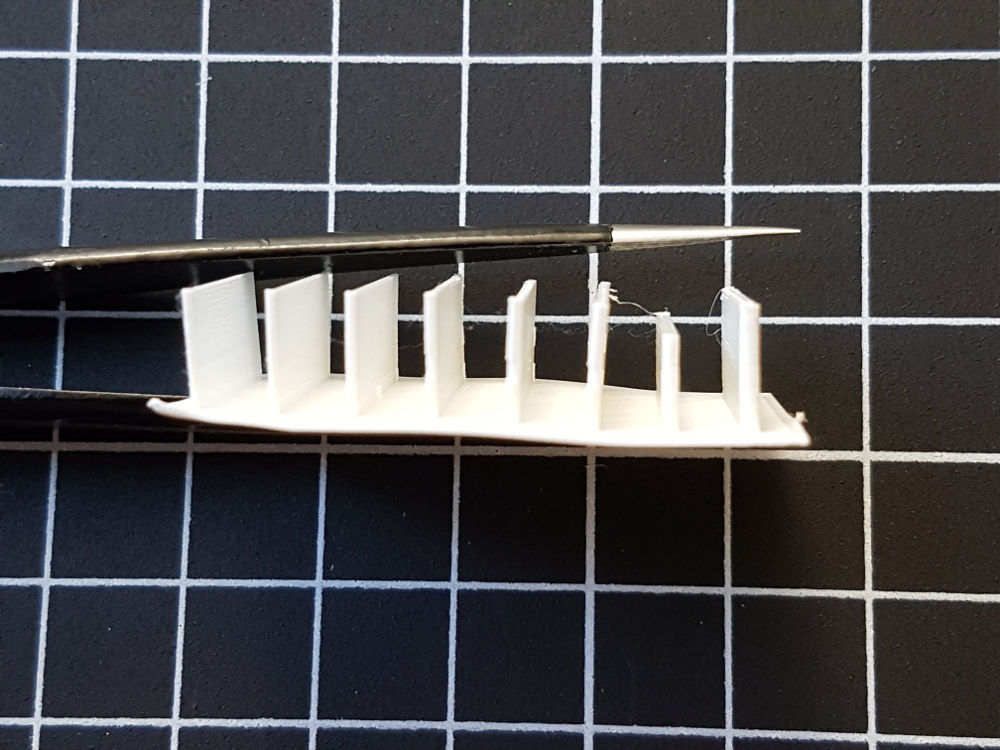 Nozzle 0.25mm
DESIGN AND 3D PRINT AN OBJECT
that could not be made subtractively
For this task I want to print a vase for the Fab Lab.
Rhino | Grasshopper
I start “sketching” the form of the vase in the Front View of Rhino and set also the axis for the object. At first, I use the command 'Revolve' but it doesn’t work so well because
the model had no wall thickness. So I use the command 'Tube' and enter the wall thickness for the object. I also add the base and the lid for the vase and generate a volume with the 'Boolean Union'.
In Grasshopper, it takes a while till I could array the spheres (command 'Array polar') and set different spheres sizes. For this step I use the command 'Random'. The next basic steps are to move and rotate the rows with a sequence (Series) so that each row had a different angle. The last step in Grasshopper is to 'Bake' the geometry (the spheres) for Rhino.
Note: With the sliders you can change the size of the spheres, number of spheres in each row and the number of rows for the vase.
Once the spheres are being imported in Rhino I use the 'Boolean Difference' to subtract the spheres from the vase and export the 3D object as an STL file.
CURA | ULTIMAKER
In Cura, I reduce the size for a test print and check the wall thickness.
Size of the 3D model: diameter 64 mm, height 102 mm
You can see the result… It is very good, but some parts could not be printed. The distance between the spheres must be (for this size) bigger. I can change it in Grasshopper with the sliders.
 Rhino axis
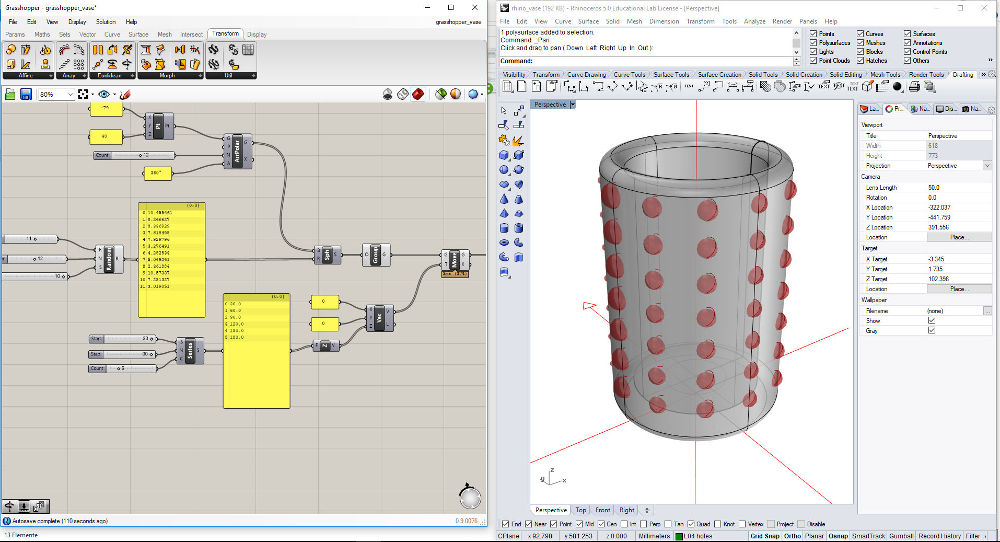 Grasshopper
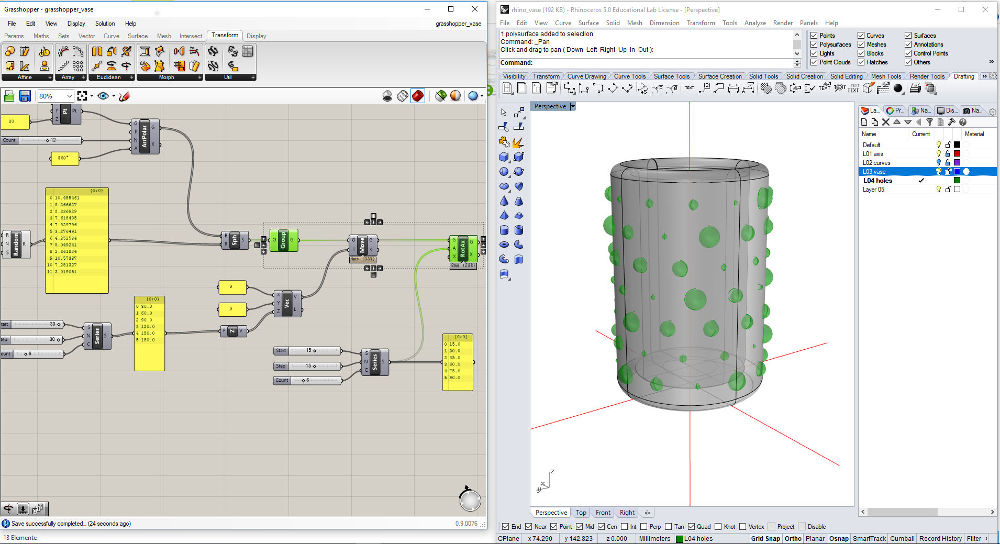 Grasshopper
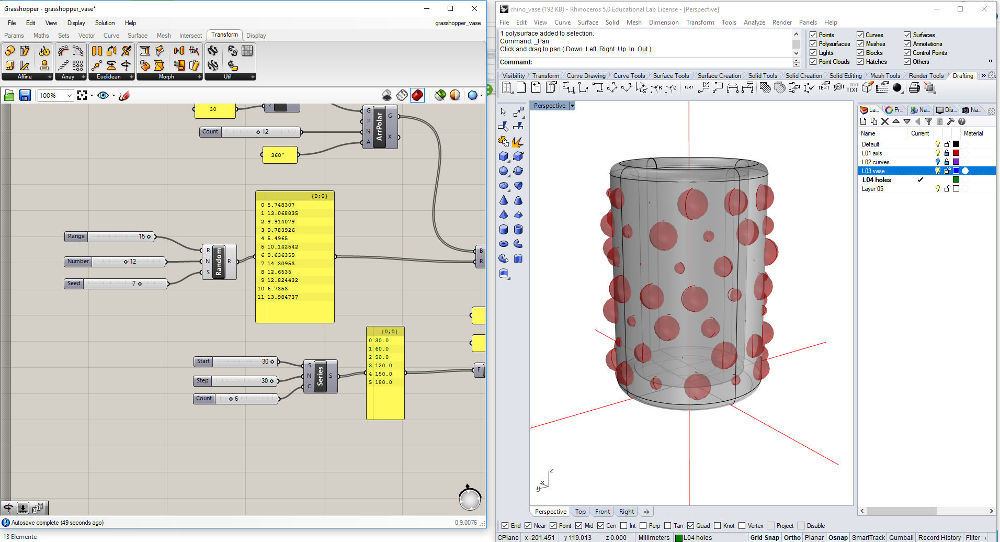 Grasshopper: spheres (parametric)
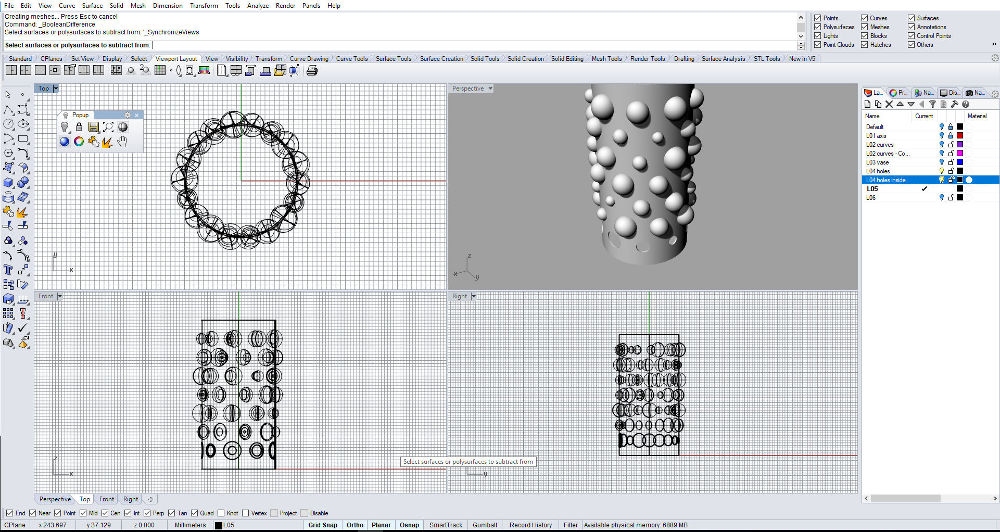 Vase with spheres
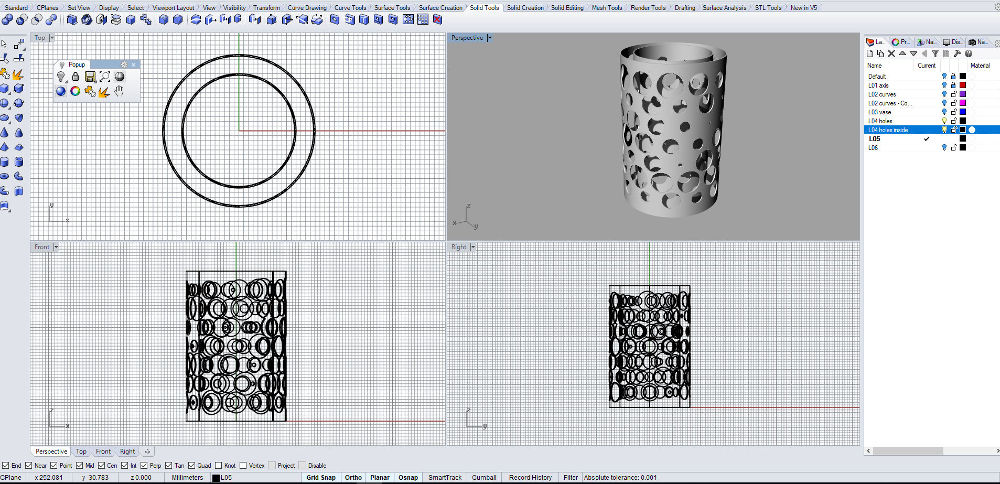 Vase with holes
 Vase final
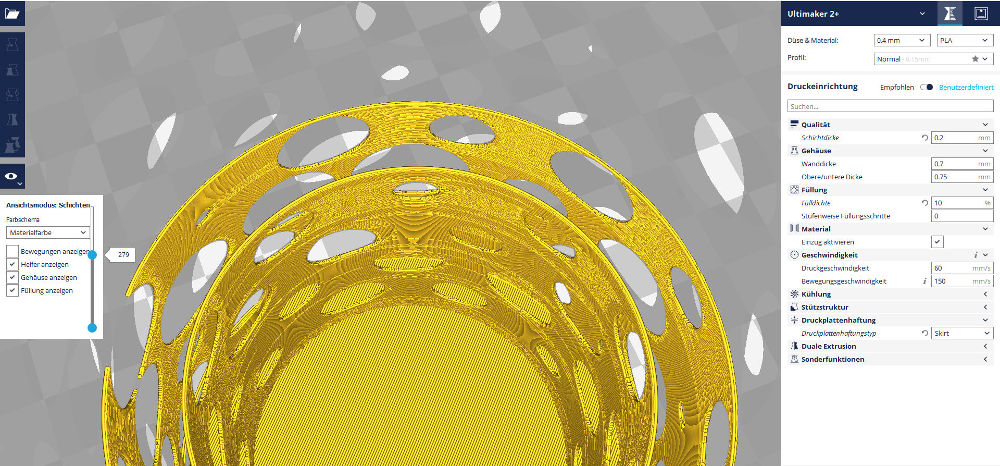 Vase in Cura
 SLA (Stereolithography)
This process uses an ultraviolet laser on a vat of resin. The laser draws a shape on to the resin vat. The resin is solidified and forms a single layer of the 3D volume.
PreForm Settings:
- Start the Preform Software and choose the resin tank and cartridge (They get chipped when you insert them the first time).
I choose the standard Material White Resin >Go to Next
- Load the STL model. I also scale the size of the vase.
Size of the 3D model: diameter 25 mm, height 32 mm
- If is necessary you have to rotate the object, so that the 3D model doesn’t stick to the plate.
- Apply support structure and check that 'Preform' does not show red areas on the surface of the 3D model.
- Send the model to the printer via Wi-Fi to the printer.
Printer Calibration:
- Choose the mode to level the printer by rotating the feet under the printer with the round tolls.
- Check that the resin tank and the build-plate are absolutely clean and the vent cap is open. Then start printing.
Post processing after the print:
- Take the build plate with the model out of the printer.
- Wear rubber gloves for the next steps.
- Remove the model from the build plate with a scraper. Take care that you don't scratch the build plate.
- Put the model in a basin with Isopropyl Alcohol (IPA) > 90% concentration to remove the rest of the resin from the model for arround 10 minutes. You can use the Form Wasch alternatively. (https://formlabs.com/tools/wash-cure/)
- Take the model out of the IPA basin and let it dry.
- Put the model into the Form Cure machine and set the correct parameter for the resin. I set 60 minutes at 60° C for the standard resin. (https://formlabs.com/tools/wash-cure/) The Form Cure is tempering the model.
- Remove the support structure from the model carefully.
CONCLUSION: For very small objects I recommend the Formlabs printer. It delivers tiny objects with a lot of details. These are also stable.
 Preform
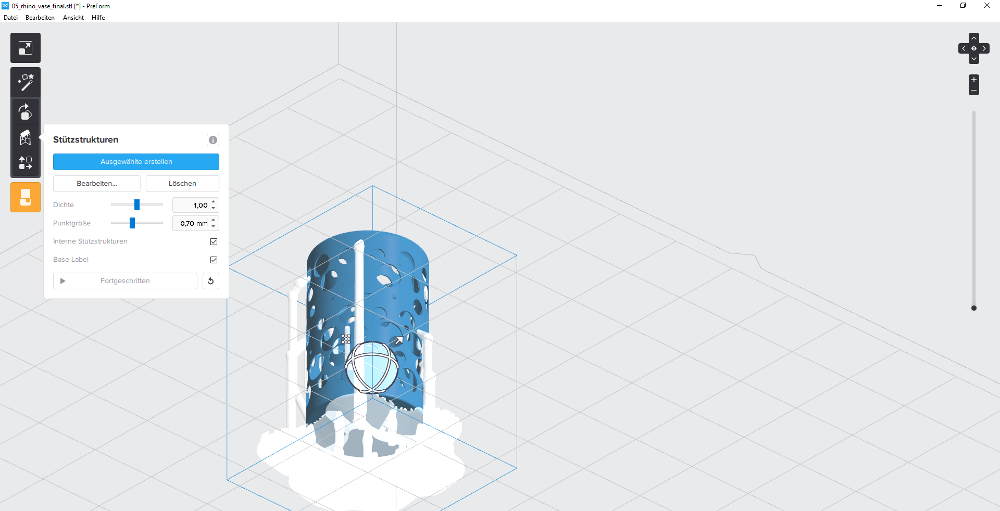 Preform, support structure
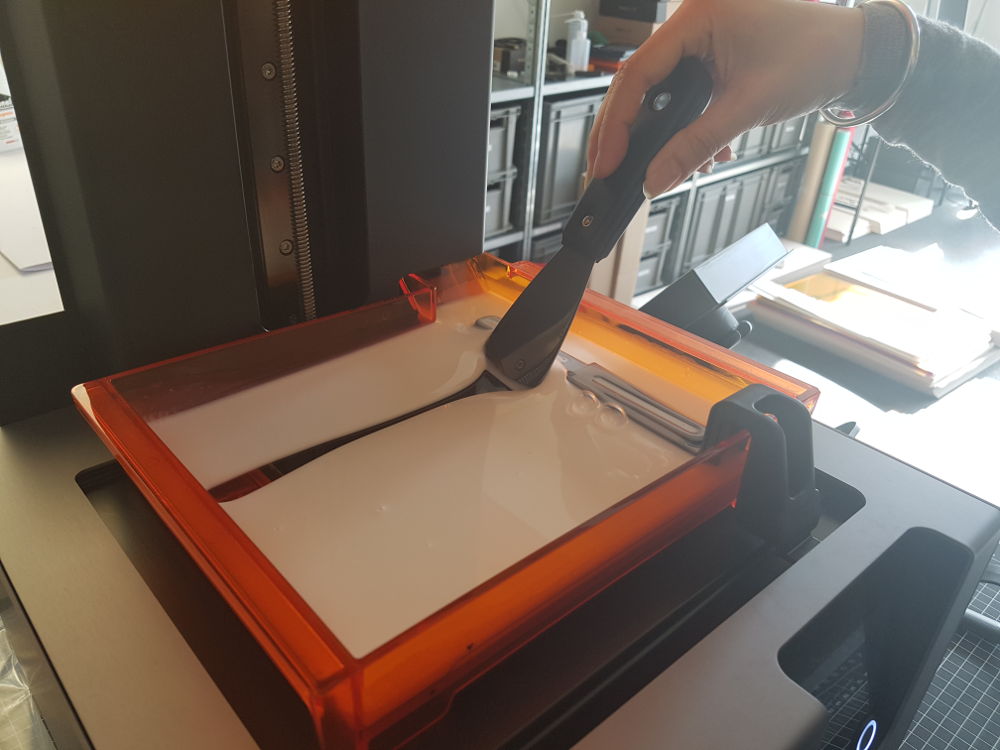 Preparing the resin tank
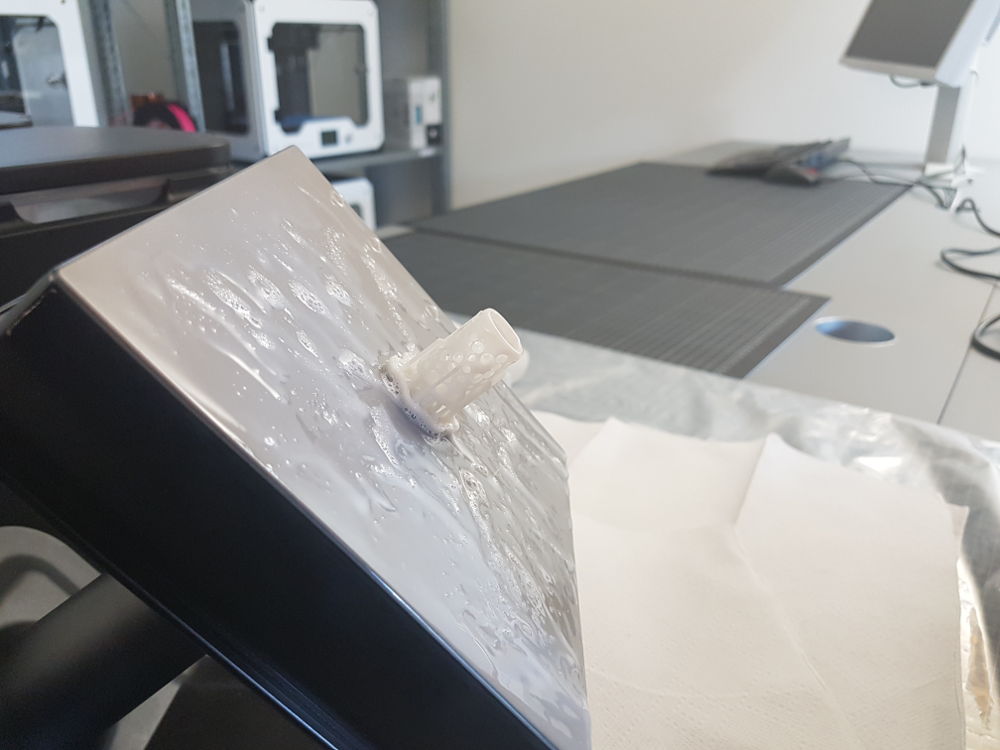 Ready for the post process
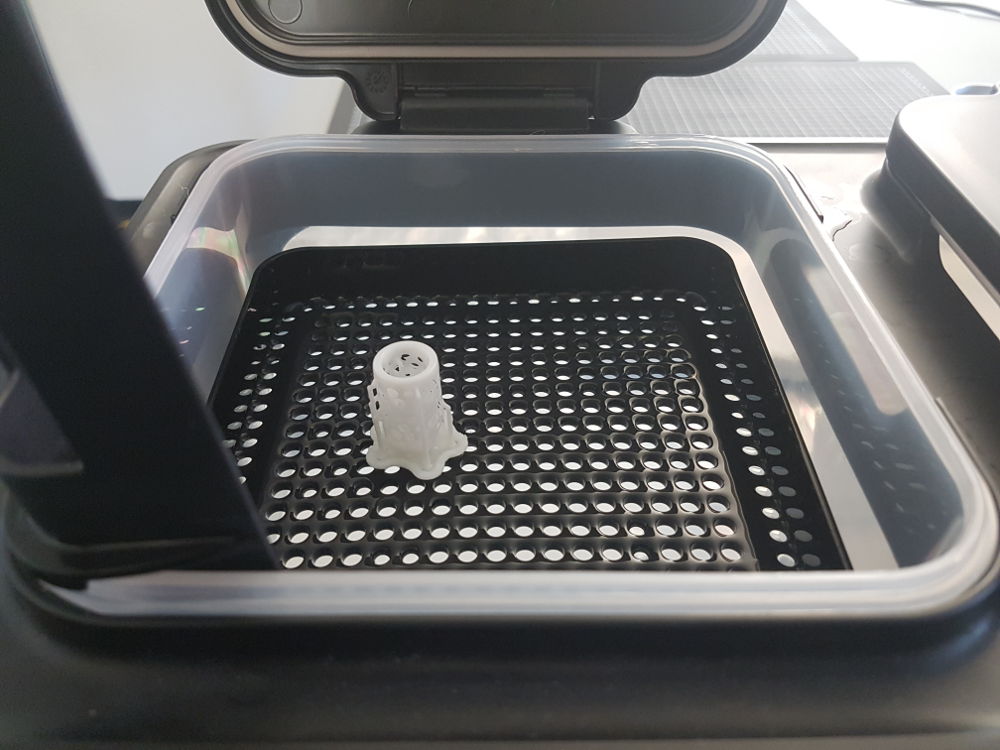 Remove rests of resin
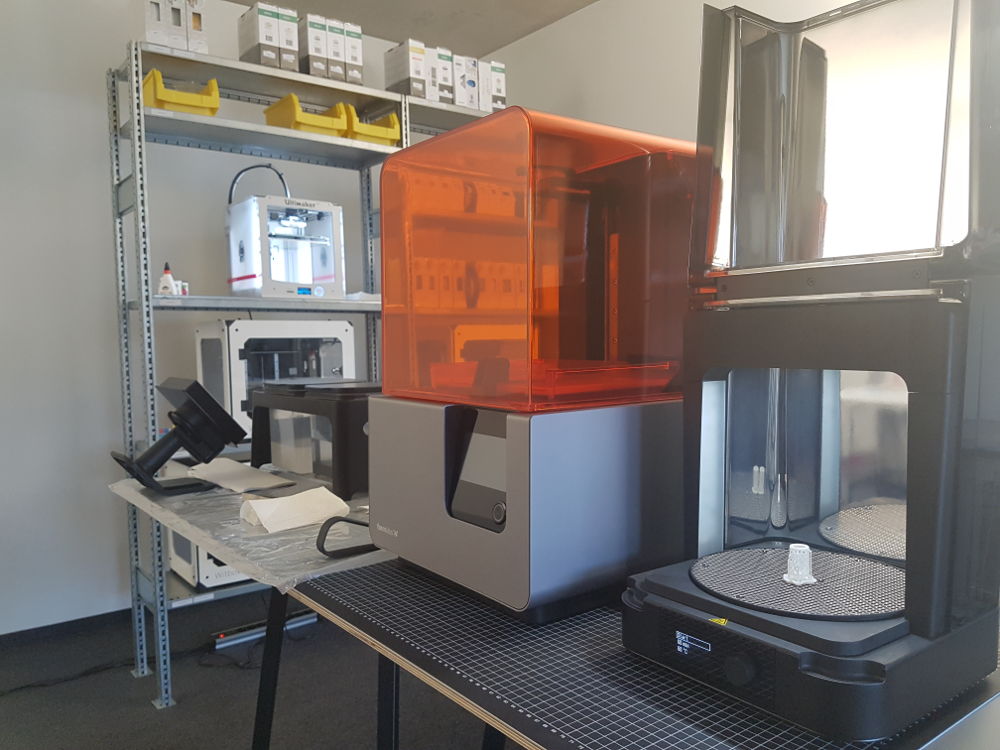 Formlabs
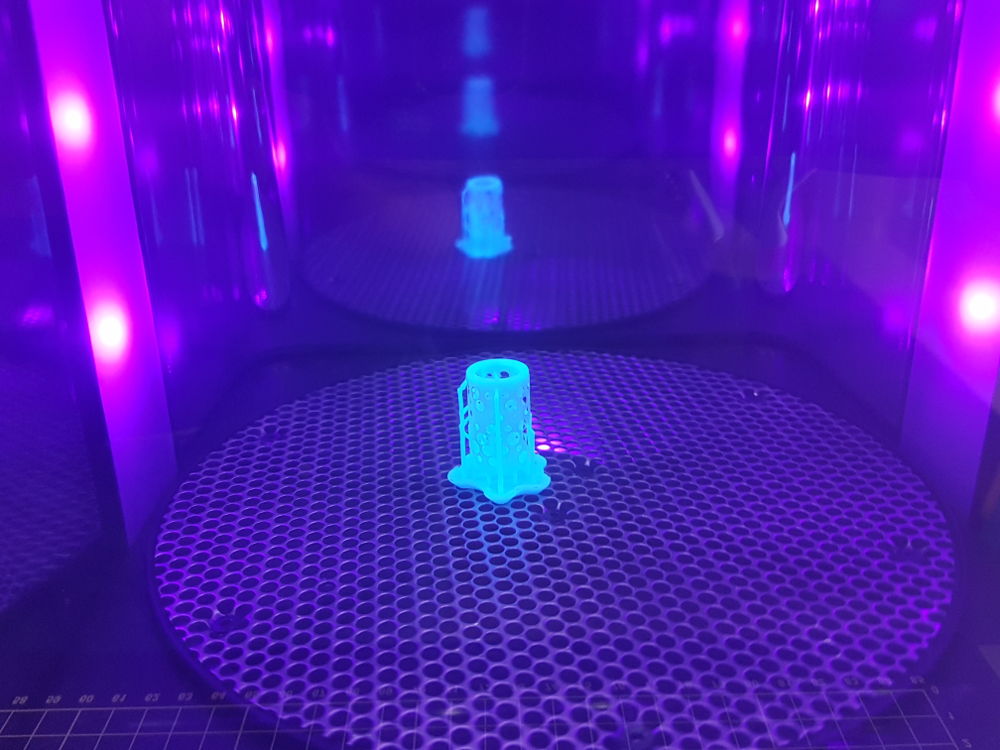 Form Cure
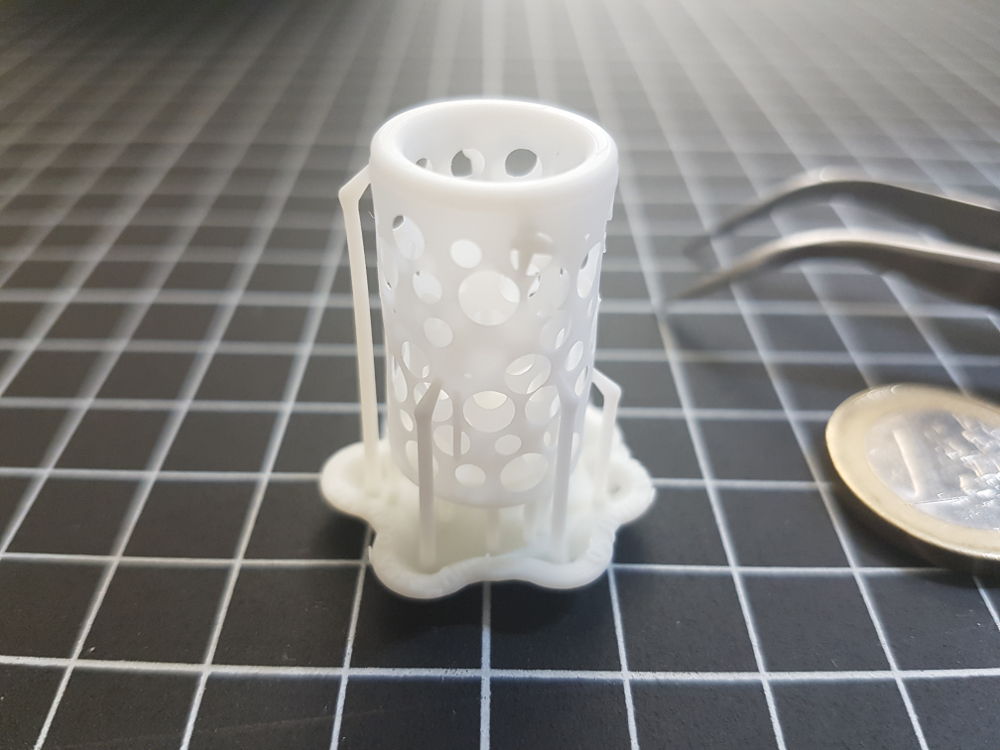 Vase
Vase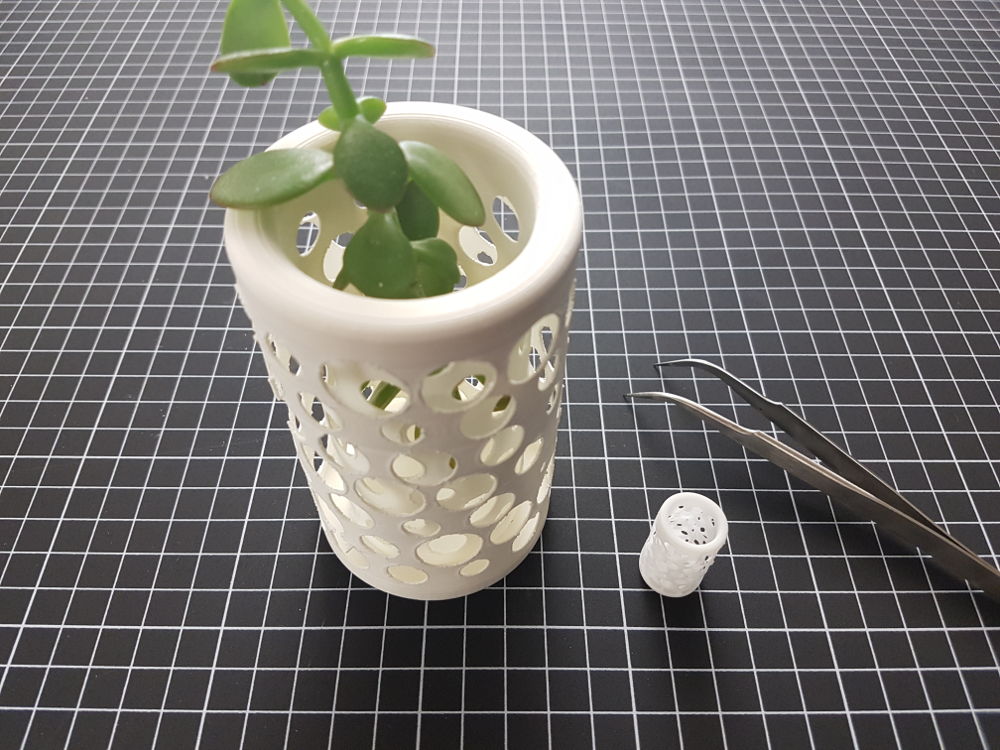 Vase: Ultimaker and Formlabs prints
3D SCANNING WITH SENSE
To do the 3D scanning I did these steps:.
- Install and open the software for the Sense 3D scanner.
- See the instructions about the scanning process.
- Position the object to scan. The environment light and the background should be homogeneous.
- Hold the scanner in 45° angle in front of the object. You should see the object as big as possible on your screen. You will see a green frame around the object that the starting position of the scan process.
- On the software interface you have the Scan Settings for the size of the object. Use 'Object' for small objects, 'Head' for medium and 'Body' for large objects.
- Set the Scan resolution to High.
- Click SCAN (green button on the left) to start scanning.
- Move the scanner around the object (approximately 30 seconds for 360°).
It is important that you move smoothly around the object. The correctly scanned areas will appear green, if you lose the tracking, the object will appear red. Move back a bit and wait until the scanner gets the object again. Proceed the screen process.
- Press FINISH. The object is getting rendered.
- Click FILL. The program will close the holes and generate a printable model.
I can't scan the second object with 3D scanner Sense. The surface is too shiny. That's why I test the ReCap Software.
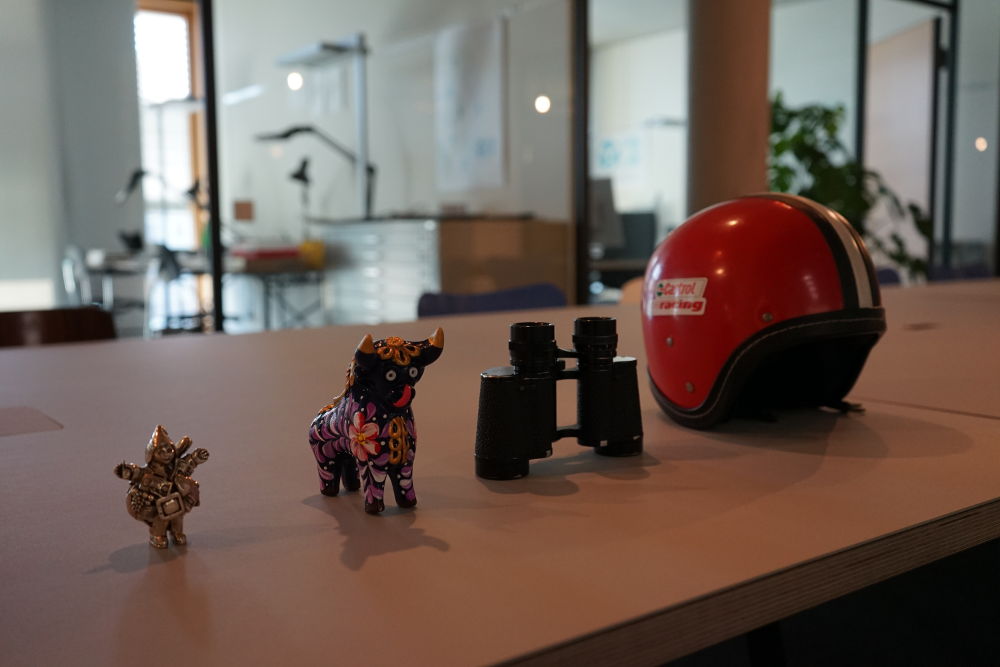 Objects to scan
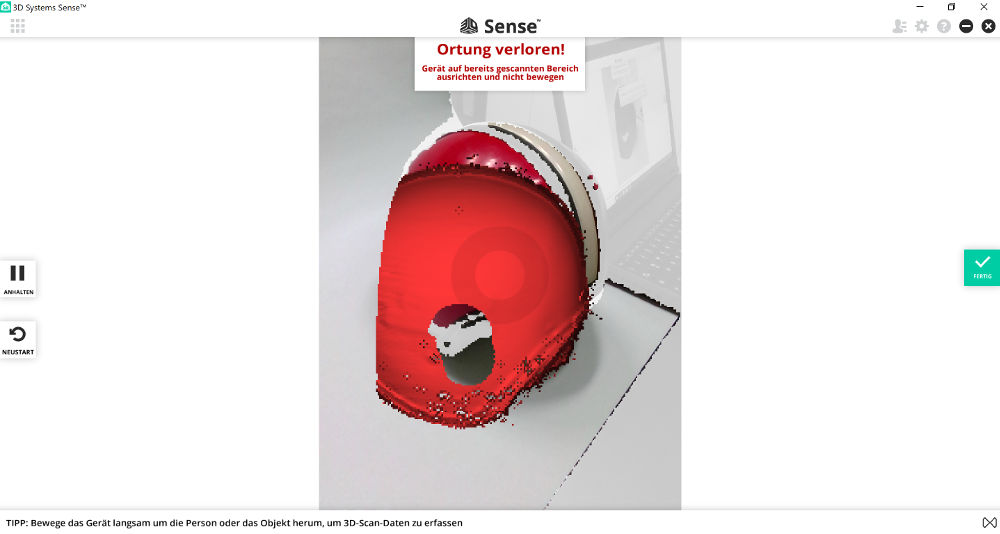 Sense: object 1, test
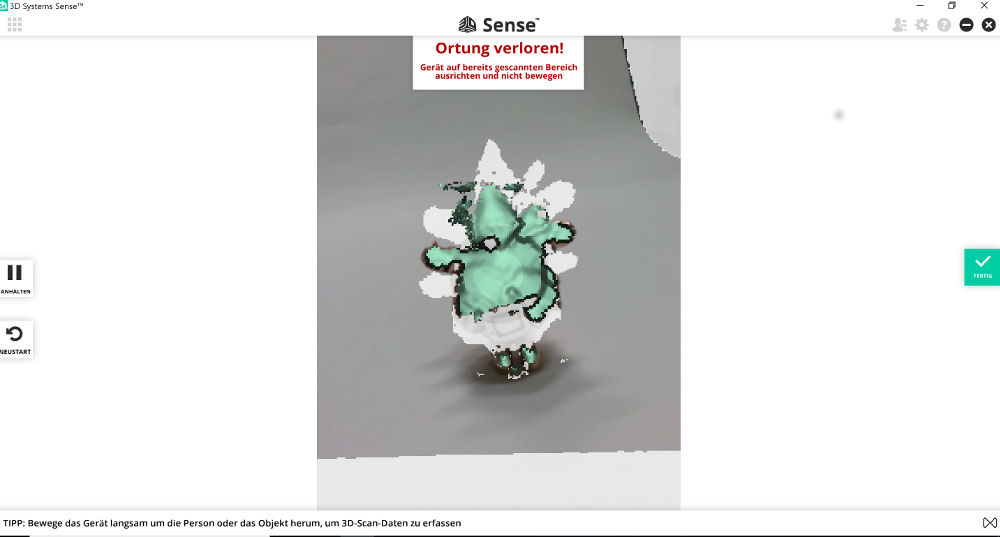 Sense: object 2
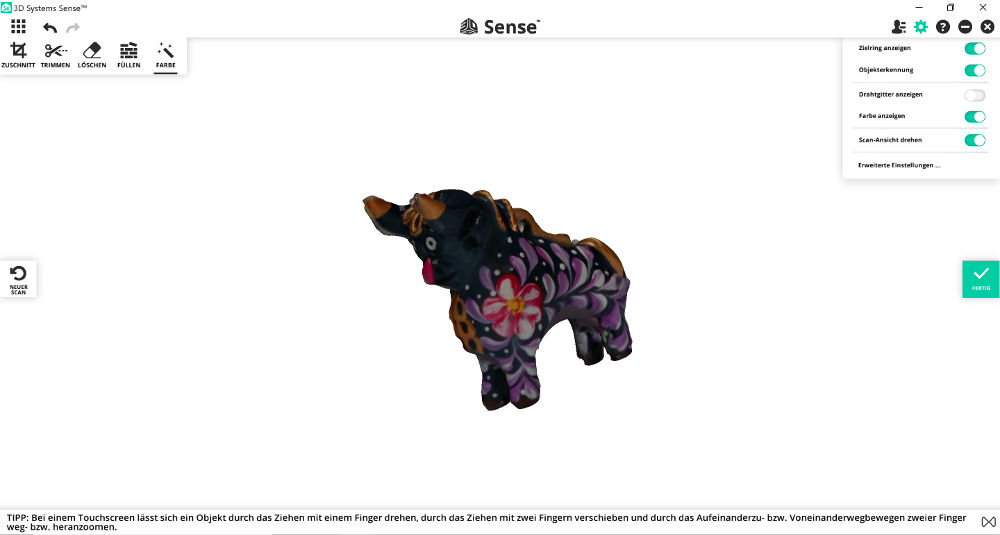 Sense: object 3
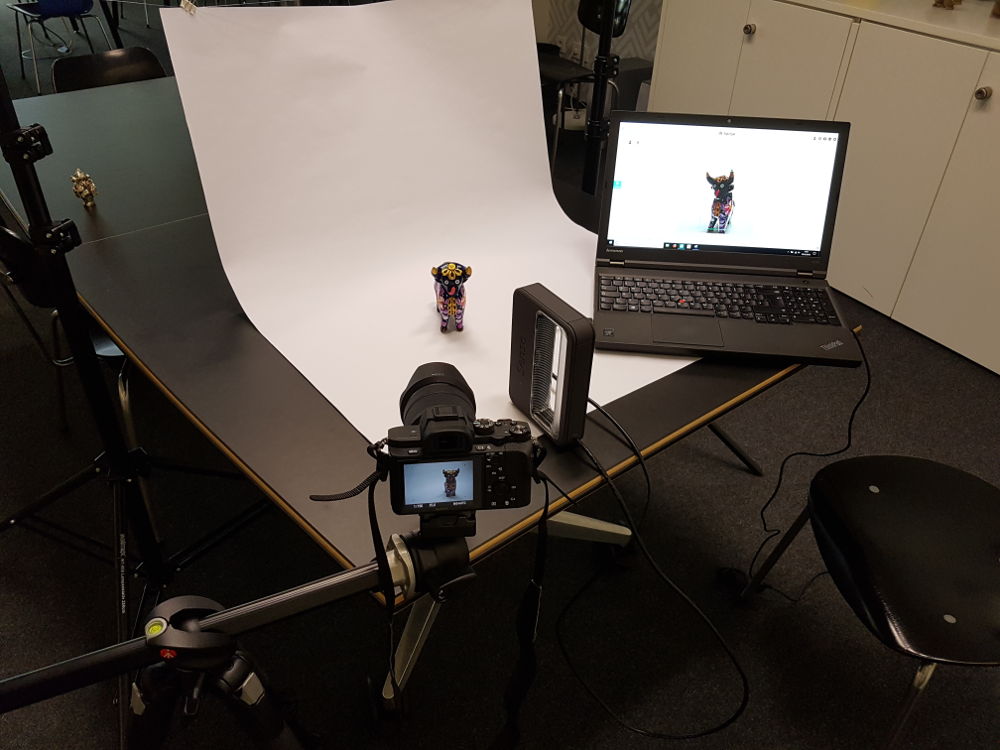 Sense: object 3
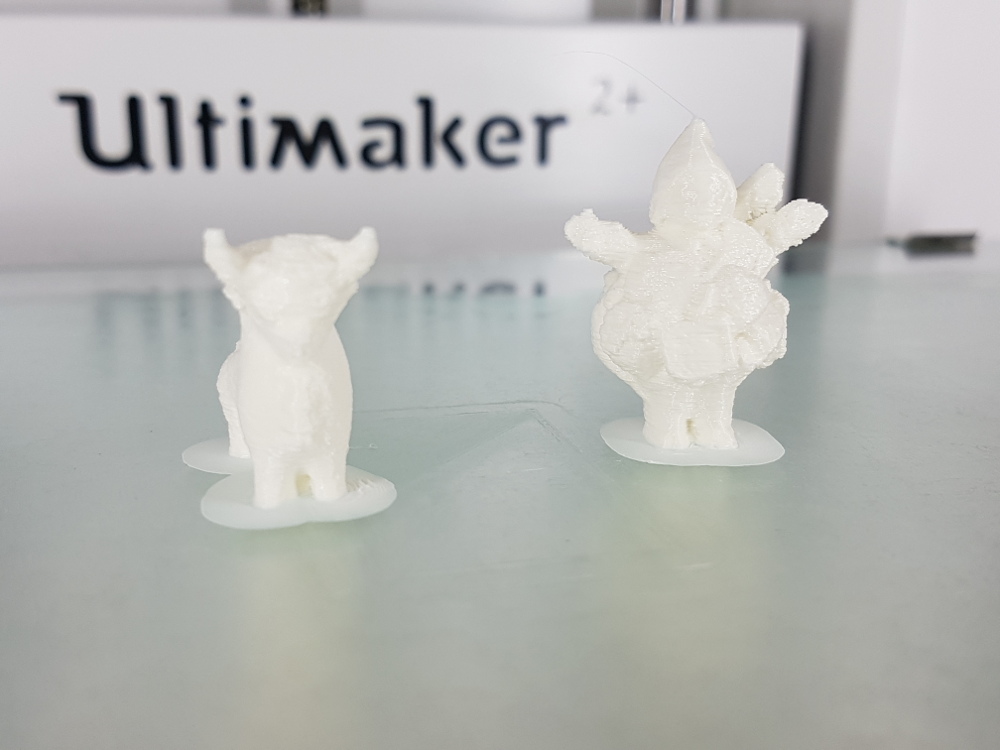 Print with Ultimaker
PHOTOGRAMMETRY WITH RECAP
Here are the steps I'm going to do for the 3D scanning:
- Position the object you want to scan on a rotary table. The environment light and the background should be homogeneous. For the rotary table I take wood and cut it with the laser-cutter. The surface should be white (use paper).
- Put your camera on a tripod.
- Shoot first one photo, then turn the table a few millimeters so that you see your object in another perspective. Shoot another photo and do this process again until you have around 50 high resolution photos from your object without any background.
(For the first try I shoot 20 photos: it didn’t work.).
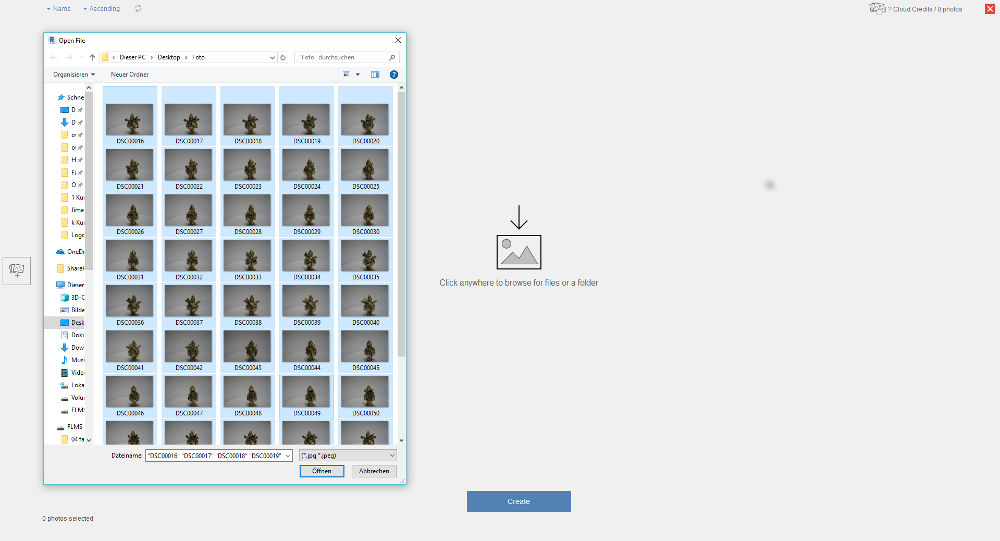
- Then open Autodesk ReCap Photo and select “Create 3D” and “Object”.
- In a new window click anywhere and select the photos you need.
- Select “Create” and the 3D volume will be uploaded in the Autodesk Cloud and will be built.
- When the model is ready you can download it from the cloud and open it with ReCap. Export it as an STL file.
Important: You can search for Issues in ReCap, for example intersections or holes. You can easily remove or close them in ReCap.
With ReCap I could scan this object very well, I recommend it for shiny objects like this.
 Recap: object 2
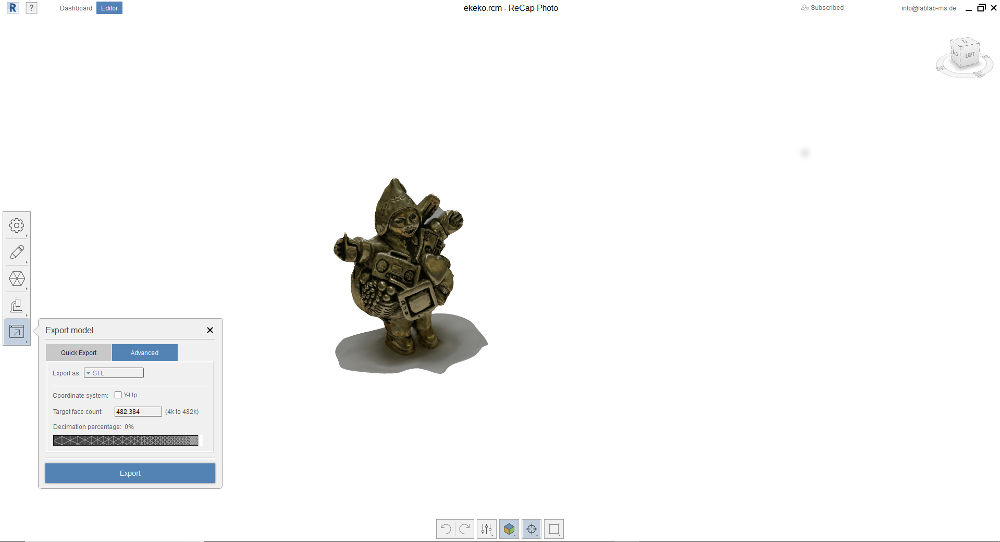 Recap: object 2
 Recap: detect issues
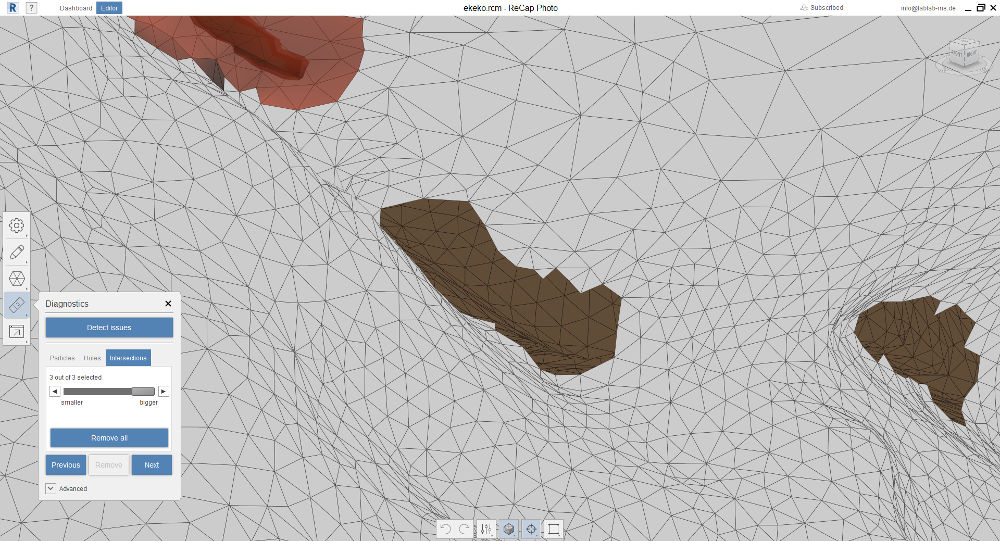 Recap: object 2, remove errors
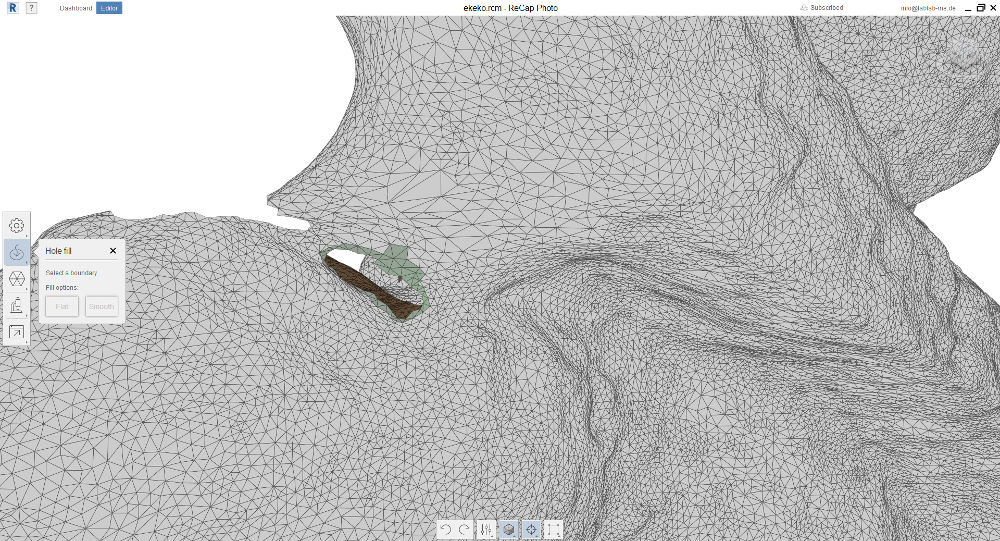 Recap: object 2, remove holes
Download
| 3D print tests for wall thickness(zip) | Download |
| Grasshopper and Rhino files(zip) | Download |
| Cura files(STL) were too large for the Download section. Please contact me, if you need the files. | Contact |