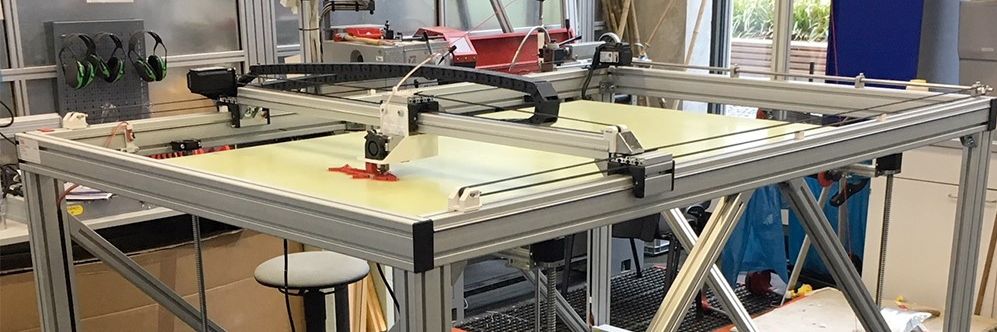
Big 3D-Printer
With a maximum volume of 150 x 90 x80 cm
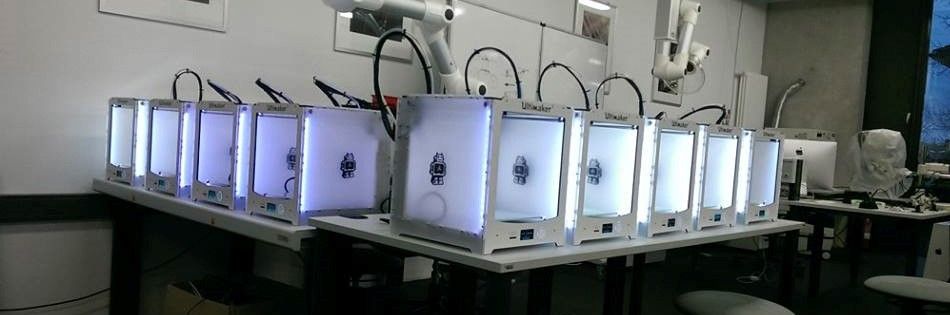
Some of our Ultimaker
We´ve got more than 25 3D-Printer of diffrent types
Greeting
Our best employee in HRW FabLab
Assignment 12:
interface and application programming
Task:
- compare as many tool options as possible (group project)
- write an application that interfaces with an input &/or output device that you made
Work
This week we have du build our own application that interfaces with an input and/or output device. I started to check a lot auf different ways to solve this quest and search in the documentation of the last years to find useful hints. Neil gave us in the lesson a lot of different software tools so I take a look at some of them and watched some first tutorials to get a impression of the workflow. At the end I decided to use https://processing.org/ for my assignment. There a various reasons for it:Neil told us that Processing is quite similar to the Arduino IDE. Cause I used the Arduino IDE that is a great pro. Additional our instructors worked with Processing last year too so they could help during problems. And the last and main reason was the big range of tutorials and documented examples. Cause I´m not a programmer I need a lot of basic knowledge’s.
So what is Processing?
Processing is an open source computer programming language and integrated development environment (IDE) built for the electronic arts, new media art, and visual design communities with the purpose of teaching the fundamentals of computer programming in a visual context, and to serve as the foundation for electronic sketchbooks.
The project was initiated in 2001 by Casey Reas and Benjamin Fry, both formerly of the Aesthetics and Computation Group at the MIT Media Lab. In 2012, they started the Processing Foundation along with Daniel Shiffman, who joined as a third project lead. Johanna Hedva joined the Foundation in 2014 as Director of Advocacy. One of the aims of Processing is to allow non-programmers to start computer programming aided by visual feedback. The Processing language builds on the Java language, but uses a simplified syntax and a graphics user interface.(Wikipedia)
After watching some tutorials at Youtube I thought a servo-controller would be a nice challenge to solve with Processing. The control option with Arduino I showed two weeks ago, so I can use my first knowledges and extend my program.
So lets start with the known Arduino IDE and build the frame for my controller. See the Arduino program below.
Arduino Code
#include <SoftwareSerial.h>   //that is a necessary Library to get connection to Processing
#include <Servo.h>    //You know that library from week 10


Servo myservo;                   // Create servo object to control a servo
int servoPin = 8;                // Connect servo to pwm pin 8
int val = 0;                     //starting value as fixed-point for calculation

void setup() {
  myservo.attach(servoPin);      // Attach the servo to the PWM pin
  Serial.begin(9600);           // Start serial communication at 9600 bps
}


void loop() {
  if (Serial.available()) {      // If data is available to read,
    val = Serial.read();         // read it and save it in val
  }
  myservo.write(val);            // Set the servo position
  delay(15);                     // Wait for the servo to get there
}
As you see there is not a lot new in the program than in week 10. I only included a new library and set the servo position not to a fix value but as a variable. And in each loop I read out the serial data and set it to my variable.
Every Processing program consists 2 functions. The “setup()” and the “draw()” function. Thea are nearly the same as the Arduino “setup()” and “loop()”. The code in setup () is run once, and the code in draw () is executed continuously. Processing is using Java as language and added some special functions to allow various designs for interfaces. So lets Take a look at my finished Processing program. At this point I had to thanks my instructor Aleksandra Konopek for her support during the programming process.
Processing Code
import processing.serial.*;   //import a library to allow the connection to my Board

Serial myPort;      // Create object "myPort" from Serial class
String val;         // Create a String to receive data from the serrial port
float mx = 0.0;      //declare variable "m" and assign it the value 0.0
PFont font24;        //need this to discribe the text style

void setup() {
  size(800, 400);        //generate a window with 800px width and 400px height
  noStroke();
  frameRate(10);
  String portName = Serial.list()[0];  //here you hae to set the correct port. See explanation below
                                        // Open the port that the board is connected to
  myPort = new Serial(this,portName, 9600);  //use the same speed (9600 bps)
  font24 = createFont("Helvetica",20);       //set the text style

}

void draw() {
  background(100);         // grey background
  fill(200,200,200);         // Set brighter grey color
  rect(100, 100, 600, 200);      // Draw square
  float dif = mouseX-mx-25 ;     //add the mouse controll, only X coorinate
  if (abs(dif) > 0.1) {
    mx += dif/1.0;
  }
  mx = constrain(mx, 100, 650);                // Keeps marker on the screen
  noStroke();
  fill(255,90,50);                              //set color of the bar
  rect(120, 190, 560, 20);                         //draw the bar
  fill(0,0,255);                                //set the marker color
   ellipse(mx+25, 200, 20, 70);               // Draw the position marker
  int angle = int(map(mx, 100, 700,0,180));    // Scale the value to the range 0-180
  textFont(font24);                            //set the text style
   text("FabAcademy 2018", 10, 20);            //letter the interface
   text("Servo-Controller", 105, 120);
  text("0", 120, 250);
   text("45", (110+(655-120)/4), 250);
    text("90", (110+(655-120)/2), 250);
     text("135", (110+(655-120)/4*3), 250);
    text("180", 655, 250);
     text("by Lukas Hellwig", 545, 290);
  myPort.write(angle);                        // Write the angle to the serial port!
}
The most difficult part was to identify the right port. the following line is the important one for this.
String portName = Serial.list()[0]; 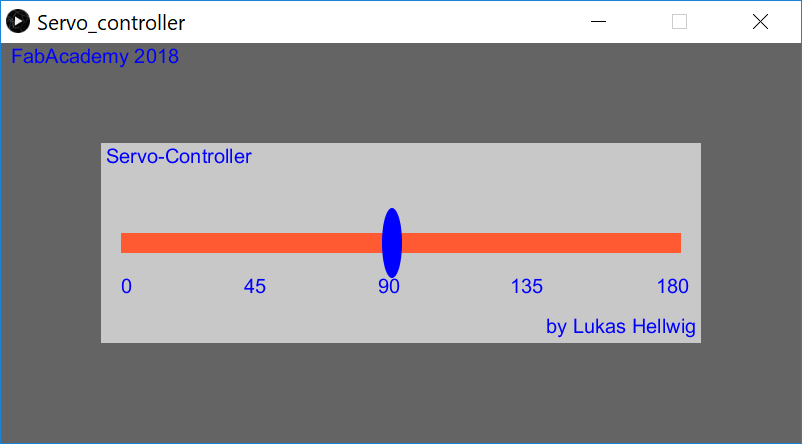
It is a clear design out of some geometric forms. For my first self developed interface I´m proud of it. In the next step I´d like to change the direction für my final projekt to controll the computer mouse with some input devices. Wiring the board is quite simple and I explained it in week 11, so I don´t explain it now again step by step. But now lets take a look at the working interface application:
Downloads
| Arduino program | download |
| Processing program | download |
