I have had a bit of experience using a ShopBot CNC router before. I have designed some chairs and other furniture, but unfotunately never ending up with a finished prototype. I believe this is mainly due to not taking into account the variable thickness of the stock material and testing the gaps needed for joints prior to cutting. Also a few sessions would have been saved by cutting a small maquette on a laser cutter or even in card before.
I am quite excited to do some 3D milling, but I do not think this is the week for it. This option has not been readily available in the past, but I hope to take advantage of the opportunity during the moulding and casting or composite materials week.
Some good links to look at advising about joints etc including health and safety concerns:
ITP Fabrication
Guerrilla guide to CNC machining
I am going to take a design I have made in the past and simplify it. The main error I came across when I last cut this was getting the cross joint in the middle wrong, which could have been avoided with a test piece. There are also a lot of complicated joints which I aim to significntly simplify. Finally this file is not parametric, so altering the design for different stock is actually quite time consuming so time to get on the grasshopper again.
In the end I did not have the file ready in time to test on the laser cutter, but they say fortune favours the bold so off I went. I managed to create the file parametriclly, but I only put in a value for stock thickness rather than tolerance of my joints.
I created the file on grasshopper, but it was incredibly clumsy. I believe it would be much easier to create a file from scratch rather than working from existing files. It is such an ugly definition, but I have put it up, you can see in the picture the complexity.

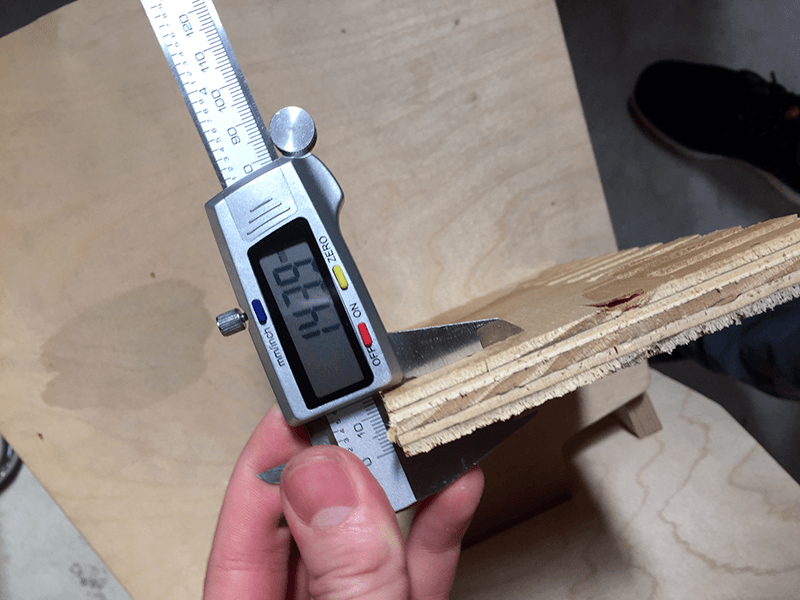
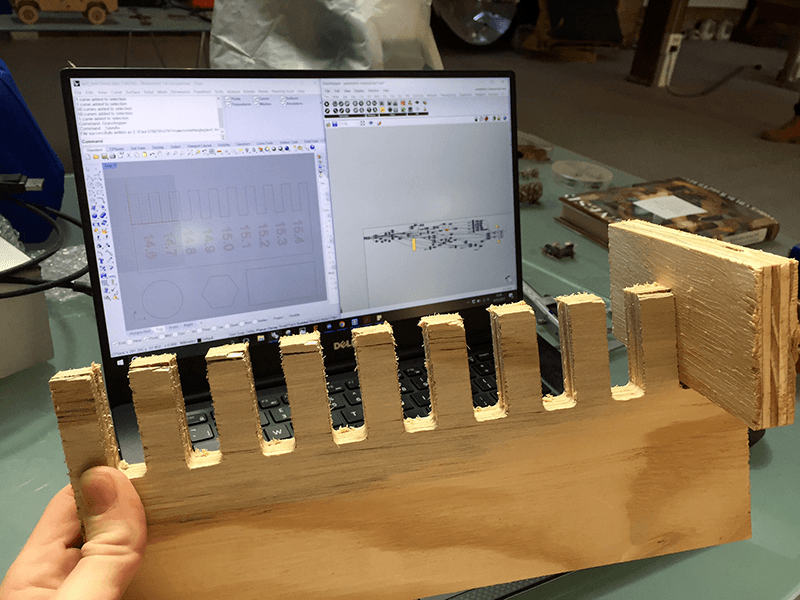
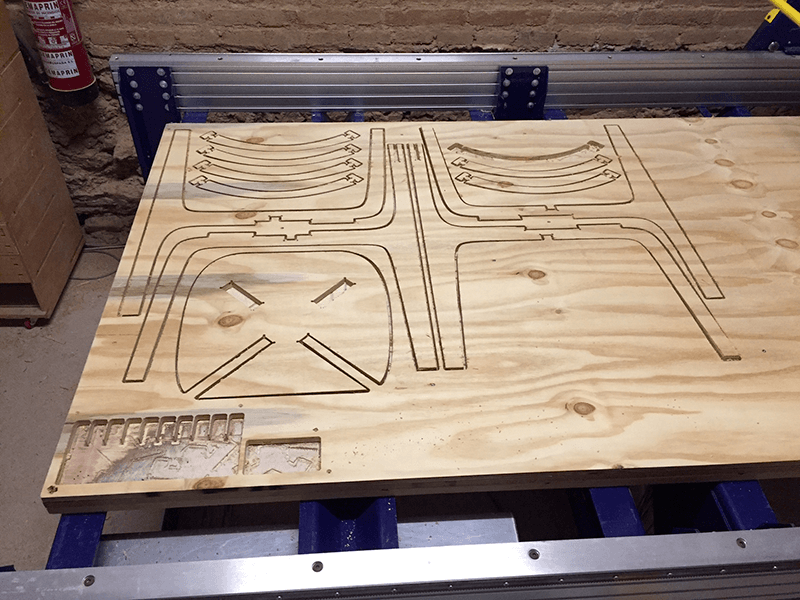
I first did a test piece to see what thickness I should leave. As you can see there is an incredible variation in the thickness of the material. Although good for testing, cheap material isn't great.
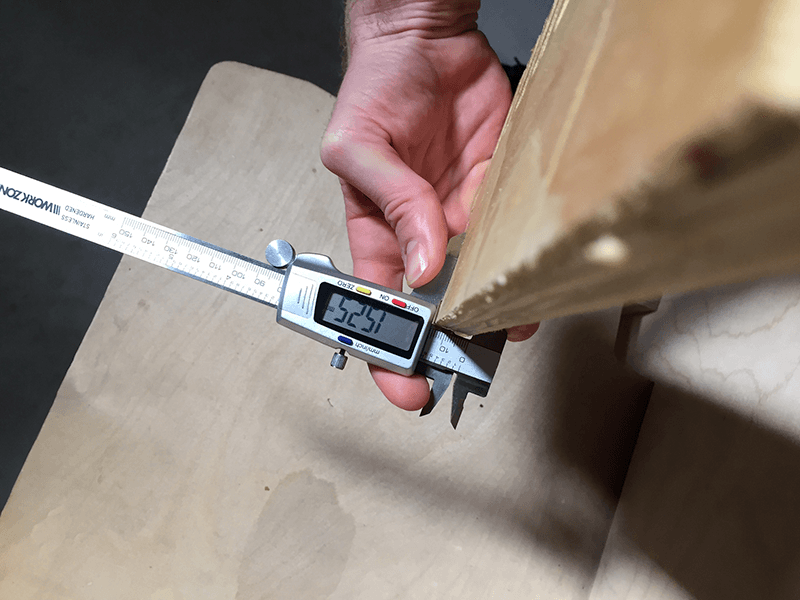
I estimated a tolerance of approximately .2mm around all sides of the joints, Altered my grasshopper file and off I went.
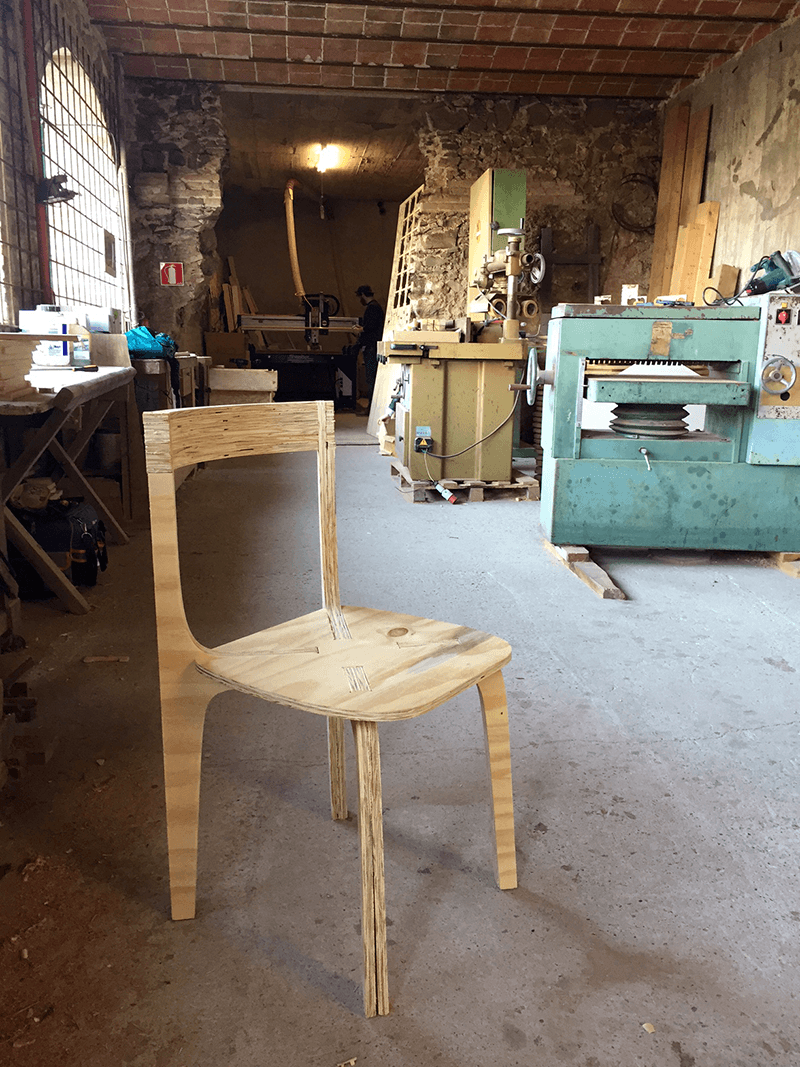
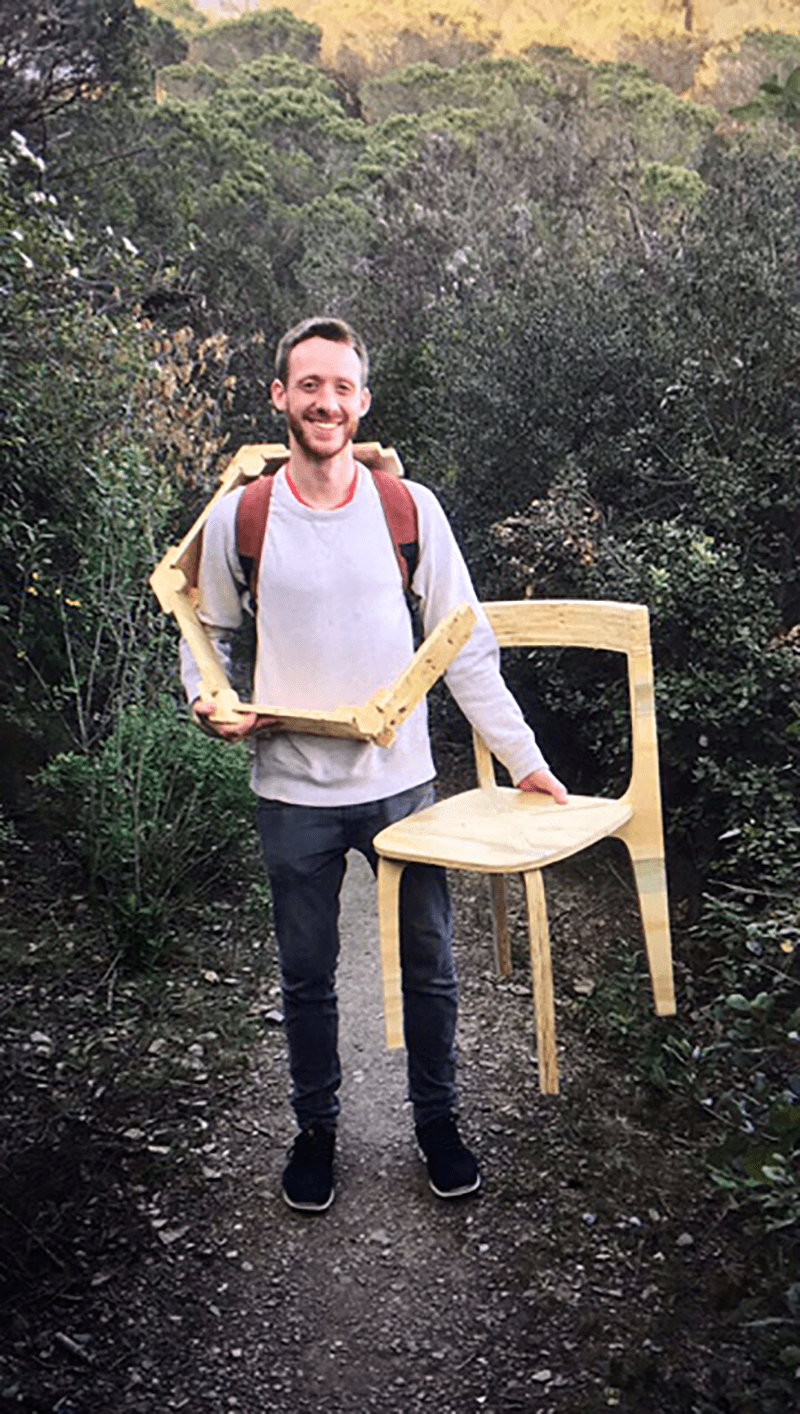
I was very happy with the chair. I milled this up in the Green Fab Lab. A colleague and I decided to walk down the hill through a forest track back to the city, which, with a chair and 3 large hexagons was fun. Well I had fun.
This chair is now my FabLab throne that I use every day I am in the lab. There are definitely some improvements to be made. Firstly aestheticaly, the seat size and shape could be altered. Structurally I was told of the torsion I am getting in the legs with the orientation of my planes and basically I need to align some pieces in a perpendicular direction to get some sort of bracing. I dont partcularly want to add bracing or cover up any of the end grain for aesthtic reasons. I am able to thicken the legs though and also making it out of a better quality material will increase stability.
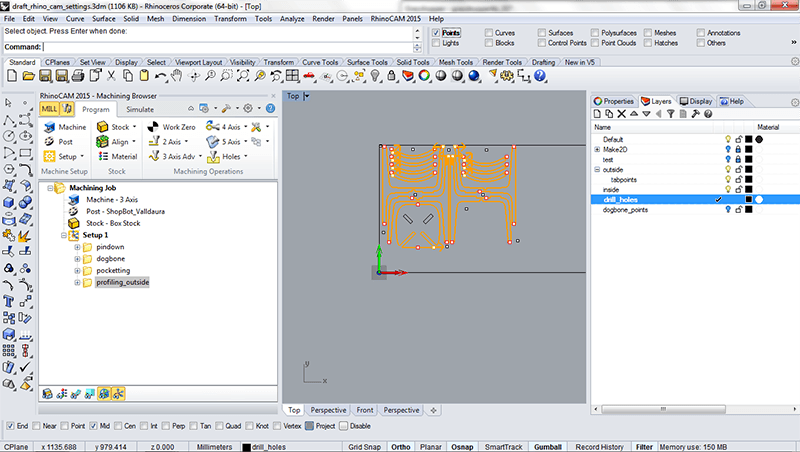
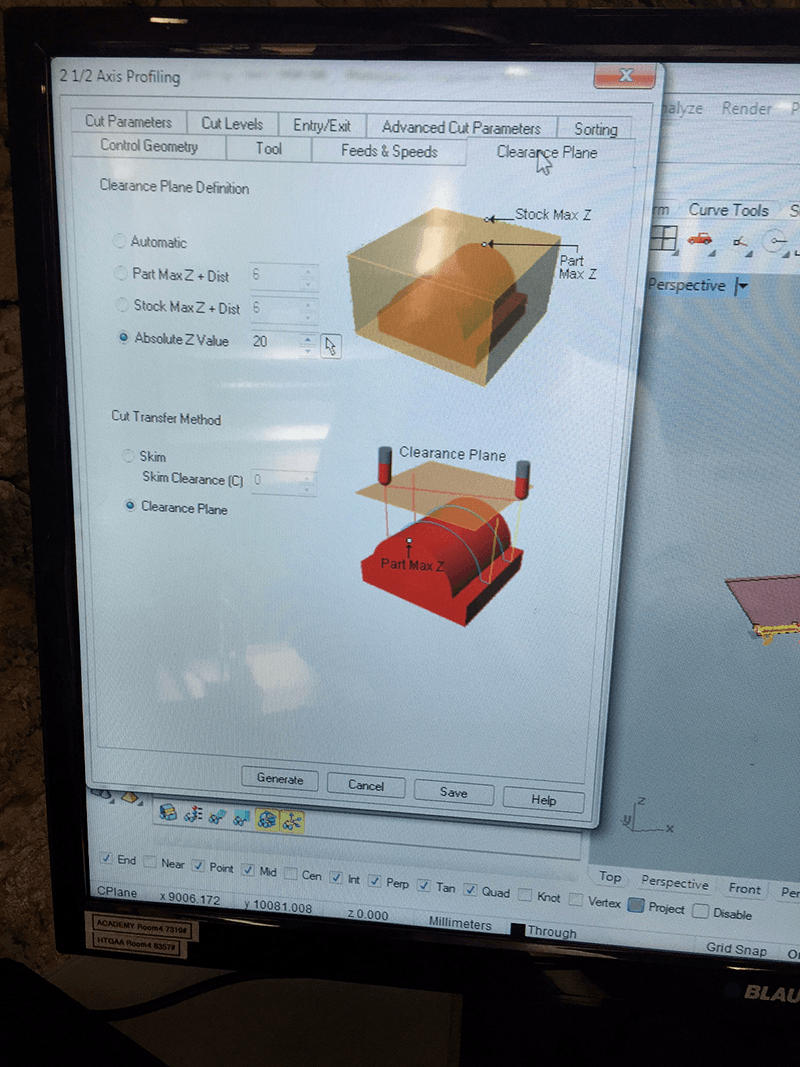
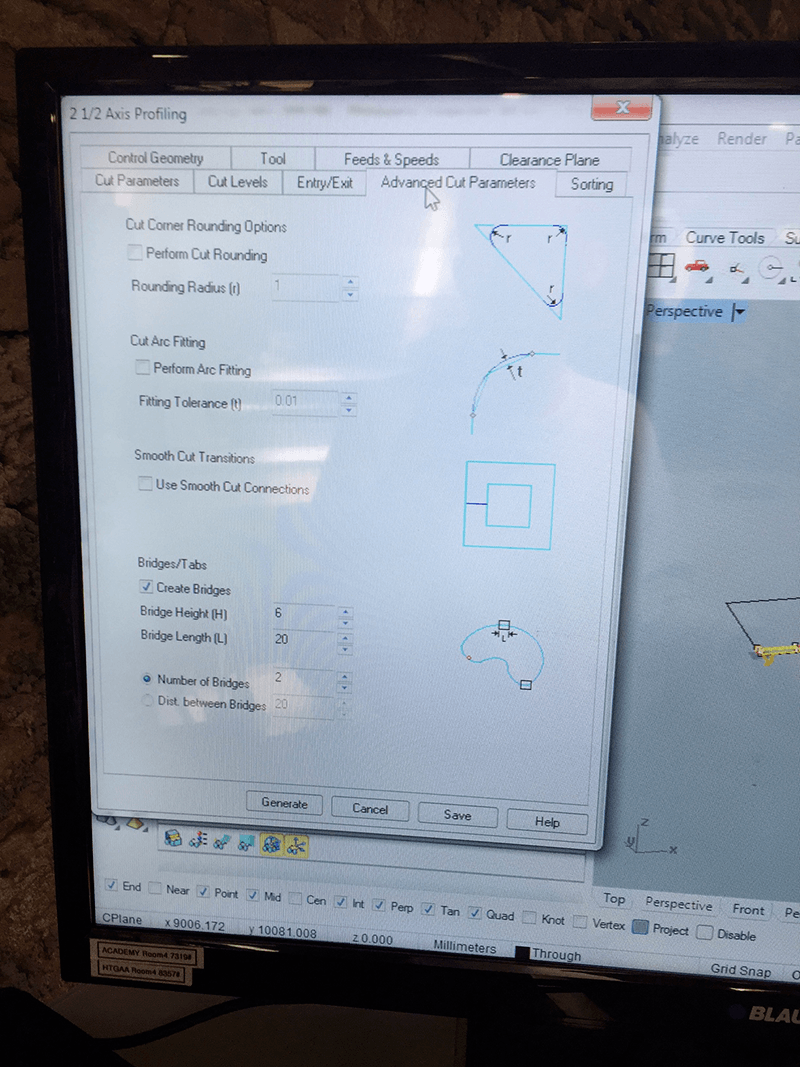
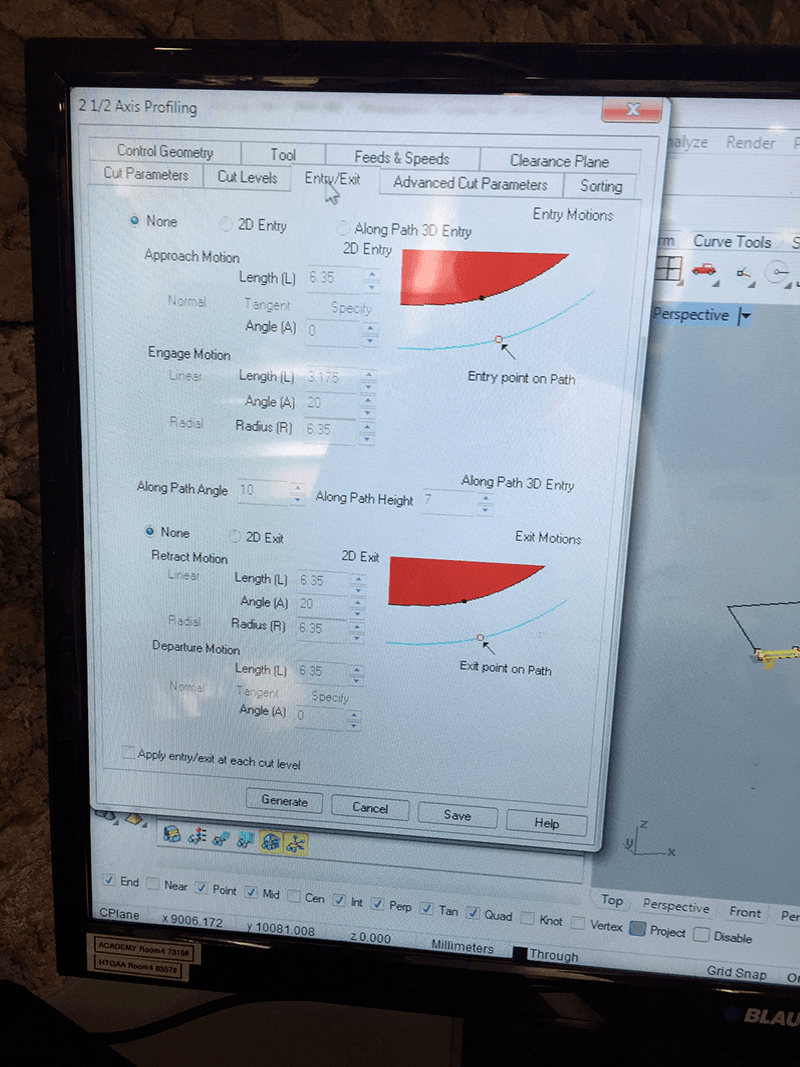
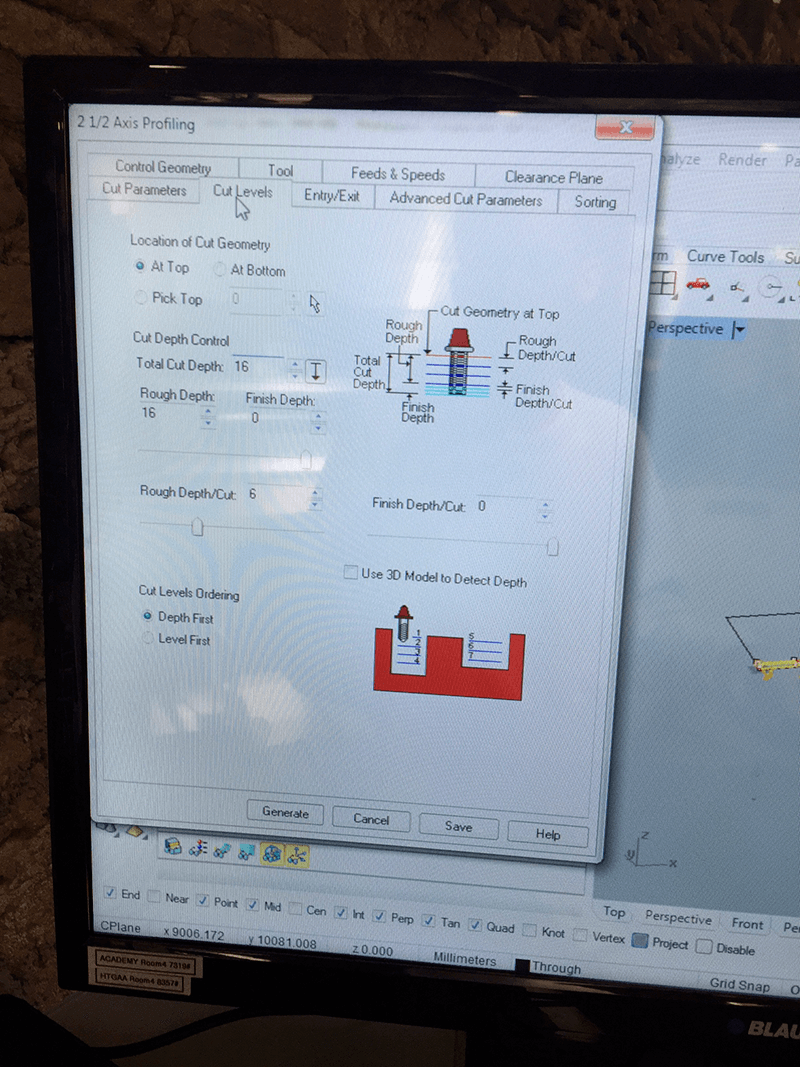
Below are the settings I used to mill the chair using rhinoCAM
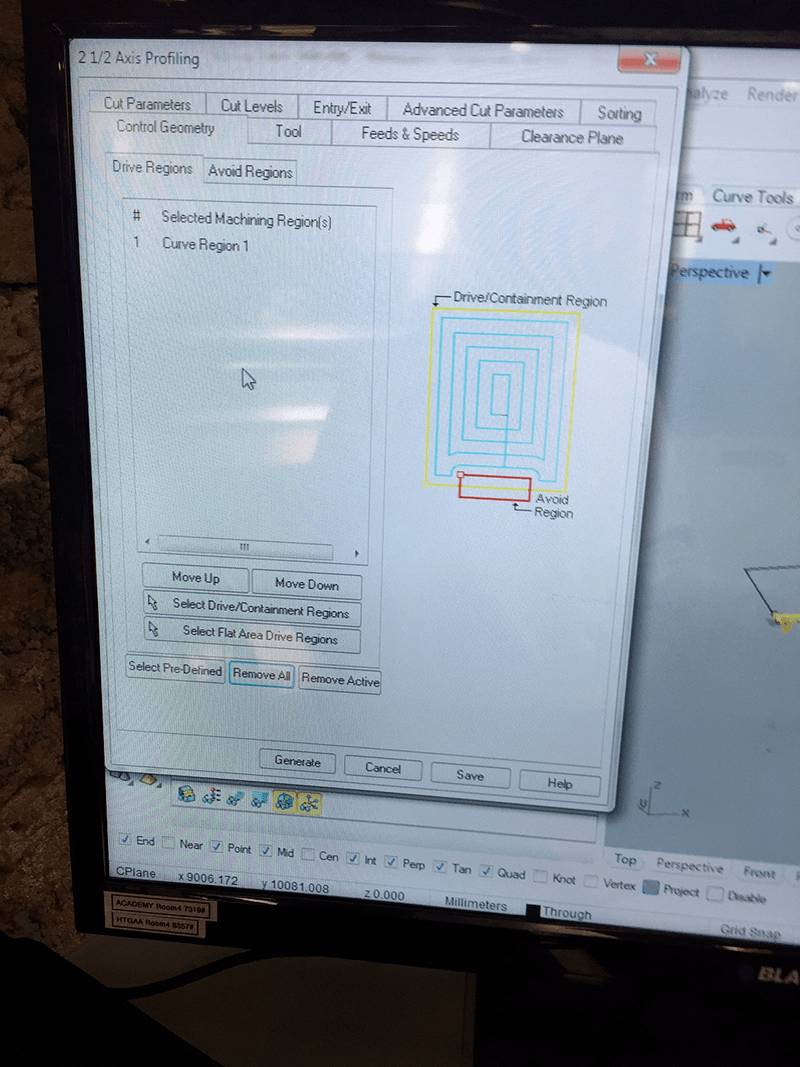
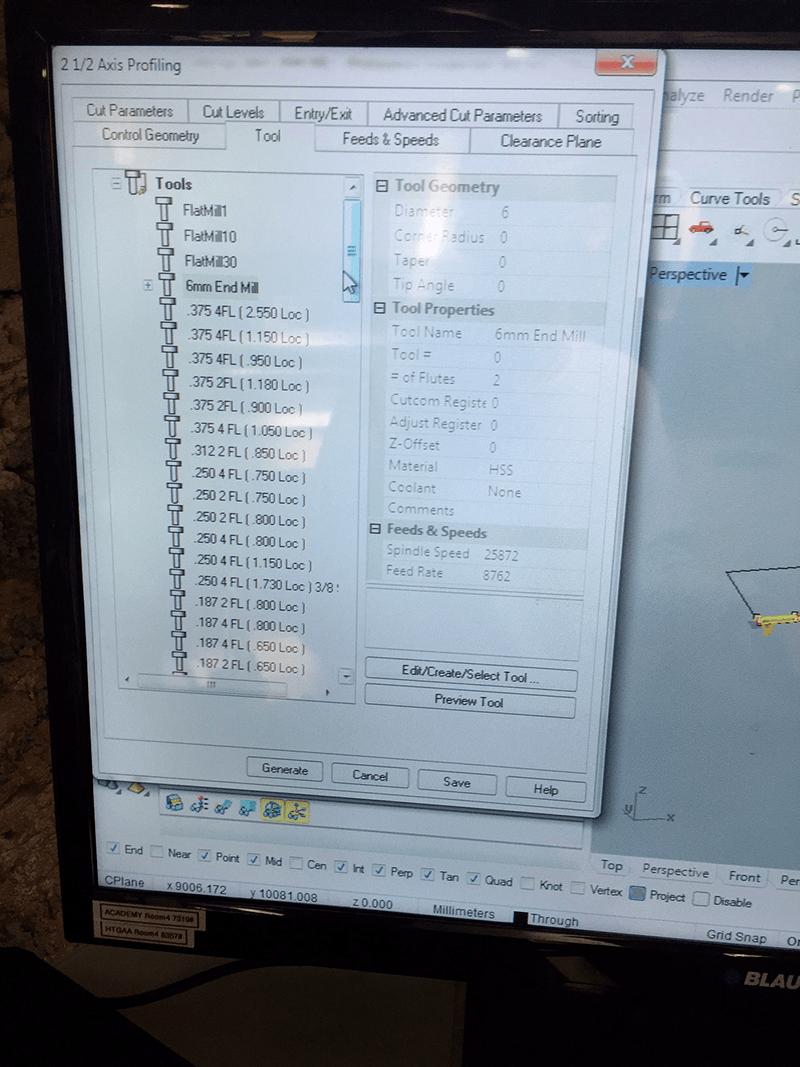
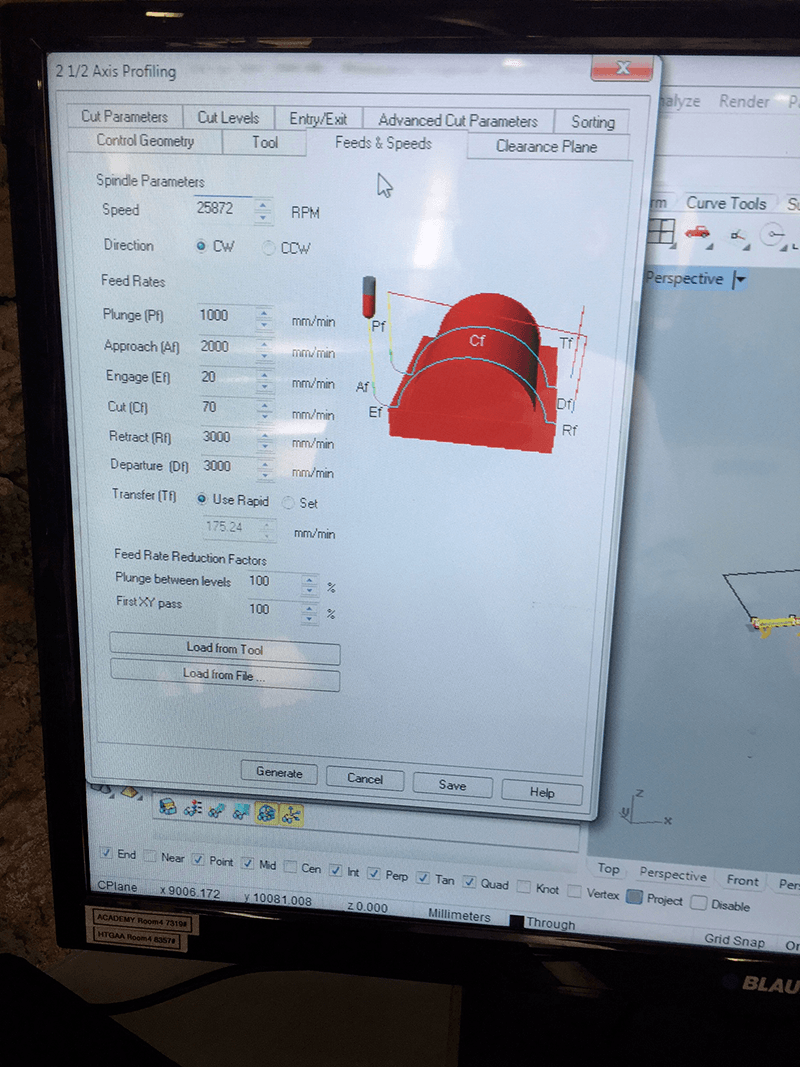
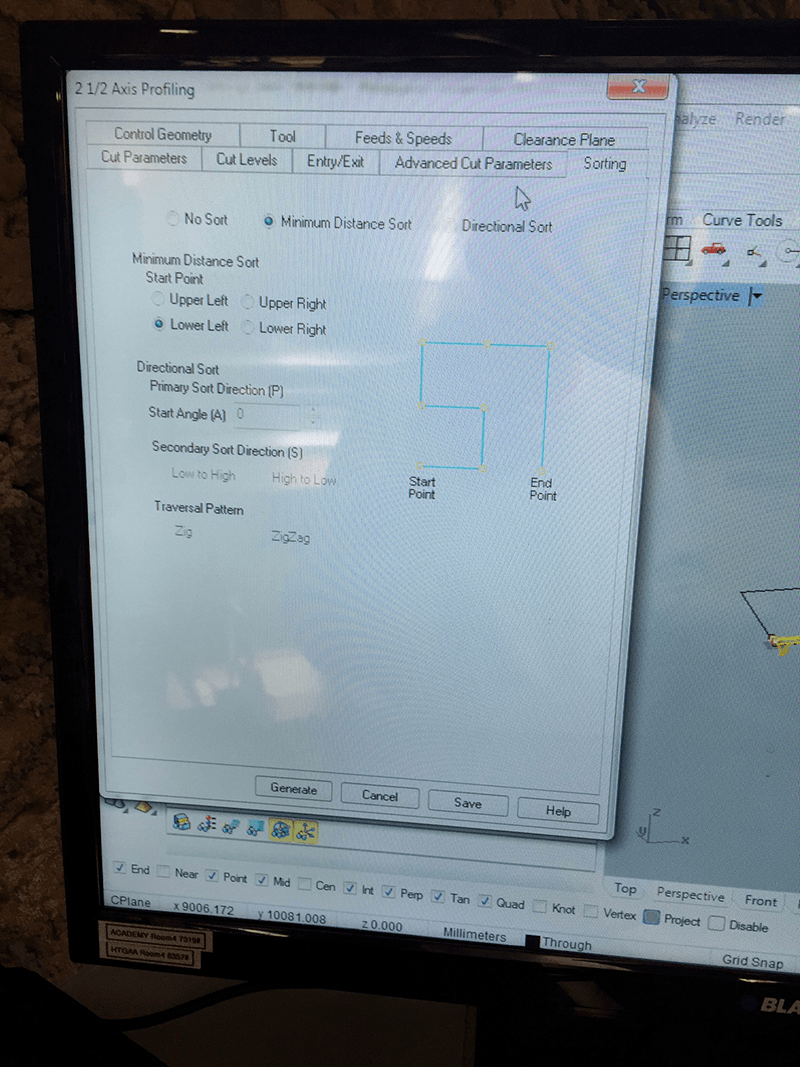
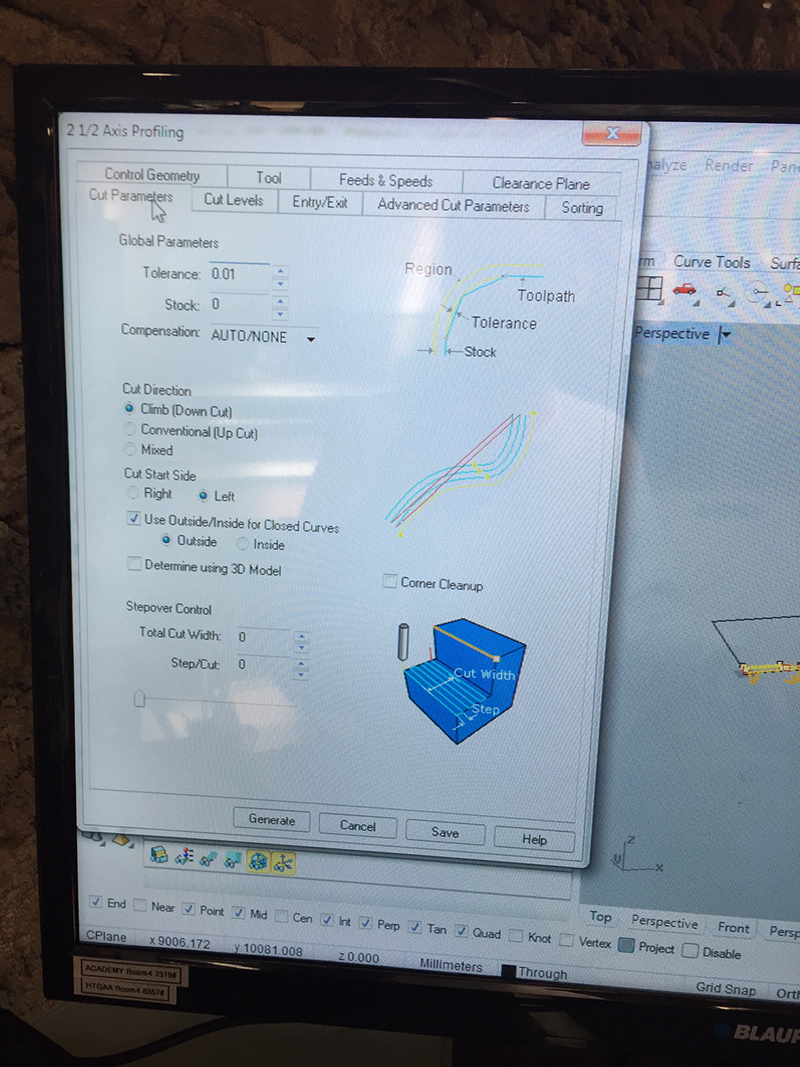
The spindle speed I used was 25500 and 8500 for the feed rate when cutting in 2D. This was preset in RhinoCam for the 6mm bit we selected. It was important to 'nest' my cuts, which involves placing the parts close to each other to make most efficient use of the material, but not so close that the cuts overlap. For this, as I was using a 6mm diameter cutter I left 24mm (6mm either side for cut and 12mm gap in the middle for stability).
Some of the other settings seen on the tabs in the images above include:
We used screws to secure the material to the bed and left 'tabs' (small 5*3mm connections) to stop the final cut pieces become loose and potential dangerous.
With the cutter and and the material I used we were able to cut the piece in 3 passes (6mm each pass), this reduced strain on the toolbit and router and gave a clean cut.
2018
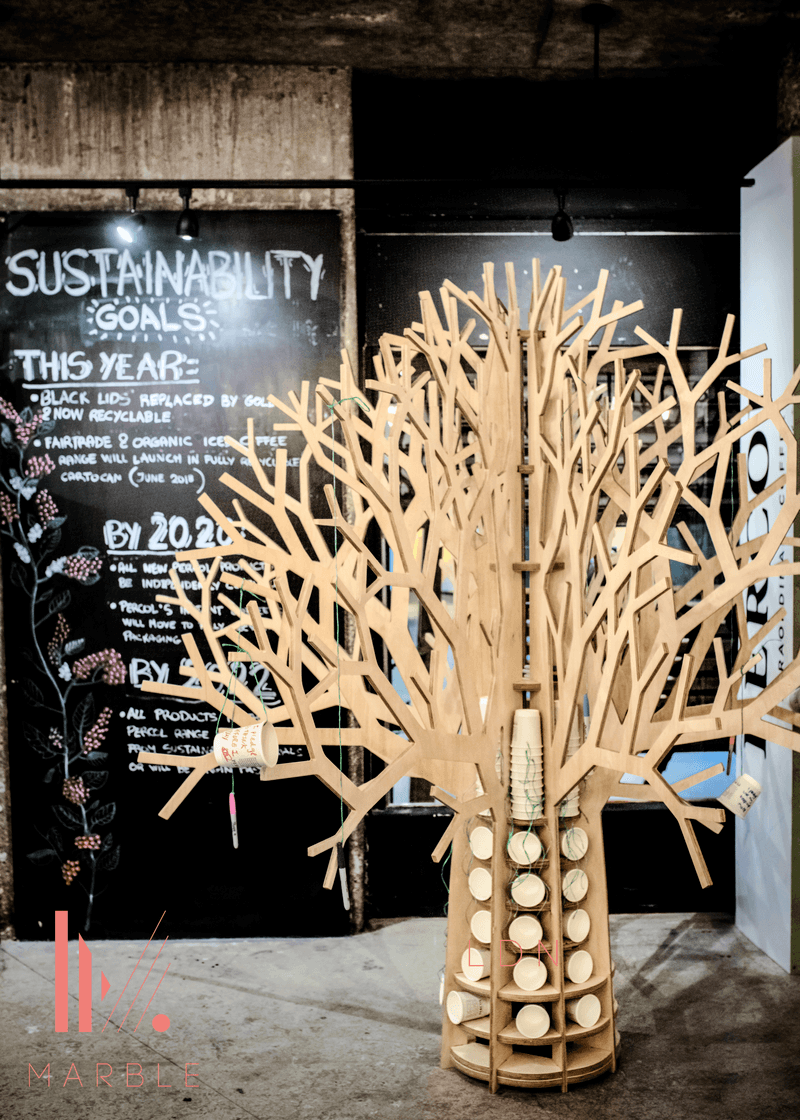
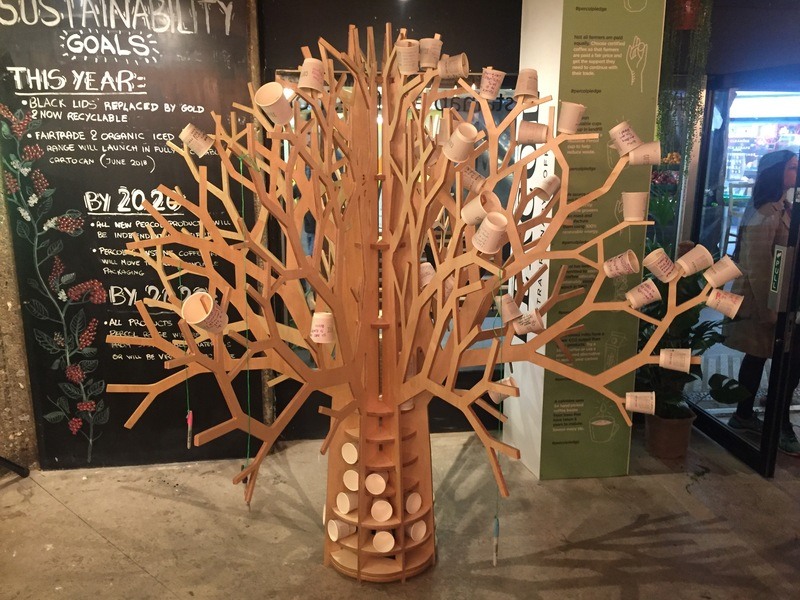
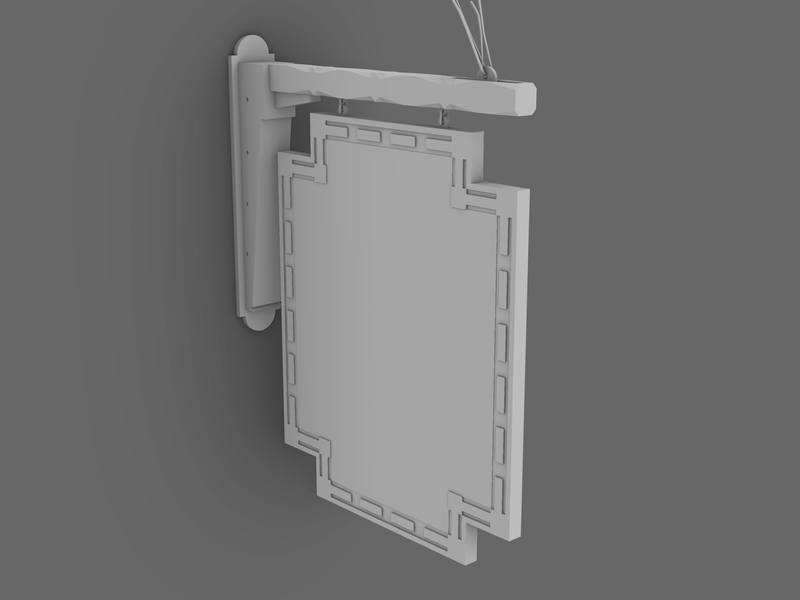
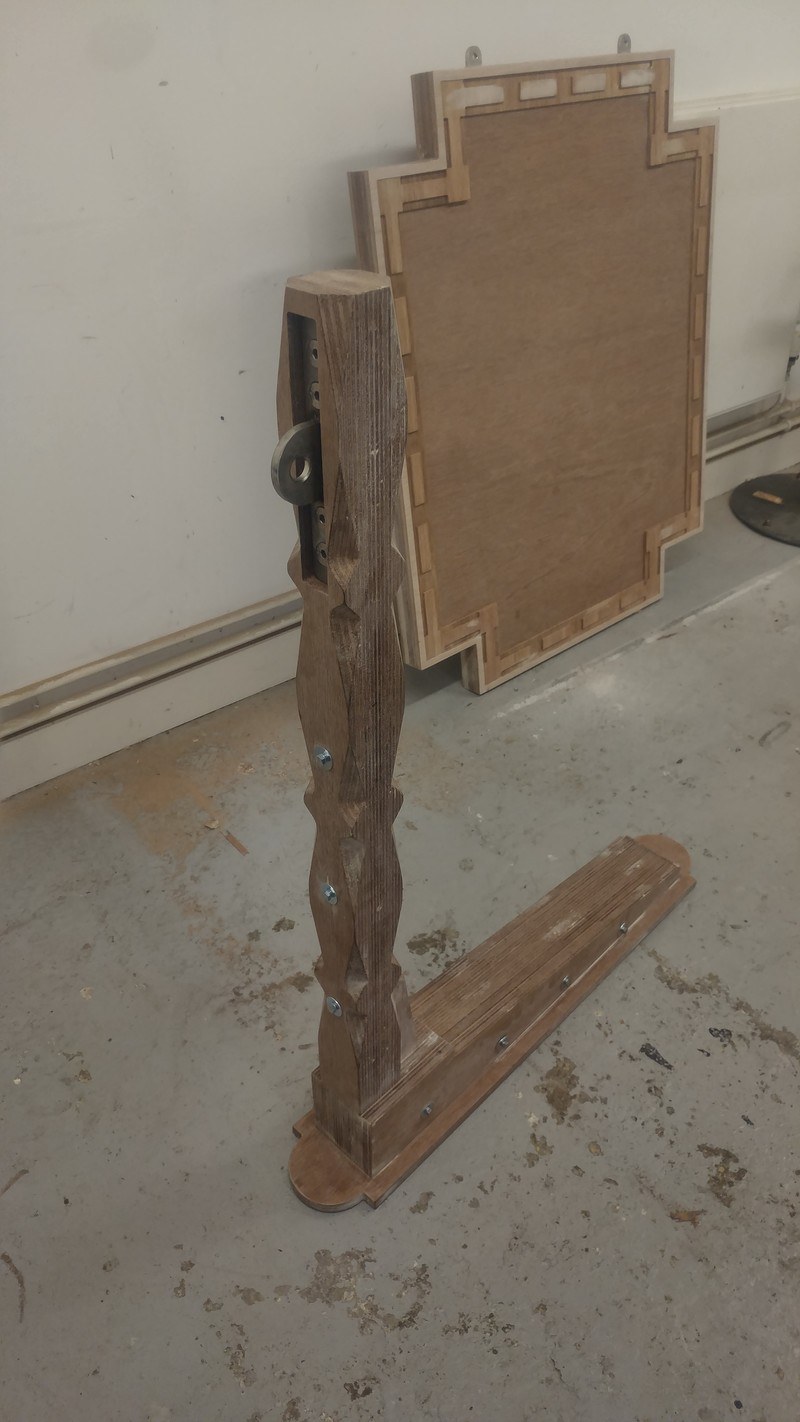
During my 2018 stint, I didn't do anything for this week, but I did gain a few paid jobs using the skills I learnt from this week, fabricating a tree for a popup event and a remaking an old sign for a famous furniture company.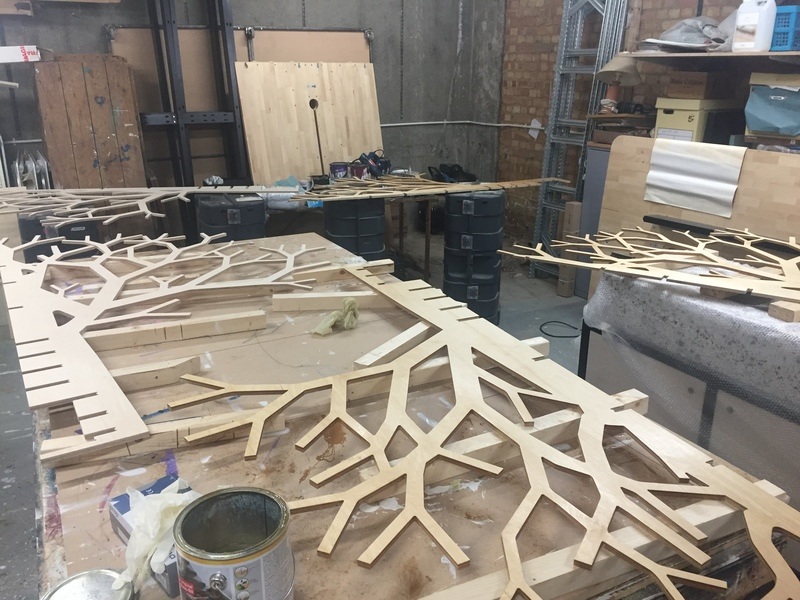
.JPG)