

Week 13
Interface and Application Programming
Individual assignment:
write an application that interfaces with an input &/or output device that you made
Group assignment:
compare as many tool options as possible, my contribution in this to read about different interfacing communication tools and discuss with group, link for group work
Checklist
Described your process using words/images/screenshots
Explained the the GUI that you made and how you did it
Outlined problems and how you fixed them
Included original code
Files
2 App apk
About this week
In this week i am making an application which is graphic interface base , can be use to operate input and output devices this is really new thing for me and fun learning i started with nils lecture which is really good thing to start as it give you introduction to all the option which you can try for this thing
he talked about many things which you find in our schedule - refer our schedule for this week
1 Language , this are core languages in which codes are written you can start with Java , python but one should have basic knowledge of programming to start writing application with this as it take time to learn this things so i choose to start with any IDE i.e integrated development environment which is a fast idea to start with as it help you to code easily
2 Interface to write -This you may say an IDE like eclipse
3 Data -this is what actually you application contain on its interface
4 User interface - This is the interface of your application i.e graphic interfaceface which is screen having butons etc .
5 Math - Mathematical function used in your application
6 Audio /video - This are extra thing which you may include to improve user experience etc.
For this week I am making app which will make dc motor to move forward and backward as using forward and backward switch Which i have given in my app , i am using bluetooth connectivity for connecting my board with mobile and arduino to program my board here i am using my final project board
Understanding all this term i have two option to start either with programing using code for which if you have understanding of arduino code nicely you may start with processing or programing using graphic mathematical blocks for which you may use Mit App Inventor , firefly and i go with mit app inventor for this week
About MIT App inventor
App Inventor for Android is an open-source web application originally provided by Google, and now maintained by the Massachusetts Institute of Technology (MIT).It allows newcomers to computer programming to create software applications for the Android operating system (OS). It uses a graphical interface, very similar to Scratch and the StarLogo TNG user interface, which allows users to drag-and-drop visual objects to create an application that can run on Android devices. In creating App Inventor, read more on wiki
link for learning tutorial this is from their home page here you will find all relevant source for learning basic to advance about this find text turorials on this page link to video tutorial
Starting Making App on Mit App Inventor
For stating making app you have to visit link and click on create app button it directed to another link where you have to create account using your gmail account , i started by making simple Talk To Me app at MIT App Inventor Tutorial #1 by following step directed in official youtube tutorial video link , there are 3 videos on it explaning basic tools of inventor with steps for making basic App, so i am not writing tutorial for that here as explained better in videos , i start making another App for controling motor i.e output device using app and writing steps for that
Designing App for controlling motor
This screen has all visual component which you want in your app ,buttons ,sliders etc also you can select backgound color ,images etc. this is as simple as making graphic page
DESIGN SCREEN OF APP

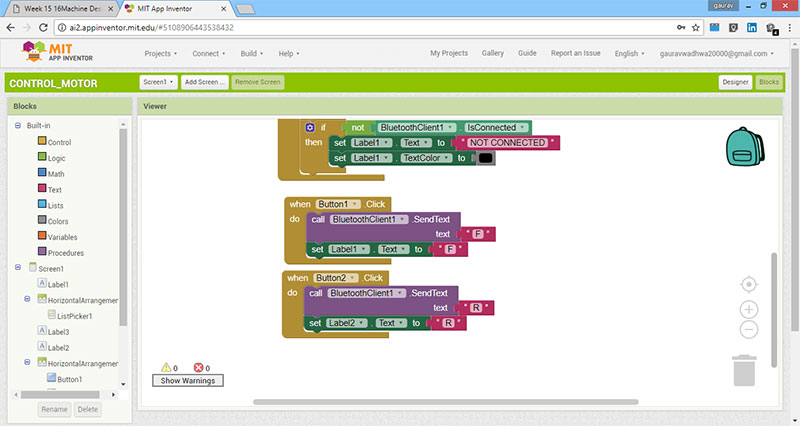
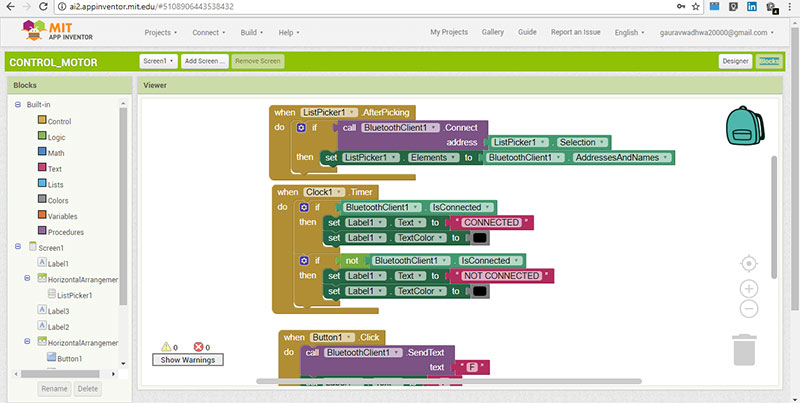
Making blocks i.e building logic for app
For making of app based on your algorithm , As here first we want first action is to set bluetooth connectivity , for which we set our elements to bluetooth clint AddressAndNames than set clock which shows Connected on screen when bluetooth connected than we set buttons as to return F and R using bluetoothclint1 from button 1 and button 2 respectively
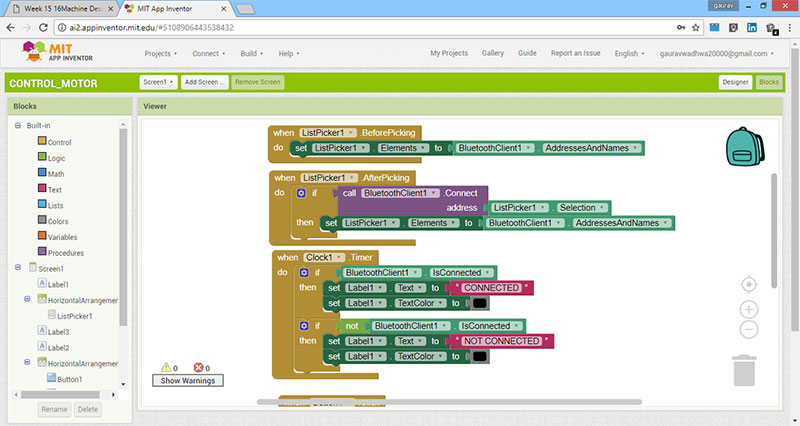
Problem Encounted
Before reaching to right code i did some mistakes as in first line of block i forgot to add element to bluetoothclint1 this thus on pressing them i am not getting response for connecting bluetooth , on doing correction in code my app respond properly
Testing App
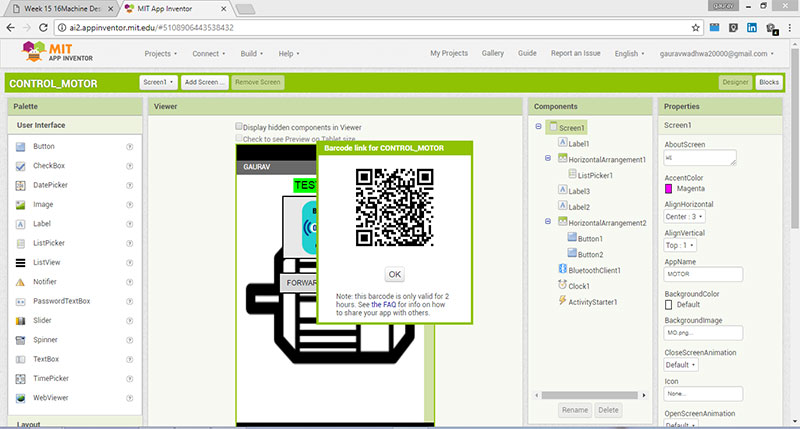
For testing app you have to connect your mobile or test in emulator you can select this option from following mode

now connect the app using bar-code on screen as shown it will directely open that app on your screen for for checking its functionality you have to connect that app with bluetooth device or you can download app apk from build option
Making connection for programming board
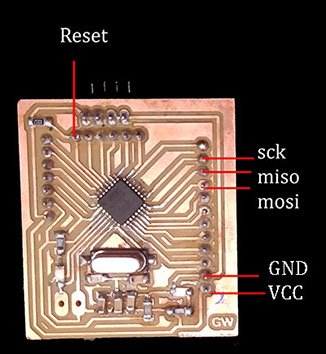

Here i am using arduino for programing the board you can also use fabisp for progrming the board ,i have used that in previous ( week 9 ) for programing and i find more comfortable using arduino so i am using arduino here ,i have shown programing pins you just connect them for programig and upload code
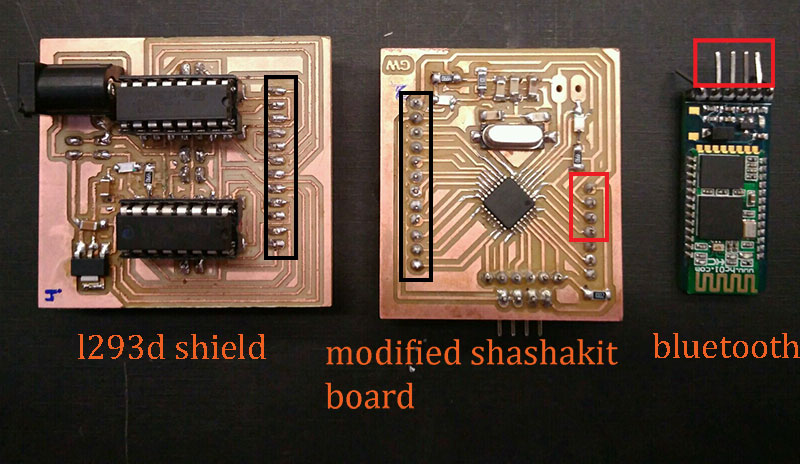
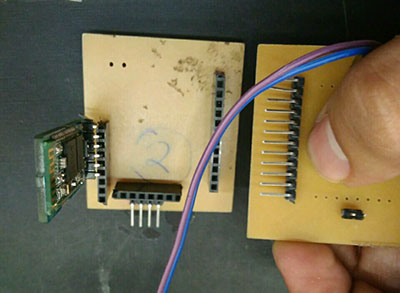
Connection of Board with Shield and Bluetooth
In this i have given female pins in my shashakit board and l shape male pins in shield connect them as shown in image by black box and connect bluetooth to its pins shown by red box
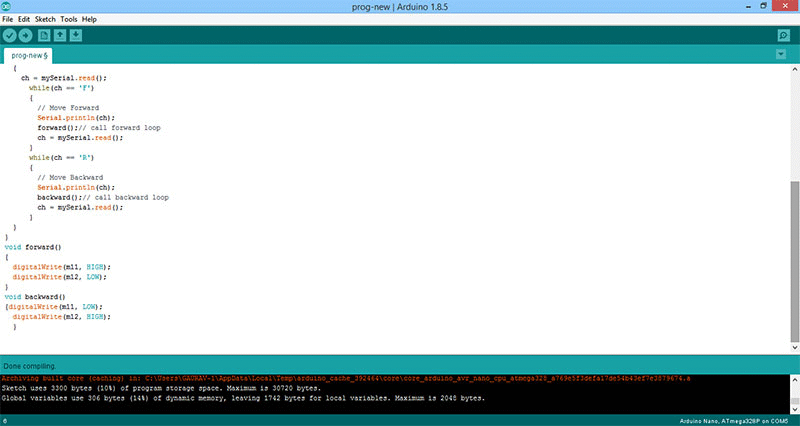
Programing Code
Final Video of testing app
Conclusion
In this week i successfully make an App and tested its working , i love features of mit app inventor even i am using the same tool for making app for my final project in which i made 9 button each represents one direction to control movement of my omni bot , you may Visit my Project Development Page for Referring App

This work by Gaurav wadhwa is licensed under a Creative Commons Attribution-NonCommercial 4.0 International License.