Week 10 | Molding and Casting
Fab Academy 2018 | Archive
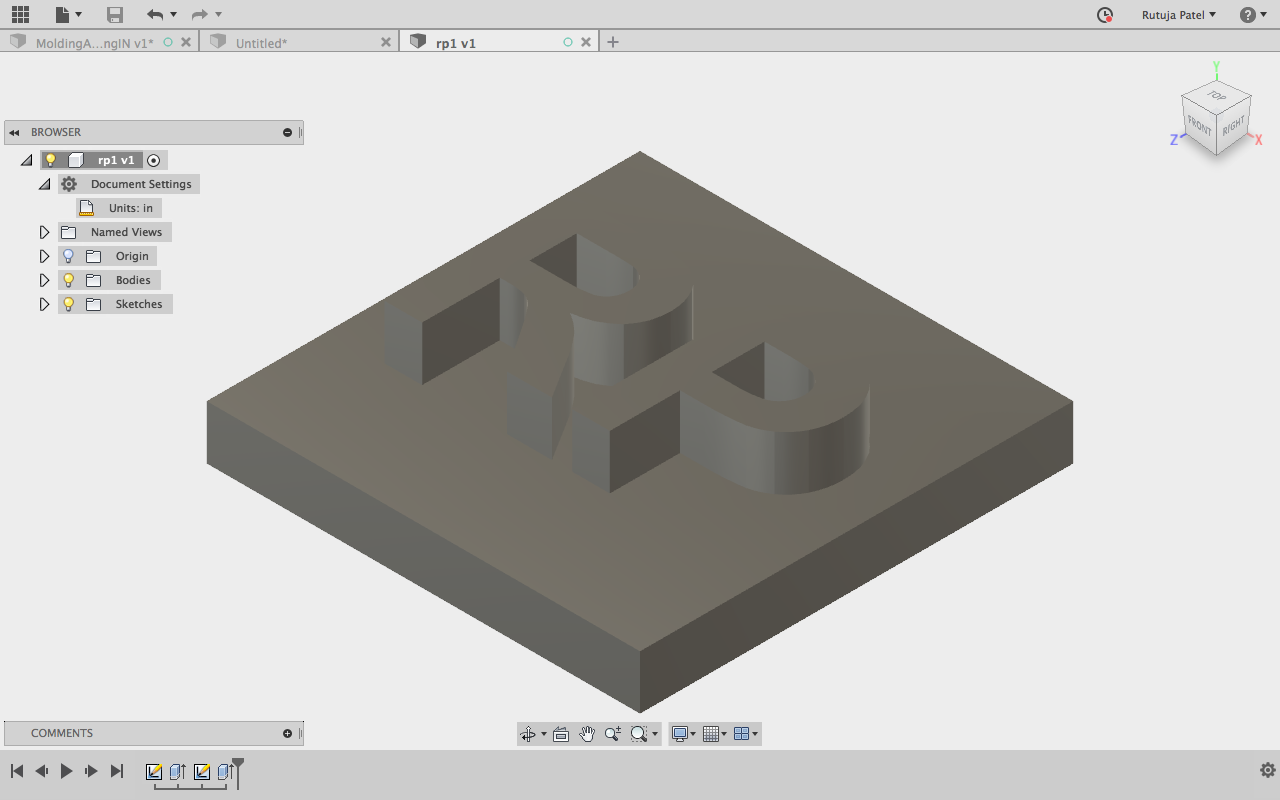
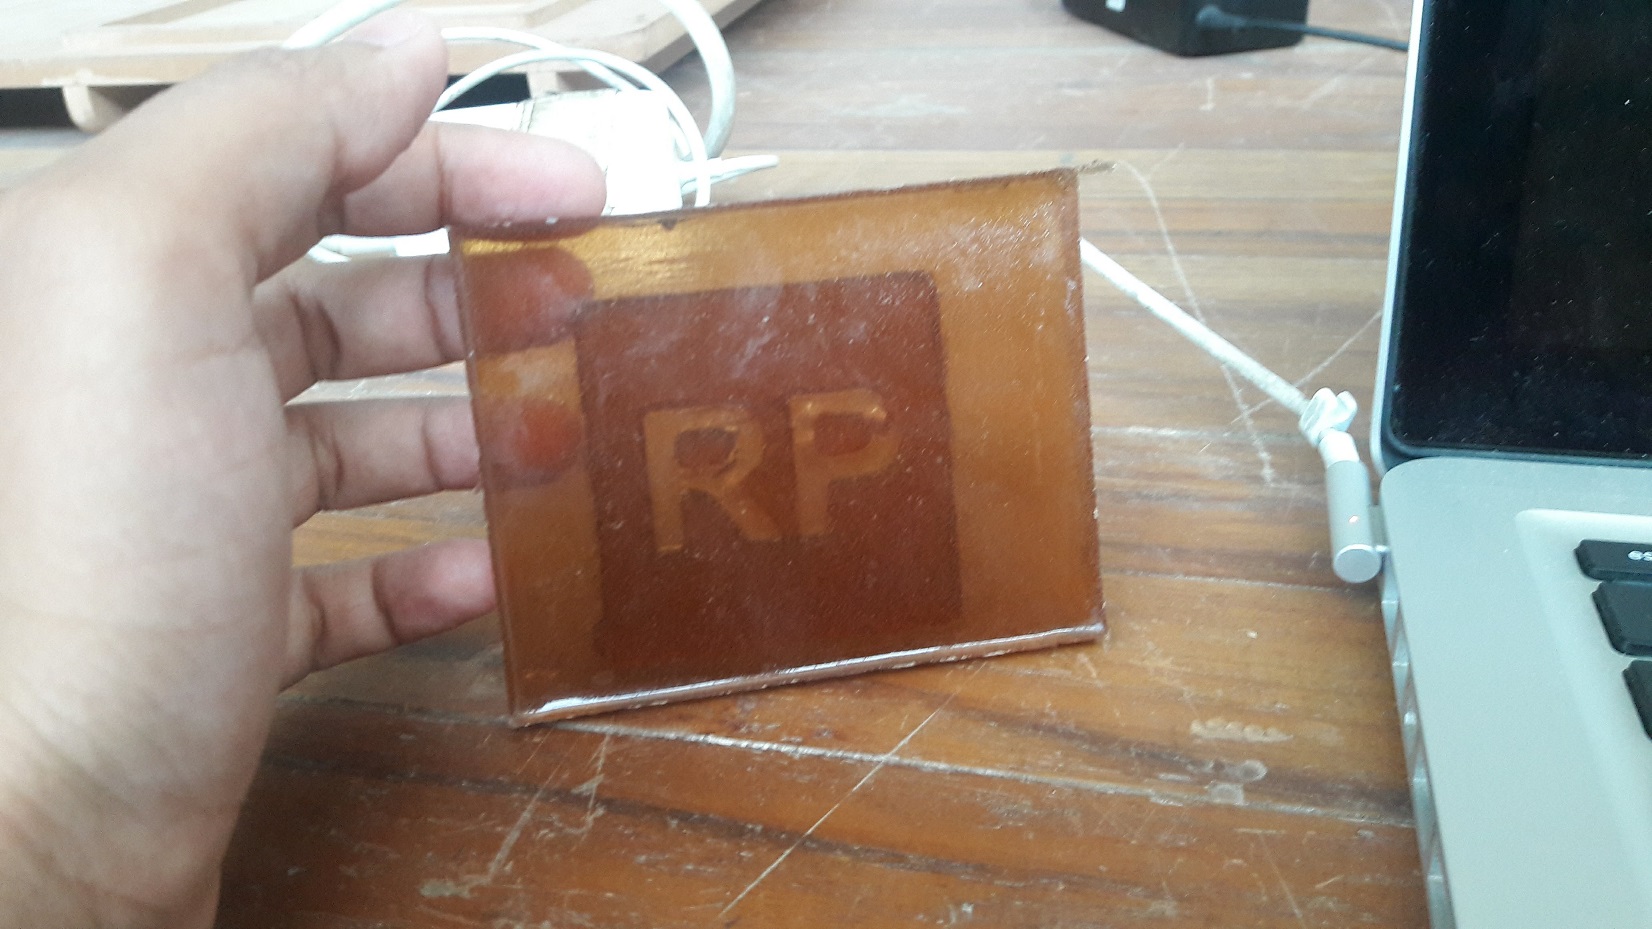
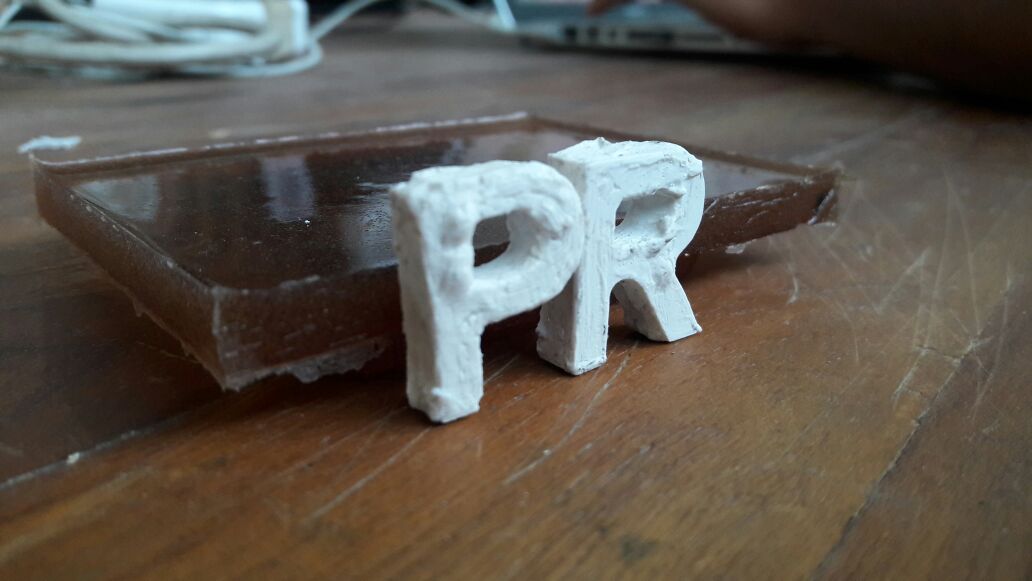
Molding & Casting my name's Intial Letter "RP"
We made the Mould in Modela Milling machine. The process of making Mould is Simple.
Commands I used :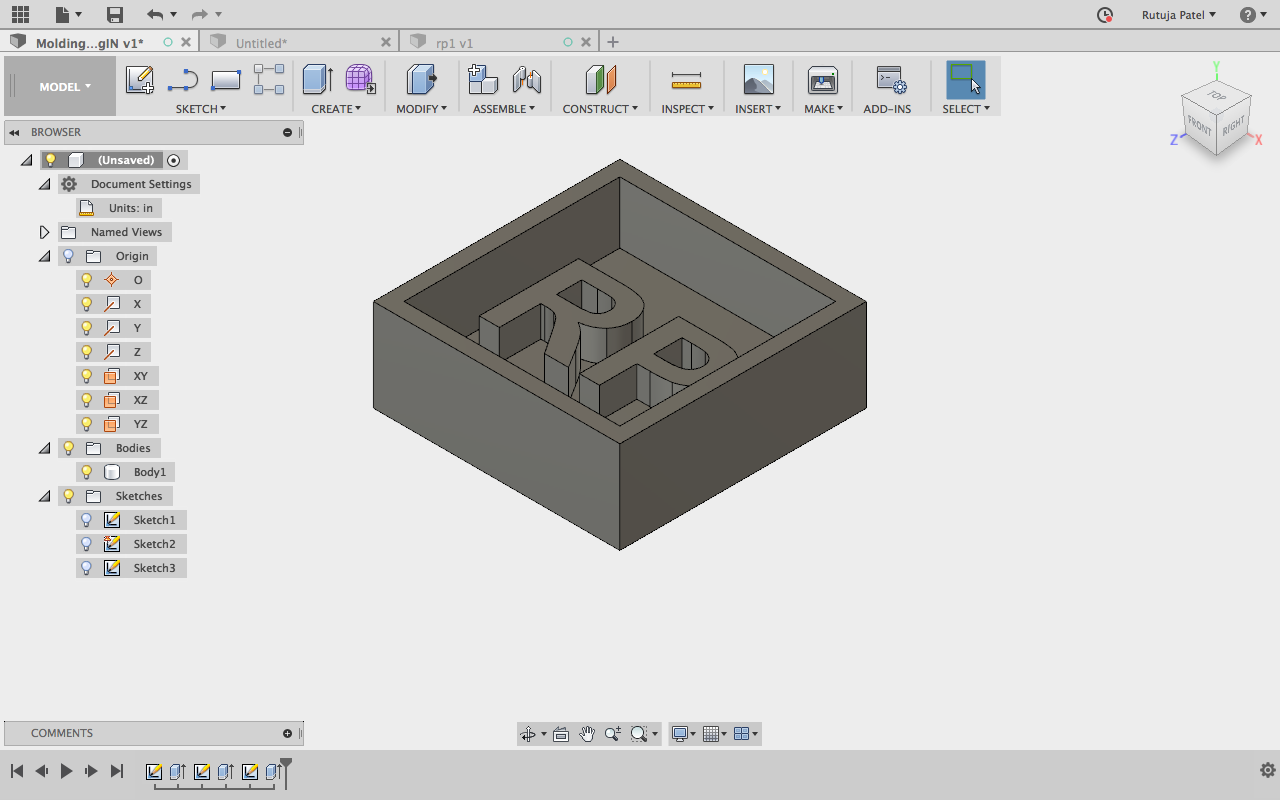
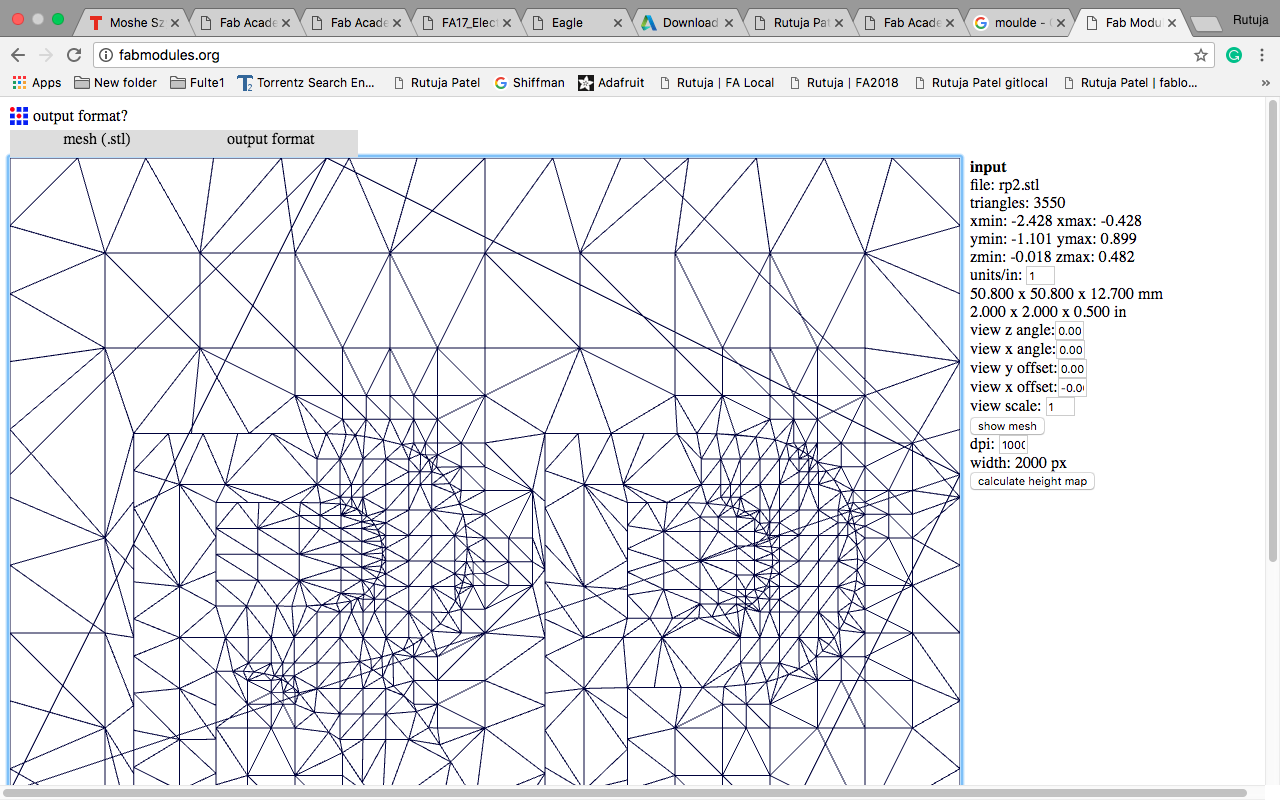
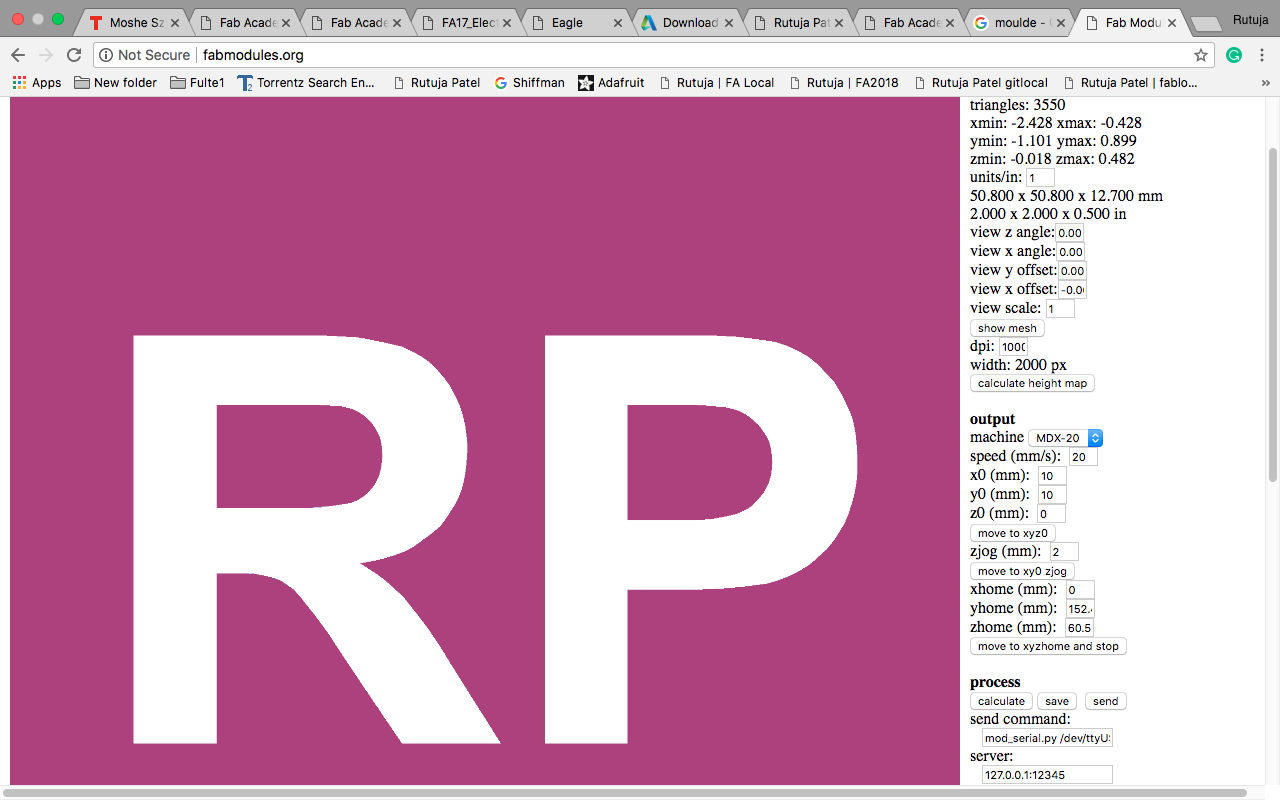
After making the design, I converted the design into (.stl) and then opened it into the fab modules. For checking whether the dimension of the image is perfect or not, we calculate the height map. When I opened the file, it showed me image dimension error.
I made the design in (mm) which after opening in fab modules the dimension changed into (inches). Aaditya suggested me to first convert the file into (.step) format from fusion and then open in Rhino and convert it into (.stl) format. I tried various other format but still it didn’t work.
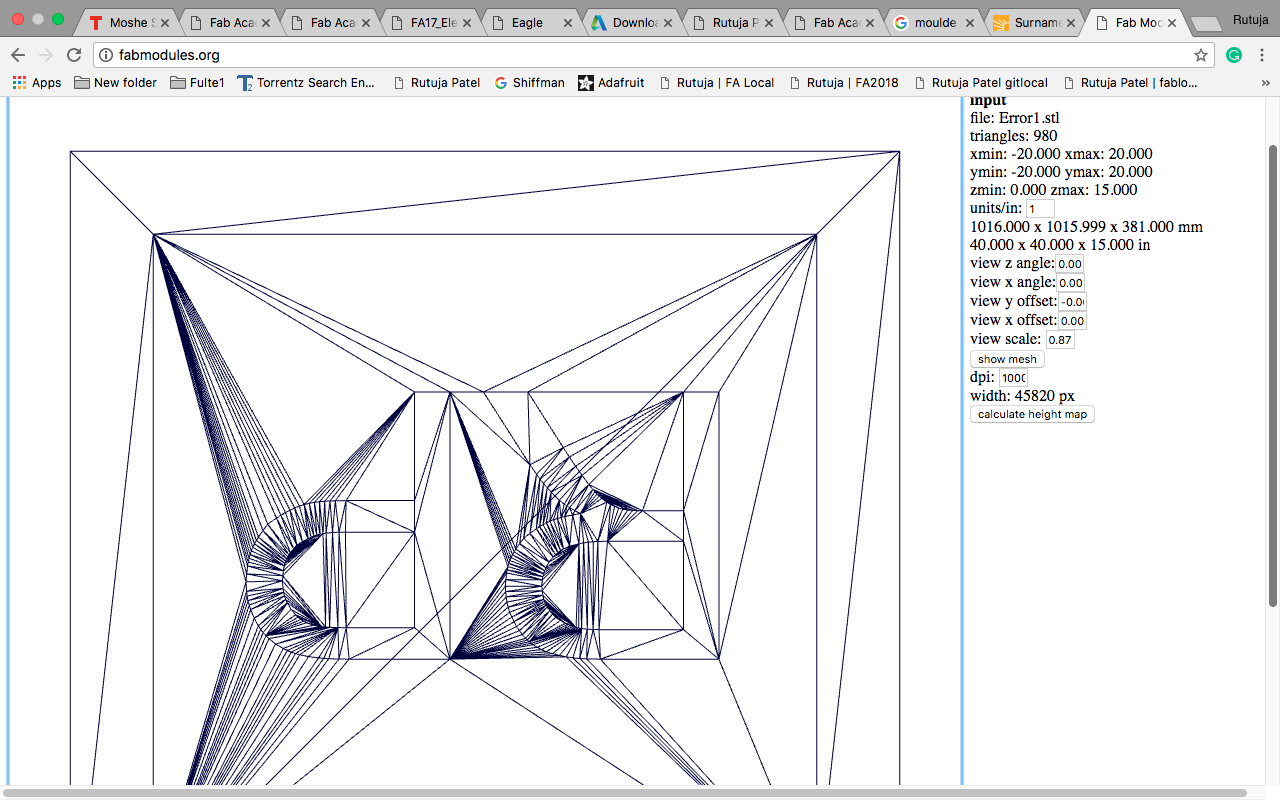
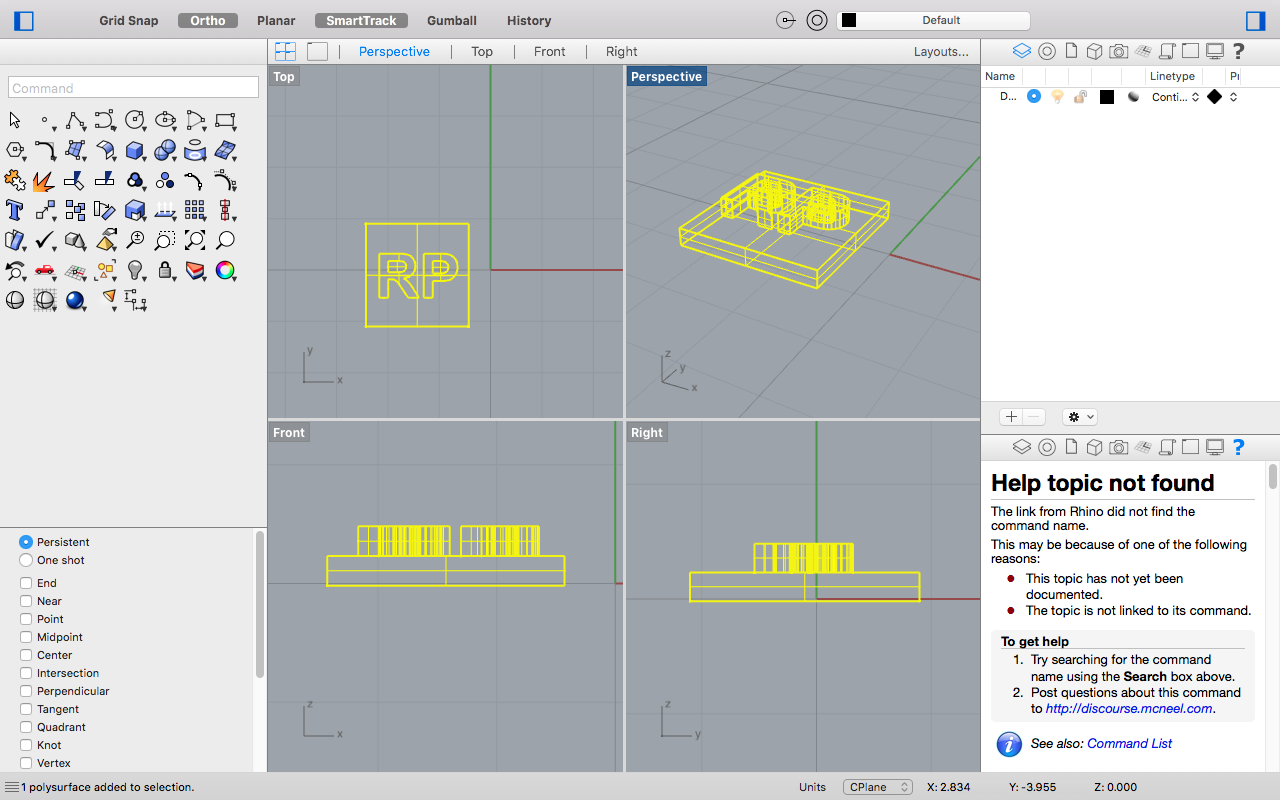
As I was not able to find the solution, I decided to make the same design in inches. I made the design in (inches) and converted into (.stl) format from Rhino.
This time the design was opening in fab modules, the mash and size of the design was also correct but was not able to calculate the height map.
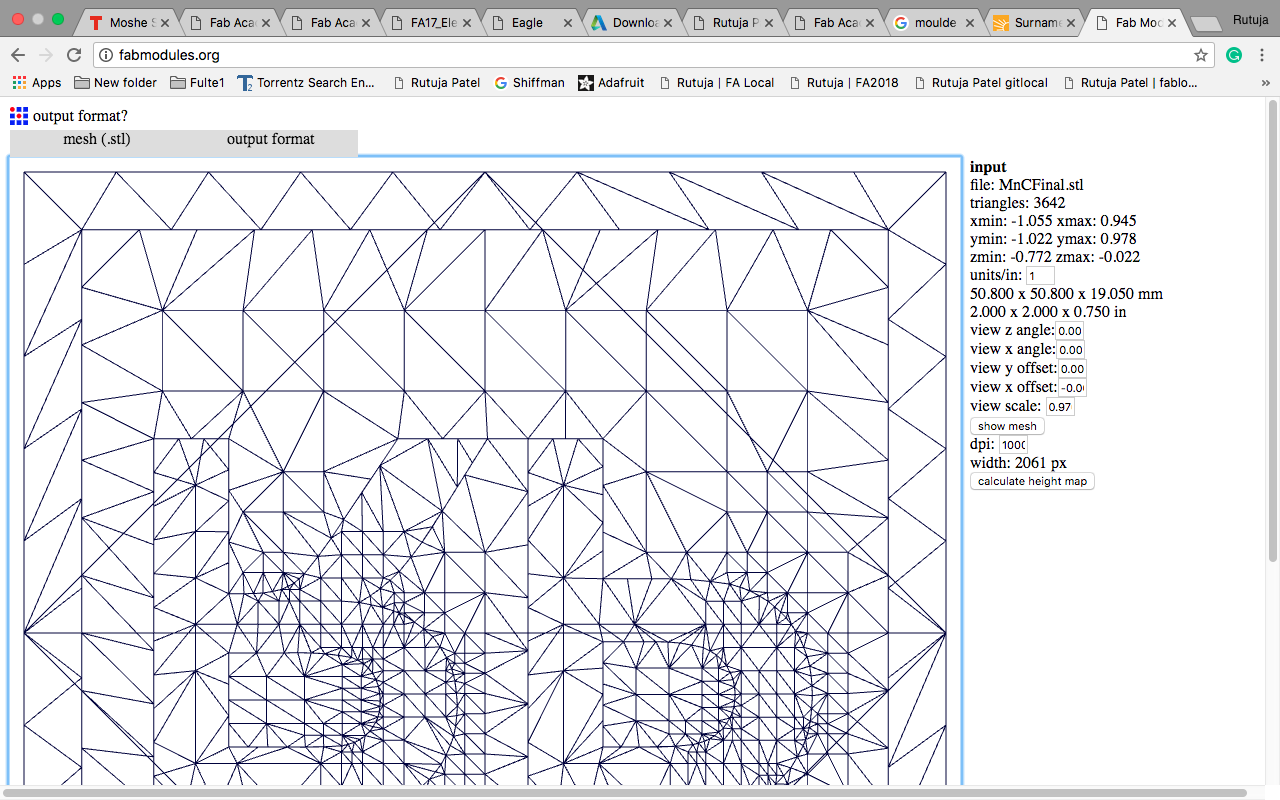
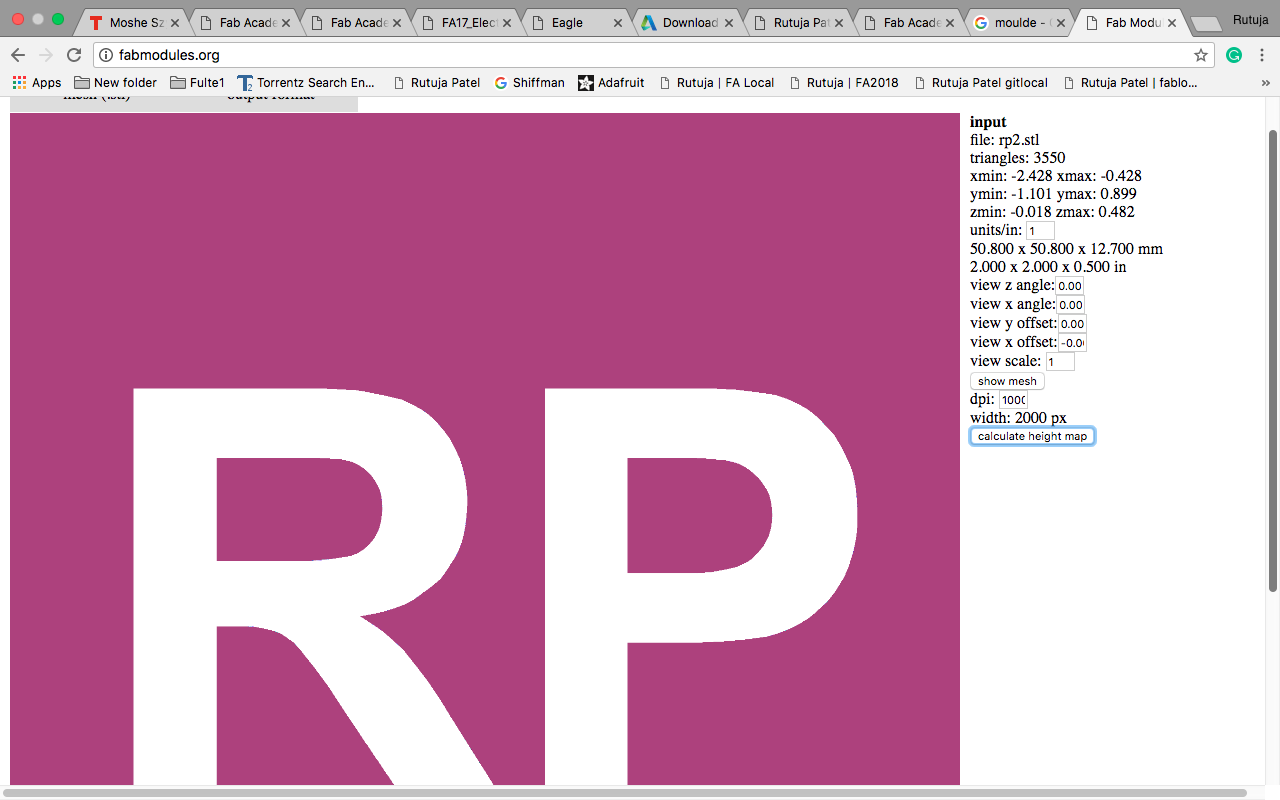
Now I tried the design with removing the borders. I made the same design in (inches) but without borders and converted it into (.dxf) format and then converted into (.stl) format from Rhino.
This time the design was perfectly working, the size was correct and the height map was calculated correctly.
Milling in Modella
Steps of giving parameters in fab modules :
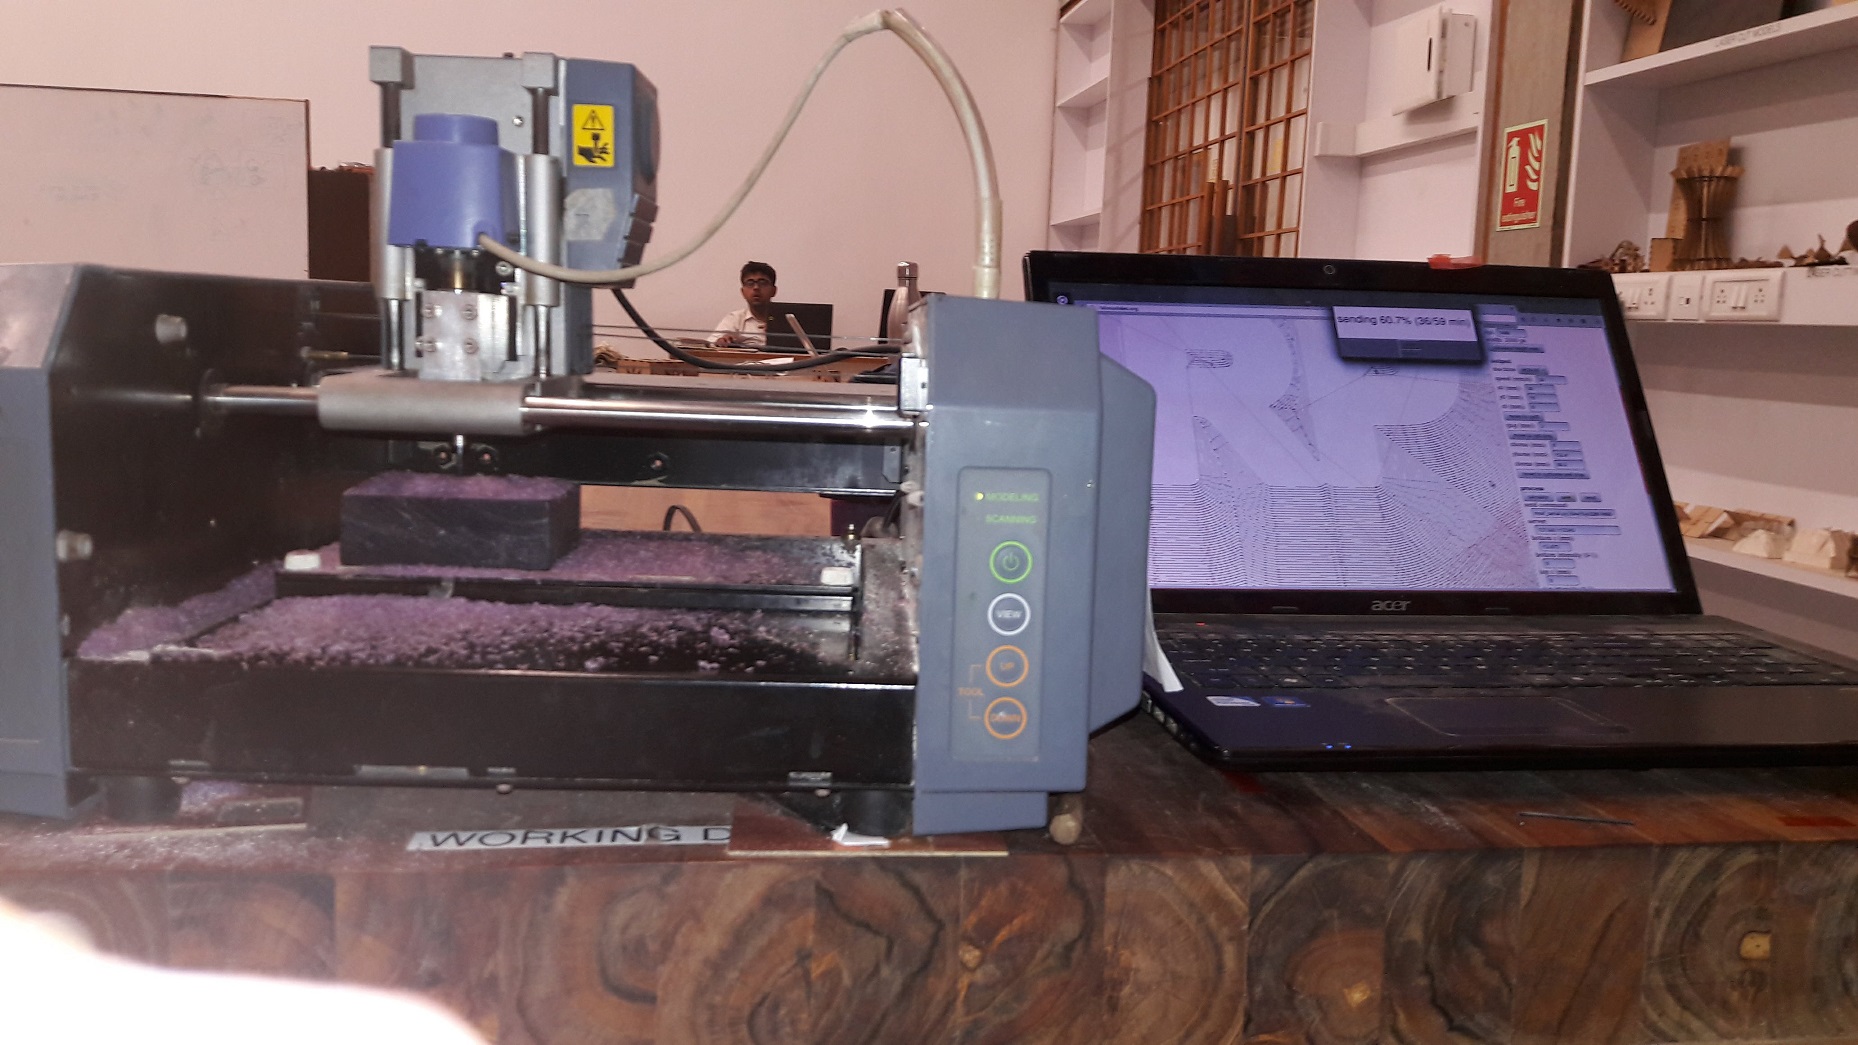
The modules takes nearly 15 min to calculate the file and then we can start. The mould was milling fine. In the figure, the path is clearly seen.
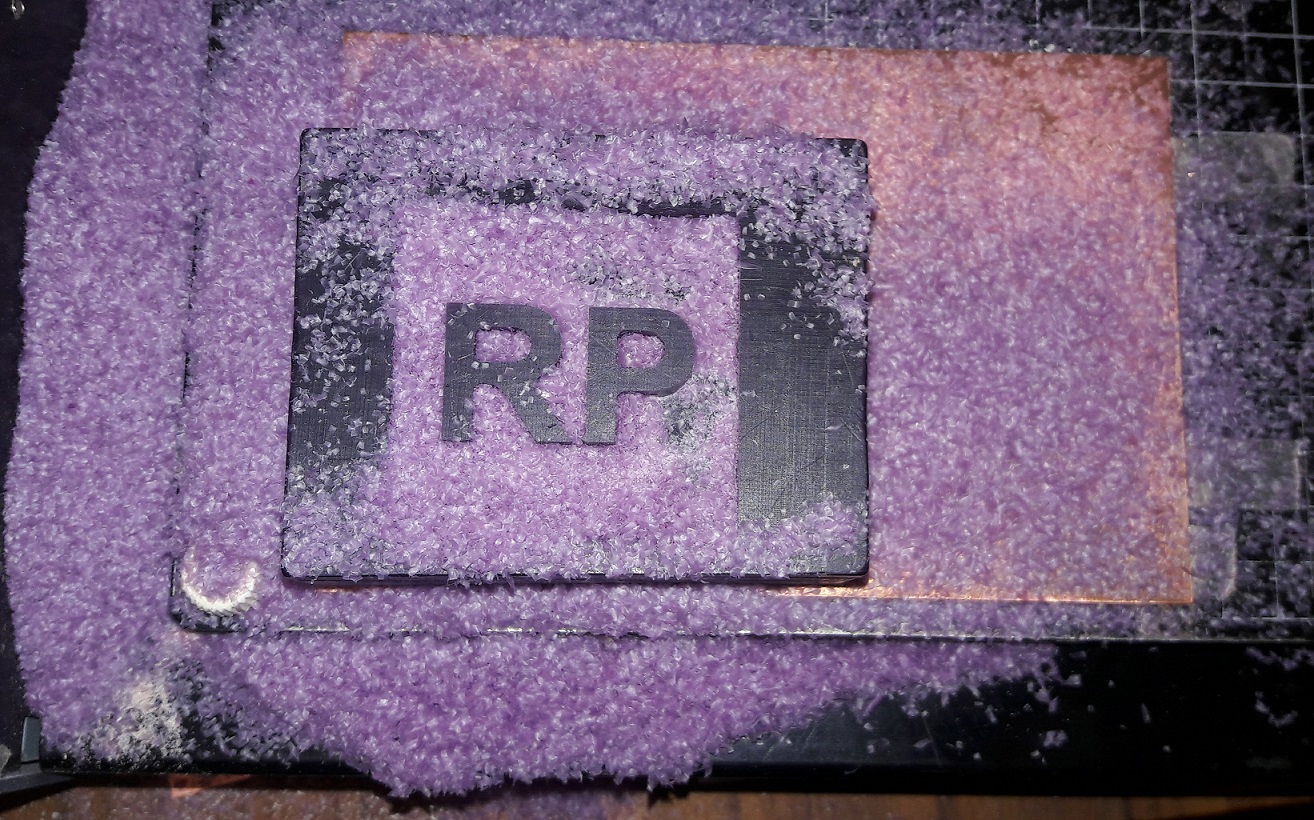
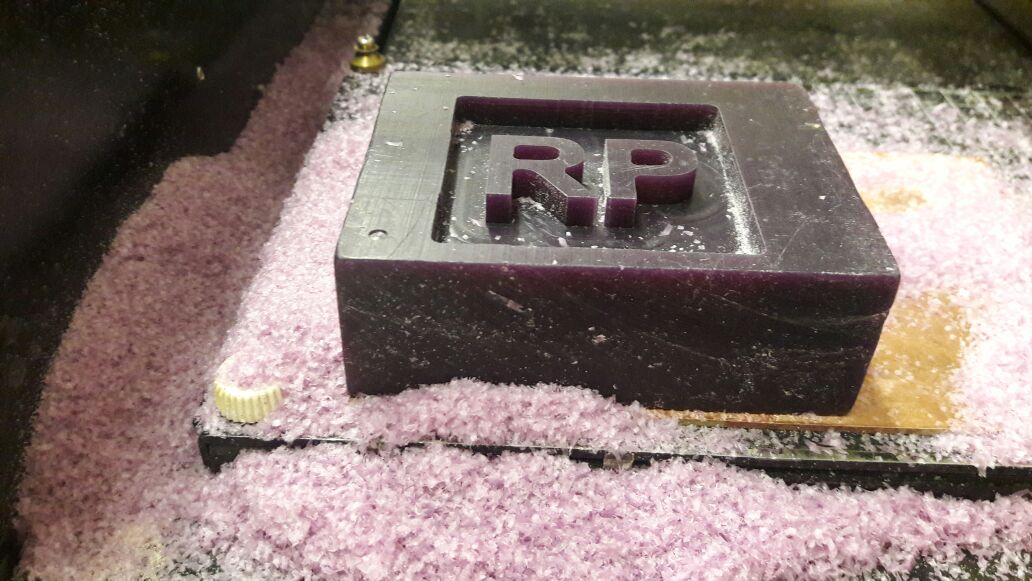
It looked perfectly good after the rough cut. Now the next step was to do finish cut with the same parameters. For Finish cut, parameters given in the module should be same. I the same parameters but still the machine did not cut properly. It started cutting before the origin so I stopped the machine. The letters were properly cut so I continued with making the mould. The wax material was not available in the lab, so I didn’t have option for making the mould again.

The datasheet for the material I am using is here
Next step is to make negative moulde, I used plywood and stick it around the wax mould. I used fevicol and strong tape to stick the plywood.
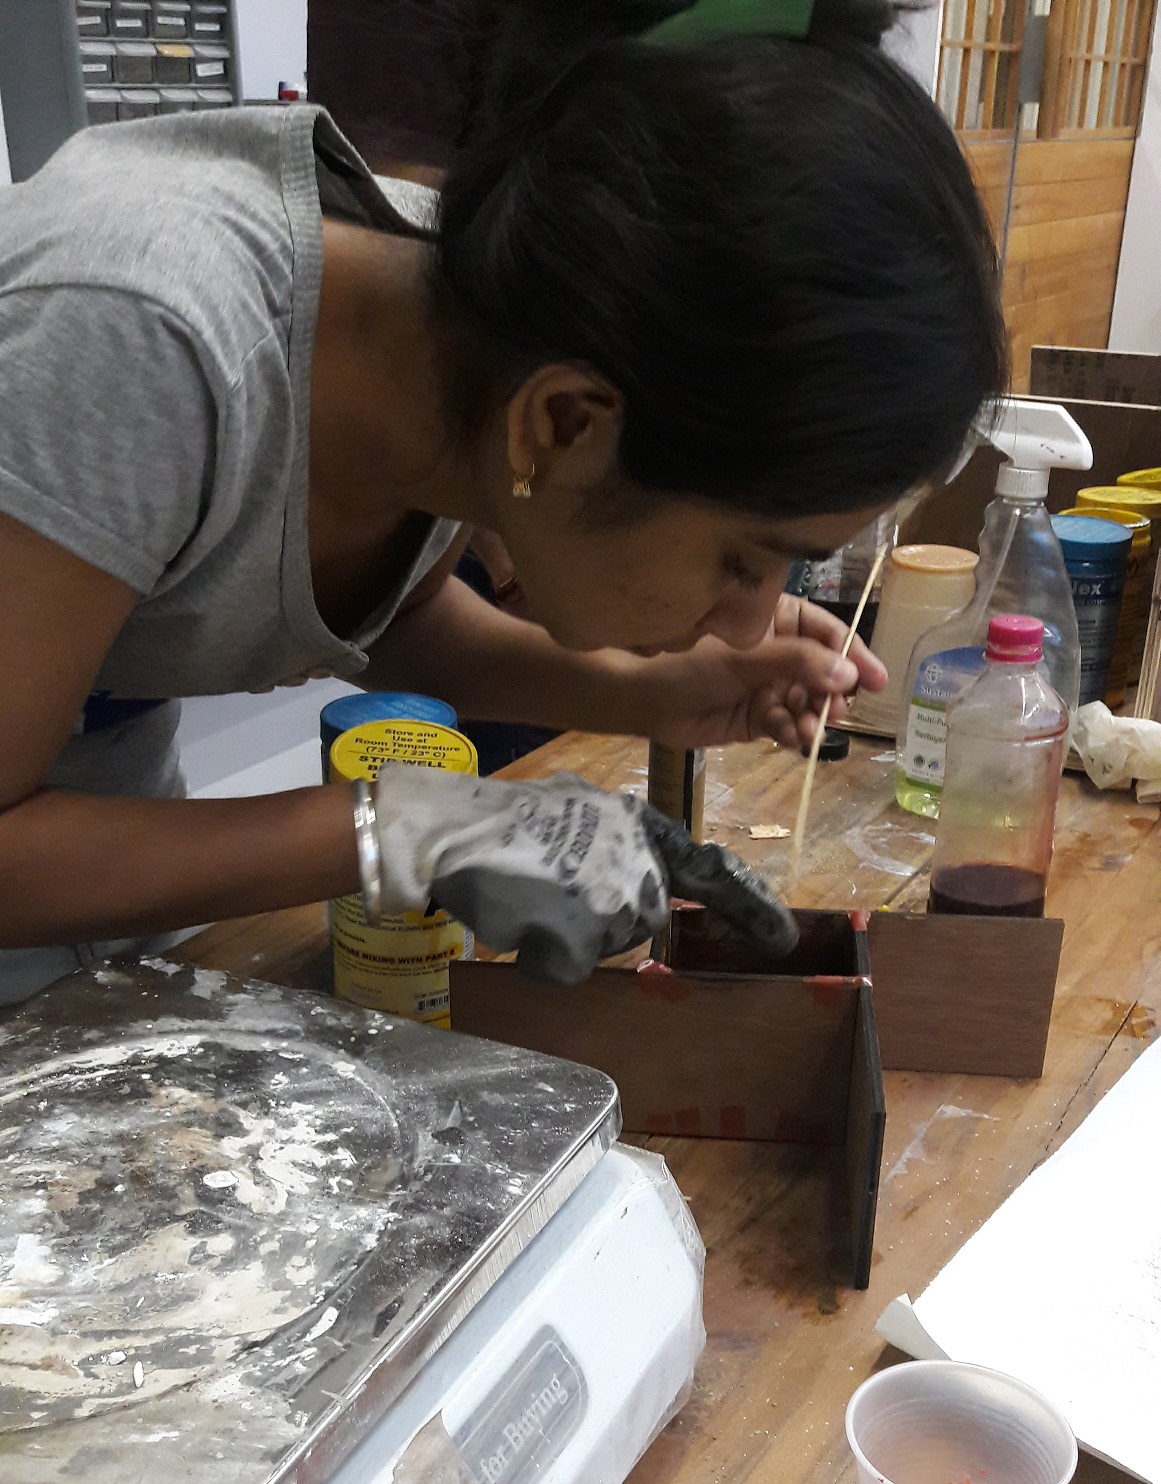
Now for making the negative mould, we mix two rubber compounds. Gaurav helped me in mixing the compounds in a proper manner. First step was to apply grece in the mould so the compound does not get stick to the wax. Make sure to wear gloves while applying the grece.
Image : ApplyingGrece
I used PMC-780 rubber compound.
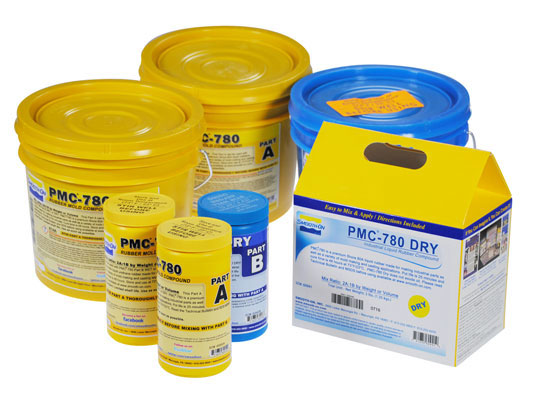
These compounds are to be mixed in the ratio of 2A:B amount. For measuring the amount of the compound, I used the weighing machine which was in our lab. When we start the machine, it is necessary to set it at zero weight. We take the rubber compound in the glass for measuring and mixing. When we keep the glass on the machine, it will show some weight so again we have to set it as zero.


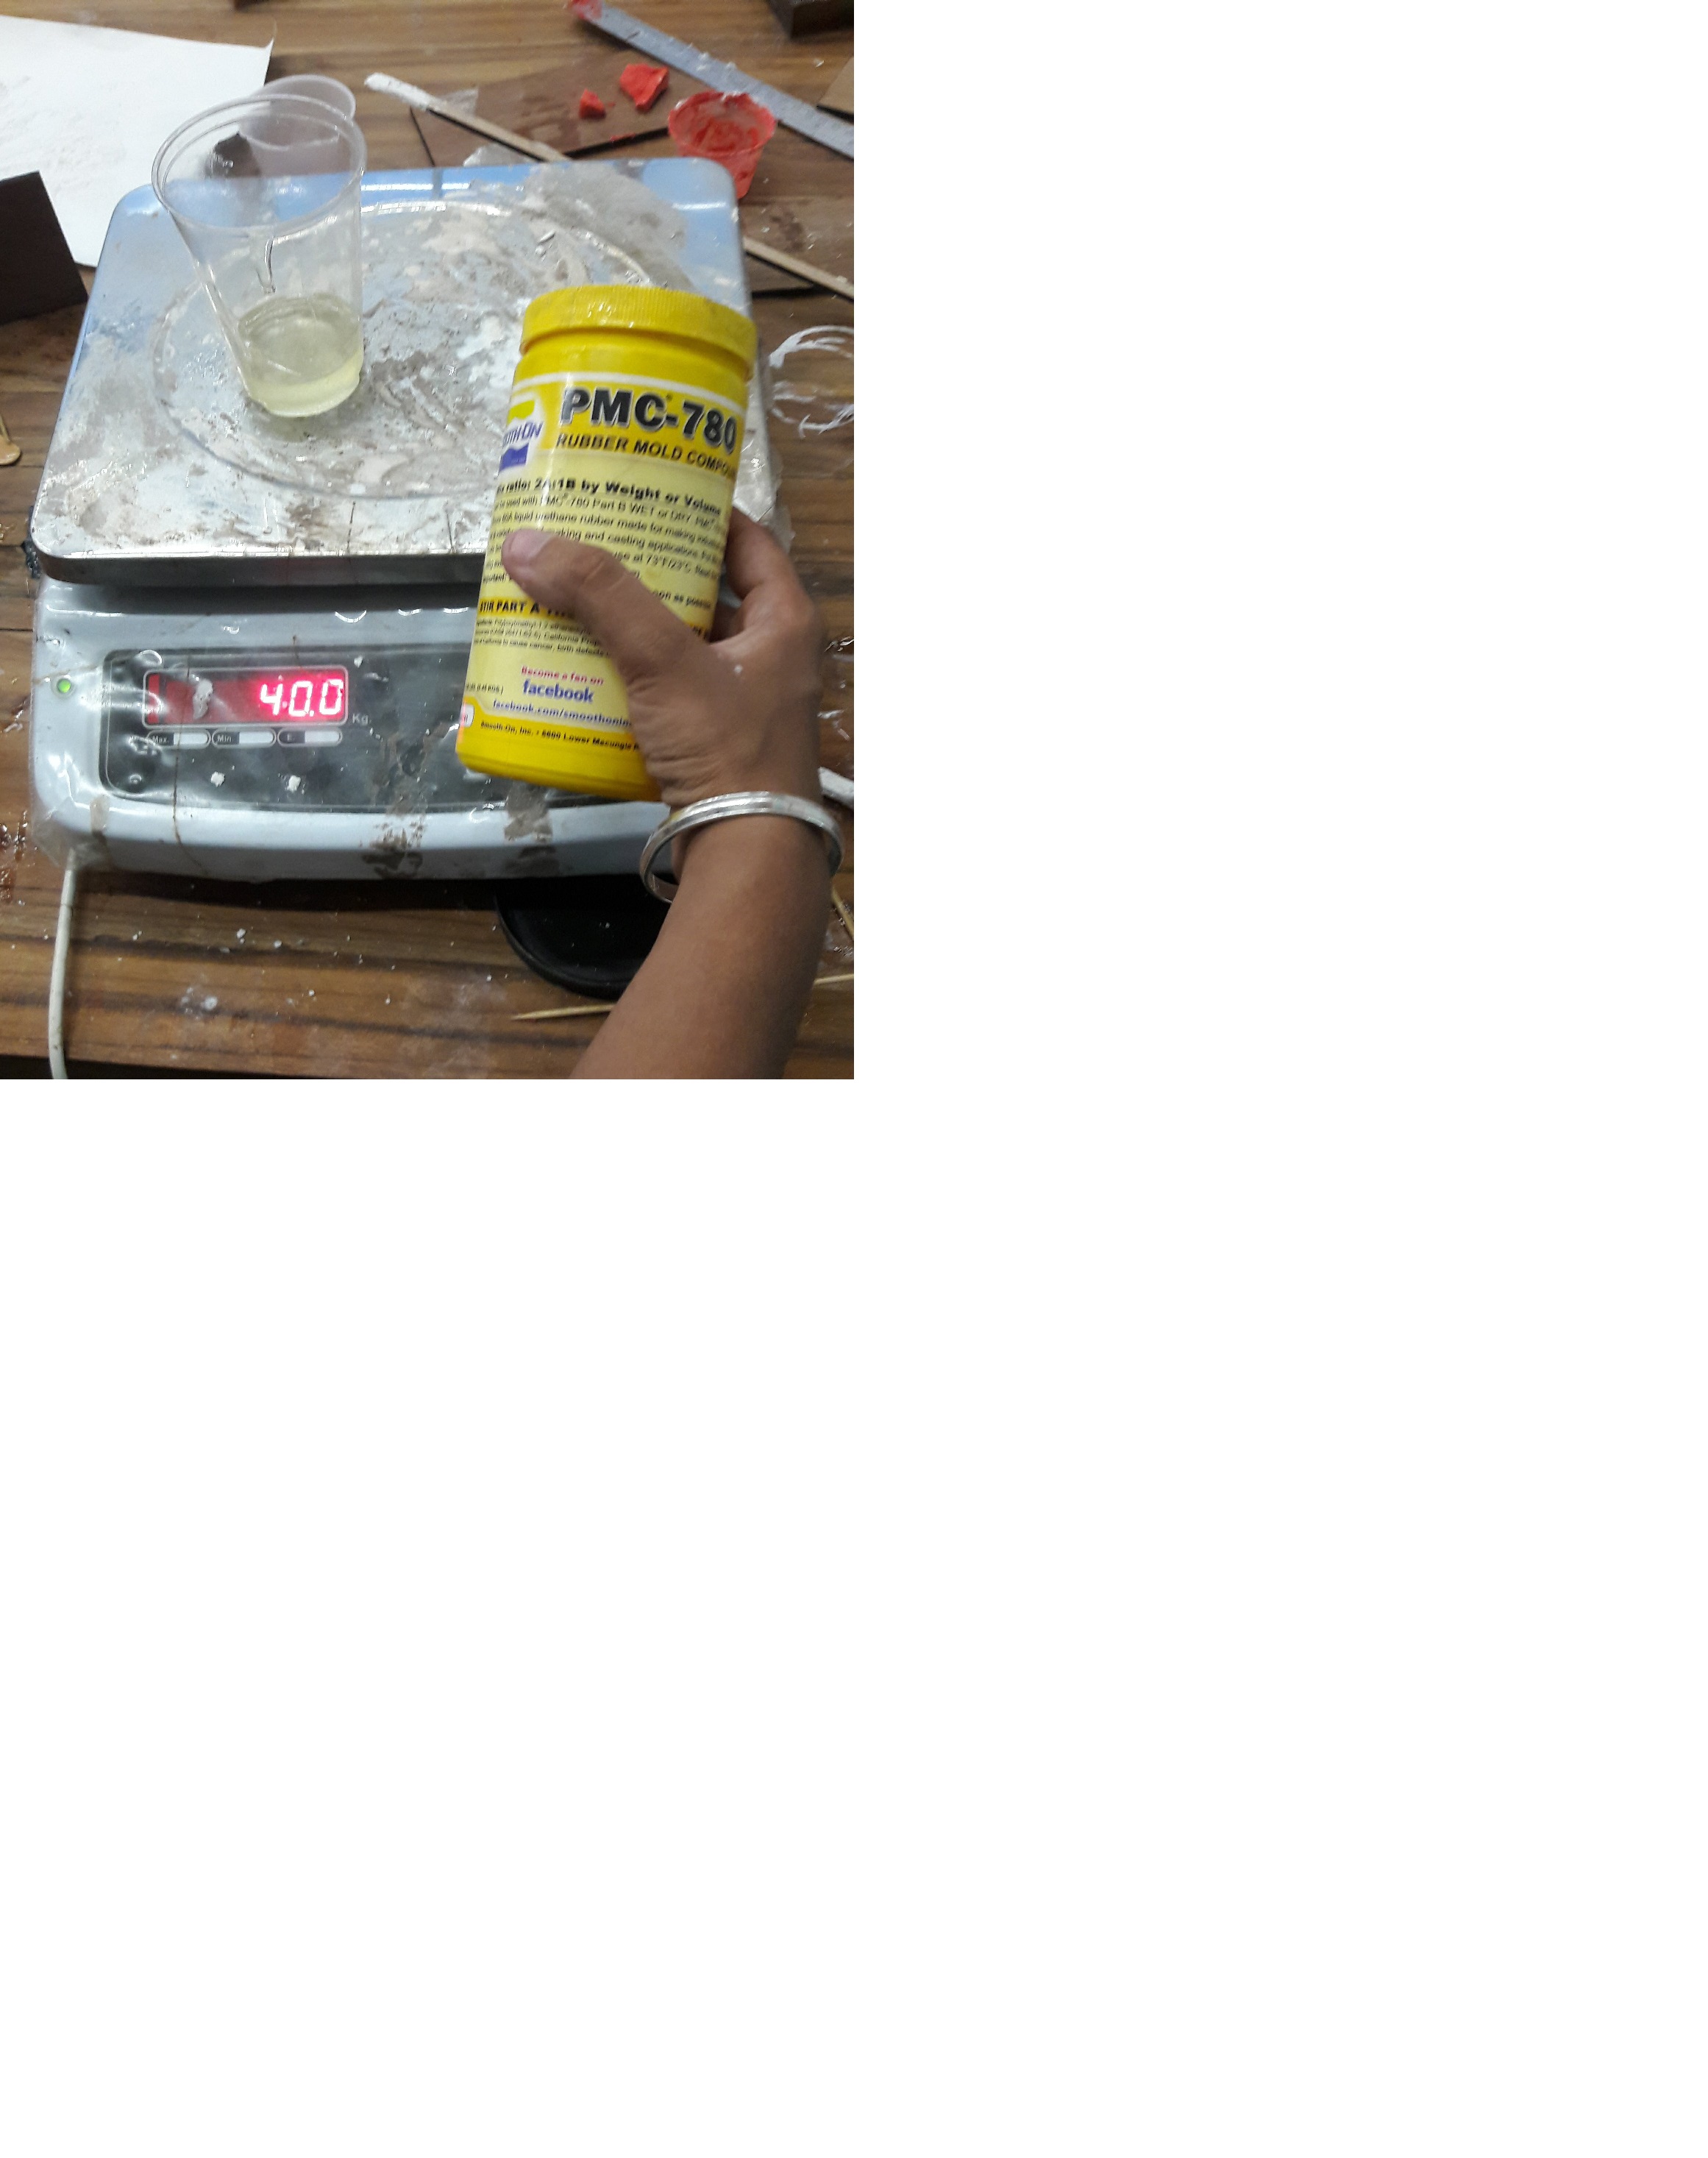
Now I poured compound A in the glass.
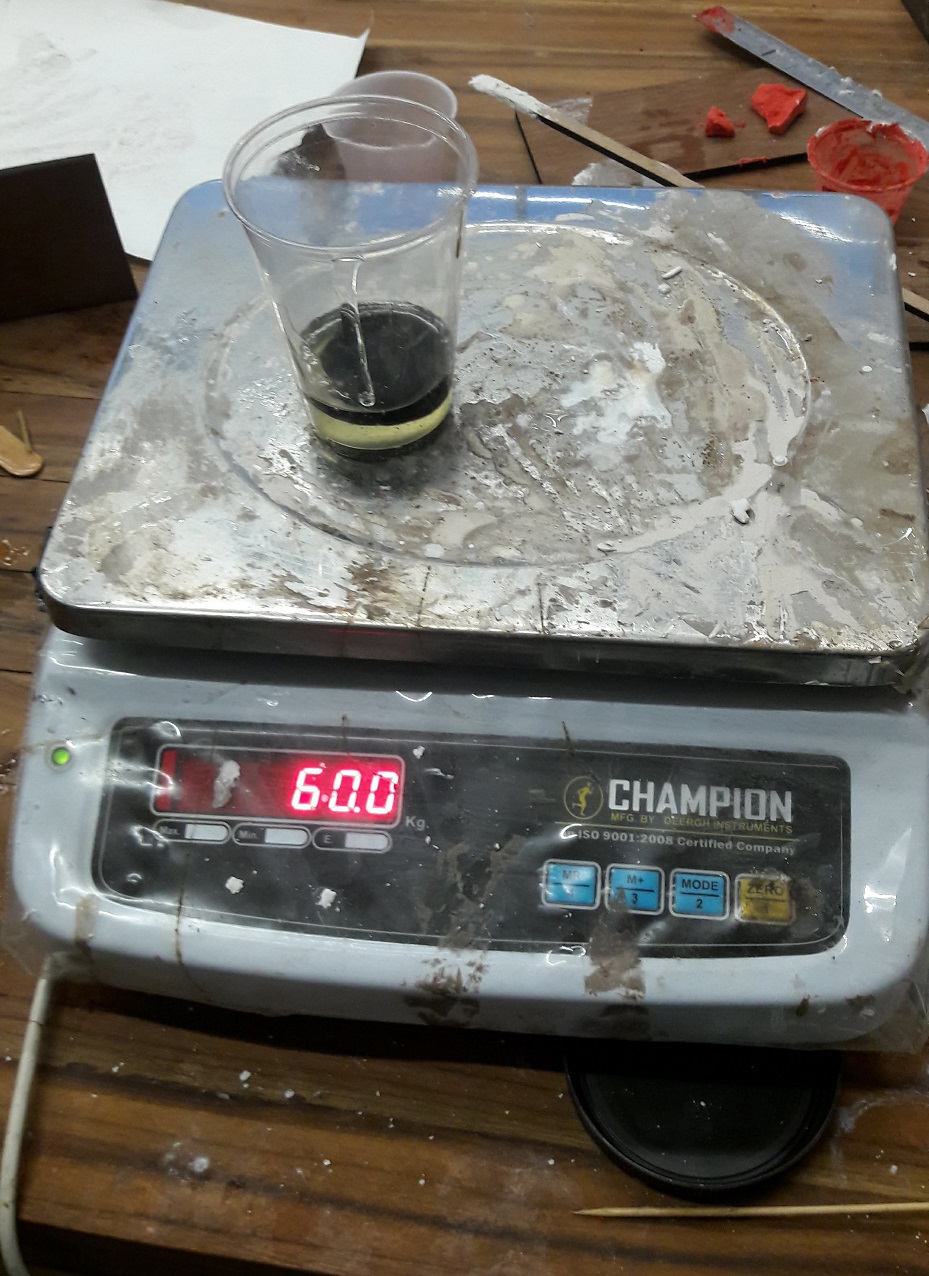
Now Pour Compound B
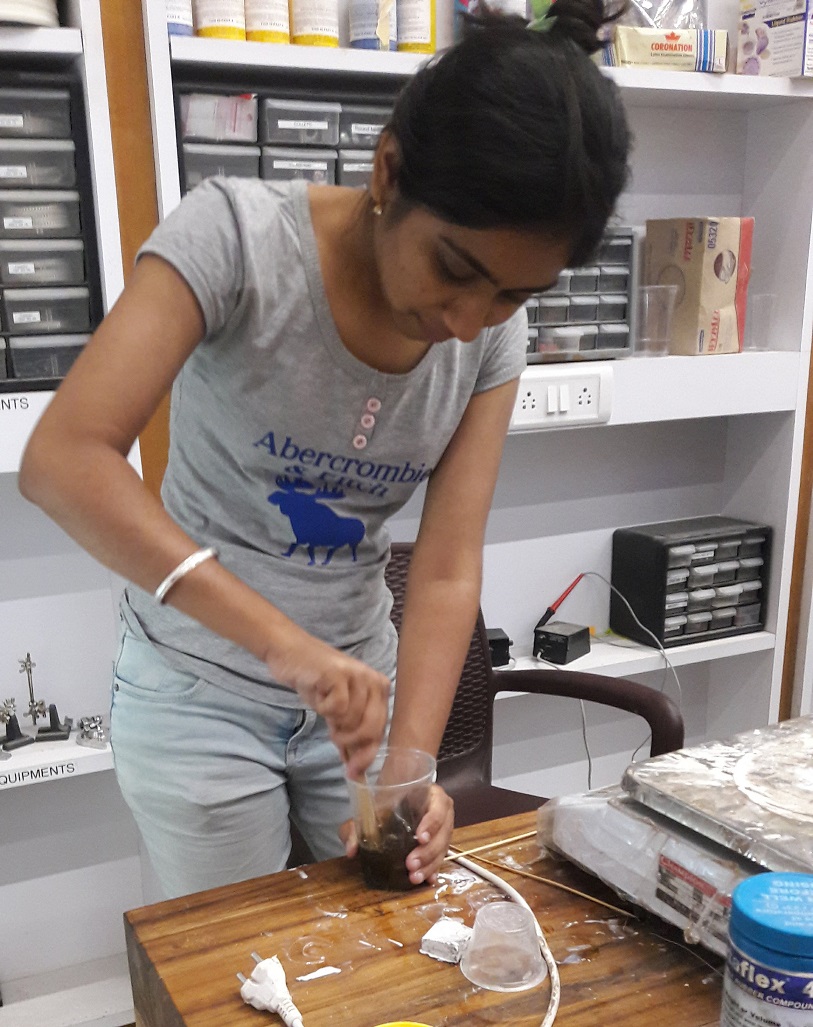
Now I had to stir the compound for at least 3 min so that it can mix properly.
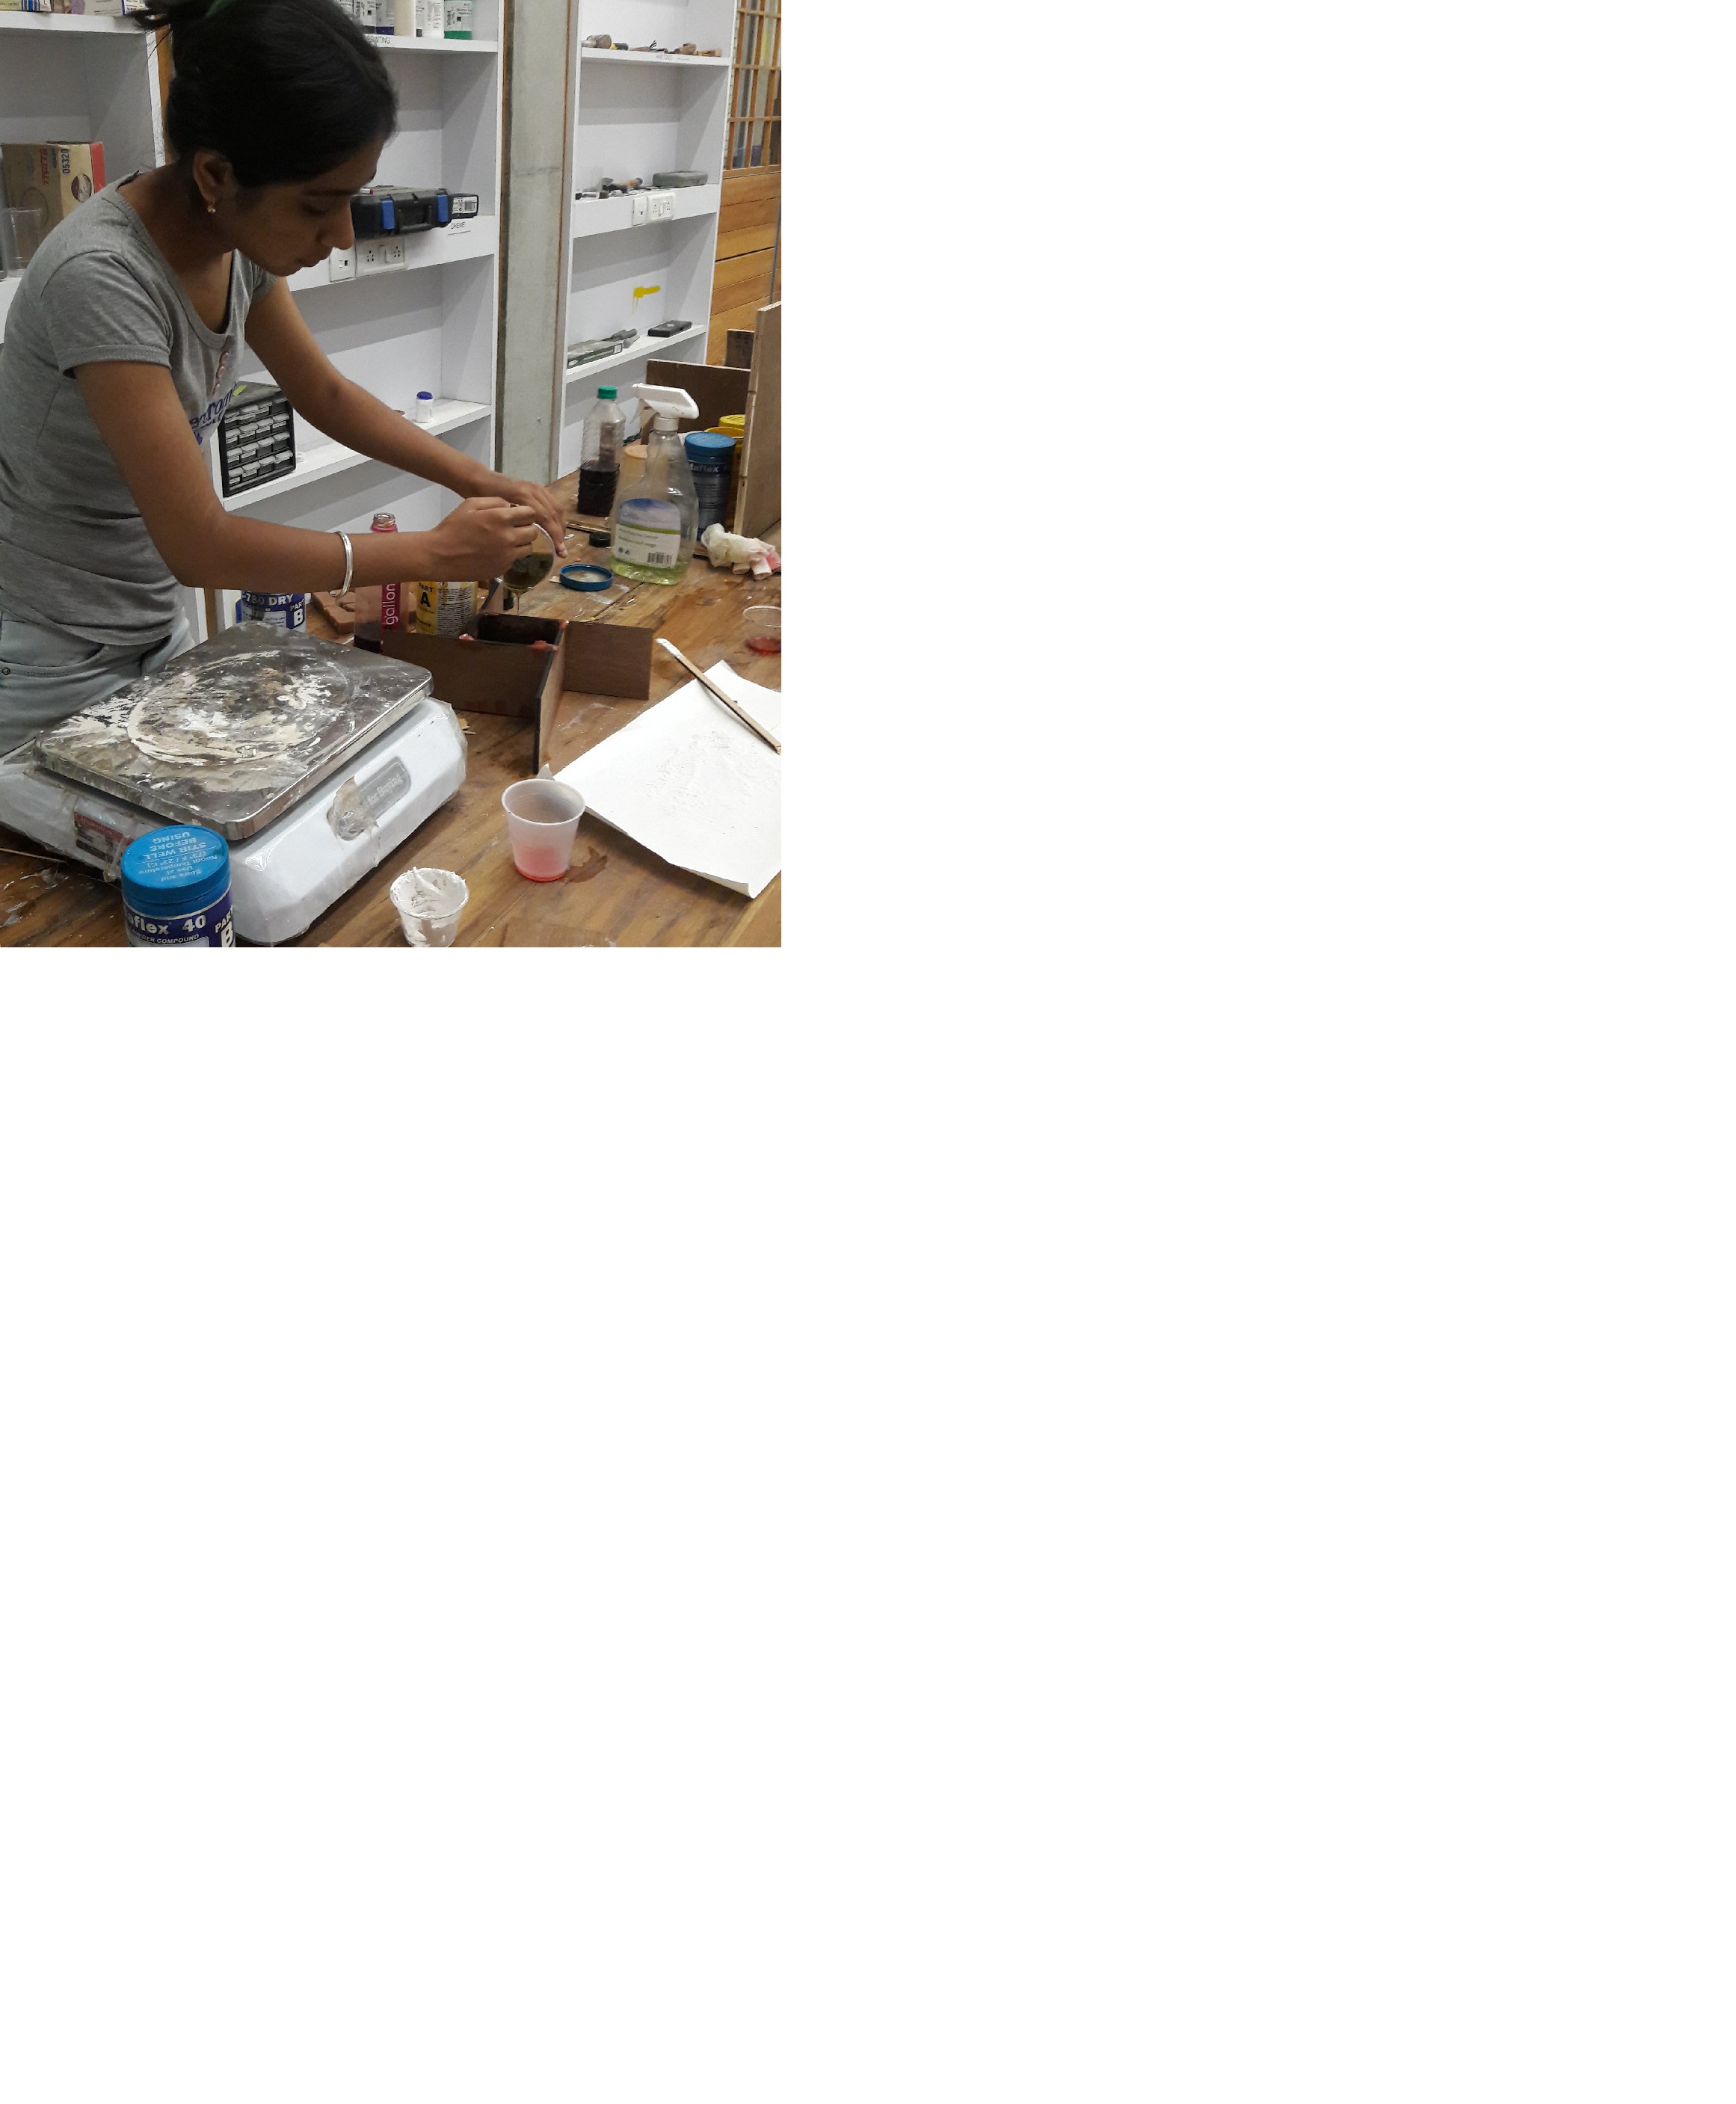
Now gently pour the rubber compound into your mould.

It takes 16 hrs to become solid. I kept the mould at a proper place.
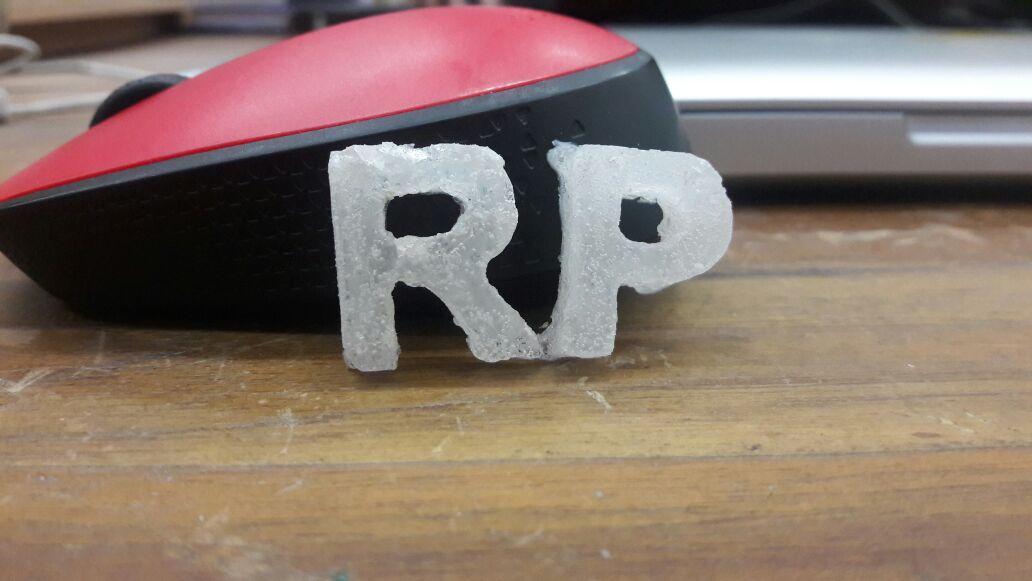
Next step is to do casting, PVC compound was available at the lab so I used it for the casting. Following the same process in PVC caste.
For more better information you can visit Group Site.
- Create Positive Mould using the milling machine.
- Create Negative Mould using the Rubber Compounds.
- Add PVC or Plastic materials as a Caste
Making design
This week was for making a mould. I wanted to make a mould with initial letters of my name and last name so I made a simple design in Fusion software. I am more comfortable at fusion, so I decided to use Fusion.Commands I used :
- Text
- Rectangle
- Extrude
After making the design, I converted the design into (.stl) and then opened it into the fab modules. For checking whether the dimension of the image is perfect or not, we calculate the height map. When I opened the file, it showed me image dimension error.
I made the design in (mm) which after opening in fab modules the dimension changed into (inches). Aaditya suggested me to first convert the file into (.step) format from fusion and then open in Rhino and convert it into (.stl) format. I tried various other format but still it didn’t work.
As I was not able to find the solution, I decided to make the same design in inches. I made the design in (inches) and converted into (.stl) format from Rhino.
This time the design was opening in fab modules, the mash and size of the design was also correct but was not able to calculate the height map.
Now I tried the design with removing the borders. I made the same design in (inches) but without borders and converted it into (.dxf) format and then converted into (.stl) format from Rhino.
This time the design was perfectly working, the size was correct and the height map was calculated correctly.
Milling in Modella
Steps of giving parameters in fab modules :
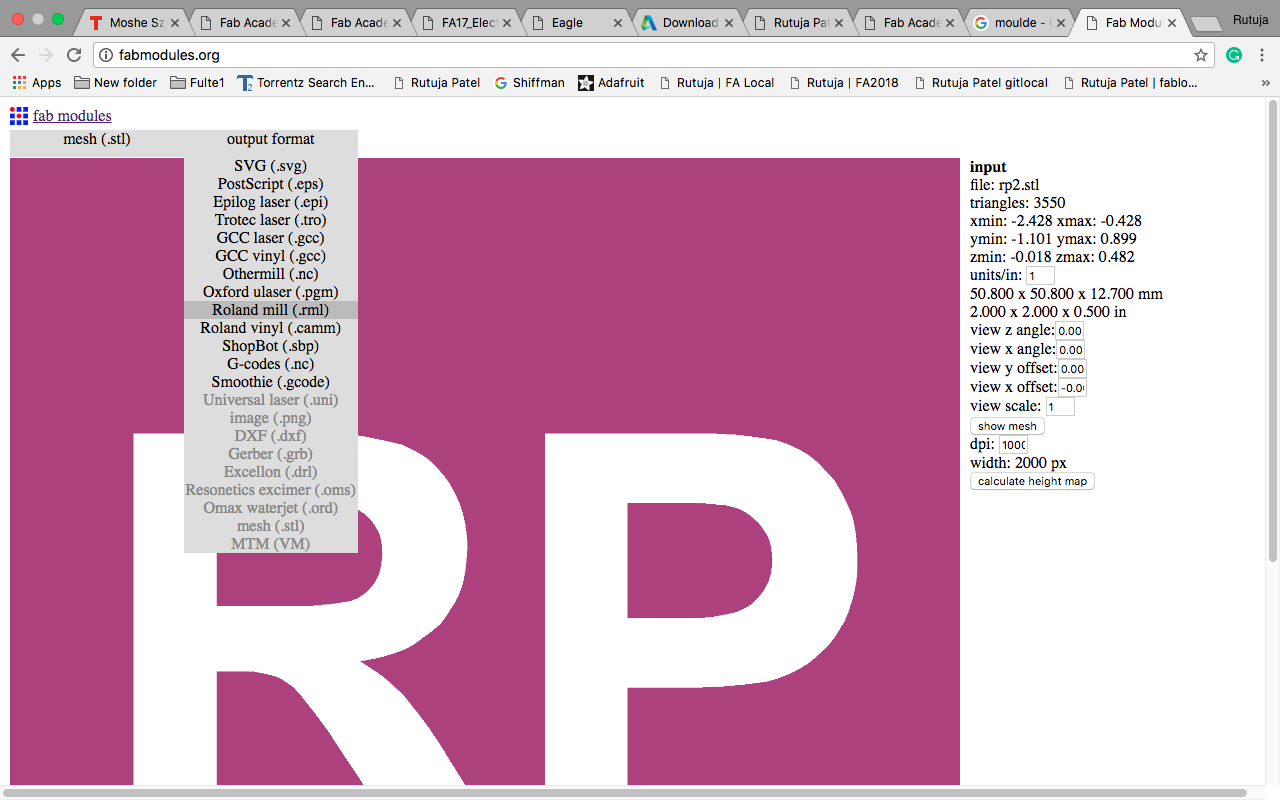
- Open the (.stl) file in the fab modules and check the dimension of image whether it is correct or not.
- Give (.rml) as Output Format.
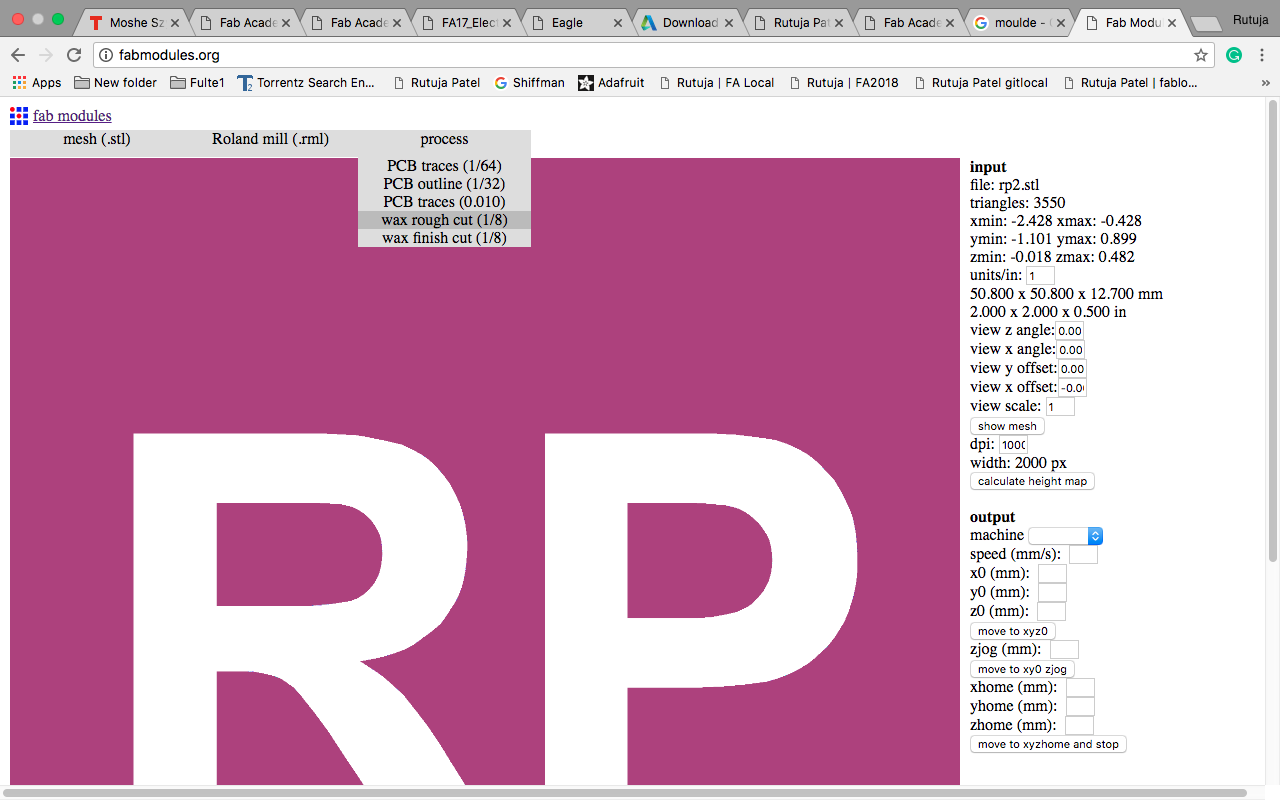
- Process : wax ⅛ rough cut
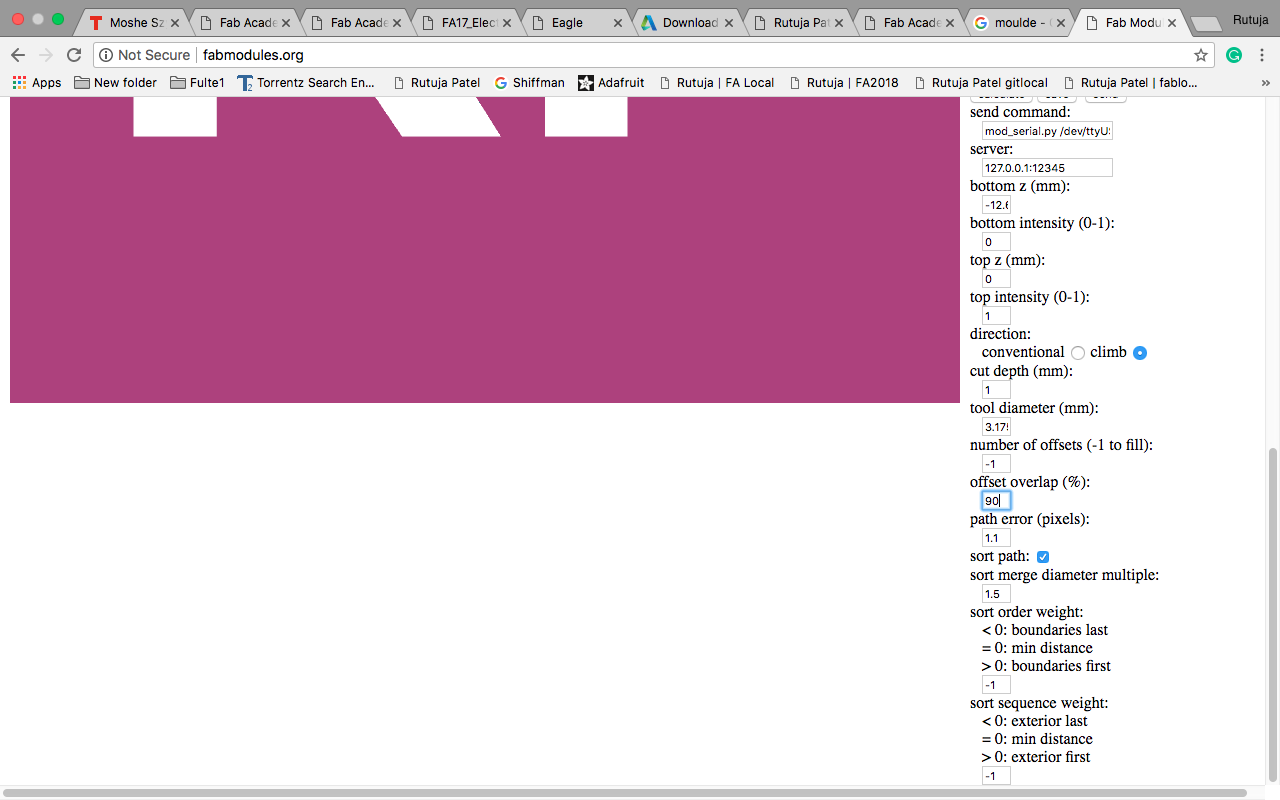
- Overlab : 90
- Arrange all the parameters as shown in the figure
The modules takes nearly 15 min to calculate the file and then we can start. The mould was milling fine. In the figure, the path is clearly seen.
It looked perfectly good after the rough cut. Now the next step was to do finish cut with the same parameters. For Finish cut, parameters given in the module should be same. I the same parameters but still the machine did not cut properly. It started cutting before the origin so I stopped the machine. The letters were properly cut so I continued with making the mould. The wax material was not available in the lab, so I didn’t have option for making the mould again.
Now for making the negative mould, we mix two rubber compounds. Gaurav helped me in mixing the compounds in a proper manner. First step was to apply grece in the mould so the compound does not get stick to the wax. Make sure to wear gloves while applying the grece.
Image : ApplyingGrece
I used PMC-780 rubber compound.
These compounds are to be mixed in the ratio of 2A:B amount. For measuring the amount of the compound, I used the weighing machine which was in our lab. When we start the machine, it is necessary to set it at zero weight. We take the rubber compound in the glass for measuring and mixing. When we keep the glass on the machine, it will show some weight so again we have to set it as zero.
Now I poured compound A in the glass.
Now Pour Compound B
Now I had to stir the compound for at least 3 min so that it can mix properly.
Now gently pour the rubber compound into your mould.
It takes 16 hrs to become solid. I kept the mould at a proper place.
Next step is to do casting, PVC compound was available at the lab so I used it for the casting. Following the same process in PVC caste.
For more better information you can visit Group Site.