WEEK 14
Mecahincal Design + Machine Design
Assignment:
- Make a machine, inlcuding the end effector, build the passive parts and operate it manually
- Automate your machine. Document the group project and your individual contribution
Software(s):
- CoolTerm
- MODS
Skill(s):
- Programming
- Group Work
- Gcode
Family Matters
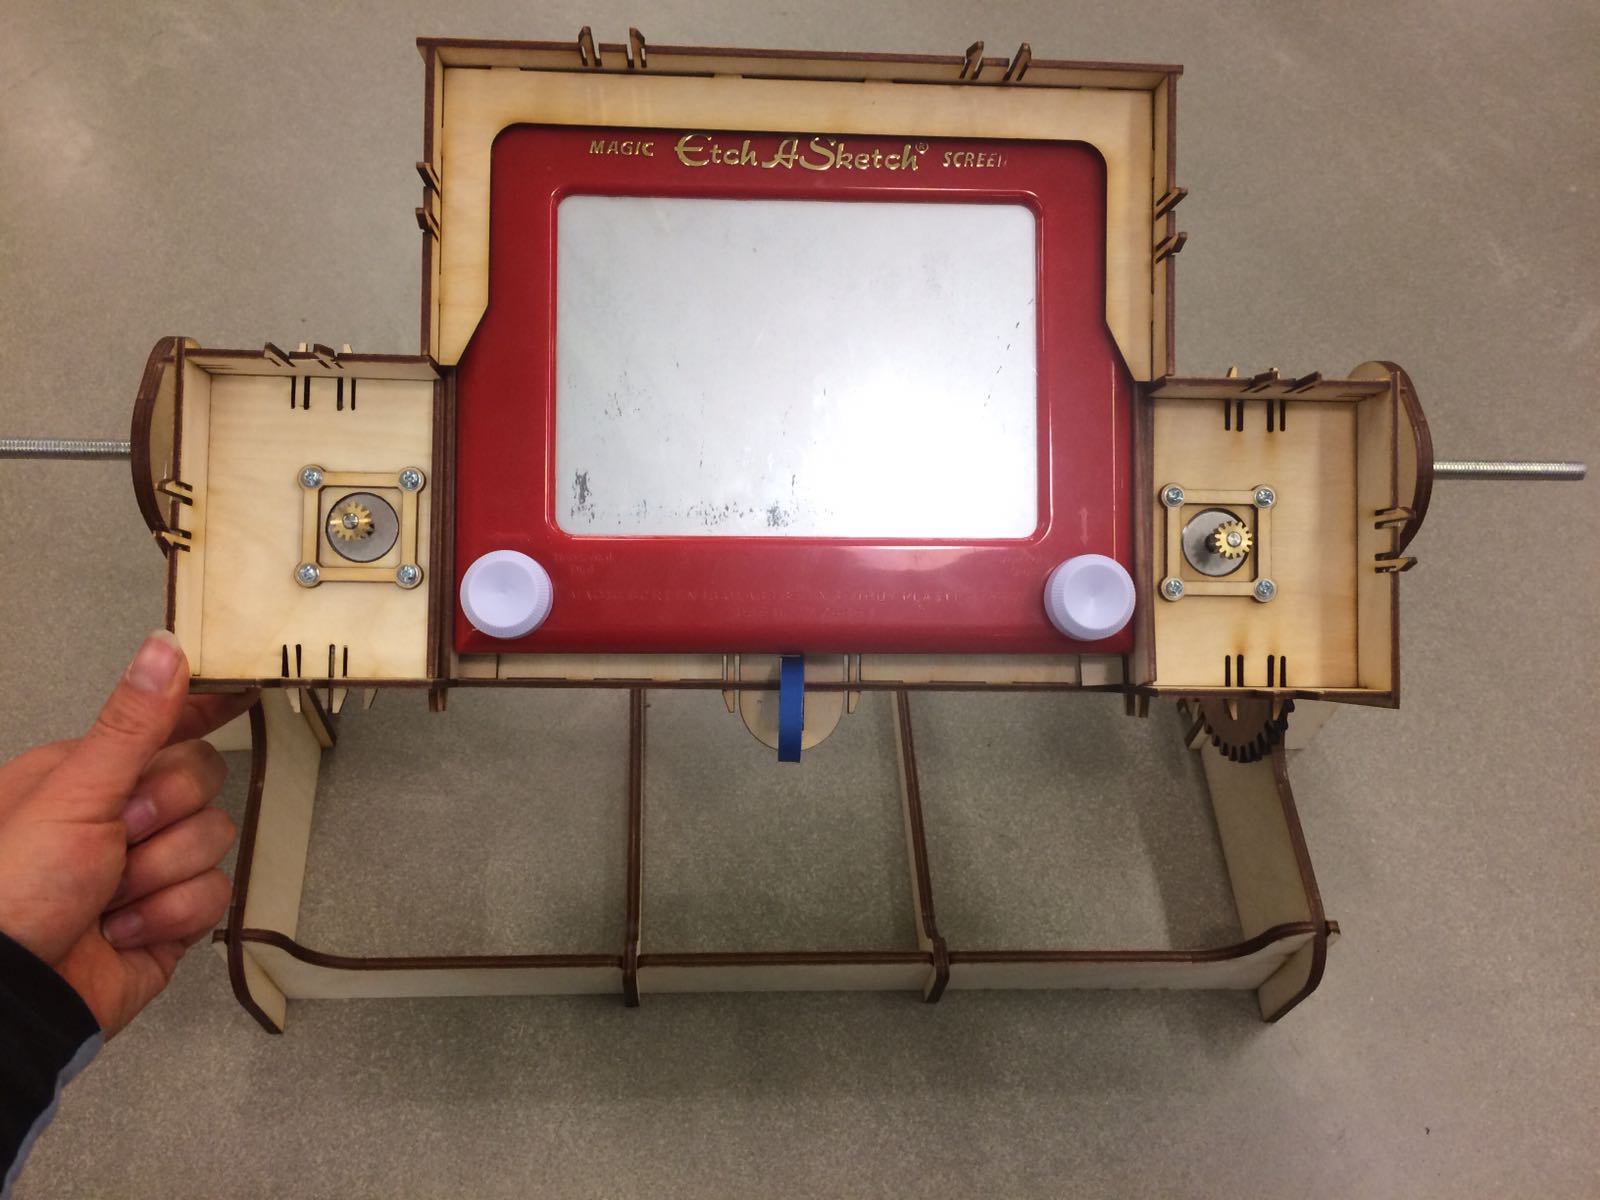
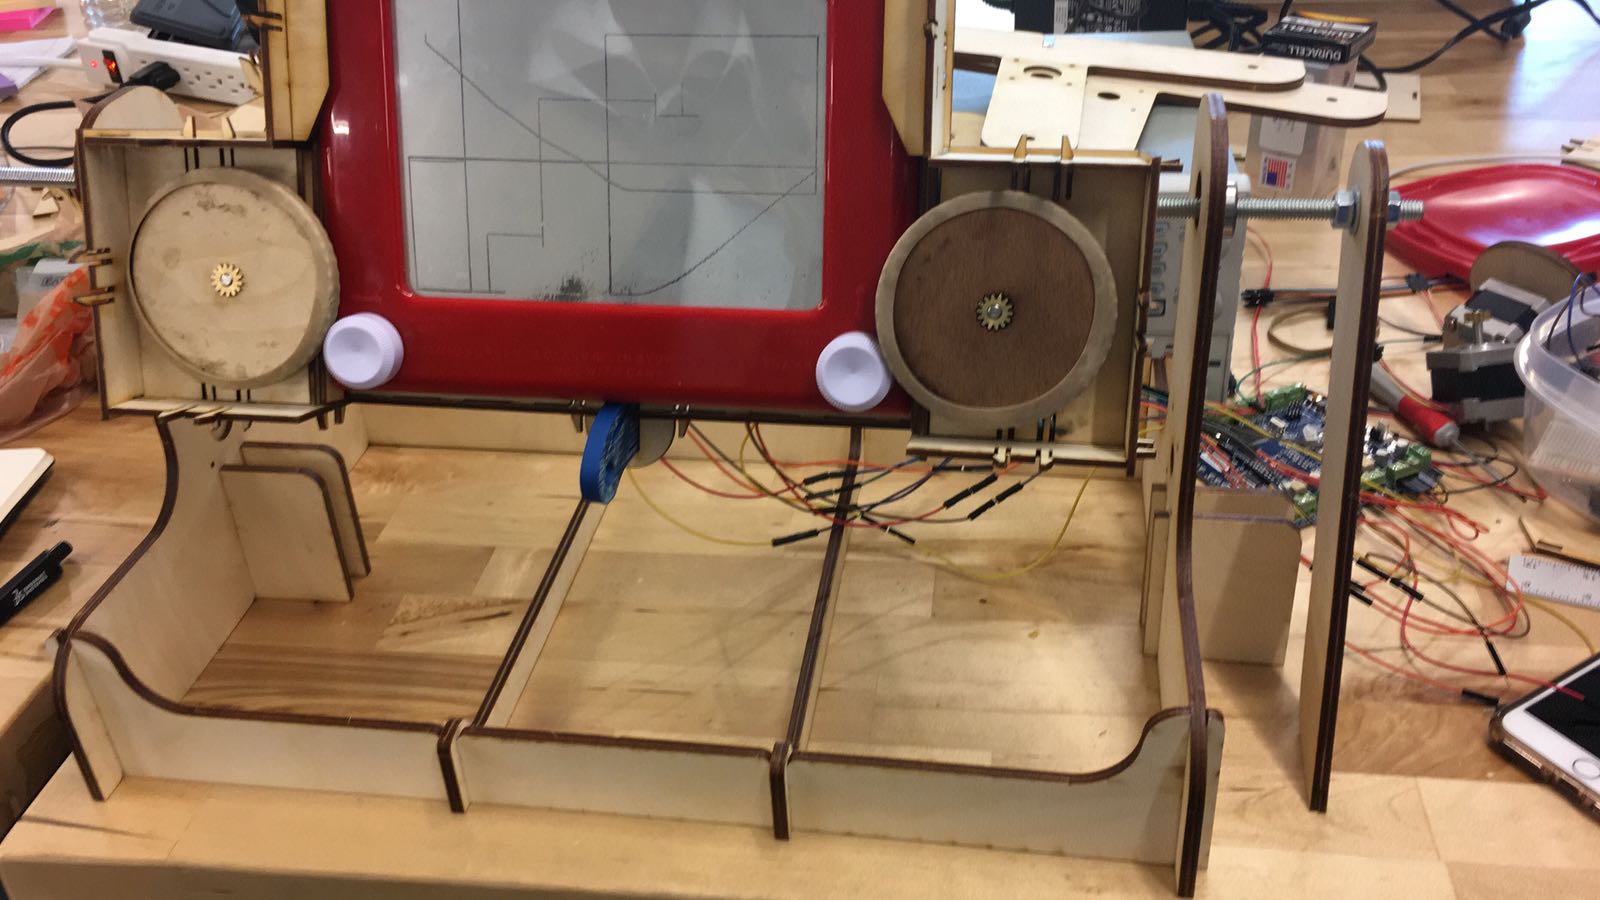
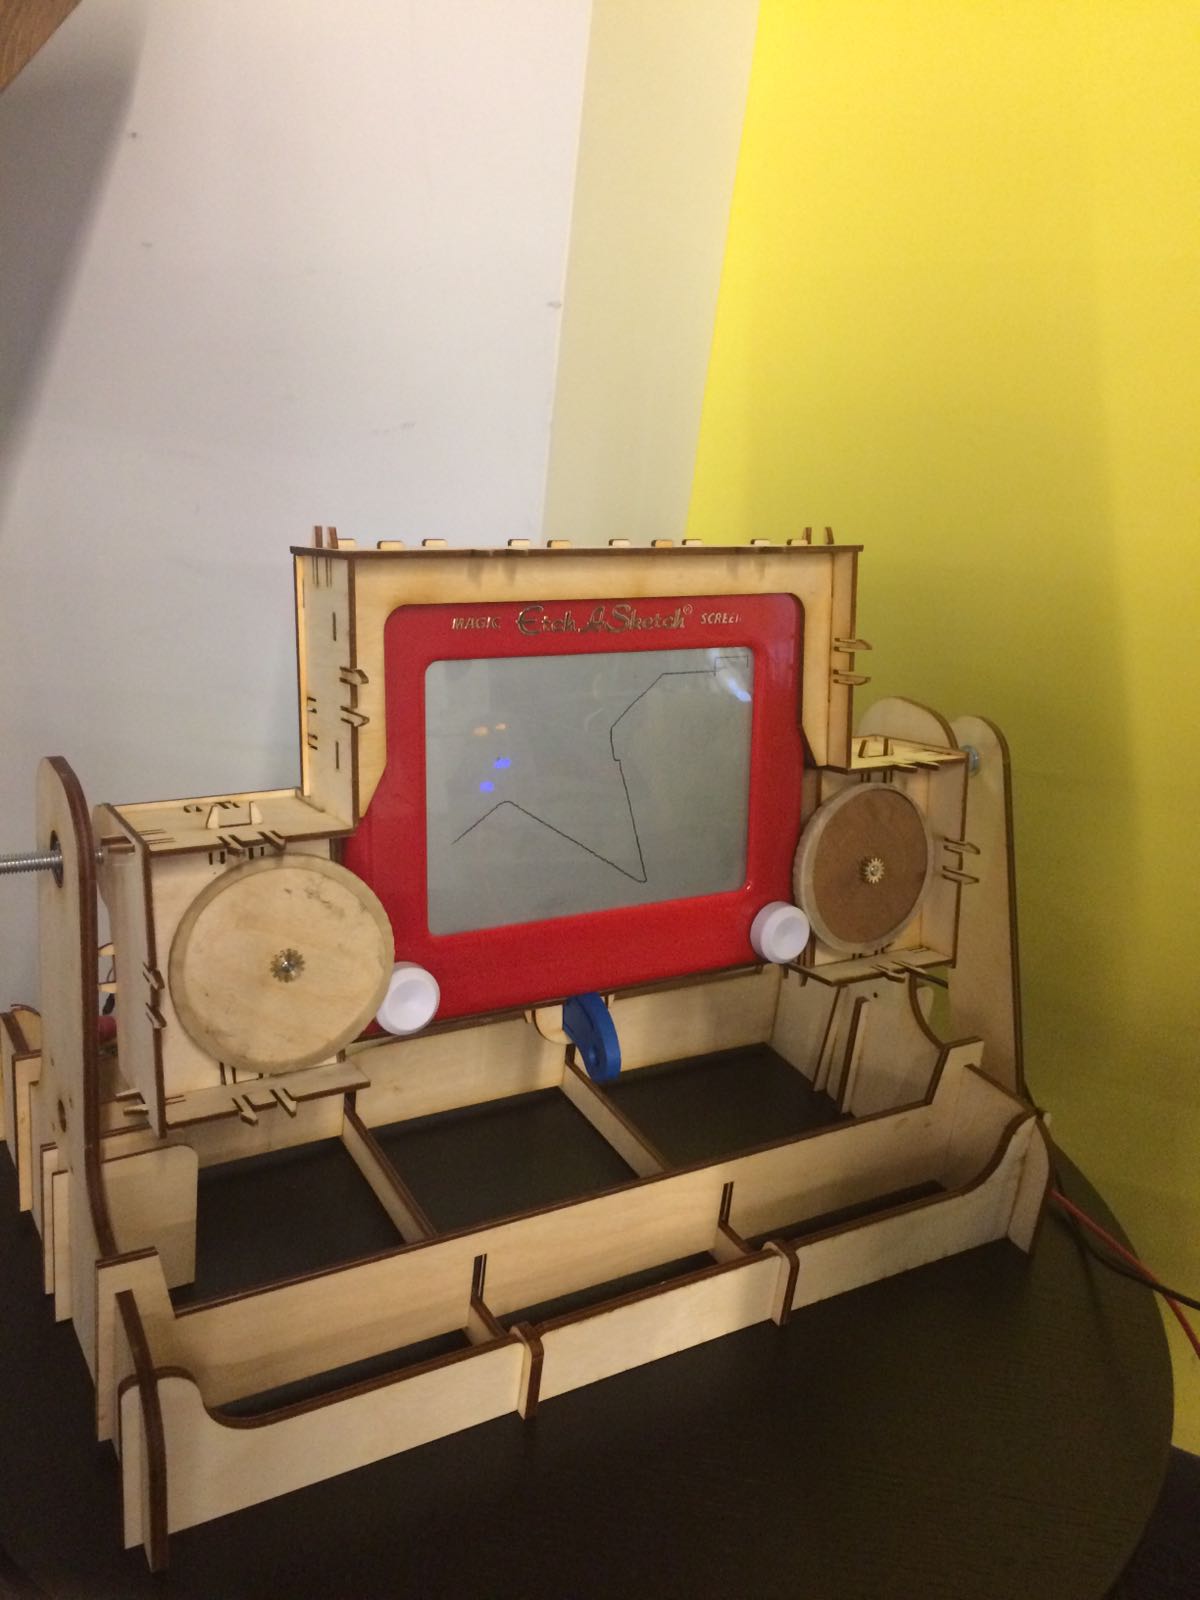
For Week 14 and 15 my classmates and I were tasked to created and automate a machine to do something as a group project. What we decided to create was an automated Etch-A-Sketch machine. Below I will describe the my individual contribution to the overall group project.
Click here here to learn more about the overall project
PROGRAMMING STEPPER MOTORS
| CONNECTING/SET-UP |
Pillar and I took on the challenge of programming the two stepper motors that will turn the knobs of the Etch-A-Sketch. The first step we took was learning more about the TinyG since it was the first time either of us has used one.
We found a great wiki page on everything TinyG. Once we were up to speed on the TinyG, we proceeded to connect our motors to the TinyG by following this great tutorial
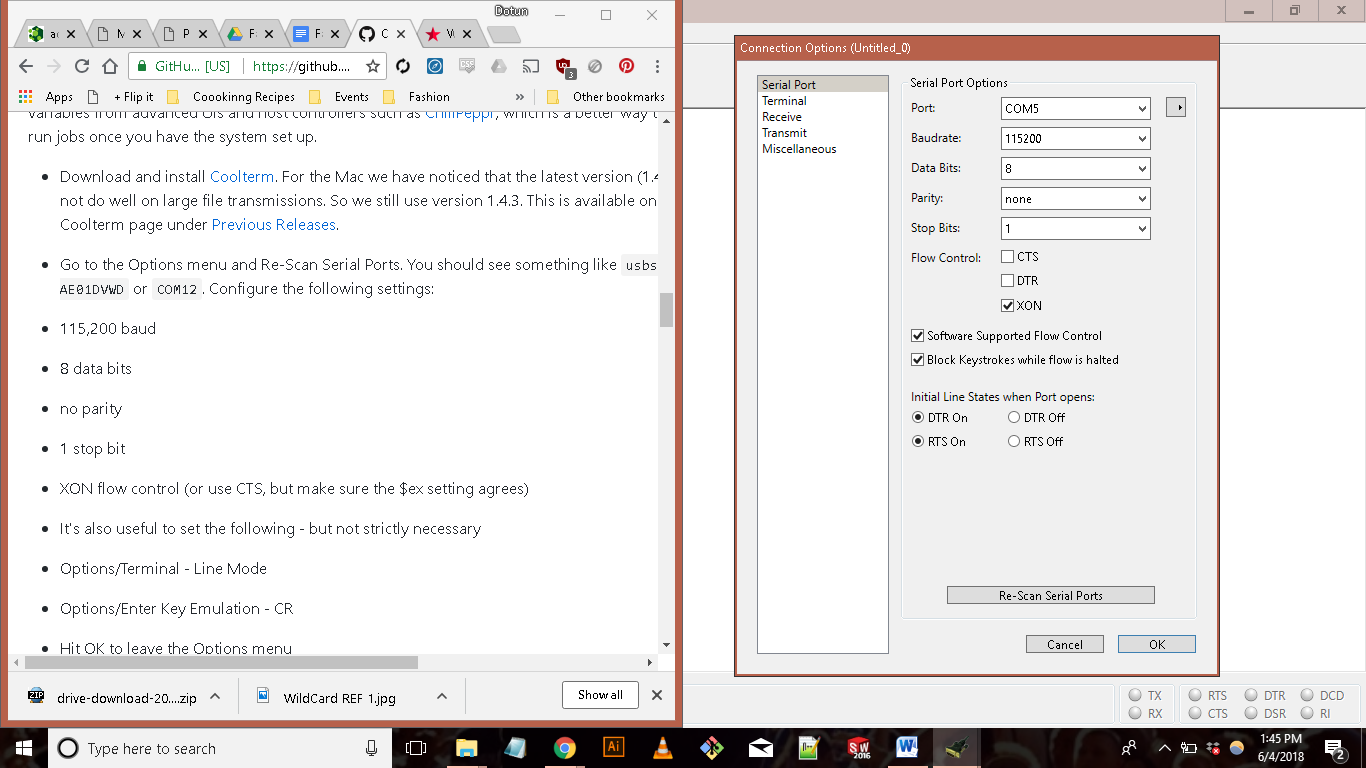
First we downloaded and installed CoolTerm, which is a simpler serial port terminal application that is geared towards the need to exchange data with hardware connected to serial port such as servo controllers, robotic kits, GPS receivers, and microcontrollers. With CoolTerm installed and open, we went into the Options menu and configure the settings according to the tutorial mentioned above. Following the rest of the tutorial we were able to successfully connect our computer to the TinyG.
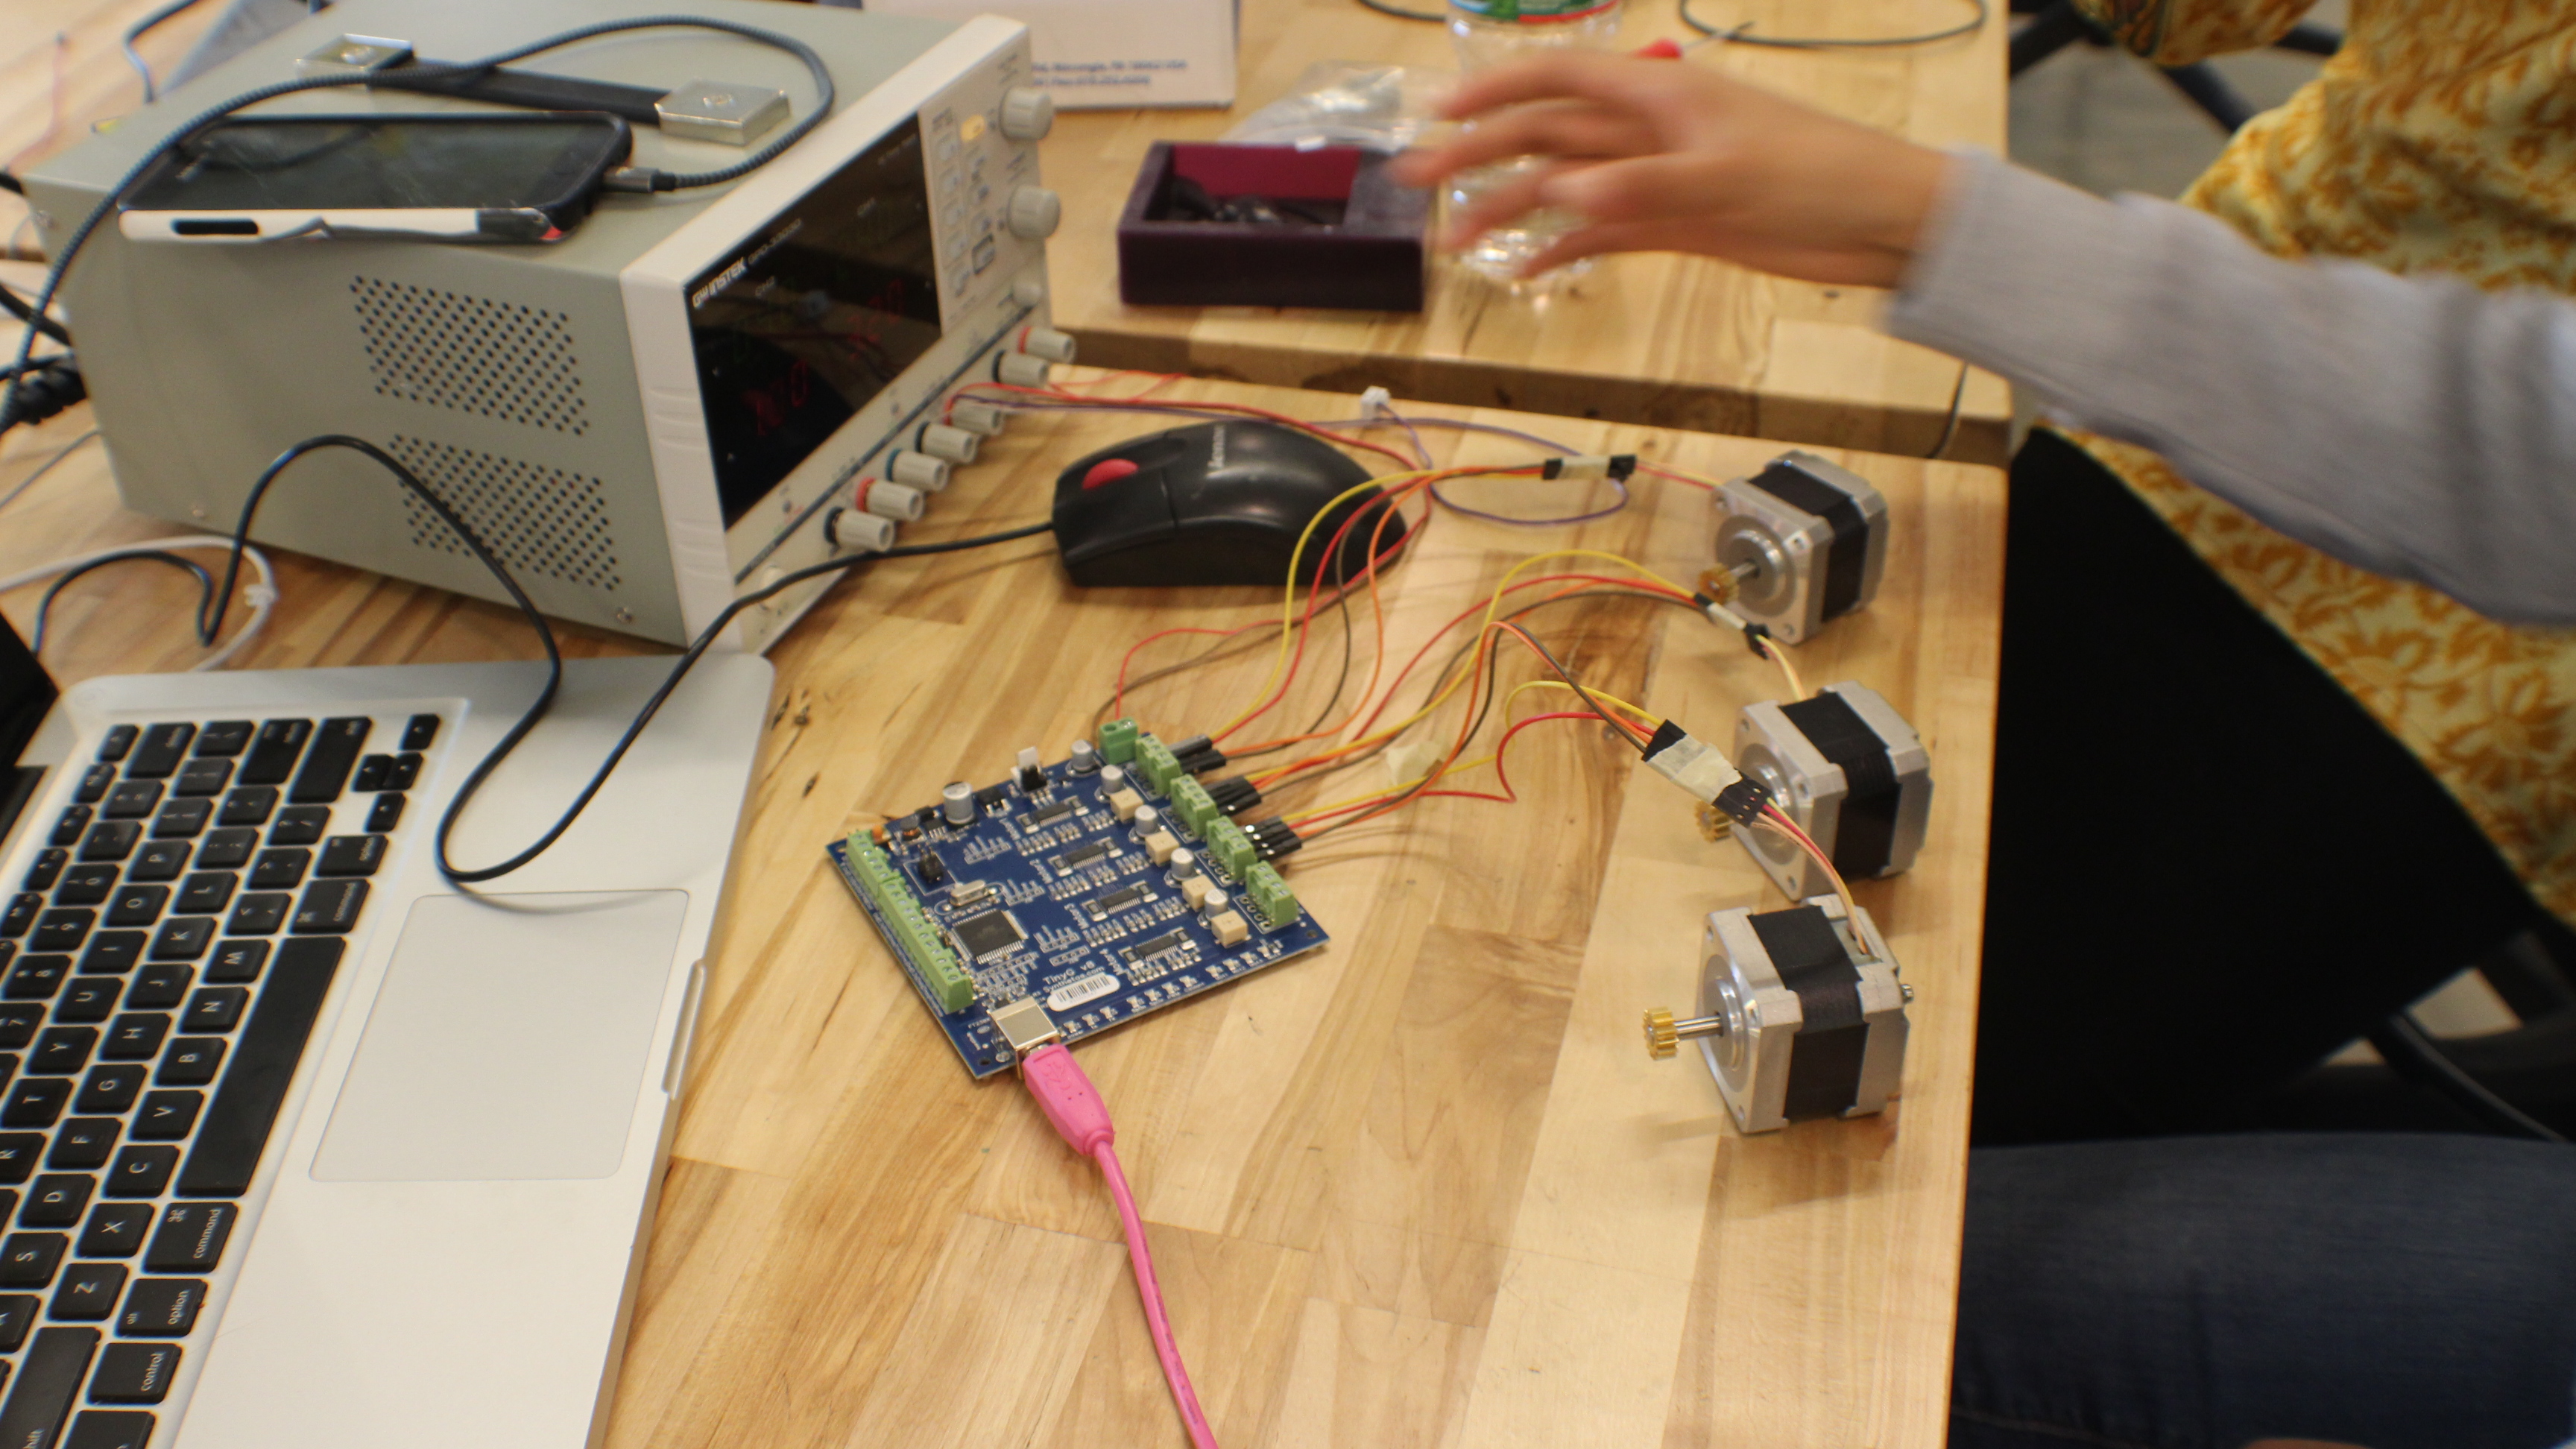
Next we wired the motors to the TinyG. We thought it would be best to wire and test the motors outside of our machine first. This we way can have better control over the motors without damaging the machine. Once the motors were connected we turned on the power and did a smoke check. Everything looked good.
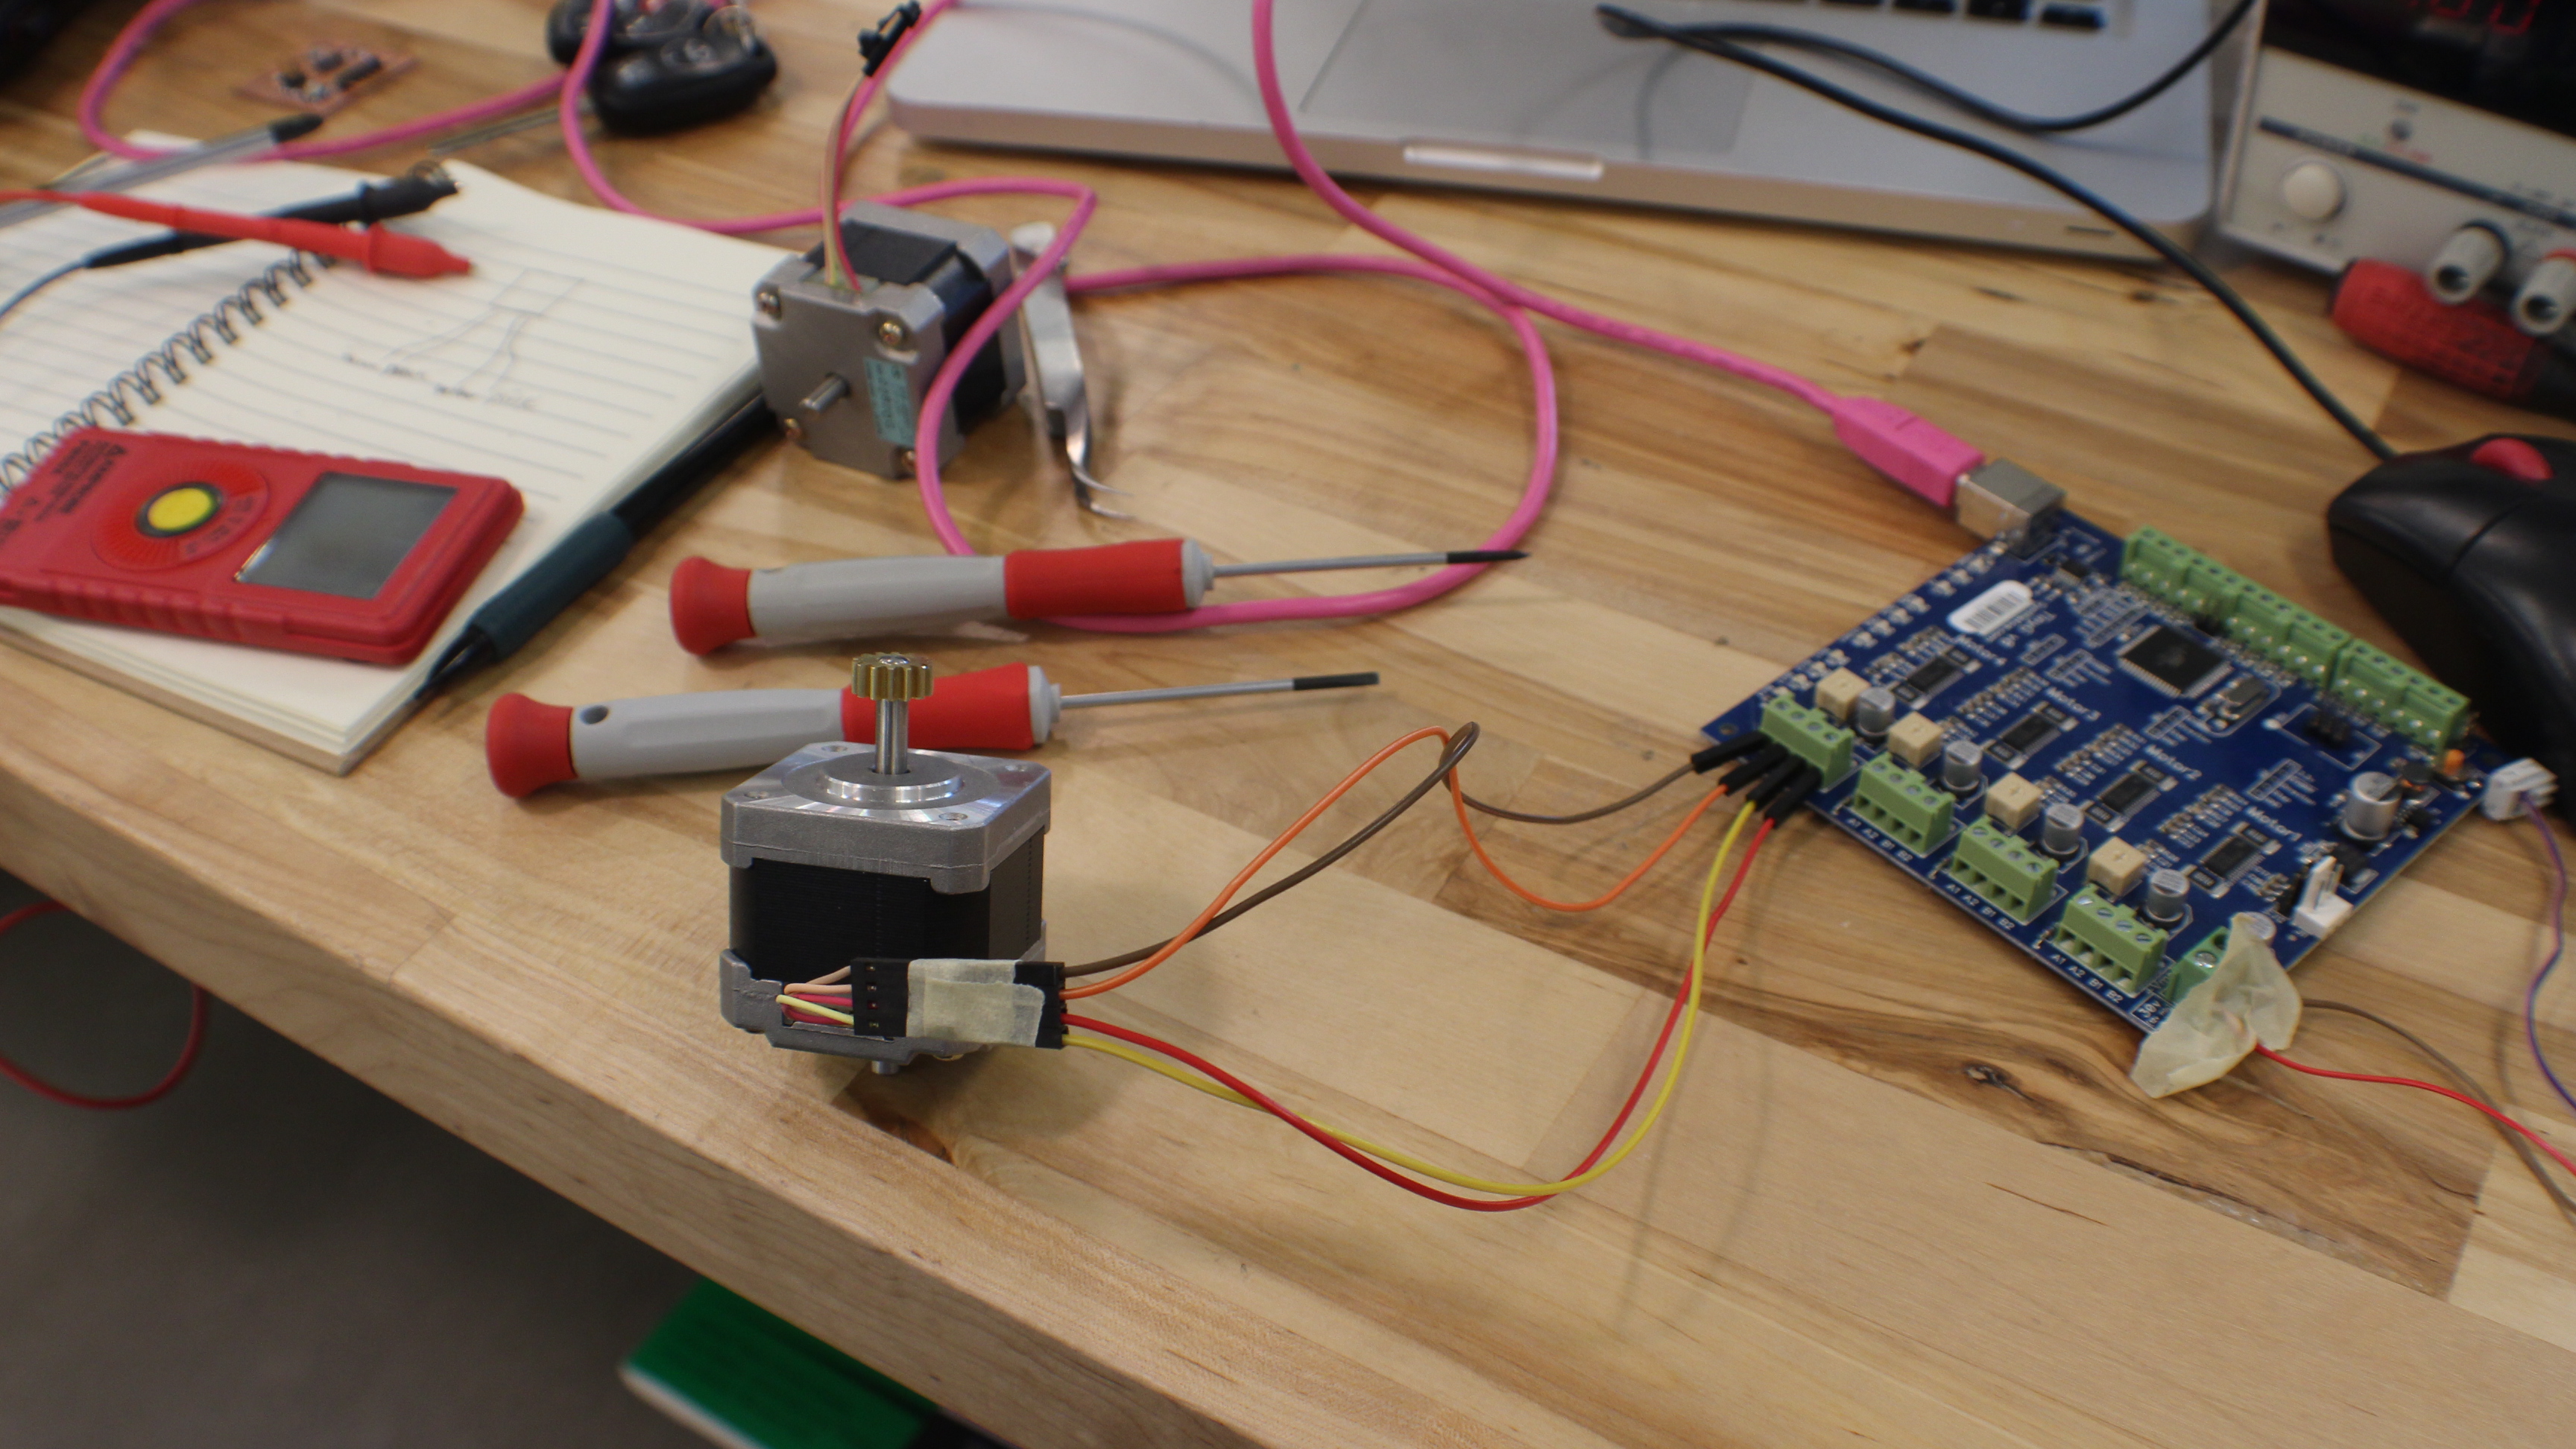
With the set-up complete, we can now test drive the motors to makes sure connections and orientation are good. The TinyG has built-in tests that we found a list of. We ran a few tests. Our favorite test was $test=4 because the motors made a cool video game sound that was quite lovely haha.
|DRAWING|
With everything set up, I proceeded to start drawing with our motors. At this point we put the motors back into our machine to simulate real time use.
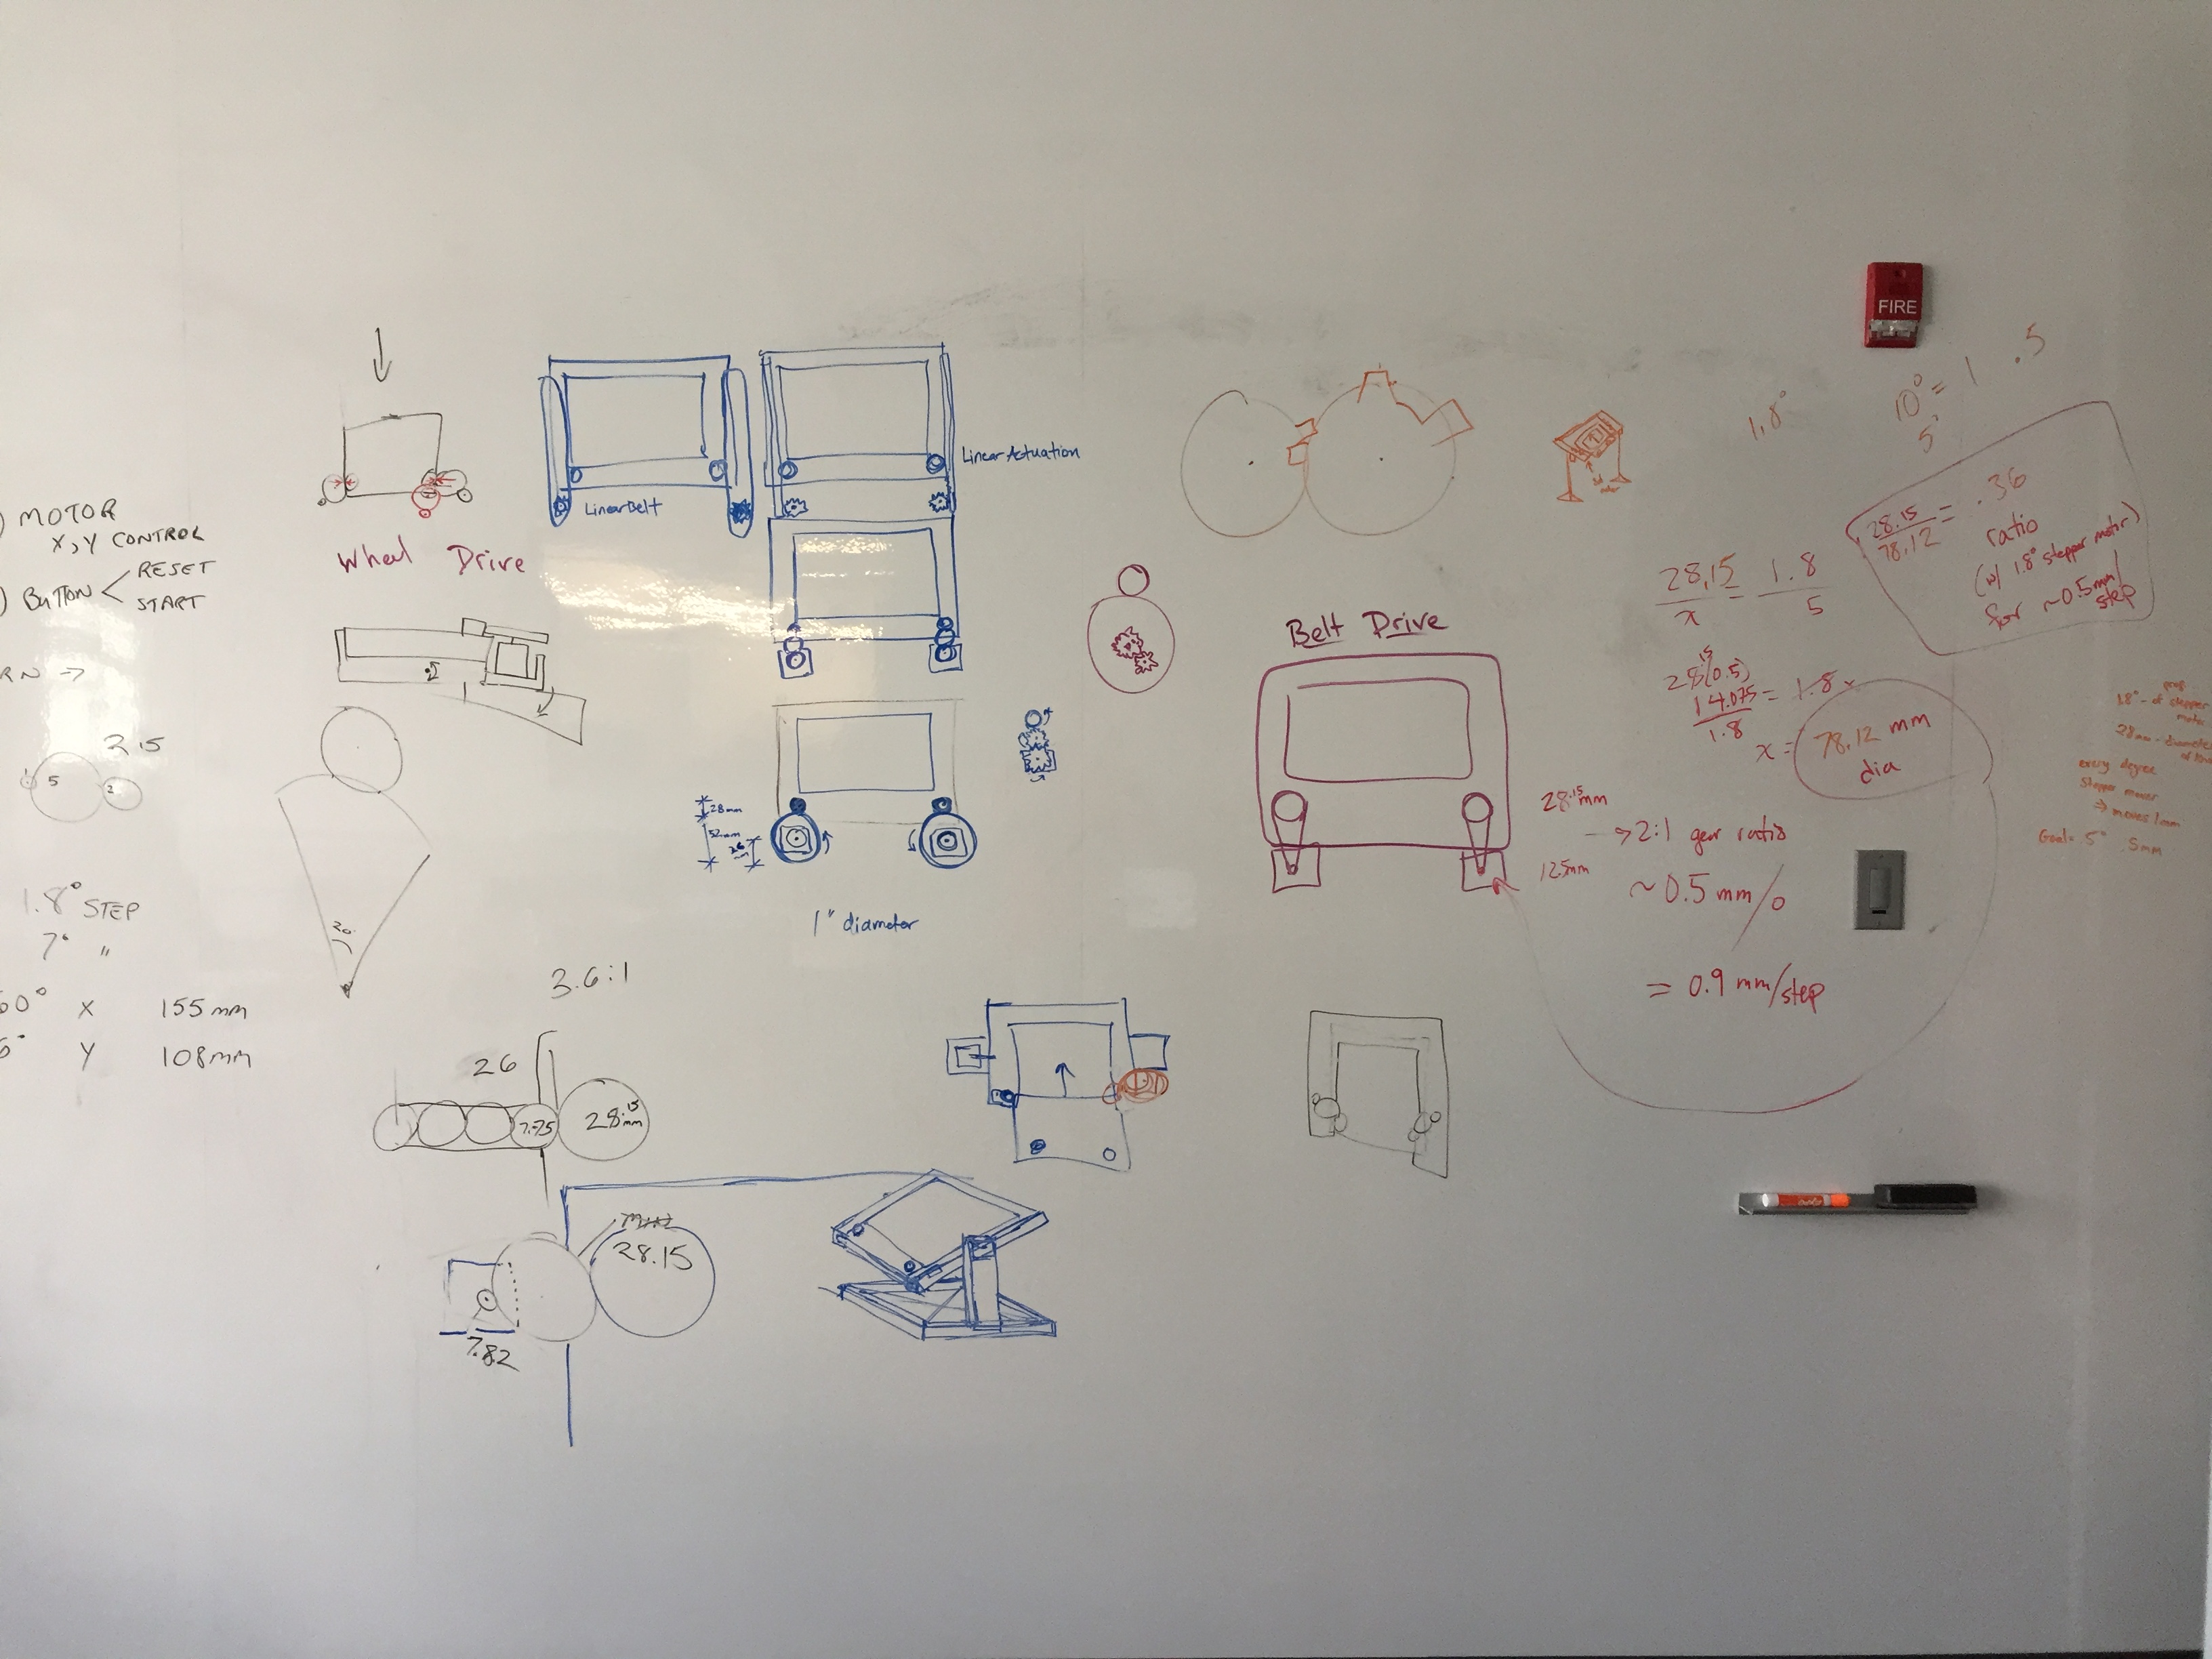
I started the program process by manually putting in code line by line. I was still getting use to gcode so this approached helped me understand the language and what terms did what. Also this was a good chance for us to see if out machine worked on the most basic level and answer questions like; If the motor goes through one rotation how far does the Etch-A-Sketch stylus move? The first couple of code I wrote was simple line codes.
Ex: g1 y5 f200
g1 x5 y0
g1 x0
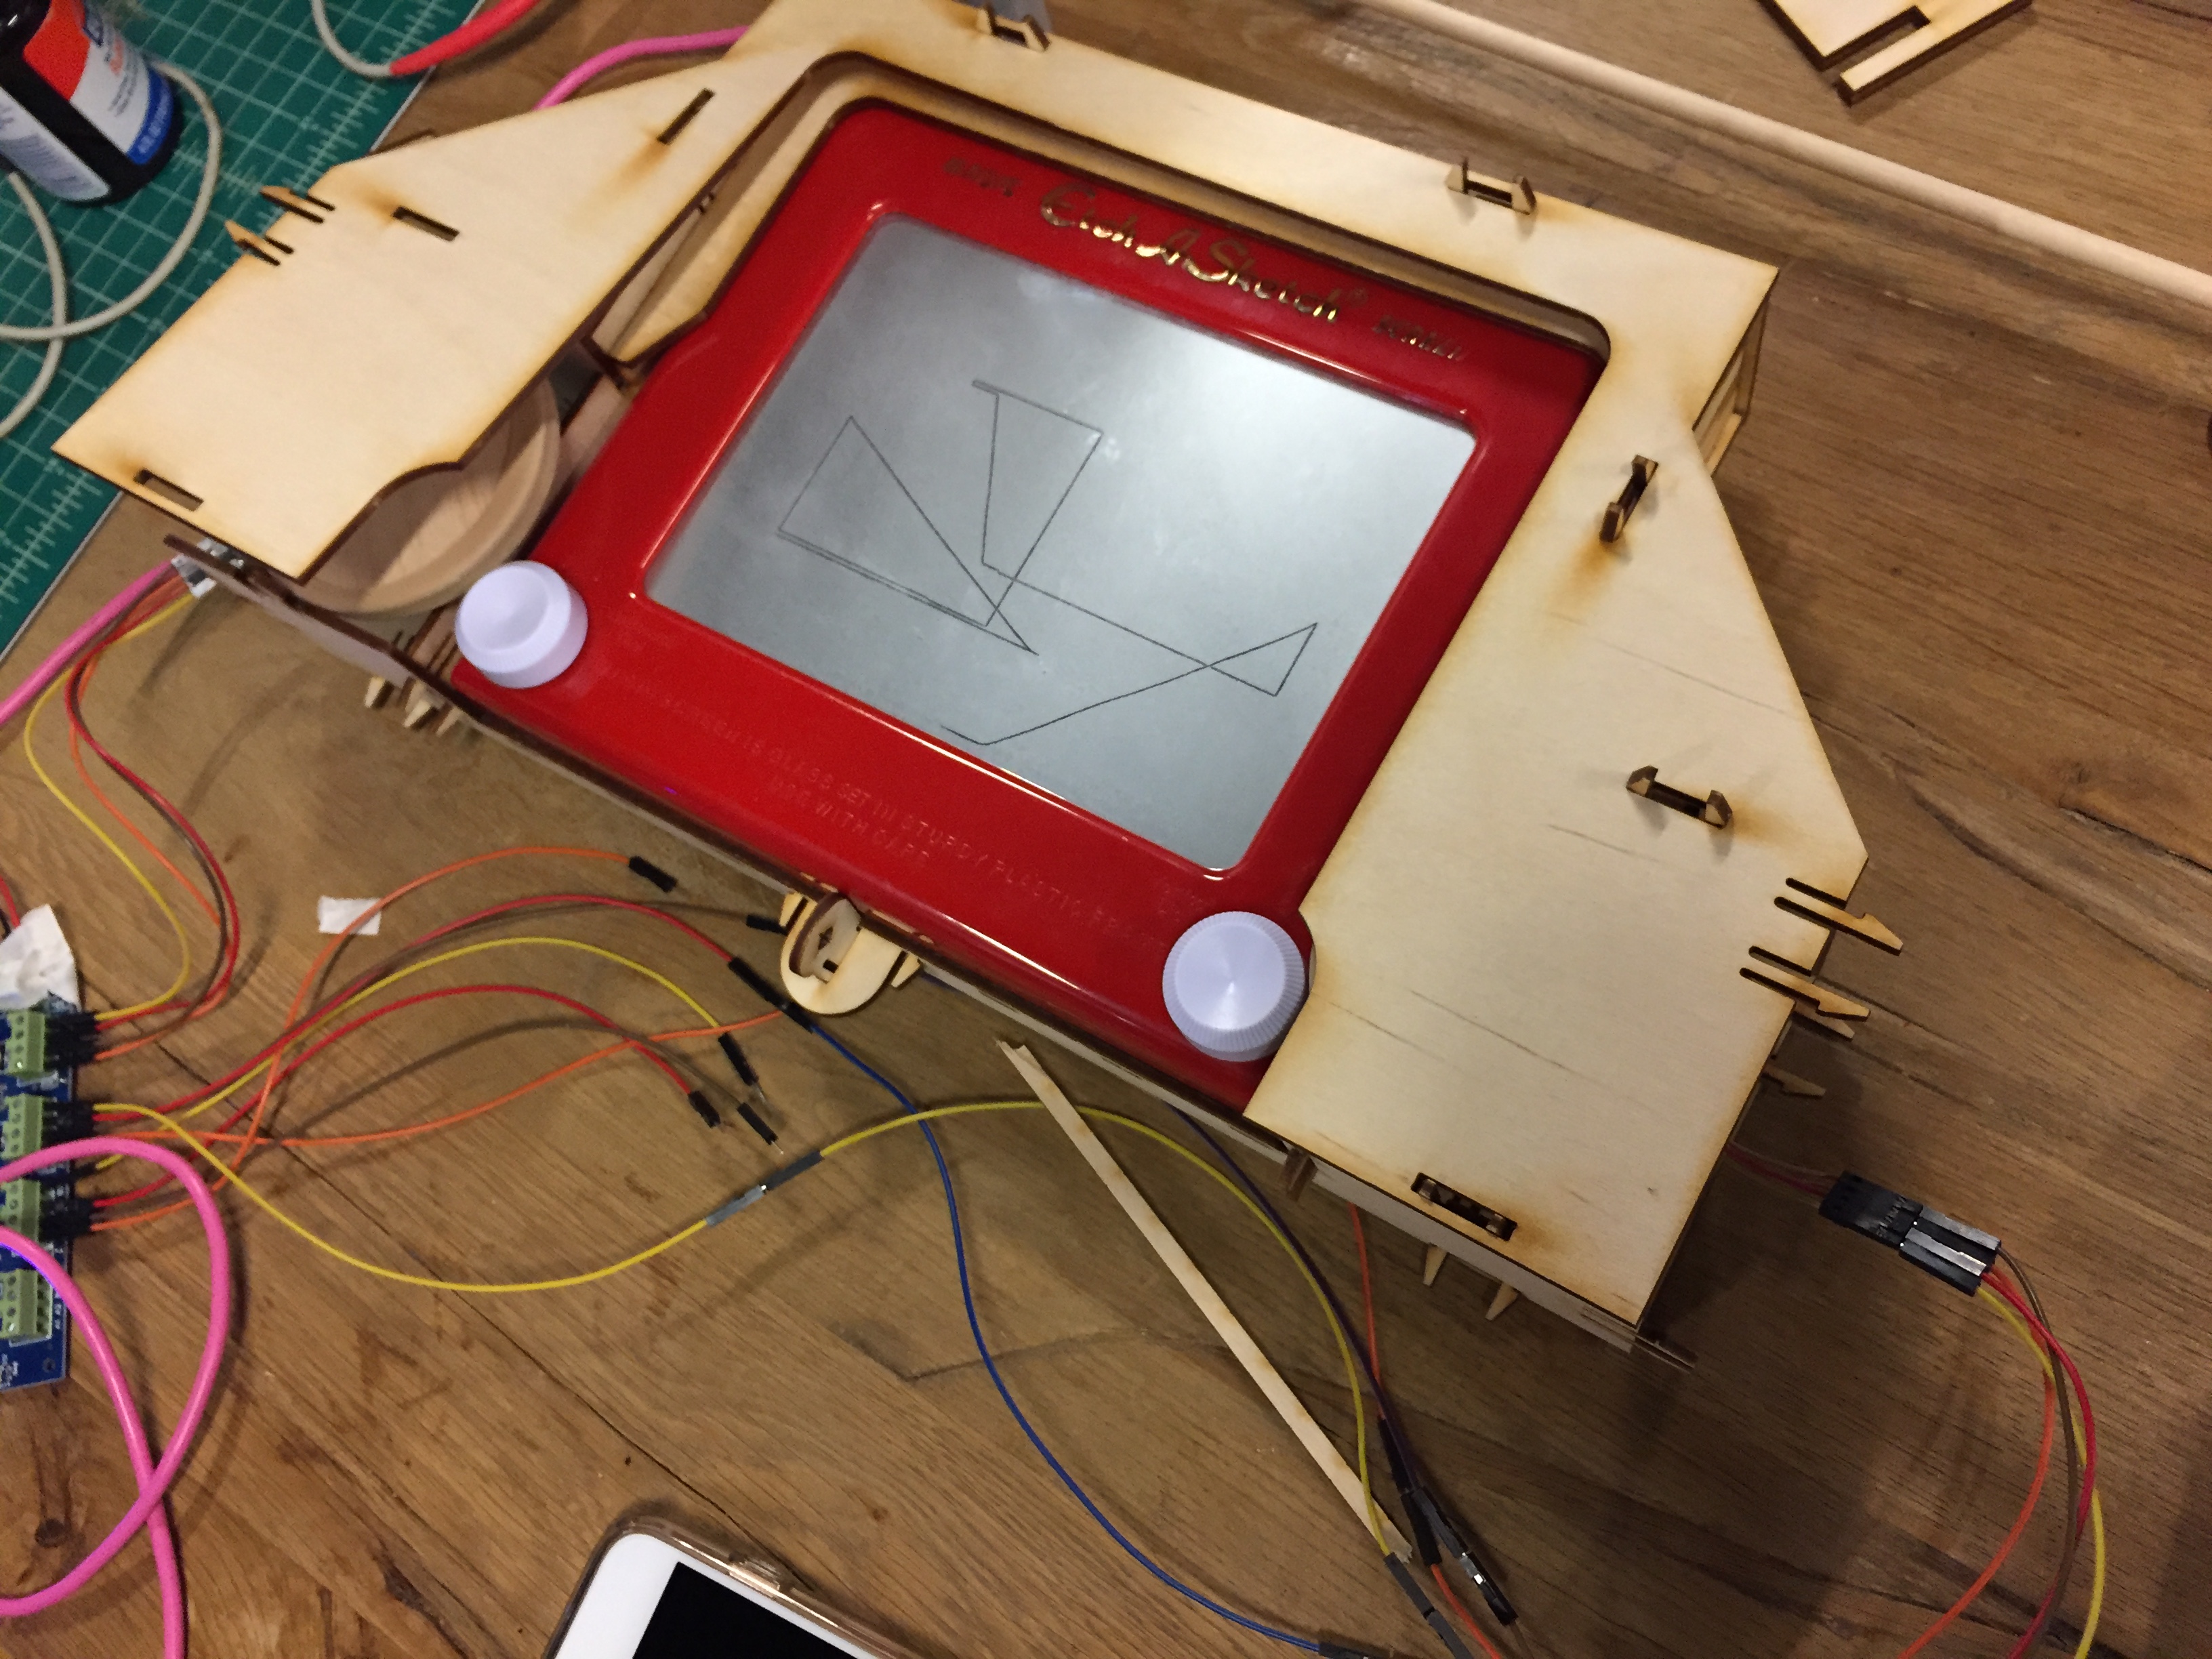
By theory the code above will produce a small right triangle but when we ran the code into the something else happened. The motors would move but they would surpass the Etch-A-Sketch boundaries relatively quickly. This was due to the fact that we haven’t calibrated the motors and TinyG to the dimensions of the Etch-A-Sketch.
|CALIBRATING|
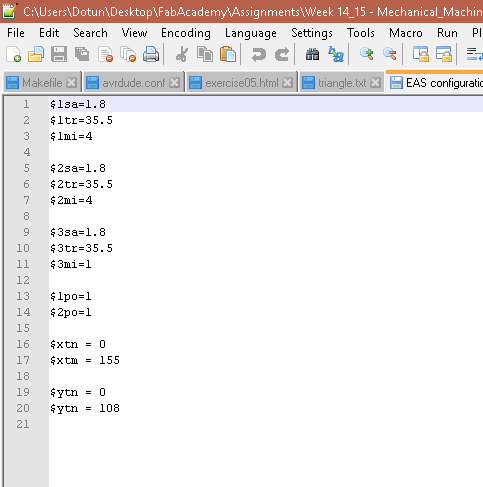
Calibrating the TinyG was pretty straightforward thanks to this great document found on the TinyG wiki page. After reading up on how to configure the TinyG, I figured out the main motor settings I had to focus on for our project were:
$1sa = Step Angle
$1tr = travel per revolution
$1mi = microsteps
$1po = polarity
$xtn = travel minimum
$xtm = travel maximum
The value I put in for the step and angle and travel per revolution were values received from the calculations that the group did in the earlier stages of the project. Microsteps refer to how many microsteps you want per whole step. Polarity determines the direction of the motors. This is helpful in case you wire the motors backwards and instead of rewiring you can just switch the polarity. Travel minimum and maximum act as limiters and can be used to set boundaries.
I wrote a quick configuration gcode file that can be imported into CoolTerm to configure the TinyG on the fly.
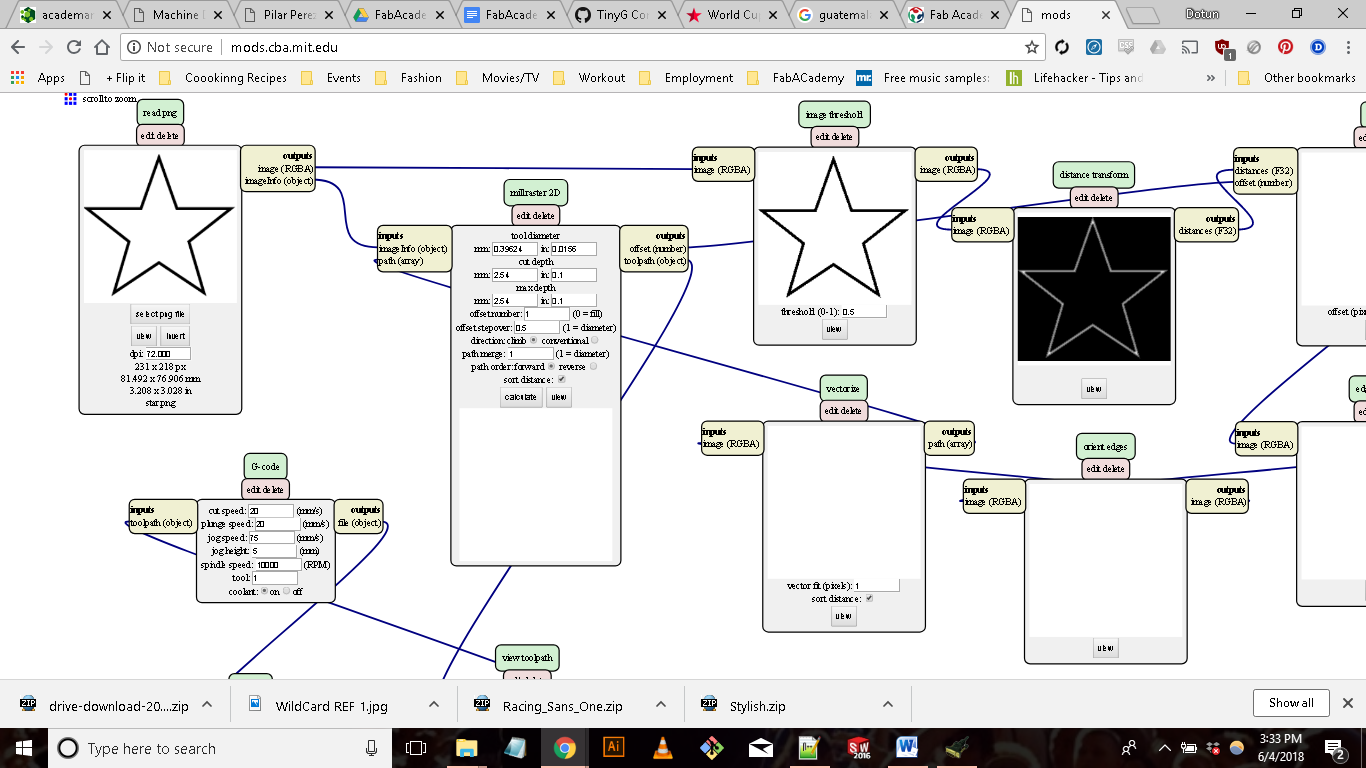
With the TinyG calibrated we were ready to start sending images to our Etch-a-Sketch. At this point the question was what would be the best way to send images to our machine. We had a few options. One option was to using Chillpepper (http://chilipeppr.com/) to control load and control our motors. Chillipepper is a hardware fiddle, meaning it is a website that lets you easily create a workspace to fiddle with your hardware from software. Chillipepper allows you to load gcode and program the motors directly from the site. We attempted using Chillipepper but ran into many problems. We couldn’t really figure how to effectively interface between Chillipepper and our TinyG board. So instead we decided to look for a different option. Emily St. Germain did a great job on figuring out how to convert images to gcode using MODS. All we had to do is open mods> G-code: mil 2D png and load our desired png into MODS. Once the image is loaded you can save the G-code file directly off of MODS. Next we opened Coolterm and loaded the fle and ran the file. It was a success! The Etch-A-Sketch drew the star within the boundaries of the sketch which is a big improvement.
I’m happy with what we were able to accomplish as a team in with two weeks. At the moment there are a few improvements that can make the machine better. In the future we hope to have a sturdy machine that you are able to load in any Etch-A-Sketch and create art with. We also were talking about implementing an automated erasing function to the machine.