3D Scanning and Printing
01
Asigment
Group Assignment
Test the design rules for your 3D printer(s)Individual Assignment:
design and 3D print an object (small, few cm) that could not be made subtractively and 3D scan an object (and optionally print it)
Resource
Download File
Group Asignment
02
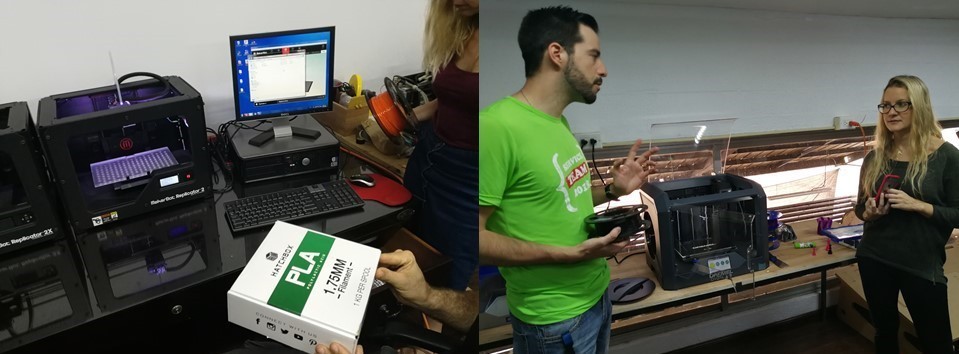
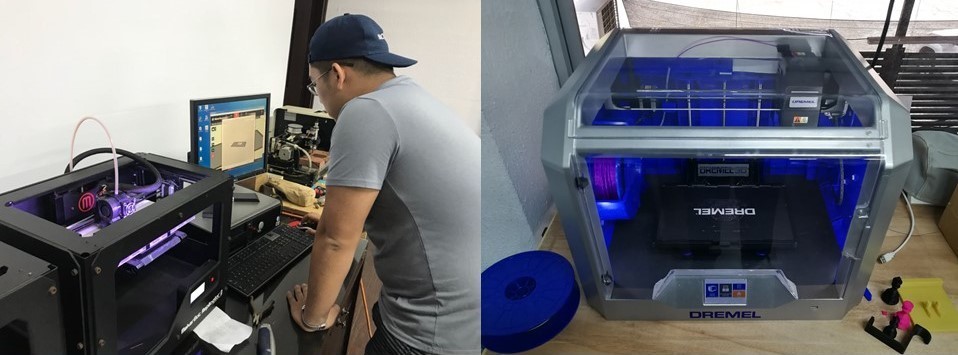
we had the explanation of the use of 3D printing by matthew director of the fablab where I explain that it was a somewhat old printer but it works perfectly since it was repaired and from the company DREMEL that gave us the help and donation of a printer to fablab .
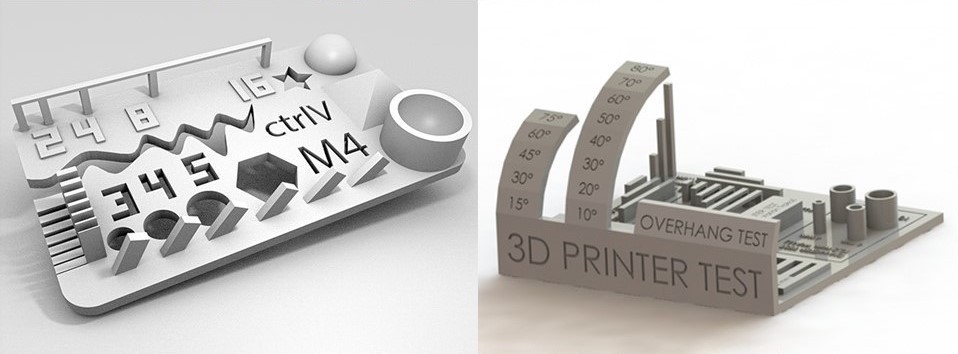
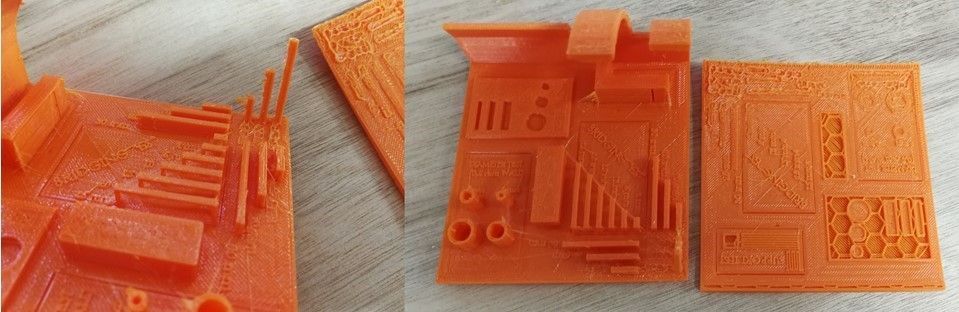
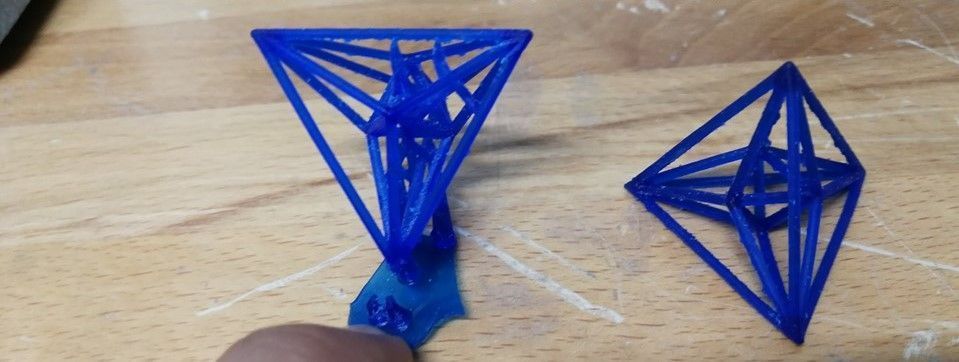
For the printing test we have used two 3D objects to see the print quality as angle, geometrical shape, letter, bridge and thickness. These two 3D models are downloaded from the Thingiverse platform ( models # 1 and model # 2).
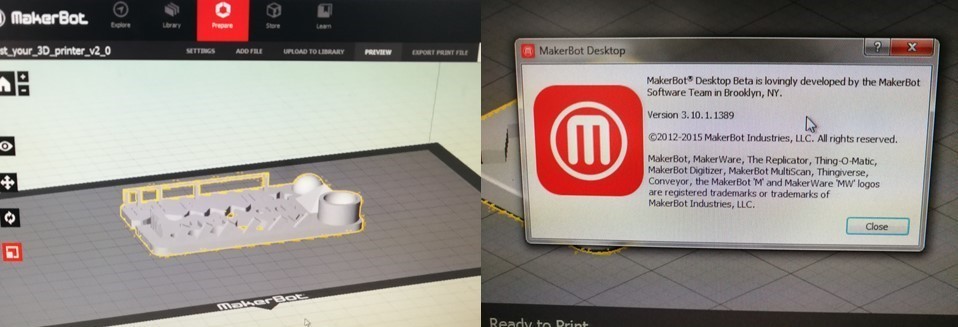
I was also watching because the makerbot printer uses a program of them but in beta version and it is because the new printer allows to work in connection to internet or wifi which the new program is in the cloud and does not allow extracting the file to save it in the memoris sd.With the donated printer from dremel company is a 3D40 model where if you accept internet connection, but you had no problem with it and it has not been put into operation but they did the explanation. since it already had a file in the memory of the same printer, it was put to print and the material that was used is nylon.
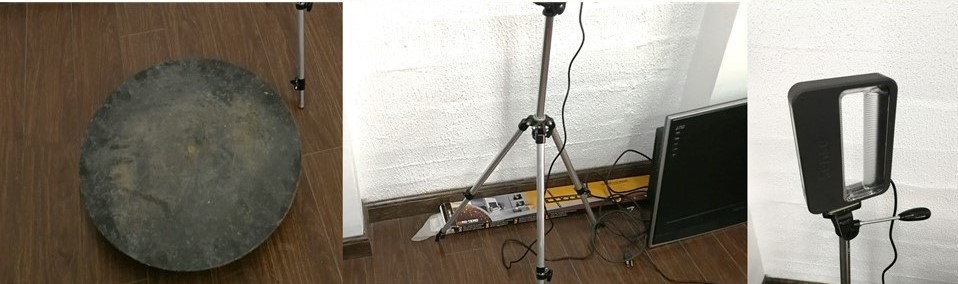
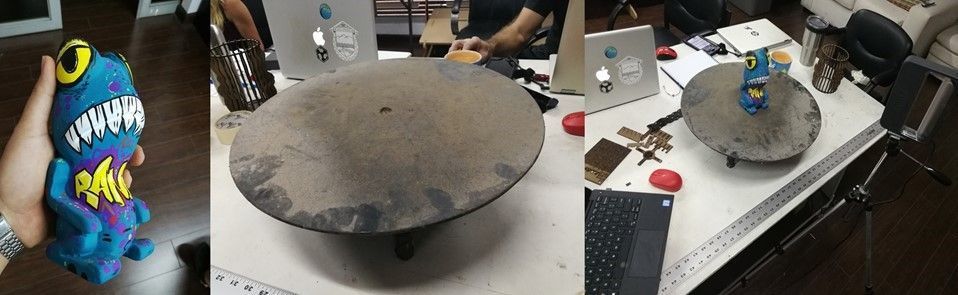
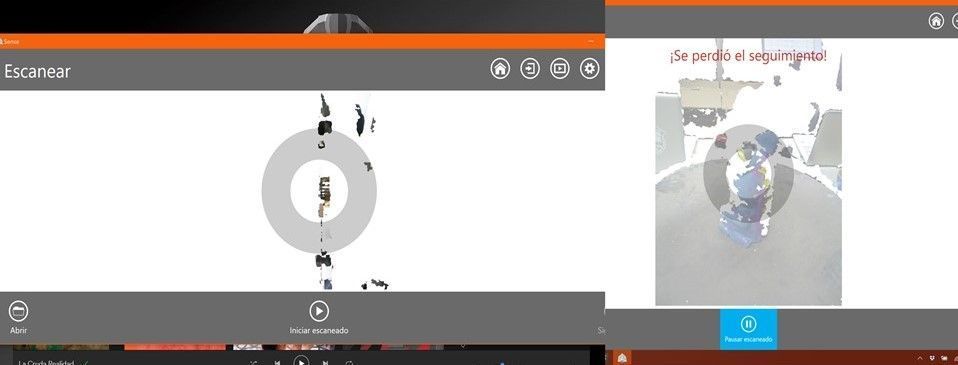
for the scan assignment we use a rotating platform, tripod, and the SENSE scanner
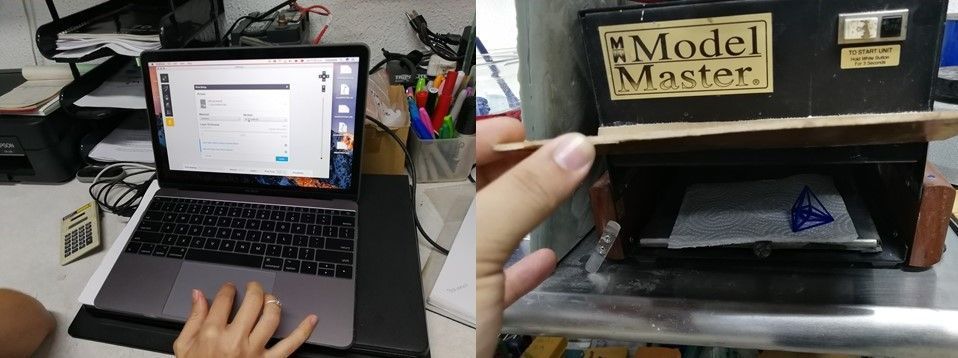
with the downloaded file we have put it in the makerbot program. the program is old only for old printer models that use usb cable or sd memory.
in the configuration section of the program you have two options, the personalization and the fast one. for this test I use the customization where the raft, support and infill option is disabled to determine the total rigidity of the piece.
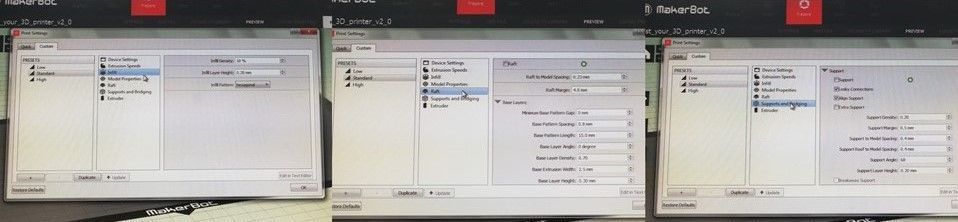
Once the print configuration is done, we click on the preview section and it is there where it indicates the amount of material that is needed and the printing time. You can also visualize the layer and printing process.
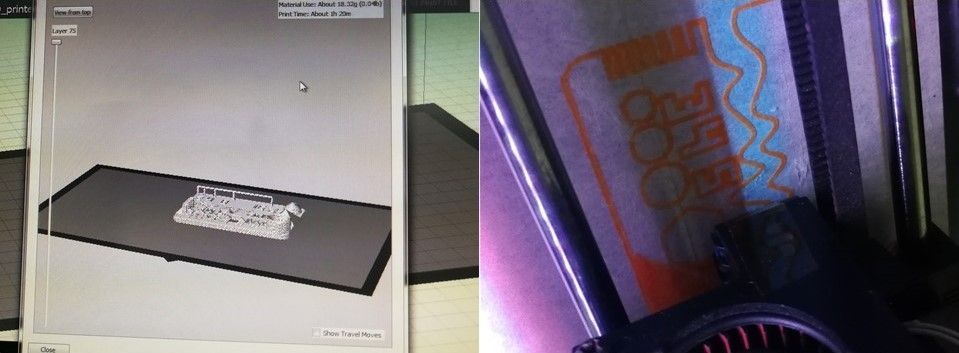
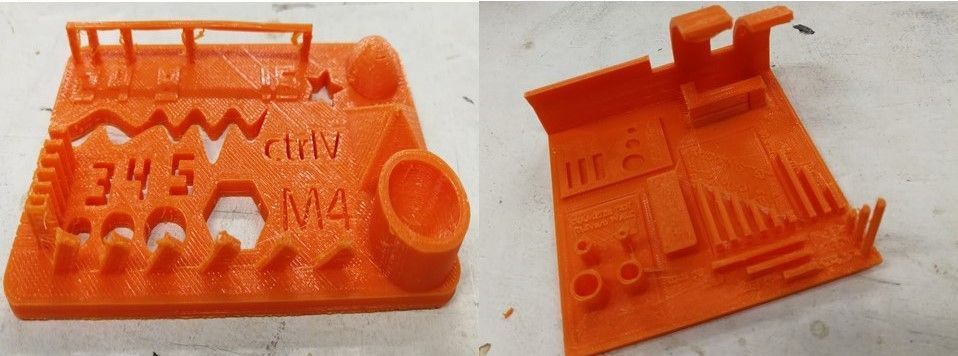
The images shown above and below is the result of the impression. for the model # 1 it was printed well without any difficulty instead with model # 2 it had to be reprinted because it got up from the plate. In addition, model # 2 had more surface imperfections such as plastic garbage.
Another explanation we had was the formlab printer that is a Stereolithography type that uses photosensitive resin has the same philosophy as an FDM printer but the other way around it uses a manufacturer's own program to be used and printed.
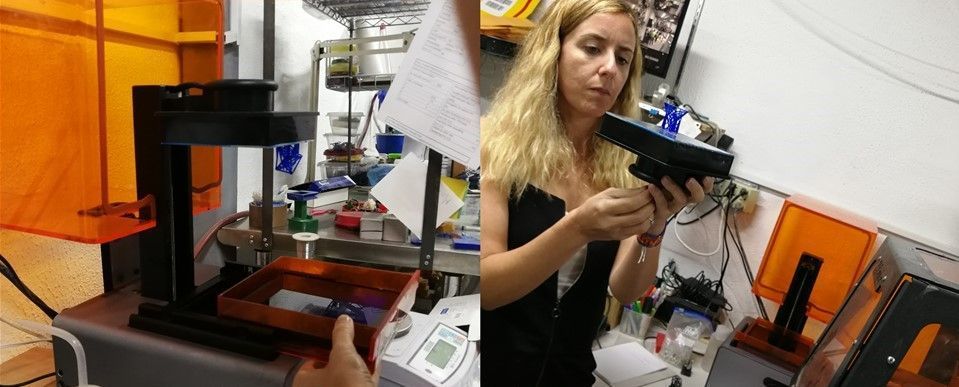
a 3D test model that was designed by monset to make a necklace was printed, the program makes the whole piece print with an angle of 45 on the plate and with support to make printing more efficient. also a cure chamber is used under ultraviolet light
Here we can see the difference between two pieces that were cured by ultraviolet light and the other not with support.
Individual Assigment
03
- 3D Scaning N Printing
for this assignment to scan something, I used a sculpture made by anuvis who is working on the fablab as a project. He made this sculpture by hand and drawing which there is no 3D digital design. use the rotating platform to do the scan because I have experience in using this type of ecanner where it is more feasible to use a base and tripod.
sense is the program that the sensor uses to perform the scan. which we must enter the sensor serial and the pin code to be able to use and that the program recognizes it also we must select which type of object we are going to scan object or person >> small, medium or large.
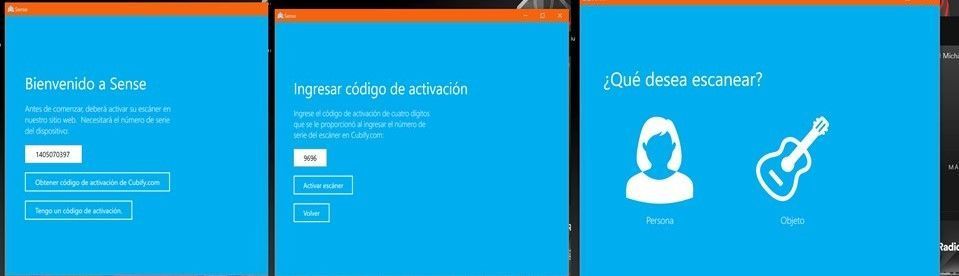
I selected small object and started to test the sensor and the base.
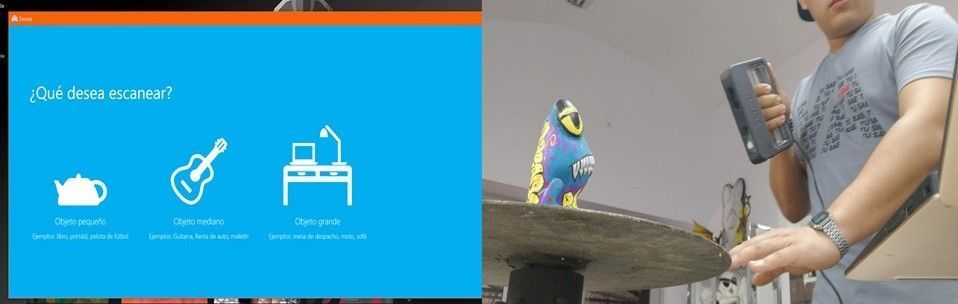
the object to be scanned can not have a shiny surface or white, silver or chrome because the software will not detect it.
once scanned the program shows that the object is hollow and not solid. for that you must click where it says create solid.
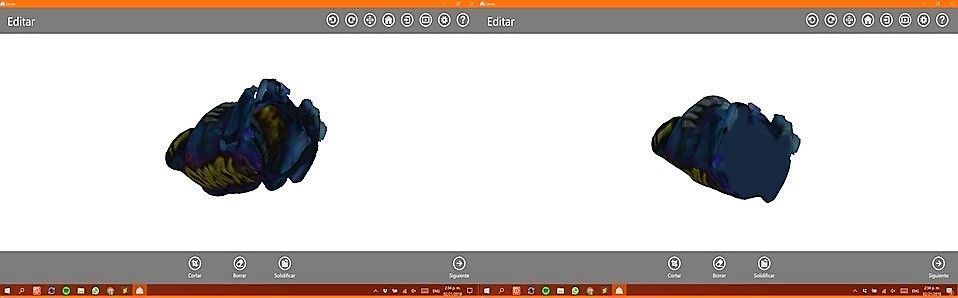
since the object is in the base, a part of the base has also been scanned for that the program allows us to erase unwanted part.

then the scanned object is exported or saved. and when opening the file to see how it is. the piece has some imperfections like hollow, not smooth surface.
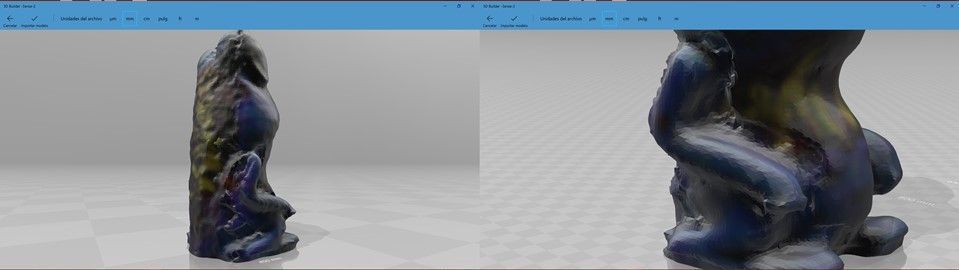
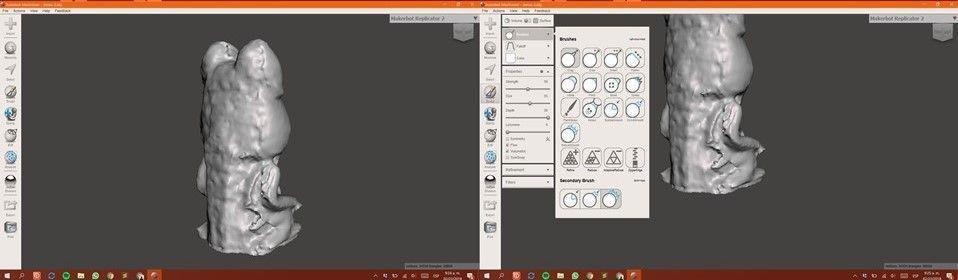
To make the corrections of the imperfections a 3d modeling program is used as meshmixer since it is easy to use.In the program has a variety of 3D modeling tool in sculpt such as depth, diameter, type and etc.
I have repaired the imperfections of the object like the area near the arm of the toad. and the final result is a smoother surface
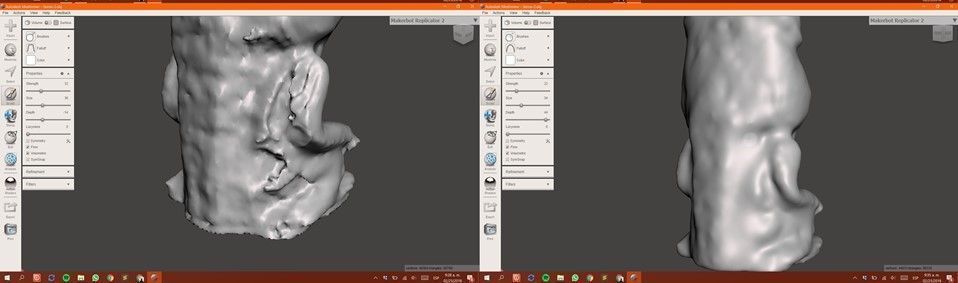
Here we can see the difference between the 3d model scanned the 3D model repaired.
and I've also designed a keychain with the mecamaker logo.importing an illustrator sketch in .dxf format.
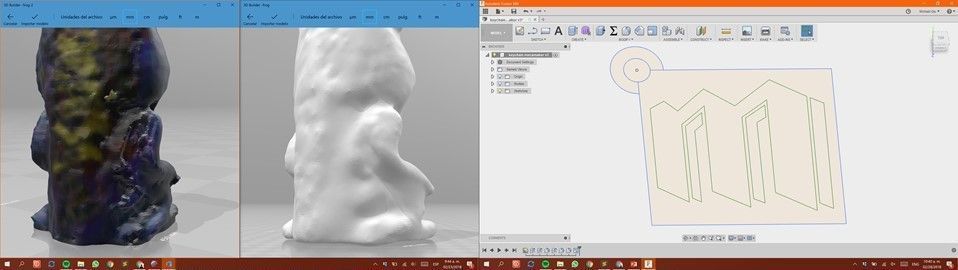
then it is extruded and filled it
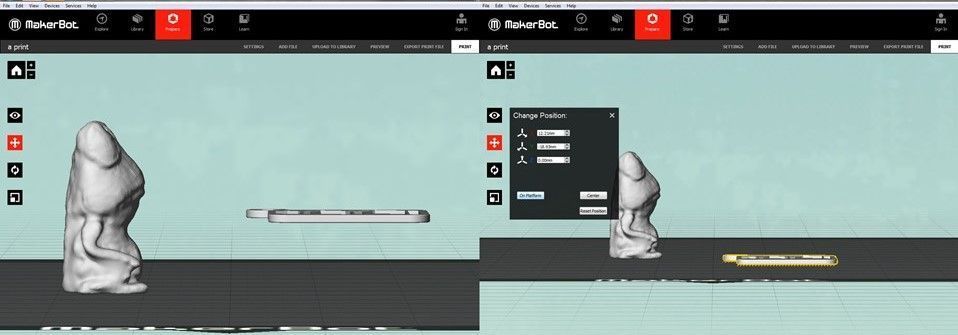
then it is imported into the makerbot program to be printed. but there was a problem with the keychain.
and the problem was that the keychain model is floating and re-positioned to the printing plate
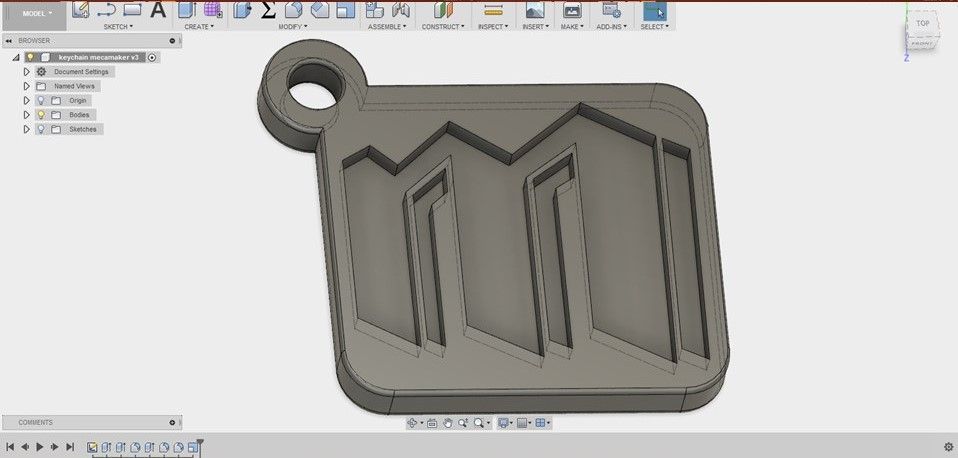
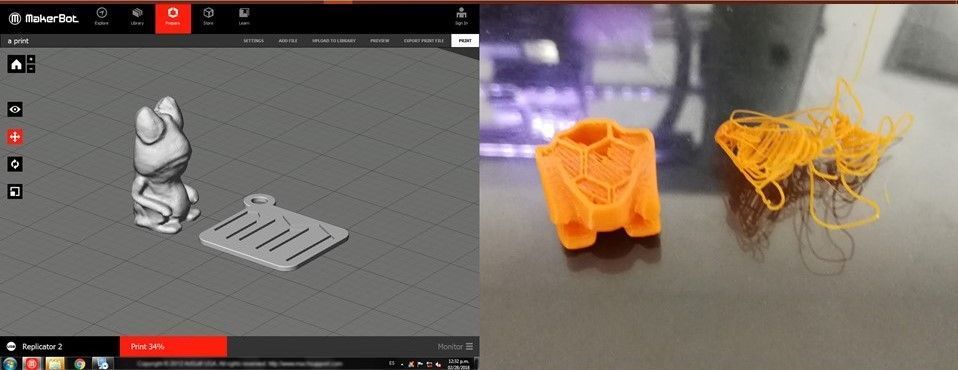
once printed the two models (the toad and the key ring) but the keychain came out very thin.
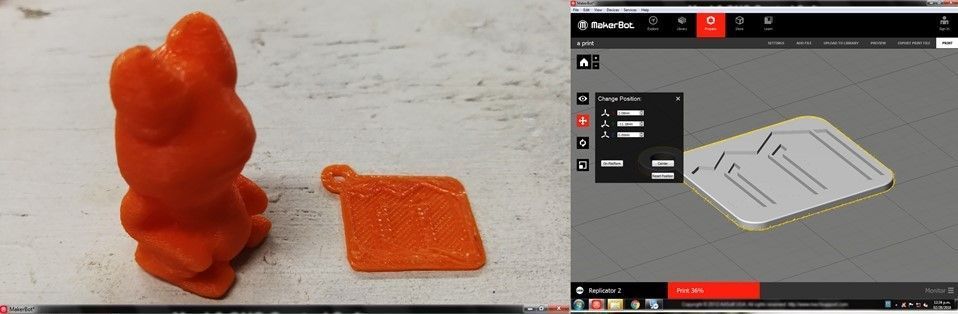
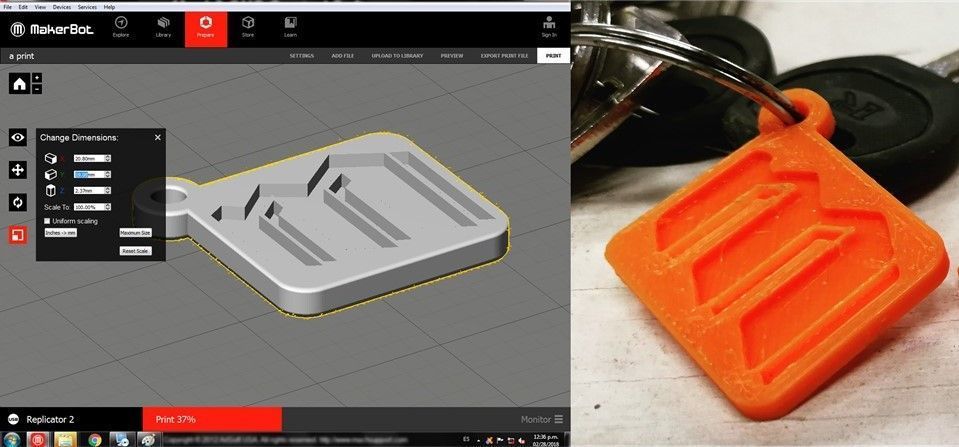
the thickness of the fusion model had to be modified 360 to 20mm of 10mm and then only the keychain was printed.
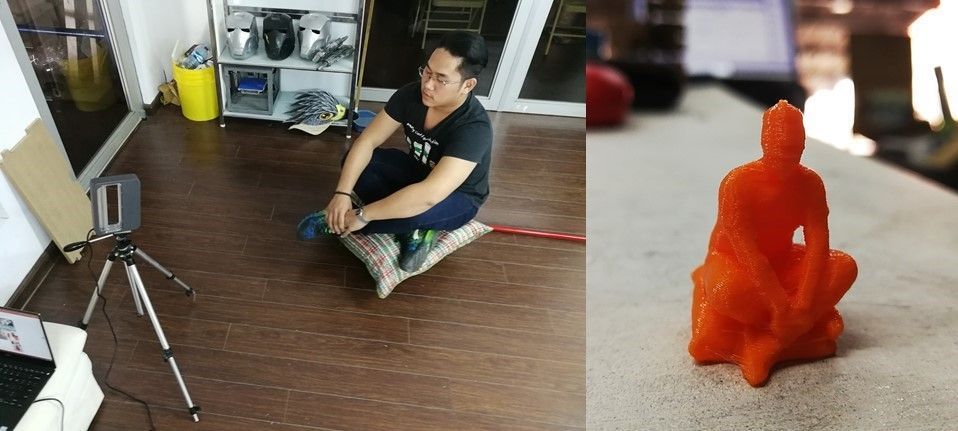
and I scan myself for fun! using the same step above. I sat on the rotating base and the scanner on a tripod and monset helped in scanning and rotating the base. Then I modified it in the meshmixer porgama and finally I printed it.
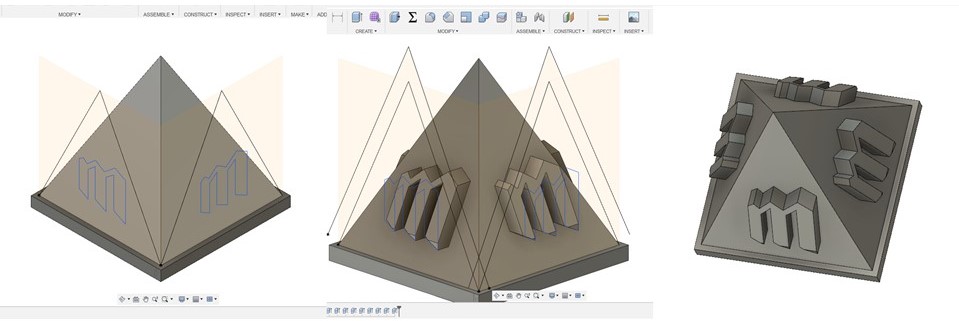
I have previously designed a keychain in which it can be made in laser cutting or in a milling and so design a pyramid with the same ¨m¨ logo since it has 4 sides with angles and reliefs where a laser cnc can not reach this freedom. cut like a cnc milling 3 axes.