Week 5
Design and 3D print an object, 3D scan an object
3D Scanning and Printing. Have you:
group assignment: - test the design rules for your 3D printer(s)
individual assignment: - design and 3D print an object (small, few cm3, limited by printer time) that could not be made subtractively - 3D scan an object (and optionally print it)
group assignment development
individual assignment
Described what you learned by testing the 3D printers
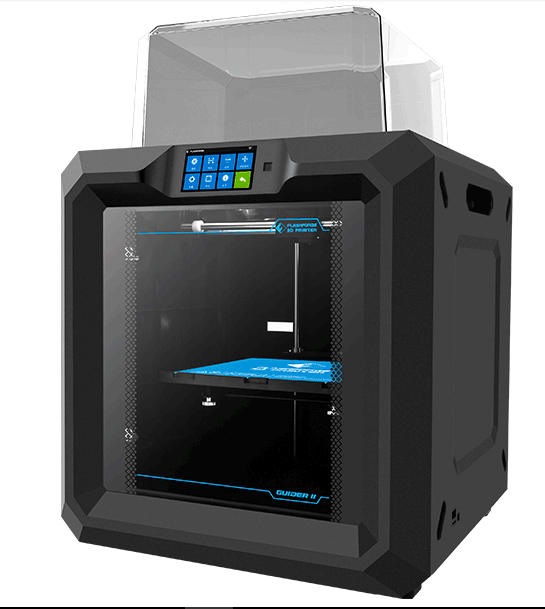
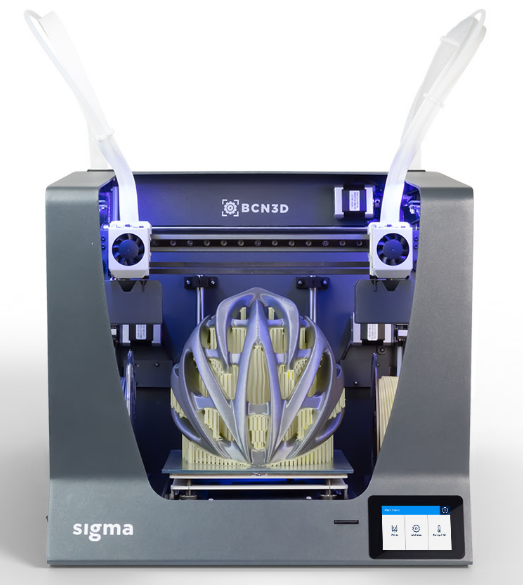
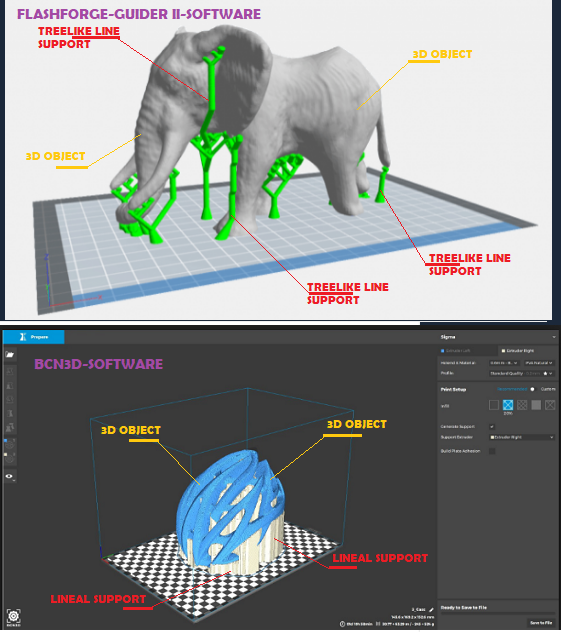
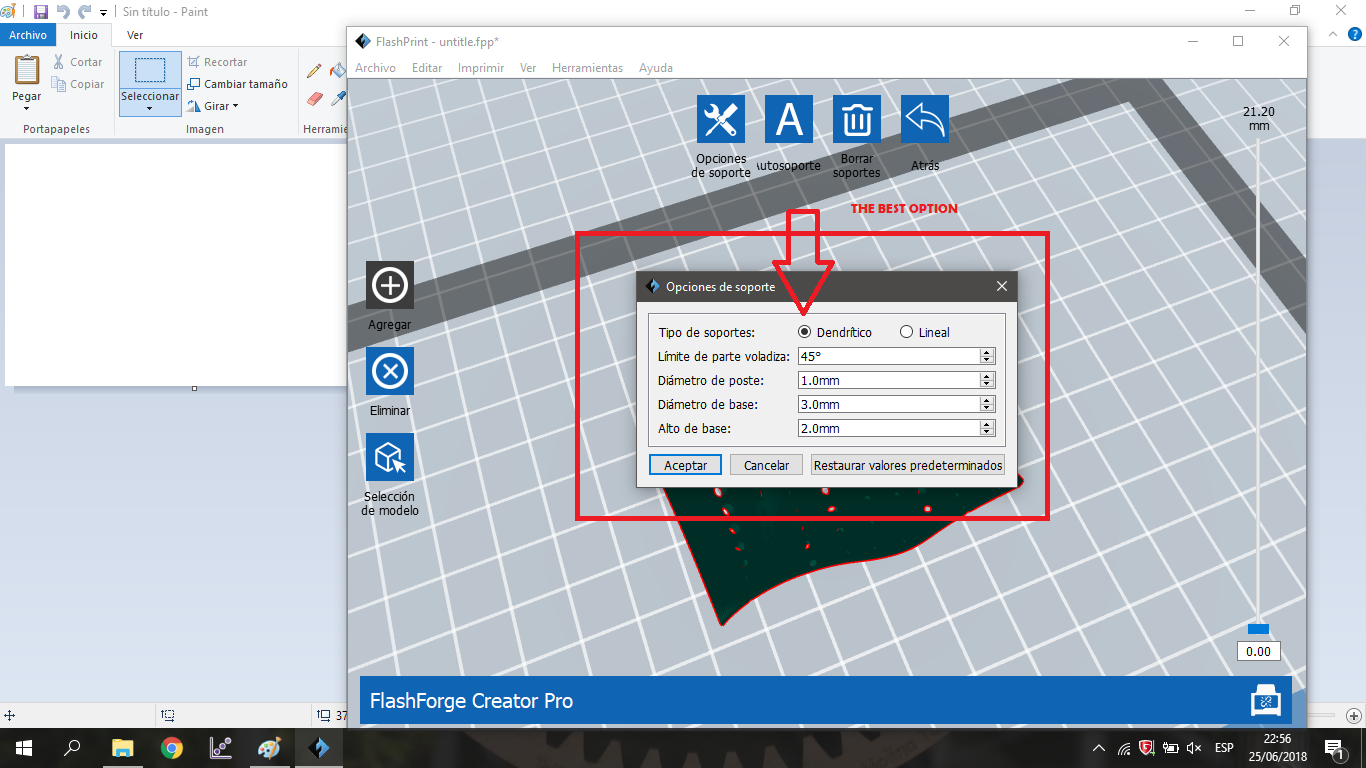
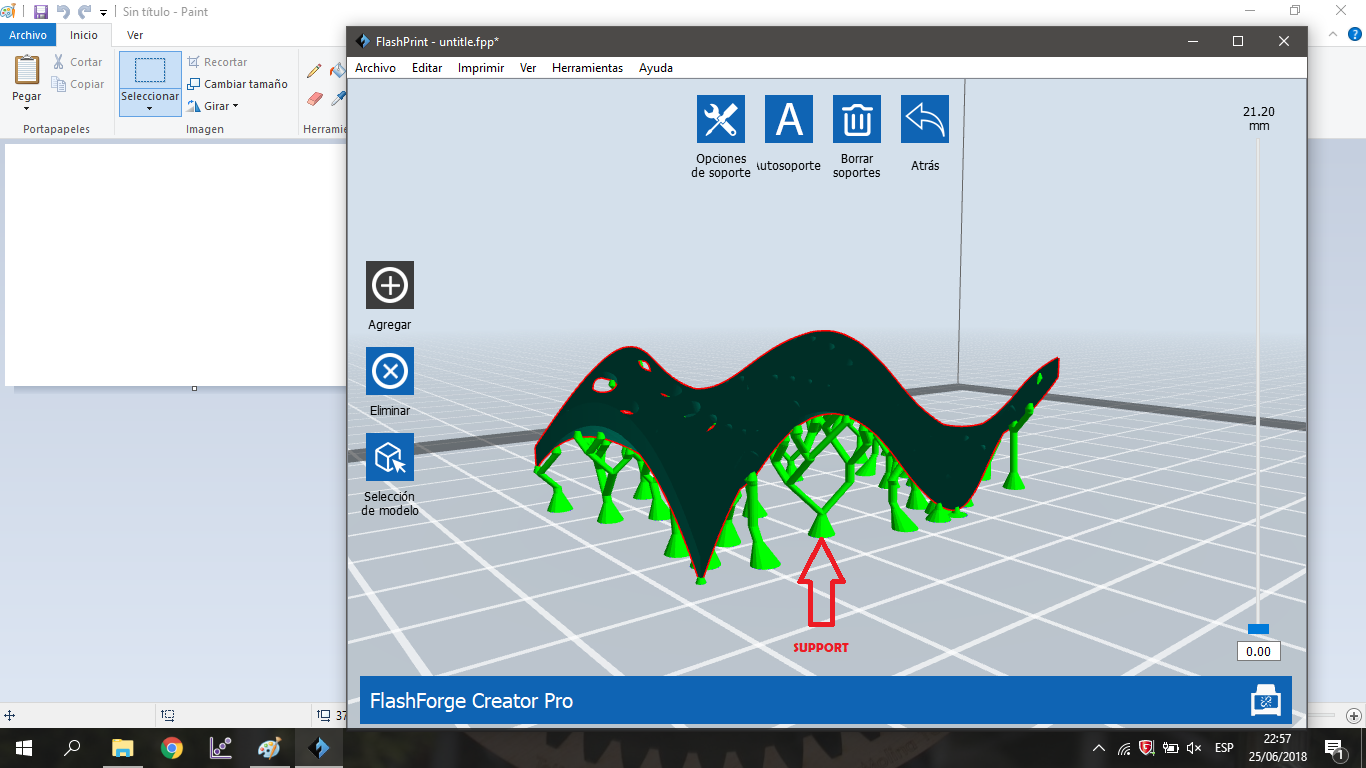
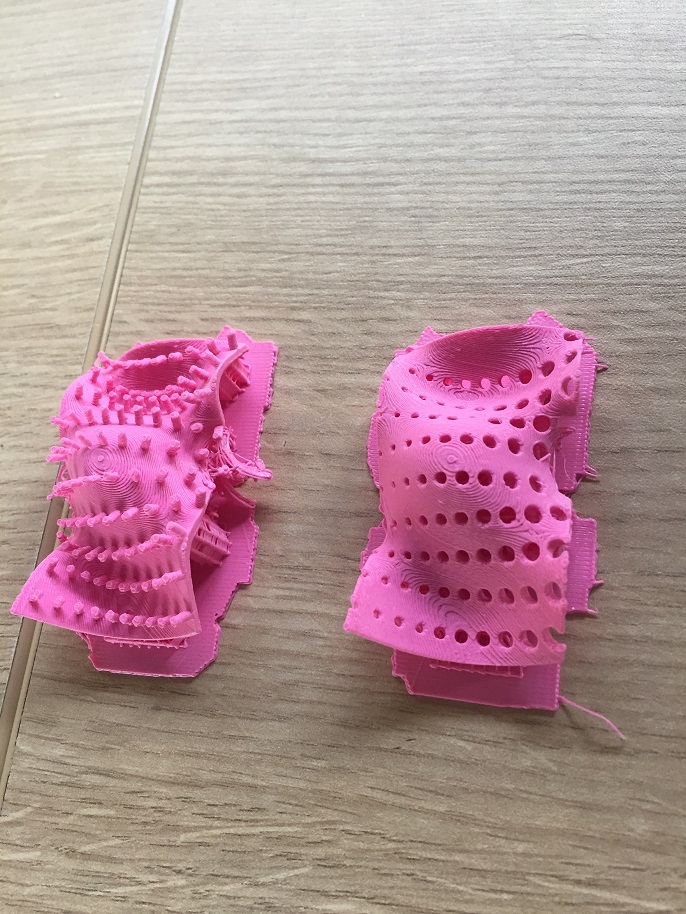
To print the pieces compare two 3D printers, the first is the Flashforge-Guider II, and the second is the BCN3D, both have a similar maximum print volume, but I find that the Flashforge-Guider II is faster. I also found a very important feature, is the support geometry that generates the Flashforge, the TreeLike line support is very useful to optimize the time of printing and cleaning. For my final work these two factors are important because they determine the viability of the structures to be printed. It is also very interesting how the Flashforge supports do not need to start at the base of the object to support material at different heights
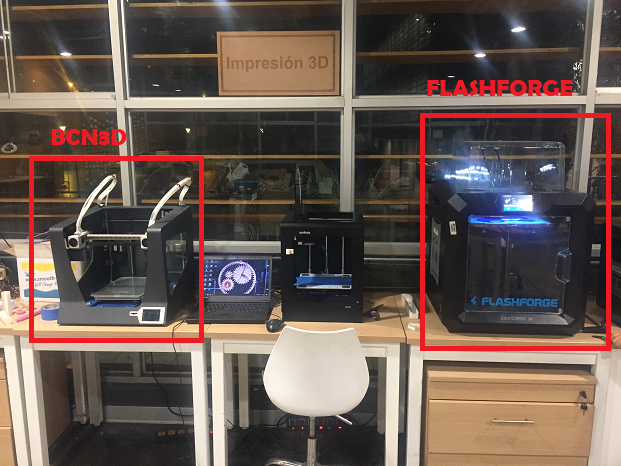
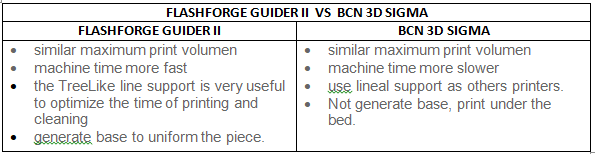
Comparison of the bcn3d with the Flashforge
Shown how you designed and made your object and explained why it could not be made subtractively
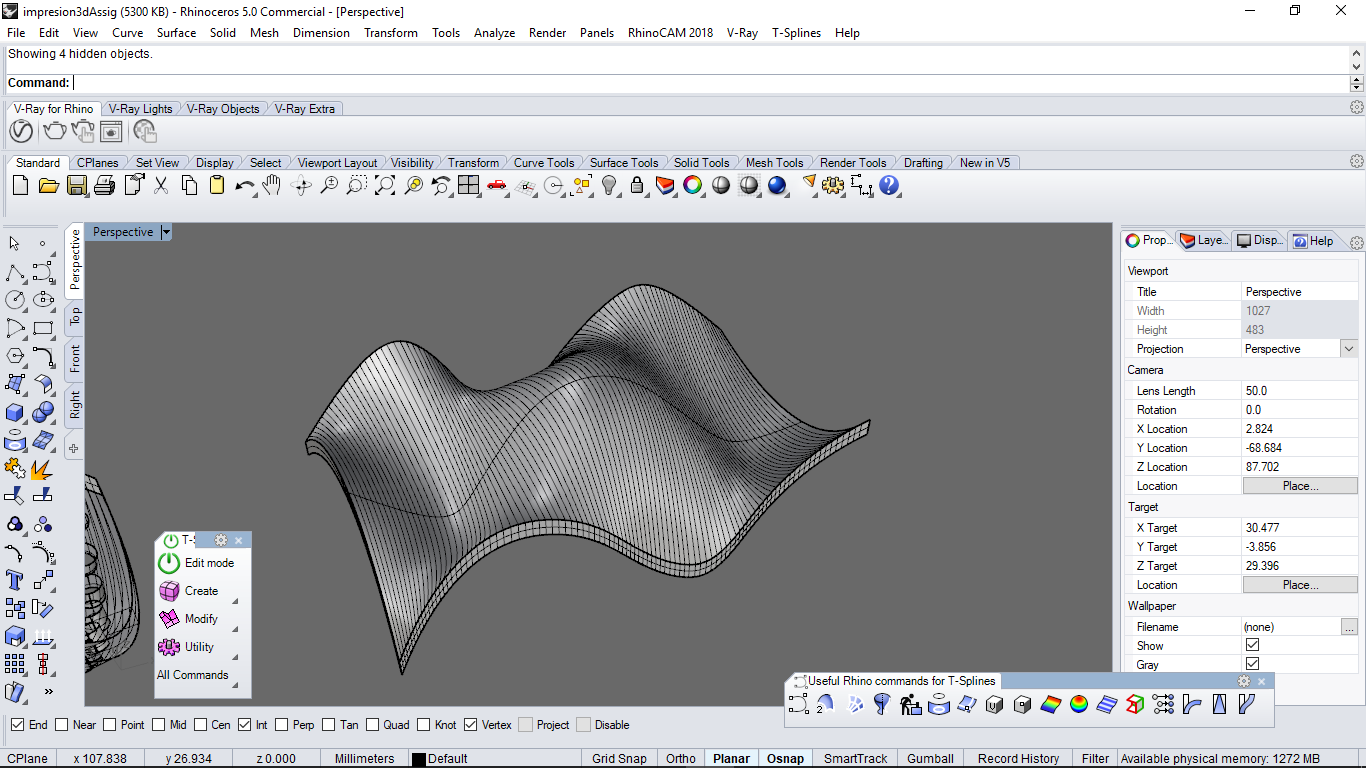
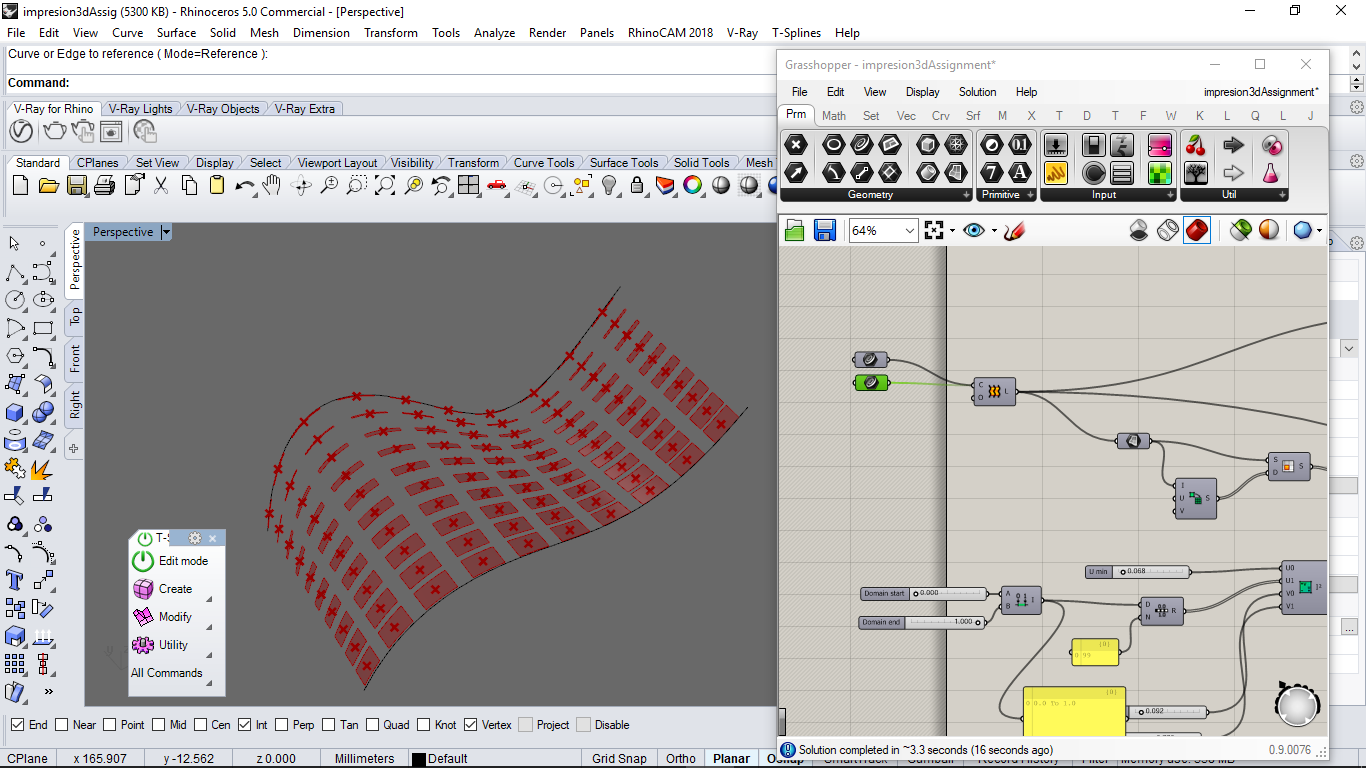
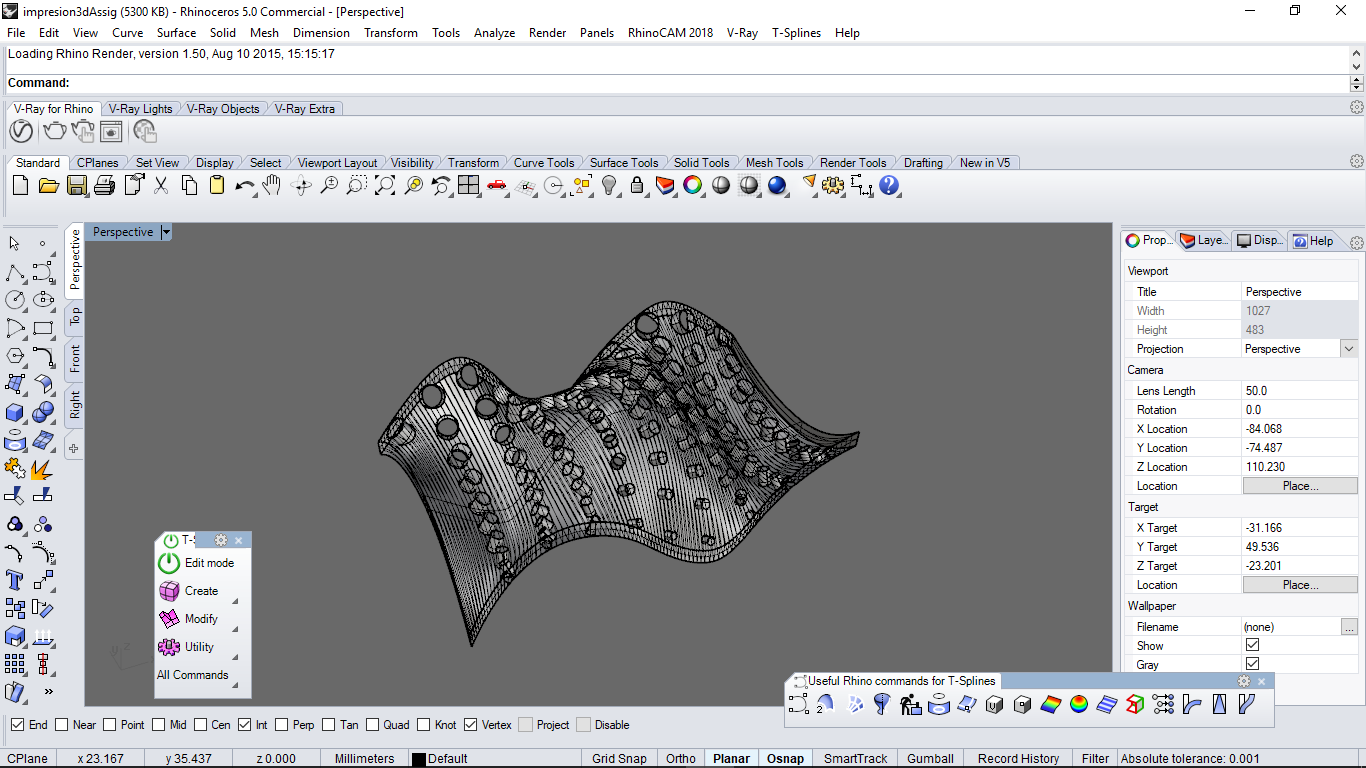
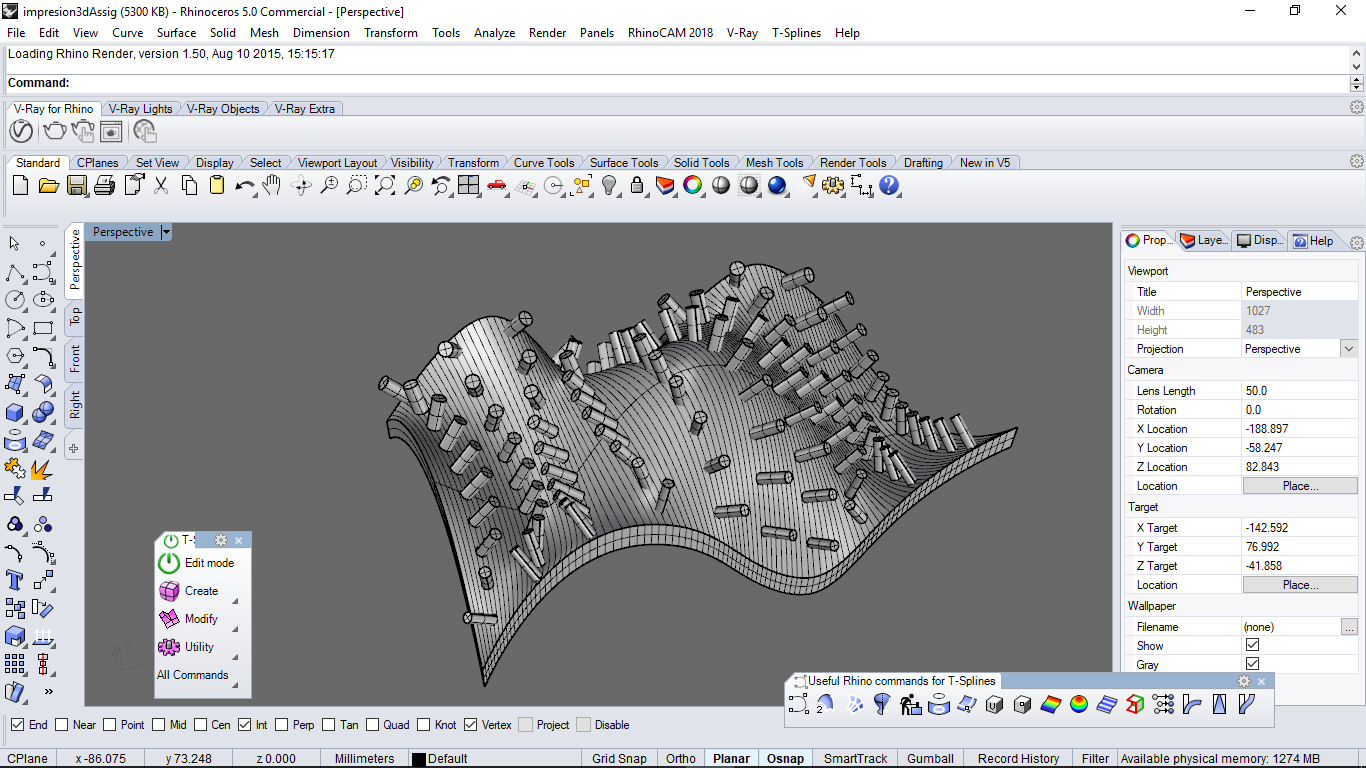
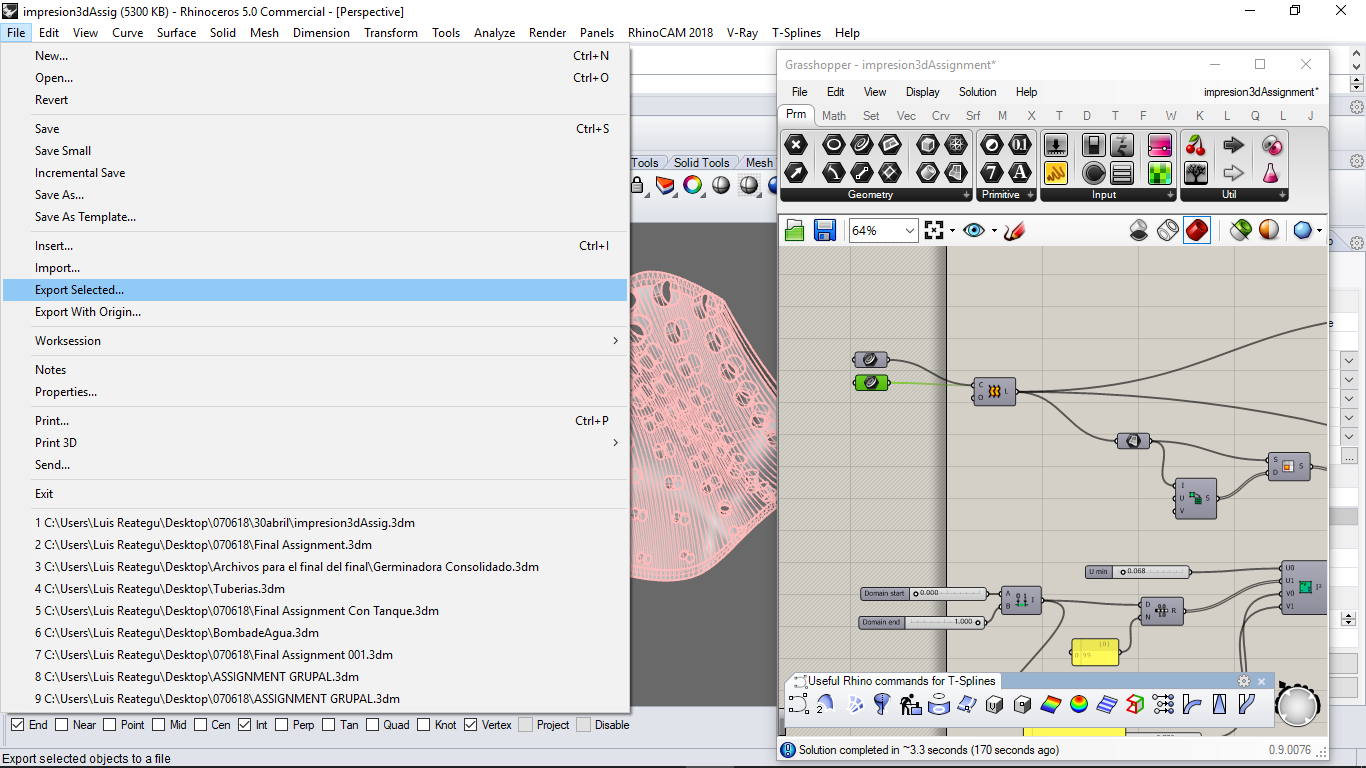
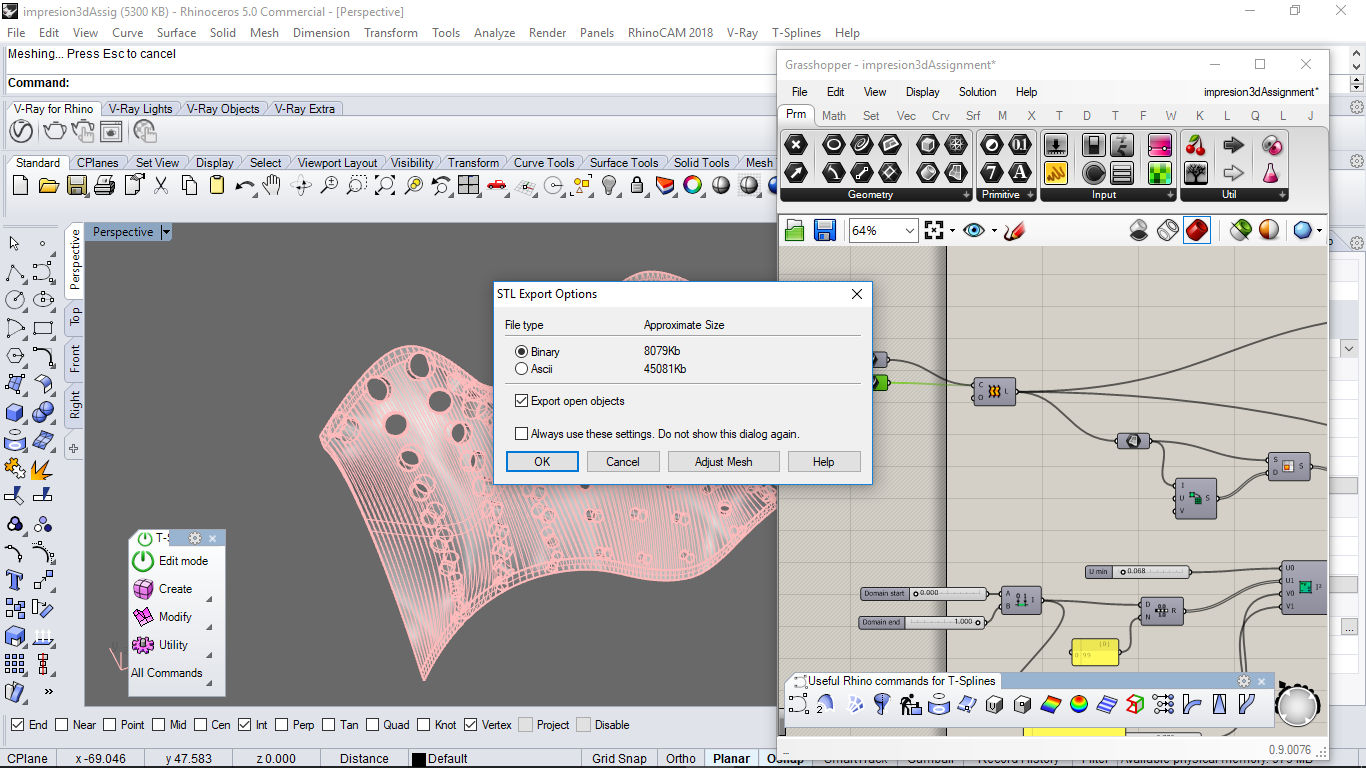
Design the Object in Grasshopper Parametric System and bake to Rhino3D
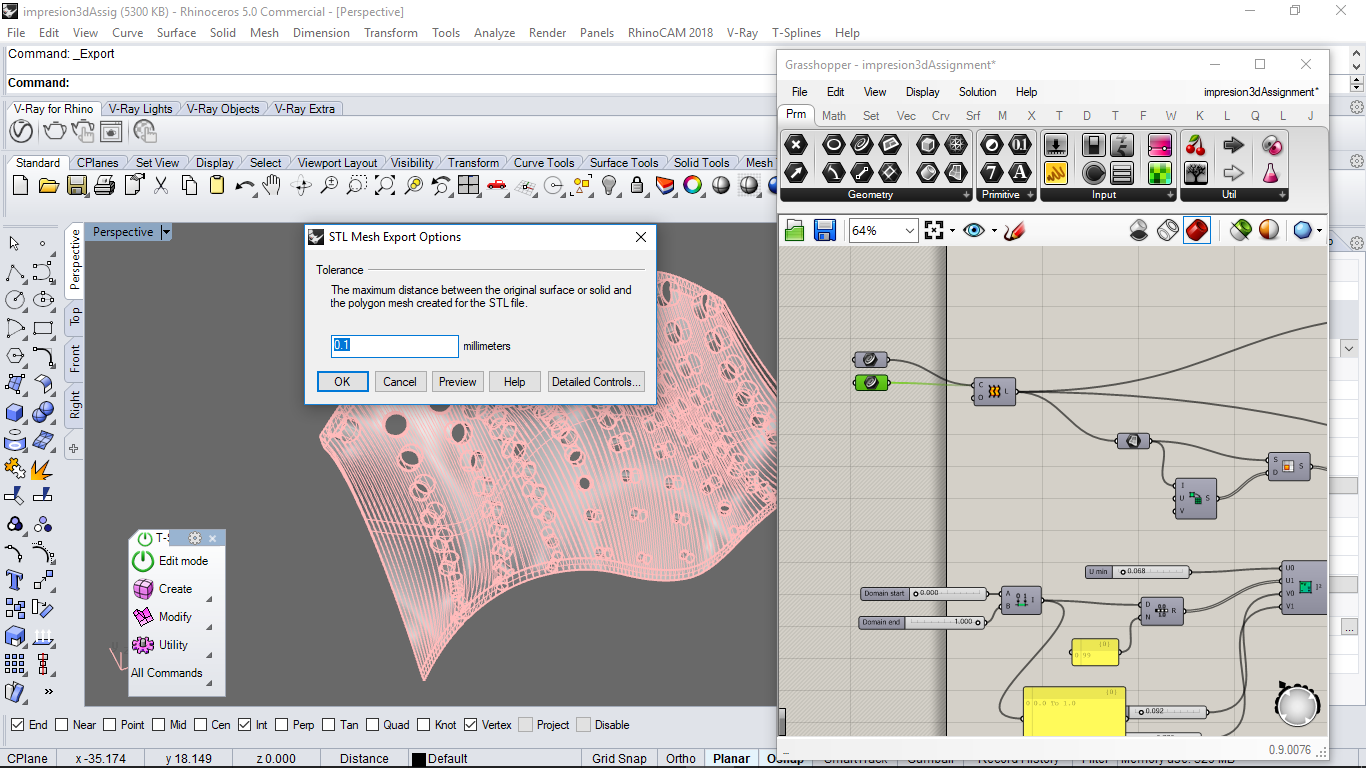
Export the Object to stl format with the following features:

Import the stl file in BC3D software to configurate it

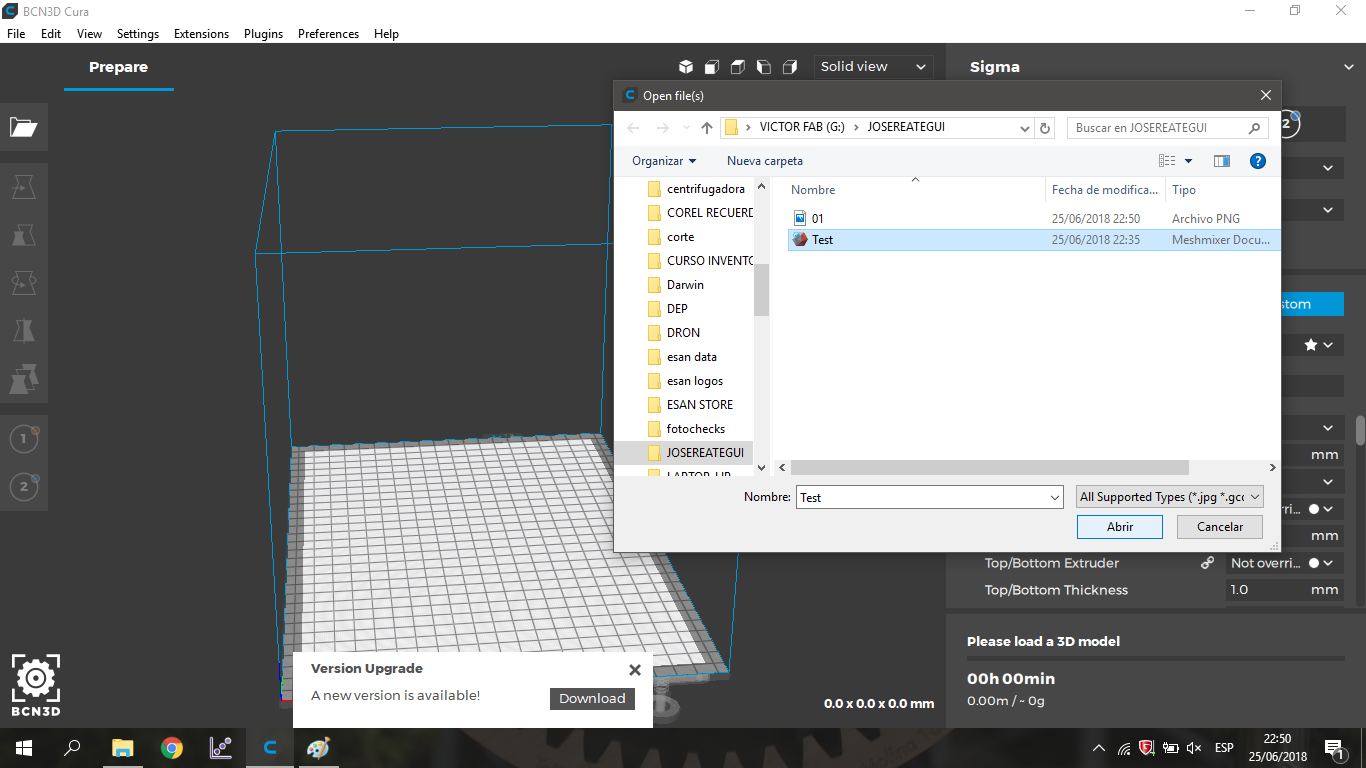
On the left side we have the modification panel, here we can move, rotate, scale the 3D object
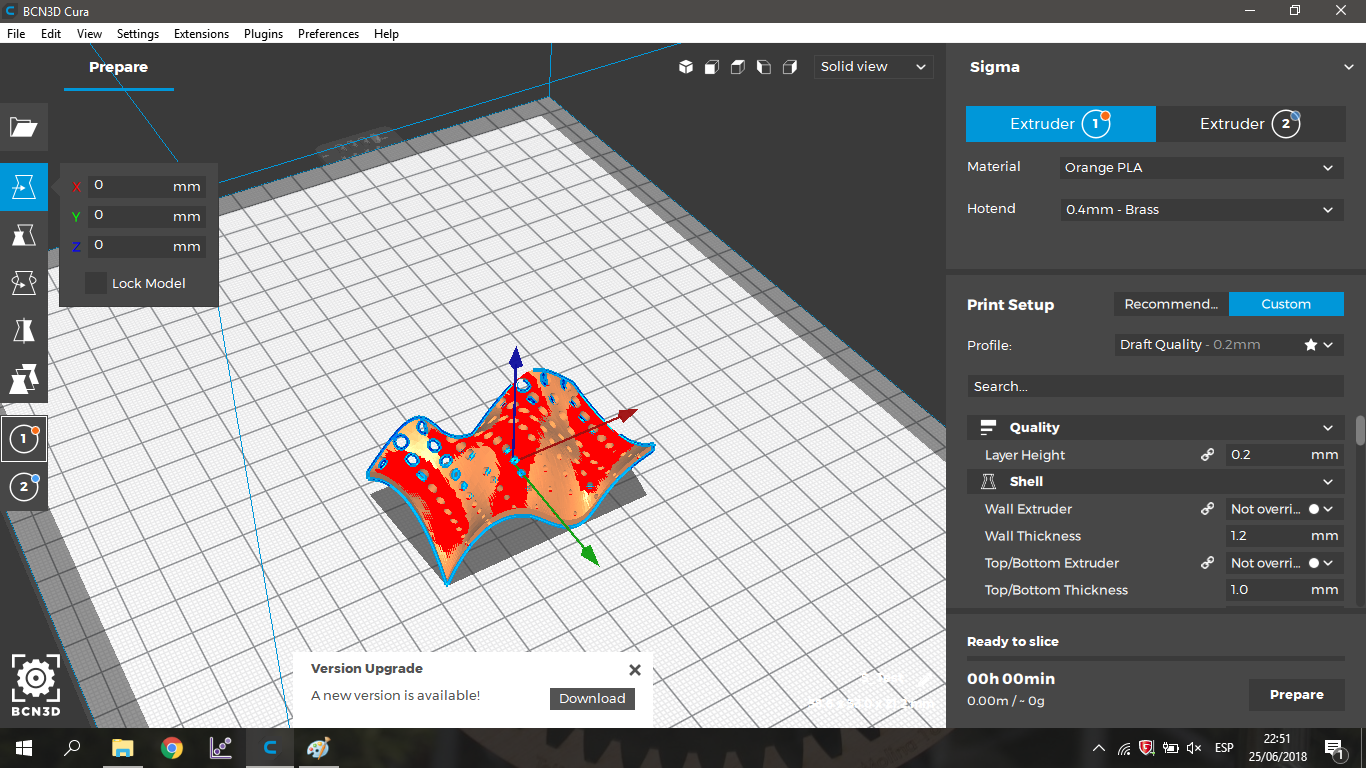
we define the infill, this is in function to the quality and speed that we need, that is to say, the higher the percentage the longer the machining time and the higher the quality.

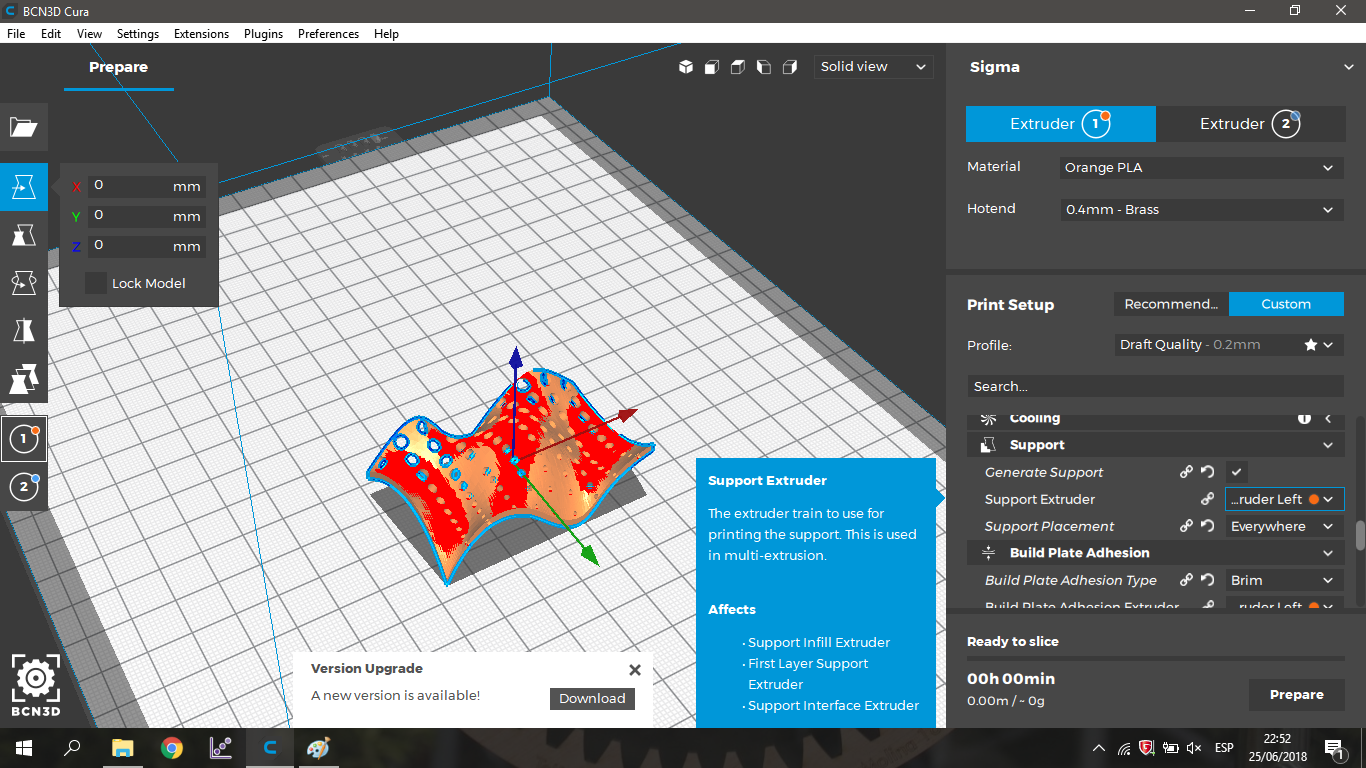
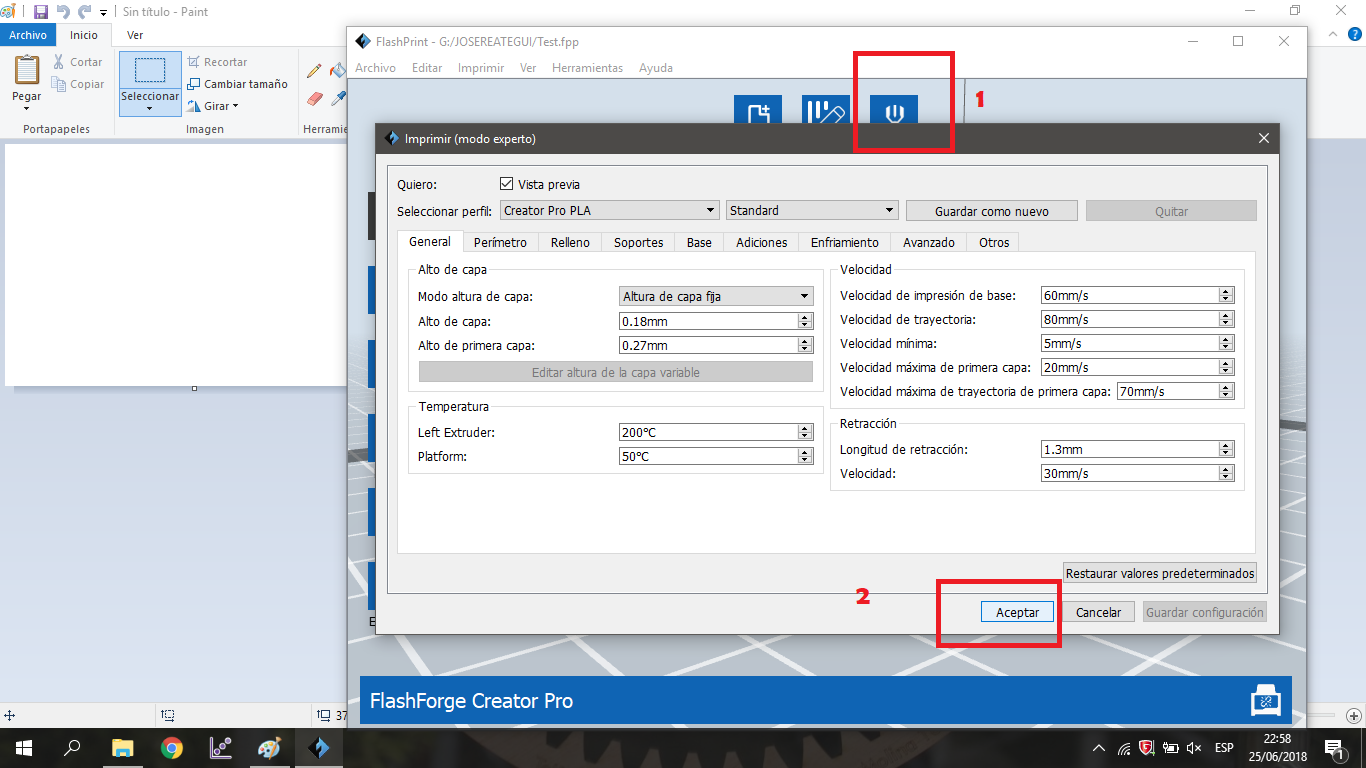
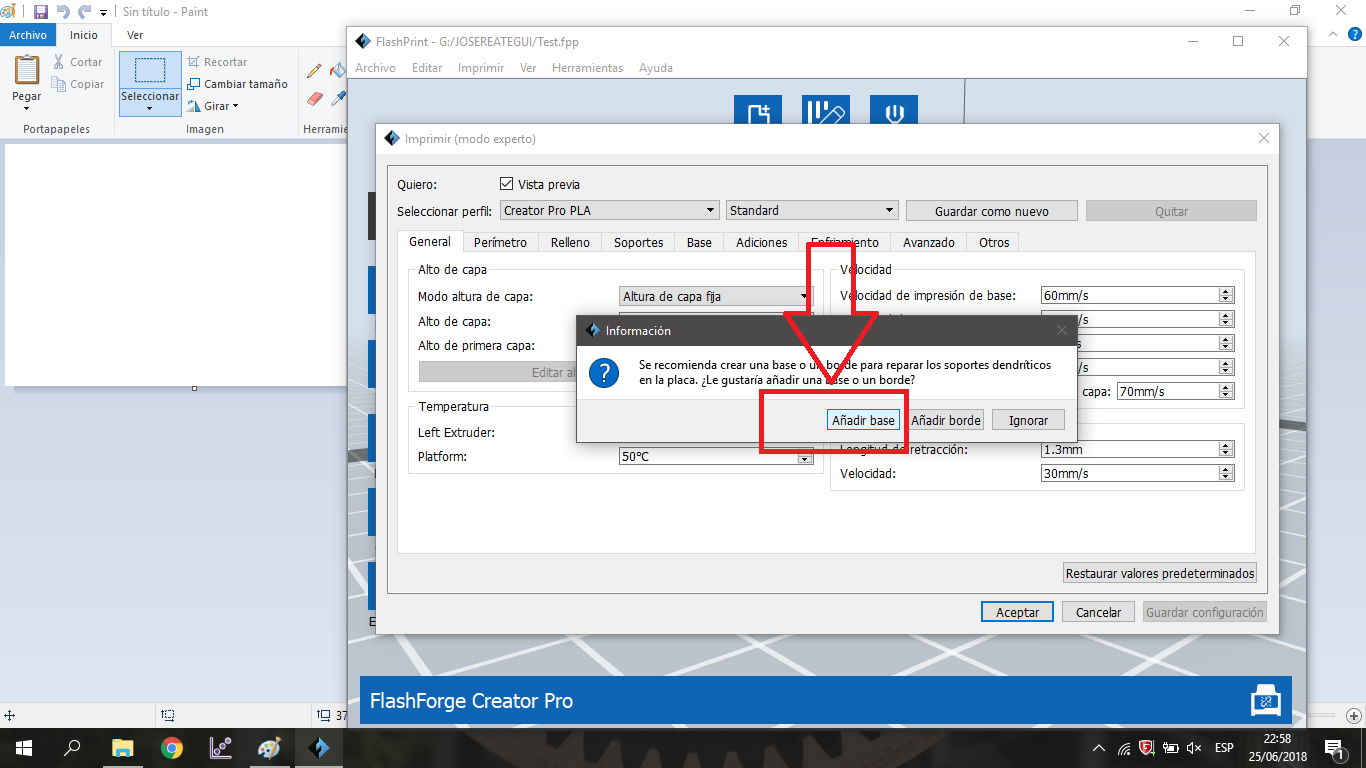
It is necessary to place supports to 3D printing, because they will help to reduce errors, we must consider that the supports increase the printing time. Then we proceed to the slicing and the export of the resulting file.
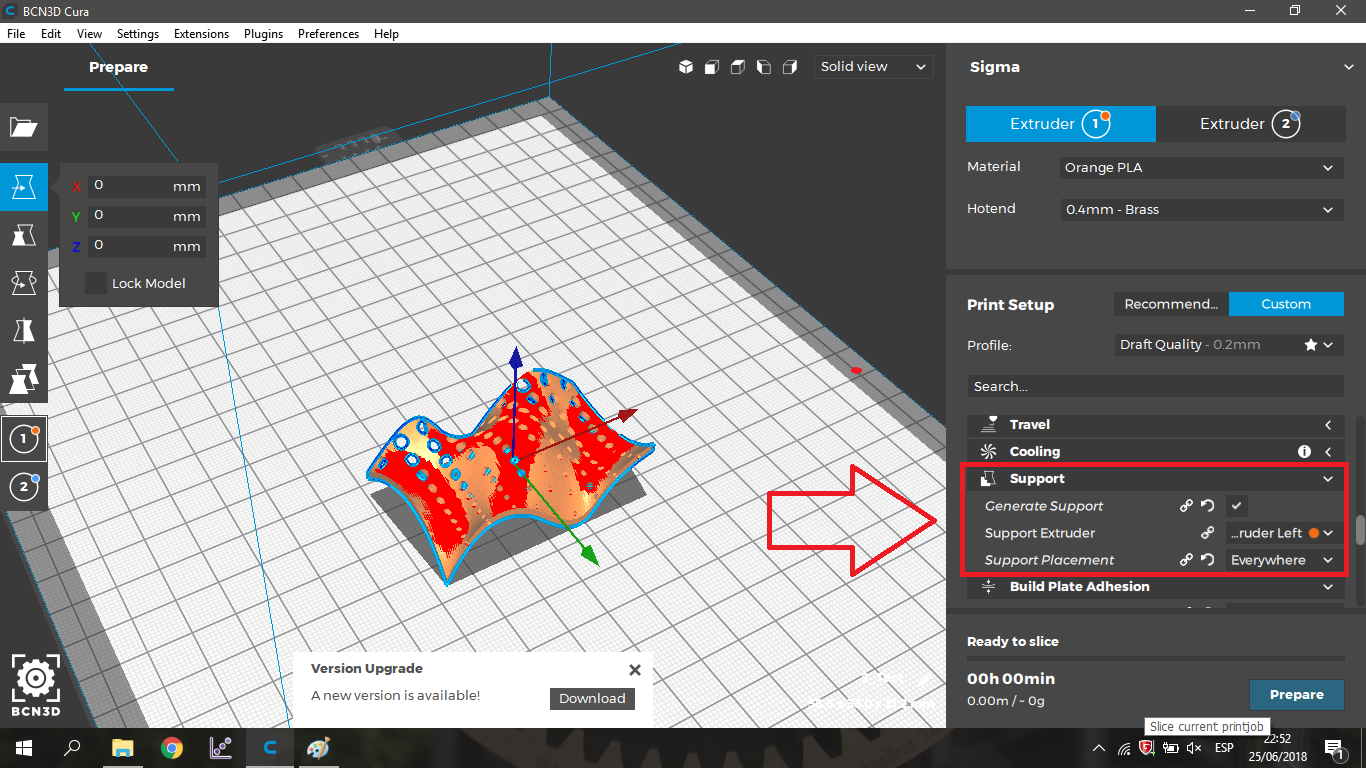
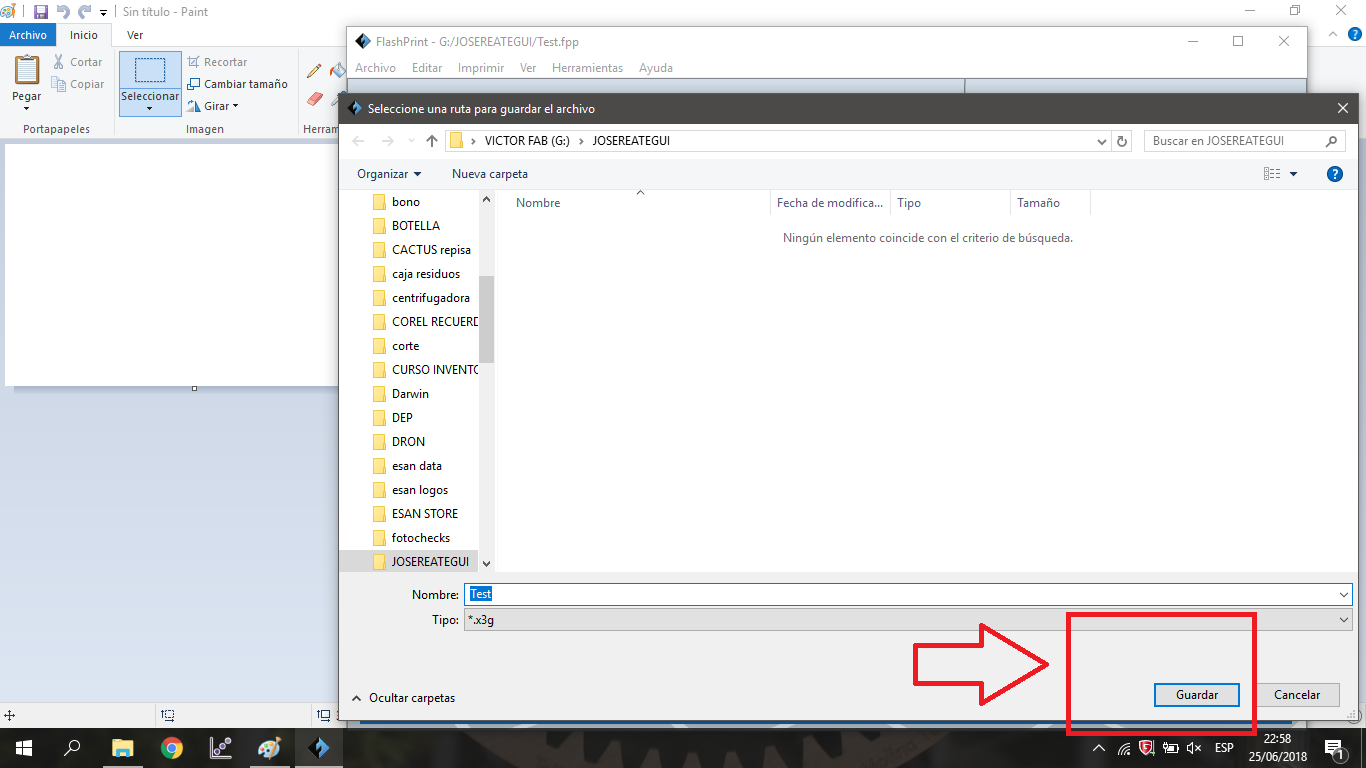
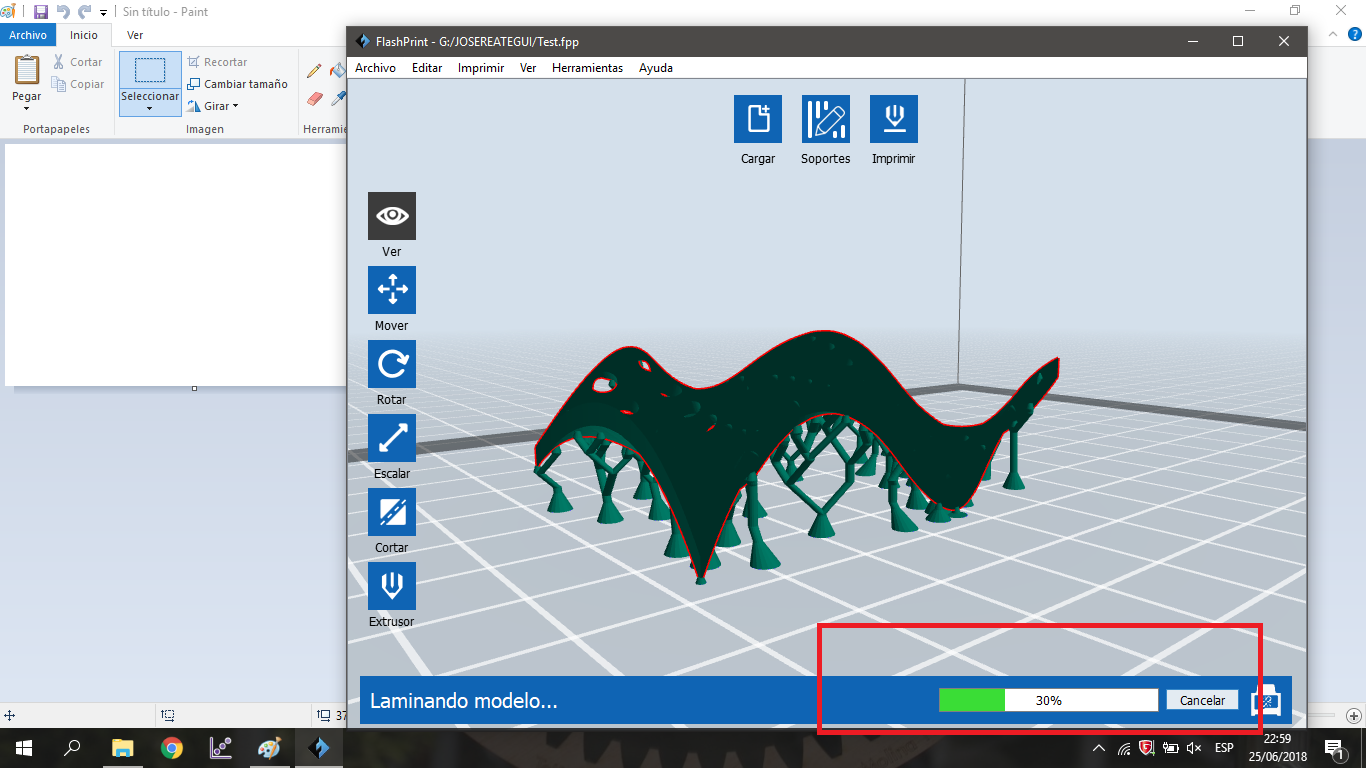
Click on Prepare to start with the slicing

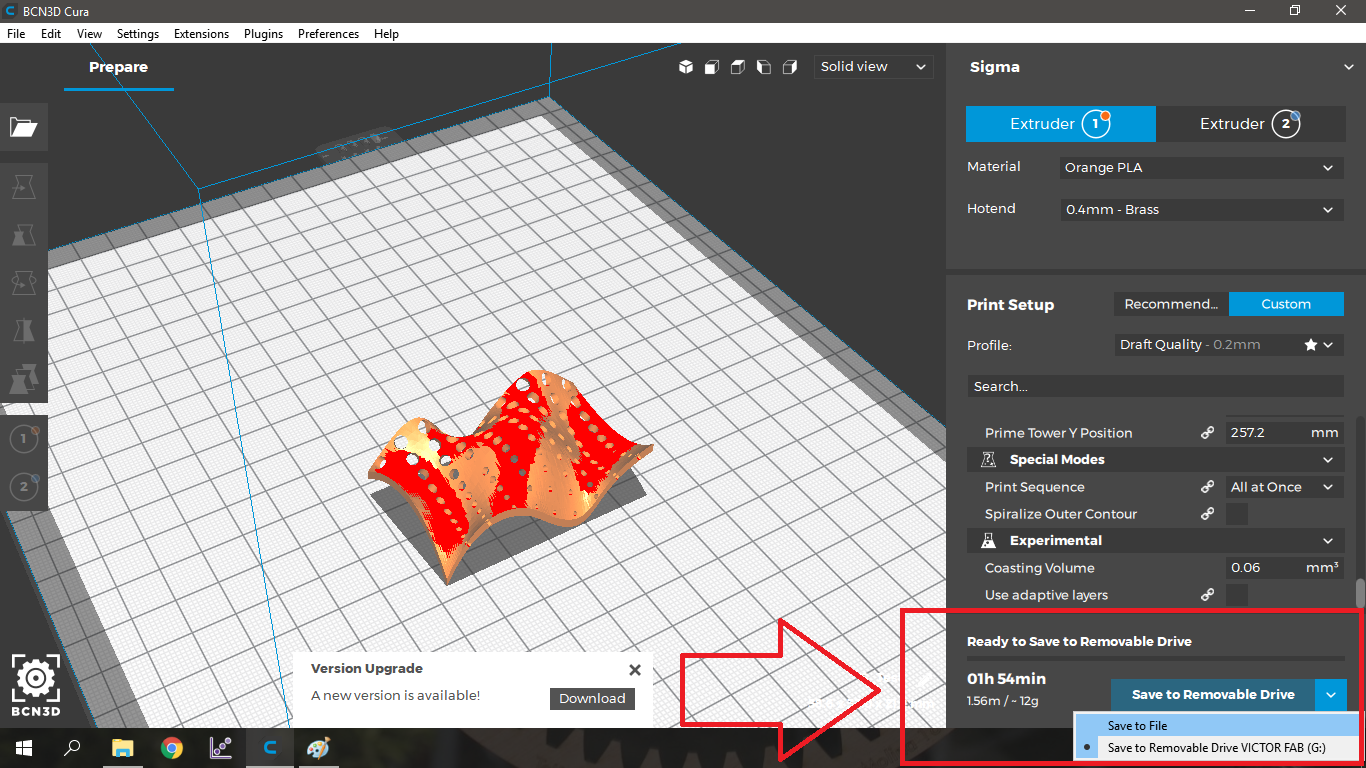
Save the file
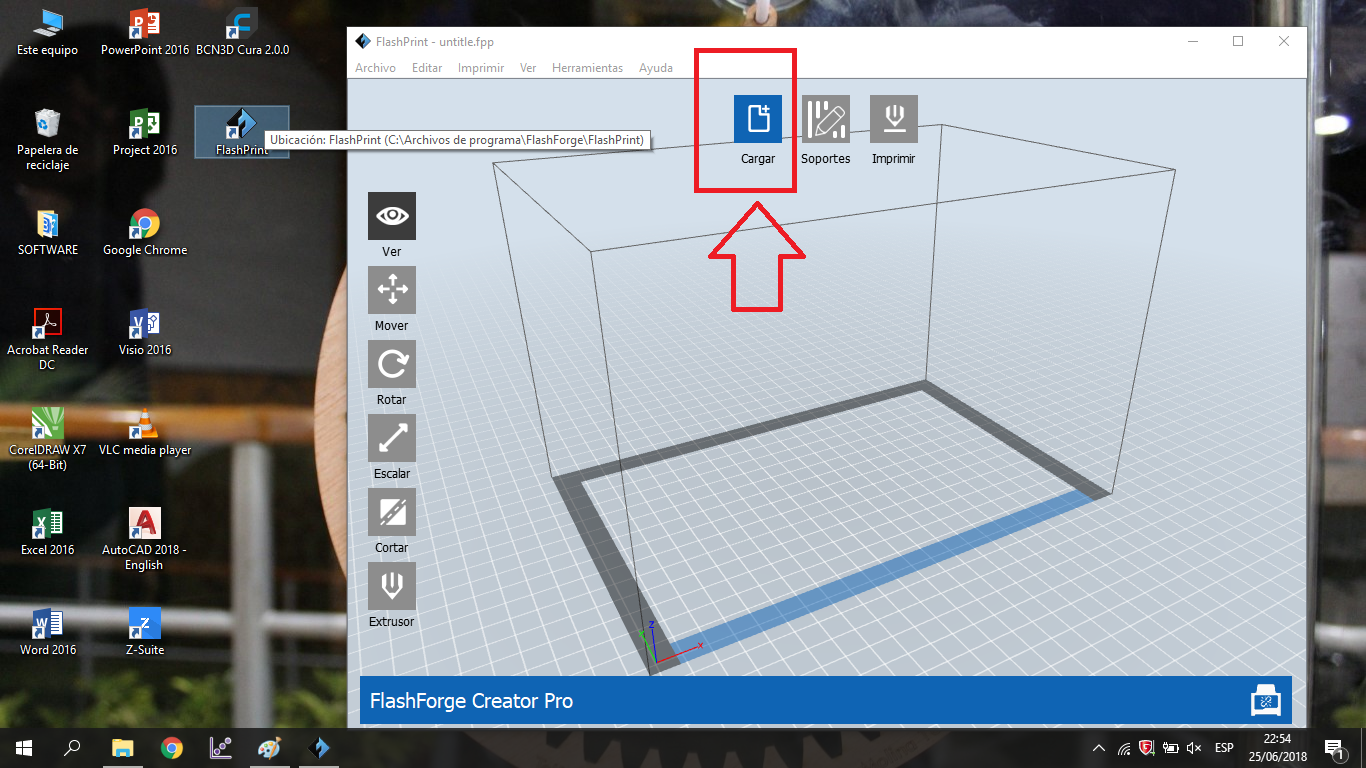
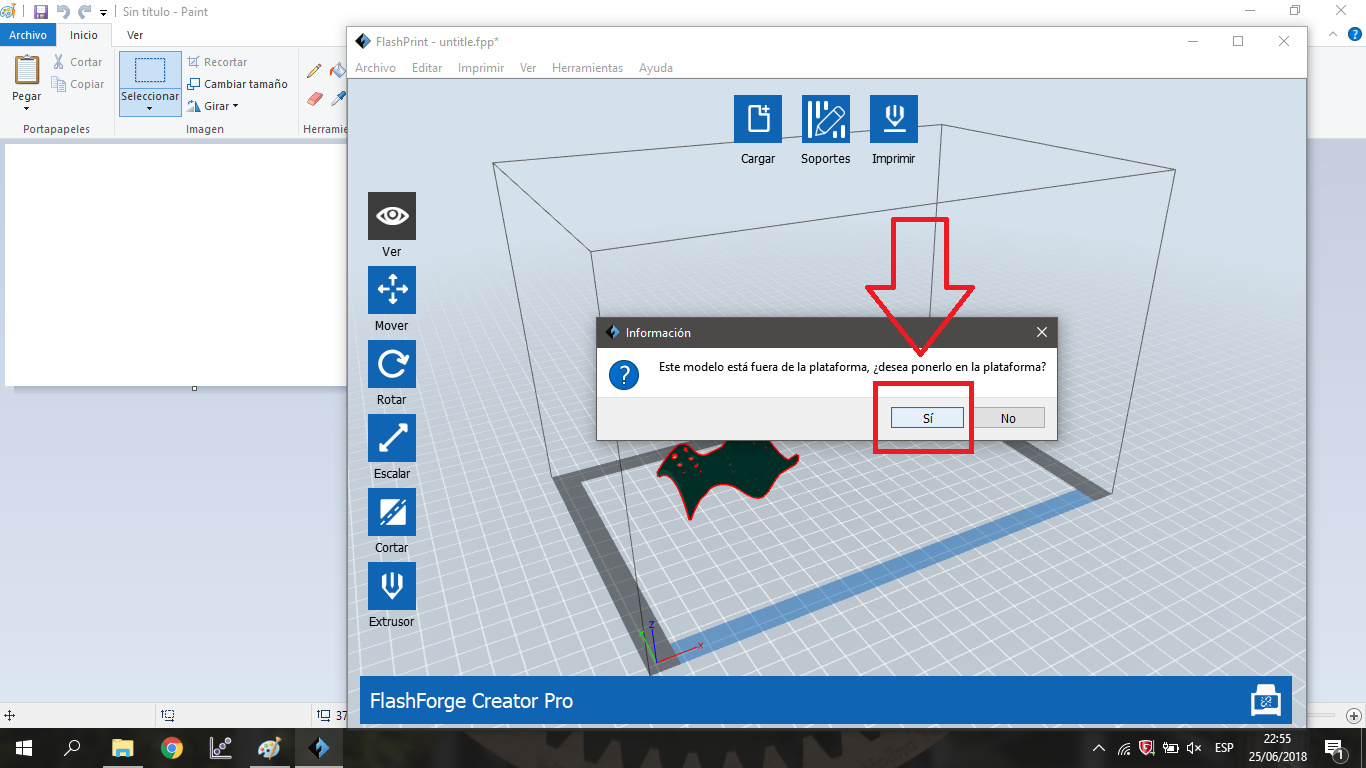
Prepare the configuration to Second 3DPrinter
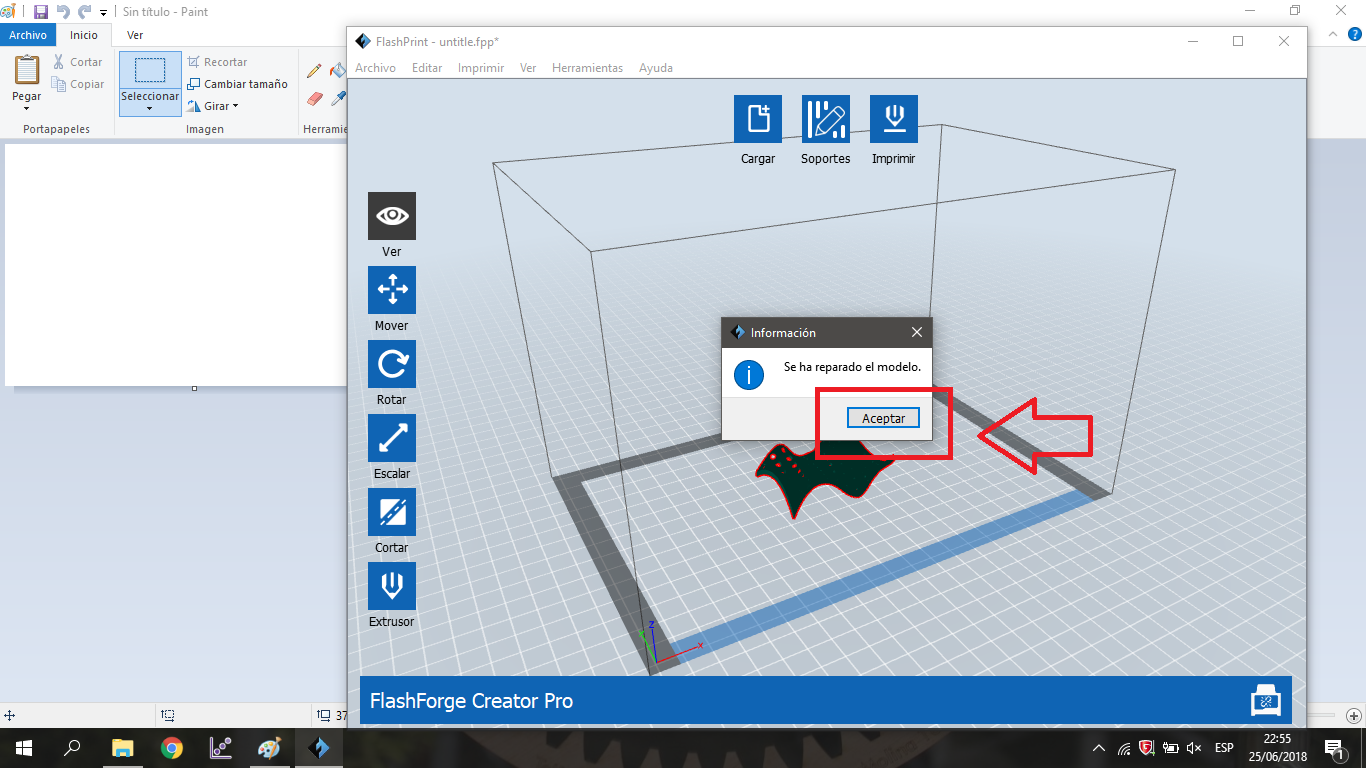
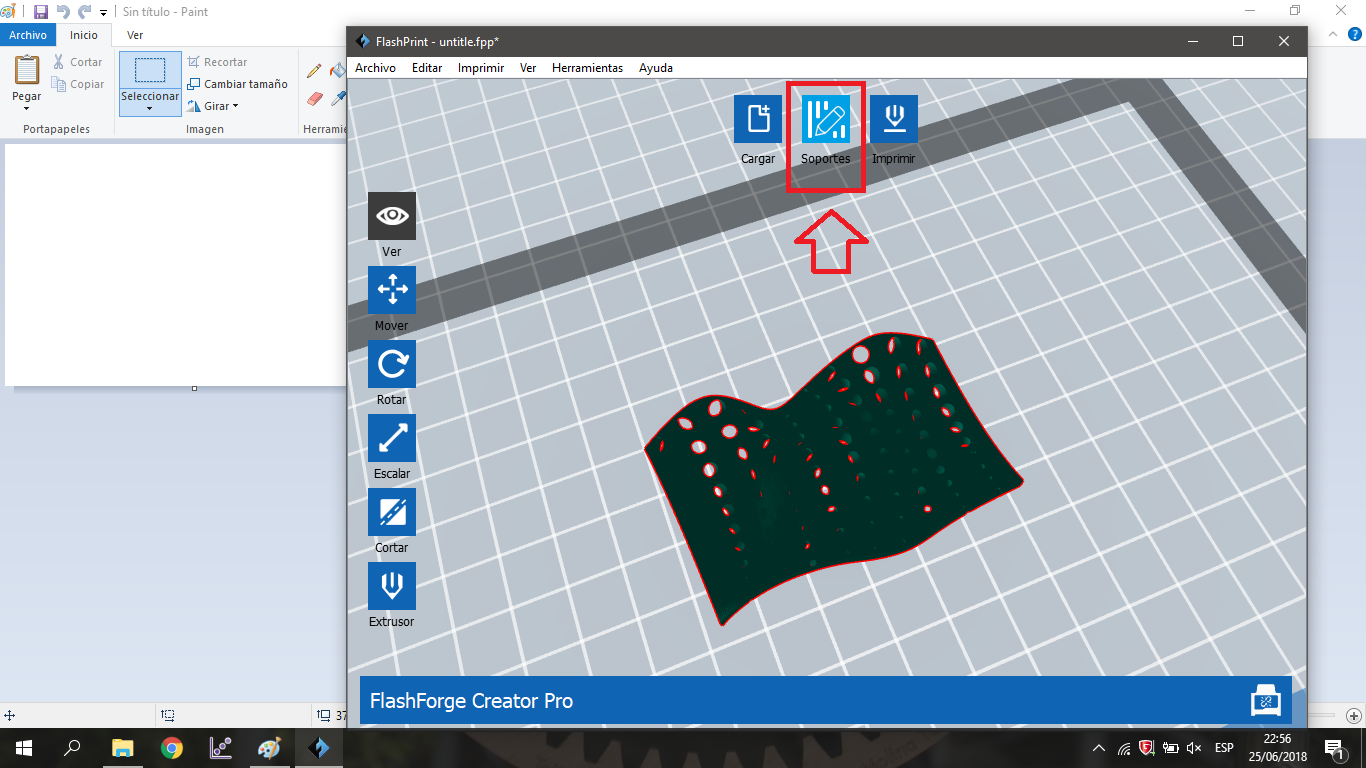
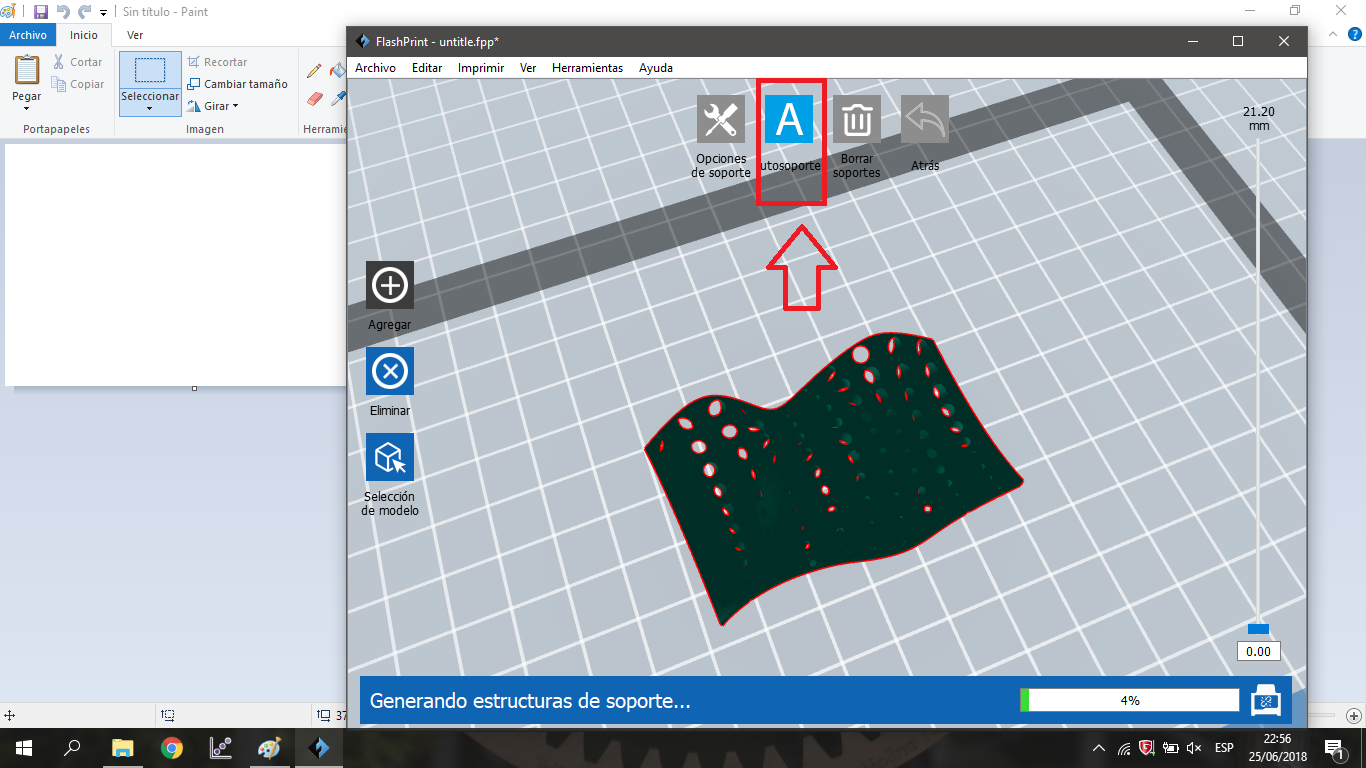
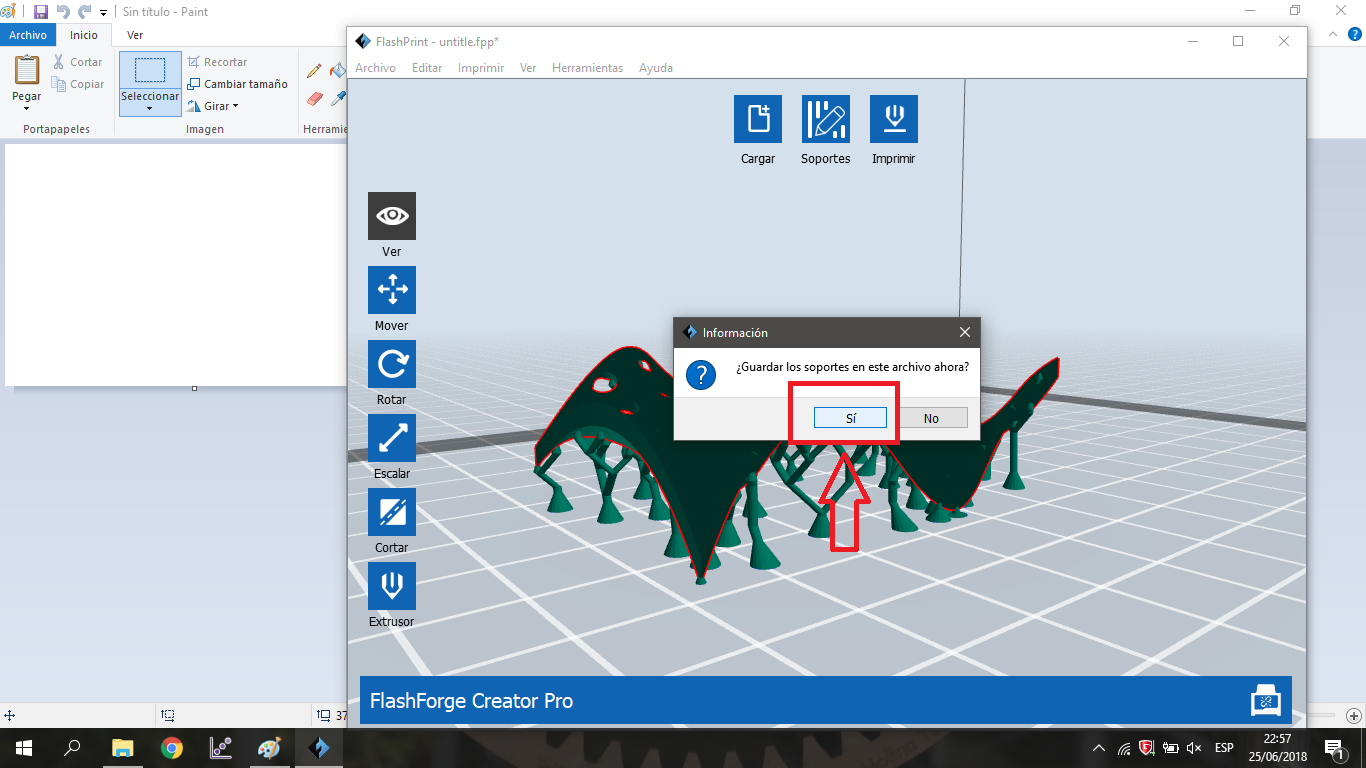
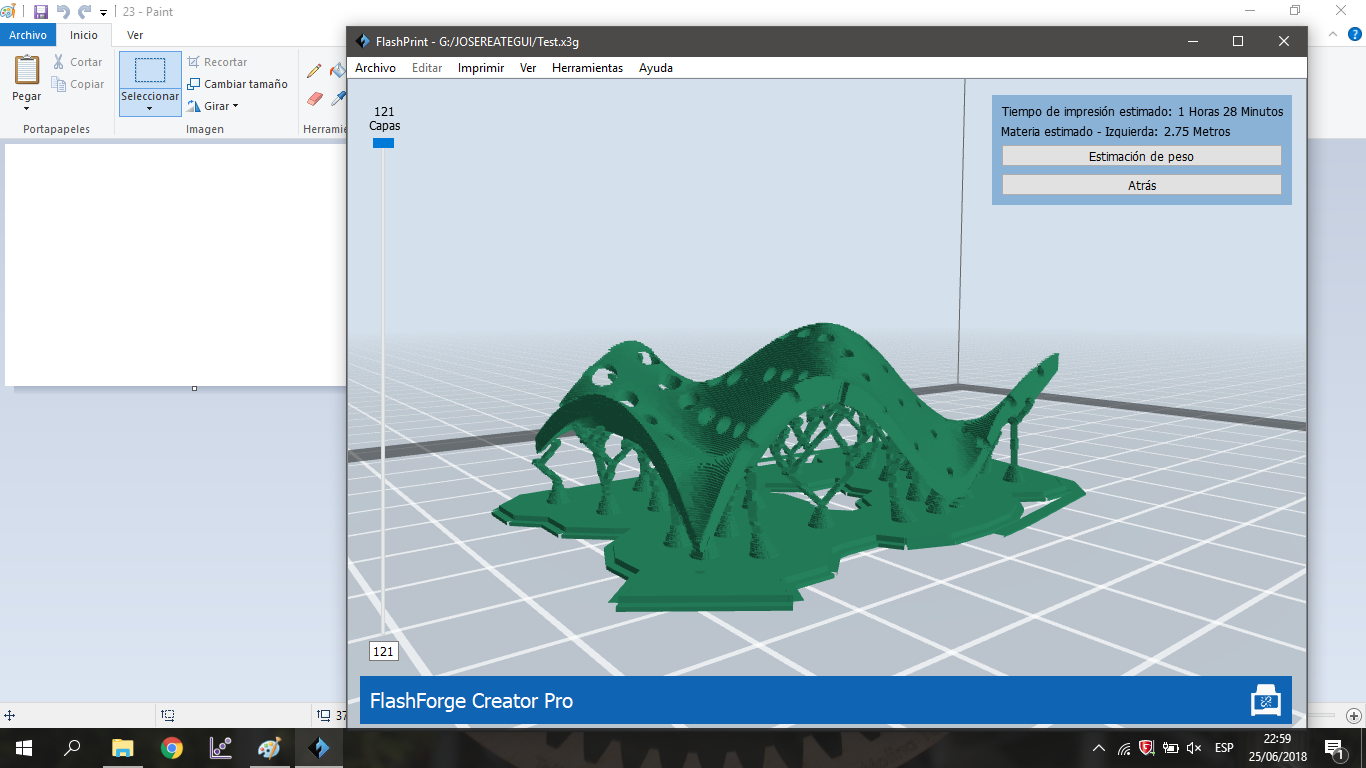
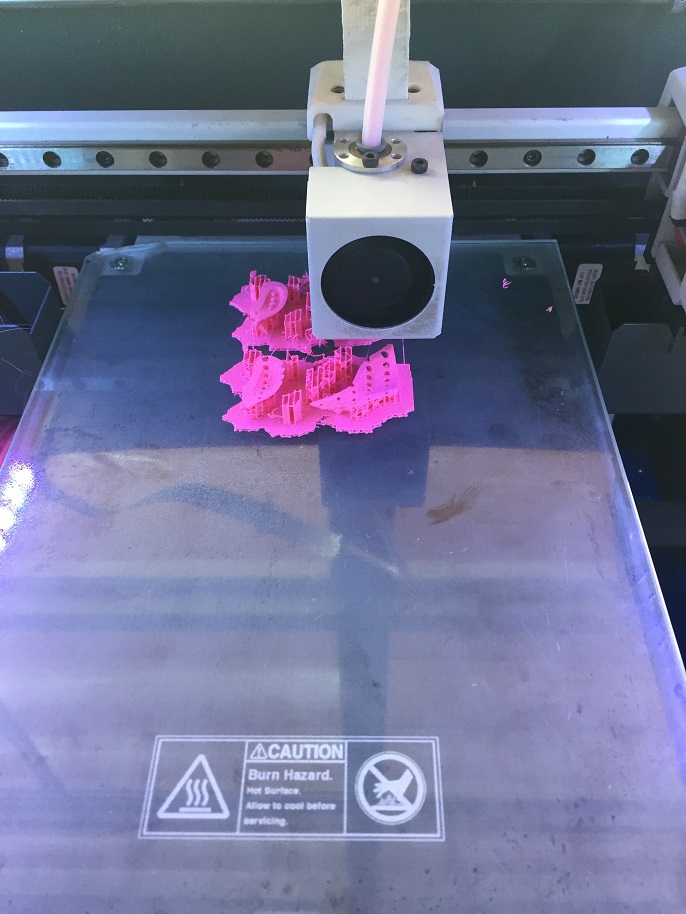
First we have to import the stl file, then it is necessary to place it on the platform and if necessary make the changes for a good impression, that is, turns, movements or scaling. Then you have to generate the supports, the interesting thing about this printer is the type of support it generates, known as treelike, the reduction of printing time is very interesting. Once chosen the support with the configuration of the image is necessary to protect the supports and ask to print the piece adding a base and exportantolo in .gx

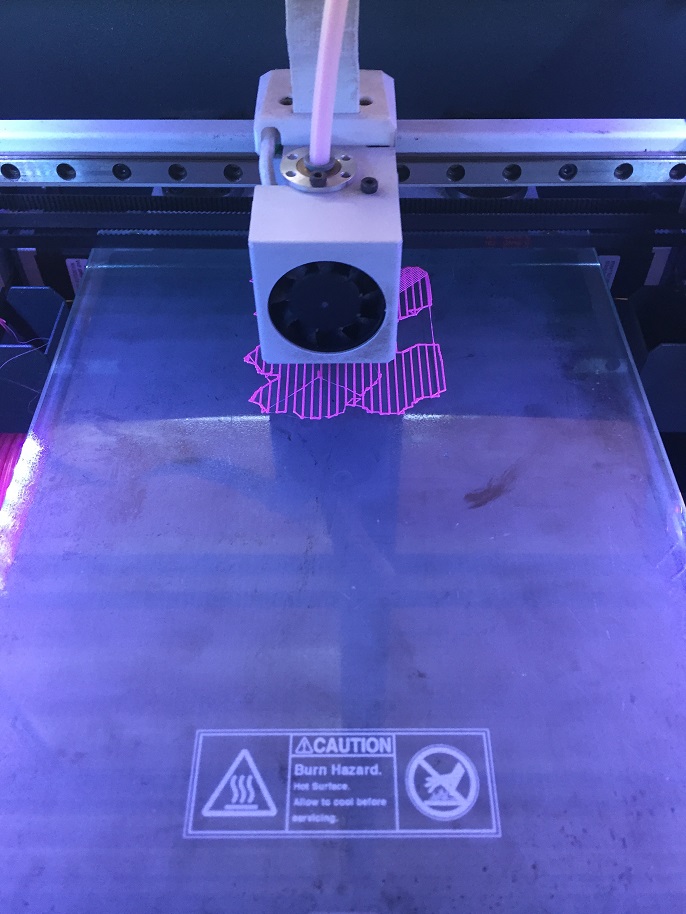
Use The 3d Printer. It is important to consider that the machine suggests printing a bed on which the object is going to be printed, also in this bed it allows a better adhesion to the bed of the 3D printer.
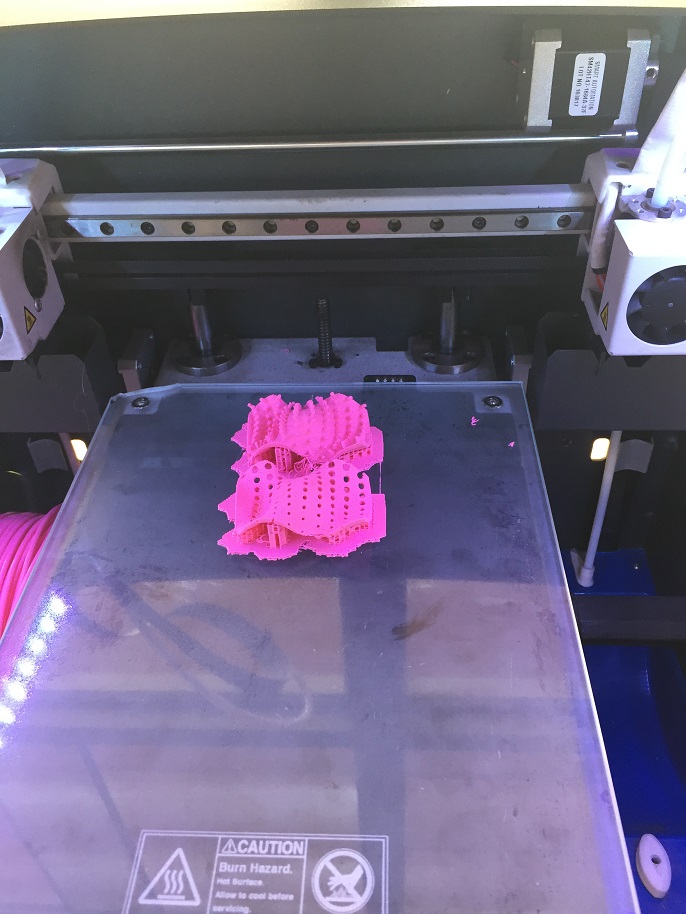
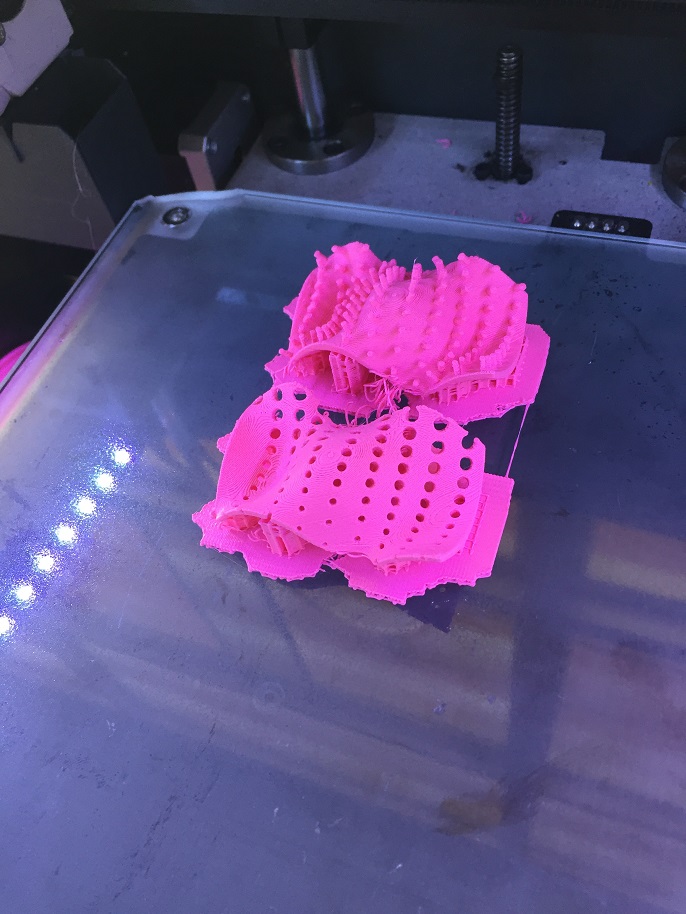
Testing the objects.

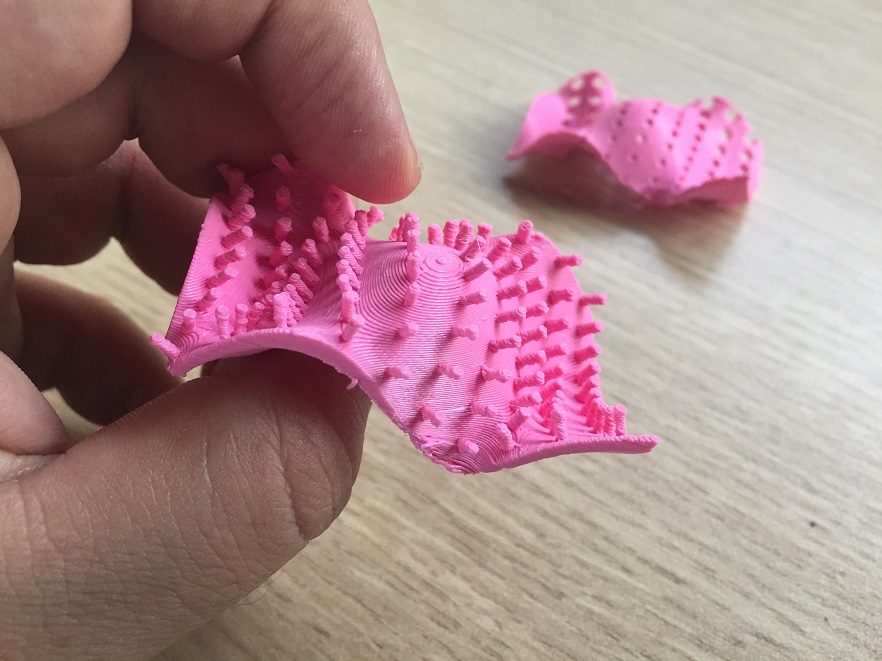
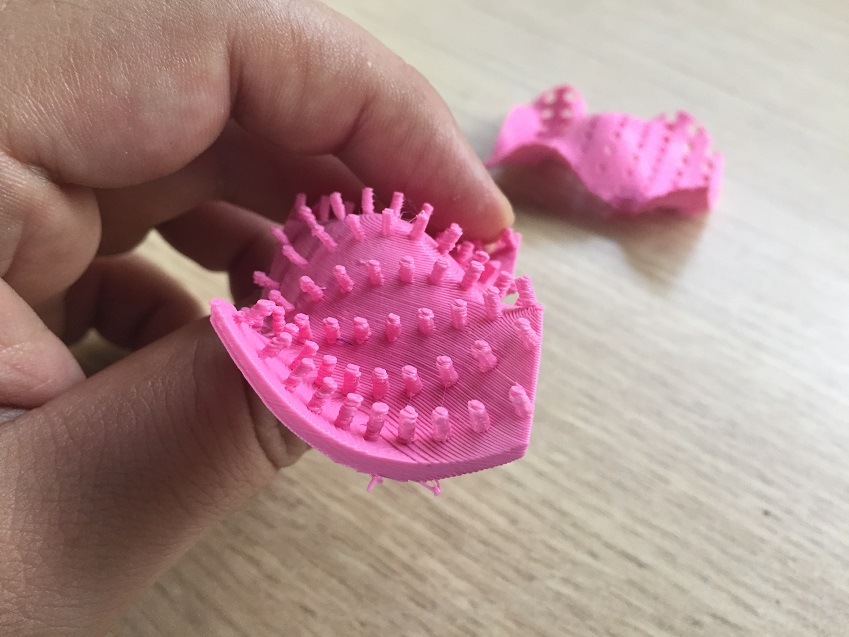
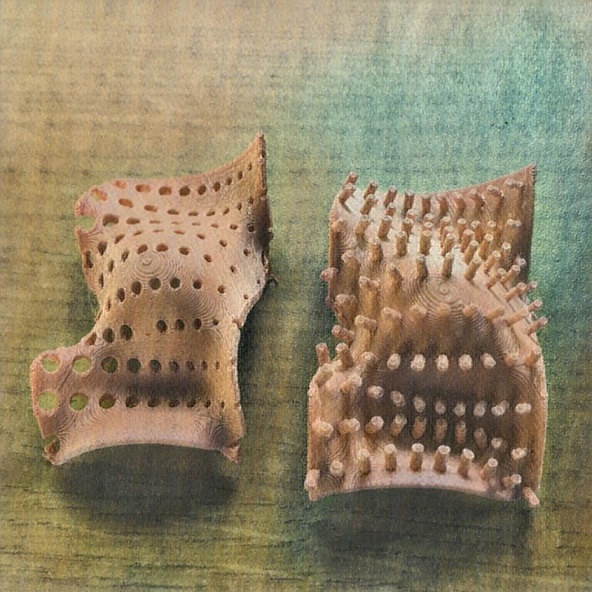
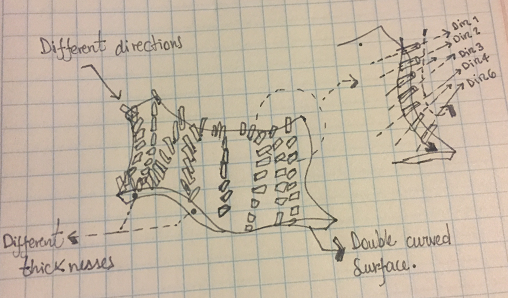
Why it could not be made subtractively?
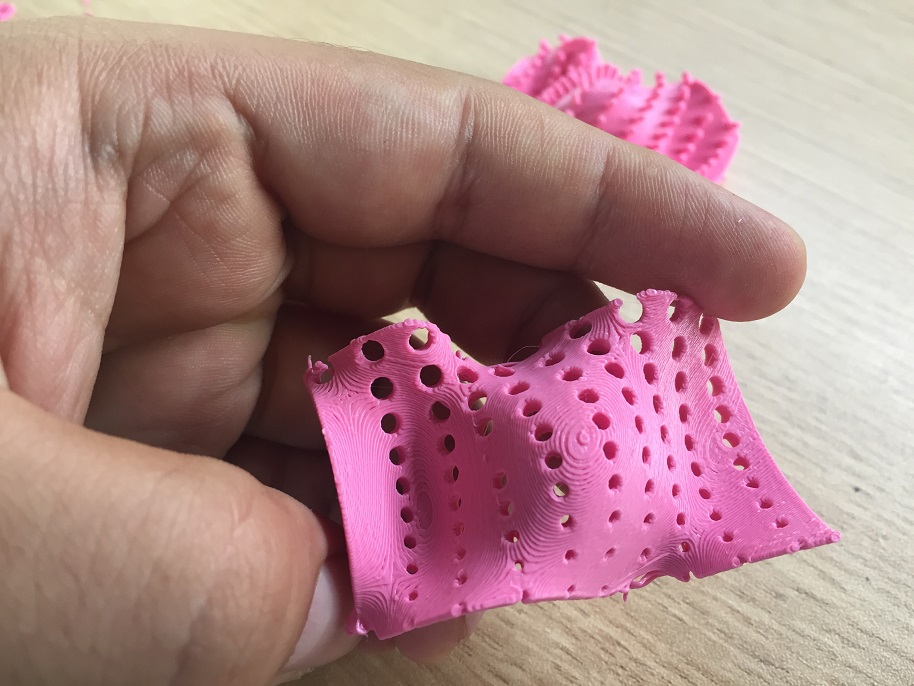
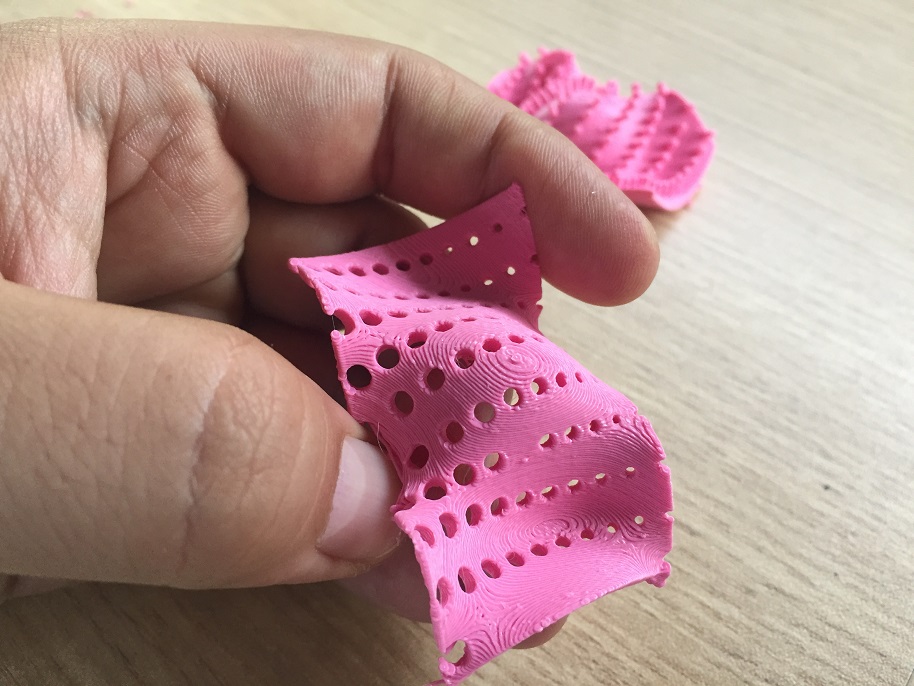
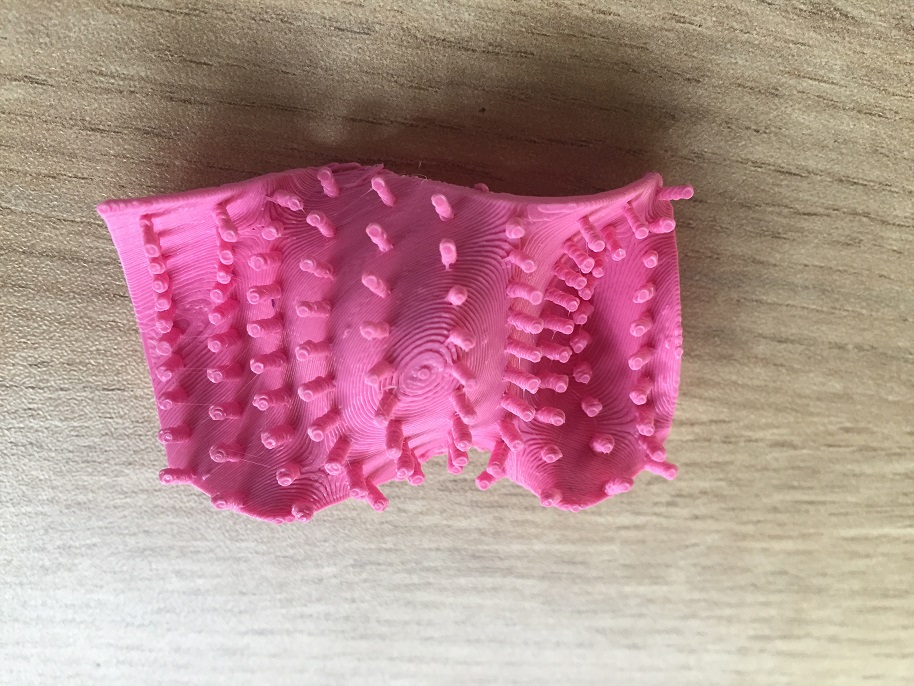
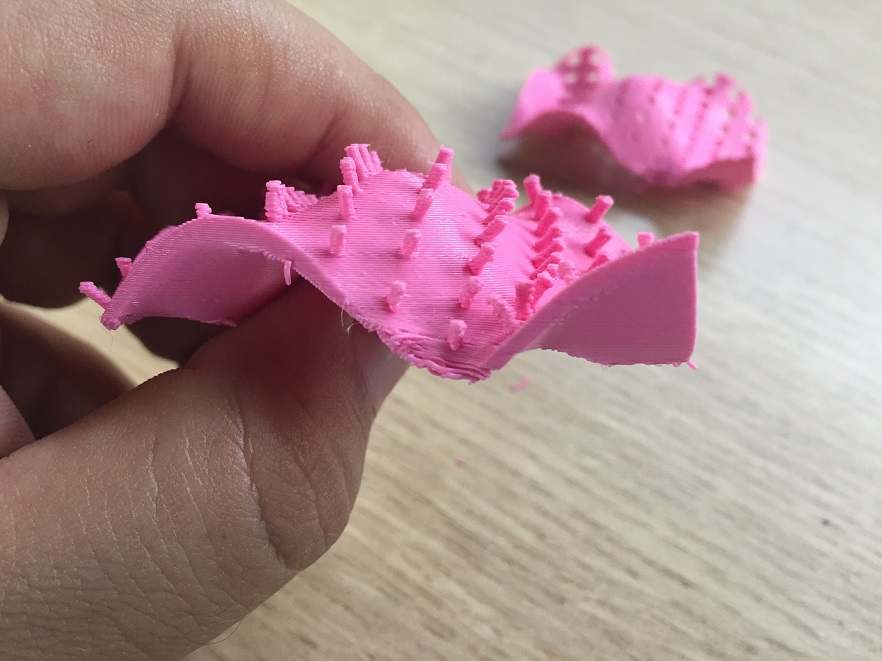
Because the piece has different thickness and a double curvature surface. Also the lines that come out of the surface can not be made with subtractive fabrication, because they have different directions, different normal vectors and a thickness that is outside the tolerance of the subtractive machines.
Outlined problems and how you fixed them
There were problems to print geometry with holes, the main option generated by the software is to repair the stl, in principle this is fine but I recommend paying close attention because it can yield bad results, ie fill the gaps in the design. To avoid this problem it is necessary to build a good geometry that does not contain gaps in the mesh, the mesh of the stl format.
Another very frequent problem is the lifting of the object printed in 3D. Once the object has this defect, it is necessary to stop printing. The way to avoid this problem is placing a bed to the object to be printed.
3D scan an object (and optionally print it)
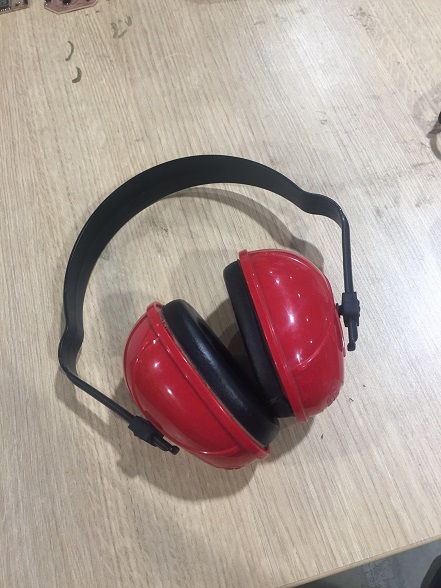
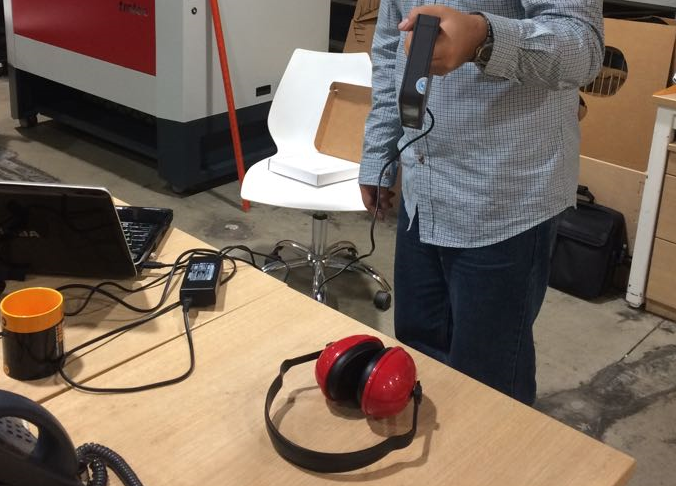
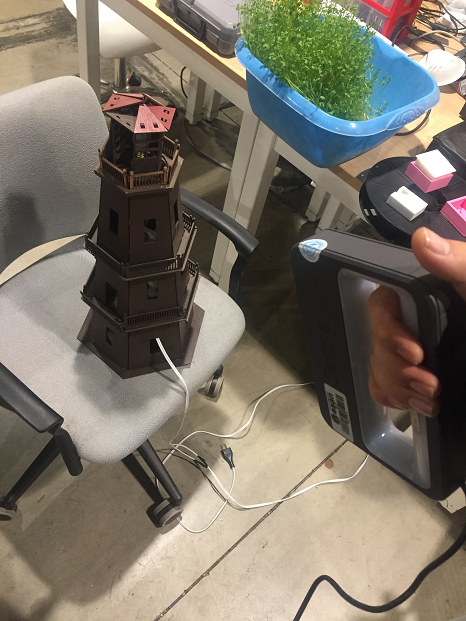
The first thing we must do is to be in a very bright environment, the object to be scanned preferably should not have reflective surfaces, because the sensor could not detect the surfaces.
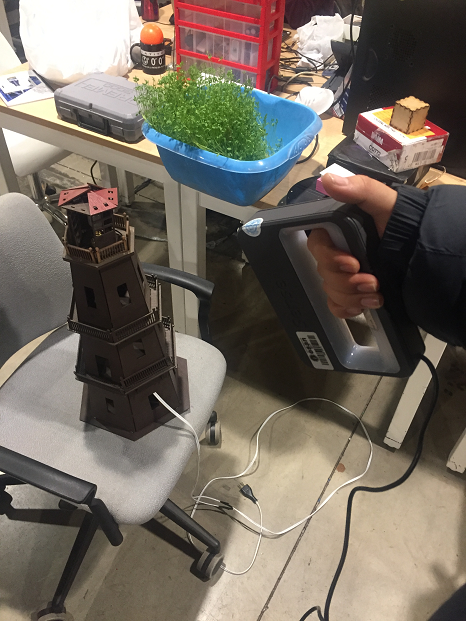
Prepare the Object and the handler scanner.
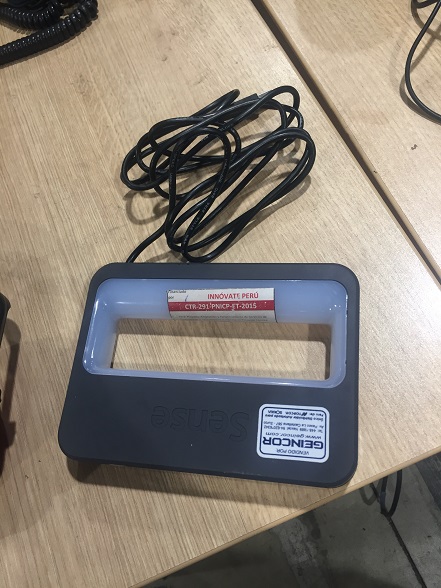
To start, it is important to connect the handheld scanner, since the Sense program only starts if the scanner is connected. So, Prepare the Scan program.
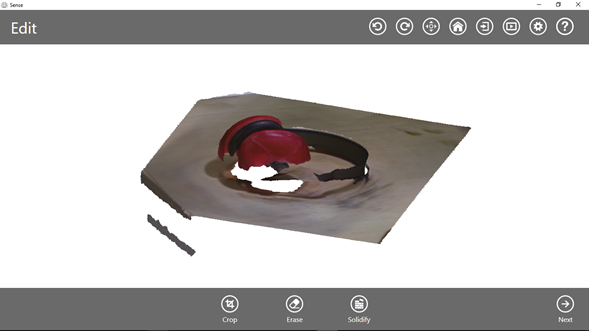
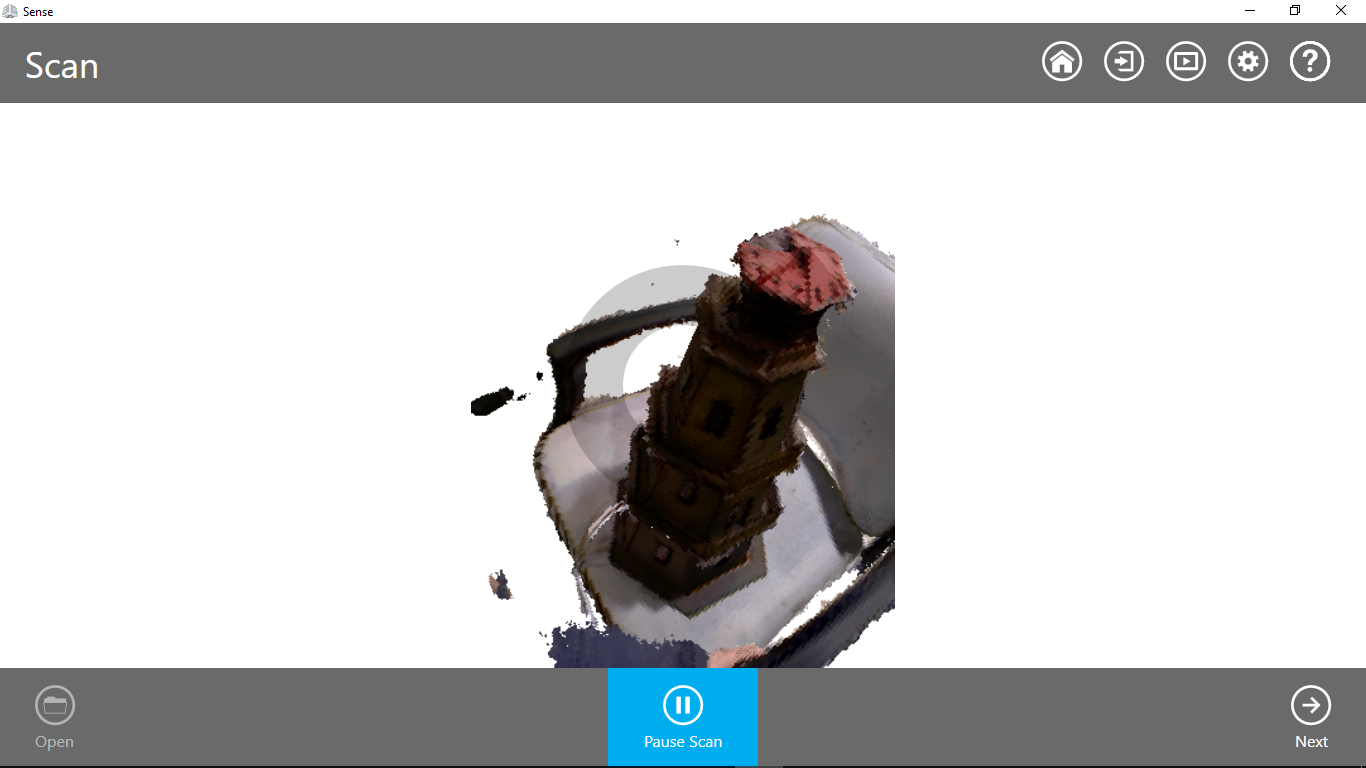
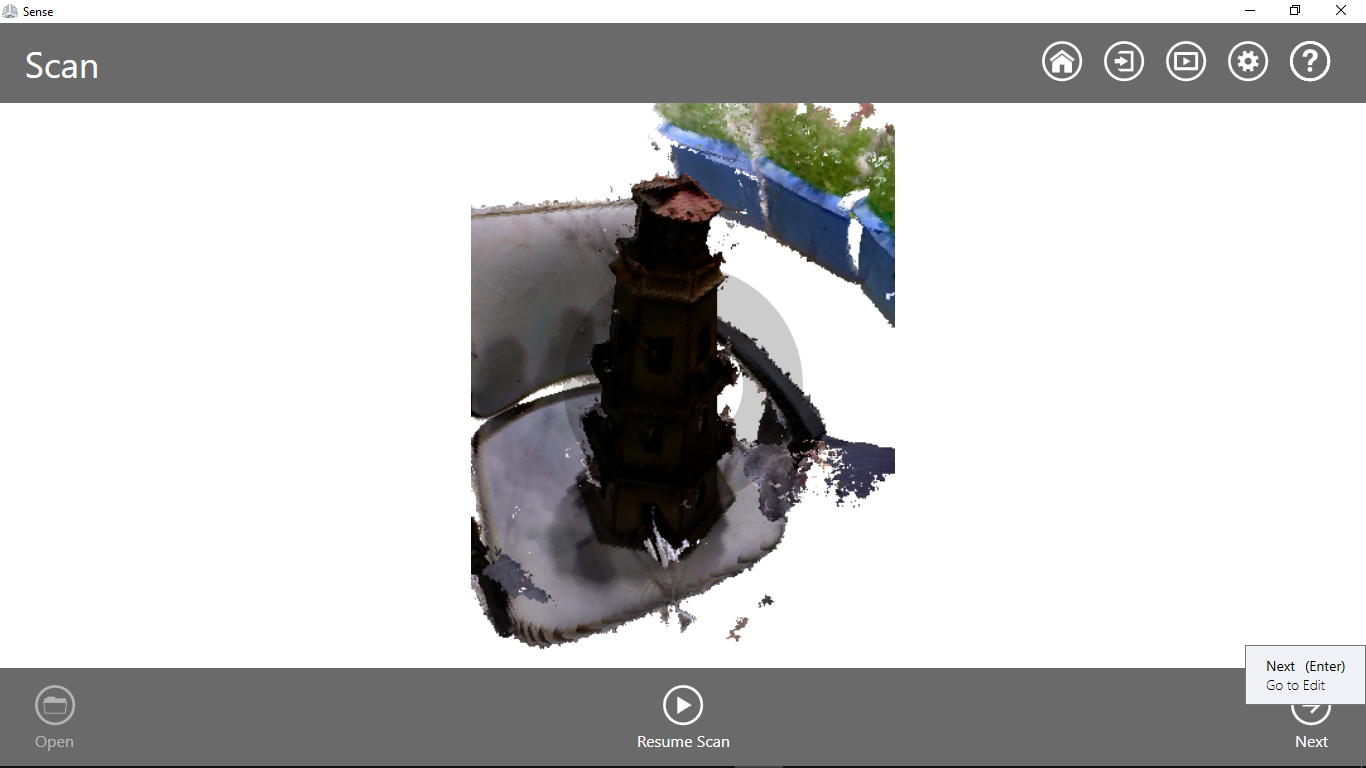
We must consider that our scanner works with a certain distance, preferably 1.2 meters. and while you scan around the object you must be careful not to get too close. The wrong distance generates white pixels in the object that the machine will then interpret as empty. Use the Scan Handler.
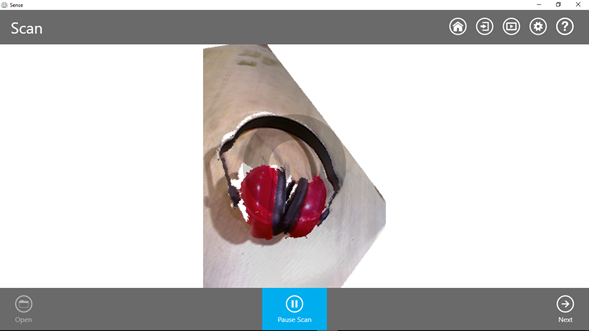
Before doing it, the image must be framed for better tracking and scanning by the program

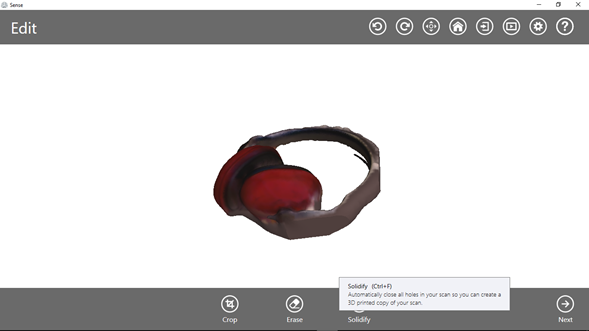
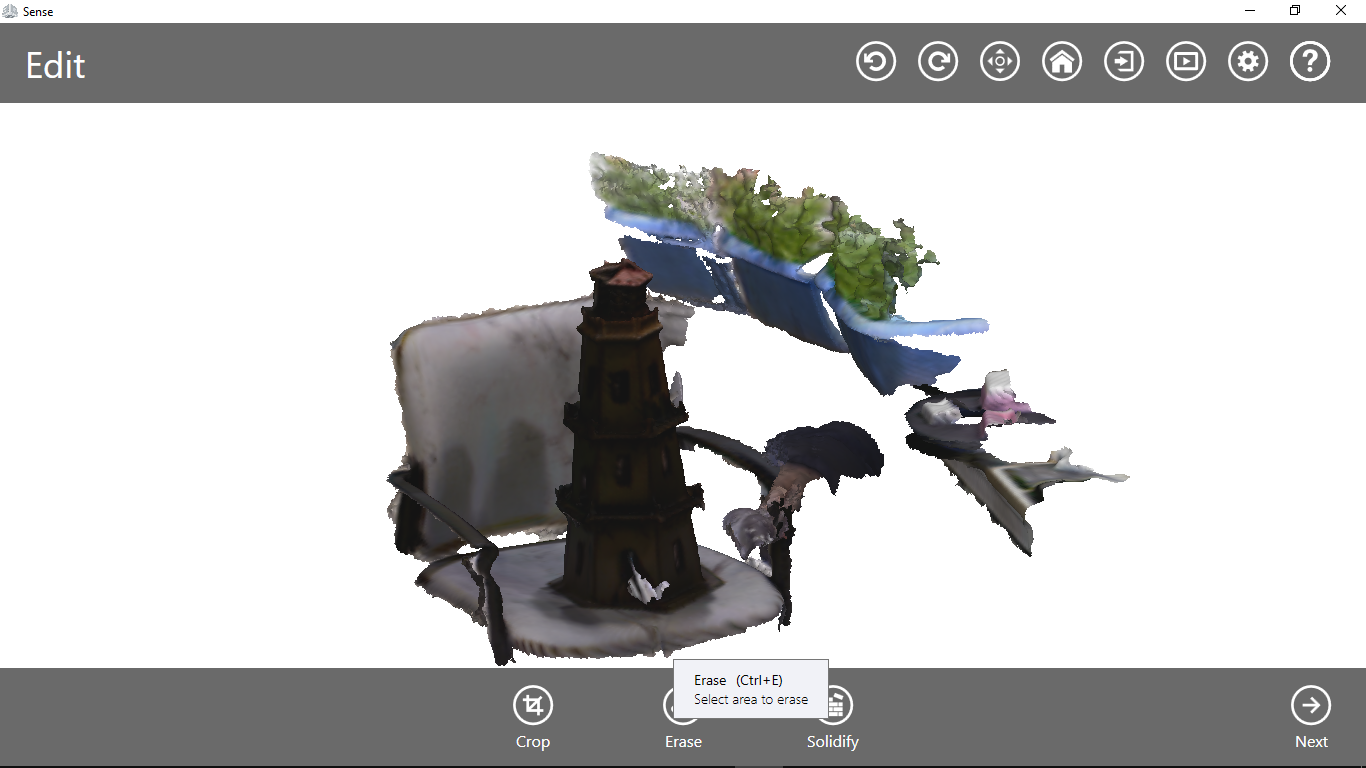
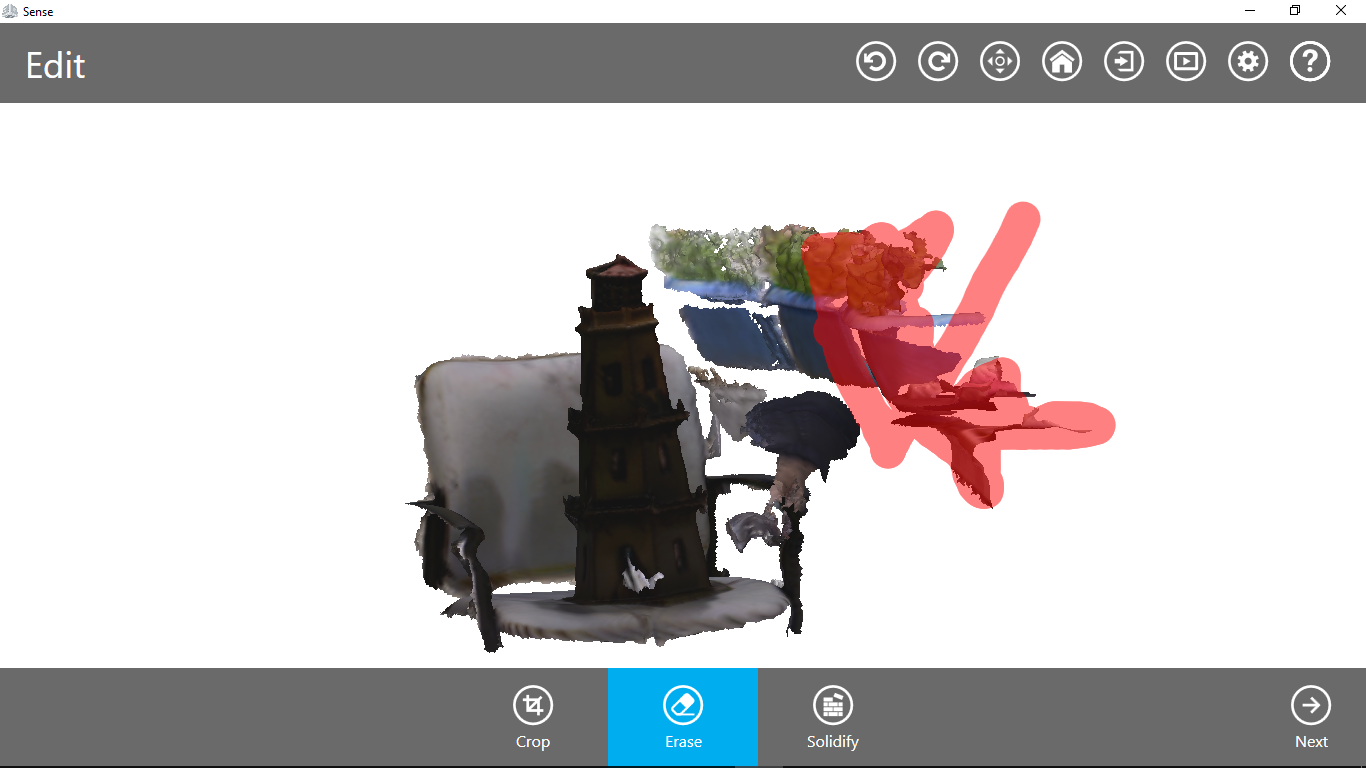
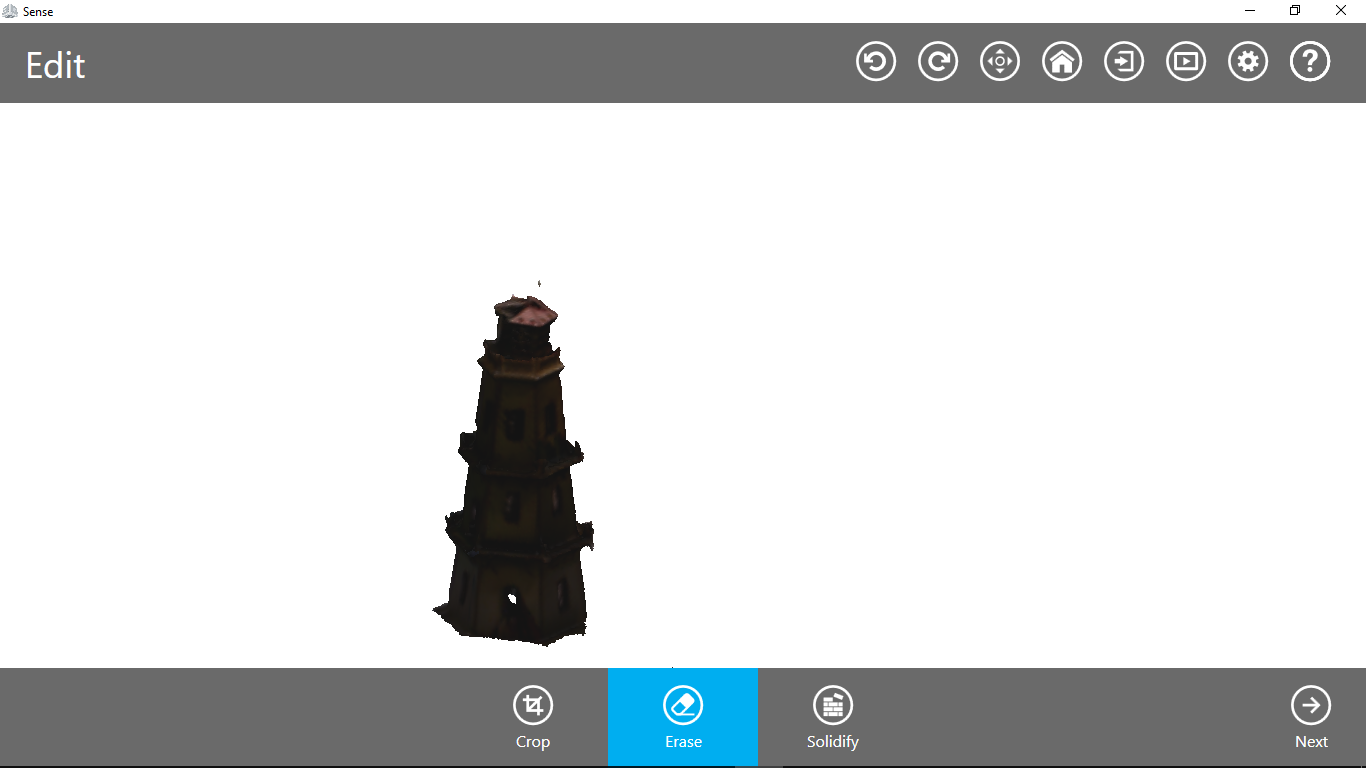
Produce the solid with "solidify" and export in .stl format
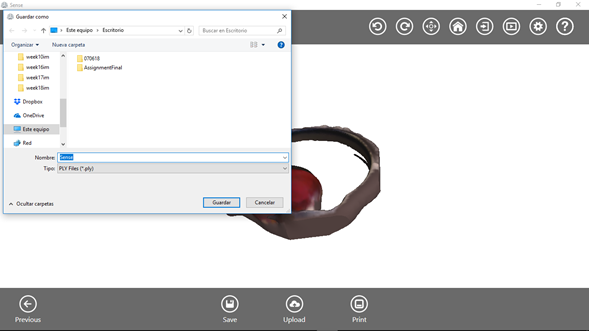
Use this stl file to produce a file compatible with 3d Printer and Print it!

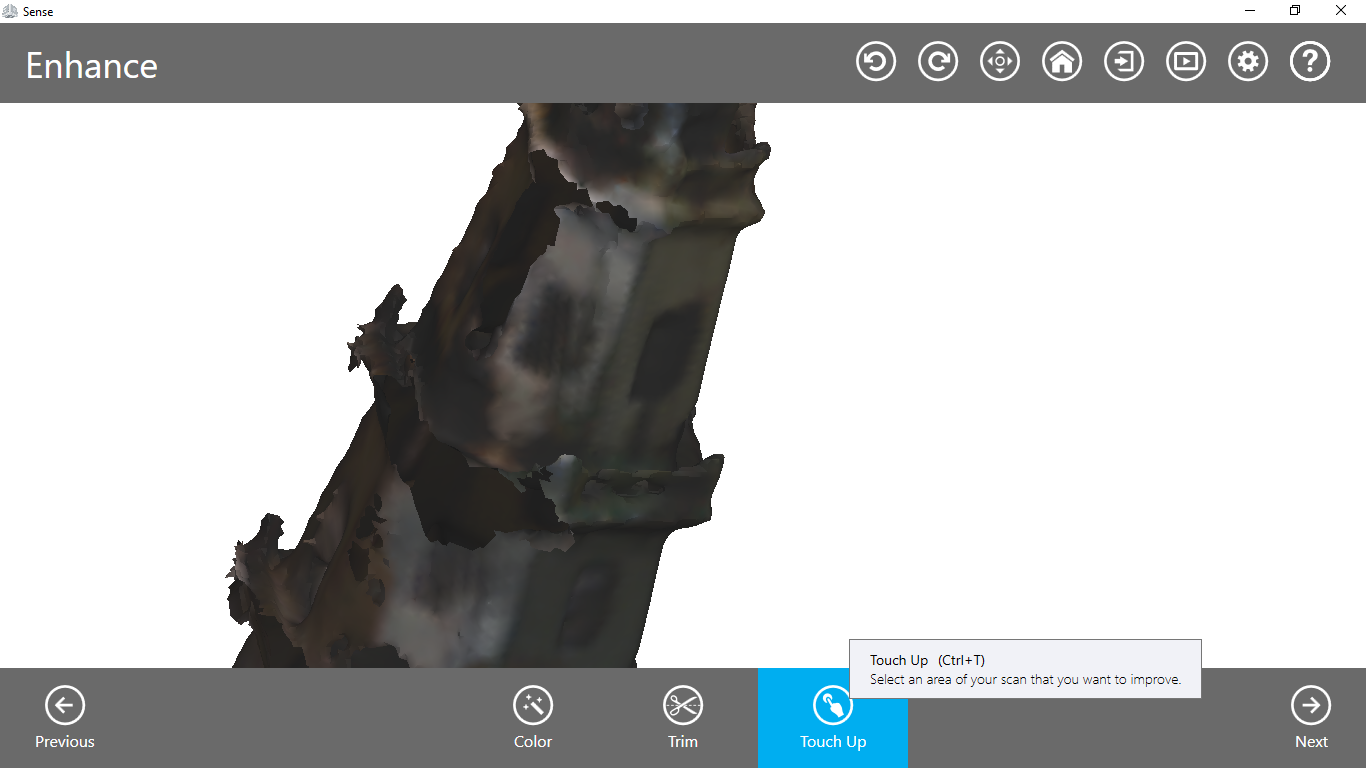
To improve the skills with the 3D scanner, I did a new scan of a tower-lamp, following the previous steps described, but with an additional, 3D modeling with the Sense program, it is very interesting how the program is able to do it with the "Touch Up" option.
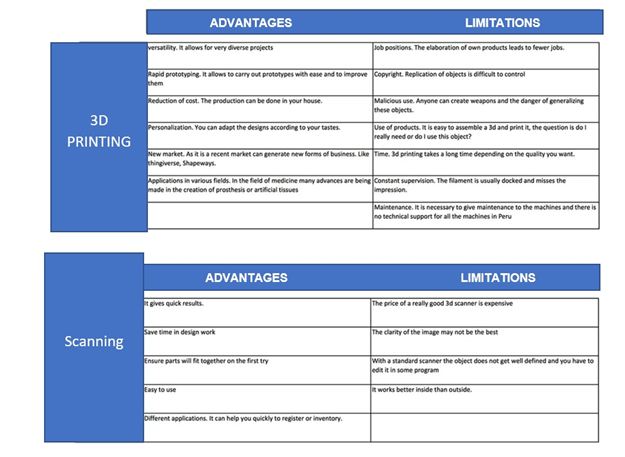
Finally, it is important to have a comparative table of 3D printing and 3D scanning.