-
Fab Academy 2018
-
Design. Make. create.
-
Shape the Future
Our group work assignment is to characterize the specifications of our PCB production process.
The milling machine we used is the Roland SRM-20. It's a desktop milling machine with a lot of applications as it can mill a variety of different material including: modeling wax, chemical wood, foam, acrylic, poly acetate, ABS and PCB boards.
For this week, we used this machine for producing PCB boards and our group assignments is basically to test and discover the capabilities of this machine.
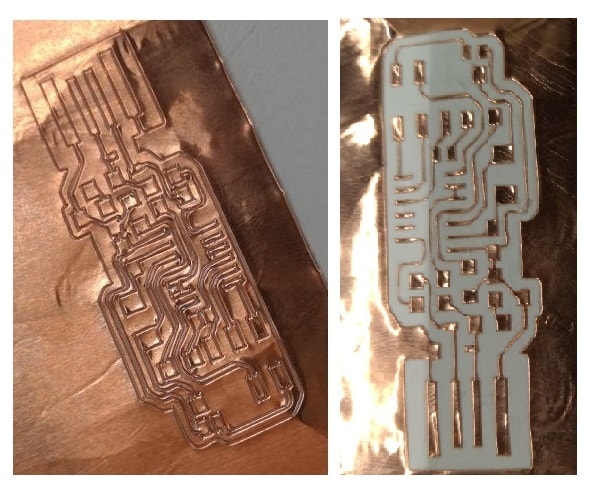
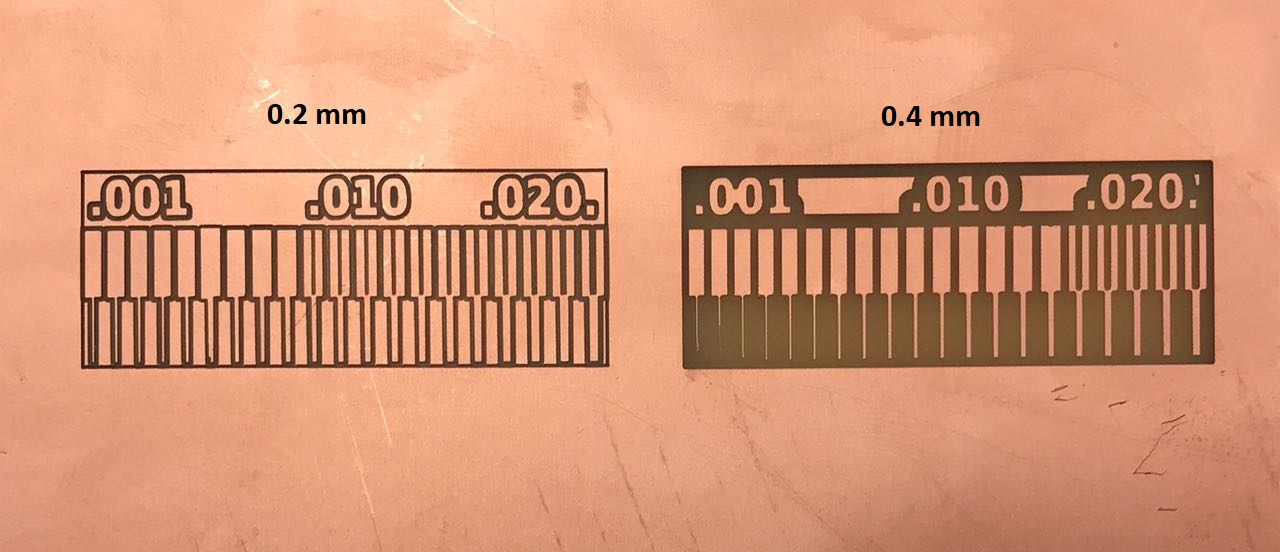
We used a ready design to mill a copper sheet. The first drill bit we used 0.4mm to engrave the traces seen in the below image.
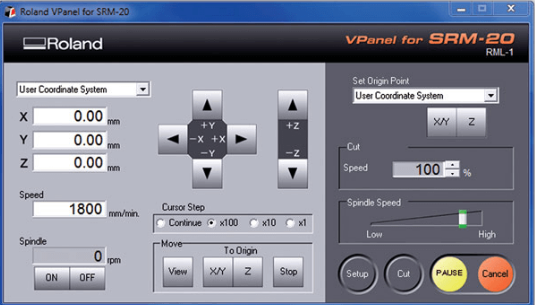
After inserting the drill bit, we did machine calibration to choose the zero (origin) of the x,y & z axis.
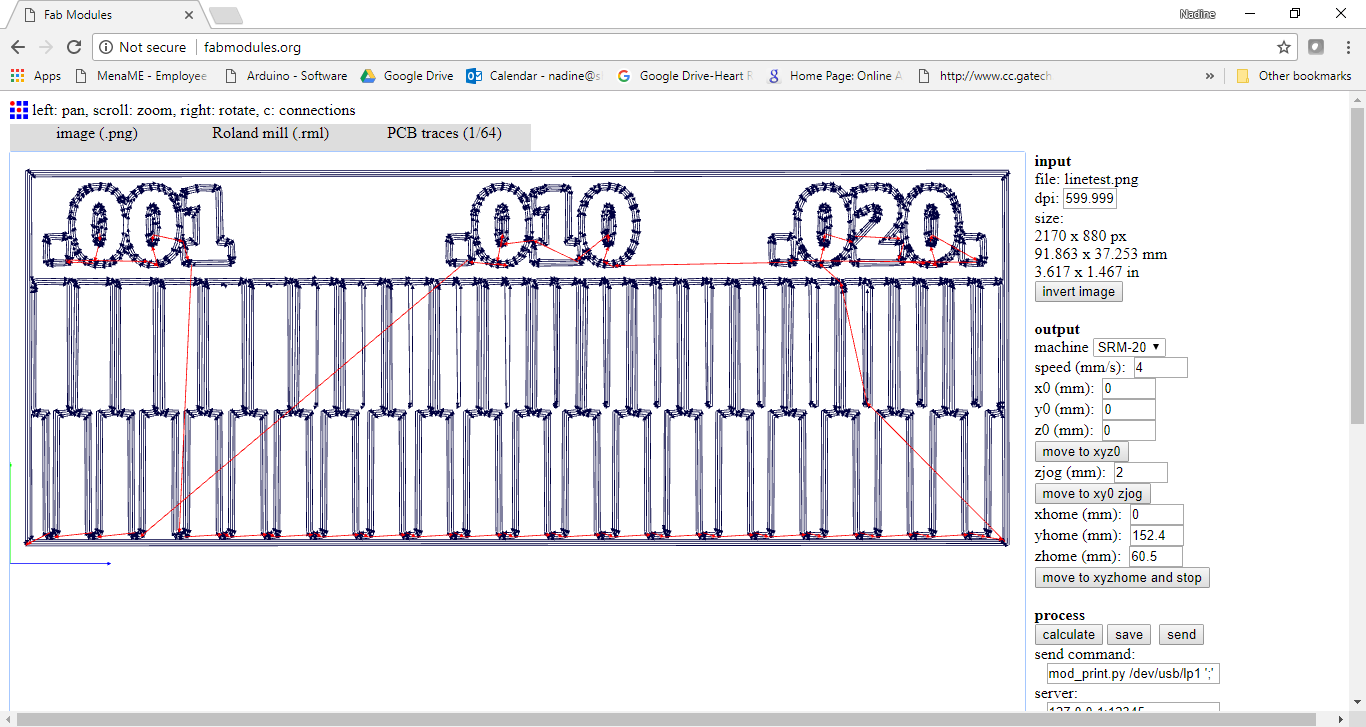
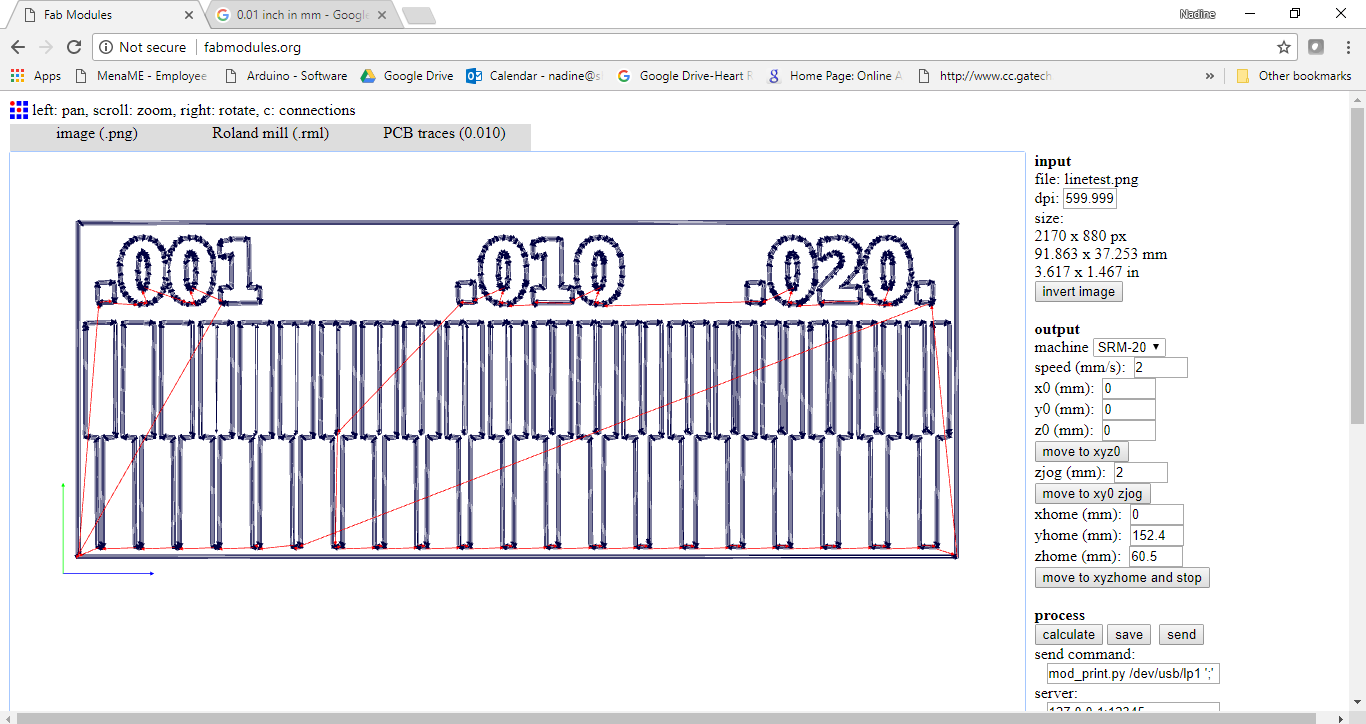
We used Fabmodules as our CAM Processor to set the settings for our Roland SRM-20 Milling Machine. The below image shows the settings.
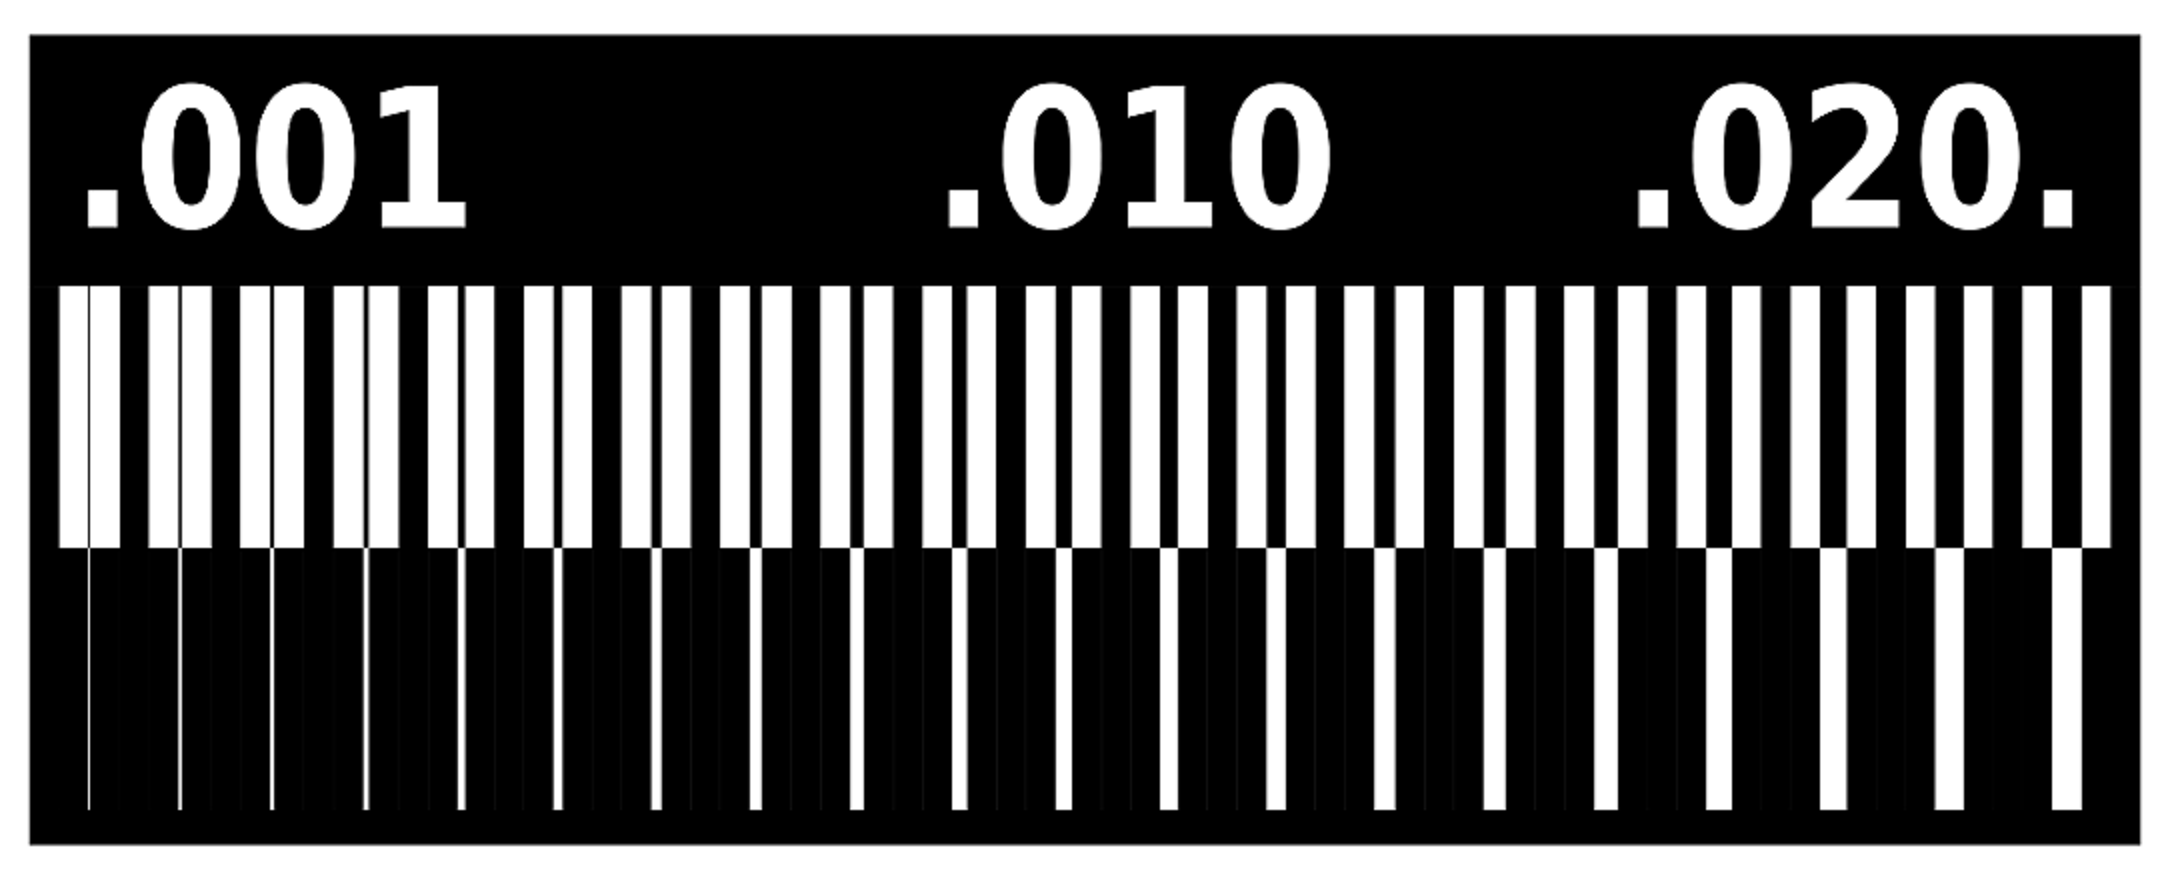
Then after that we changed the endmill to 0.2mm and changed the settings to the below.
The main settings that we changed is the speed, cause we were afraid to break the drill bit. We changed the speed to 2mm/s.
The below image shows the result we accomplished.
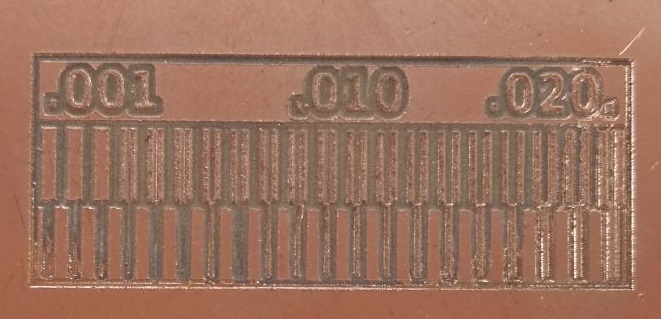
Then we wanted to go even further so we tried the 0.1mm and here's the outcome.
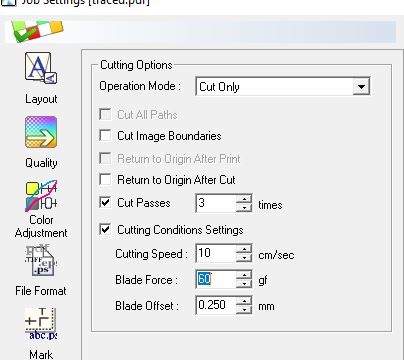
We also tried flexible PCB using the vinyl cutter. We glued the copper sheet on another vinyl material because the width of the copper sheet is small. Then we opened the image in CorelDraw and colored the edges red so the cutter can recognize it as cut.
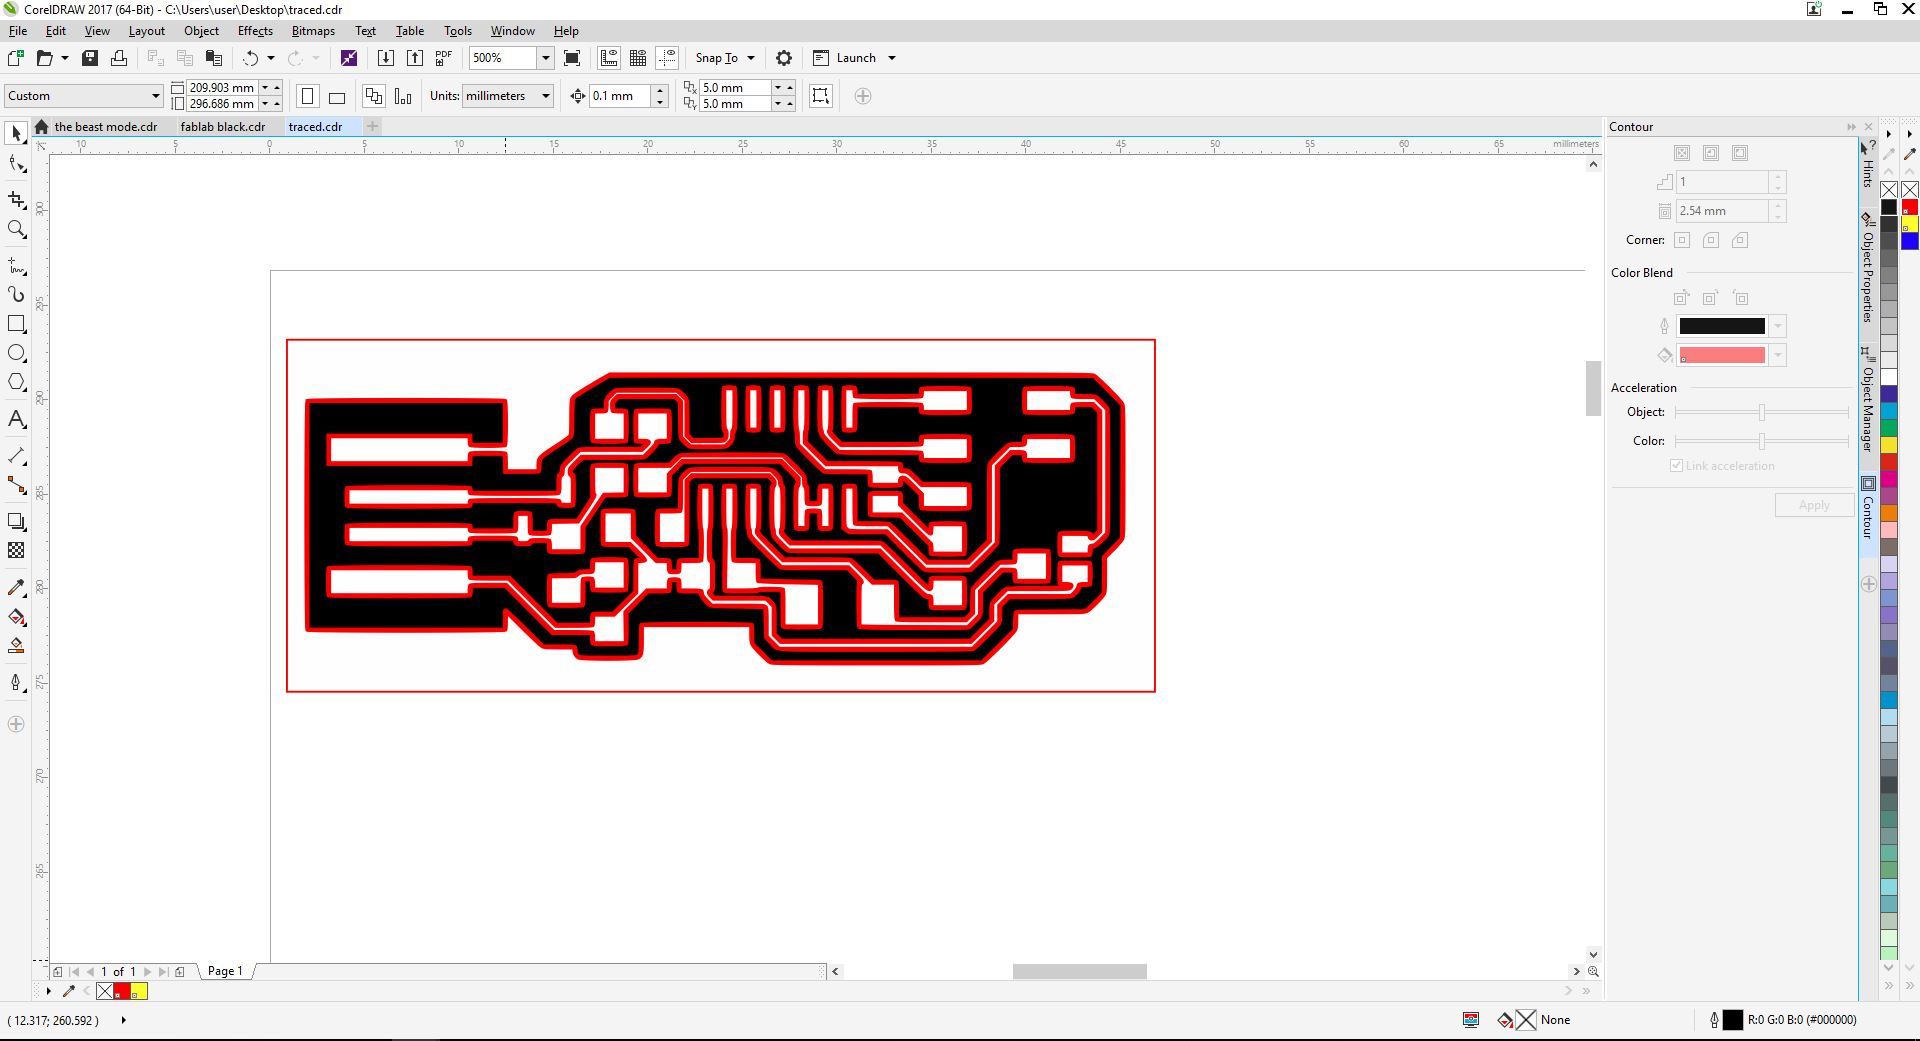
The cut settings are seen below.
The result is seen below.