In this week we have two main tasks read a datasheet of a microcontroller and program it using many languages and programers.
Firstly, I will progam my ATiny 44Hello board which I made in
Electronic Design Week
using a FabISB which I made in
Electronics Production Week
Then, I will program my Hello board using Arduino IDE with differant C codes.
Before designing the ATtiny44 Hello board I should read it's datasheet which can be found HERE. As I noticed it is a document of 229 page #. surely I haven't to read all of them, I just have to look for important information such as :
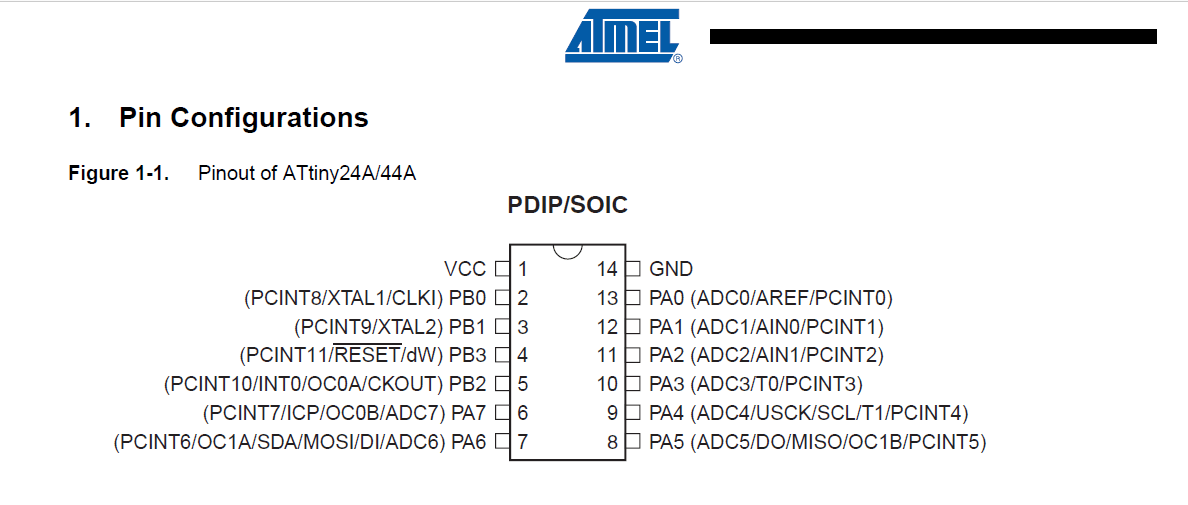
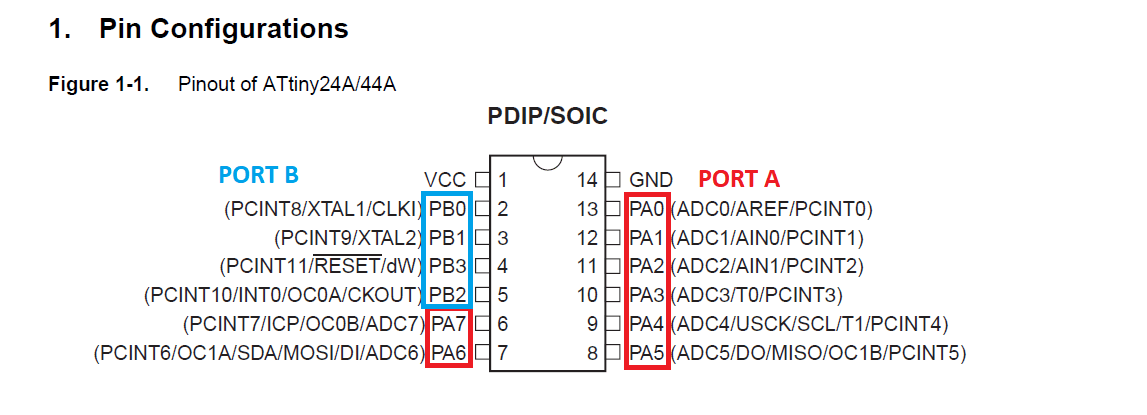
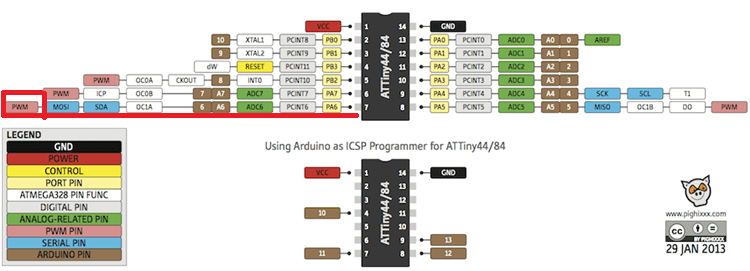
Pin Configuration Which shows the functions of each pin:
After pin configuration section in datasheet there is an Overview talks about Architectural of AVR chips followed by a description of all components.
There are a lot of details actually I couldn't understand and explain in this assignment. I just want to talk about main things I need to program my board. As shown in pin configration, ATtiny 44 has two digital I/O PORTS A and B. PORT A has 8 pins and PORT B has 4 pins:
Each port pin consists of three register bits DDxn, PORTxn, and PINxn as shown below:
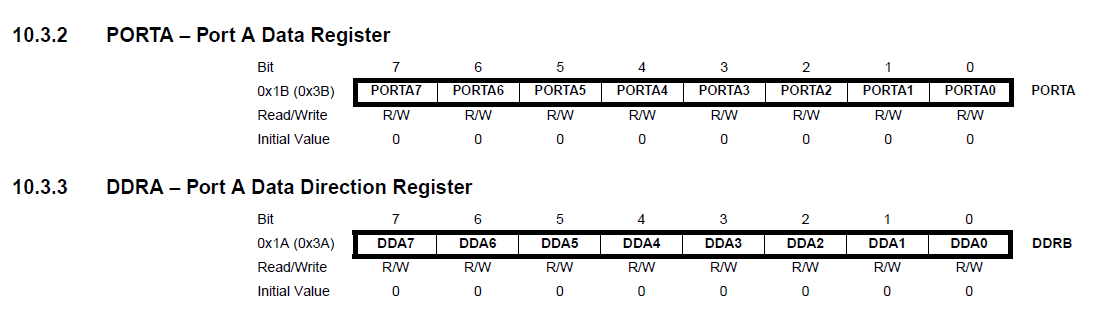

DDxn selects the direction of the pin for example if DDRA2=1 the PA1 pin sets as an output pin if DDRA2=0 that means the pin is an input pin.
PORTxn register is let bit confusing, so I will copy the description exactly from the datasheet:
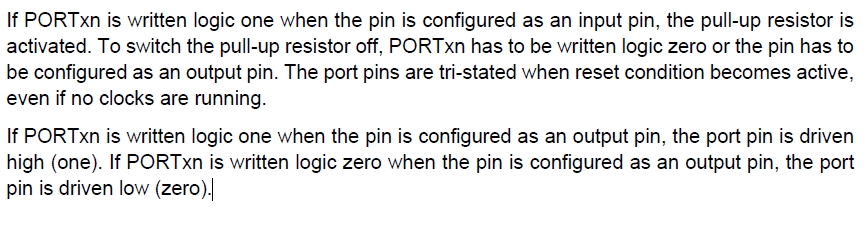
PINxn register works just when the Pin sets as input pin to store the data entered by each input pin.
In previous week when I designed my board I connected LED to PA2 pin and BUTTON to PA3 pin

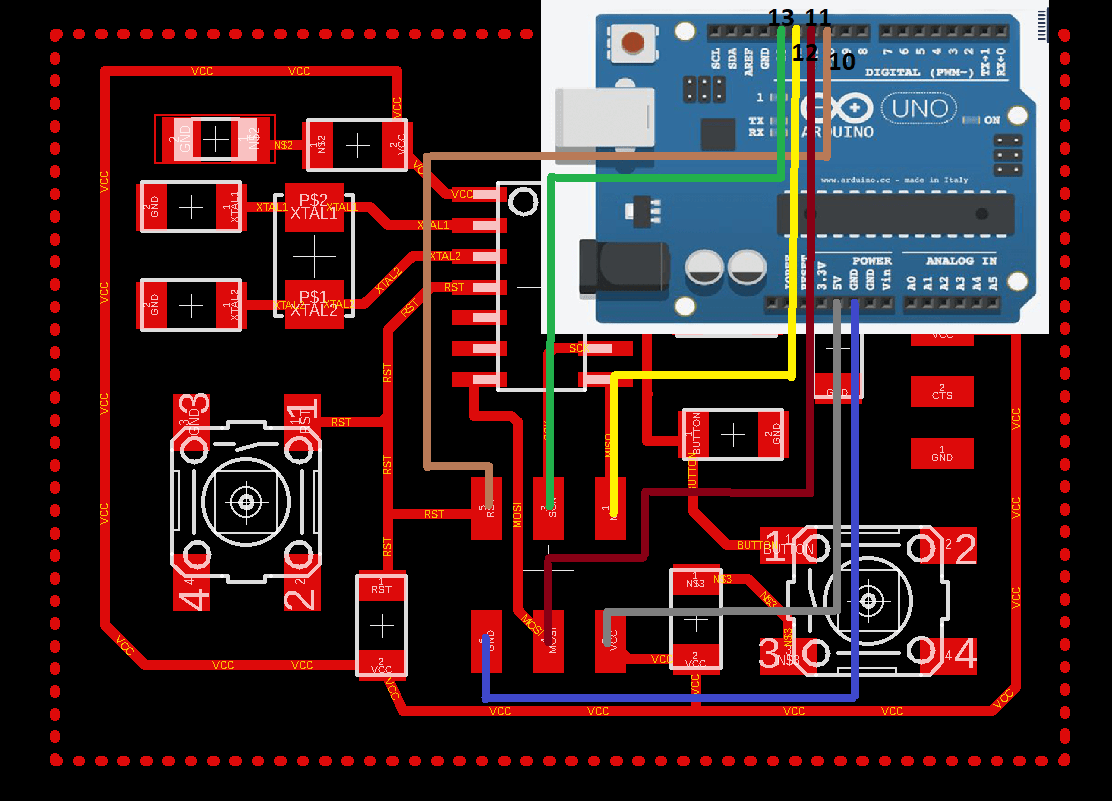
First I connected Hello board ISP pins to FabISP pins as listed:
Now I will follow the main 3 steps to program my board with FabISP
First step to download the necessary software for AVR Programming open Luinux terminal and write these instructions
First type
sudo apt-get install flex byacc bison gcc libusb-dev avrdude
Then
sudo apt-get install gcc-avr
Select yes when asking by tapping y
Then write
sudo apt-get install avr-libc
Then type to install which may be already installed when programming FabISP
sudo apt-get install libc6-dev
The second step is preparing the make file as written in WIKIPEDIA the definition of make file is :
Make is a build automation tool that automatically builds executable programs and libraries from source code by reading files called Makefiles which specify how to derive the target program. Though integrated development environments and language-specific compiler features can also be used to manage a build process, Make remains widely used, especially in Unix and Unix-like operating systems.
Besides building programs, Make can be used to manage any project where some files must be updated automatically from others whenever the others change.
which is has the configurations needed to compile a C code to the machine .hex code.
I started from Neil's make file , then I make the necessary changes. In the figure below there is my makefile with command starts by # to explain what's the mean of each instruction. Note that I deleted the command when I moved to the next step , but I put them here just for clarification.
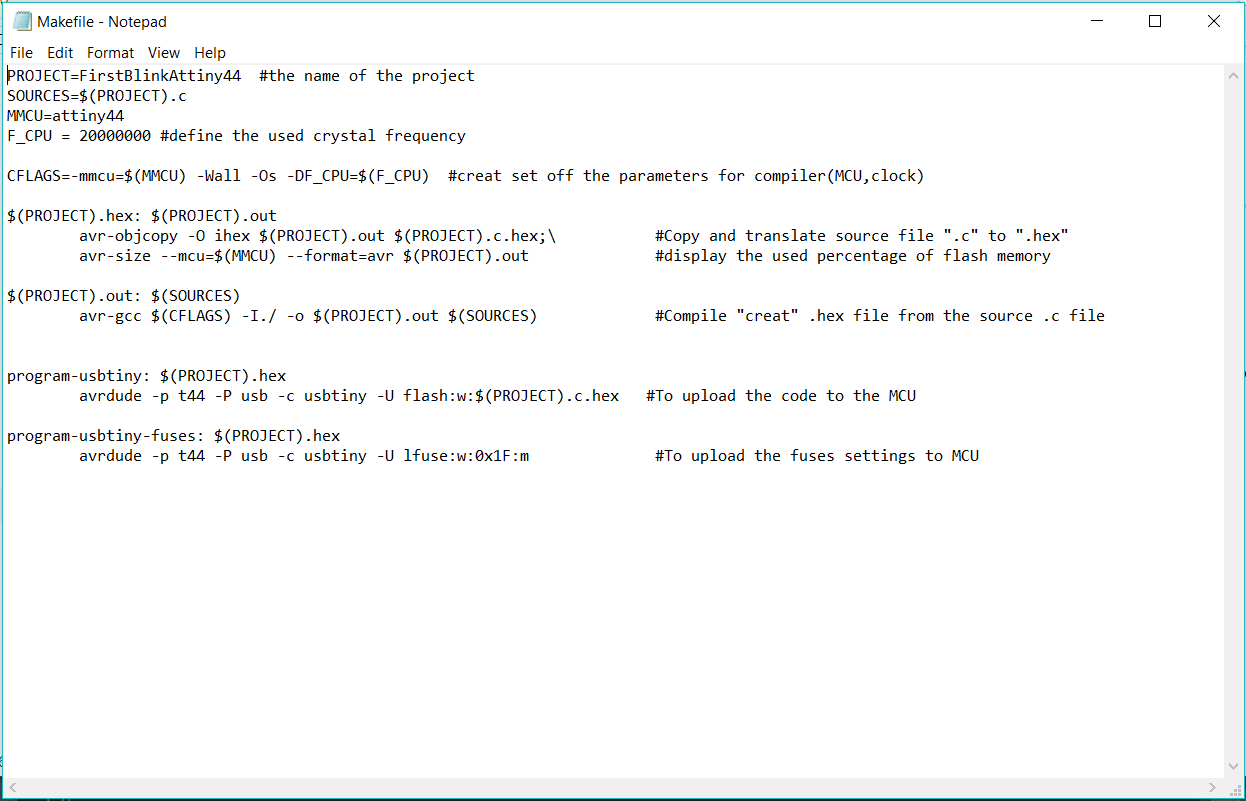
After prapering the make file, connect the FabISB to the laptop USB and In Lunix terminal type lsusb to see if the computer can recognize the FabISB, if it is success just type sudo make if it is done type sudo make program-usbtiny
I try a blinking led C code shown
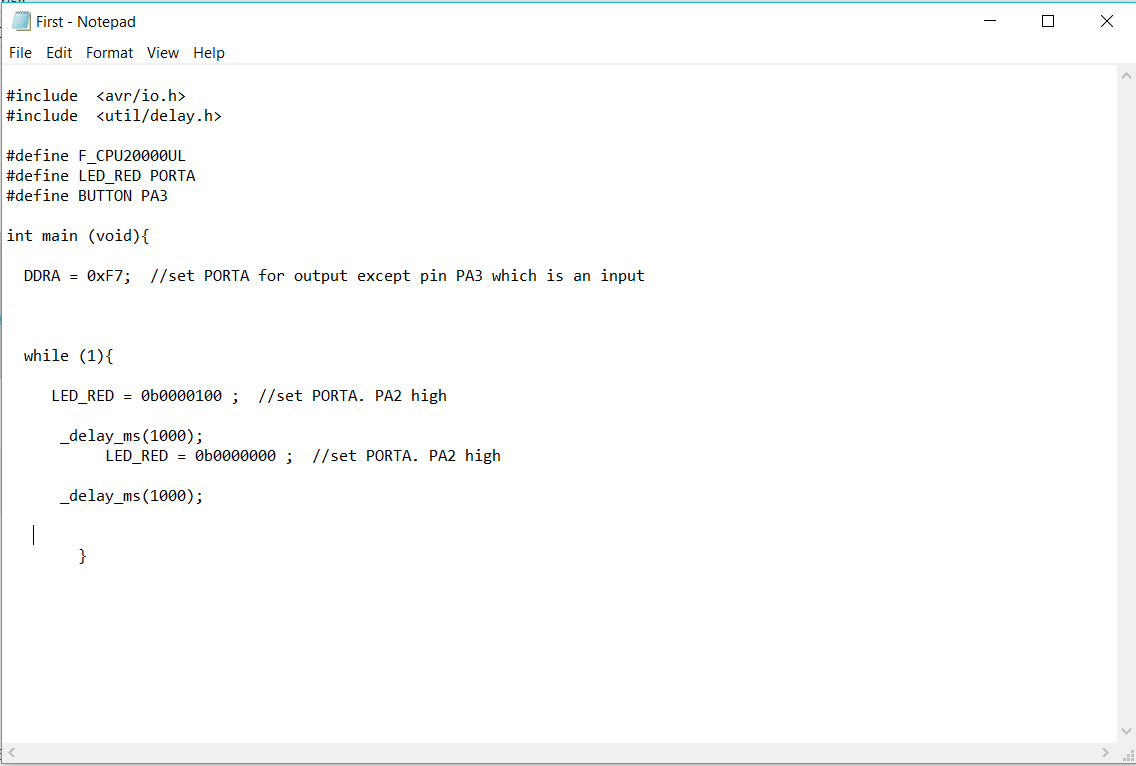
You can show the Video below
Then I wrote a code to control a button and led
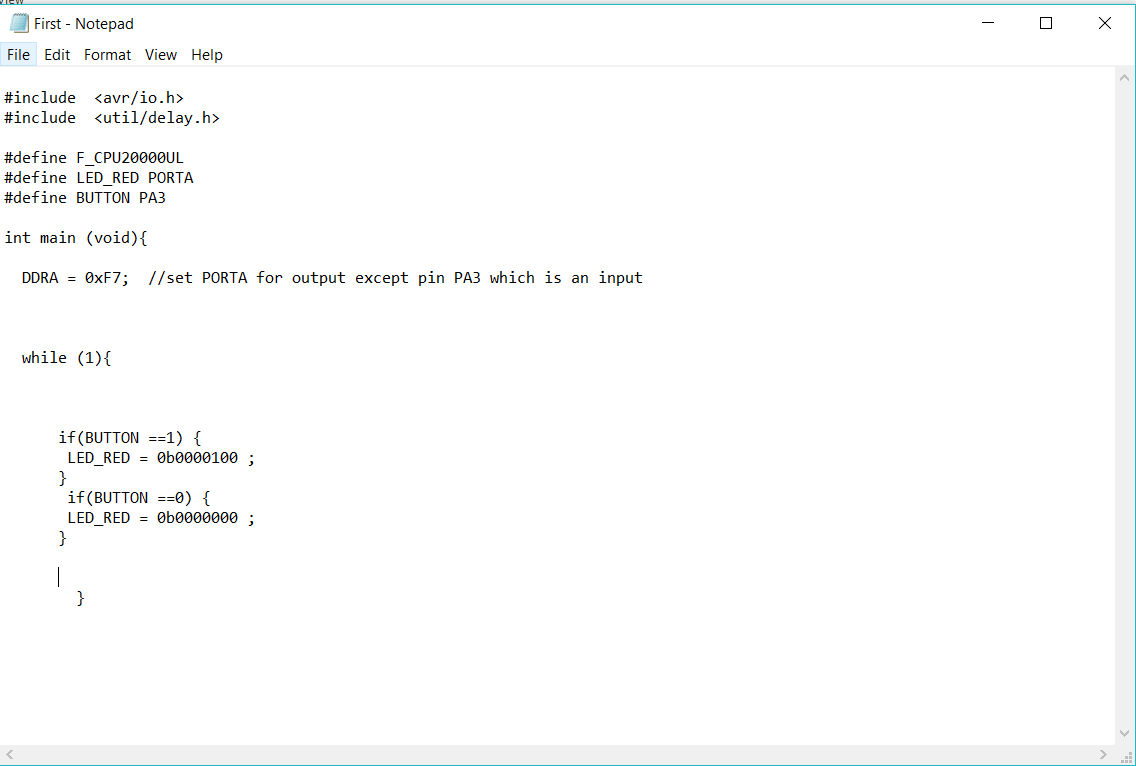
You can show the Video below
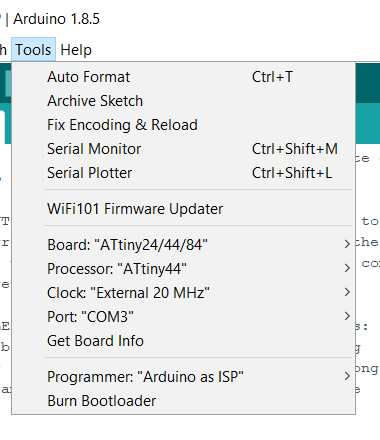
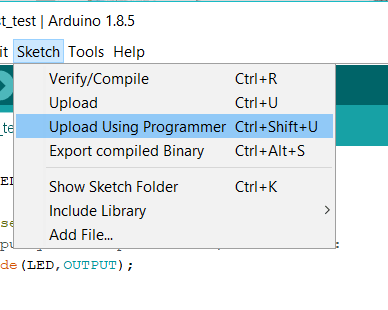
I thought if the previous complicated method should be repeated every time to program anything I don't want to program any more, but fortunately there are many other easier methods, one of them is to use an Arduino board as a ISP and write your code either in C or Arduino C or any other language. I will use Arduino C and I will do everything in this step just using Arduino IDE. Although I did these steps in Electronic design week I will repeat them briefly because I always made mistakes when repeating them.
In my code I want to use a PWM pin, but in my board I didn't connect all pins, I just connect pins 2 and 3 but any of them weren't PWM pin so I just looked to ATiny44 pin out and I noticed that I could use MOSI pin as a PWM :)
A PWM pin allows you not just to output a high or a low value through you pin, but you could send a fraction of the output voltage by setting a number between 0 and 255 using analogWrite(Pin, x); command. 0 will give you zero volt, 255 will give you 5 volts, any other value between them will give you a ratio between 0 and 5.
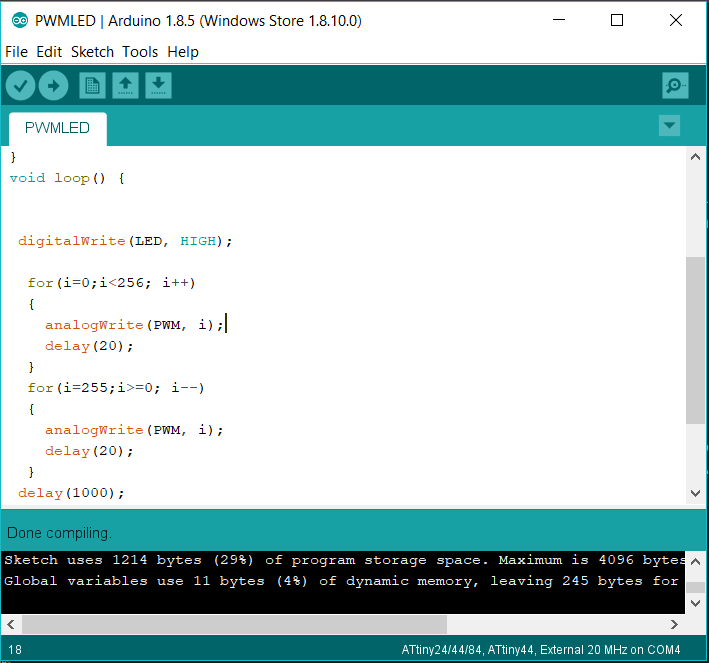
In my code I used for loop and PWM to control a LED light intensity. The first for loop will increase the vaule of an index i from 0 to 255 and send it to PWM pin. The second one will reverse job. I connected an external led to MOSI pin after I uploaded the code.
This is my simple code:
The connections and final result in this video
Even that I just connect one LED on my board I used FTDI cable TX and RX pins as digital pins to control 2 external LEDs. The connections:

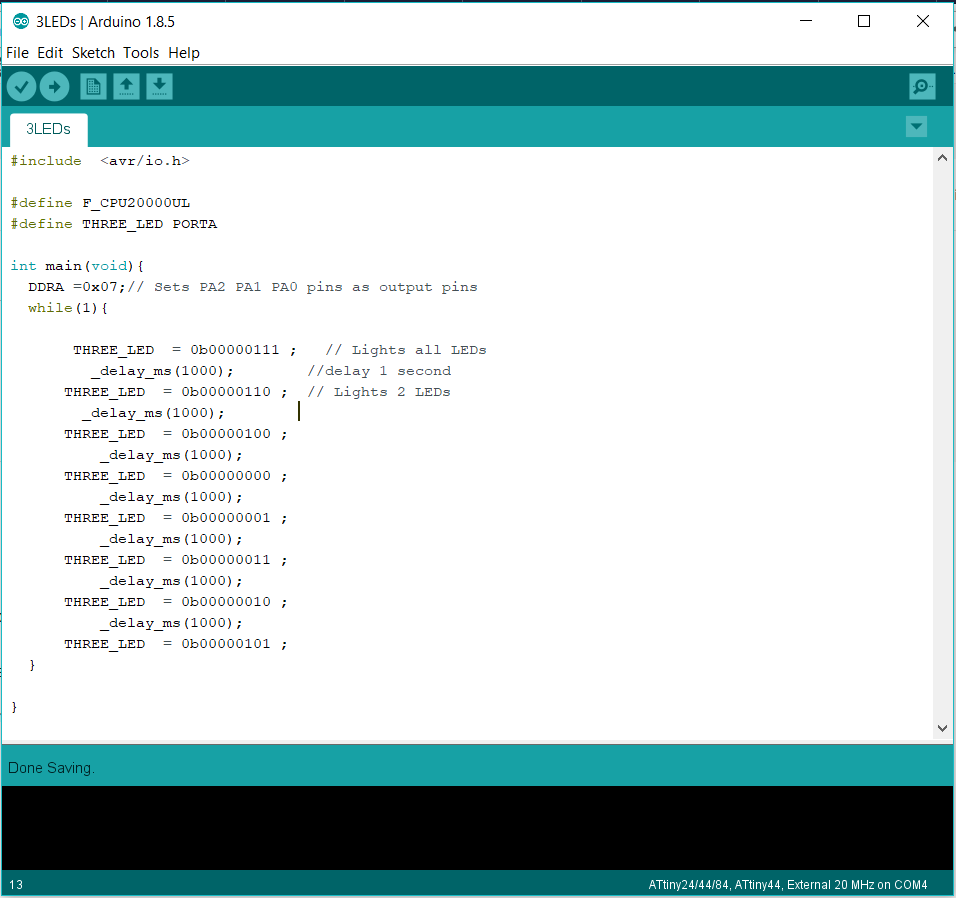
My C code which I uploaded to ATtiny 44 using previous method Arduino as ISP:
Watch the video
When I tried to upload my code to ATtiny using FabISB an unknown error keeps occur. Then I tried to power my Hello board using Arduino UNO 5V and GND pins instead of powere it from FabISB fortunately it works! . The reason was the power from computer USB port it is not enough to power both FabISB and Hello board so when I powered it from external source I solved that problem.
Download Codes