The first task of this week was to create a website in order to post our weekly assignments and the final project. Because this is my first time building a website, it took a lot from me just to build a very simple one. Anyway, I will never give up and I'll keep learning and improving my page.
As a start I read an
HTML tutorial and
CSS tutorial from
www.w3schools.com. I used a
Brackets software to write both HTML and CSS codes, Brackets also give a live preview for your codes. The first step was to create two new files index.html
and main.css
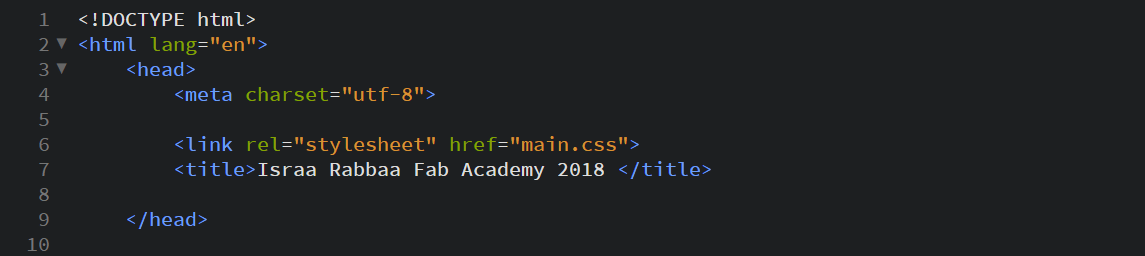
. Start with HTML file: the figure below shows the settings of the beginning of the html code and the ‹head› tag which has the link of the CSS file that describe the style of this html page and ‹title› tag which set the title of the web page. These settings don't visible in the web page.
After ‹head› tag the ‹body› describes the visible content of the page and I divided into to classes to easy control their styles in CSS file. Here is an example for a class that contain the main head of my page.

My main.css
file describes the style of the index.html
file. As I divided my code into separate div
s so I could manage each ‹div› style without affecting the others. The figure below shows the settings of the first part titles and background picture features.

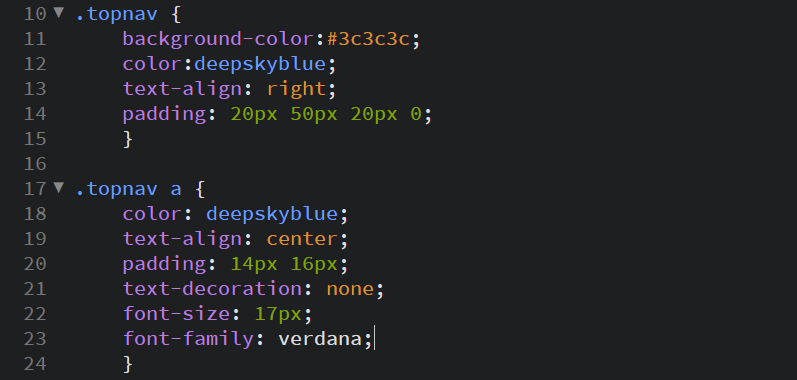
I decided to add a top navigation bar, that shows below, to easily move to the desired section in the page by clicking on its name in the bar.

The HTML code for the navigation bar is:

The CSS code for the navigation bar is:
Beside of the HTML code for the main page index.html
file I created an individual HTML file for each week assignment ex: week1.html
, but one CSS file to manage all weeks HTML files weeks.css
Again, it seems that everything is new in the first week, this is my first time working with GITLab
and even hear the expression version control
so I was confused at the beginning, but thanks for our great instructor Alobt Dima he gave us a detailed explanation of how to easily use the GITLab
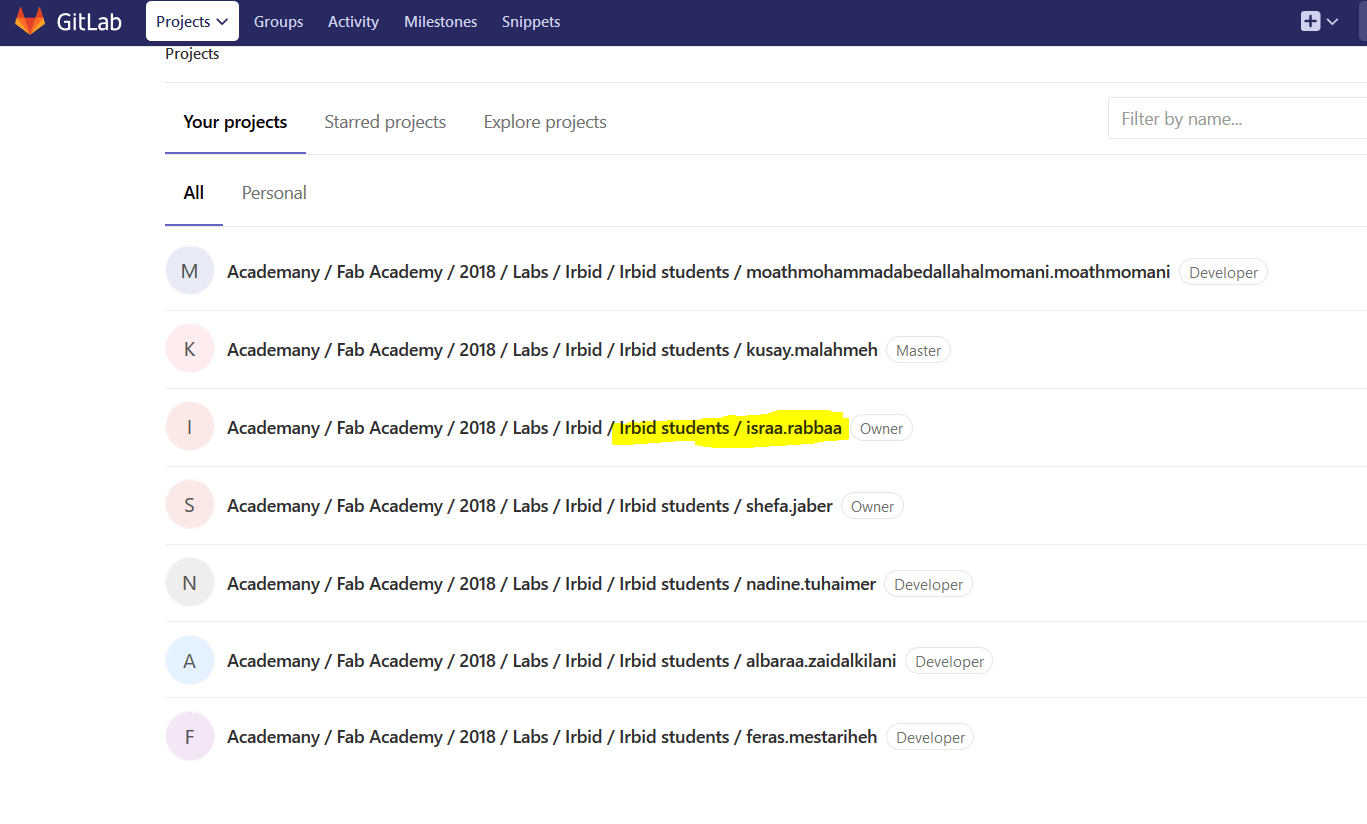
Firstly, I logged in into my GitLab account and found my name as shown:
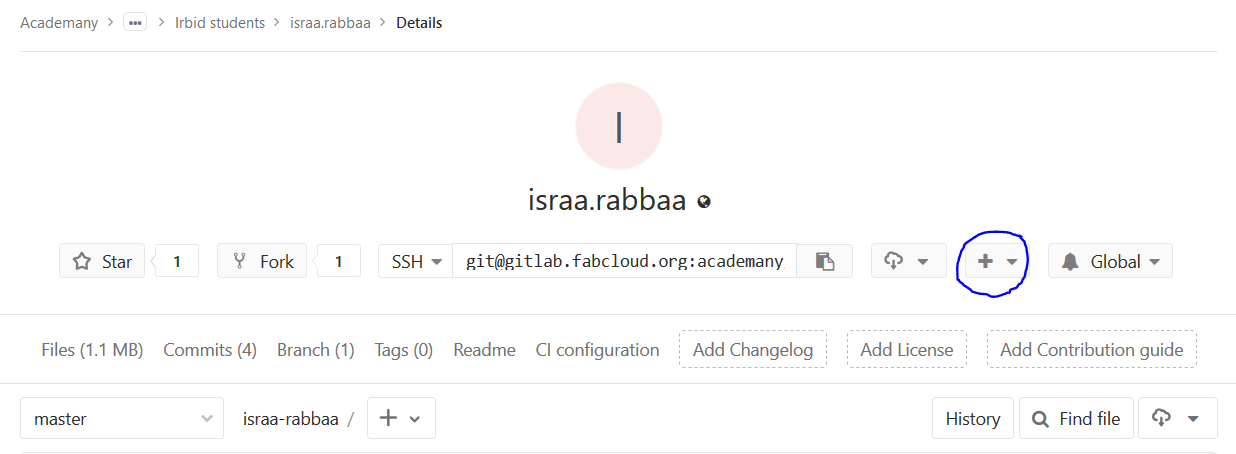
Secondly, I entered into my account and created a new file by clicking on +
icon as shown, then write the file name index.html
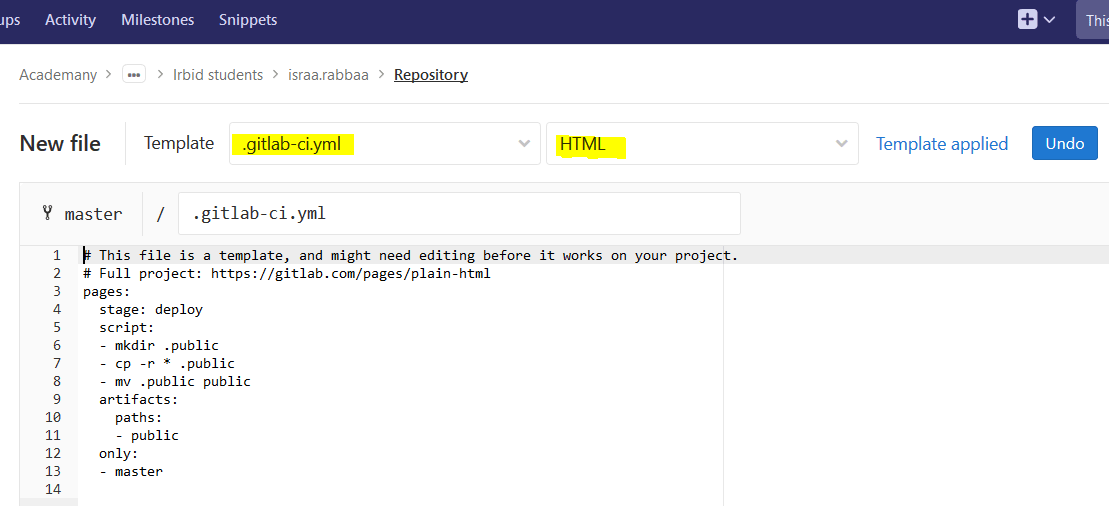
In order to upload the index file I added a.yml
file by again clicking on +
as the previous step, then I choose templets as shown in the figure below, after that added anything in commit message filed then pressed commit changes.
By the end of this step I have a blank HTML page when I click on my name in the Fab Academy 2018 list of students in this link
Now moving to Git Bash App, which could be installed from this link Then I wrote the shown below commands respectively as Git Bash command window
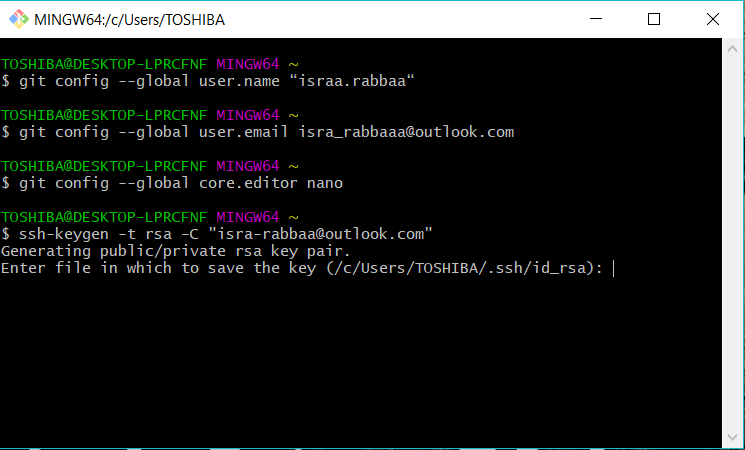
Then I continued pressing Enter and y
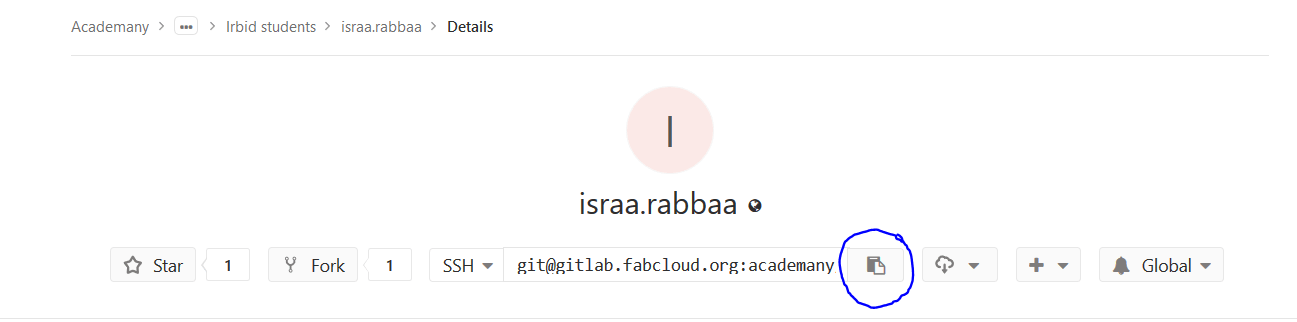
, after that I wrote this command cat ~/.ssh/id_rsa.pub .Then I have a key, I copy and paste it into the page Israa Rabbaa_Setting_ SSH Keys page .Then I create a new folder in my computer to be my local working directory I named it GIT and navigate to it. Then I copy the link shownnin the picture below.
After that I created a new folder in my computer to be my local working directory I named it GIT
, then I navigated into it. Then I copied the link shown in the figure
Finally, I write this command followed by enter:
git clone the link I copied
Now I can upload my files after editing them using these three commands:
git add -A: this will add all the files in the dirictory
git commit -m
                        a useful Message for update information
this command will just add a title for the updating opreation
git push
: this command will push all files added
in the first commandto the my GITLab account