Project Management Week
For this week's assignment; we had to build a personal website to document our work throughout this course.
I previously built 2 websites but using website builders where you just drag and drop elements, I sometimes needed to tweak the html to do certain things so I was familiar with the html programming, however I haven't built a full site from scratch before so I was pretty excited about that!
I volunteered about a month before the Fab Academy started to give an intro to html to my co-workers who are also taking the Fab Academy (see the presentation I used). So I already knew the basics, but I'll mention them anyway.
HTML stands for Hyper Text Markup Language which basically builds the structure of your site. I used  Brackets software to develope my site.
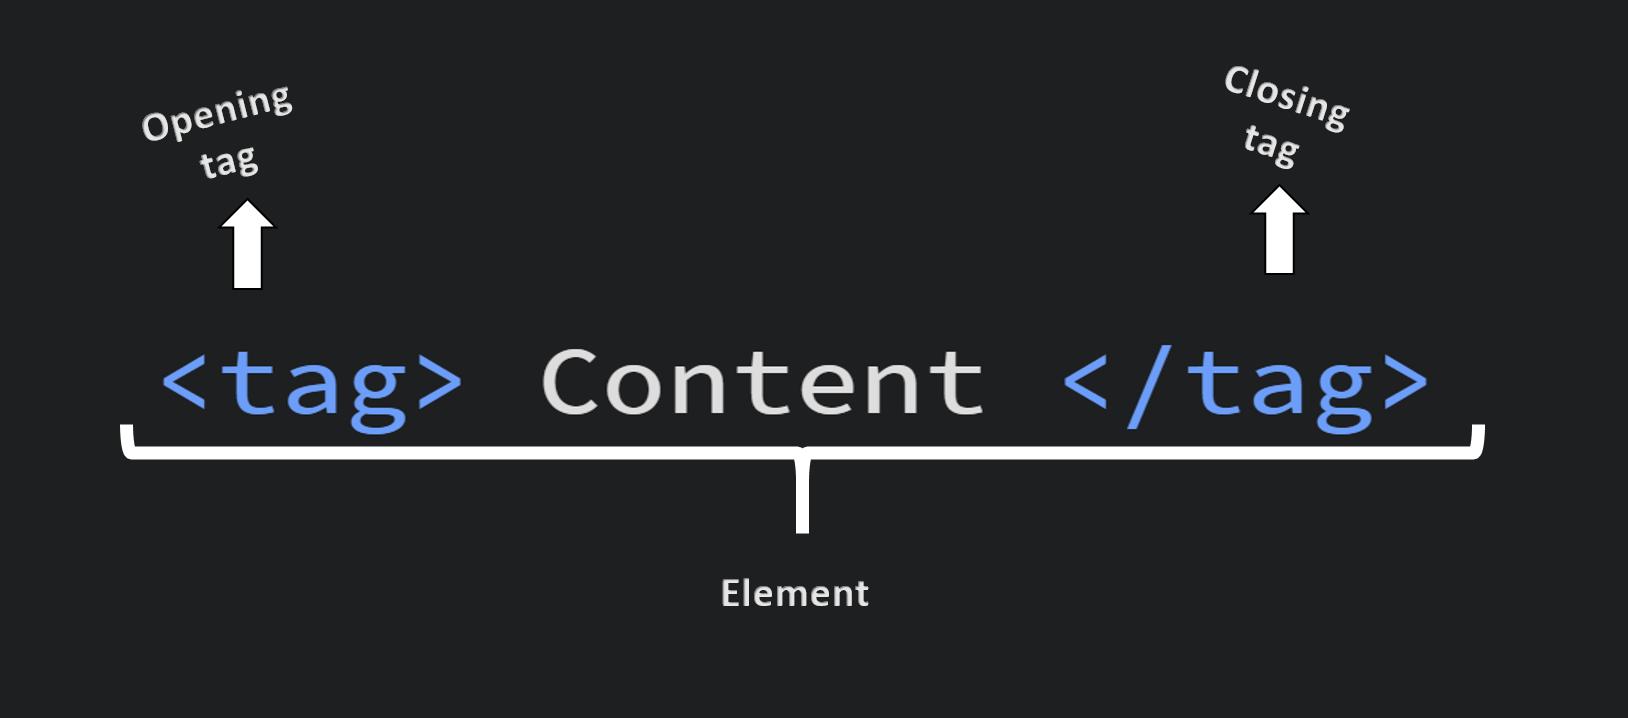
A piece of HTML code will in most cases consist of an opening tag, a closing tag and the content within which looks like the following:
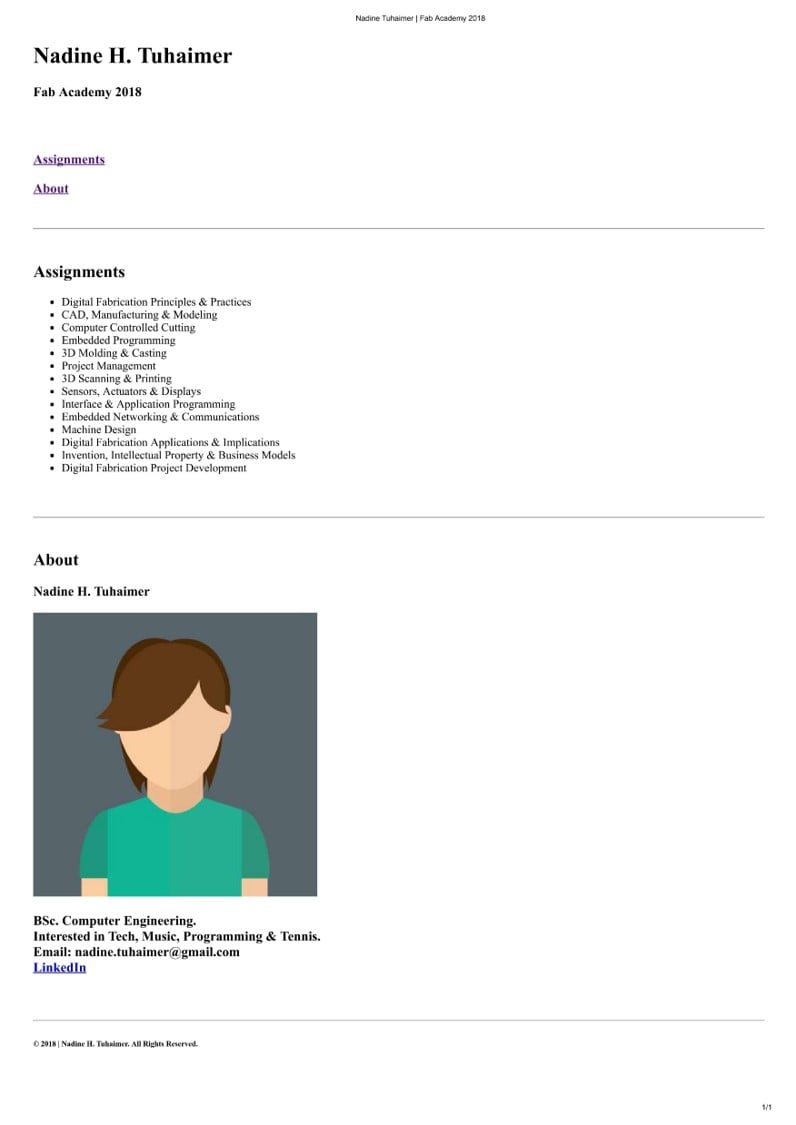
At first my site looked like this, using only html:
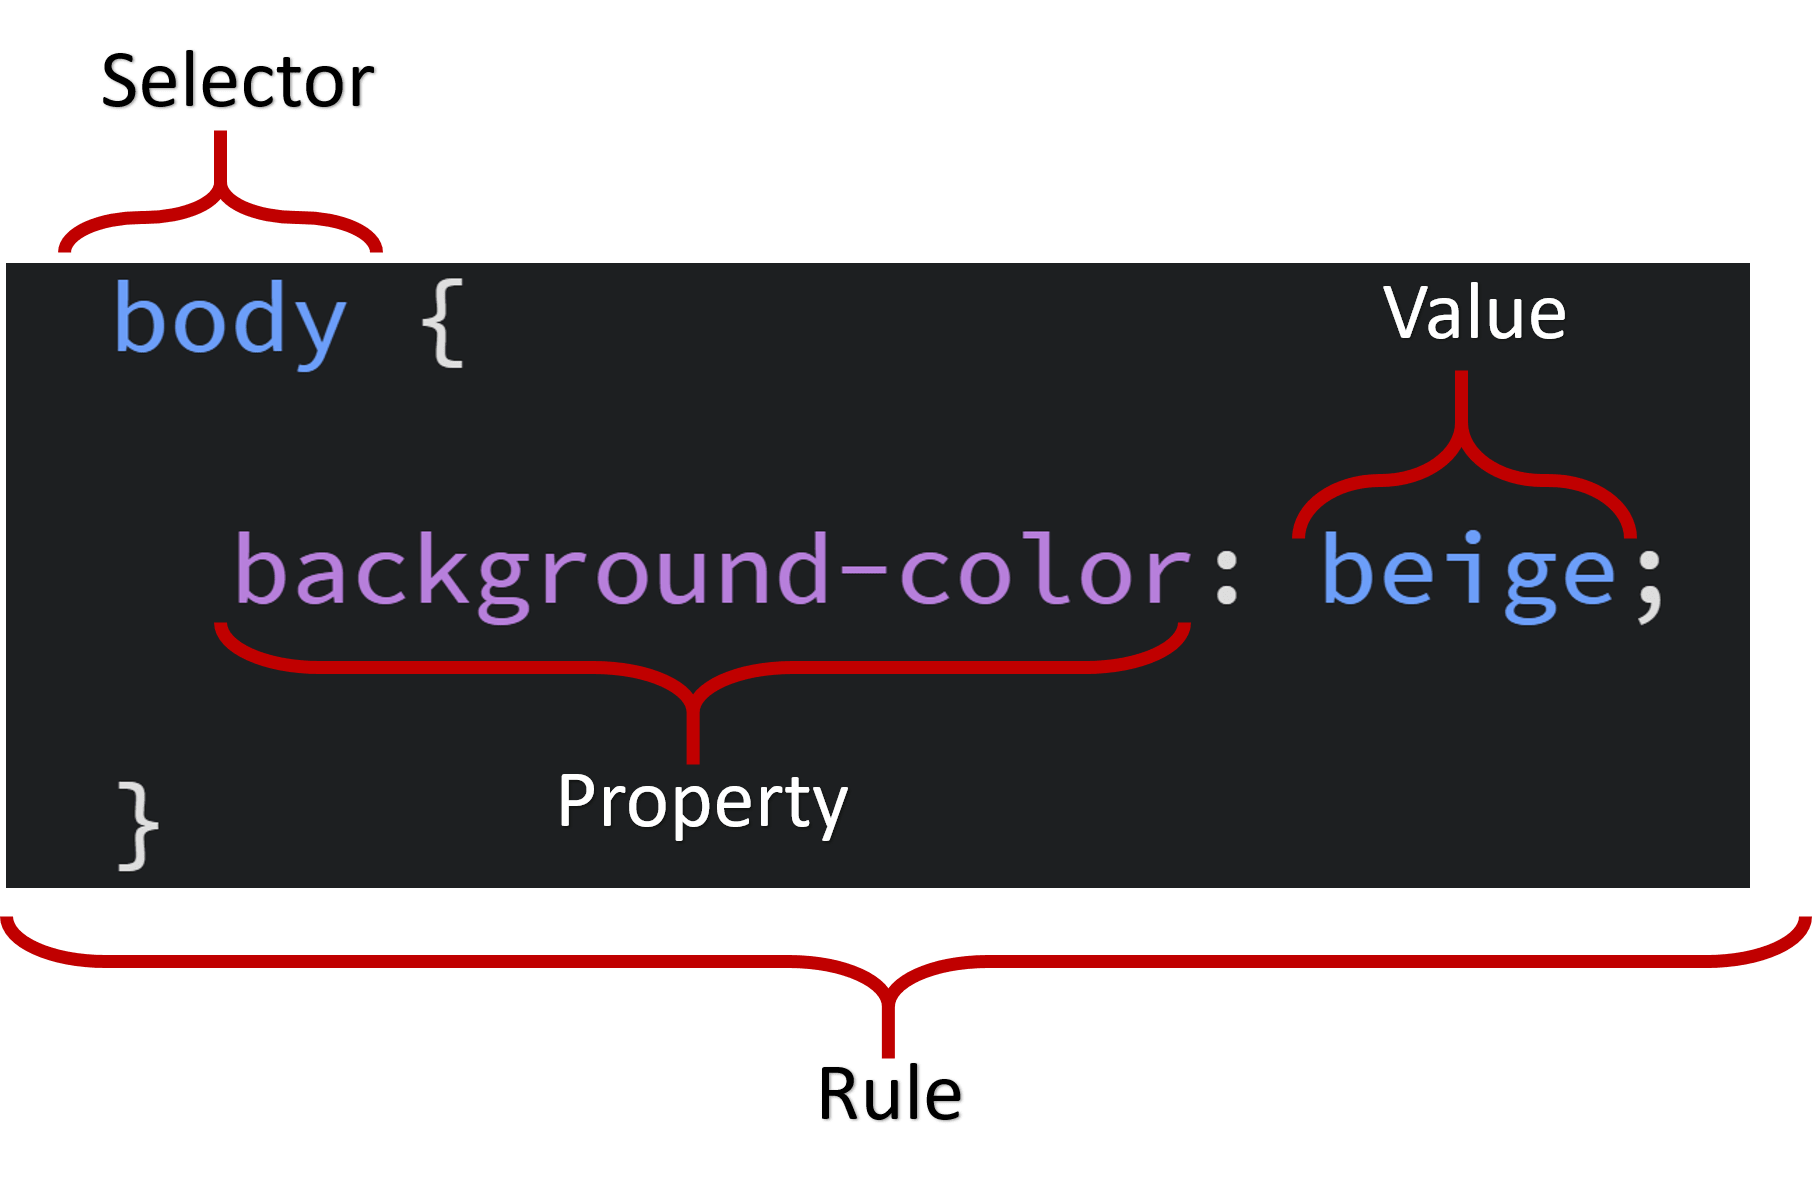
Then I had to make it pretty using CSS which stands for Cascading Style Sheet. CSS is how your site is presented so it's the presentational layer of your site. A piece of CSS code looks like this:
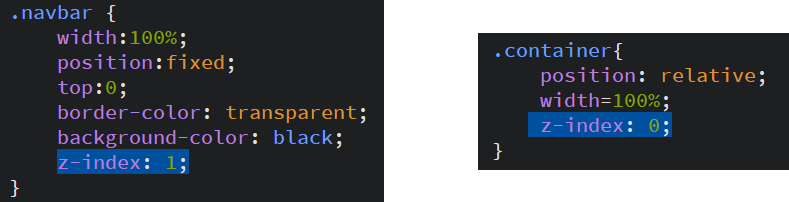
I decided to use the table element for the weekly assignments section, where I put images as table data. It looked great at first but when I started to add columns for following weeks I had a problem where the images would cover the navigation bar while scrolling (as seen below).
But it came to my mind that microsoft office has this bring to front or back feature for images to stack elements on top of each other so I googled that (thank god for google!) and I discovered the z-index property. This property allows you to stack elements in the z-axis where elements with the larger value of z-index are stacked on the top. So I gave my navigation bar the value of 1 and the container which contained the images inside the table a value of 0 which worked (yaay!).
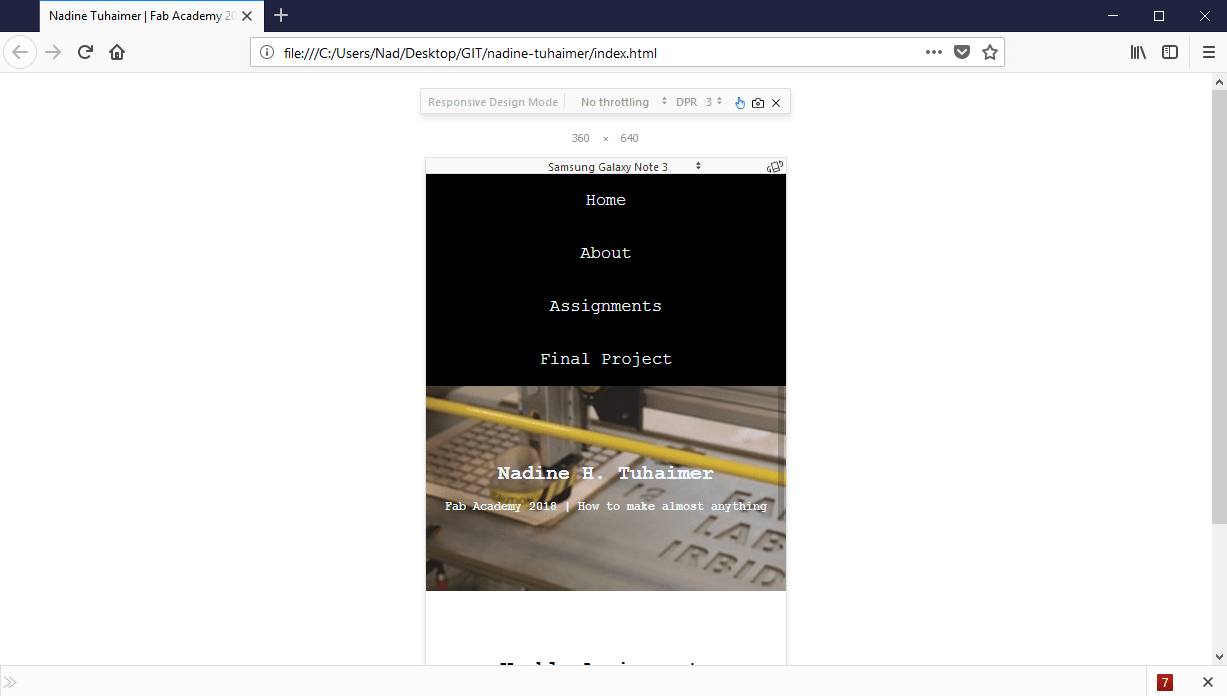
I thought my work was done! So I pushed to my repository (I'll talk about how in a bit). The site looked pretty okay I'd say but I got a bit disappointed when I checked it from my mobile phone that's when I decided to make it responsive.
Responsive means that the site adjusts according to the screen size. I did that in CSS by using the below code:
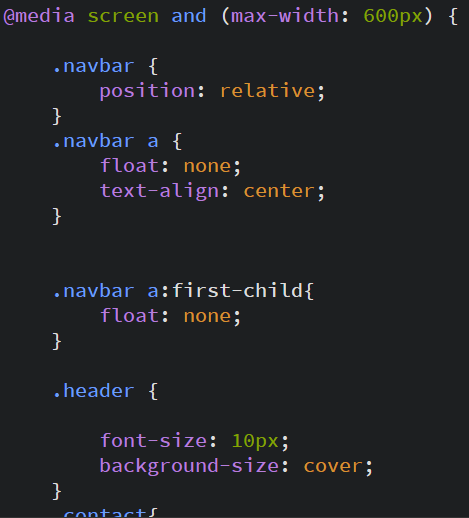
So basically, max-width is the width of the screen where your site will change how it looks according to the code within that rule.
It took a lot of testing to get it to the way it looks now and I used ![]() Mozilla firefox's responsive design mode in web developer tools to test it.
Mozilla firefox's responsive design mode in web developer tools to test it.
I had to change the float property of the navbar class to none to have the tabs (I think they're called tabs) to stack under each other.
I also changed the size of the background image in the header to display properly on smaller screens. Of course font size had to be changed accordingly. The size of the images displayed inside the table where I place the weekly assignments had to be changed as well so I went back in my code and moved the styling of those images from the html file into the CSS in a separate class (don't know why it was in the html file but oh well good thing I caught that!).
The last thing that I changed to make the site responsive was the font-size in the About section.
I thought my work was done but I decided to add a little bit of Javascript since I had time. Javascript adds behavior to your site which means if a certain event happens; your website behaves in a certain way. The only thing I added is the smooth scrolling feature and I did that with the below code:
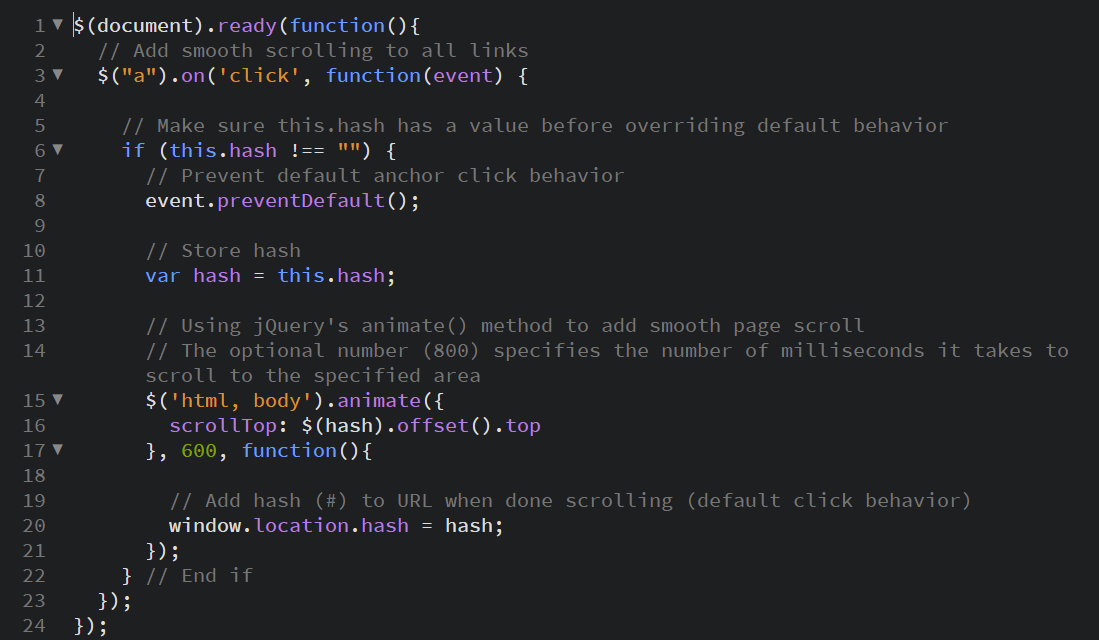
This code works when an anchor element is clicked, but only for internal linking (linking on the same webpage) and animates it.
Then I had to link my javascript to the html using <script>.
At first I placed it in the beginning of the html file after the <head> element but Dima (our instructor) mentioned that javascript is behavioral and you don't need behavior when you first load the page and suggested I move it to the bottom of the html file to make the site load faster which I did.
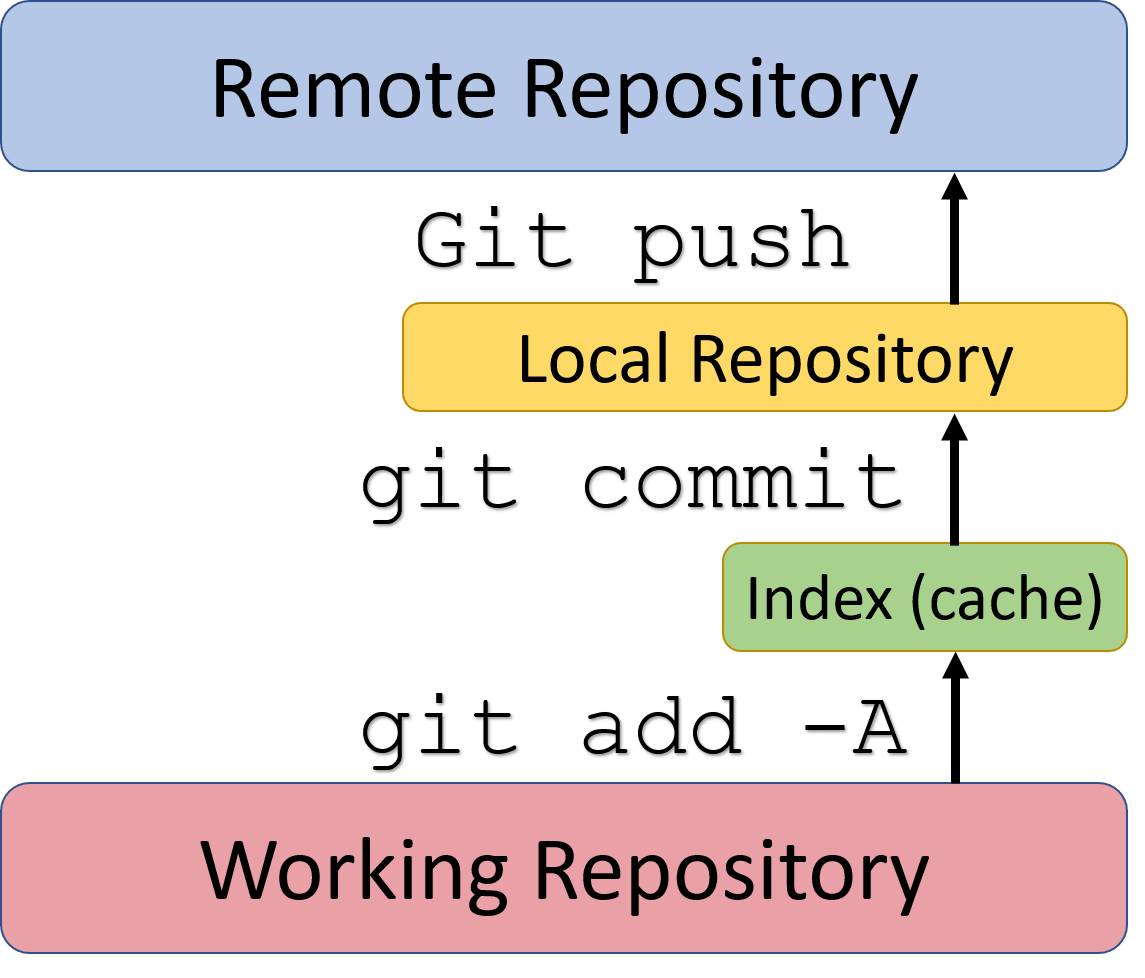
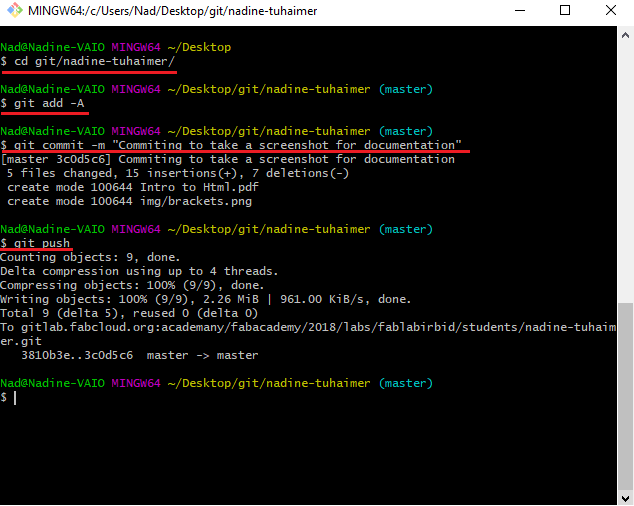
And that's pretty much how I got the site ready! Now let's get to GIT!