Week10 : Molding and Casting
Molding Flip Flop Test Part
Also check out my classmates’ works:
Group page(links to individual page at the bottom)
Download files
Scanned & meshmixed 3D data of my foot
Mold
Mold lid
Materials
Silicone
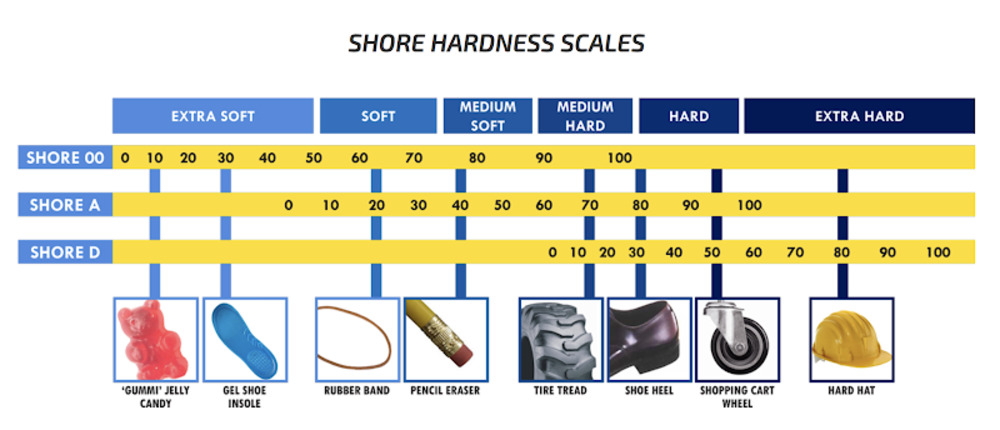
Durometer Shore Hardness Scale
Mold Start 16 fast
What matters :
Mix-ratio : 1A : 1B by volume
Pot-time : 6min
Cure-time : 30min
Mold Star SORTA Clear 37 A
What matters :
Mix-ratio : 1A:1B by volume or weight
Pot-time : 25min
Cure-time : 4h
Urethene
Smooth-Cast 300
What matters :
Mix-ratio : 1A : 1B by volume (10A : 9B by weight)
Pot-time : 3min
Cure-time : 10min
Smooth-Cast 325
What matters :
Mix-ratio : 1:1 in waight
Pot-time : 2.5min
Cure-time : 10min
Colorants & releaser
SO-Strong 9-pack Color Sampler
Only applicable for urethane materials.
Application
Using a soft brush, brush the release agent over all surfaces. Allow to dry for 10 minutes.
Reviewing SDS
Composition / ingredient
CAS (Wikipedia definition)
A CAS Registry Number,[1] also referred to as CASRN or CAS Number, is a unique numerical identifier assigned by the Chemical Abstracts Service (CAS) to every chemical substance described in the open scientific literature
You may look for the info about the material on google by asking like “cas: 101-68-8”.
Hazard identification
GHS Hazards classifications (Wikipedia)
Hazard statements form part of the Globally Harmonized System of Classification and Labelling of Chemicals (GHS). They are intended to form a set of standardized phrases about the hazards of chemical substances and mixtures that can be translated into different languages.
You can check the full list of hazard codes on wikipedia.
A hazard statement is assigned to a hazard class (physical, health, or environmental) and category (1, 2, 3, or 4).
EXAMPLE: Flammable liquids (Physical Hazard)
Category 1: Extremely flammable liquid and vapor
Category2: Highly flammable liquid and vapor
Catagory 3: Flammable liquid and vapor
Category 4: Combustible liquid
Disposal regulations
It is stated in SDS to follow the RCRA laws to dispose the material. For the detail of RCRA, refer to the link below.
Resource Conservation and Recovery Act (RCRA) Laws and Regulations
Testing
First of all, we casted a small amount of material as a test. We have done this for all the material we had at the lab.
Here are the result.
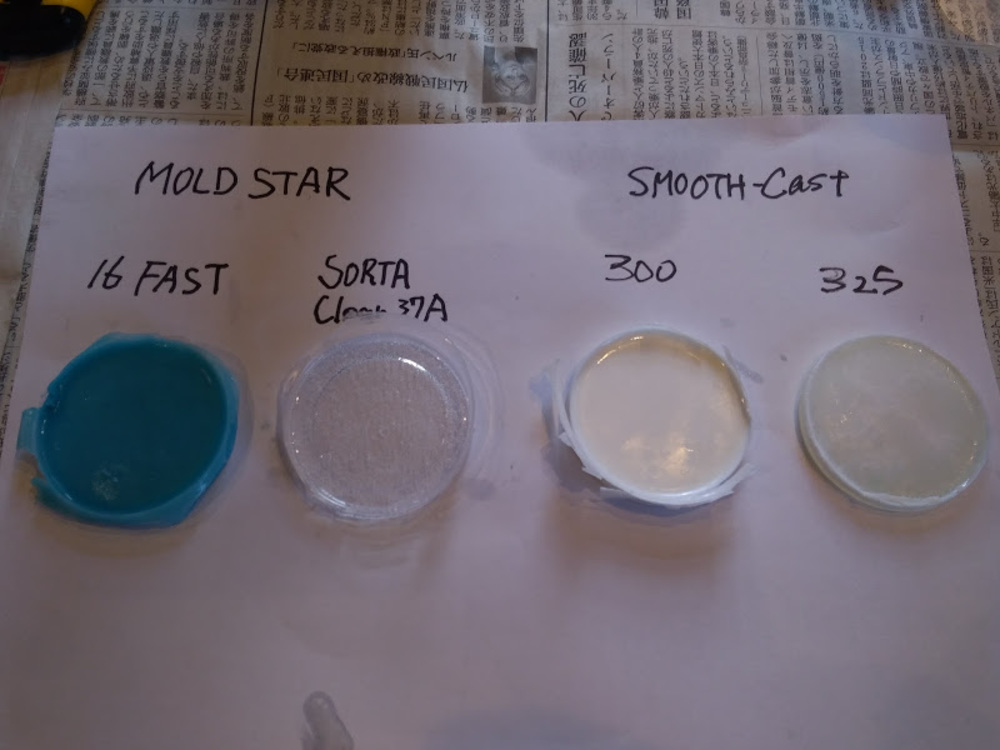
- Mold Star16 fast
Bit sticky, though smooth enough to spread through the mold. Comparatively less bubble. - Mold Star SORTA Clear 37
Highest viscosity among all. High transparency, but very hard to get rid of bubbles. - Smooth-cast 300
Product like finish without polishing. Curing time is especially short. - Smooth-cast 325
Rough surface compared to 300. Difficult to take away the bubbles. Hard.
3D modeling : design
In Week6 : 3D printing and scanning, I scanned my own foot with the help of my classmate Jun.
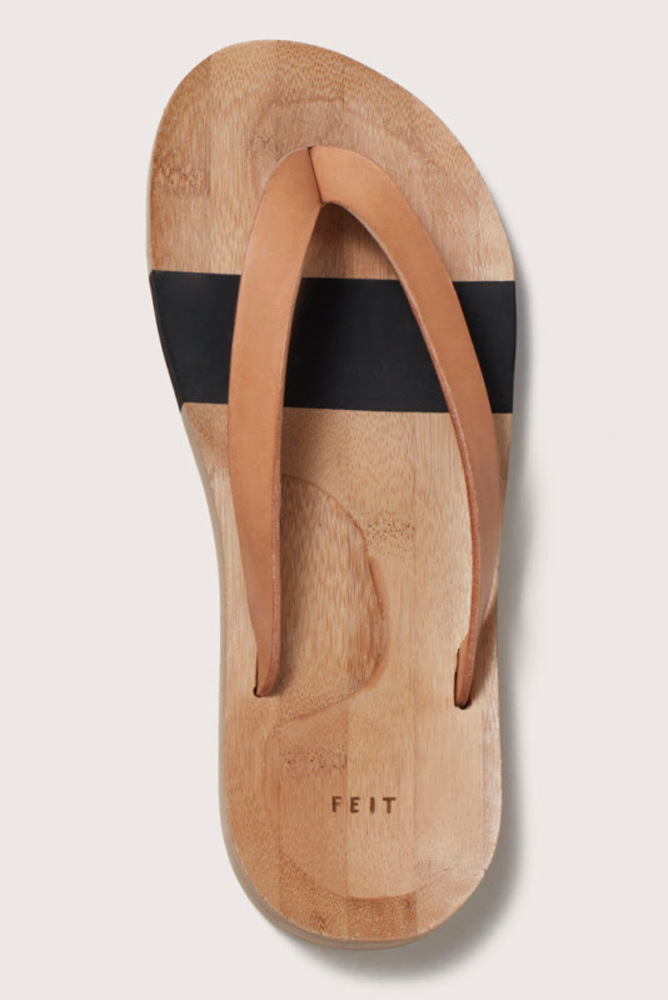
As this week’s assignment, I had been thinking of making flip-flops that suit my foot perfectly with the wood I collected from Fuji-mountain last summer.
This is also a part of Fujimock fes, an event sponsored and run by Fablab Kamakura.
This is what I am aiming for, but it doesn’t have to be faithful reproduction. It could be arranged an modified to suit my needs. The middle part is filled with rubber or silicon to ensure the flexibility of the flip-flop. I will make this middle part with casting.
Modeling flip-flop
-
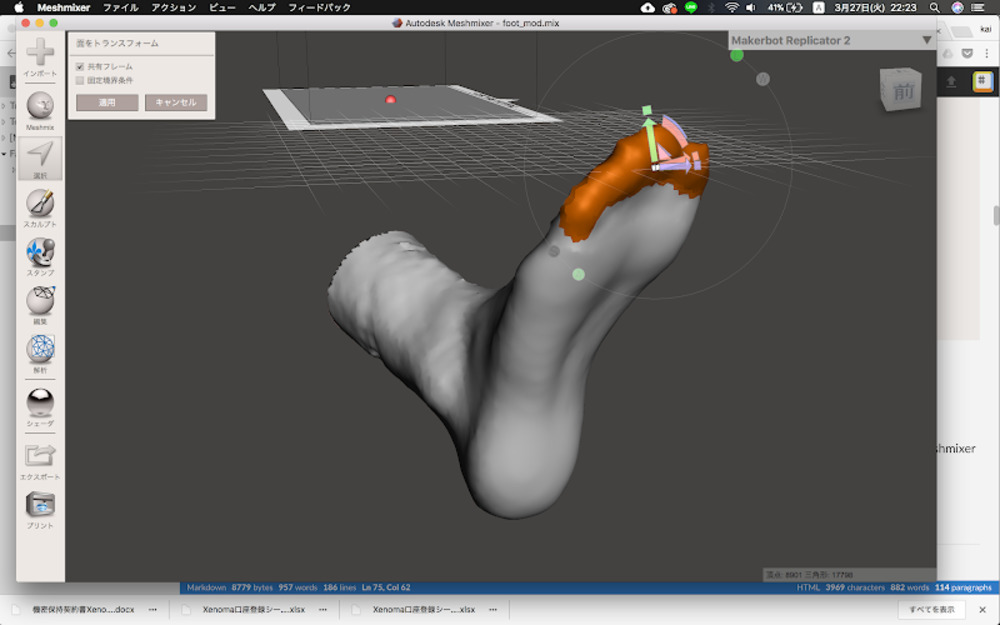
Modify scanned foot data with Meshmixer
As toe was pointing up, sole part wasn’t flat enough that I can gouge out the thin layer of wood with it. With Meshmixer, “Select” and “transform” to reshape the mesh.
Save as stl.
-
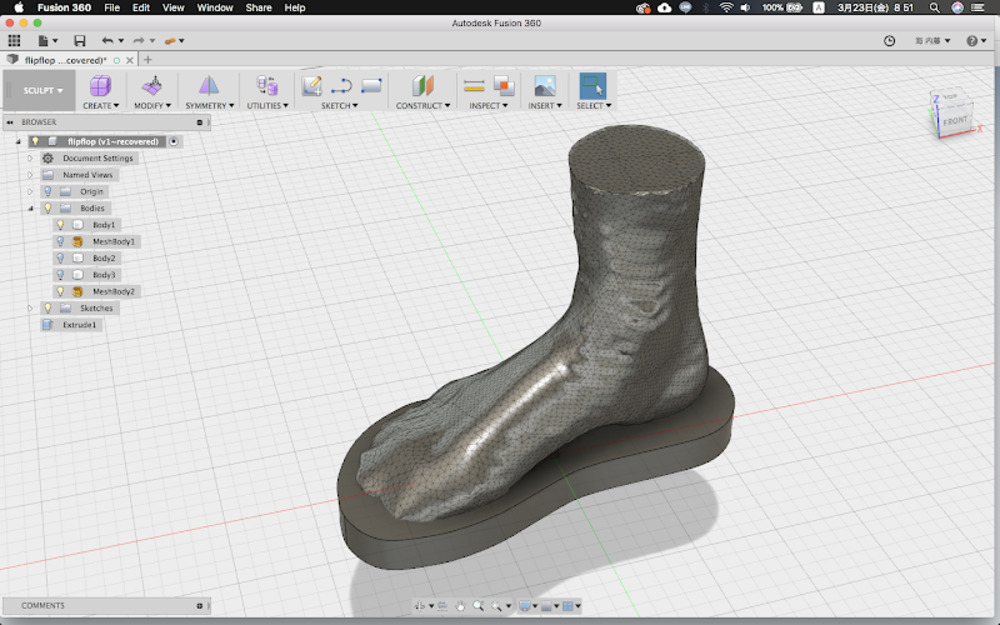
Import stl
Insert stl as a mesh in Fusion360. Adjust the direction as you insert it.
-
Disable history and switch to Sculpt mode
You need to disable history to use Sculpt mode. -
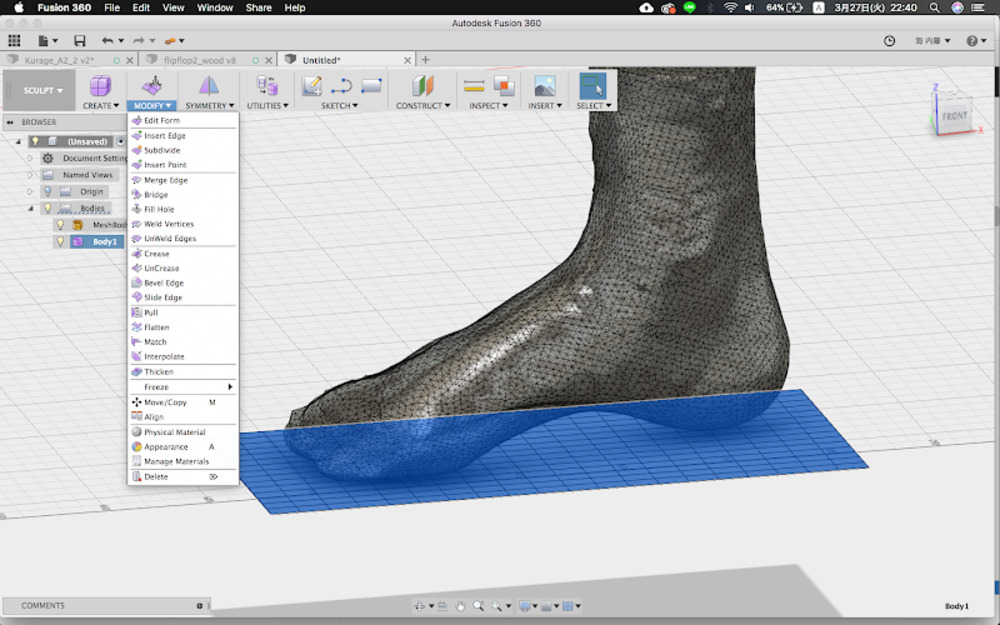
Create > Plane
Make the plane with 20x15 division of face and place it right beneath the foot model.
-
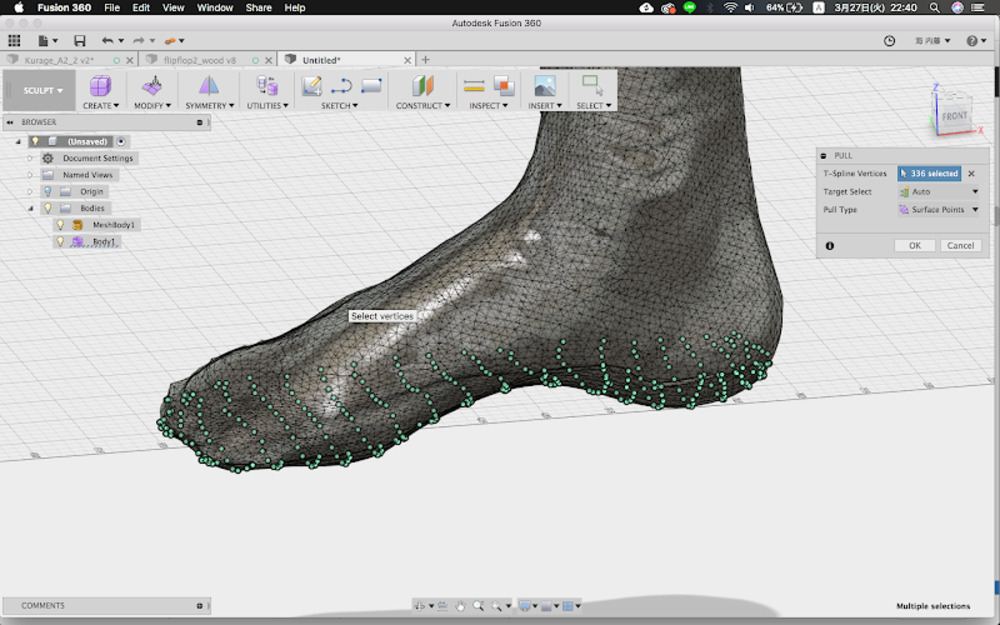
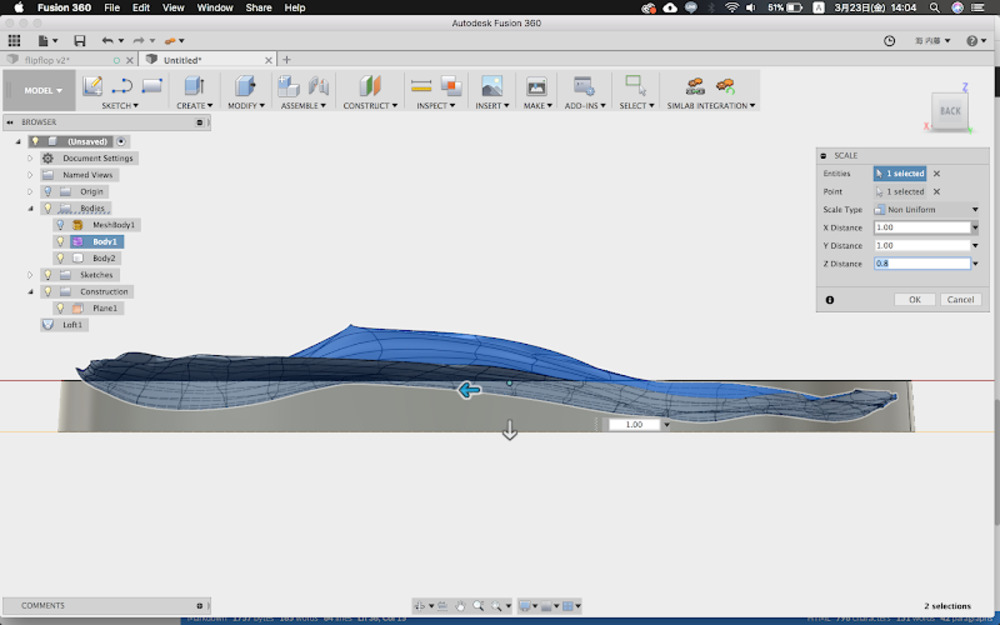
Modify > Pull
Select the plane and use pull command. It make the target sticks to the nearest object.
Now you have plane casted with my foot model.
-
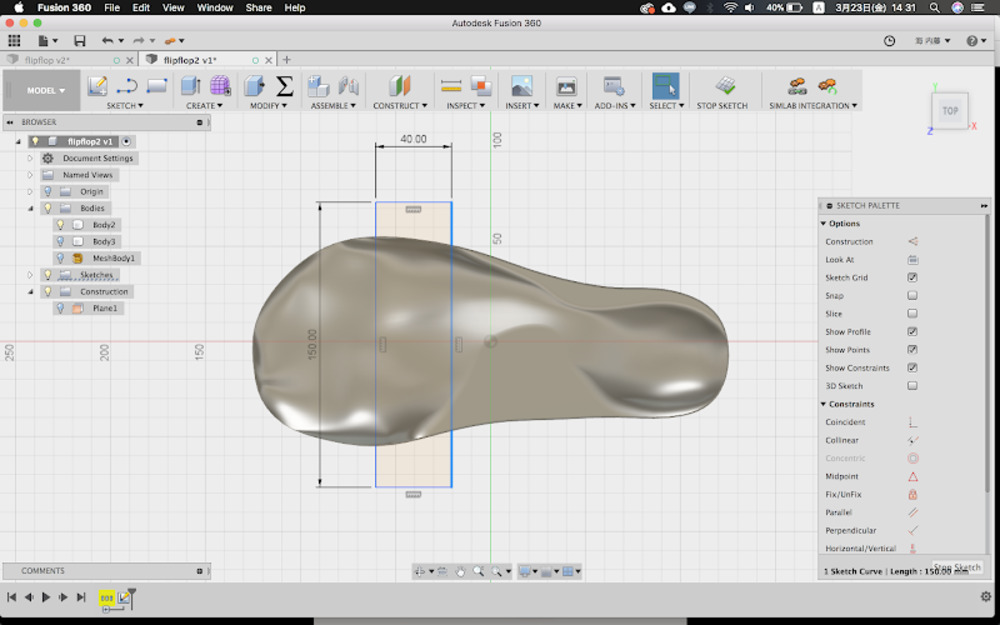
Gouge out wood board with Modify > Merge (cut)
Make wood board model. Start with making sketch out of the foot model and extrude it.
Select both and Merge (cut), casted plane from wood board model.
-
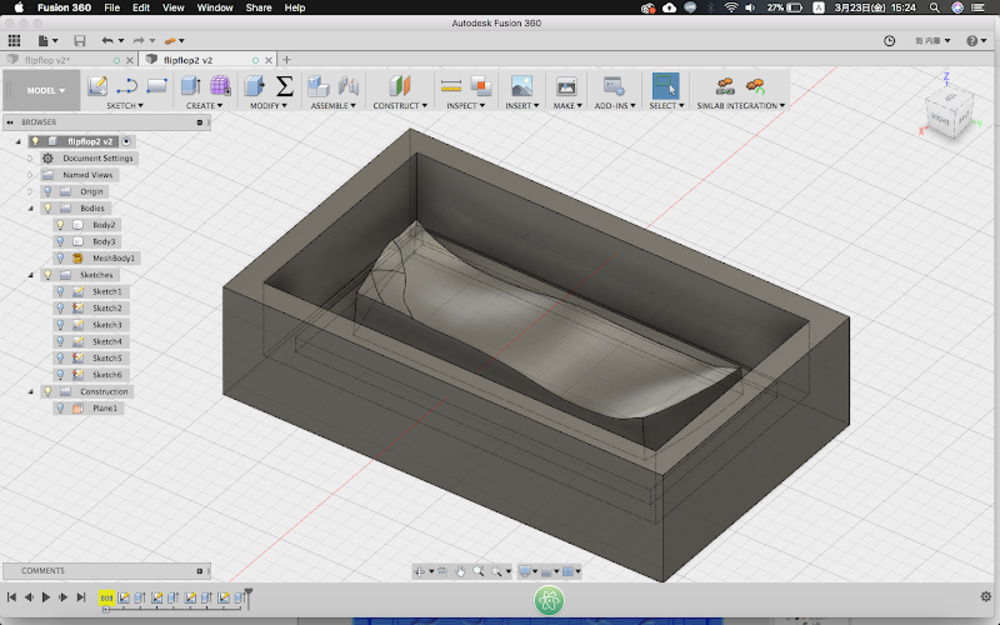
Divid wood part and rubber part
Again use Merge (cut) tool to slice the model into three pieces.
-
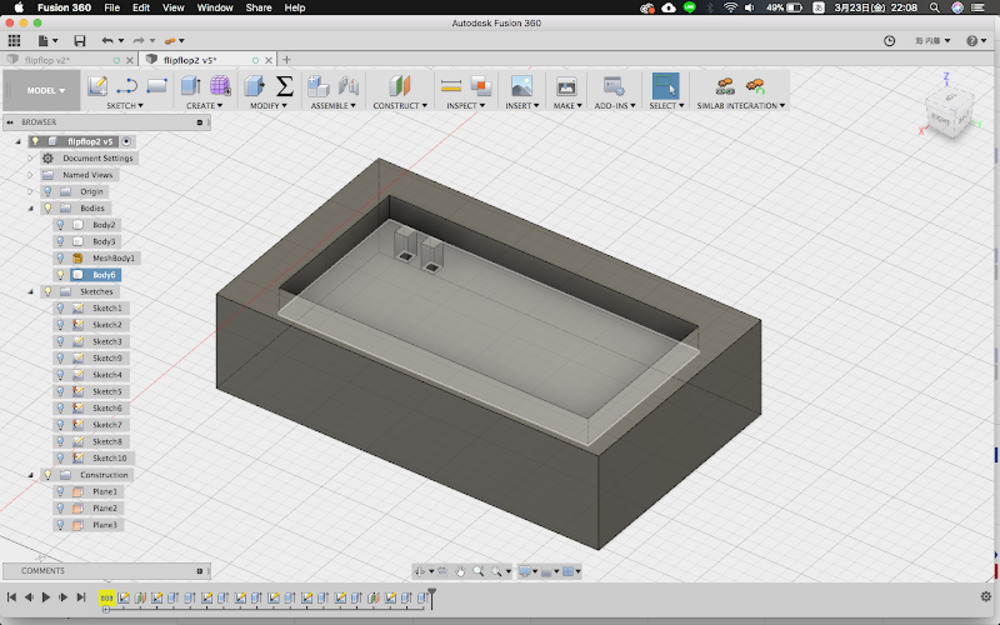
Punch holes (with extrude cut) for leather string get through.
Modeling molds
Milling
Tools
1/8 SE 4FL LONG ALTIN for rough cut and finish cut
FL : amount of milled chip (more amount to mill, less FL)
Setting
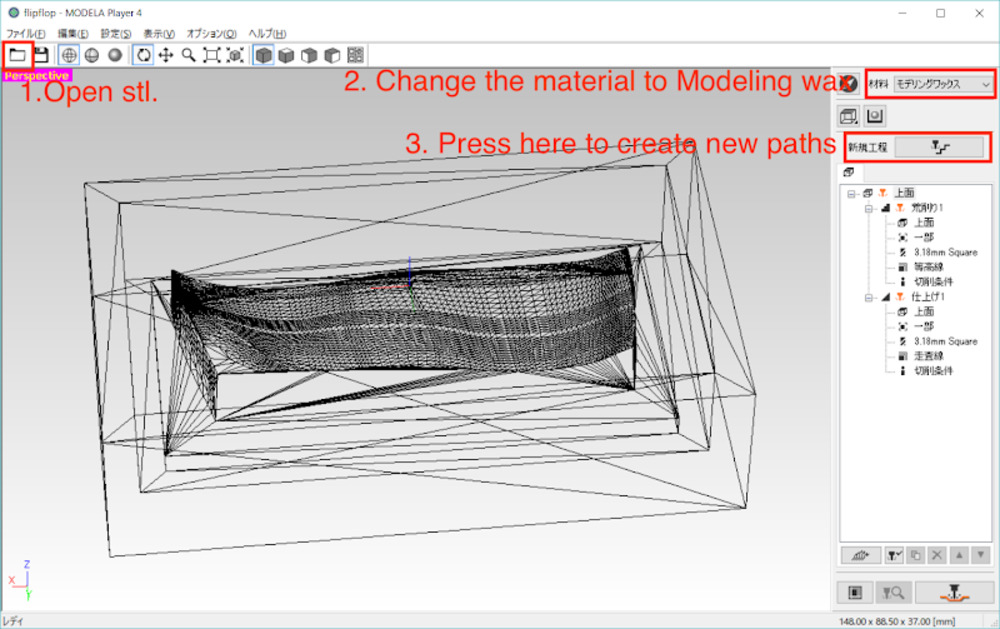
- Open stl format 3d model.
- Changed the material on the upper right corner to modeling wax.
- Press the “New paths” button to start with a new path.
Check the model info
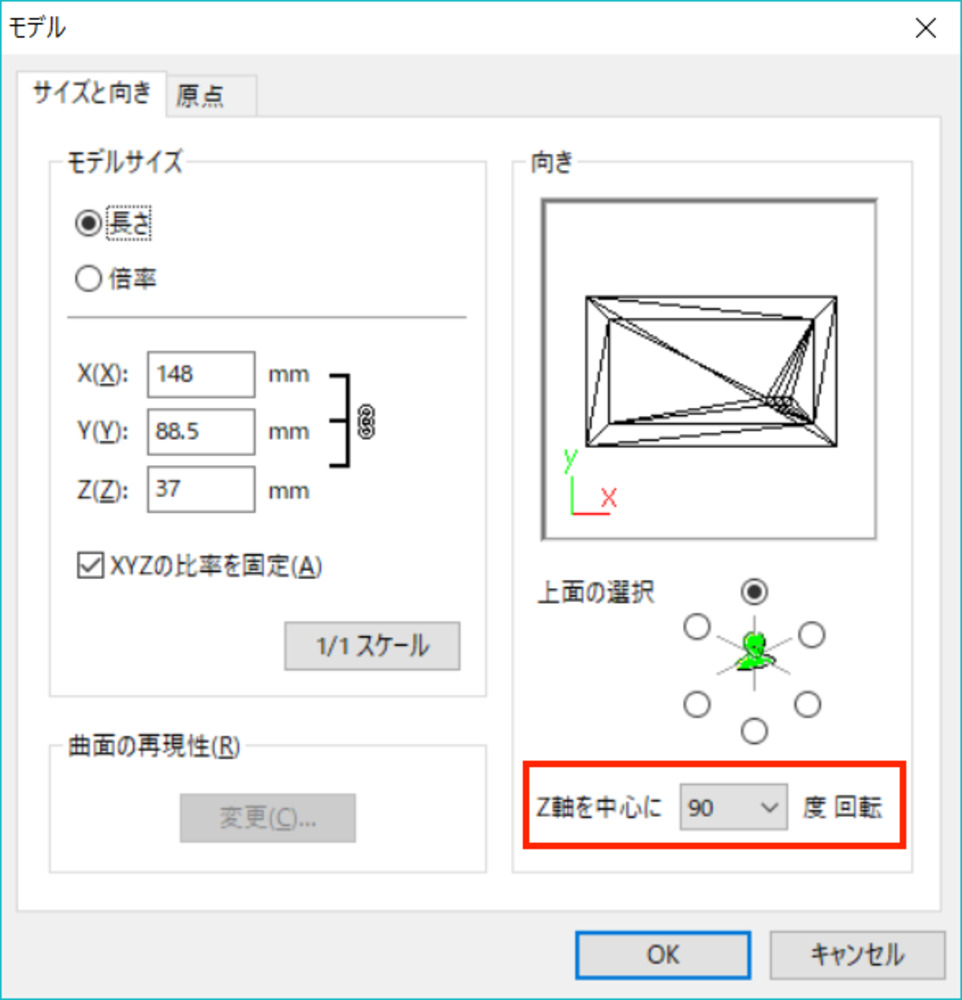
But before move on and create new paths, you better check the model info.
Setting > Model > Origin (Tab)
- Check wheather the origin of the model is set to the center of the model. If not fix it by clicking.
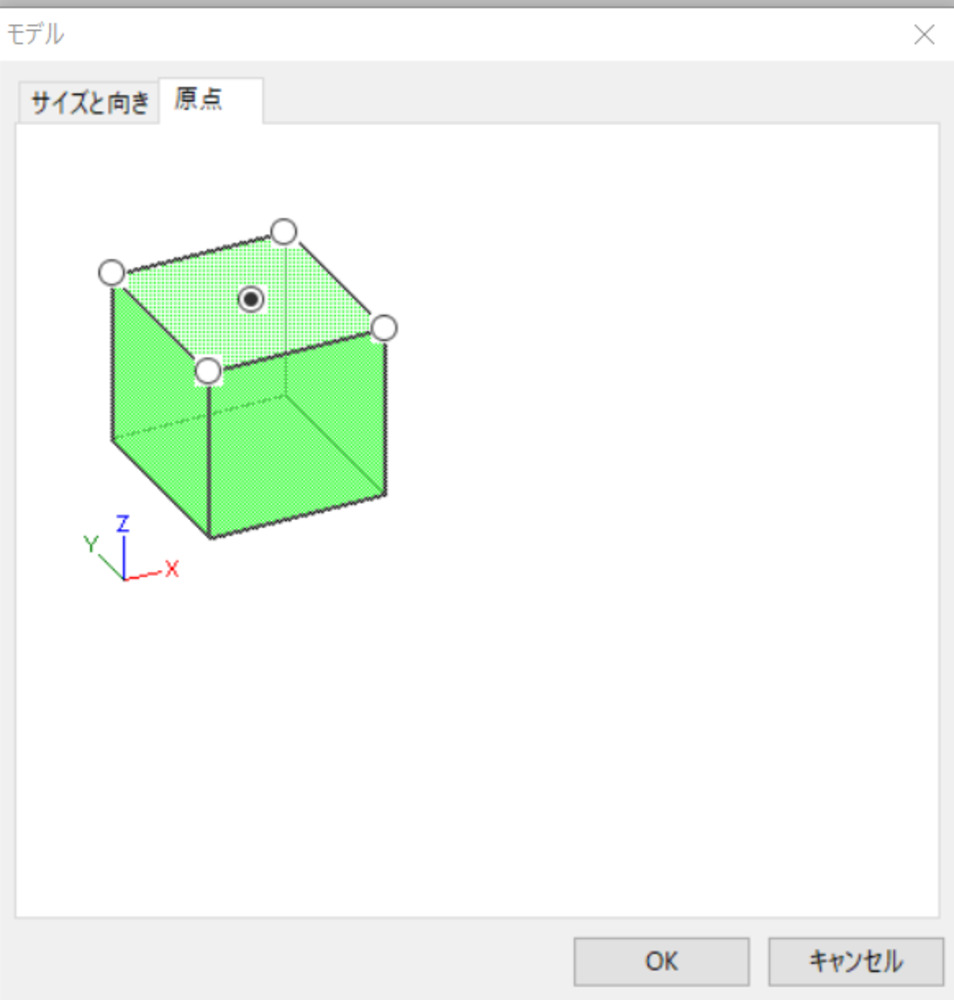
- Adjust the orientation of the model by select the rotation angle.
New path : Making path for rough cut
-
New paths (新規工程)
-
Path type : Rough cut (荒削り)
-
Milling surface : Top (上面)
-
Tool : 3.18mm / Square / Straight
-
Milling area :
Choose “partial” and select the milling area with bouding box.
Set the “depth” to the thickness of the wax you are milling (or less). -
Contour (等高線)
Making path for finishing
-
New paths (新規工程)
-
Path type : Finish(荒削り)
-
Milling surface : Top (上面)
-
Tool : 3.18mm / Square / Straight
-
Milling area :
Choose “partial” and select the milling area with bouding box.
Set the “depth” to the thickness of the wax you are milling (or less). -
Scan line (走査線)
Get the machine ready
Sacrificial wood : MDF or not required
Place and fix the wax on the worktable with double-sided tape (Nitto No.5000NS)
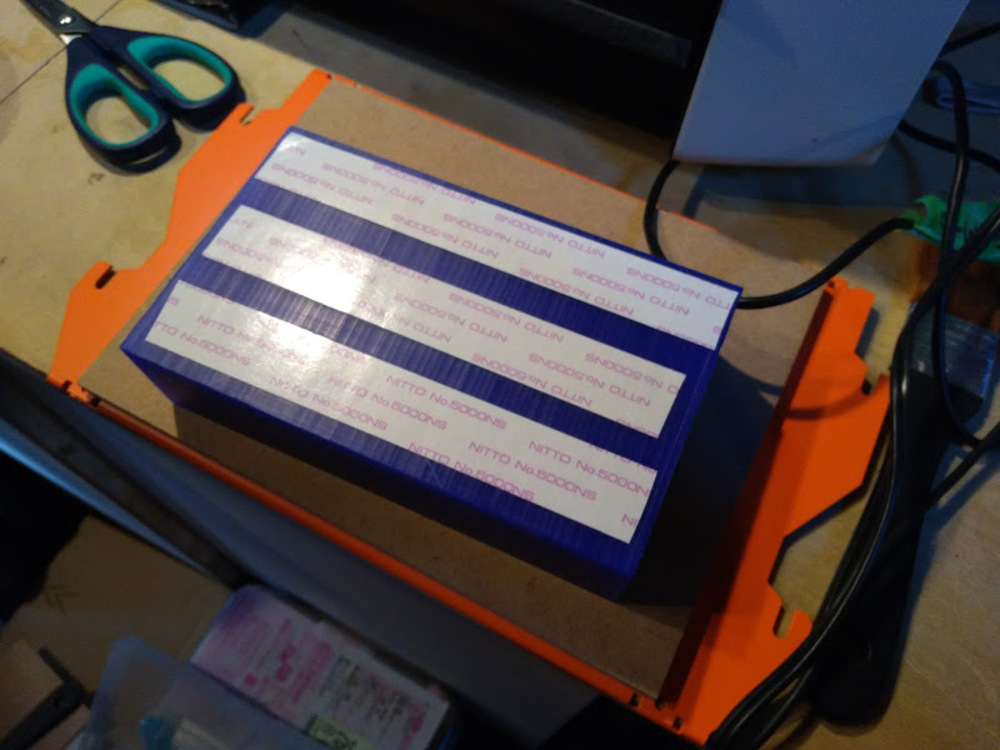
Mark the center of the wax ( draw diagonal line)
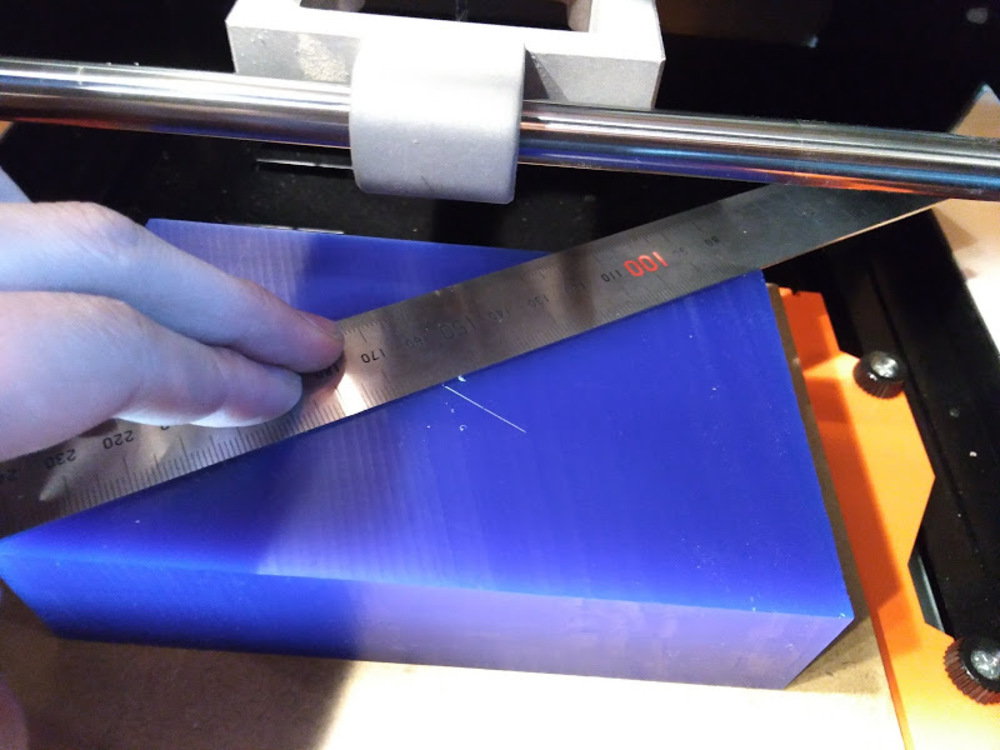
Go to VPanel and set the origin to the center of the wax.
*For the instruction to set the origin using VPanel, refer to Week5 :Electronics production.
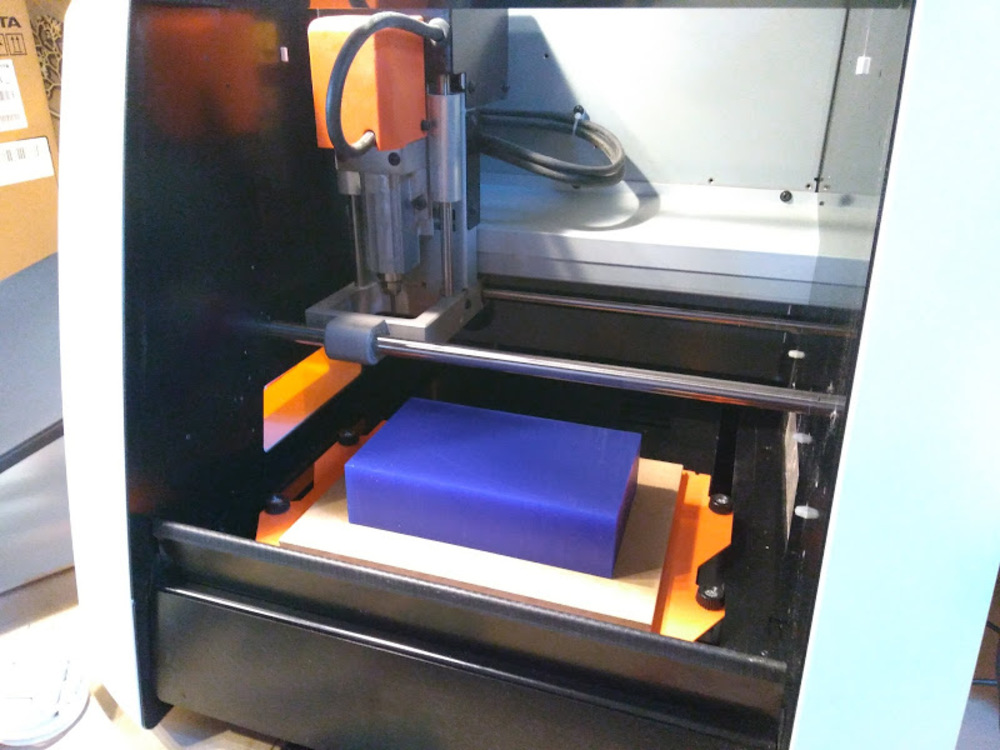
All set…
Start milling
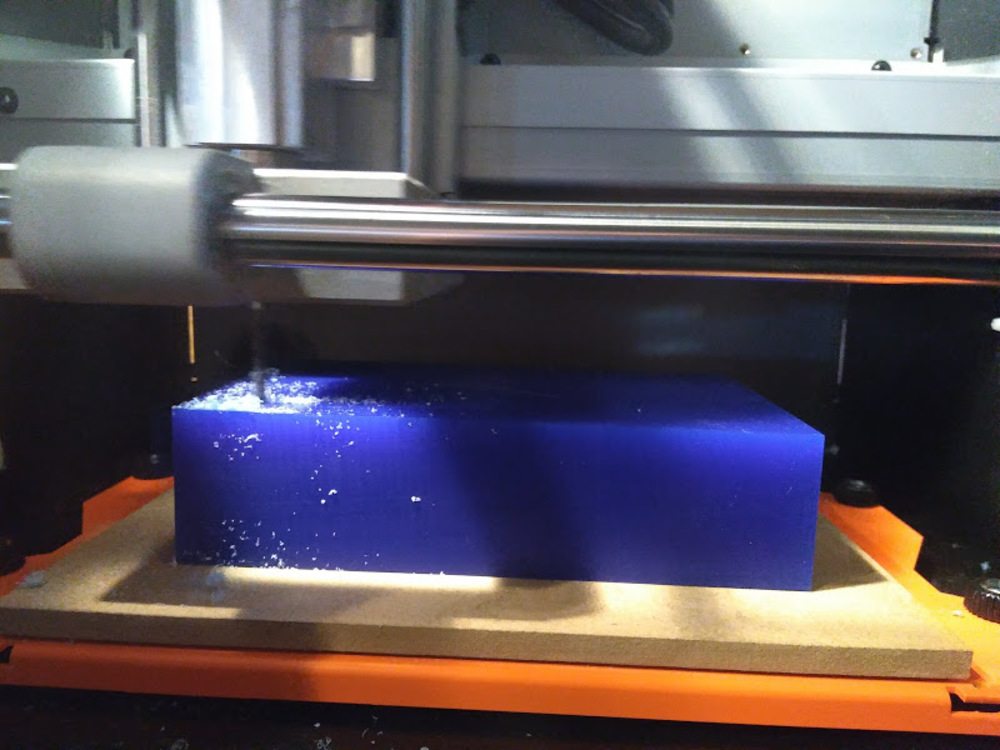
It eventually become huge pile of shavings, but it didn’t cause any problem. However, I opened the door and removed the chips once during the milling.
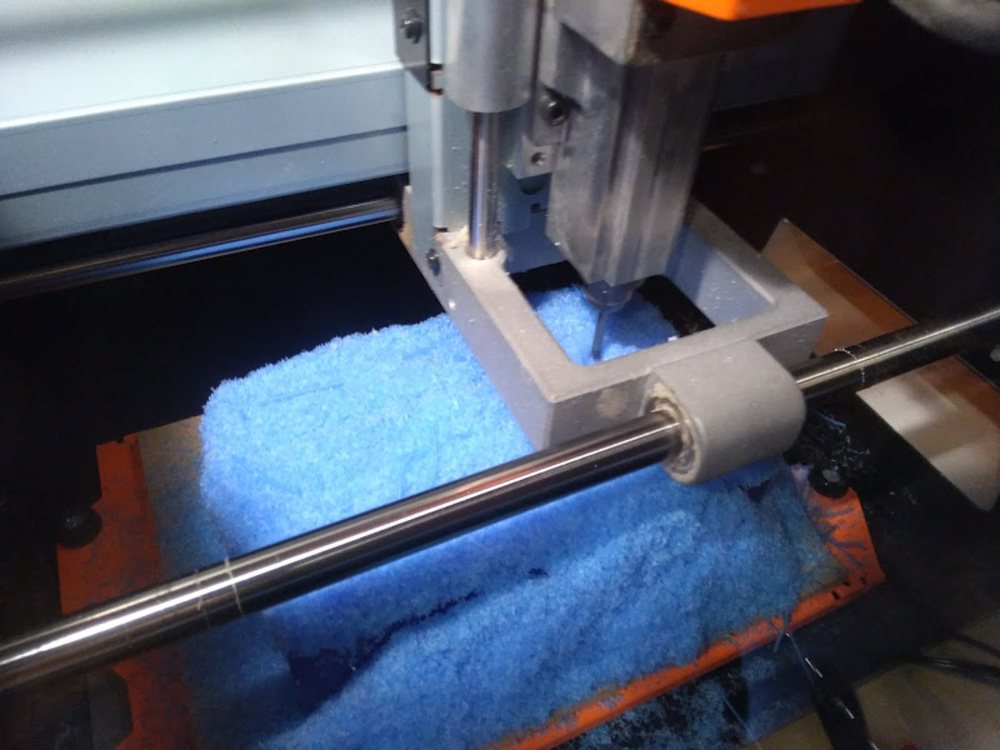
Here is the result. Finishing path made the surface smooth and beautiful.
It took approx 2 hours for the rough cut and 1 hour for the finish.
Findings
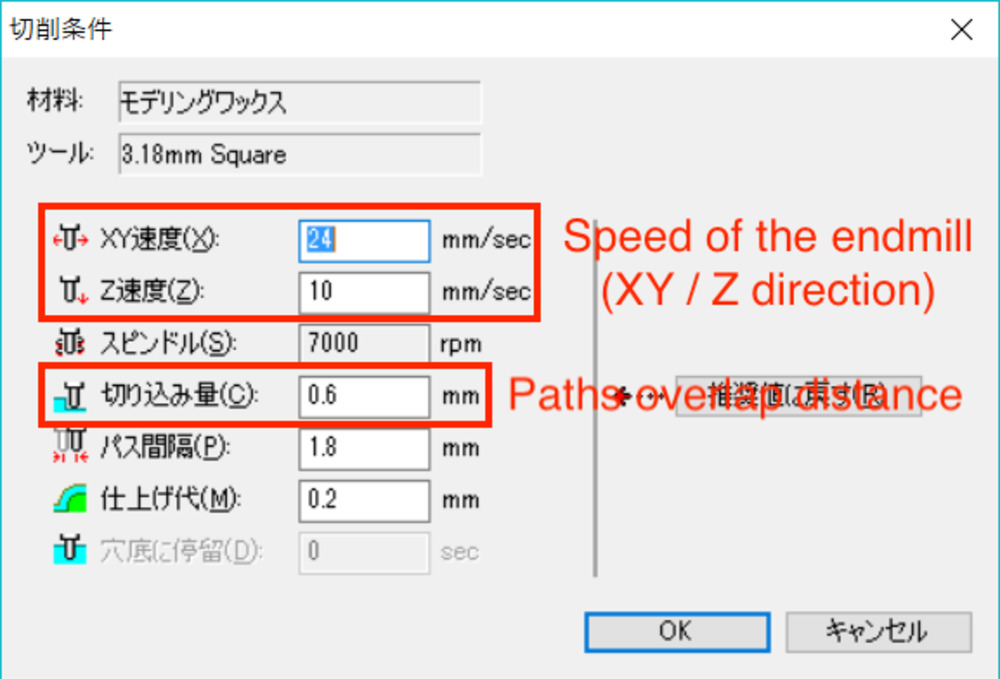
- Path overlap distance (which was set to 0.6mm to 3.175mm endmill) was too small that result in long process time.
- The space for the molding material to get in was too big.

Casting
Equipments
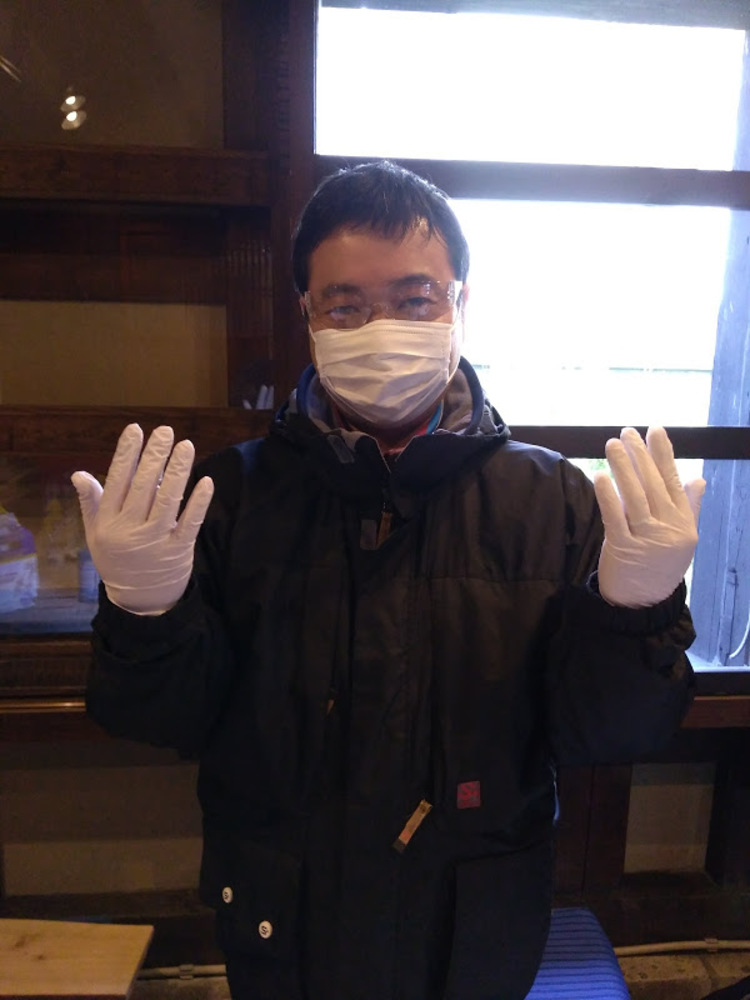
My classmate fully equipped. You at least need to wear gloves (we used latex free glove as latex was prohibited) and glasses, a mask is optional.
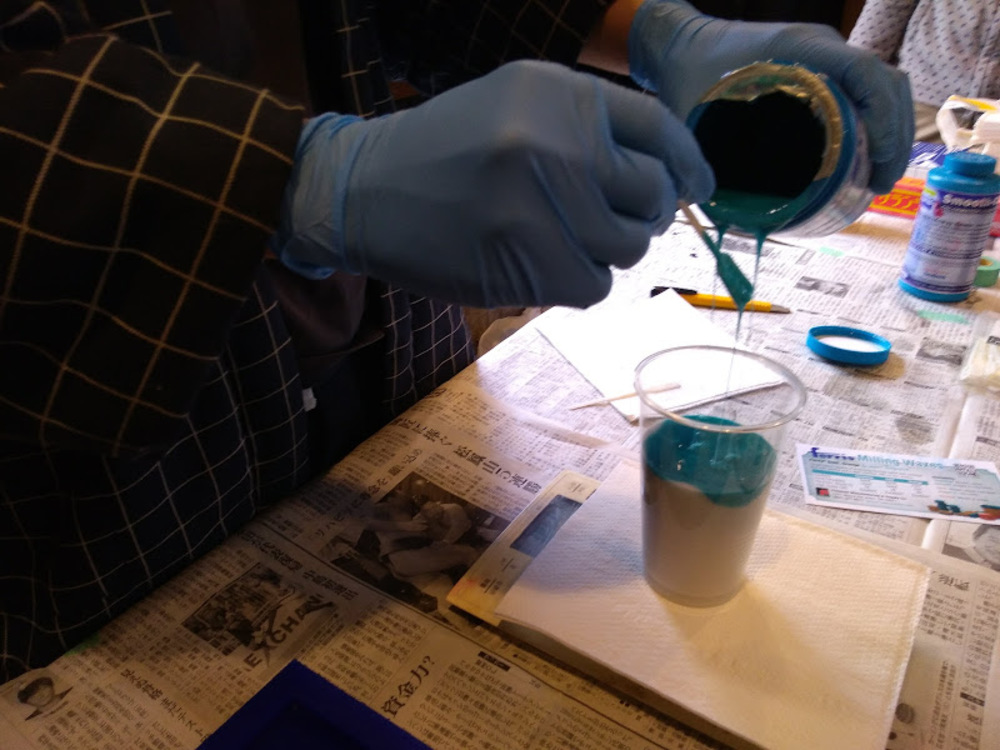
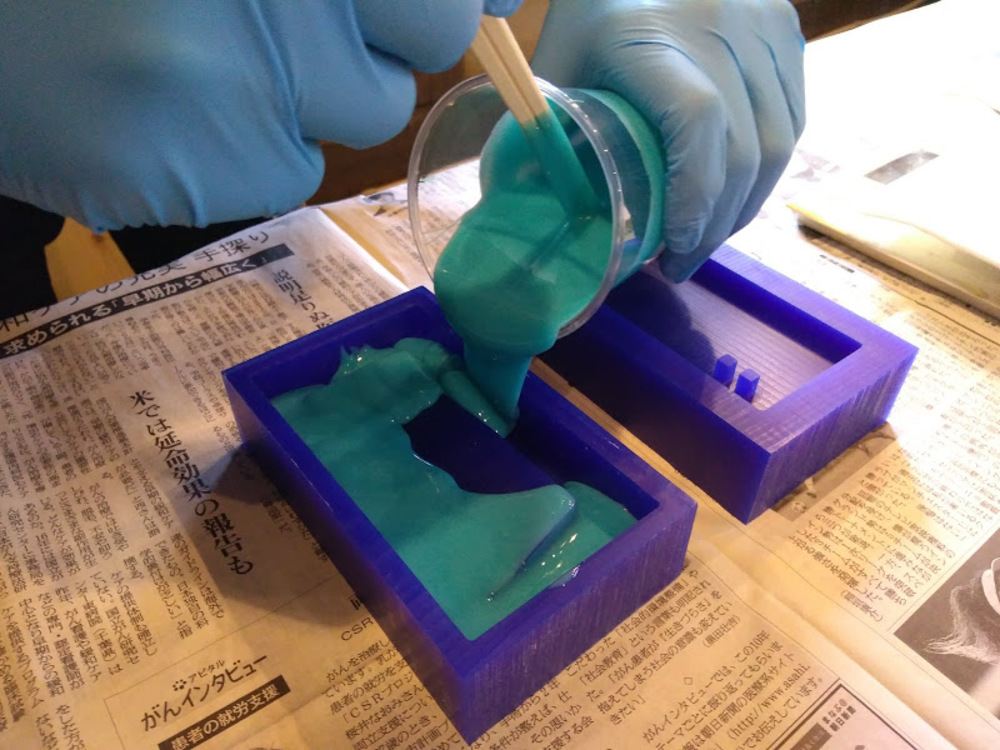
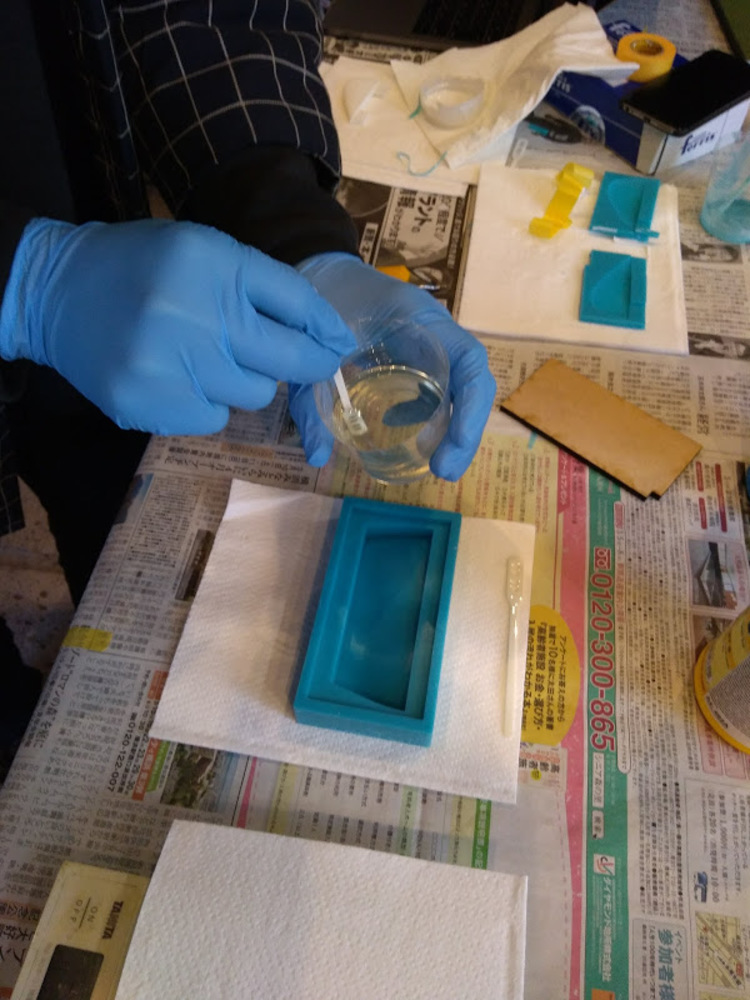
Mixing agents
Mix two fluxing materials (A and B) to trigger curing. Measure the weight to make a mix of designated ratio. Pay a tension to the working time.
Try not to make bubbles while stirring. However, make sure to mix them enough especially when you are stirring big amount of agents. If it wasn’t done properly it might not cure.
Wait 30min. Let the silicone cure.
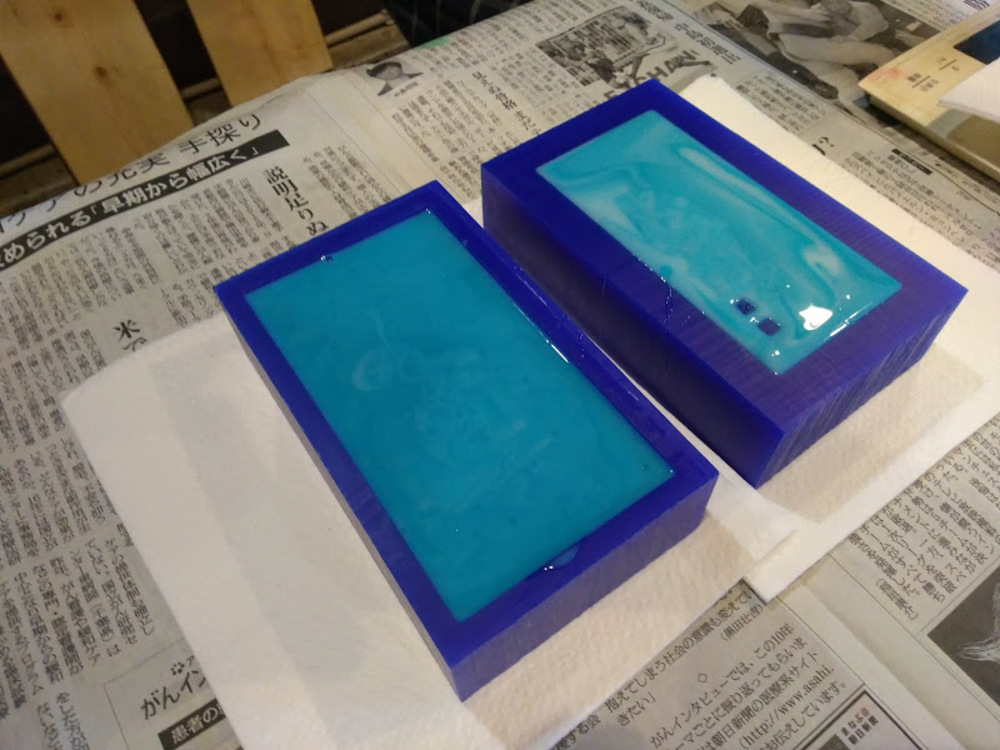
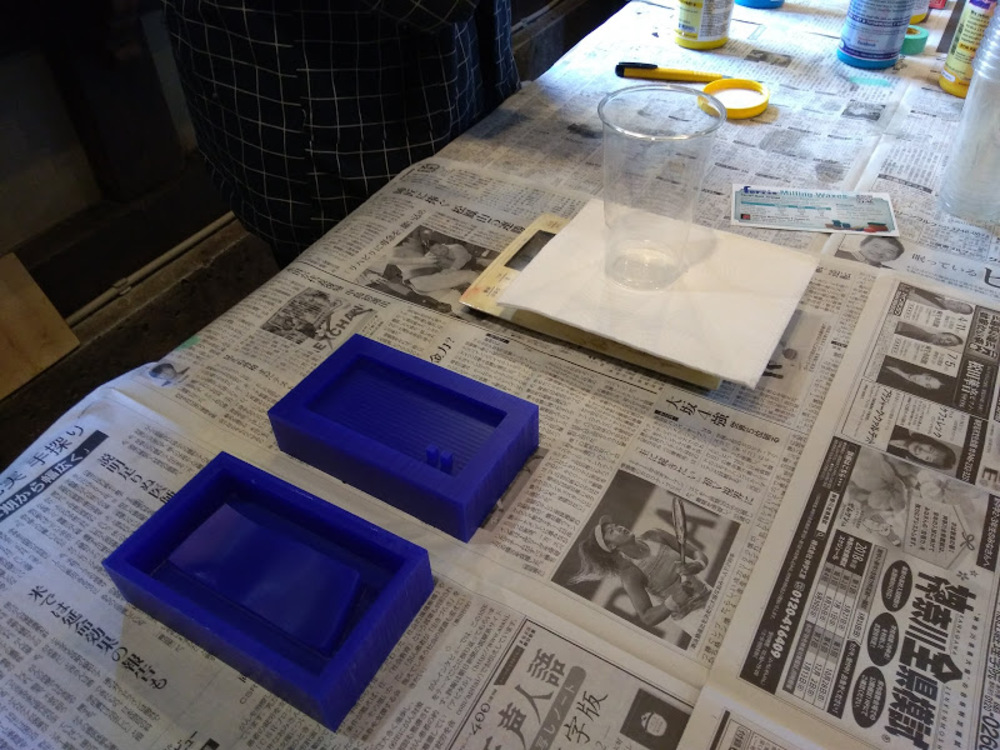
Peel it off.
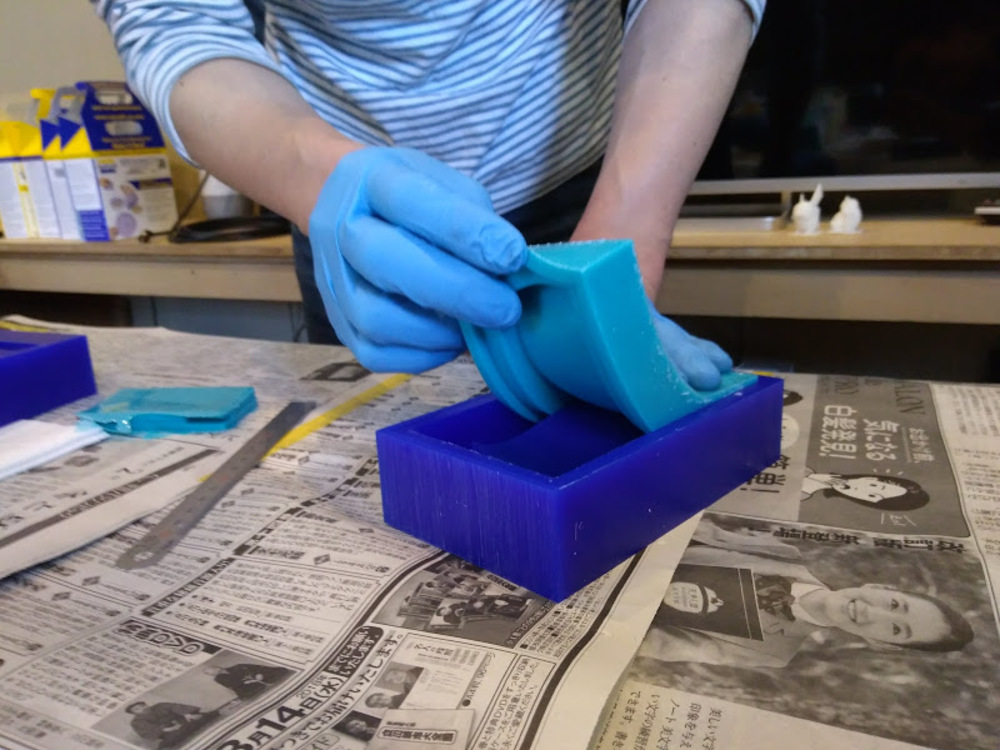
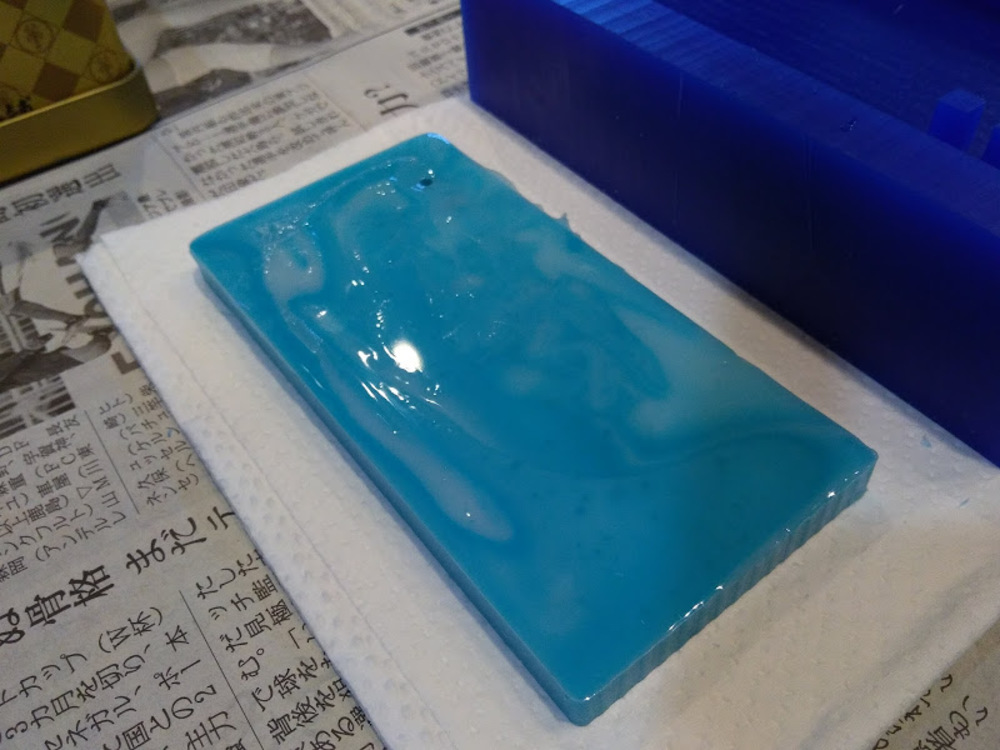
The results.
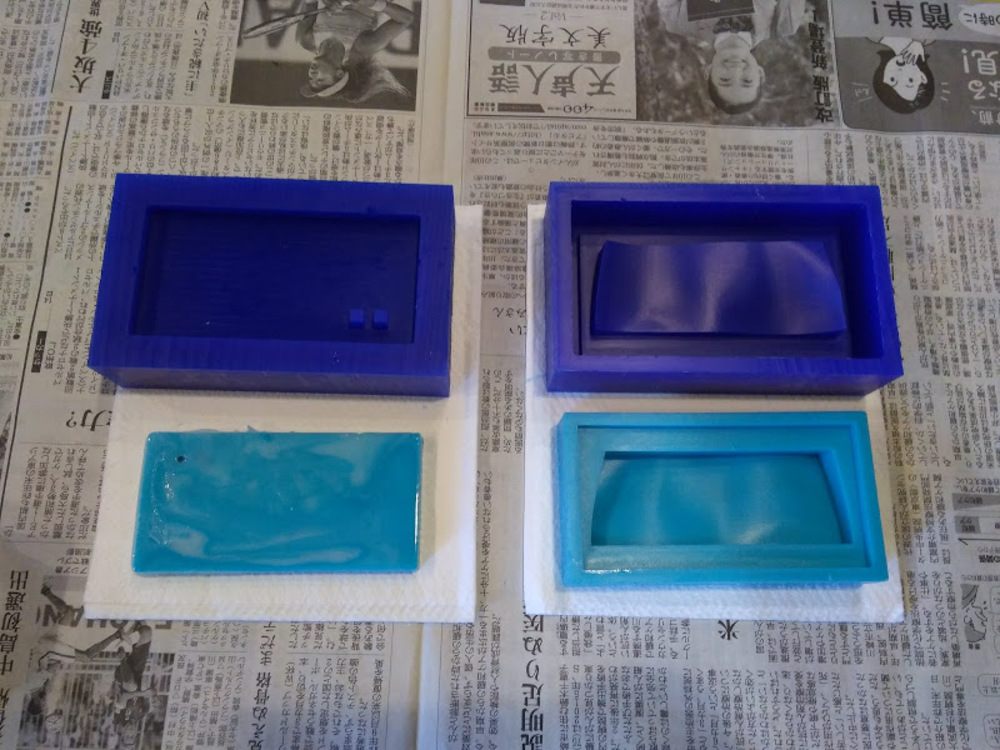
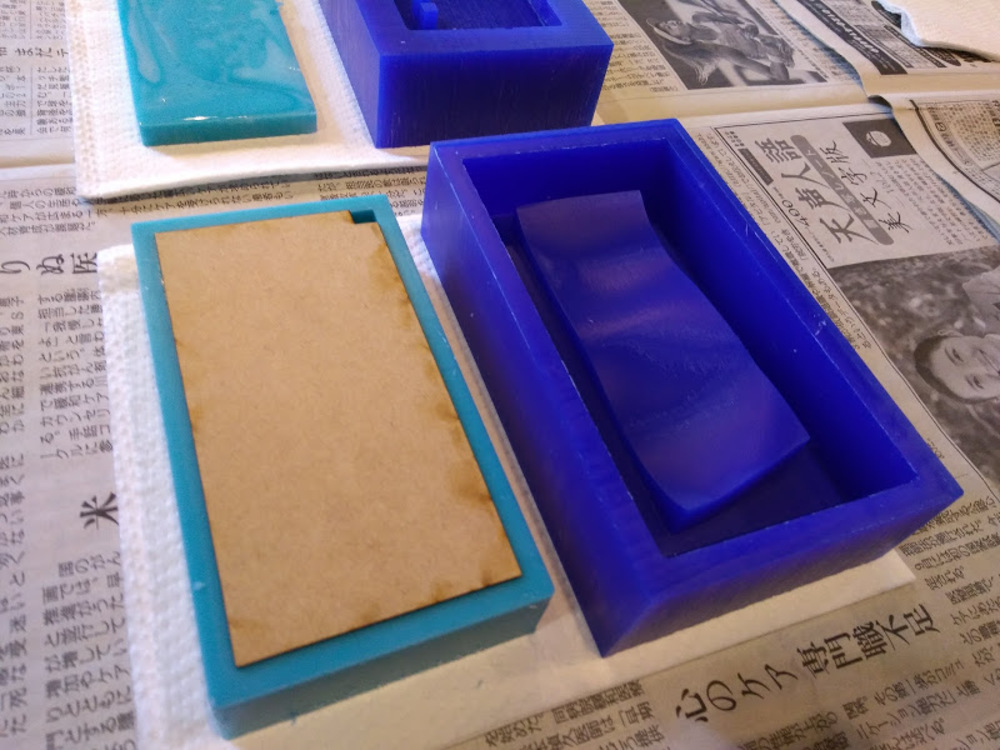
Issue
Lid part partially not cured due to insufficient stir.
I decided to make the lid with laser cut MDF.
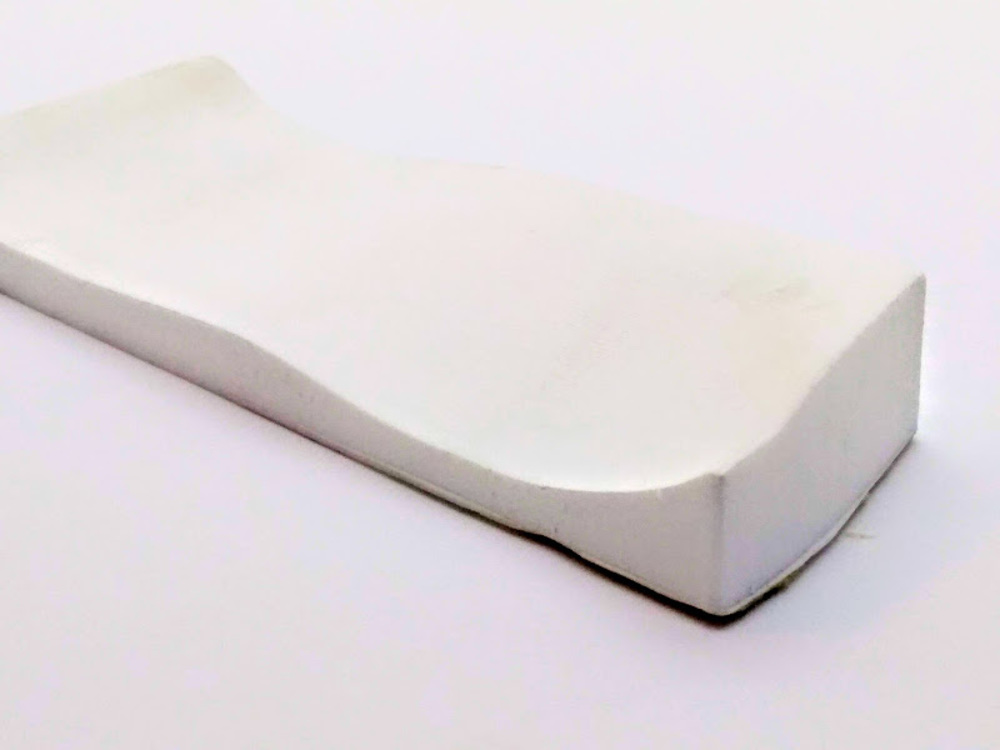
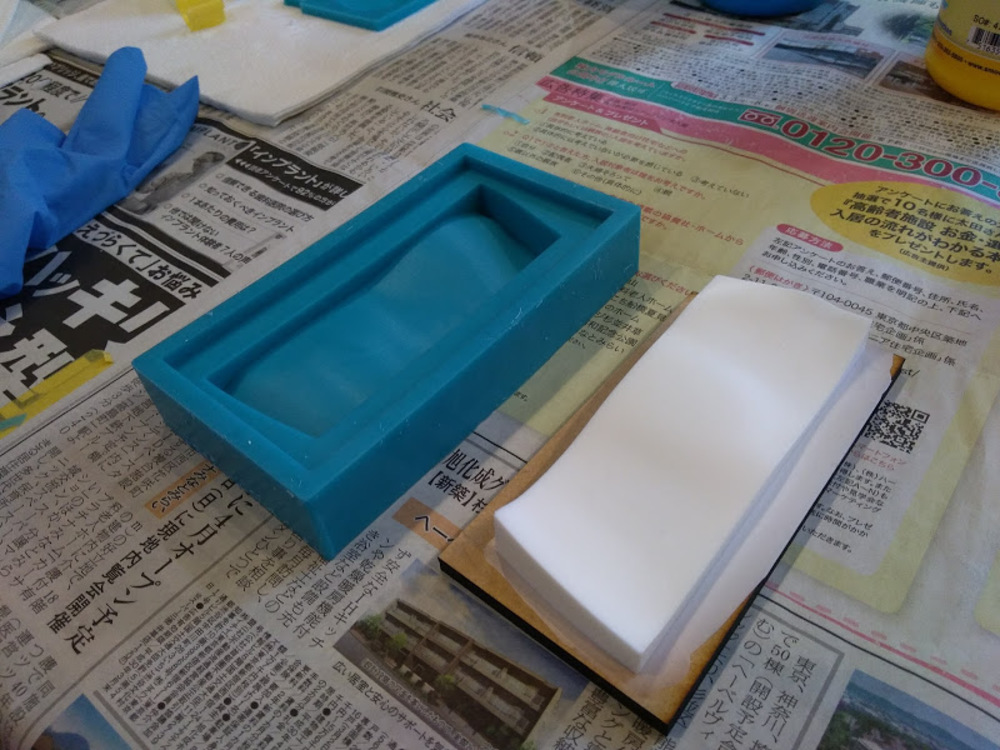
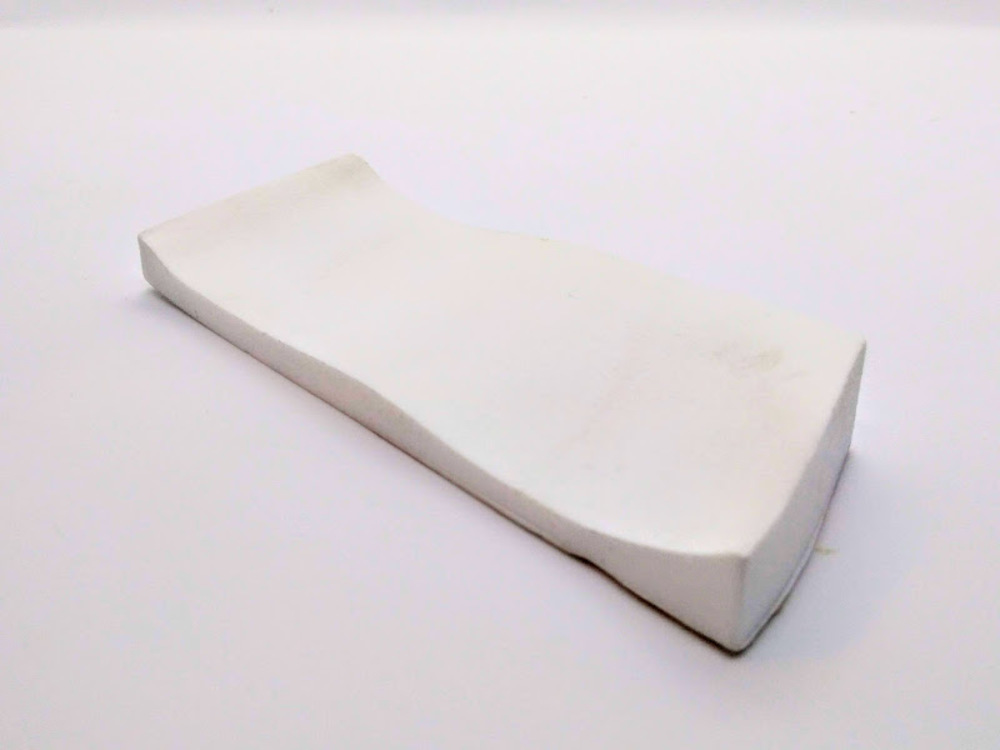
Since I didn’t have satisfying material to use as flip flop sole, I casted with smooth-cast 300 just for a test and it turn out to be successful.
After mixing solution A and B it starts to cure almost immediately, so I had to be quick with my work.
Final product.
Issue
MDF need cover to be used as a mold as resin sticks to it so hard that you won’t be able to peel it.
I would try again with plastic wrap covering MDF mold.
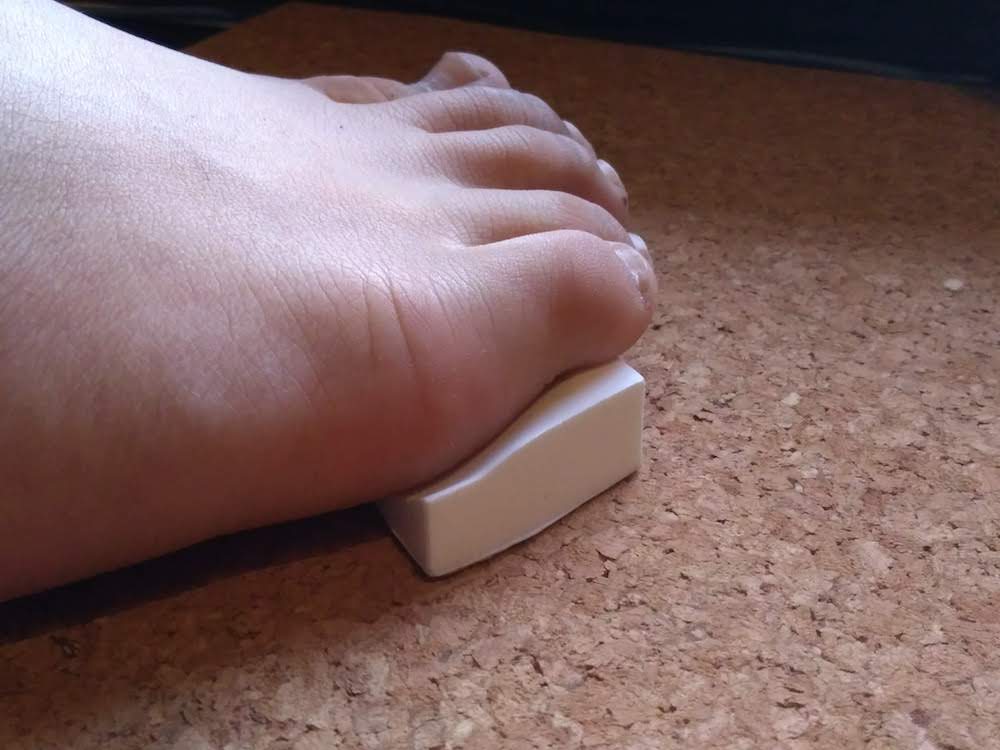
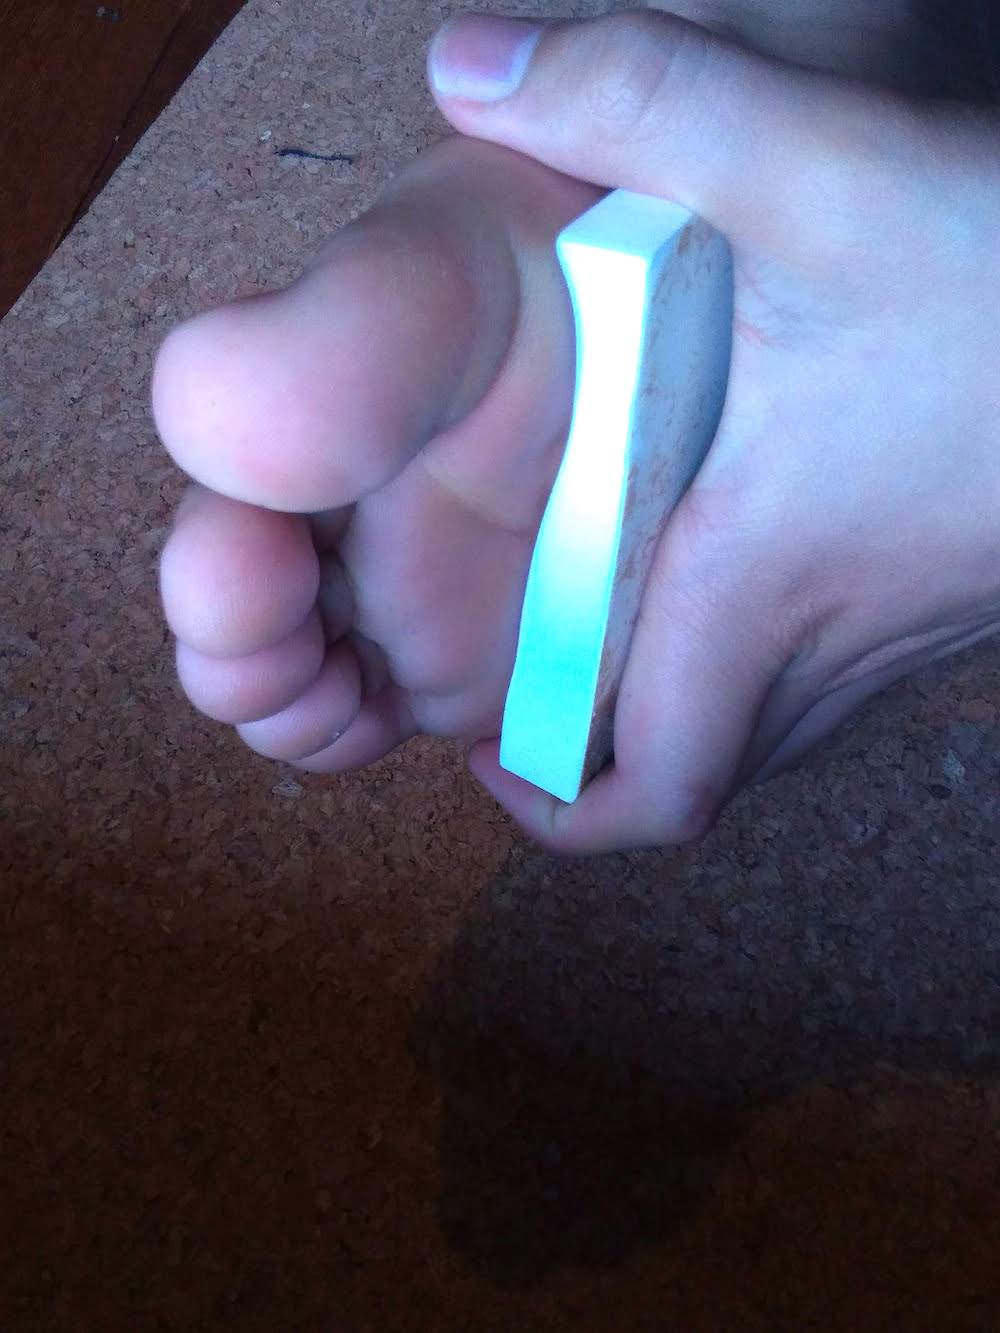
Conclusion
It fits my foot perfectly.
My next step is to make wooden parts with CNC, then assemble with flexible resin parts casted with the mold I made this week. I suppose that will be my side project outside Fabacademy.
Data
Scanned & meshmixed 3D data of my foot
Mold
Mold lid