Final Project As my Final Project I want to do a Filament Recycler(you can see a rough design of the if below) that will be able to recycle the ABS and PLA and the bottle cups, as far as I know it is possible to recycle these bottle cups. I came to the idea to make the Filament Recycler in Fundamentals of Digital Fabrication course, but unfortunately I had not enough time at that moment. Well I want this project to have some use in our Fablab. I mean that after I finish it, it shouldn't root there until someone trashes it. In oposit it should have some positive impact on sustainability in the FabLab. Learning outcomes: 1. In here in Applications and implications week I have made a "perfect" plan that should work for me. Some of this things, worked good, like make a pcb in 1 day and some of them not, like design the frame and cut it out. Well the designing cost me almost one day and I was not able to cut directly, because I was not the only person who needed the CNC. So the cut out of the frame and assemly everything together cost me 3 day in total.
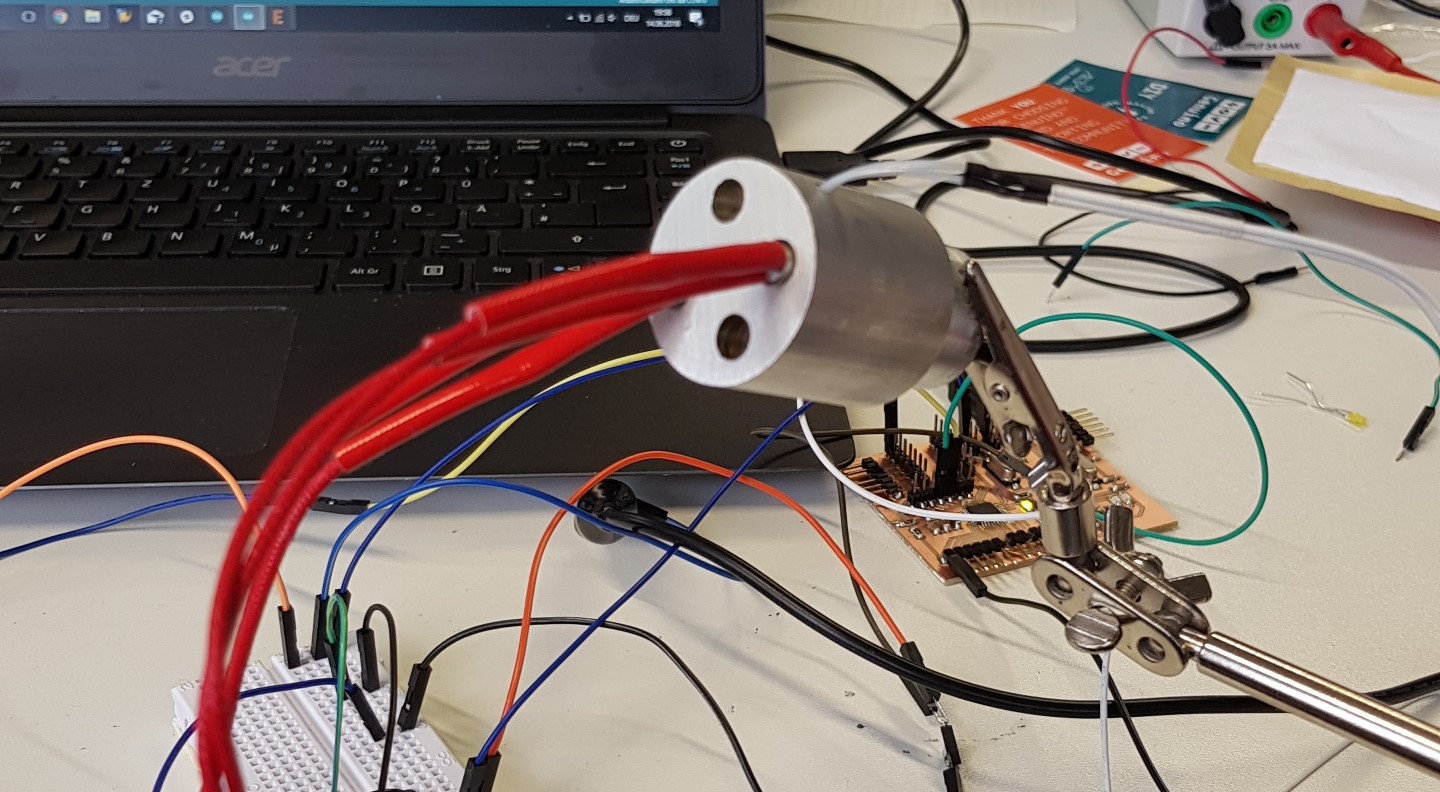
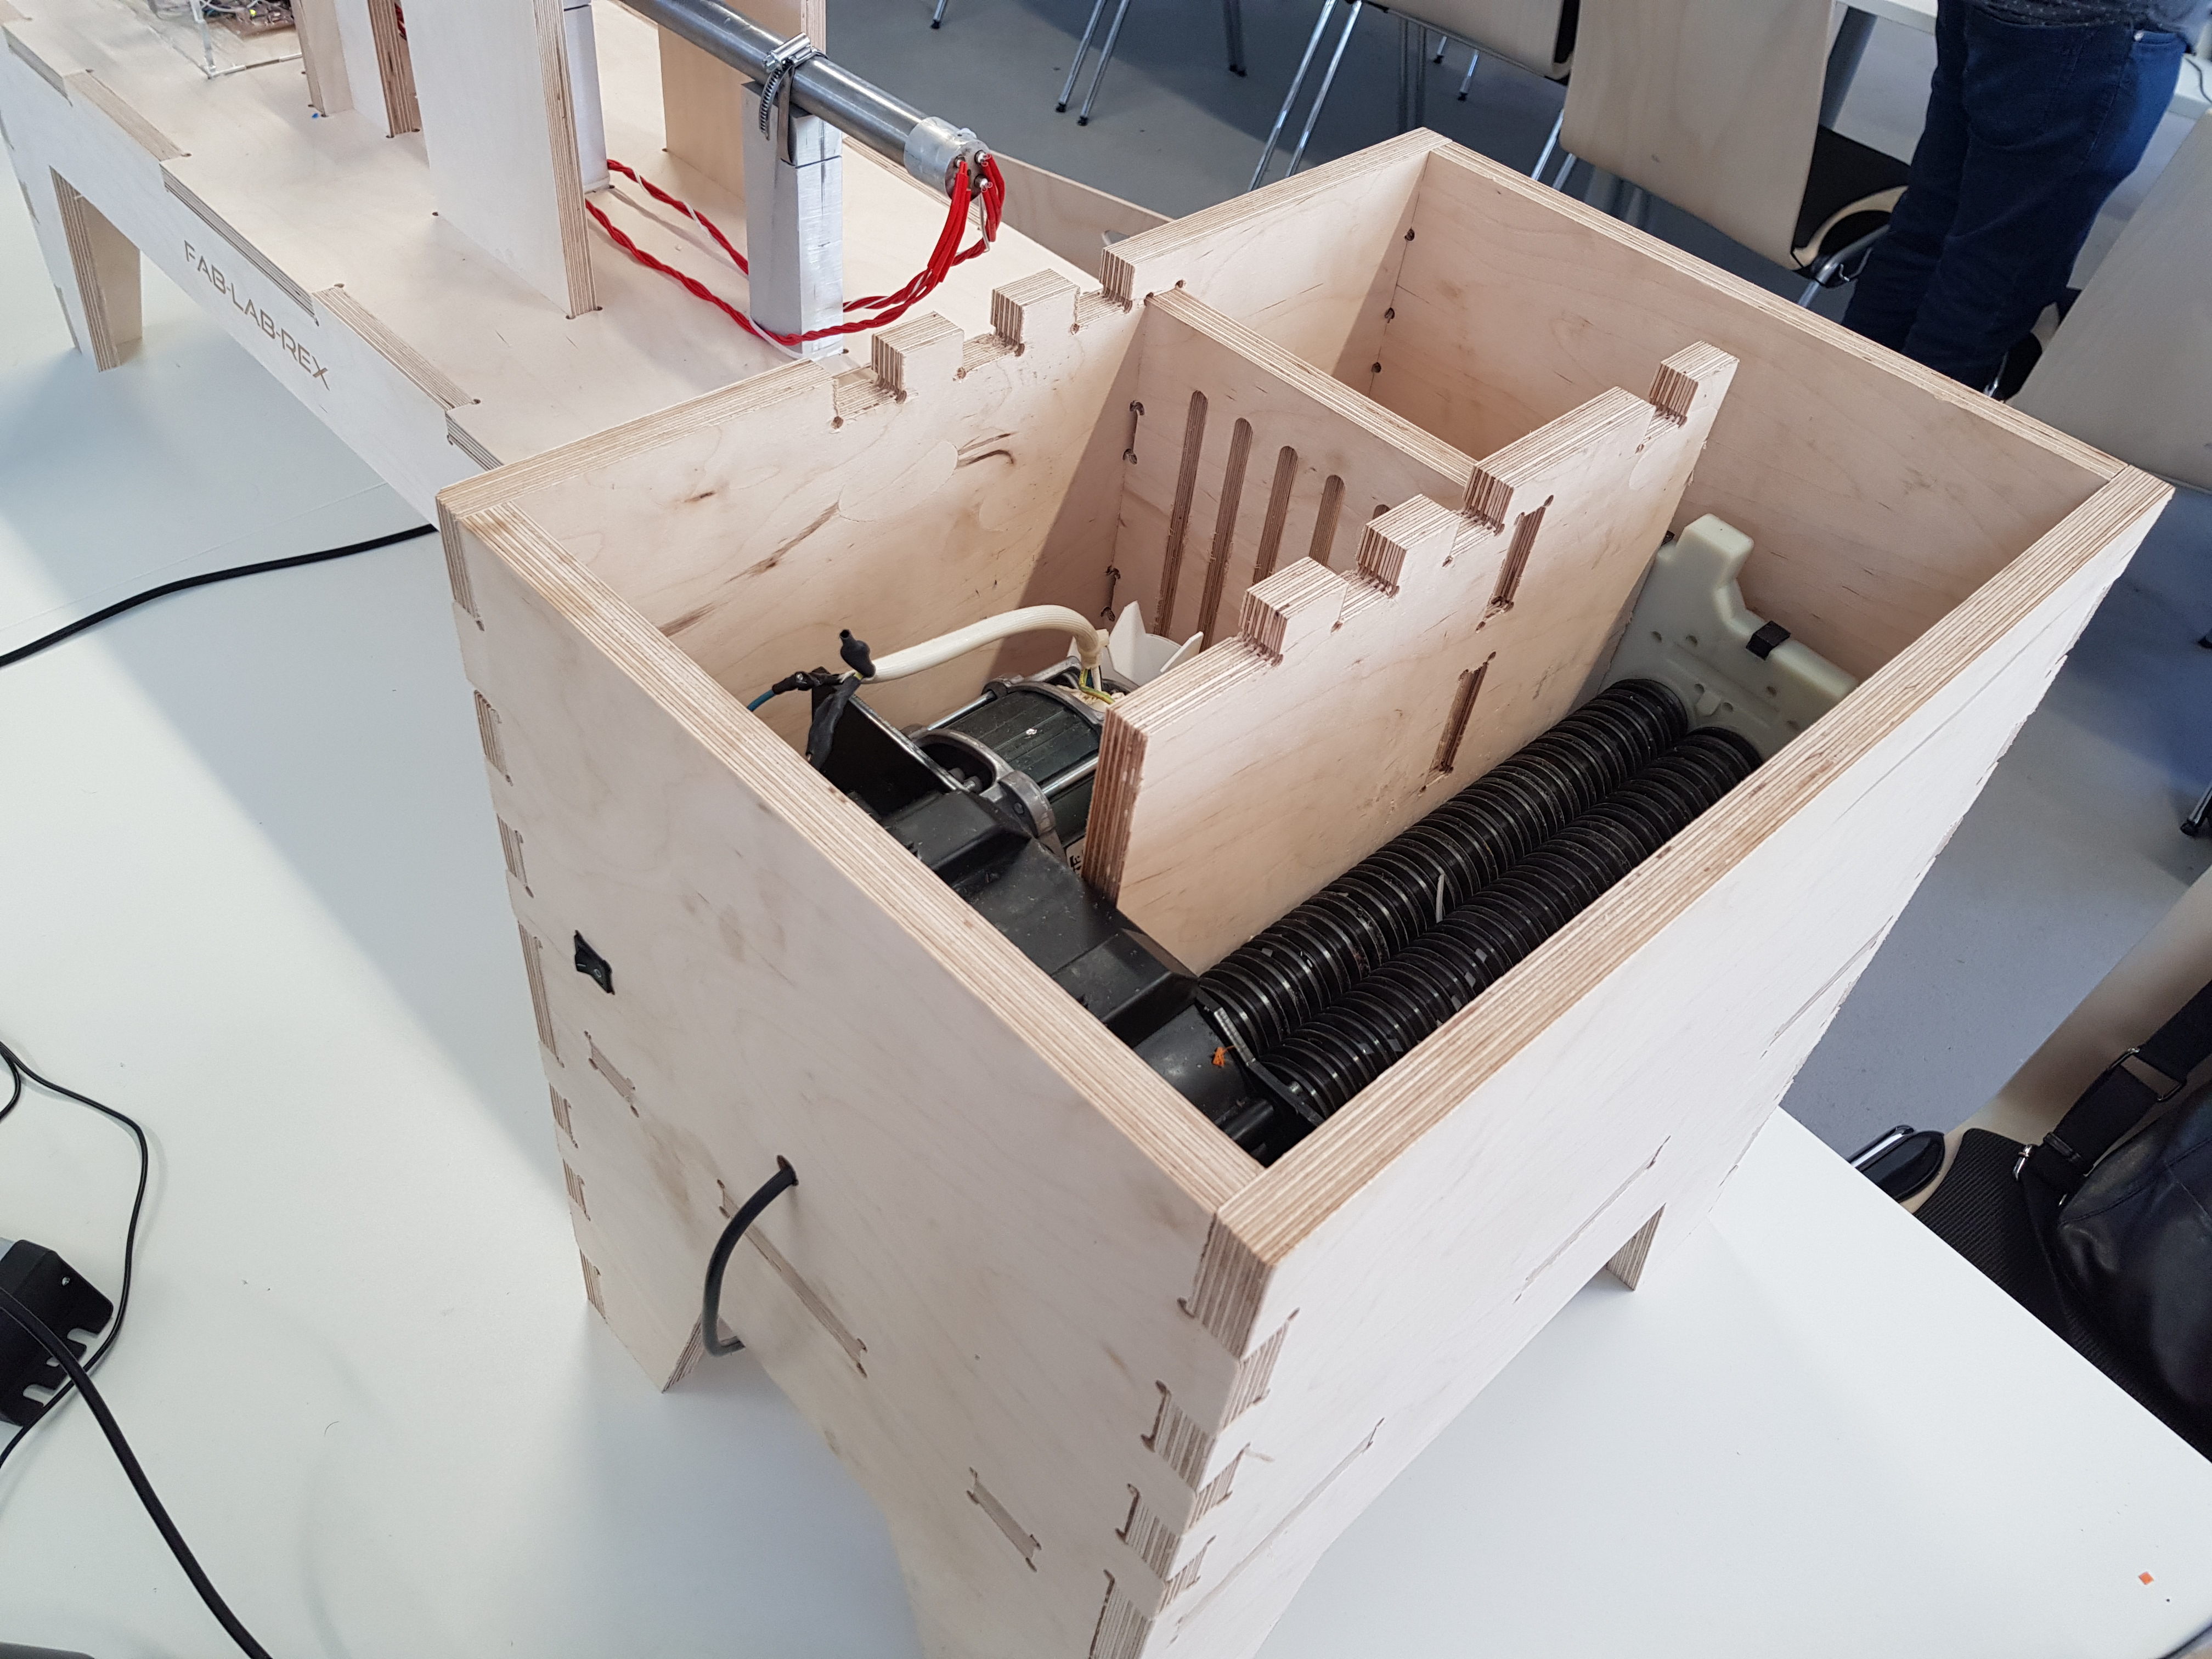
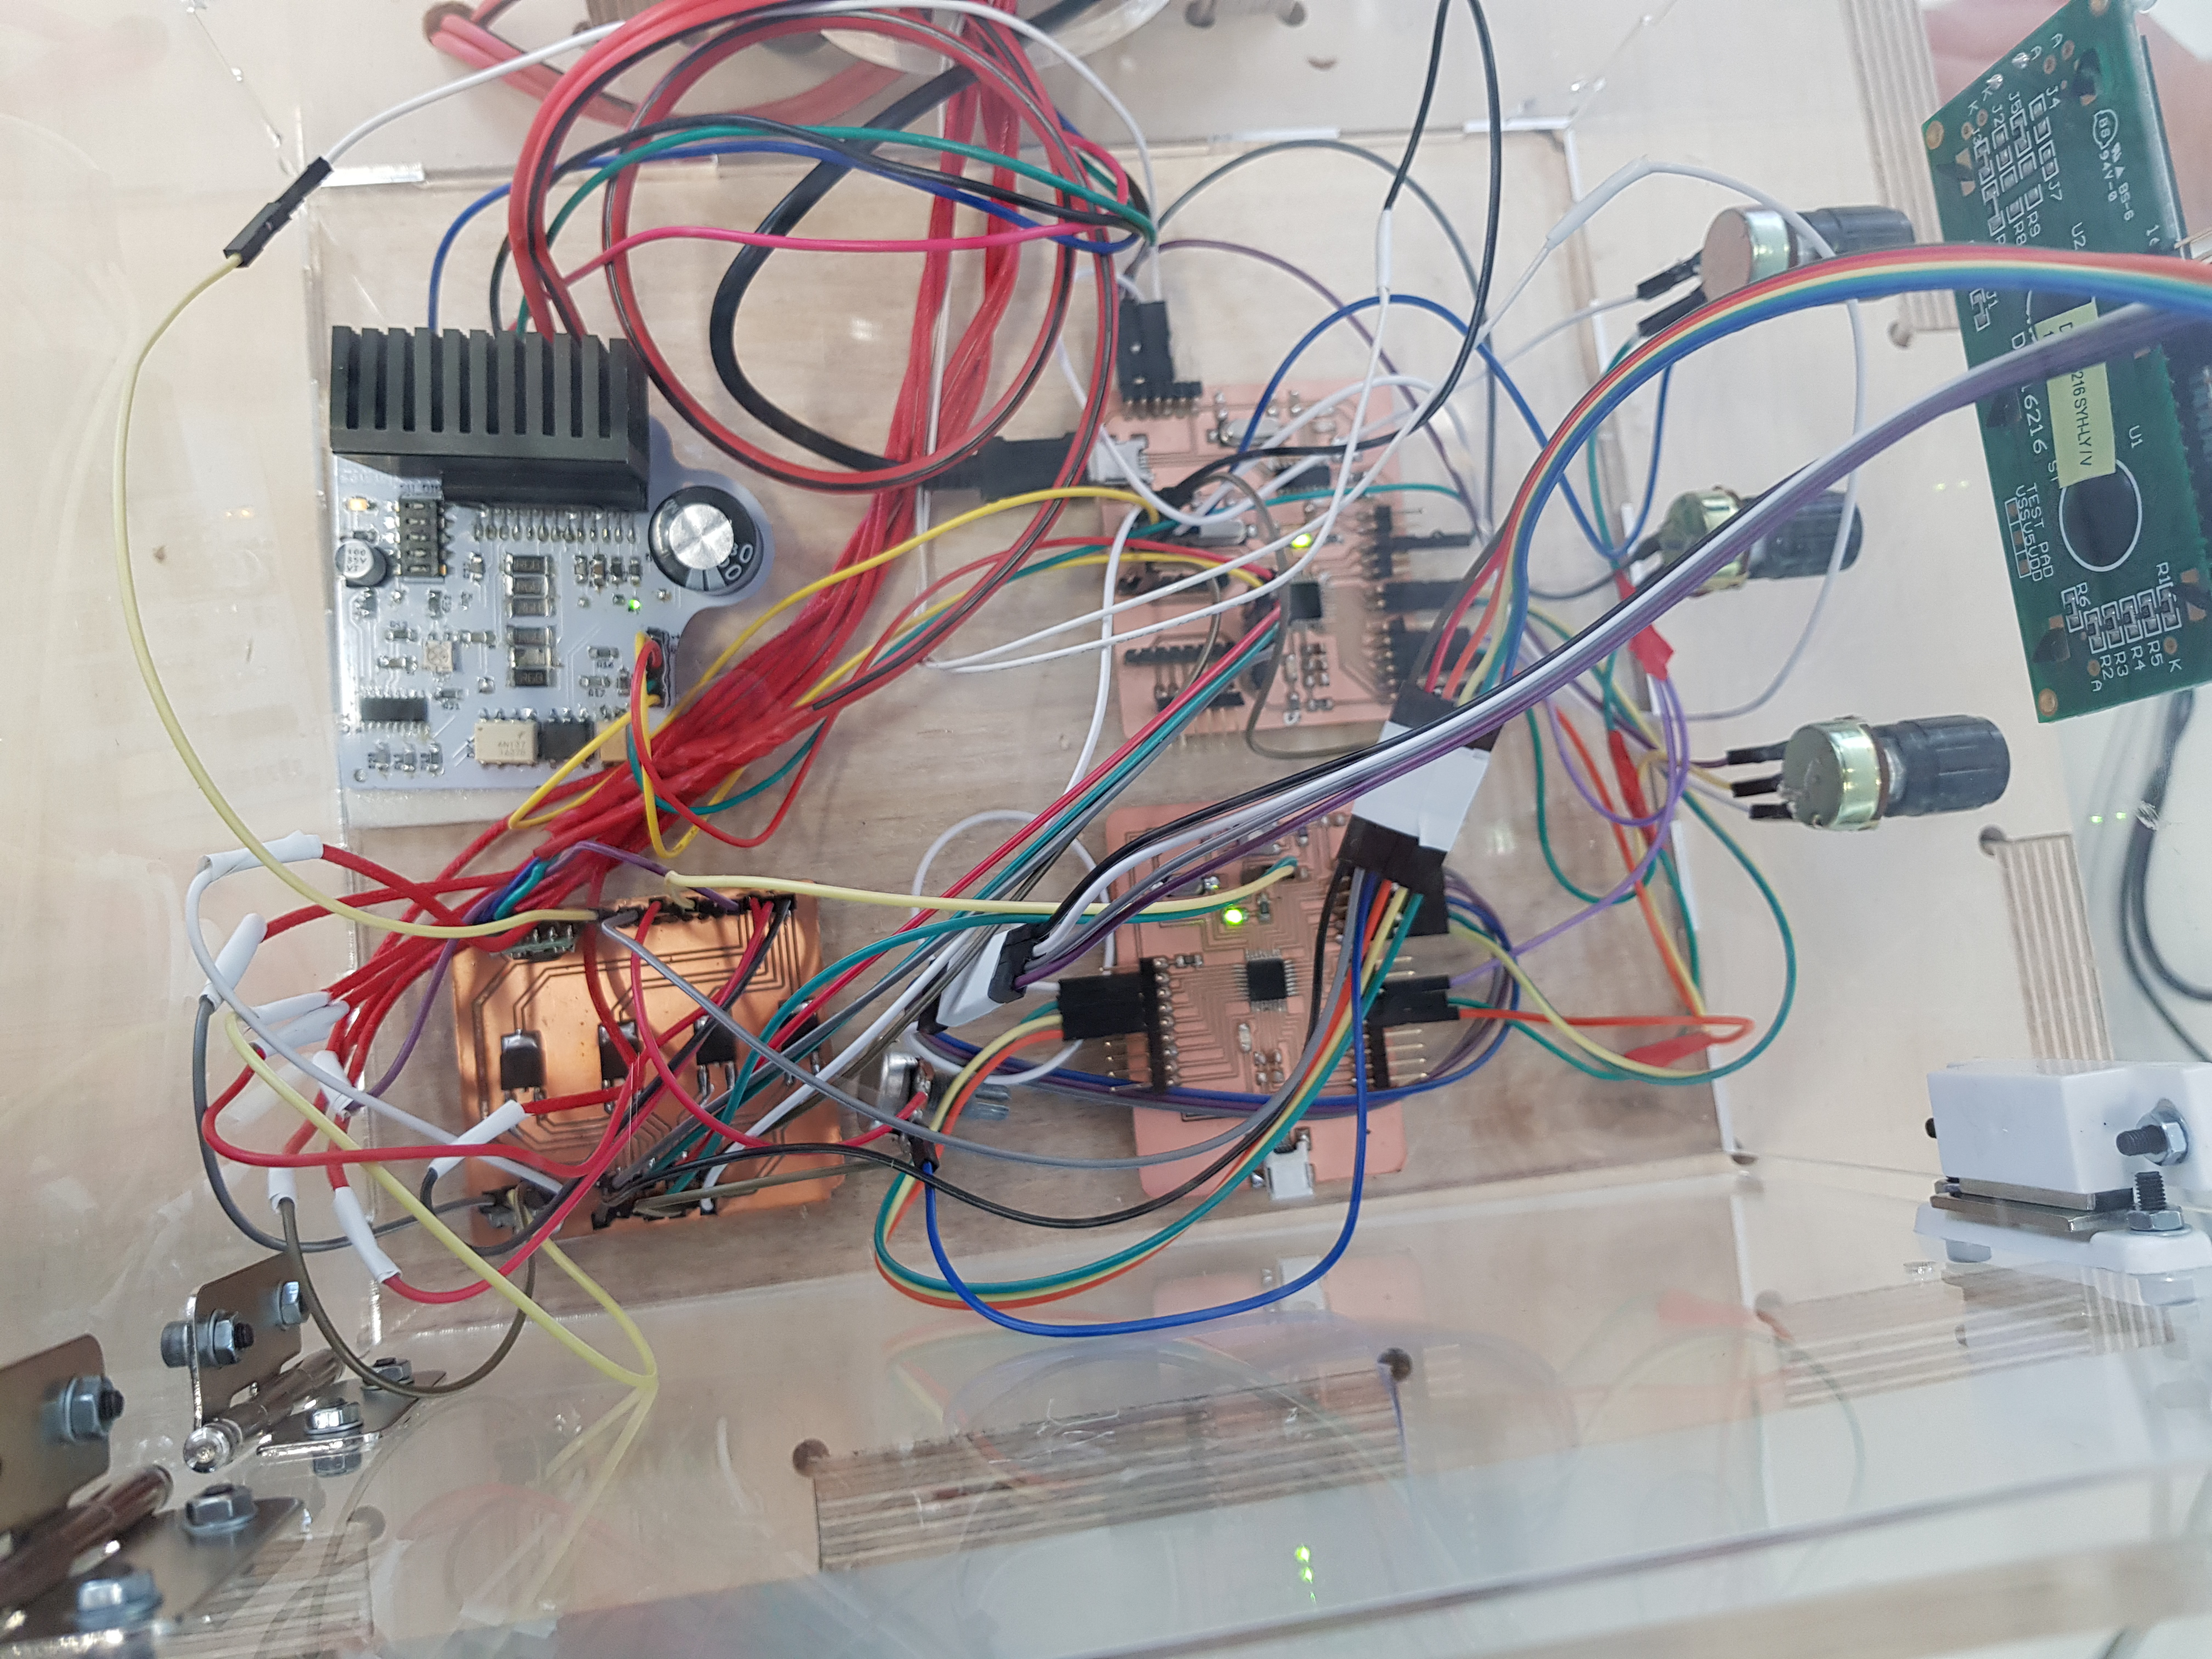
Ordering and recieving the parts that I needed went good without any delay.
2. Well for he whole project I had only 1 week, because I haven't done much for it beforehand. So I have planned to deal with the taks that I have defined here one after another and not to jump. 3. What has worked? Well the Frame that I have designed was rigit and stable as I have expected this. Also all components worked well on their own. I was able to programm the board that I have made, read an input and also make an output. I was able to control the temperature of the nozzle with the code, without use fans. And the end design looked nice(my personal opinion) as I have imagened. 4. What hasn't worked? As I have told before, I was able to program and to control everything, but I was not able to extrude the material properly. 1st and the main reason for this was the motor. I have used nema23 motor to rotate the drill bit. And I figured out that the power of this motor was not enough to force the material out. But in theory It worked, you can see in the video below that I have extruded some material out of the nozzle, I was able to do this, because I have attached the drill bit that "pushes" the material out to the normal drill ad rotated it with it. 5. What questions still need to be resolved? First and very important question is, what motor I have to use, in order to be able to push the filament out of the pipe. The 2nd question ist: Where exactly I have to put the opening to insert the shredded material, I mean where exactly I the pipe should be cutten. And the 3rdWhat difference should the pipe inner diameter and the drill bit diameter should have. In my case I had the drill bit diameter of 20mm and the innnerdeiameter of the pipe of 22mm. Well this difference could be good, to avoid the bubbles and push the air backwards if the shredded material doen't flow constantly. 6. What have I learned? Well first and important lecture for me was, that I have to plan and organize for the projects like this everything very carefully and make something beforehand. It is also very important to have plan B and plan some time for fails. 3D Model Extruder Well here you can see the 3D model that I have designed for the extruder part. Almost every single part of it to hold the constuction is made of 18mm plywood, to give stability. In my CNC design I have made a pocket to place my control panel and one smal pocket at the over end, to place some mdf or cardbord, in order not to make it dirty. Well while putting the control panel to the pocket that I have made for it I had some issue, the control panel was not fitting well to the pocket. So I had to file it a bit. Well my suggestion is that the joints were not connected all the way through, but this came to my mind afterwards. Shredder Well I had some luck to find a unmouted shredder blades and the motor. The shredder part that I have found was originally dedicated as a document destroyer. At the end I have measured everything an made a case for it. Well the motor needs 240V so I could plug it directly to the power plug and run it. The motor also needs a 14uf 450V Capasitor to run it, otherwise it may not start and we need to give a start help manually. Loft For the 3D part I have designed adn 3d Printed this loft, this loft is placed exactly above the hole of the pipe, to put the shredded material. I have printed this loft with PLA. Well I started the print at Saturday and of course I wanted to have it finished as soon as possible, but I also had to think about, that I have to place some screws though it, to hold it on desired place. That's why I have used 8mm nozzle, 2mm Layer hight, 3.2 mm wall thikness(to make it more rigit), and of course print speed of 100. Well another thing that I ahd to mention is, that the loft doesn't touches the pipe, it has some offset, I was worried abot the heat. You can also see this offset on the picture. The Loft has be glued with the pipe together with the heat resistant silicon. Case For the 2D part I have designed this Box, I have cutten this box out of the transparent acrylic, to transmit a nice look. The acrylic has 5mm of thikness. I have calculated 0.25mm of Kerf so it becomes Press-Fit. Well to be honest I had some stuggles while assembling this box. Some parts cracked while I hammered the parts together. So I had to redo them again. As you can see in the picture, I have attached an LCD Display and 3 Potentiometers to the box, to control the Rotation Speed, Current Flow and the Temperature. You can also see big hole for the Power Supply, Heaters and Thermistor cables. Boards Here you can see the board that I have designed for the final project, this board has the pinout for the polulu that has the same pin distance as TMC2100-LA silent stepper driver, but lately i figured out that the these drivers are not really good to control nema 23 or bigger motors. So I have used a satstep6600 driver to run the motor. I have also used one board from the Output week because I wanted to use an LCD 16x2 Display. And the pins from 1 modified satshakit wouldn't be enough. I have also made a board to regulate the output voltage to the Heaters and nema23 motor. In this board I have used MOSFET RFD16N05 transistors that can read PWM values from the microcontroller and use it to change the power of the heaters. You can see the datasheet below. And because it s N-Channel logic power MOSFET I have used the connection below. You can see all the board connected below In the Video below you can see 3 potentiometers, These potentiometers are there to control Rotation Speed -> RS in LCD Display, Current % of heaters -> CR, and desired temperature of the extruding head -> ST. In the video below, I only change the rotationspeed of the motor, because It is the only thing where you can see the changes with video. One thing I have to mention is that I can not directly influence these paremeters with the values from the potentiometers, because the range of the analogRead is between 0 to 1023, so I had to map them.
Programming Well to be honest I have splitted the output "wire" of the potentiometers, so that 2 board of mine recieve the same value at the same pins simultaniously. So don't get confused of the code and the amout of the potentiometers. The code is commented, so thath why I would not repeat it here again.
          // which analog pin to connect
          
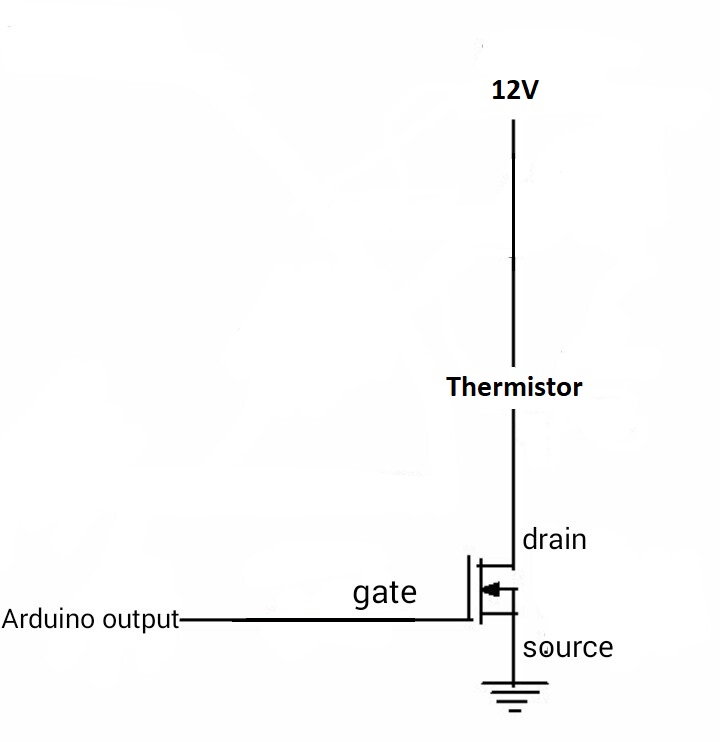
          #define THERMISTORPIN A0         
          // resistance at 25 degrees C
          #define THERMISTORNOMINAL 100000      
          // temp. for nominal resistance (almost always 25 C)
          #define TEMPERATURENOMINAL 25   
          // how many samples to take and average, more takes longer
          // but is more 'smooth'
          #define NUMSAMPLES 5
          // The beta coefficient of the thermistor (usually 3000-4000)
          #define BCOEFFICIENT 4267
          // the value of the 'other' resistor
          #define SERIESRESISTOR 100000    
         
          #define rotPin A2 
          #define curPin A3
          #define heatPin A4
         
          float steinhart;
          int rotVal = 0; 
          int curVal = 0; 
          int heatVal = 0; 
           
          uint16_t samples[NUMSAMPLES];
          int tmp;
         
         
         int stepPin1 = 4; // step pin
         int dirPin1 = 7; // direction pin
         int en = 8; // enable pin
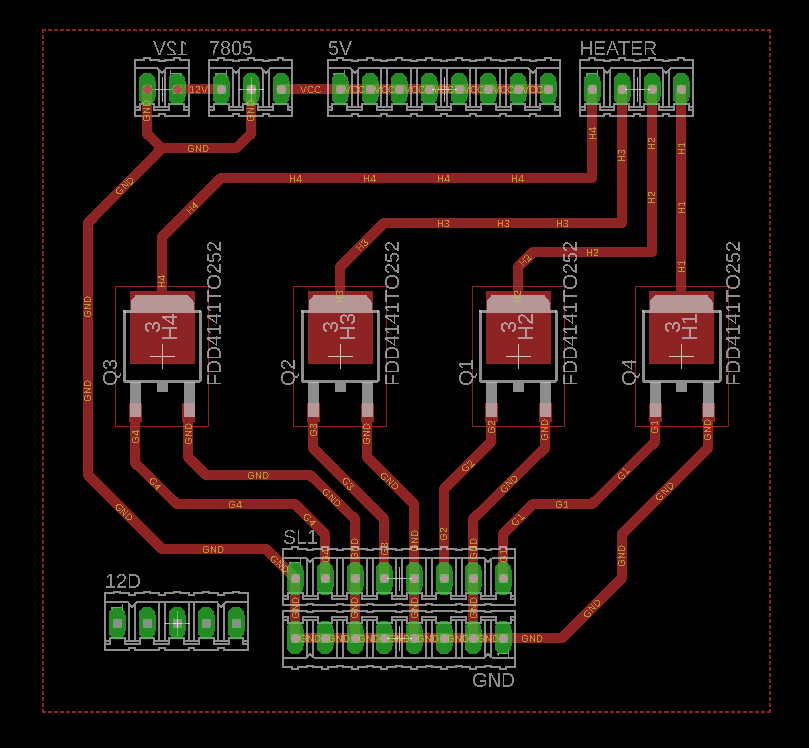


         int heaterPin0 = 6;
         int heaterPin1 = 9;
         int heaterPin2 = 10;
         int heaterPin3 = 11;
          
          void setup(void) {
         
             pinMode(stepPin1,OUTPUT); 
             pinMode(dirPin1,OUTPUT); 
             pinMode(en,OUTPUT);
            
            Serial.begin(19200);
              pinMode(heaterPin0, OUTPUT);
              pinMode(heaterPin1, OUTPUT);   // sets the pin as output for Heaters
              pinMode(heaterPin2, OUTPUT);   
              pinMode(heaterPin3, OUTPUT);
         
              pinMode(rotPin, INPUT); // sets the pin as output for potentiometers
              pinMode(curPin, INPUT);
              pinMode(heatPin, INPUT);
              delay(500);
         
          }
           
          void loop(void) {
               rotVal = analogRead(rotPin); // read values for rotation spead
               rotVal = map(rotVal, 0, 1023, 4000, 0); // map values for motor
               curVal = analogRead(curPin);// read values for current
               curVal = map(curVal, 0, 1023, 0, 255); // map values for current for analogWrite()
               heatVal = analogRead(heatPin);// read values for Heaters
               heatVal = map(heatVal, 0, 1023, 25, 250); //map values for Heaters
              if(rotVal>3990){
               digitalWrite(dirPin1,HIGH); // Enables the motor  to move in a particular direction 
                digitalWrite(en,LOW); // send low singnal to EN in satstep
               //one revolution 
                  for(int x = 0; x < 200; x++) { // 200 steps/revol
                  digitalWrite(stepPin1,HIGH); 
                  delayMicroseconds(rotVal); //here we manipulate the rotation speed
                  digitalWrite(stepPin1,LOW); //here we manipulate the rotation speed
                  delayMicroseconds(rotVal); 
                } 
              }
            uint8_t i;
            float average;
           
            
            for (i=0; i < NUMSAMPLES; i++) {
             samples[i] = analogRead(THERMISTORPIN);
            }
           
            // average all the samples out
            average = 0;
            for (i=0; i < NUMSAMPLES; i++) {
               average += samples[i];
            }
            average /= NUMSAMPLES;
           
            //Serial.print("Average analog reading "); 
            //Serial.println(average);
           
            // convert the value to resistance
            average = 1023 / average - 1;
            average = SERIESRESISTOR / average;
            //Serial.print("Thermistor resistance "); 
            //Serial.println(average);
           
            float steinhart;
            steinhart = average / THERMISTORNOMINAL;     // (R/Ro)
            steinhart = log(steinhart);                  // ln(R/Ro)
            steinhart /= BCOEFFICIENT;                   // 1/B * ln(R/Ro)
            steinhart += 1.0 / (TEMPERATURENOMINAL + 273.15); // + (1/To)
            steinhart = 1.0 / steinhart;                 // Invert
            steinhart -= 273.15;                         // convert to C
          
            //Serial.print( analogRead(THERMISTORPIN));
            //Serial.print("------------------\n");
            //Serial.print("Temperature "); 
         
            if (steinhart < heatVal){
               analogWrite(heaterPin0,curVal); // 
               analogWrite(heaterPin1,curVal); // analogRead values go from 0 to 1023, analogWrite values from 0 to 255
                analogWrite(heaterPin2,curVal); //
                analogWrite(heaterPin3,curVal);
            }else if (steinhart > heatVal){
              analogWrite(heaterPin0,0); // a
               analogWrite(heaterPin1,0); // write 0 as soon as we arrived the desired heat
                analogWrite(heaterPin2,0); //
                analogWrite(heaterPin3,0);
            }
            //Serial.println(" *C");
            
           // delay(1000);
         
          }


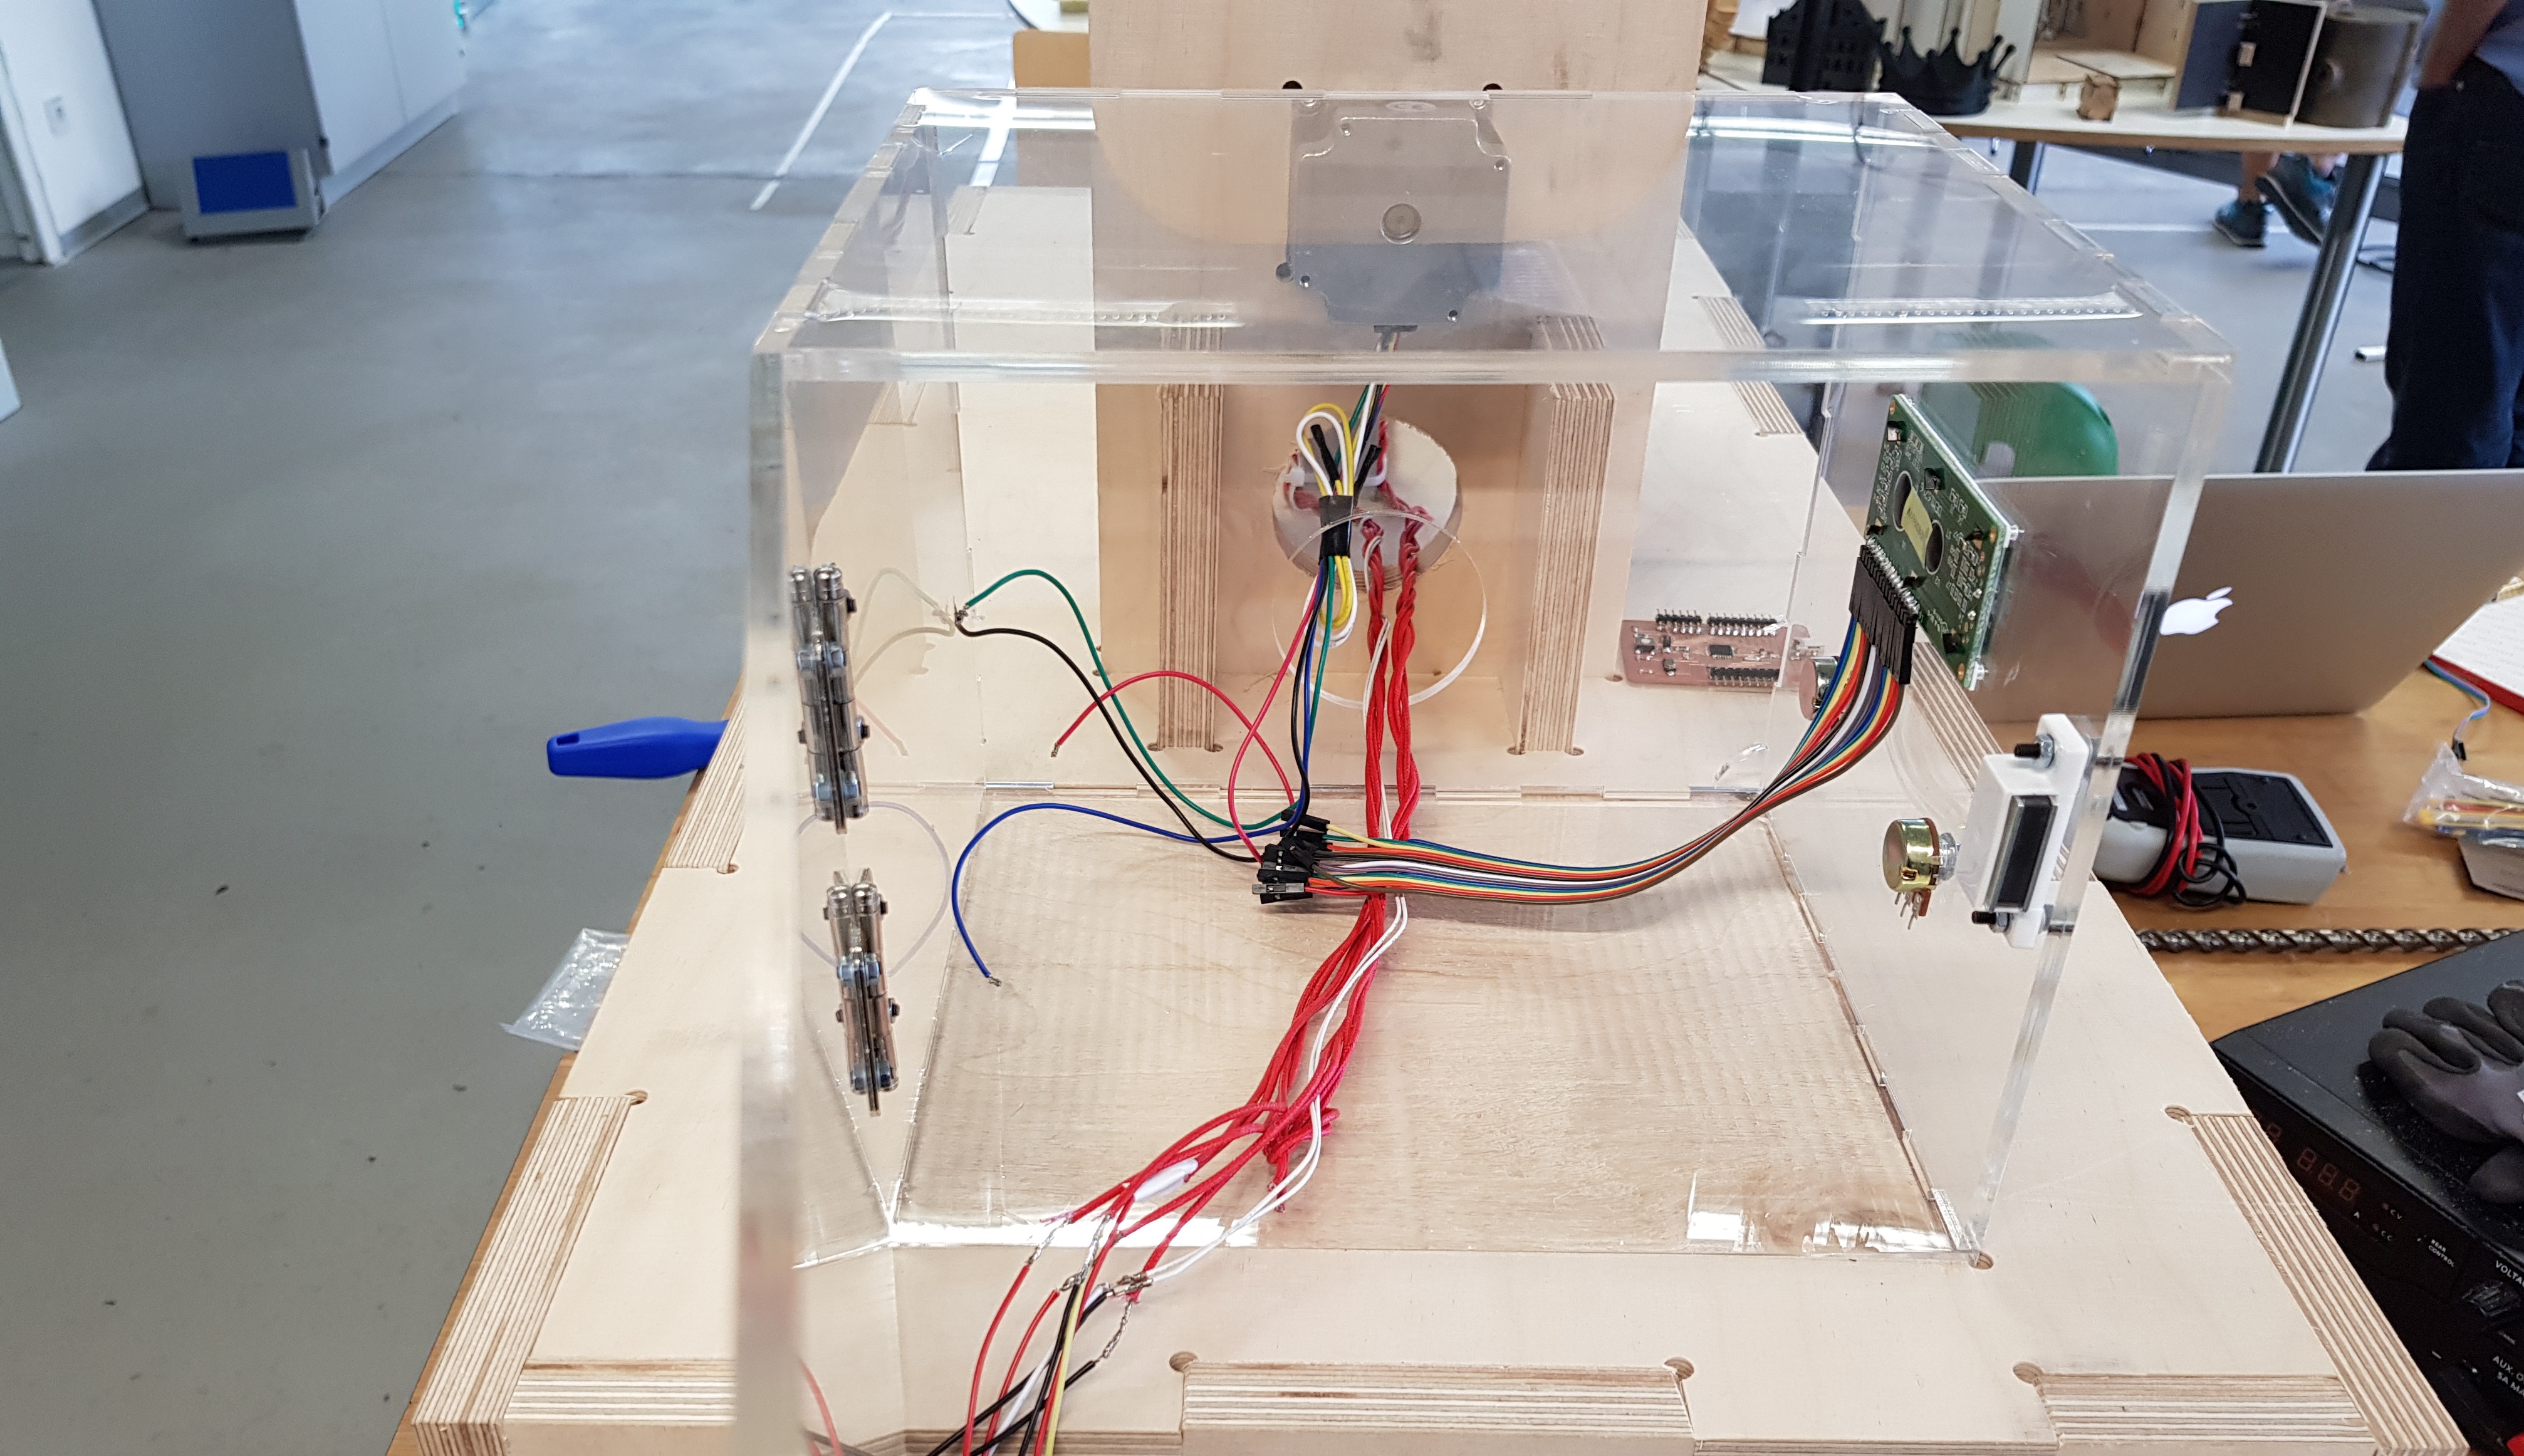
    #include <LiquidCrystal.h>
        #define rotPin A2 
        #define curPin A3
        #define heatPin A4

        float steinhart;
        int rotVal = 0; 
        int curVal = 0; 
        int heatVal = 0;

//String input;

// Connections:
// LCD pin 3 for contrants to GND, good for beginners
// rs (LCD pin 4) to Arduino pin 12
// rw (LCD pin 5) to Arduino pin 11
// enable (LCD pin 6) to Arduino pin 10
// LCD pin 15 to Arduino pin 13
// LCD pins d4, d5, d6, d7 to Arduino pins 5, 4, 3, 2
LiquidCrystal lcd(9, 8, 7, 6, 4, 3, 2); //!!!!!!!!!!!!!!!!!!!!!!!!!!!!!!!!!!! Changed the pins, so that we can upload the code without chaniging the wires from pins 12 to 10 
void setup(){
            pinMode(rotPin, INPUT);
            pinMode(curPin, INPUT);
            pinMode(heatPin, INPUT);
//Serial.begin(19200);
lcd.begin(16,2);              // columns, rows.  use 16,2 for a 16x2 LCD, etc.
lcd.clear();                  // start with a blank screen
// if you have a 4 row LCD, uncomment these lines to write to the bottom rows
// and change the lcd.begin() statement above.
//lcd.setCursor(0,2);         // set cursor to column 0, row 2
//lcd.print('Row 3');
//lcd.setCursor(0,3);         // set cursor to column 0, row 3
//lcd.print('Row 4');
}
void writeLCD(){
 lcd.clear(); // clear the LCD 
 /*
lcd.setCursor(0,0); 
lcd.print("CT:");    // change this text to whatever you like. keep it clean.
lcd.setCursor(4,0);           // set cursor to column 0, row 1
lcd.print(input);
*/

lcd.setCursor(8,0);           // set cursor to column 8, row 1 (the first row)
lcd.print("ST:");    // change this text to whatever you like. keep it clean.
lcd.setCursor(12,0);           // set cursor to column 12, row 1
lcd.print(heatVal);//print desire heat val in C


lcd.setCursor(0,1);           // set cursor to column 0, row 1 (the first row)
lcd.print("RS:");    // change this text to whatever you like. keep it clean.
lcd.setCursor(4,1);           // set cursor to column 4, row 1
lcd.print(rotVal);// print desire rotation speed in %


curVal = map(curVal, 0, 255, 0, 100); //map current values to %
lcd.setCursor(8,1);           // set cursor to column 8, row 1 (the first row)
lcd.print("CR:");      // change this text to whatever you like. keep it clean.
lcd.setCursor(12,1);           // set cursor to column 12, row 1
lcd.print(curVal); // print output for current change in analogWrite
}
void readPins(){
             rotVal = analogRead(rotPin); // here we read the values from the potentiometer (analog pin A2)
             rotVal = map(rotVal, 0, 1023, 0, 100); // here we map the value from the potentiometer to %
             
             curVal = analogRead(curPin); // here we read the values from the potentiometer (analog pin A3)
             curVal = map(curVal, 0, 1023, 0, 255,);// here we map the value from the potentiometer 
             
             heatVal = analogRead(heatPin); // here we read the values from the potentiometer (analog pin A4)
             heatVal = map(heatVal, 0, 1023, 25, 250);// here we map the value from the potentiometer 
}

  void loop(){
  readPins(); // call the readPins() function
  writeLCD();// call the writeLCD() function
  delay(100);


  }    
}
         
Assembling xD Well before the assembling parts together I have tested the heaters, in the way that I was able to keep the nozzle a the same temperature only with the code without using any fans. Here you can see the assembling of the Frame. Unfortunately I forgot to make any fillets at the joints, so that you may have to file it a bit, in order to stick them easier together. While putting all the electronic components together I have checked that they were working beforehand. Downloads Extruder Frame DXF Extruder Frame Fusion360 Loft Shredder Holder Box Satshakit Modified sch Satshakit Modified .brd PowerBoard .sch PowerBoard .brd Satstep6600 .sch Satstep6600 .brd