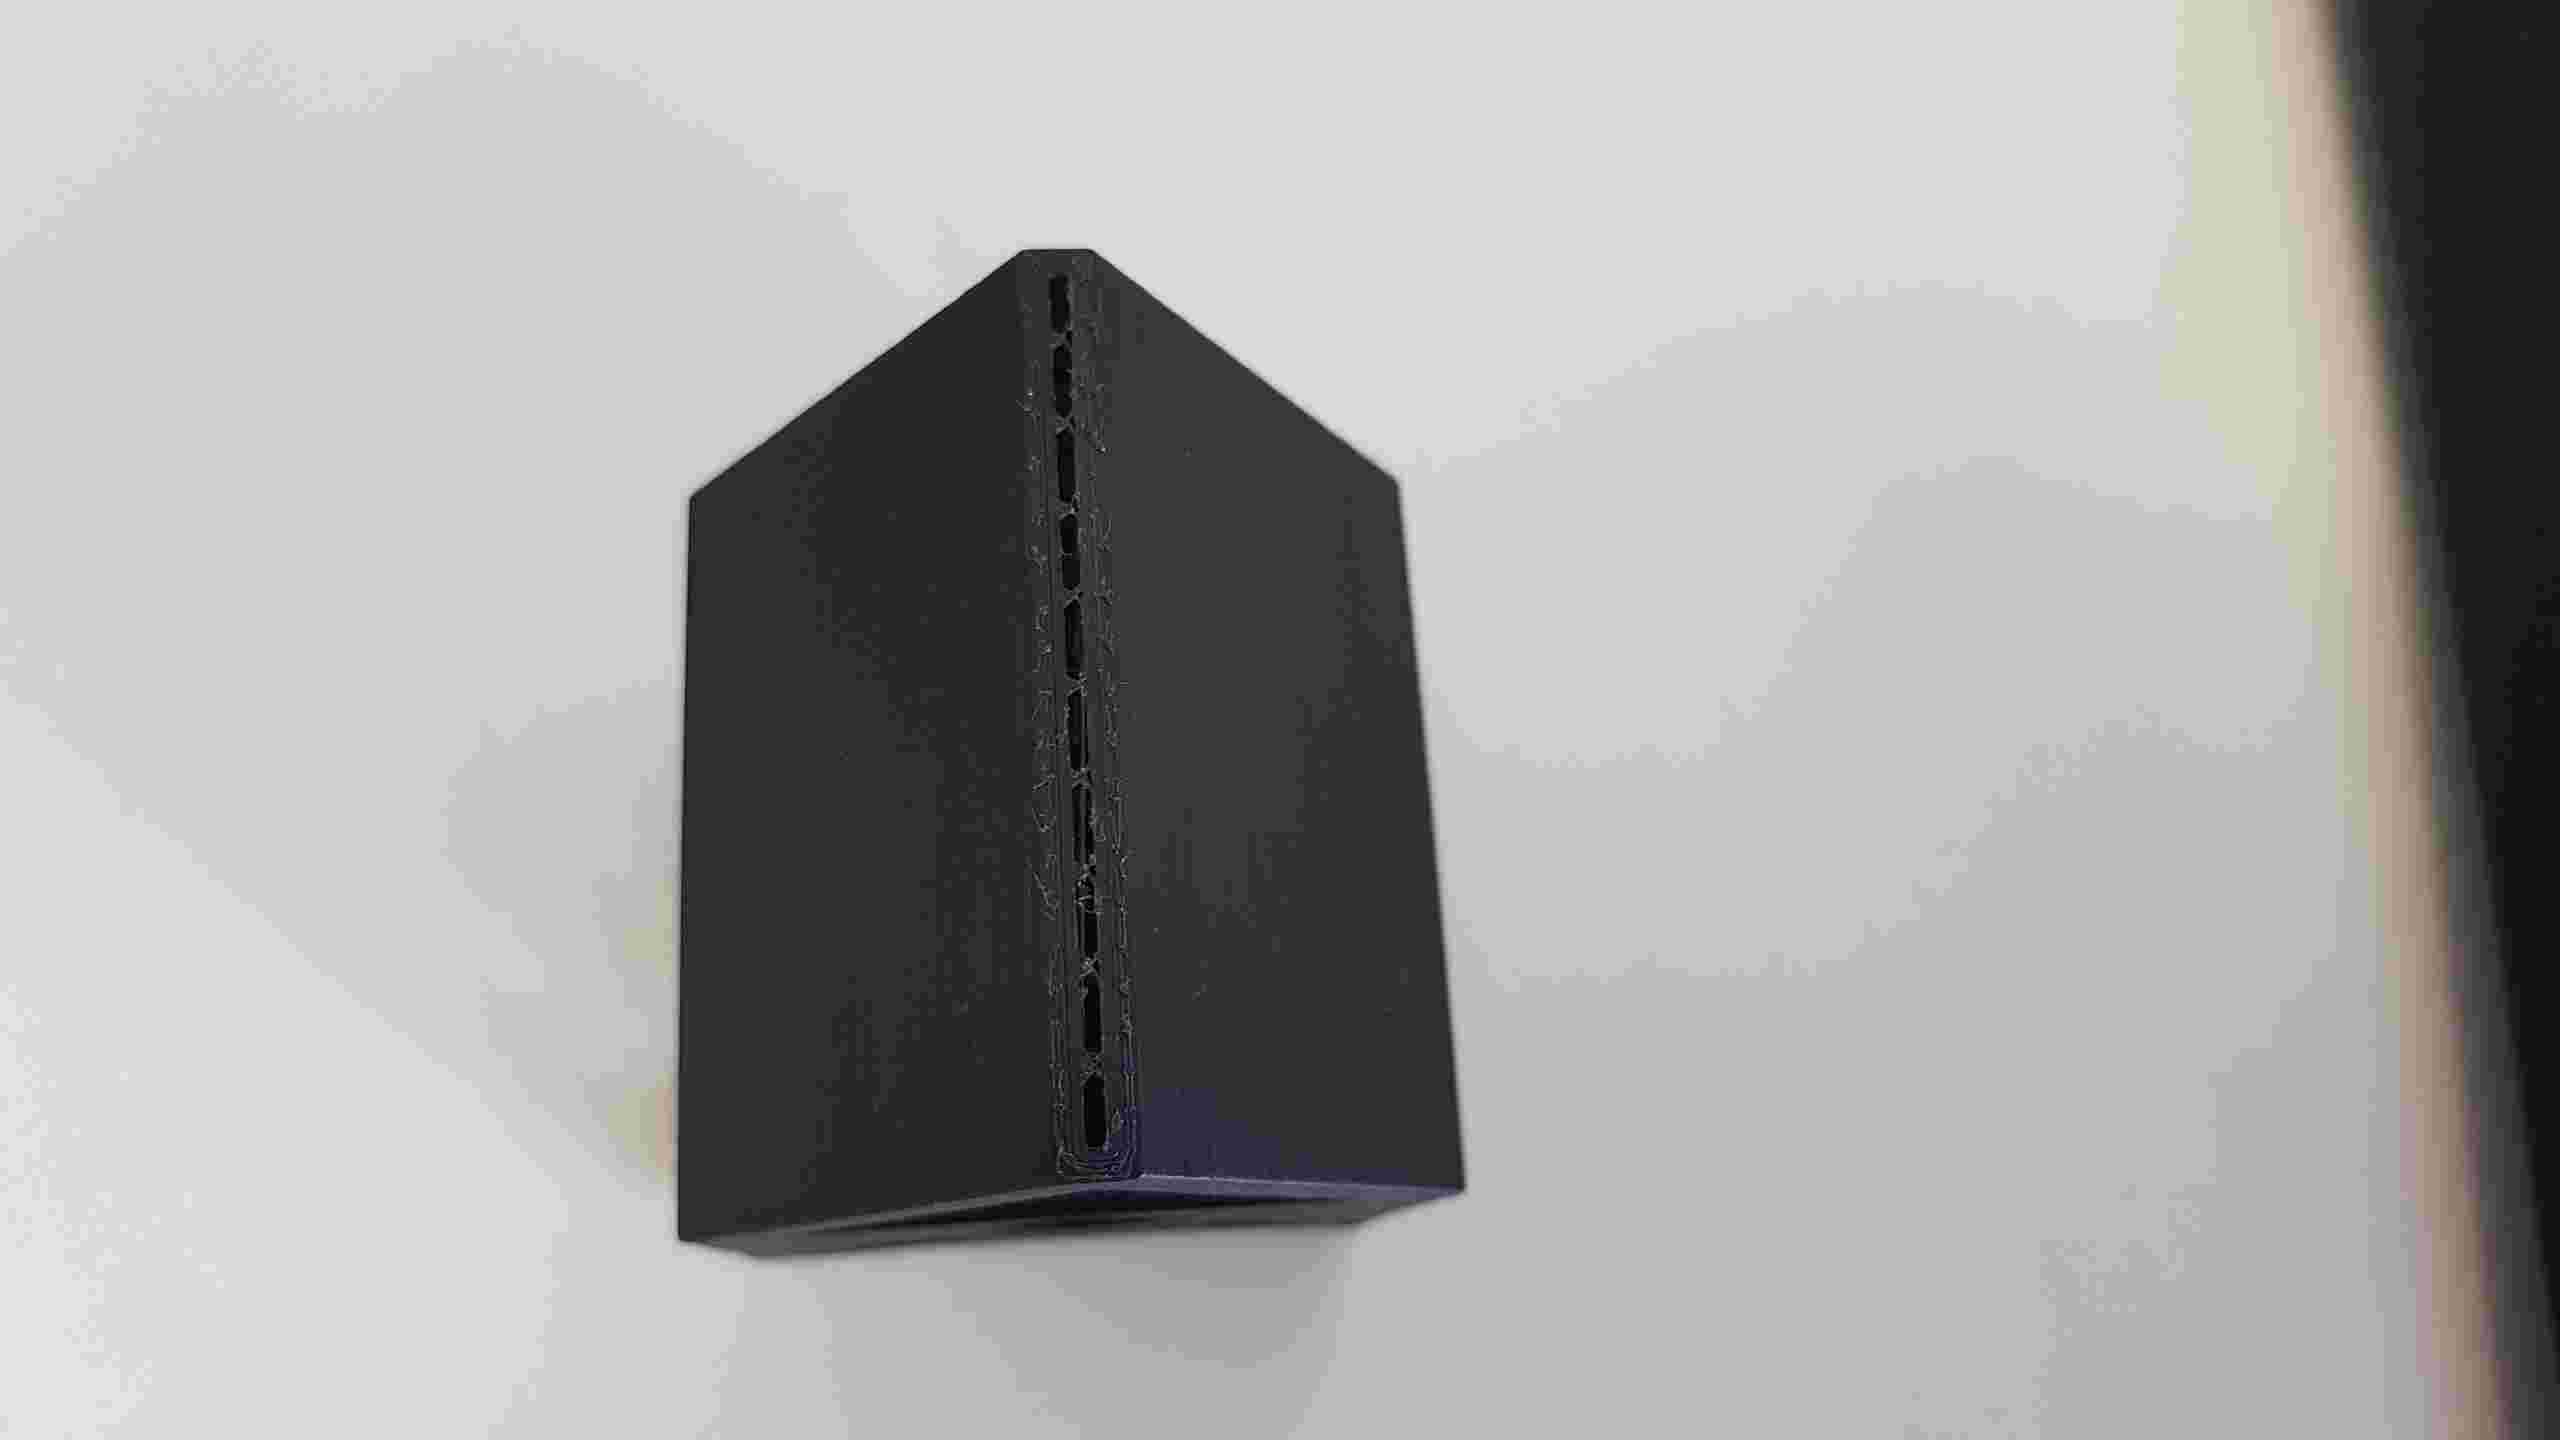
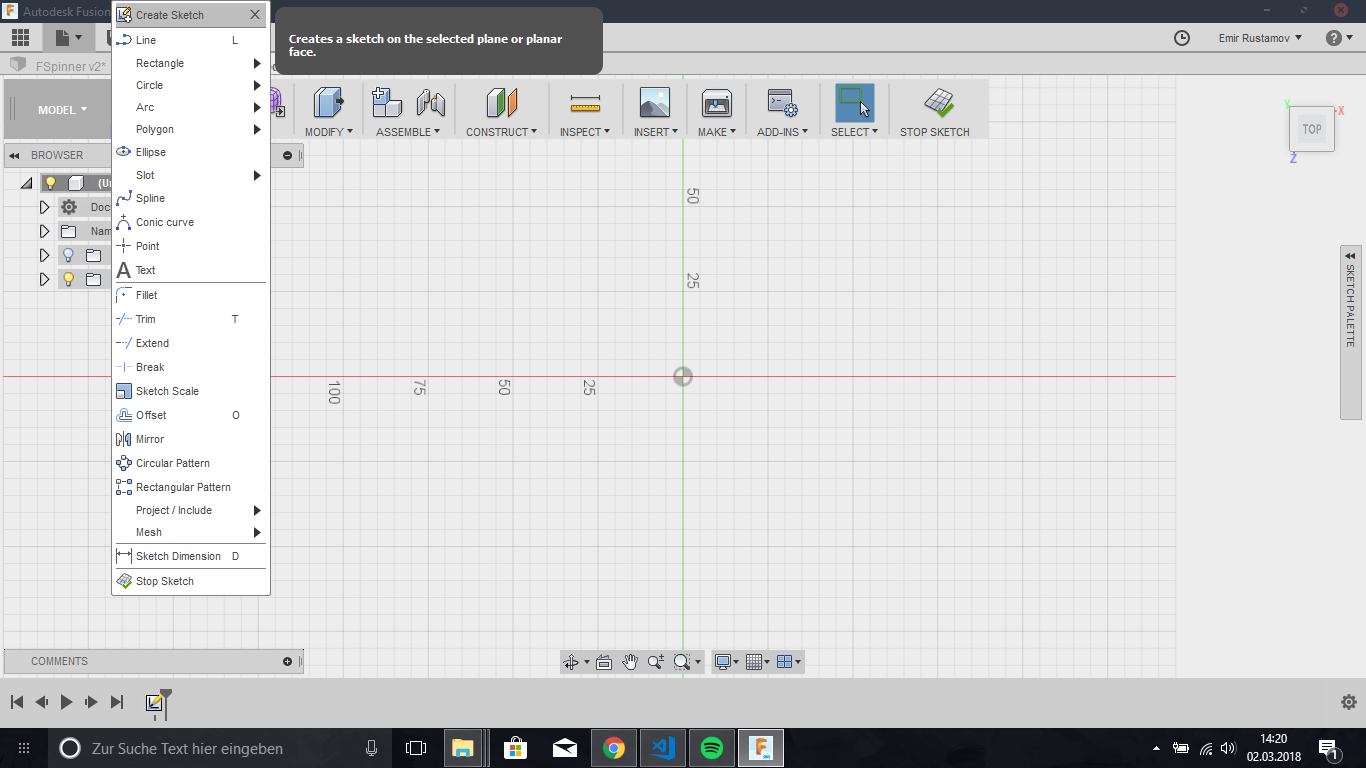
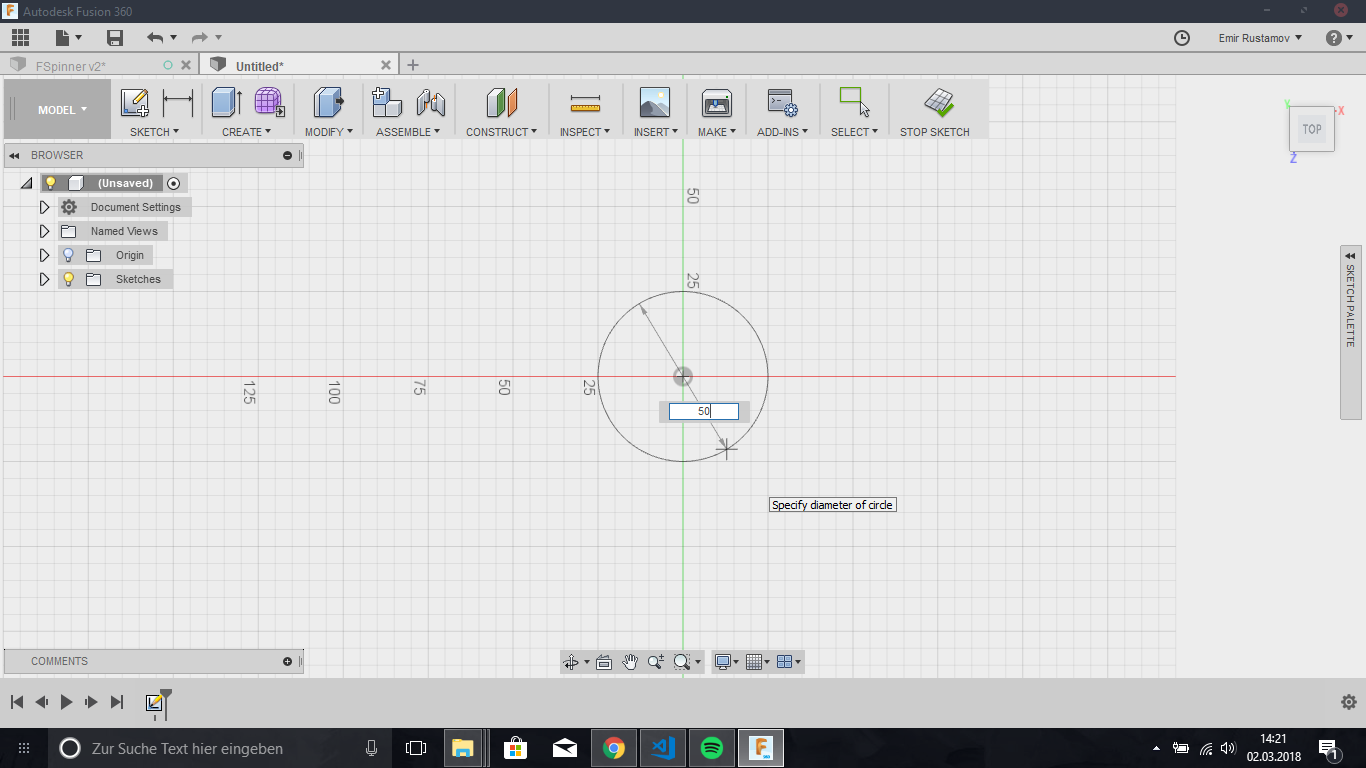
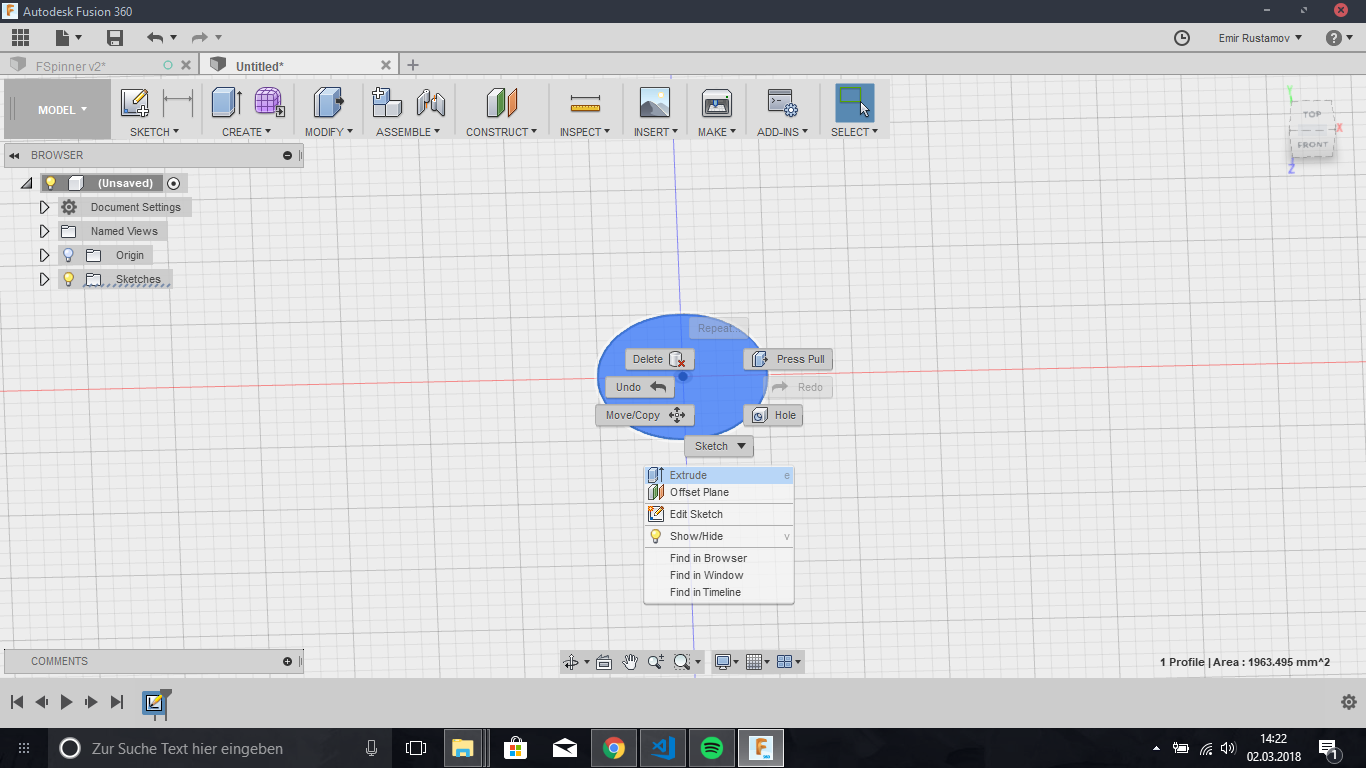
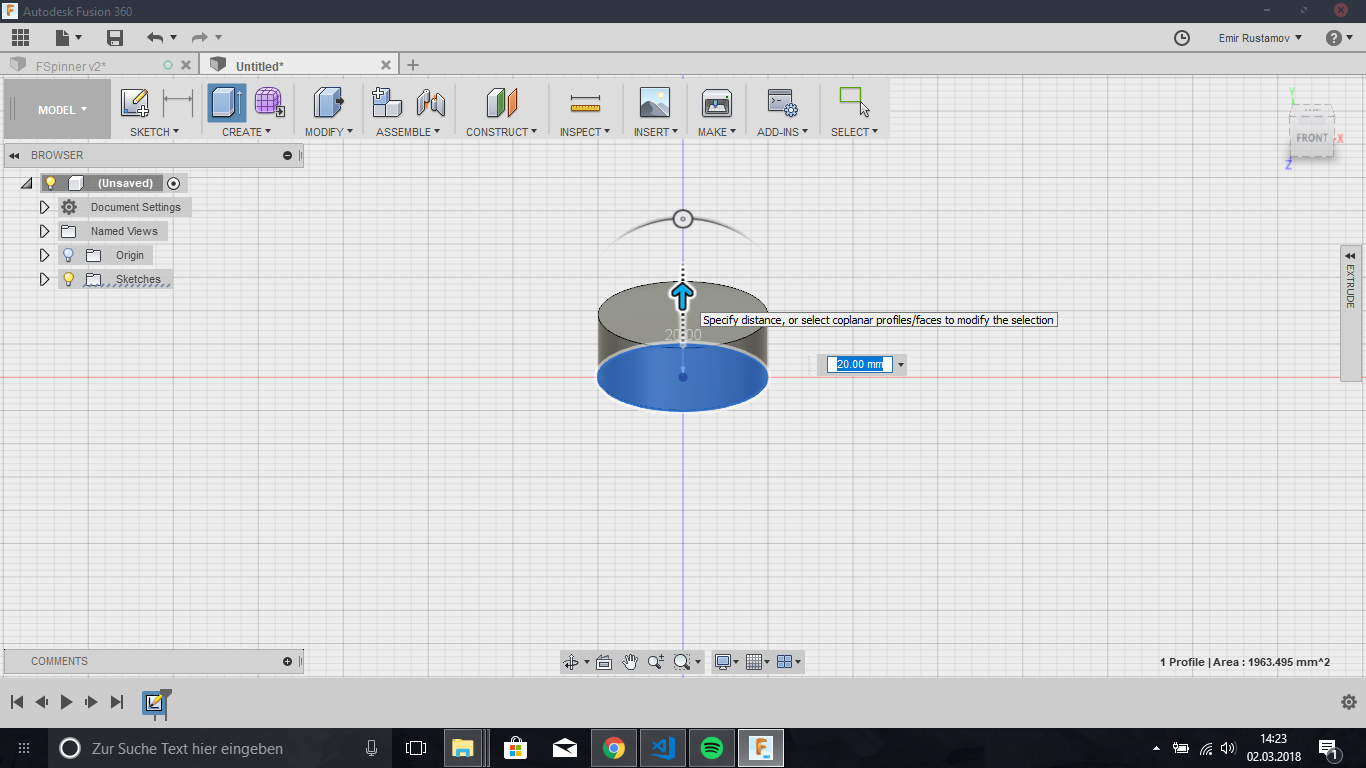
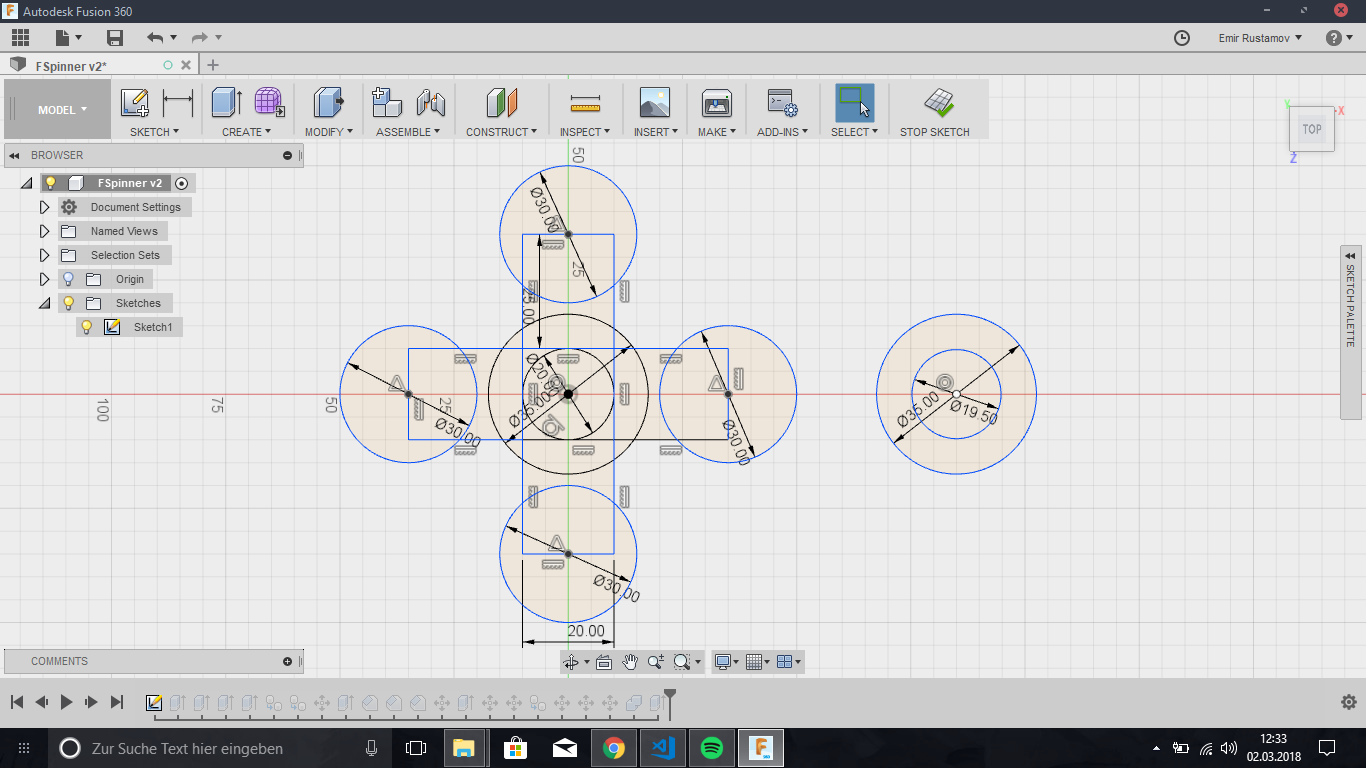
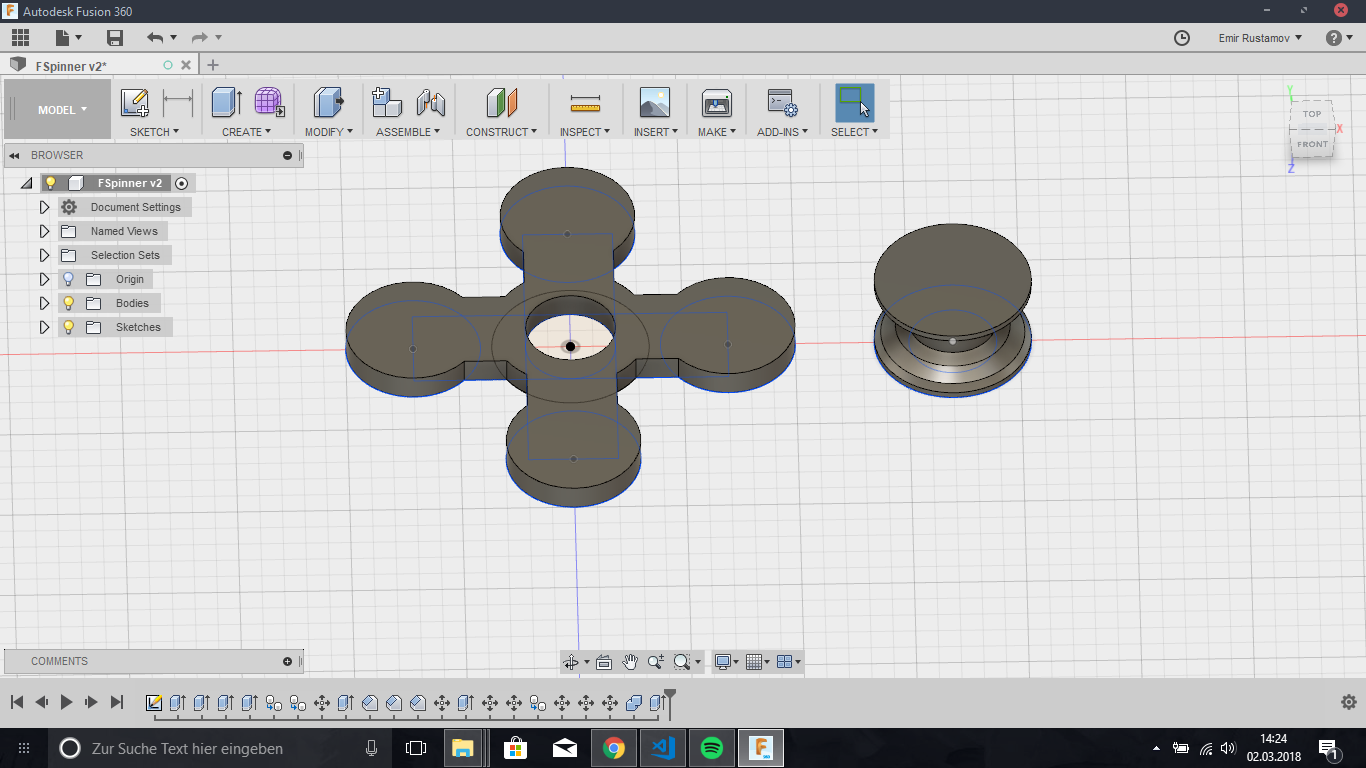
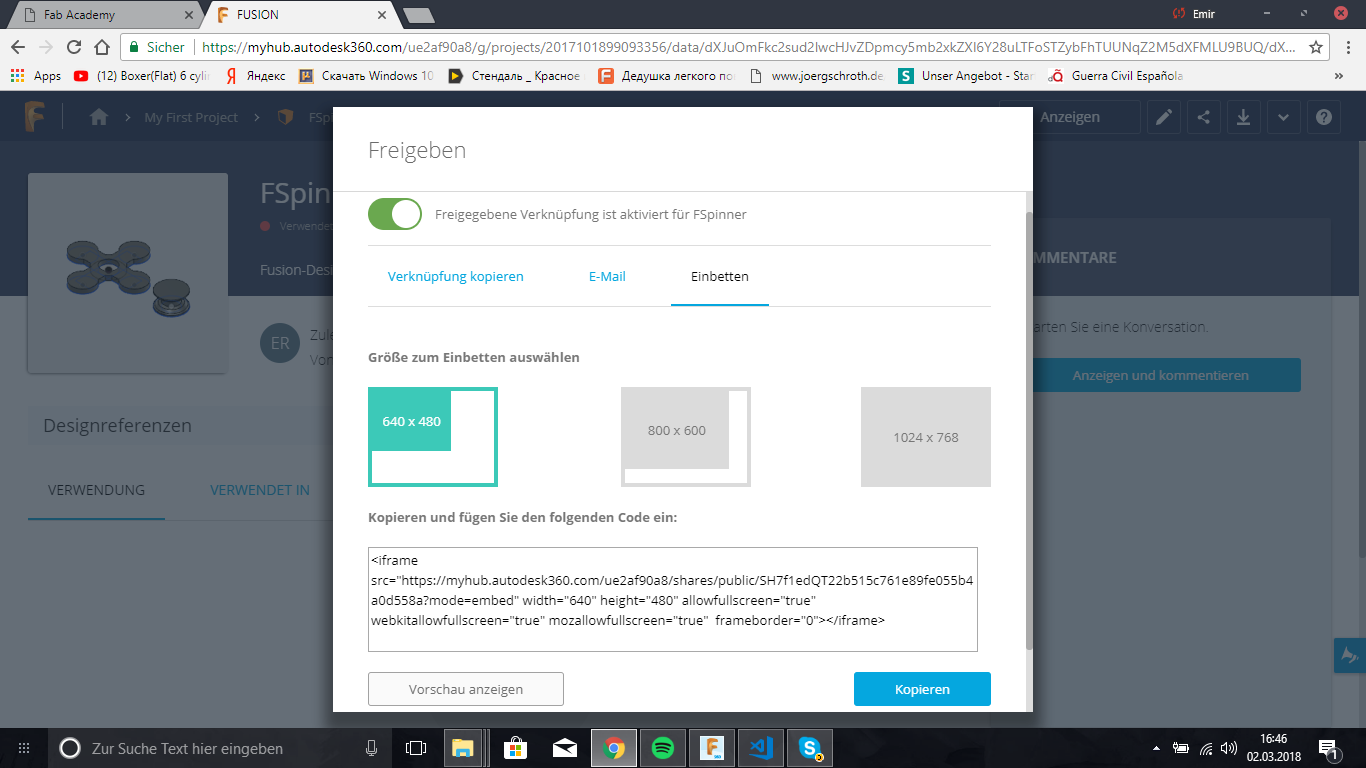
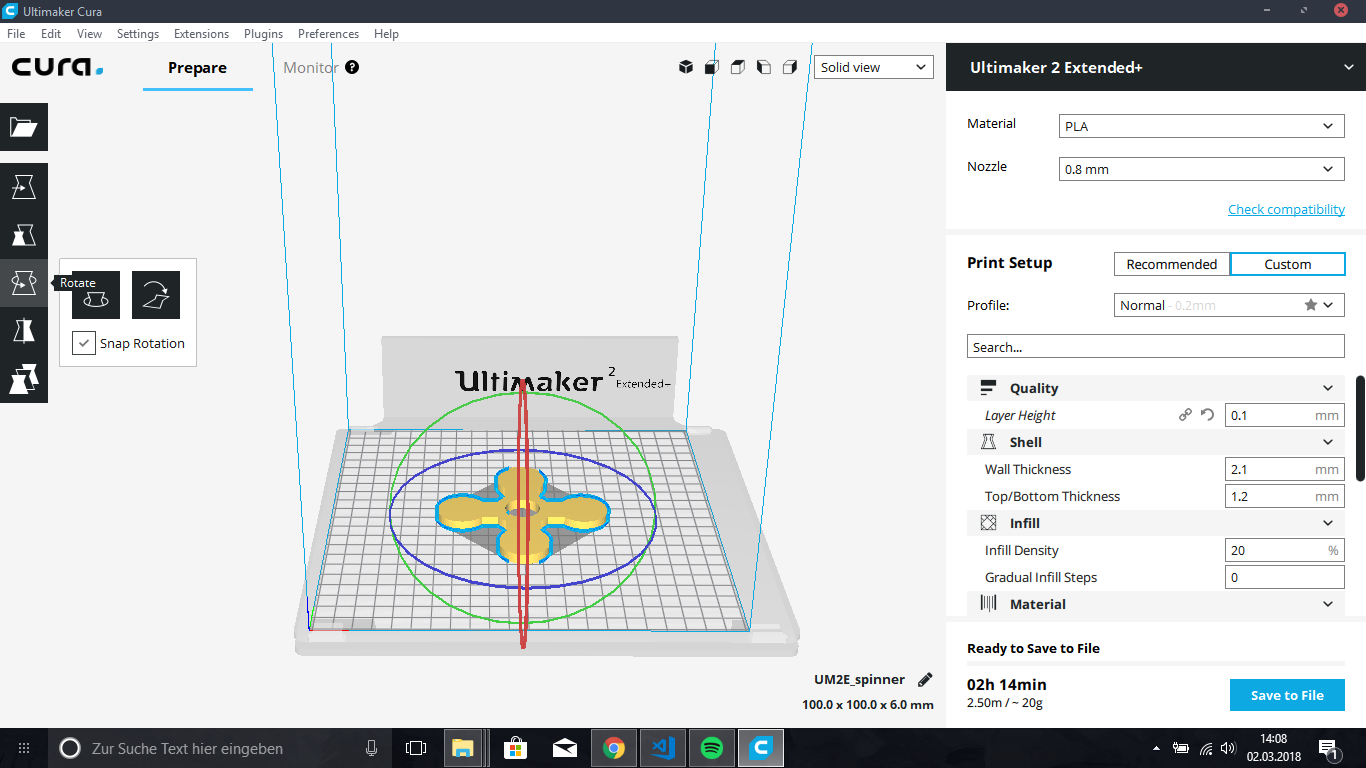
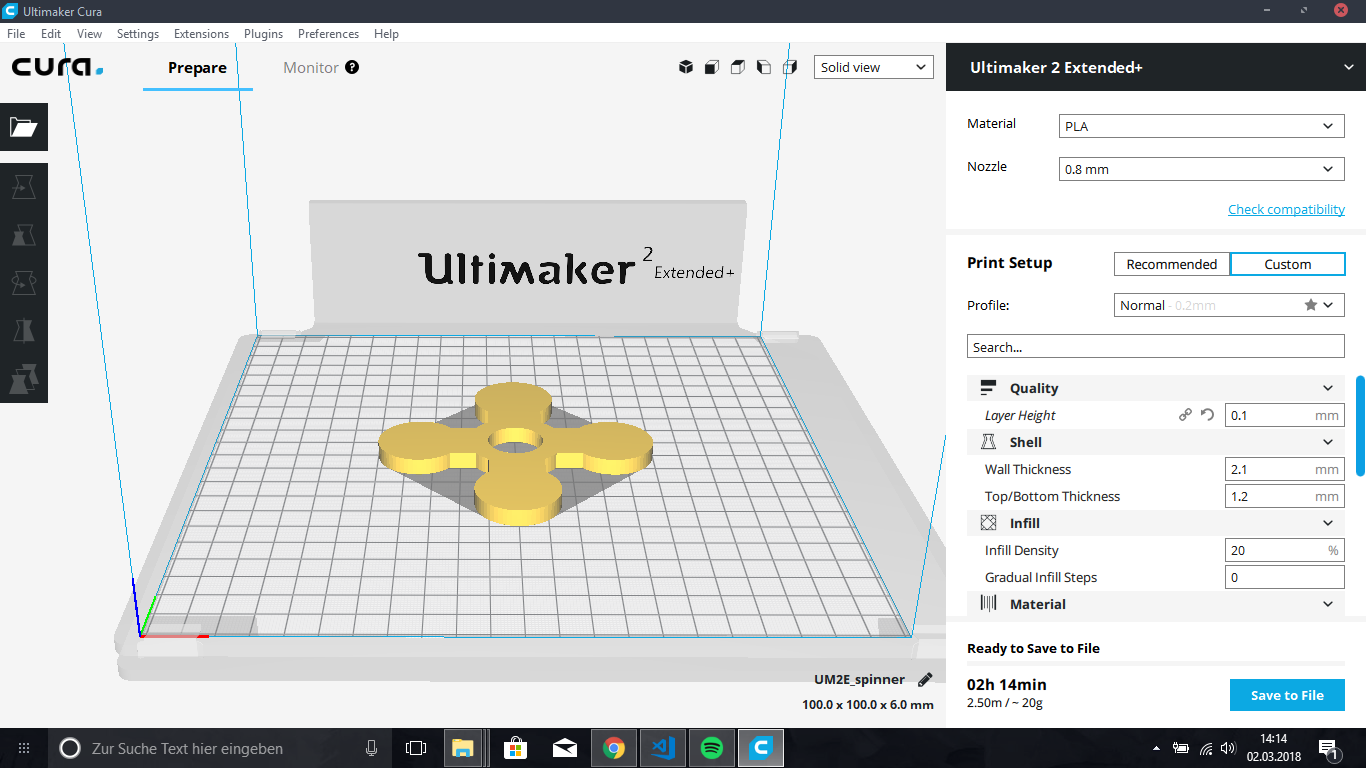
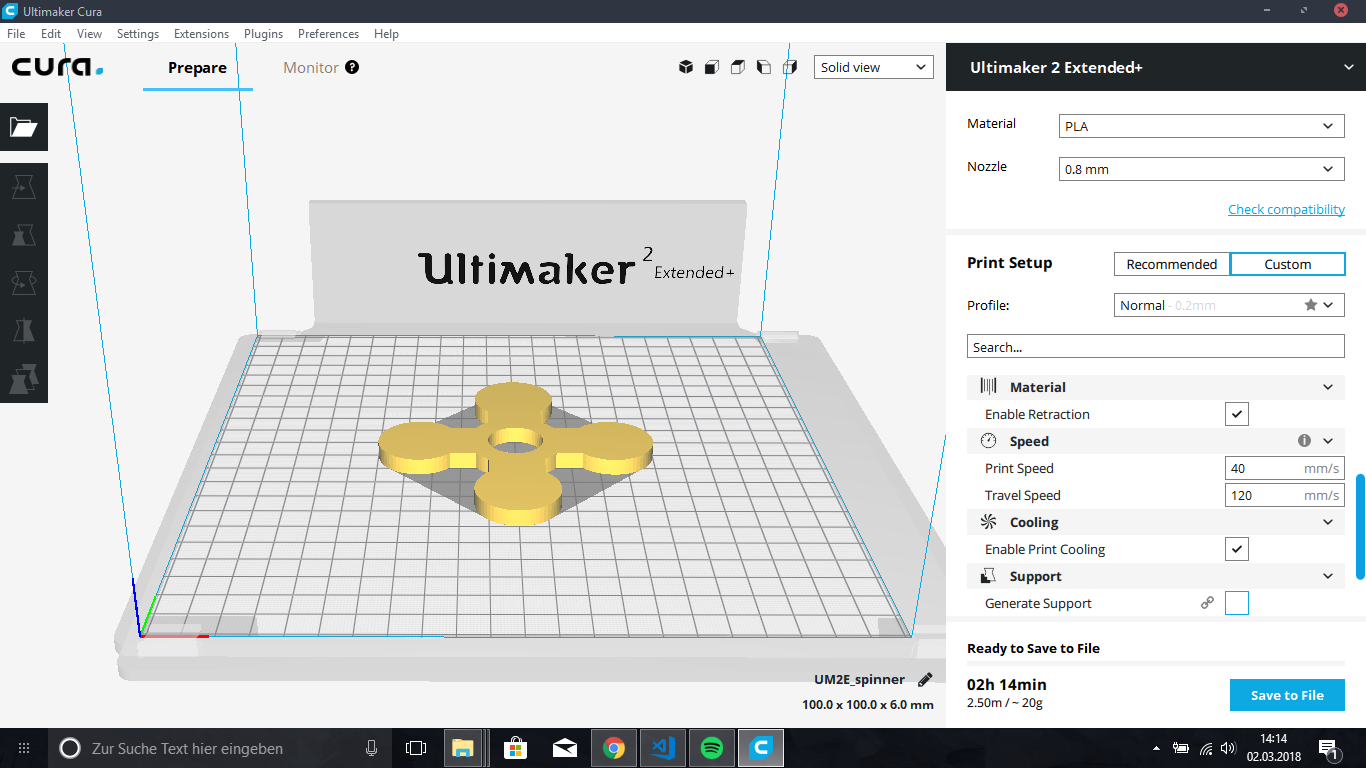
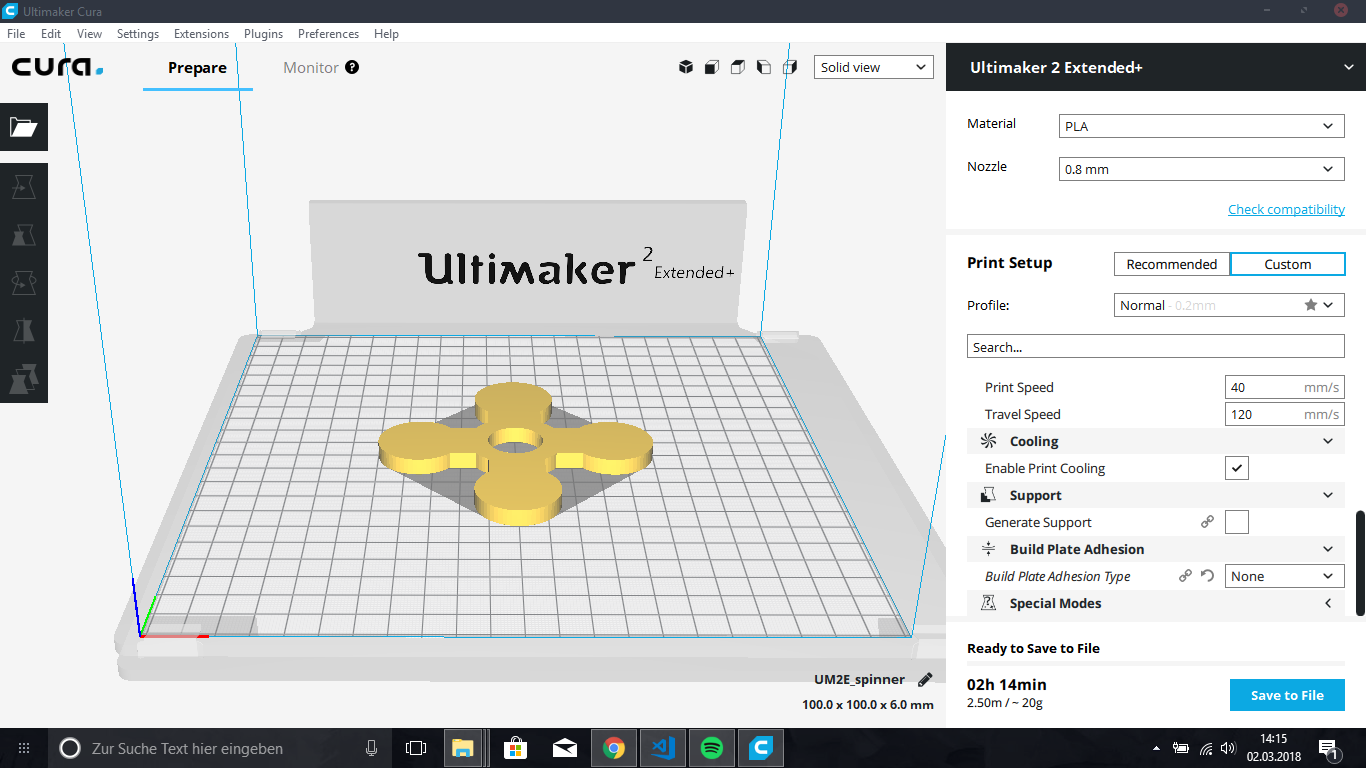
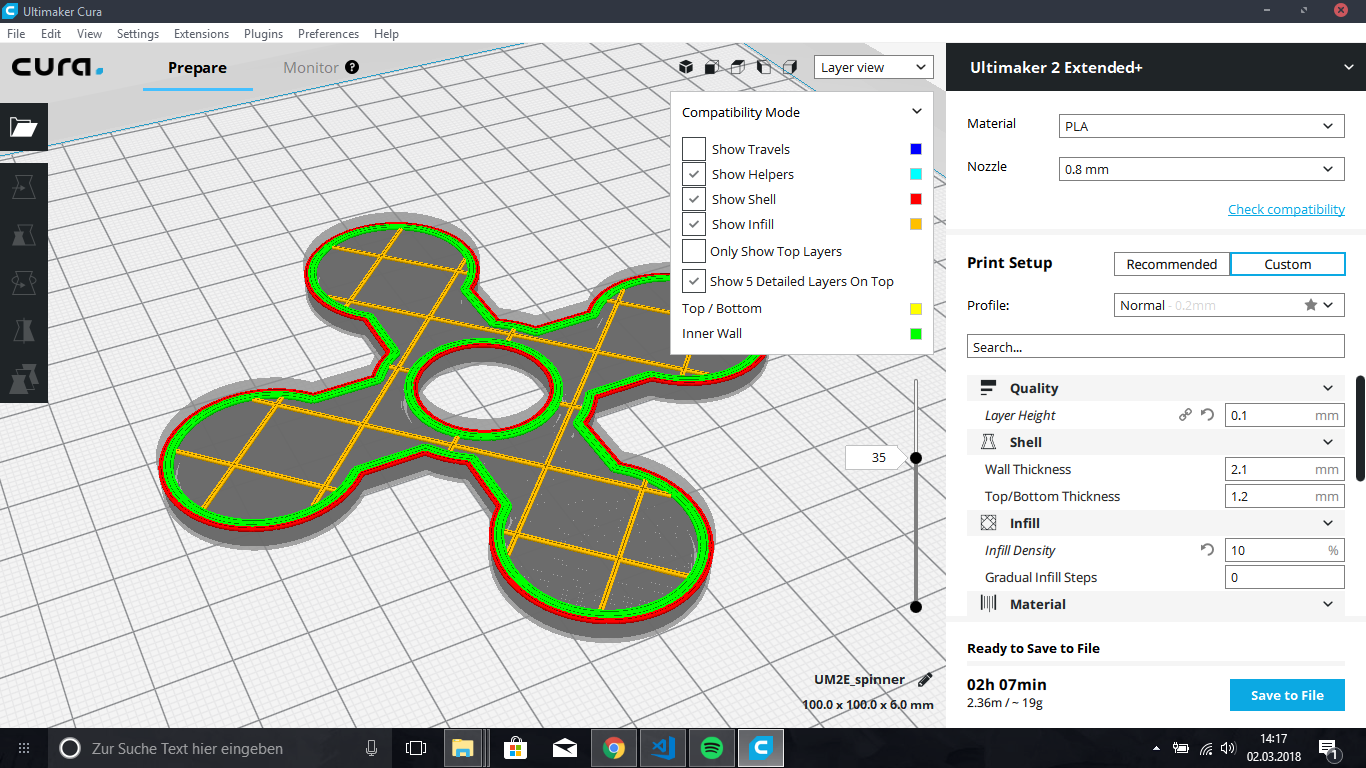
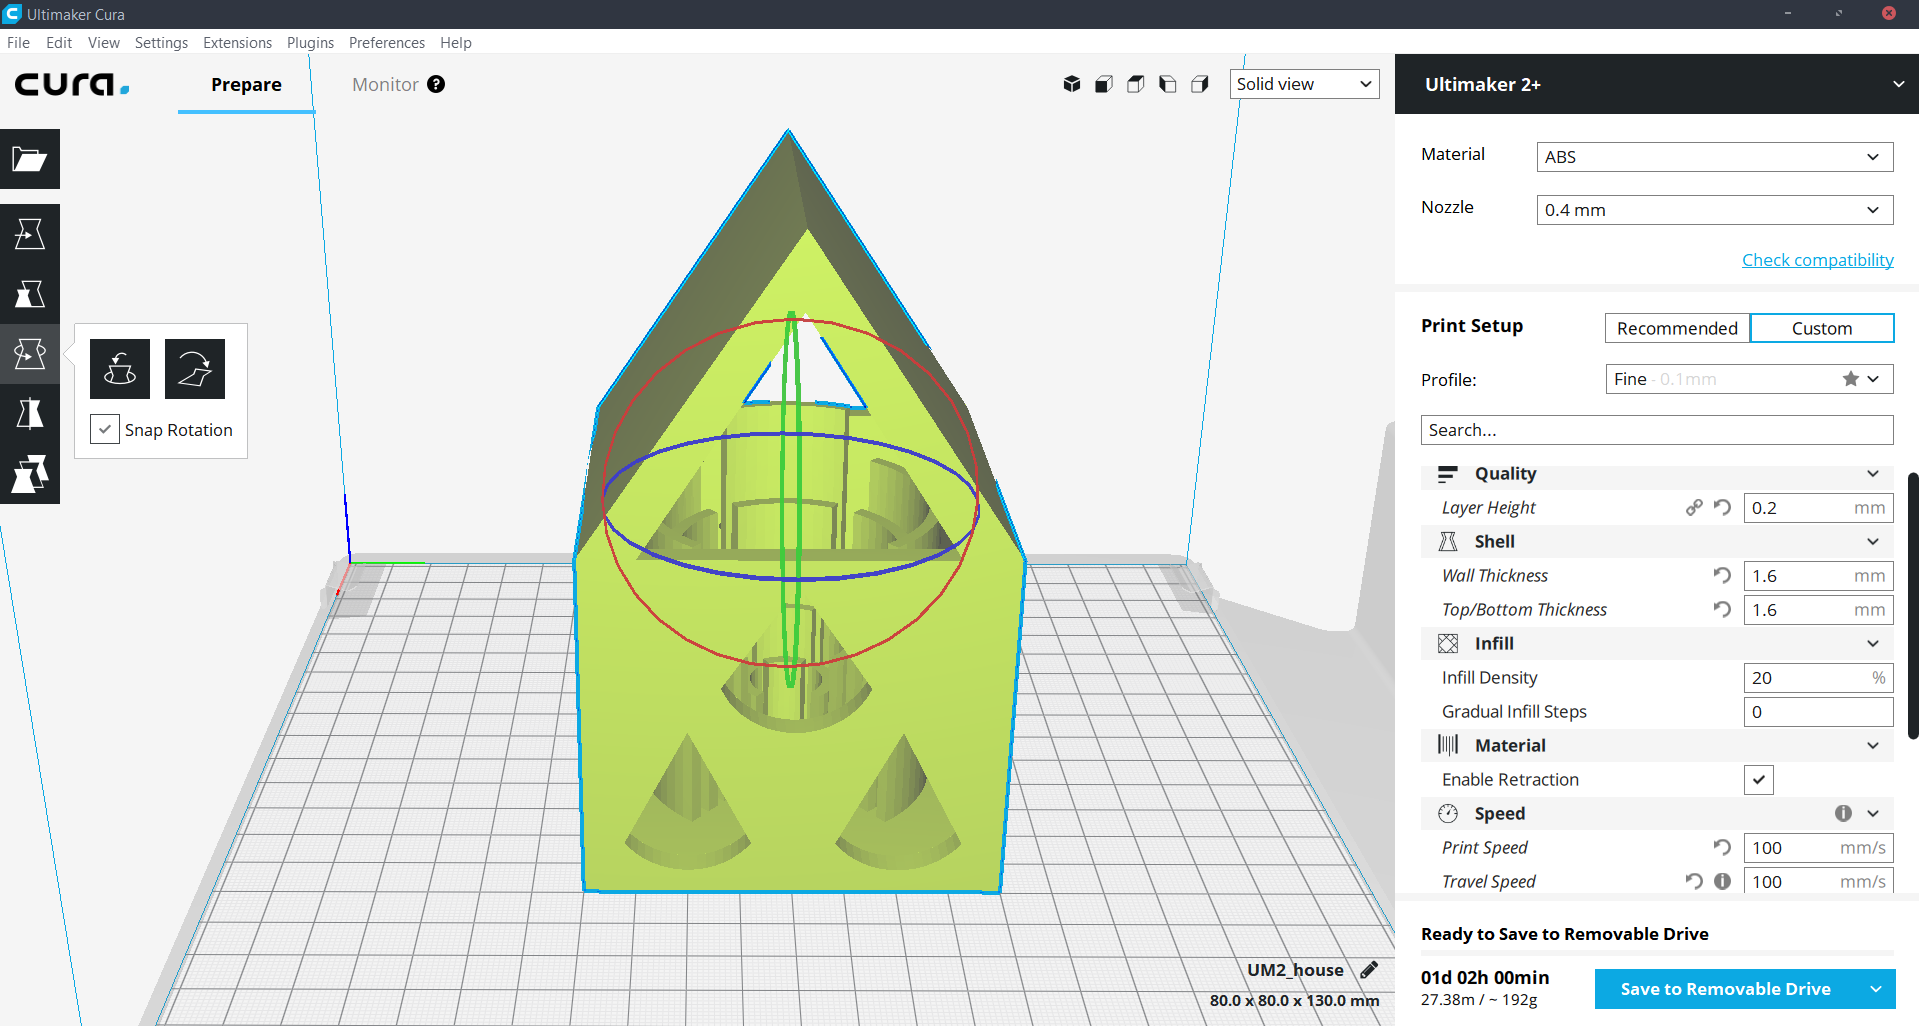
Fusion-360 SketchThe design tool that i used for this assignment is Fusion 360. I had some experience with this tool before and i really like it. One part of the objective for this week was to design an print something that cound not be made subtractively. So i decided to design and print a Fidget spinner. I really like this programm, because of here you can sketch you 3D modell in 2D view and extrude it. But do do this we have to create a Sketch, like in the picture below. Now we can create come 2D objects and specify the dimensions. Okay after we have finished the sketch we have exit the sketch state, like in the picture below.Okay now wir are at the model view, here we have to select the 2D sketch and press right mouse click.Now we can extrude it, just pull the arrow or enter the needed demension.Okay here you can see my 2D Sketch of the fidget Spinner.And here it is after the extrusion. Th thickness is 6 mm. SpinnerOkay here you can see the 3D designed model online. Another reason, why i like Fusion 360 is because you can load your 3D Model in HTML WebPage. I will shortly explain below, how you can do this.Autodesk360 MyhubOkay first we have to go to Autodesk360 Myhub, login in there with the Fusion 360 account, select the project set it free like in the picture below. In the bottom of the picture you can see a link, that you have to paste in your webpage.CuraOkay, now we proceed with the assignment. I have decided to print my Spinner with Ultimaker 2 Extended +. Ultimaker printers have their own software to generate a GCode from the .stl file. So here wo it looks like. I will introduce Cura settings with the spinning Obj, because they are similar to the 2nd part. In my case I have decided to print the spinning object first, and the holder afterwards. One imporant this i have to mention is, I had to be always near the printer while printing the second Object. Because I have to pause the printing and put spinning part at the right time.We have seen that my object stand and not lies, that is not practical. So we rotated it. To do this, we have to select our object. Click rotate at the left side and rotate a proper axies to the needed angle.Cura SettingsOkay now we will consider the Cura settings.(Click Custom on Print Setup.) I have choosen 0.1 mm of Layer Height, to make the surfaces smooth. Wall Thikness was kept by 2.1 and Top/Bottom Thikness were kept by 1.2, so my object is going to be stable. Infill Destiny 20 %, we will consider it later.Retraction should be on, so that printer doesn't extrudes material while Jumping. Print speed -> ist the movement speed of the nozzle while extruding the filament. And Travel speed ist the speed where printer doesn't extrude any material. I Have disabled any supperts, because there was no need for it in my Objects. In my case I have enabled the Building of Plate Adhesion but it was not a goot Idea, because the surface of the bottom layer of the Spinng object will not be smooth after removing it. Another Recomendation is to make a the Outer-Radius of the holder much smoller.. Cura has an excelent preview of the printing object. First change it to the Layer view at the right upper corner. Now we can see something like a volume regulator ->It shows us the layers. As I told you before will no consider the Infill Destiny. Here we have put it by 10 %. Now Scroll down and compare the pictures.Here we set the Infil Destiny by 20 % and we can see how the Infill changes, you can also change other visual parameters and see the changes here. Than you have to save the GCode to the DSCard. Insert the SDCard to the proper Printer and start the JOB.DoneI have also made some design that could not be made subtractively. It looks like a small house. As you can see this small house has windows that looks like 'Assassin's creed' sign. Well I have designed them this way in order to avoid any support. I have applied the same technique to the roof to.These are the settings I have used to pint the "House"house settings
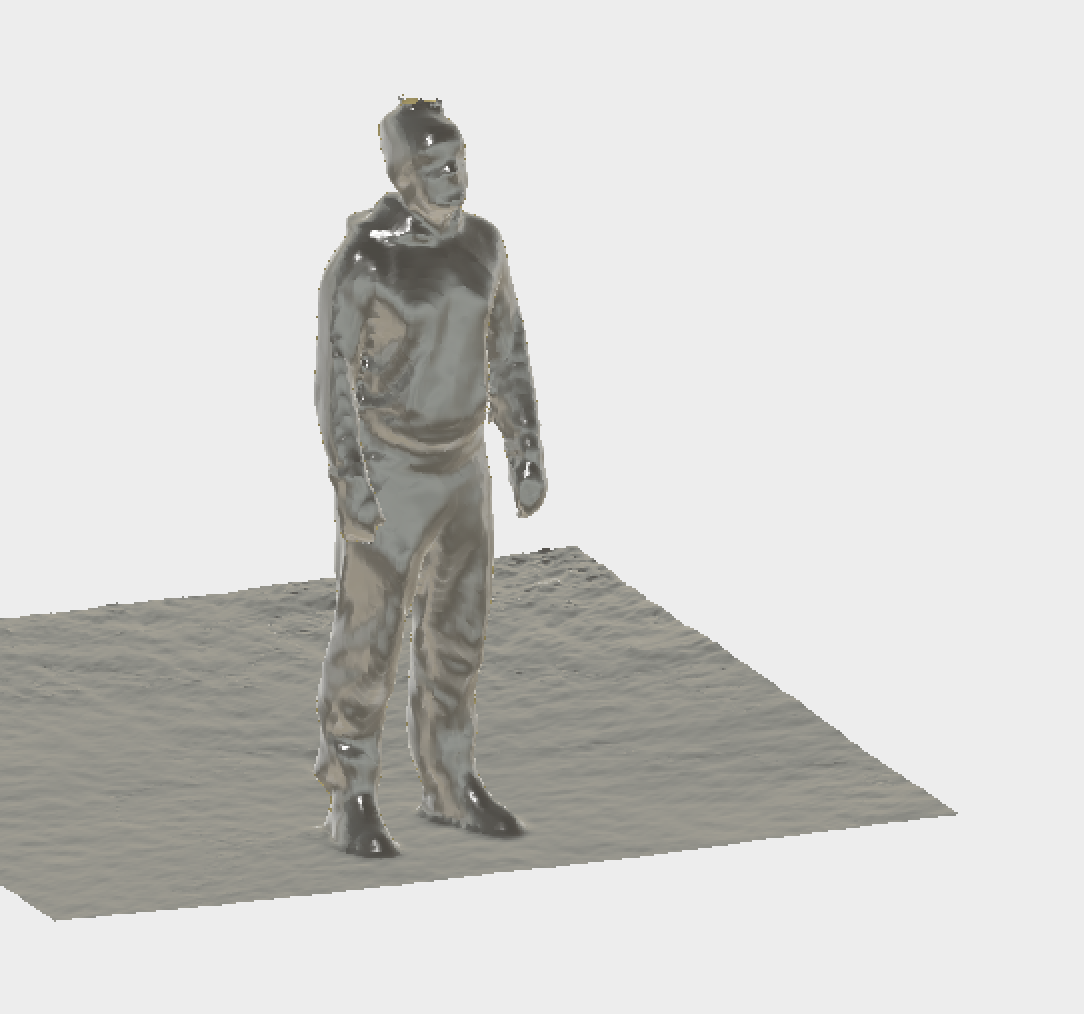
This is how my object looks like after the printWell to be honest I have aproximated the material that I have wrong, so that's why you can see that the print is unfinished. 3d Scan iSenceTo scan some object in 3d I have used iSenceTo recive the object that you have scanned, you have to write your e-nmail. And you will recieve. Well I have decided to scan a person, in order to see how presice the scanner is. And here is my result. As the conclusion I can say, that this scanner can scan the rough shape of the object, but not the smooth parts.DownloadsFidget SpinnerSHouse


 house settings