
|
| Sukkur IBA University Merit, Quality, Excellence |
WEEK-1
Principles and Practices, Presentations, and Introductions
Lecture & Recitaton of a Week:
Lecture on 17th of January, 2018: Principles and Practices, Presentations, Introductions by Neil Gershenfeld
The lecture is about an introduction for FABLAB, how it operates, how we connect with different FABLABS across the globe. After that we get some intro on Digital Fabrication and its stages. and in last each Node Lab is giving their introduction
Recitation on 22nd of January, 2018: Version Control by Fiore Basile
In this session Mr. Fiore give an intro on GIT Server, how it works and how we upload a webpage and control our updated versions on fabacademy website using GIT.
Tasks for a Week
- plan and sketch a potential final project
Final Project Proposal
Problem Statement:
Doing inventory is a difficult part of my previous job as Space Manager in Tajurbagah. To place small electronic components we have cabinets with boxes, which are categorized and updated on excel sheets also. But whenever someone need any component from those boxes it takes time to find the desired component. As for my final project I want to solve that problem by making a smart cabinet which indicates the shelf in which desired component is present.
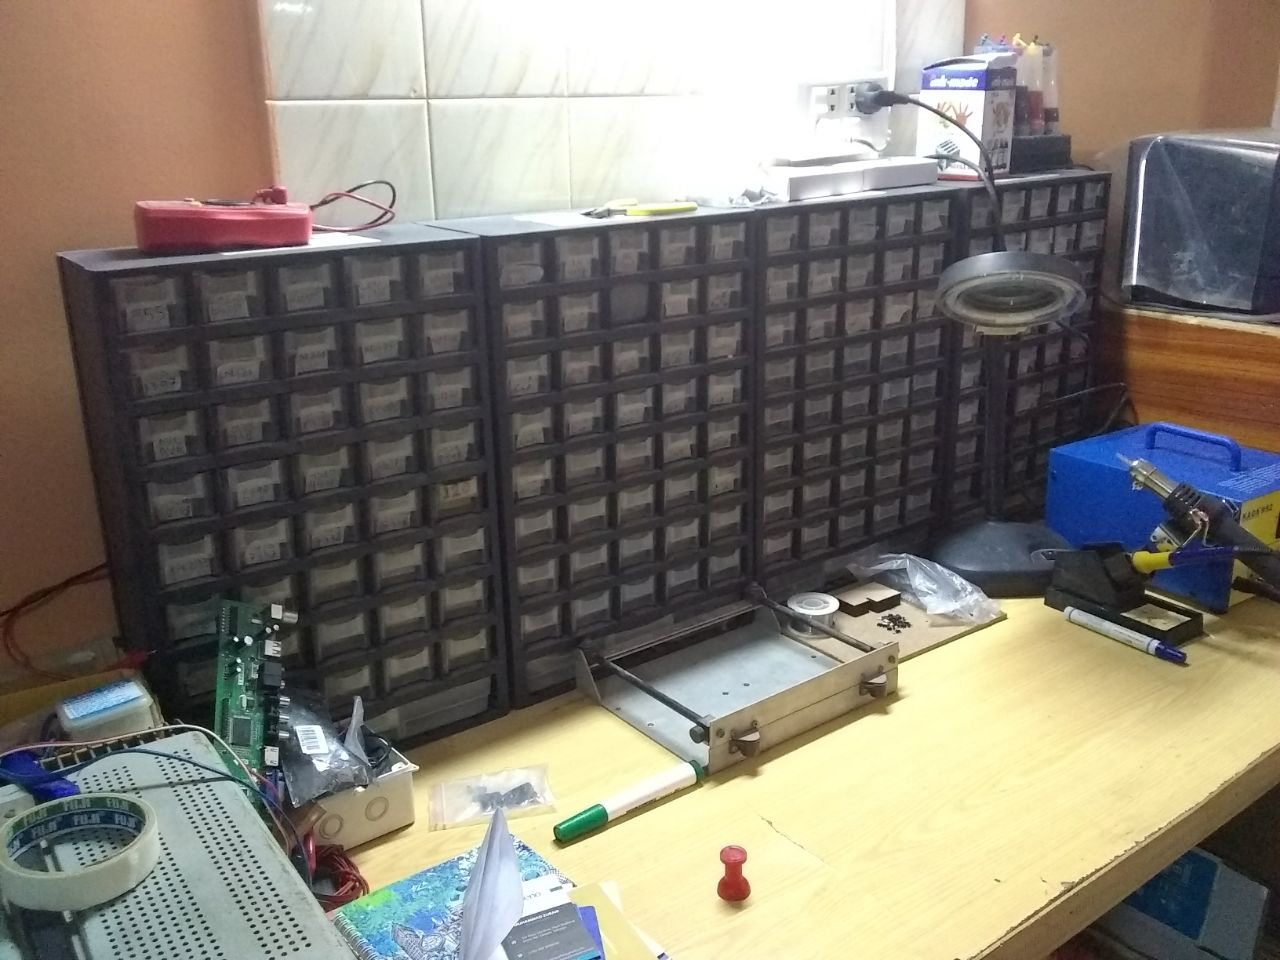
Electronic components placement at MAKERSPACE Tajurbagah Karachi
Introduction:
My idea for the Final Project is to design a smart cabinet for electronic components. For sketching the idea I am considering to make a cabinet for 24 different types of components. LED is fixed with each shelf. When a person needs any component, the LED of specific box will glow.
Plan and Sketch:
For making the sketch first I have to plan the size of the cabinet for this I consider a cabinet for 24 boxes. There are different ways to arrange boxes some are:
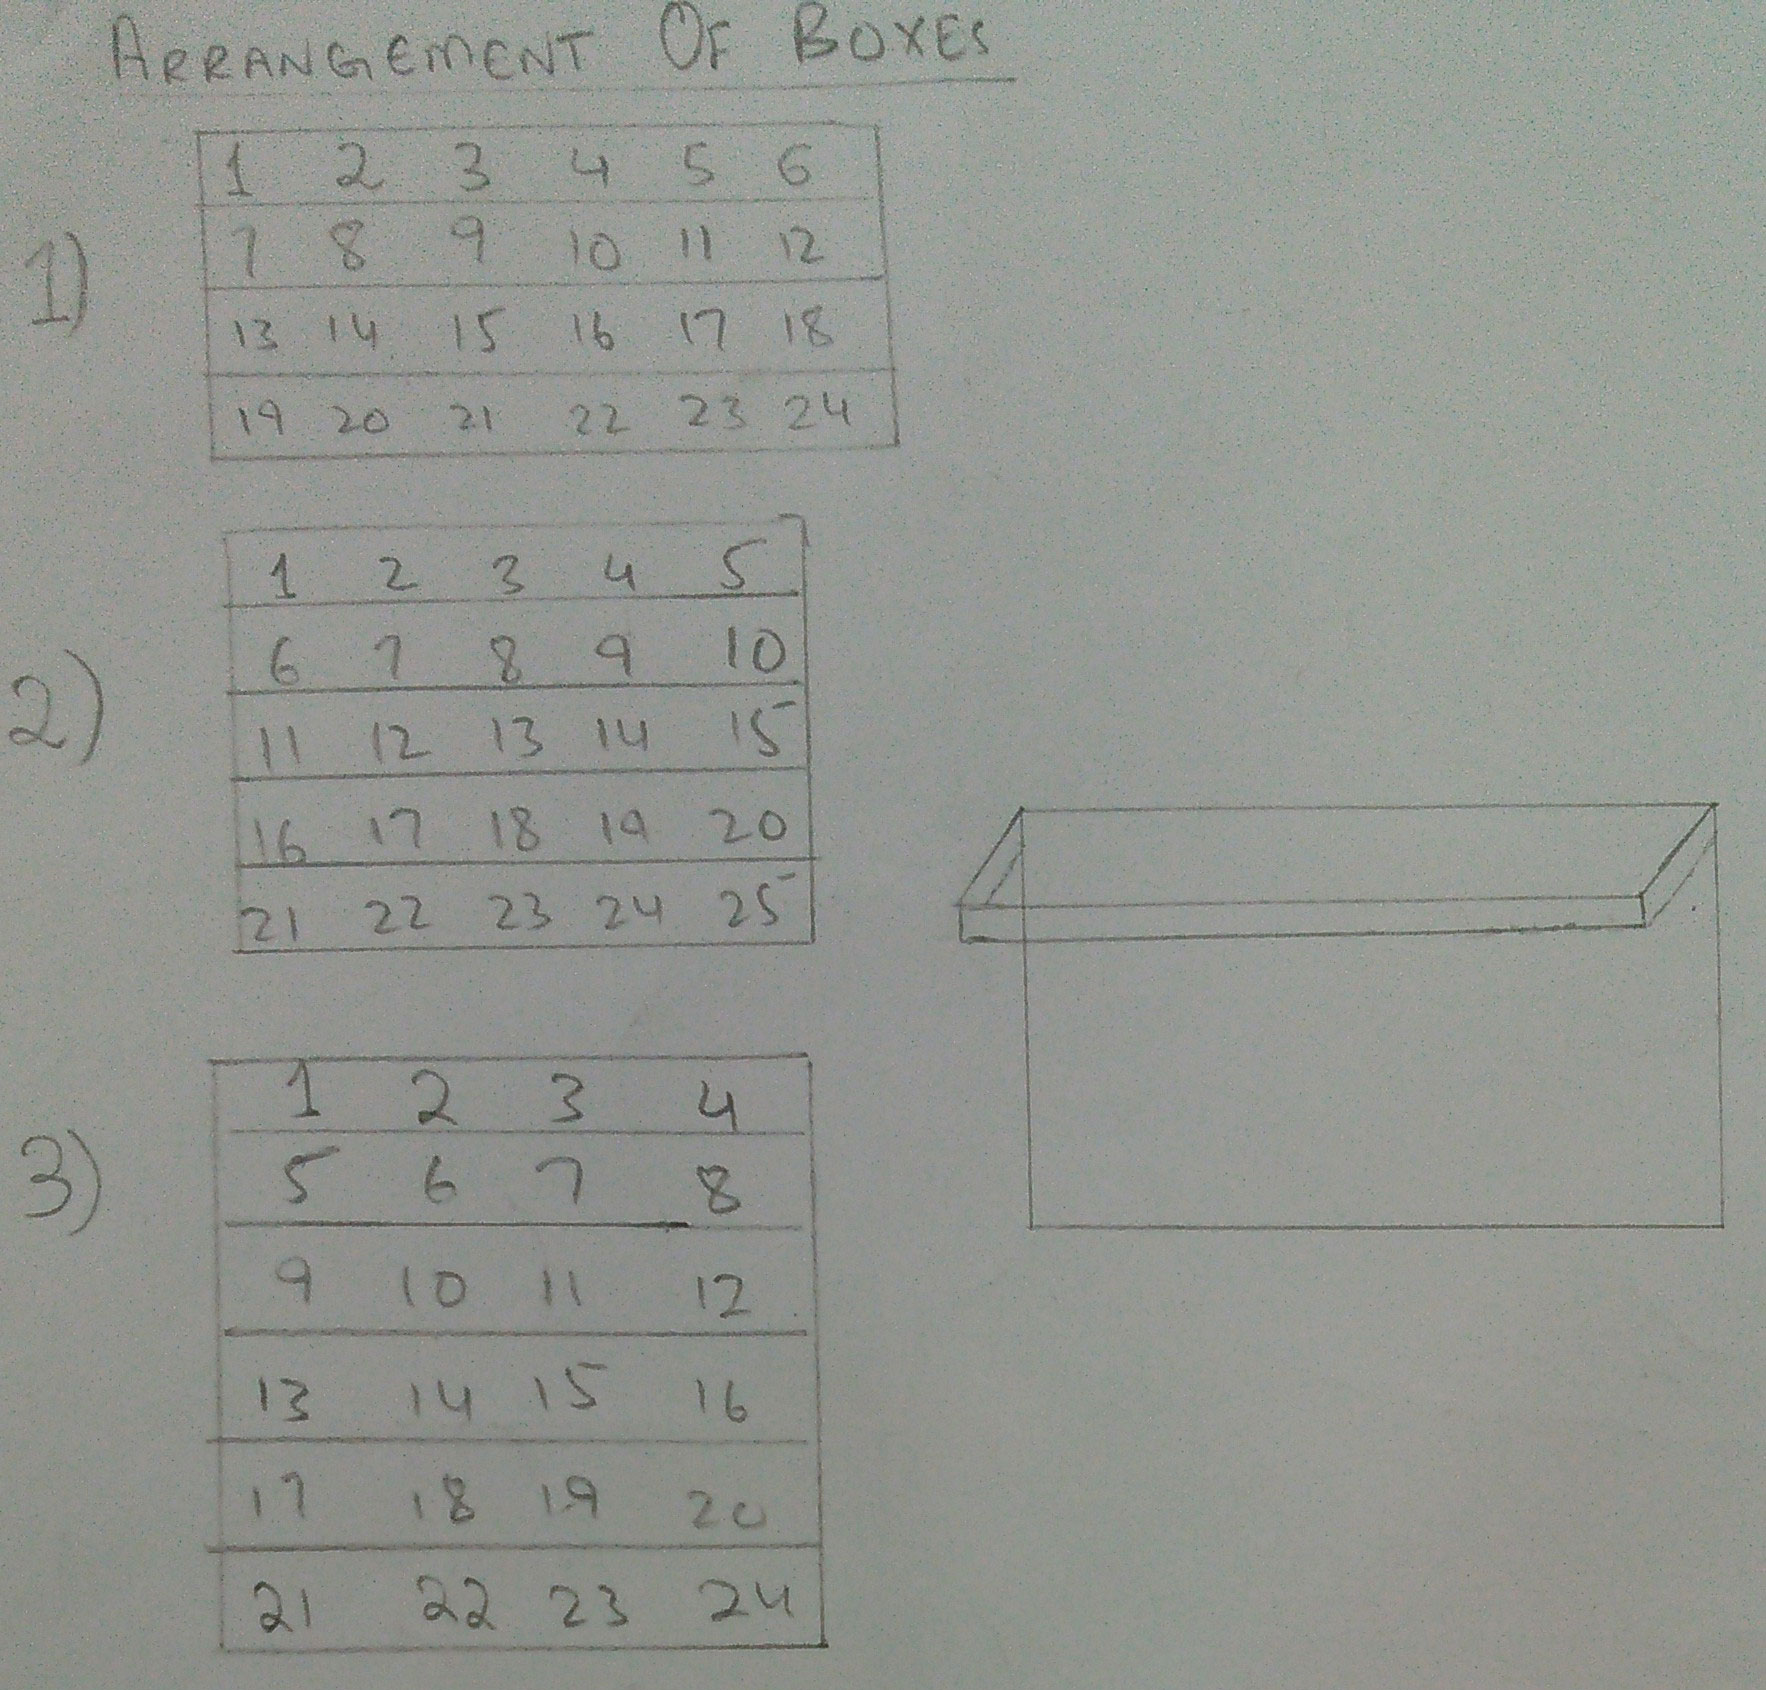
type of boxes arrangements
I selected no.1 arrangement of boxes mentioned above in picture as in this arrangement maximum no. of boxes are on plane which increase the stability of the cabinet. After boxes arrangement I sketch a front and side view of a box with sizes.
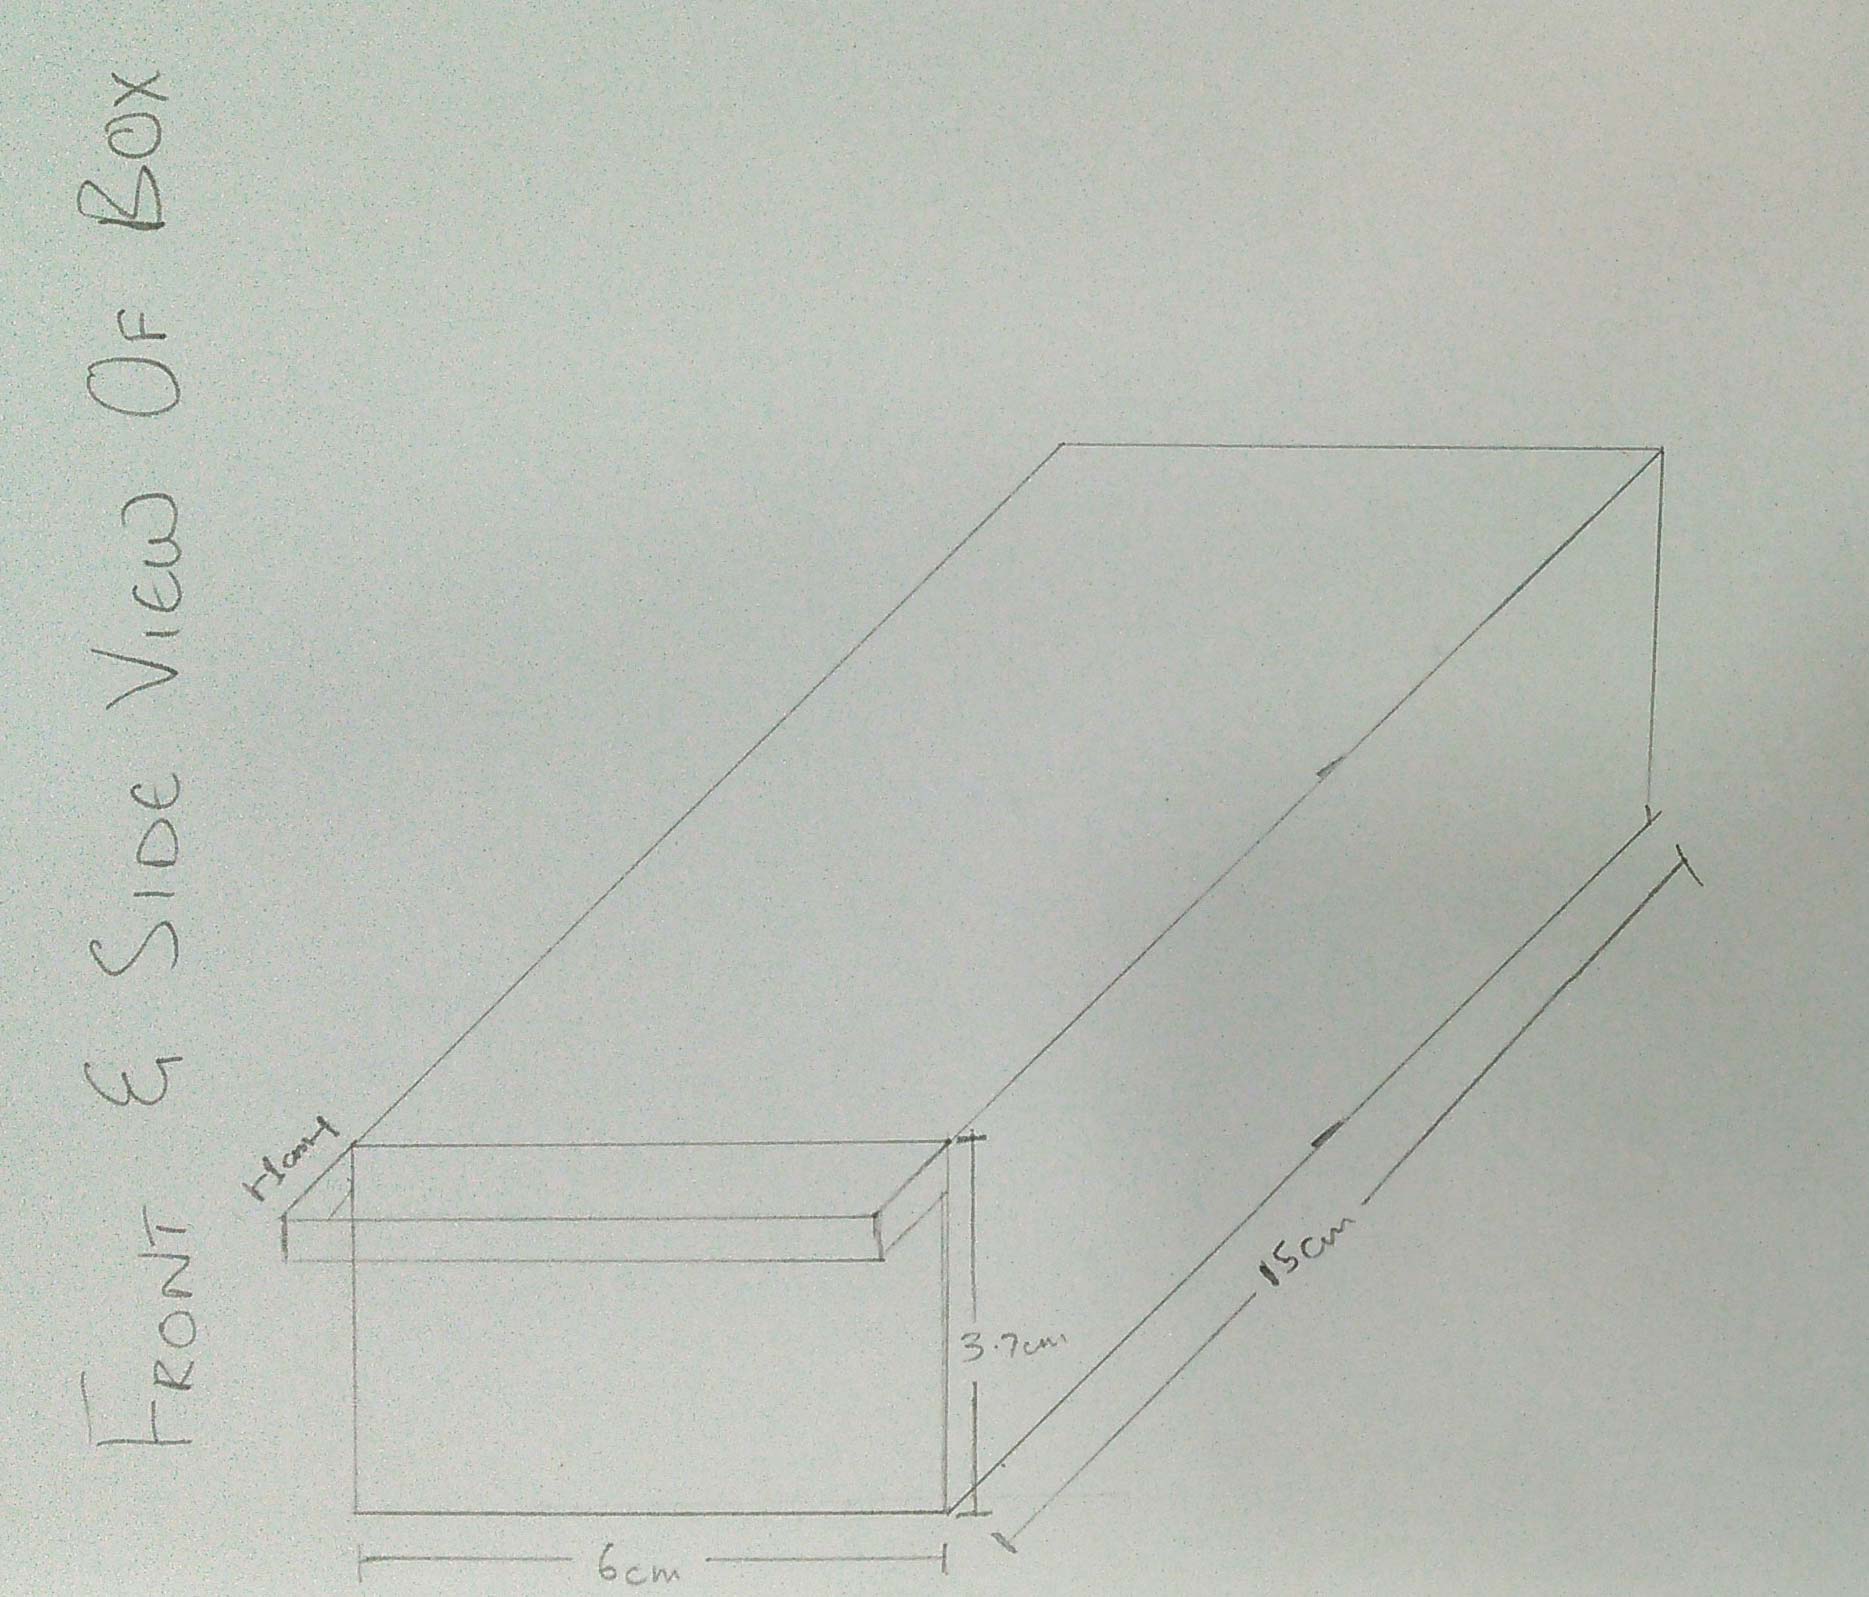
Front and Side View of a box
The size of front view is decided using golden ratio formula of a rectangle in which 2 parallel sides (which are 6cm) is 1.6 times bigger than other 2 sides (which are 3.7cm), 1cm extra piece is mentioned in front which helps to drag in and out a box from shelf.
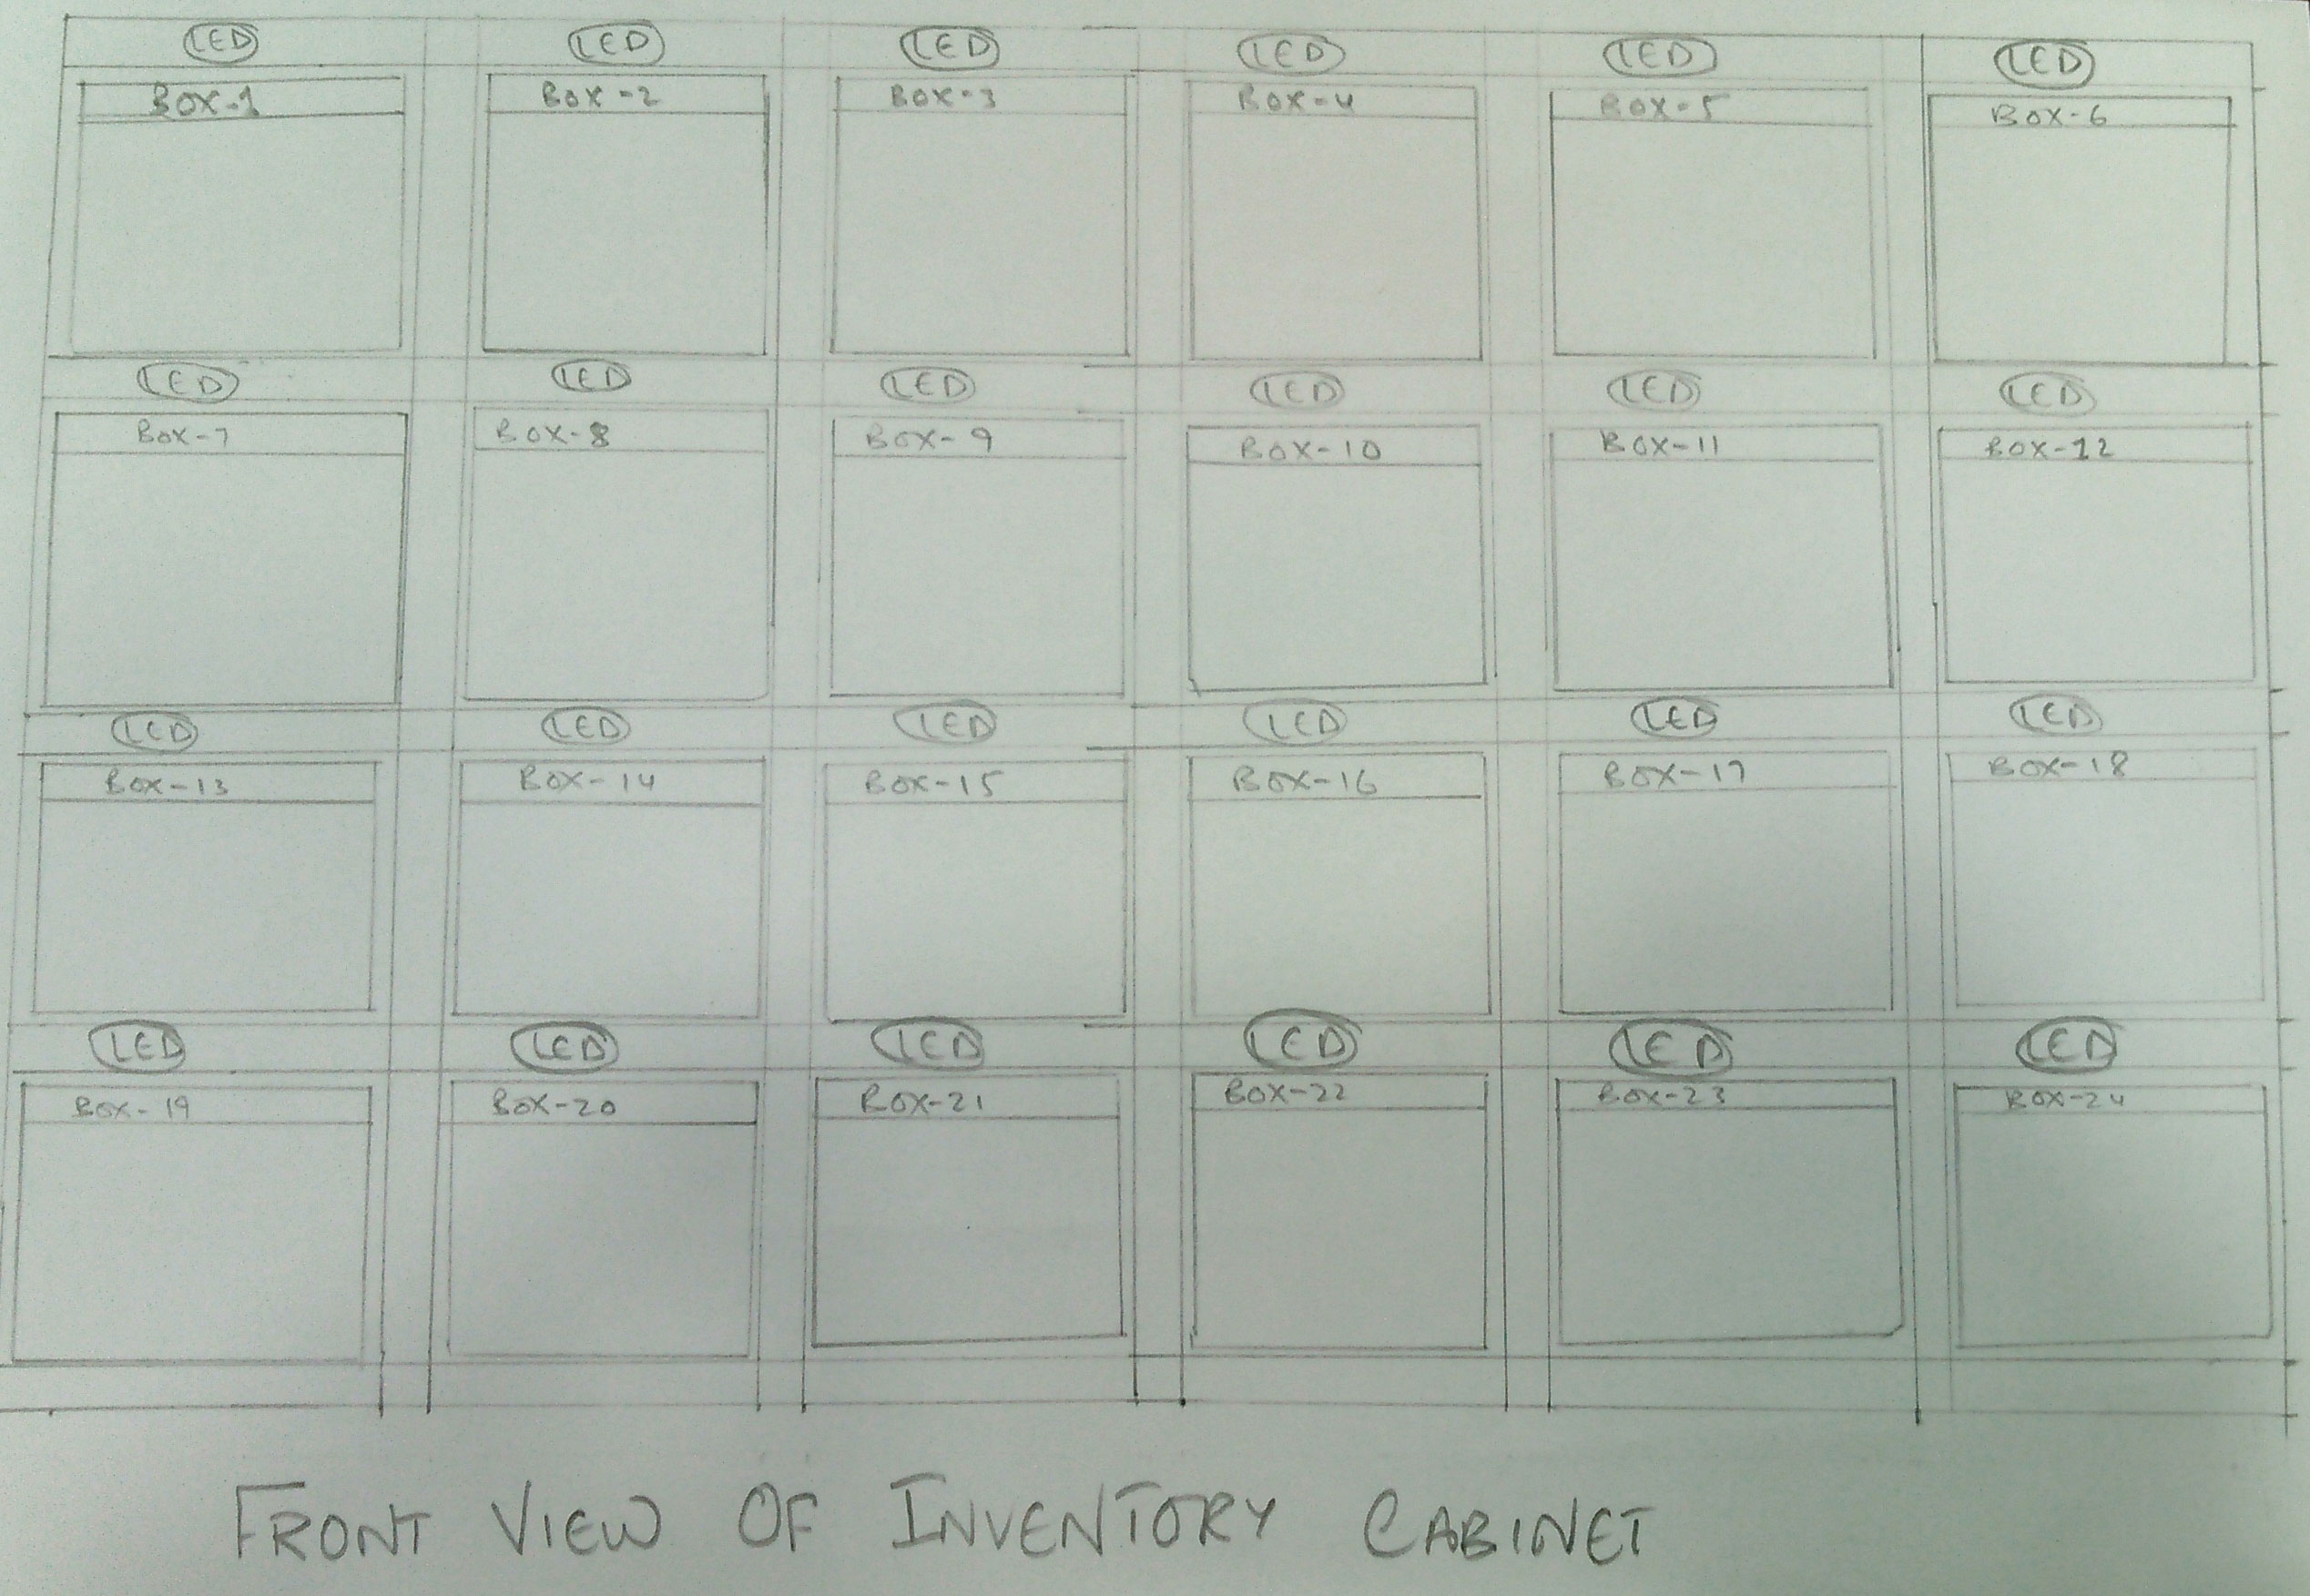
Front View of Cabinet
Basic idea for front view of cabinet, LEDs are shown above the shelves which to find desired component, the design needs more calculations and it requires more changes which occur with time.
Electronics:

Block Diagram of a circuit
Generally a smart cabinet system which is operated by any device which has browser and wifi. Inventory is updated on a local server which is excess through Wi-Fi. A search box is accessible from local webpage which helps to find desired component in the shelf, a quantity is also input by user to maintain inventory
Input Device
A mobile, PC or any silimar device is used to connect with ESP module wirelessly to give input to cabinet.
Output Device
RGB LEDs istalled on a shelf outer boundaries which blinks or illuminate to mention the desired box.
Process
I am going to use Arduino NANO in this project as controller which is further attached with ESP -12E wifi module, RGB LEDs are addressable LEDs which connect together and gives only 3 wires to connect with system one for address and two for power. RGB LEDs are connected with Arduino Nano, An inventory is set on a local server and when a user need to find any component he/she has to connect their device with esp module and goto specific web address. A search box is displayed on that webpage to search the component, after writing name of component RGB blinks on specific shelf which has that component present. It asks for quantity as well which help system to maintain inventory.
Comparision with Past Systems
After discussion with my local and regional instructors about my final project. They point out that to make this idea as my final project I need to mention why my project is different from existing inventory projects. They shared some past students webpages which already propose way to solve this problem. As comparision of my project with them, problem statement is same but method to solve the problem is different. I am sharing inventory projects below and then I describe why my project is different from them
First Project: Inventory Bot
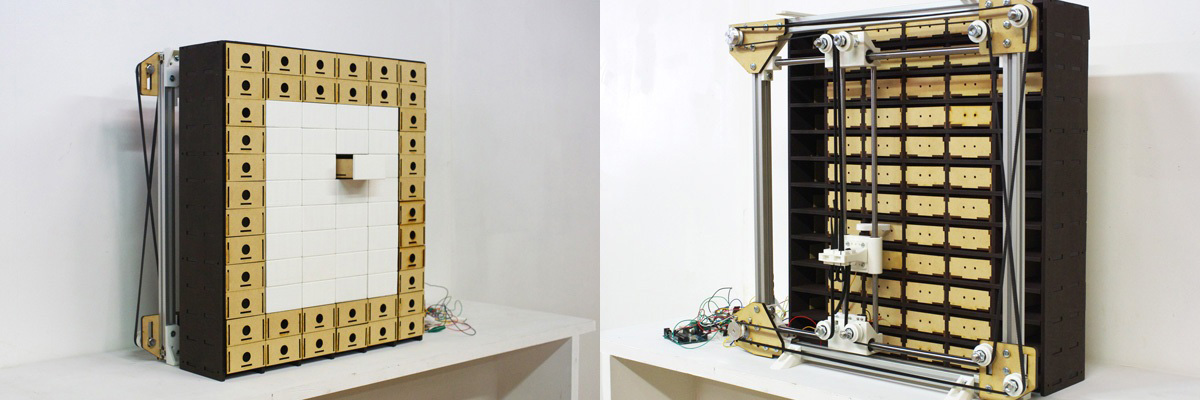
Inventroy Bot Front and Back View
Here is the link of this project page. This project is made by Kohei Morimoto from FABLAB Kitakagaya Japan in 2017. The mechanism is based on core XY sytem which is attached on back of the cabinet. A shaft with servo motor is attached on the head which pushes out the desired drawer, when a person need any component he/she has to give two inputs to machine a name of component and no. of quantity after that if the component is available the core XZ system move toward that box and push it out. The arduino is used to control the core XZ system which gets instruction from PC and act according to it.
Second Project: Wally
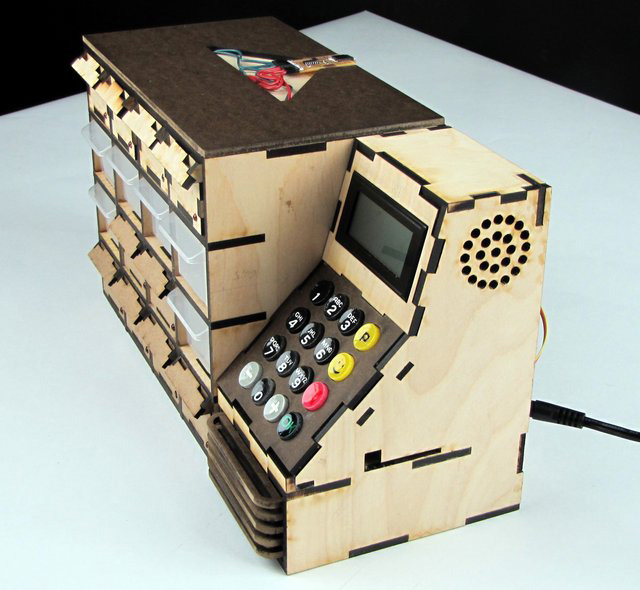
A look to Wally
Here is the link of this project page. This project is made by Kenzo Prada Abiko from AS220 FabAcademy in 2015. This project also designed to maintain the inventory for the specific projects. To interface with machine LCD is placed alongside buttons which are also fabricated, a person needs to input a number of project and the boxes which have component of those project lights up to mention them. After taking desired component a person need to enter the number of component he/she tooks. And inventory updated with respect to it.
Comparision Chart
| Smart Inventory System | Inventory Bot | Wally |
|---|---|---|
| Input | ||
| device which has wifi and browser, it can be Mobile, PC or any similar device | specific software with Laptop | buttons |
| Output | ||
| RGB LED's on boundary of a shelf | Core XZ system | LED within boxes |
| Connection Type | ||
| Wireless connection using ESP-12E between device and microcontroller | Wired connection between laptop and microcontroller | Wired connection within system |
| Display | ||
| Webpage | laptop software | 16x4 LCD |
Timeline
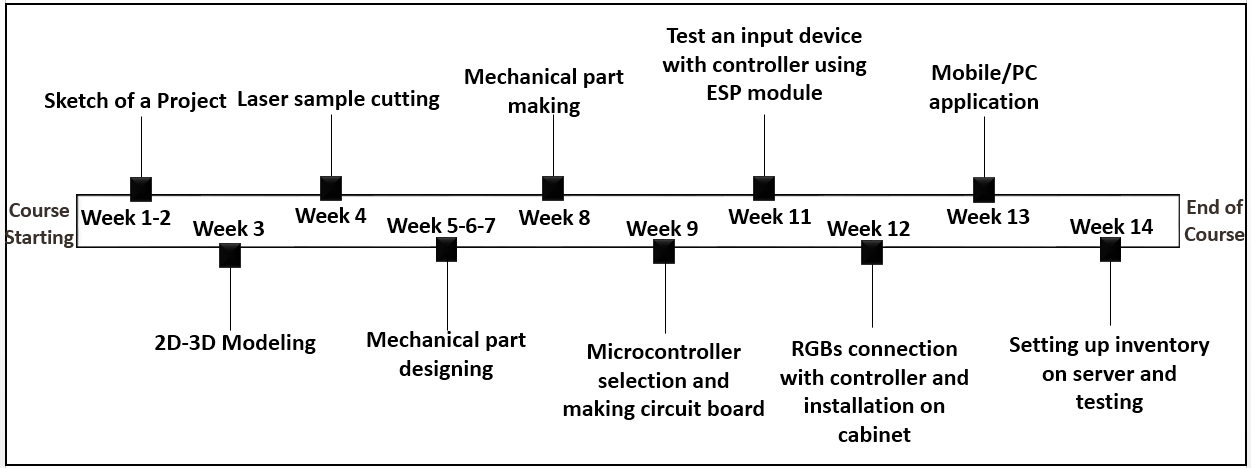
Project Timeline
Learning Outcomes
- 3D Modeling
- Laser cutting
- Microcontroller board development
- Programming
- Wiring
- Management

This work is licensed under a Creative Commons Attribution-NonCommercial 4.0 International License