Interfacing and application programmig


What to do this week

What I did this week.
  • Learnt the basics of App development
  • Created an App using MIT App inventor
  • Programmed the board I designed in the output week to display text in LCD
  • Controlled the text in the LCD using the Mobile App with the help of bluetooth module
  • Introduction

    In computing, an interface is a shared boundary across which two or more separate components of a computer system exchange information. The exchange can be between software, computer hardware, peripheral devices, humans and combinations of these. Some computer hardware devices, such as a touchscreen, can both send and receive data through the interface, while others such as a mouse or microphone may only provide an interface to send data to a given system.[Wiki]

    MIT APP INVENTOR

    App inventor for Android is an open-source web application originally provided by Google, and now maintained by the Massachusetts Institute of Technology(MIT). App inventor lets you develop applications for Android phones using a web browser and either a connected phone or emulator.

    What the App does

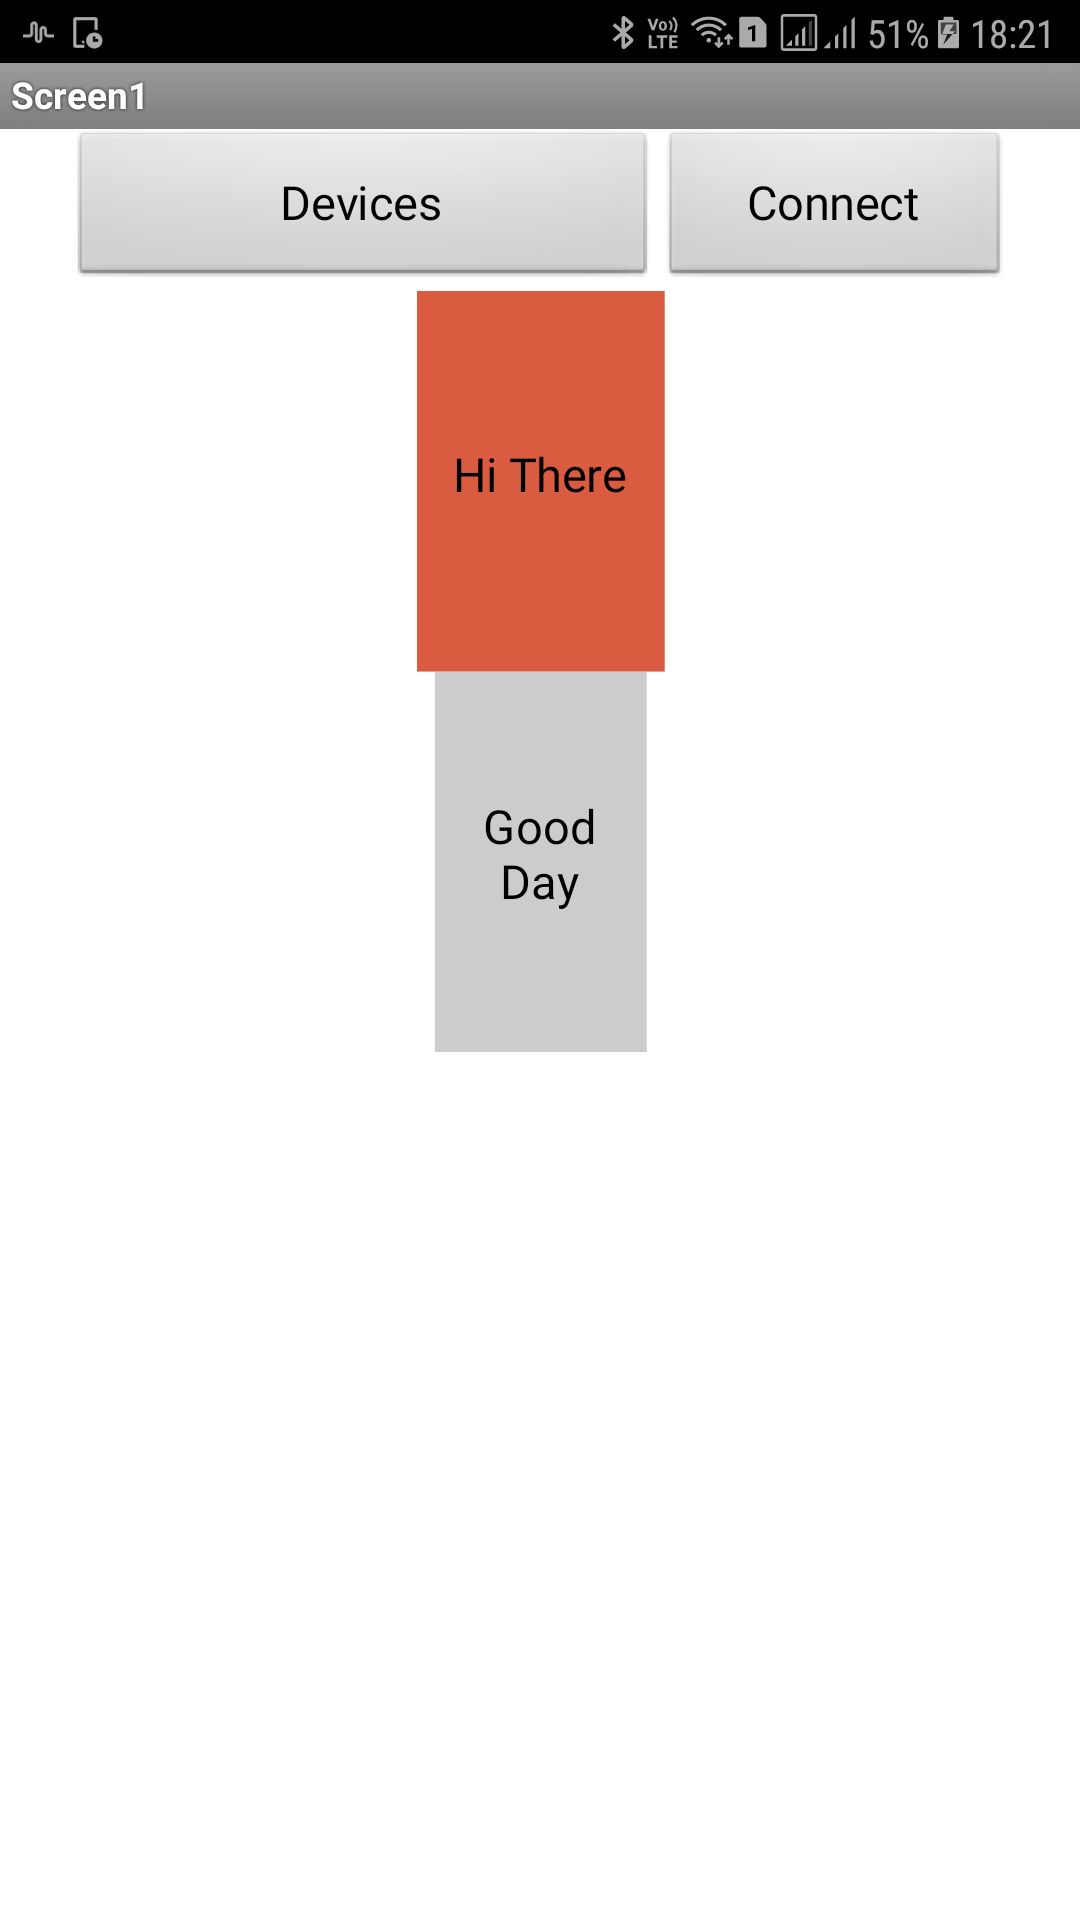
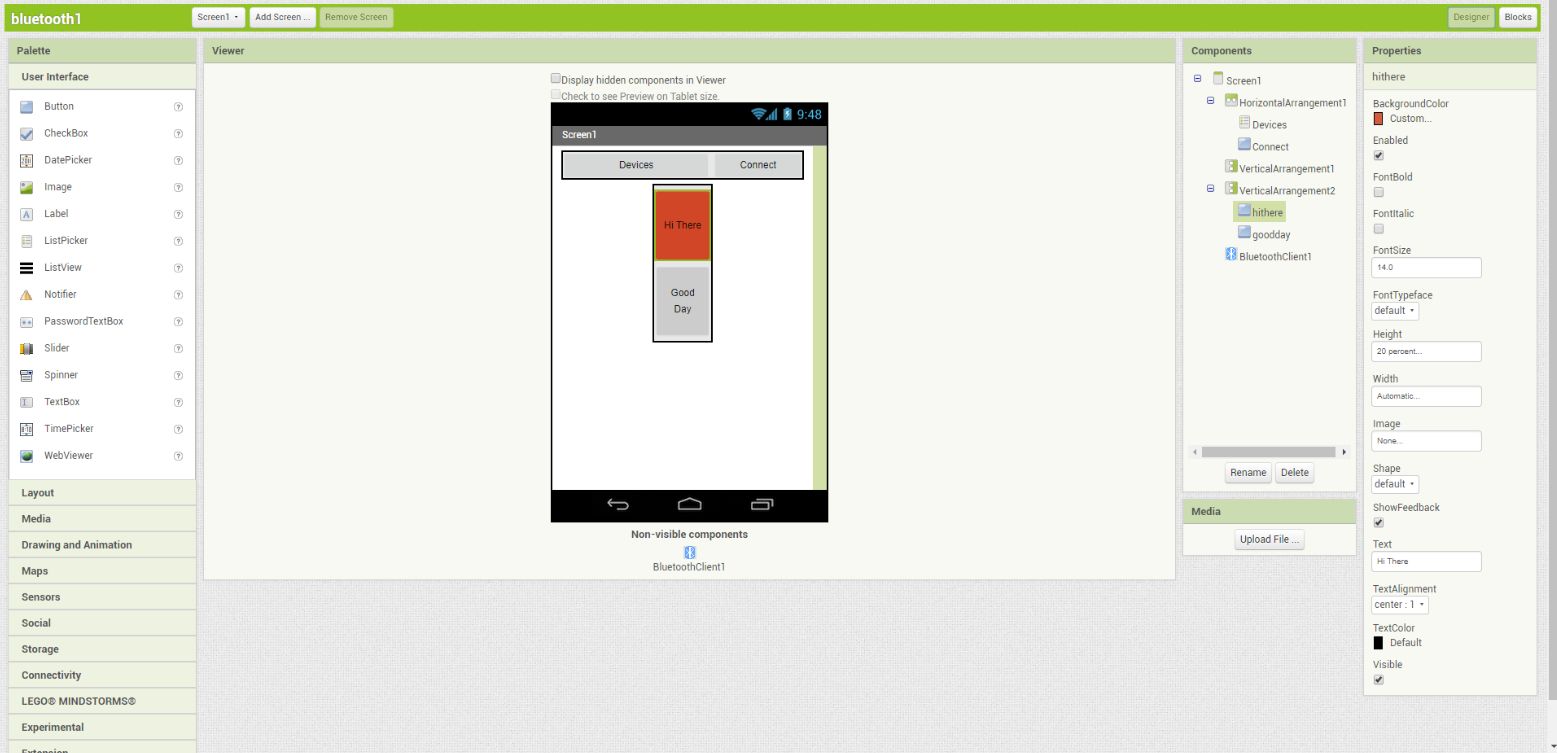
    The App is designed in such a way that using it I can display character on the LCD screen. The App has four main components.

  • A bluetooth device selector
  • A connect button to confirm the connection
  • A button saying " Hi there"
  • A button saying " Good Day"
  • Working with the App

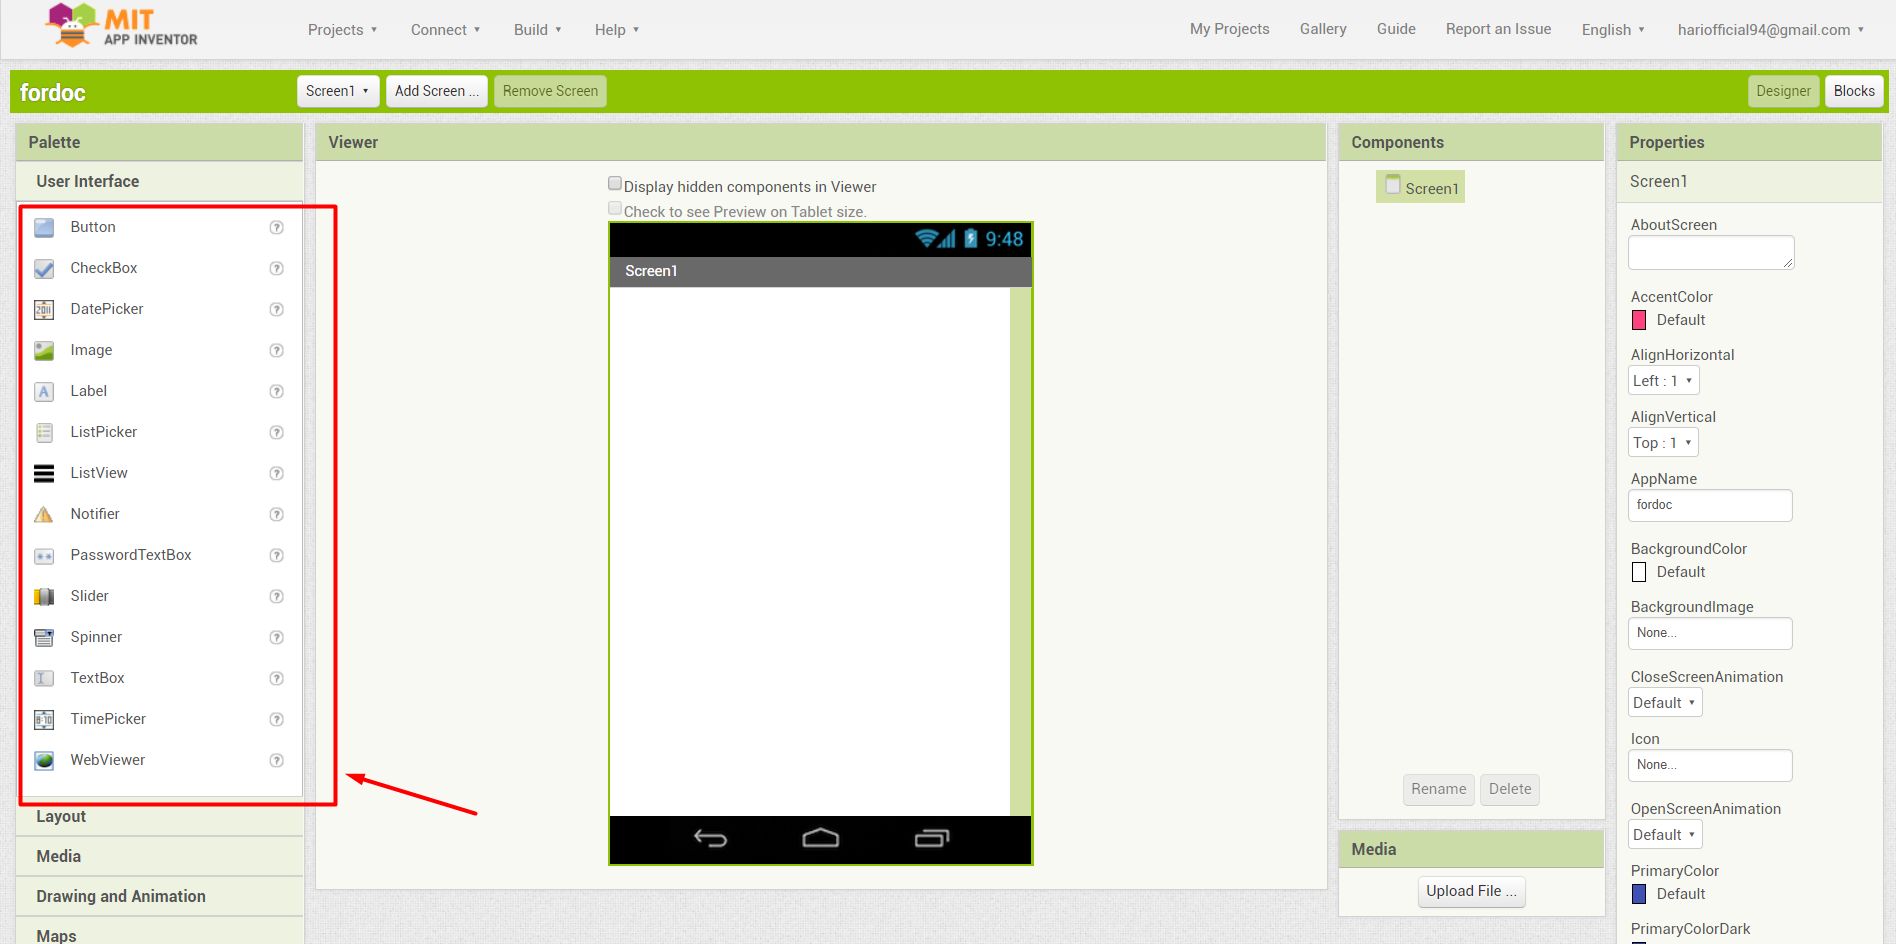
    To start using the app one should log into the MIT App inventor site Click here Then log in using one's mail id. Once you are logged in , the inventor gives an overall layout of the App. The required components can be dragged and dropped from the side

  • For selecting the Bluetooth device I used the list picker and I edited the text and changed it to "Devices" The App allows for changing the text, shape and color of the components you add. Pressing this button you will be directed to the devices selection list
  • Once the device is selected a connect button will call the bluetooth device for completing the connection.
  • When the connection is made the text on the "connect button" will change to "Disconnect"
  • If Disconnect button is clicked the text will again change back to "Connect"
  • When "goodday" button is clicked a text "K" is sent to the device
  • When "hithere" button is clicked a text "H" is sent to the device.
  • Making the Logic Blocks

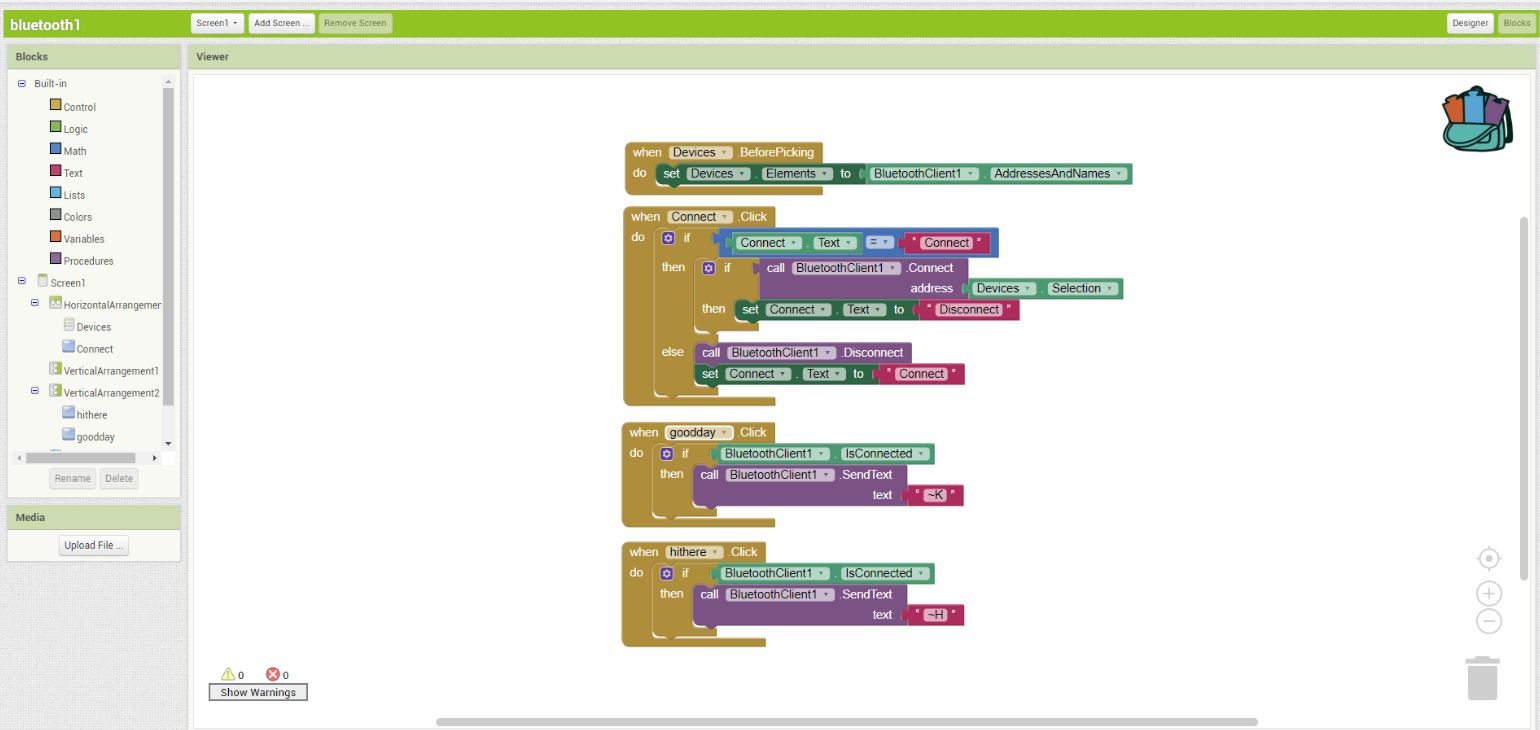
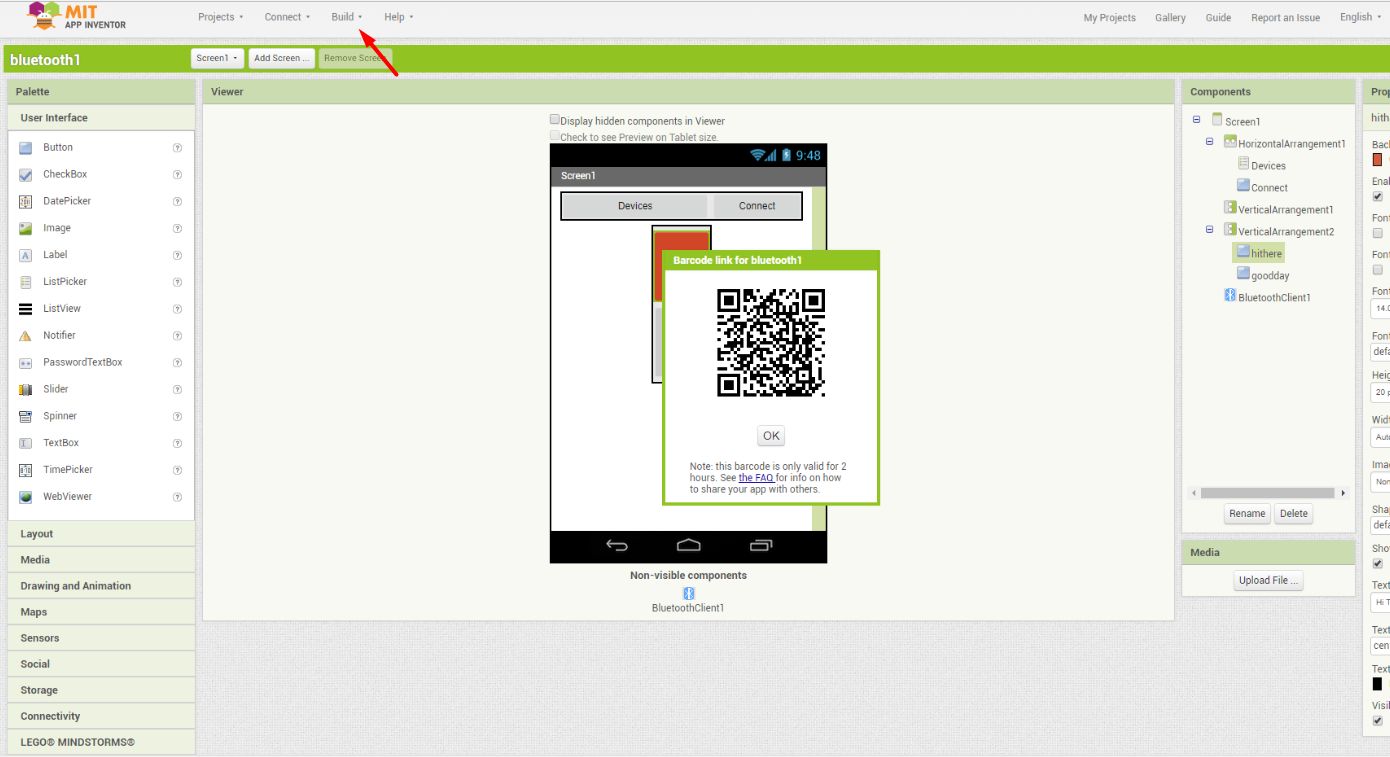
    Now to set the various functions for the components added, logic blocks are used. It is quite easy to set the commmands using this logic blocks. All the above mentioned commands are neatly layed out in the form of logic blocks that are easy to understand.

    How the interaface will look in the Mobile phone

    Generating the QR code for the App

    After the blocks are arranged click on the build button to generate the QR code for downloading the App to your mobile device.

    Programming the Board

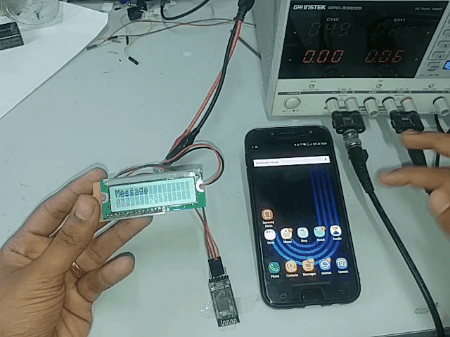
    For programmig the board two libraries were included. Liquid crystal and software serial. A bluetooth device uses UART protocol. So the RX and Tx pins were set. All the other pins were set. The first row of the LCD is programmed to display the text "Message"

    Once the first text is displayed the cursor now moves to the second row. The second row is where the other texts are going to be printed

  • If the incoming char is "H", the LCD prints "Hi, There"
  • If the incoming char is "K", the LCD prints "Good day"
  • Arduino Code

                            #include <LiquidCrystal.h>
                            #include<SoftwareSerial.h>
                            #define Rx 8
                            #define Tx 6
                            SoftwareSerial myserial(Rx, Tx);
                            
                            char data = 0;
                            
                            const int rs = 5 , en = 4 , d4 = 3 , d5 = 2 , d6 = 1 , d7 = 0;
                            
                            LiquidCrystal lcd(rs, en, d4, d5, d6, d7);
                            
                            void setup()
                            {
                              lcd.begin(16, 2);
                            
                              lcd.print("Message");
                            
                              myserial.begin(9600);
                            }
                            void loop()
                            {
                              lcd.setCursor(0, 1);
                            
                              if (myserial.available() > 0)
                              {
                                data = myserial.read();
                                if (data == 'H')
                                {
                                  lcd.print("Hi, There");
                                }
                                else if (data == 'K')
                                {
                                  lcd.print("Good Day ");
                                }
                              }
                            
                            }


    How the App works


    Click here to download the apk file.
    Click here to download the arduino file.