This week, the assignment is to learn about 3D scanning and printing
There are various ways of scanning and printing a 3D object.
Some of the ways have been described belo
This was the first time I ever attempted 3D printing. The assignment was
to 3D print a model that is non subtractive, i.e it cannot be manufactured
by any other method.
It was intially hard for me to think of a shape that is non subtractive
but later I got the idea of a shape within a shape that can only be manufactured
by additive manufacturing propcesses.
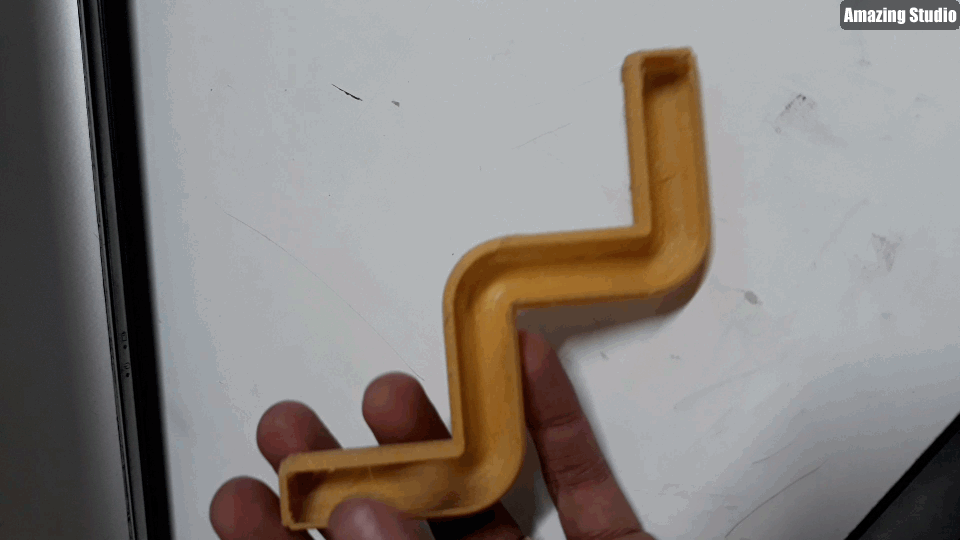
Since 3D printing is a really time consuming process , I decided to go
for a very simple design as test print. The design consist of a zig zag
path for a ball that is placed inside it. The ball can roll along the
contours but the ball cant be taken out from the model. This makes it non subtractive.
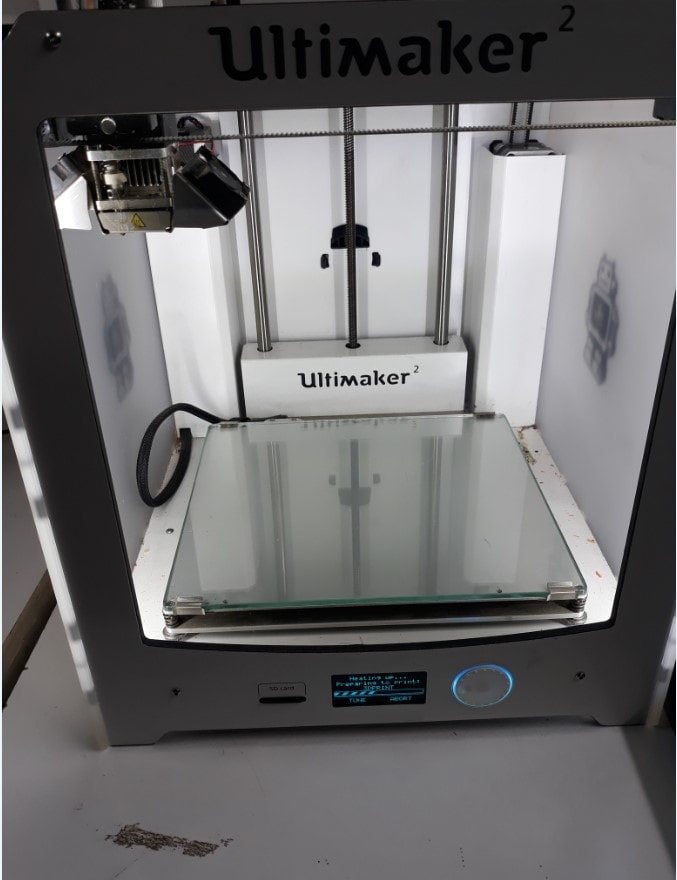
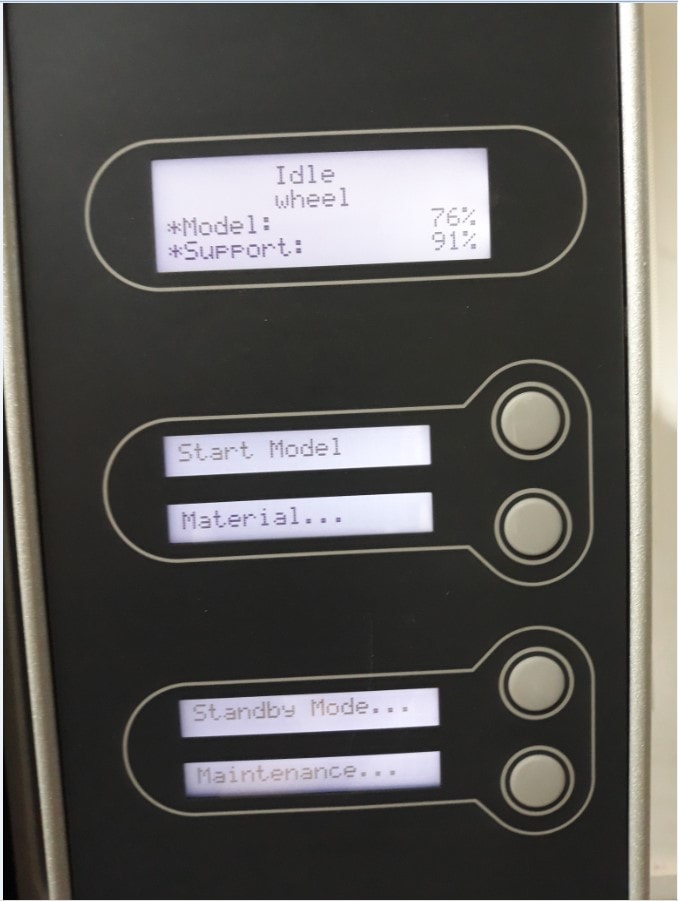
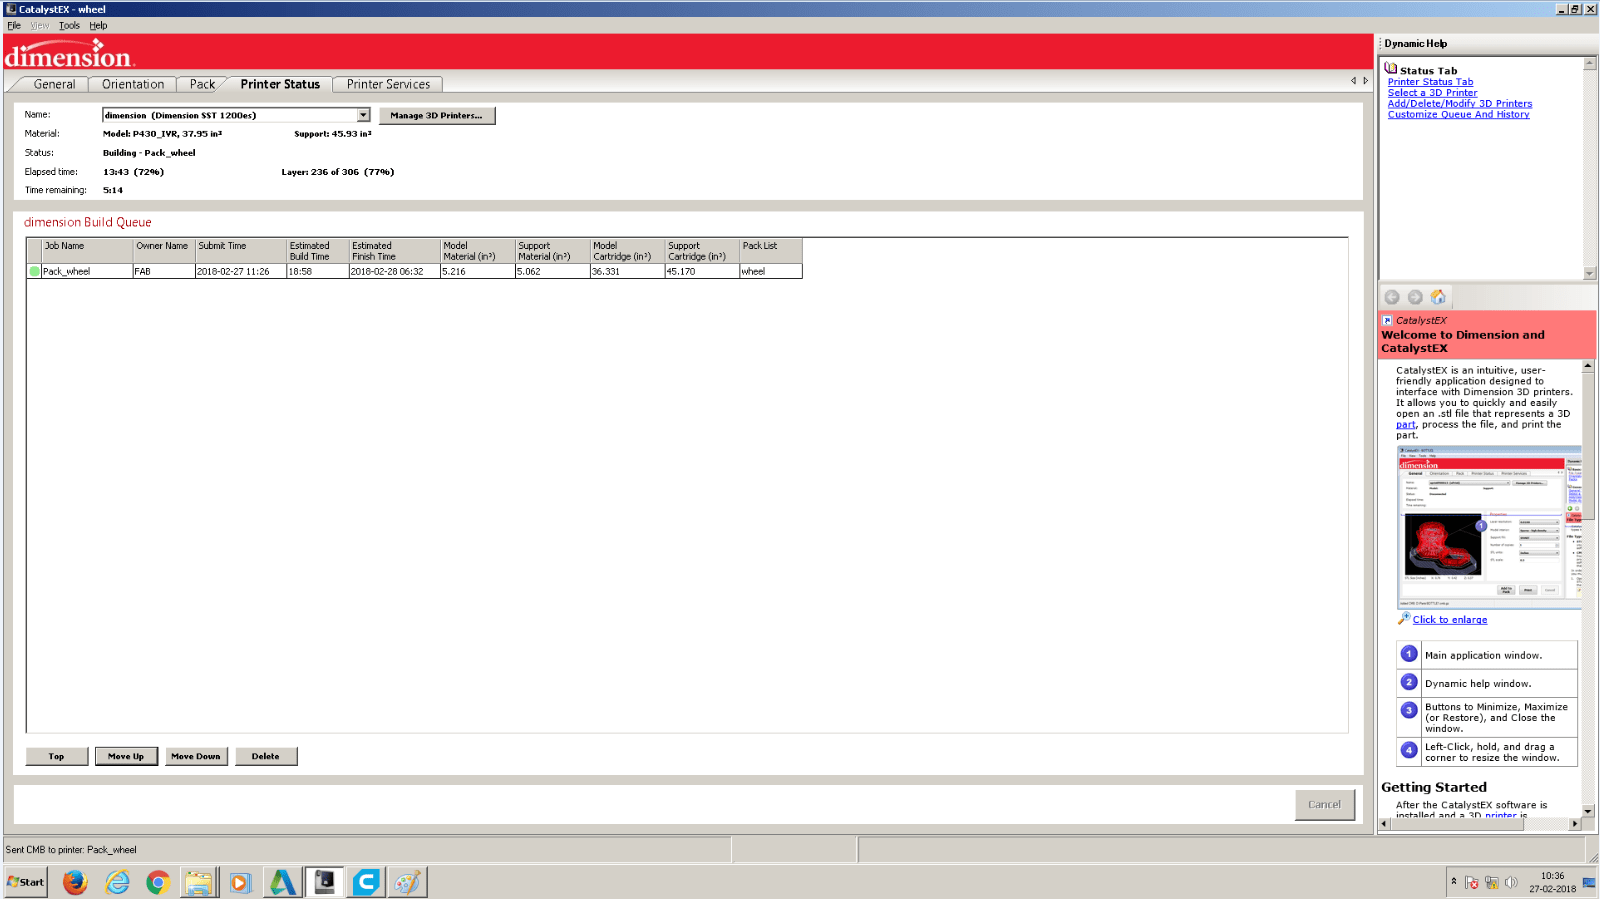
The machine used for printing the model was Ultimaker 2
I designed the model using solid works. The file was saved in .STL format.
The STL file is imported to CURA . CURA helps you set various parameters of printing.
The software lets you change the orientation of how the model is going to be printed on the base.
It also provides the option to scale the model beforehand. It can import multiples files at the
same time. This allows for printing multiple models in on go.
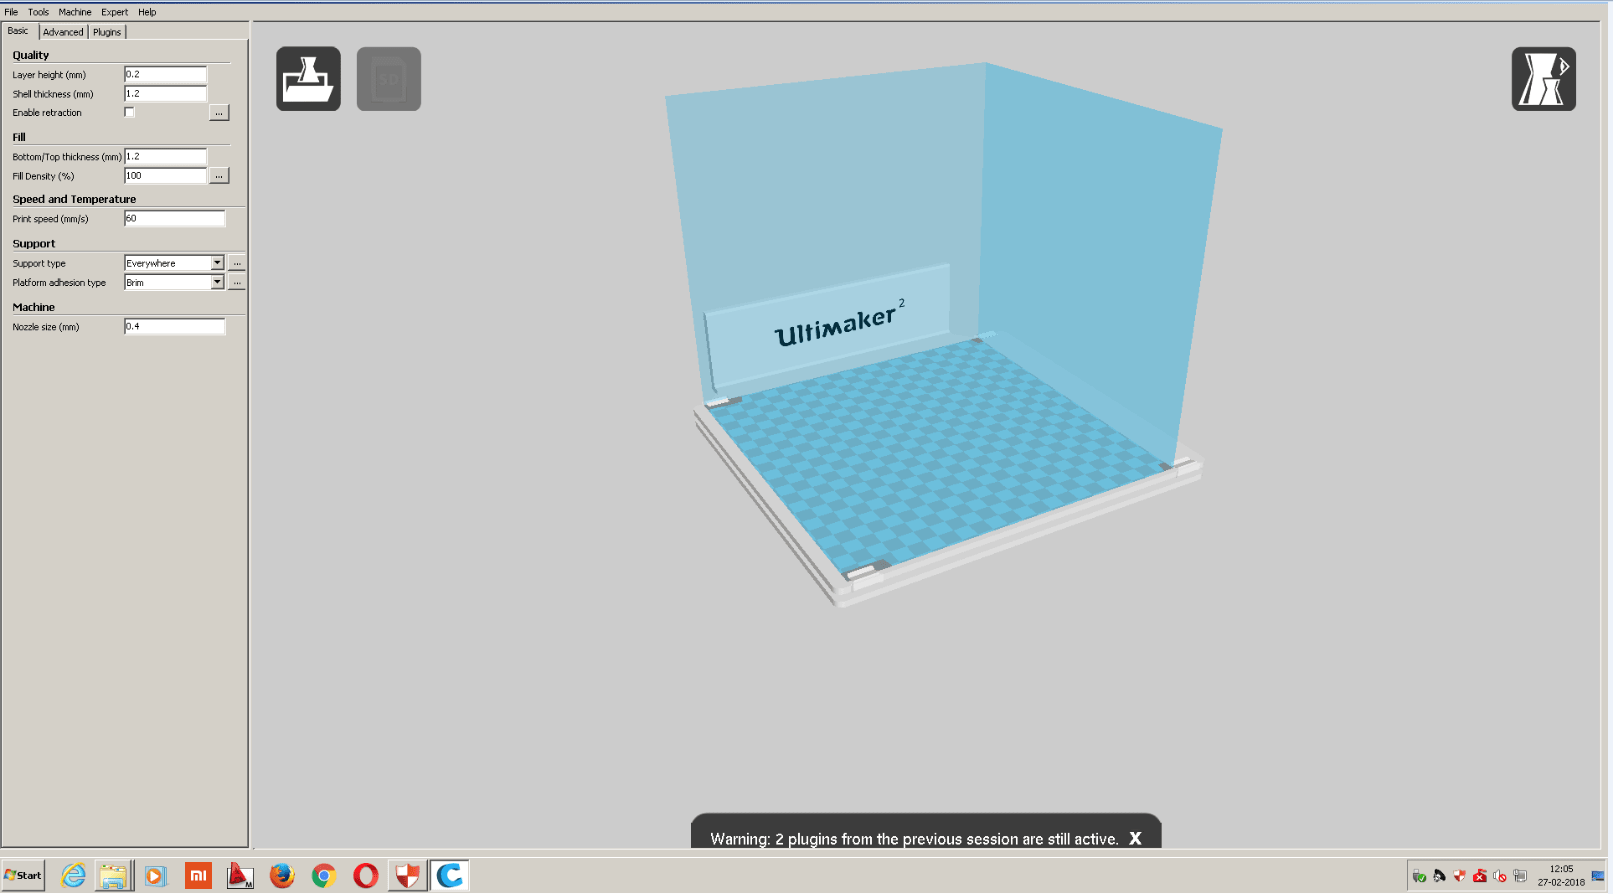
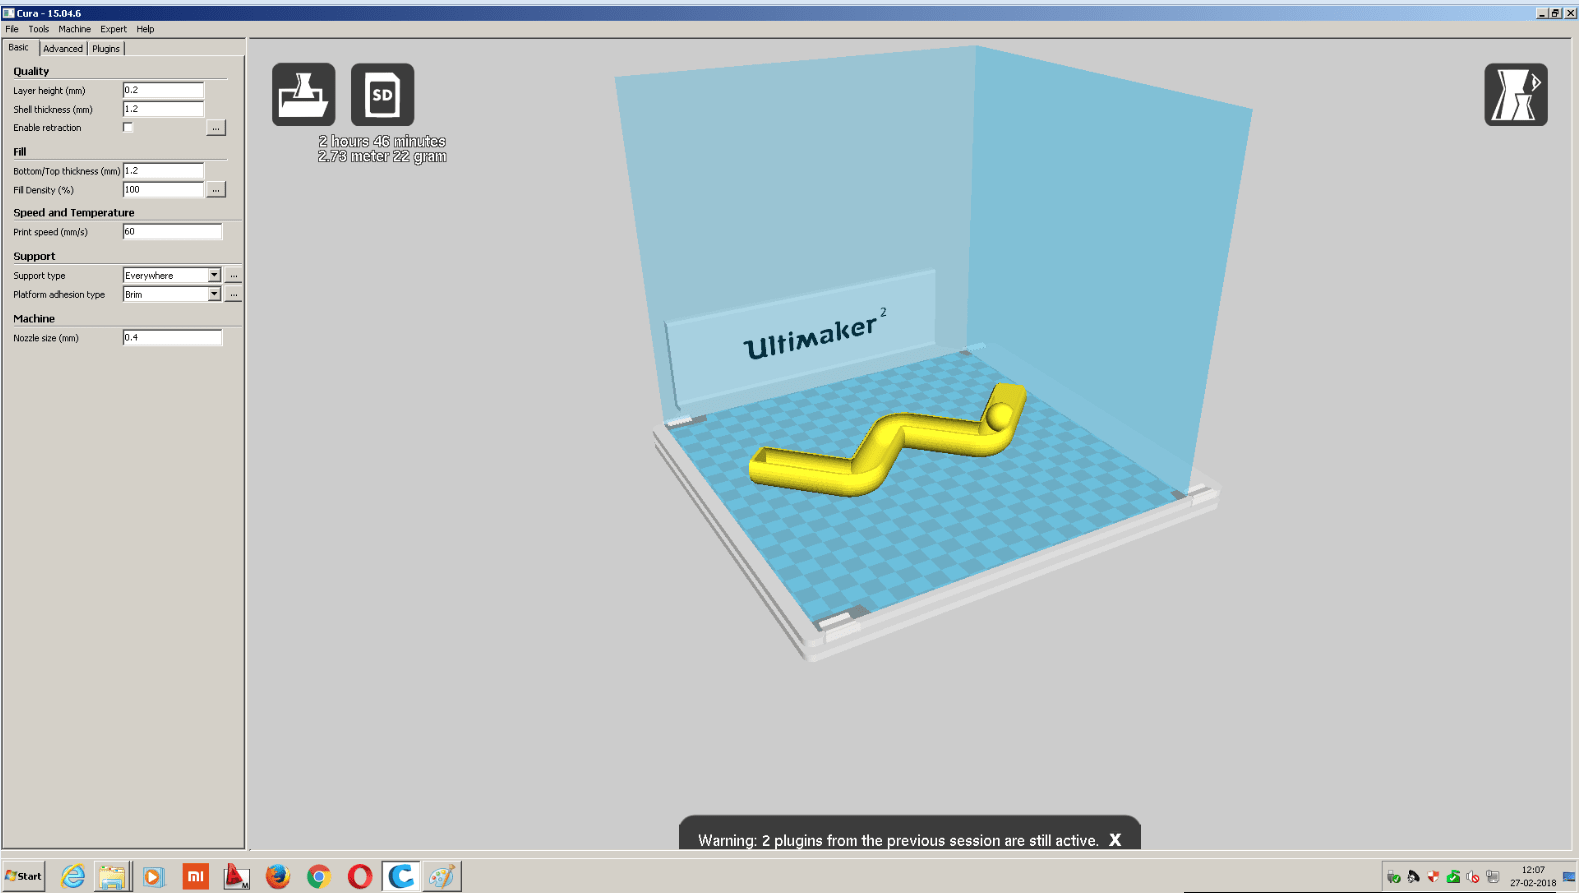
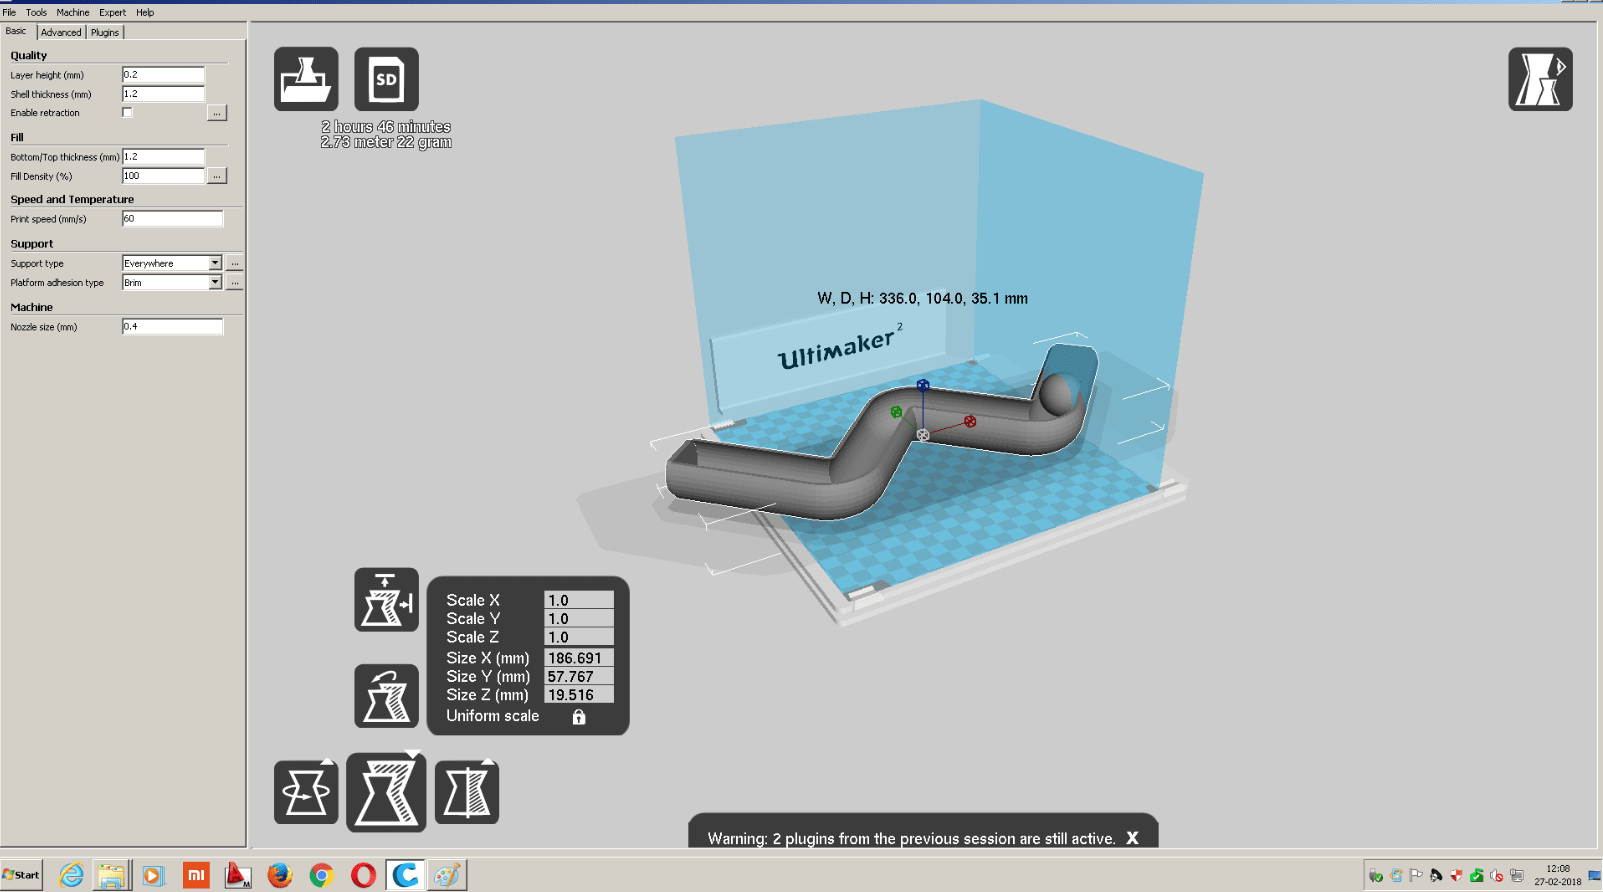
In the software , if the size of the model is too large that it cannot fit in the base it will appear grey in color.
If this happens the model can be scaled using scale tool. Scale it to a size until the color appears as yellow.
Once the parameters are set , generate a G code for the model and transfer the files
into a SD card (Input to ULtimaker is via SD card )
Once the SD card is inserted , select the file using the selector knob.
The machine takes few minutes to heat up. When the heating is over the material starts to drip.
When the dripping starts select ready. The machine now starts printing.
The estimated time for finishing my job was 1 hour.
The machine has no memory and read files for printing from the memory card , hence
one should not remove the memory card while the machine is printing.
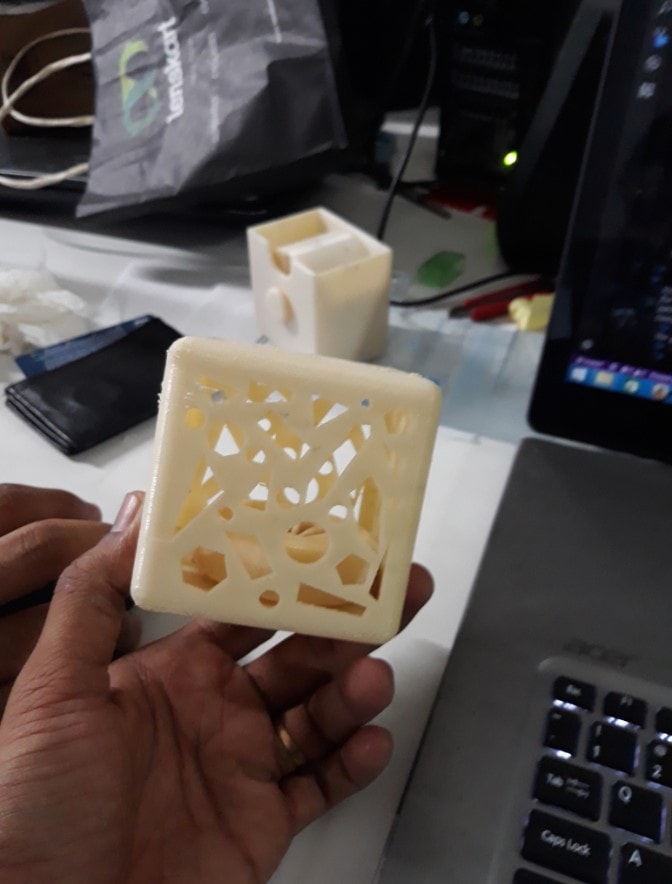
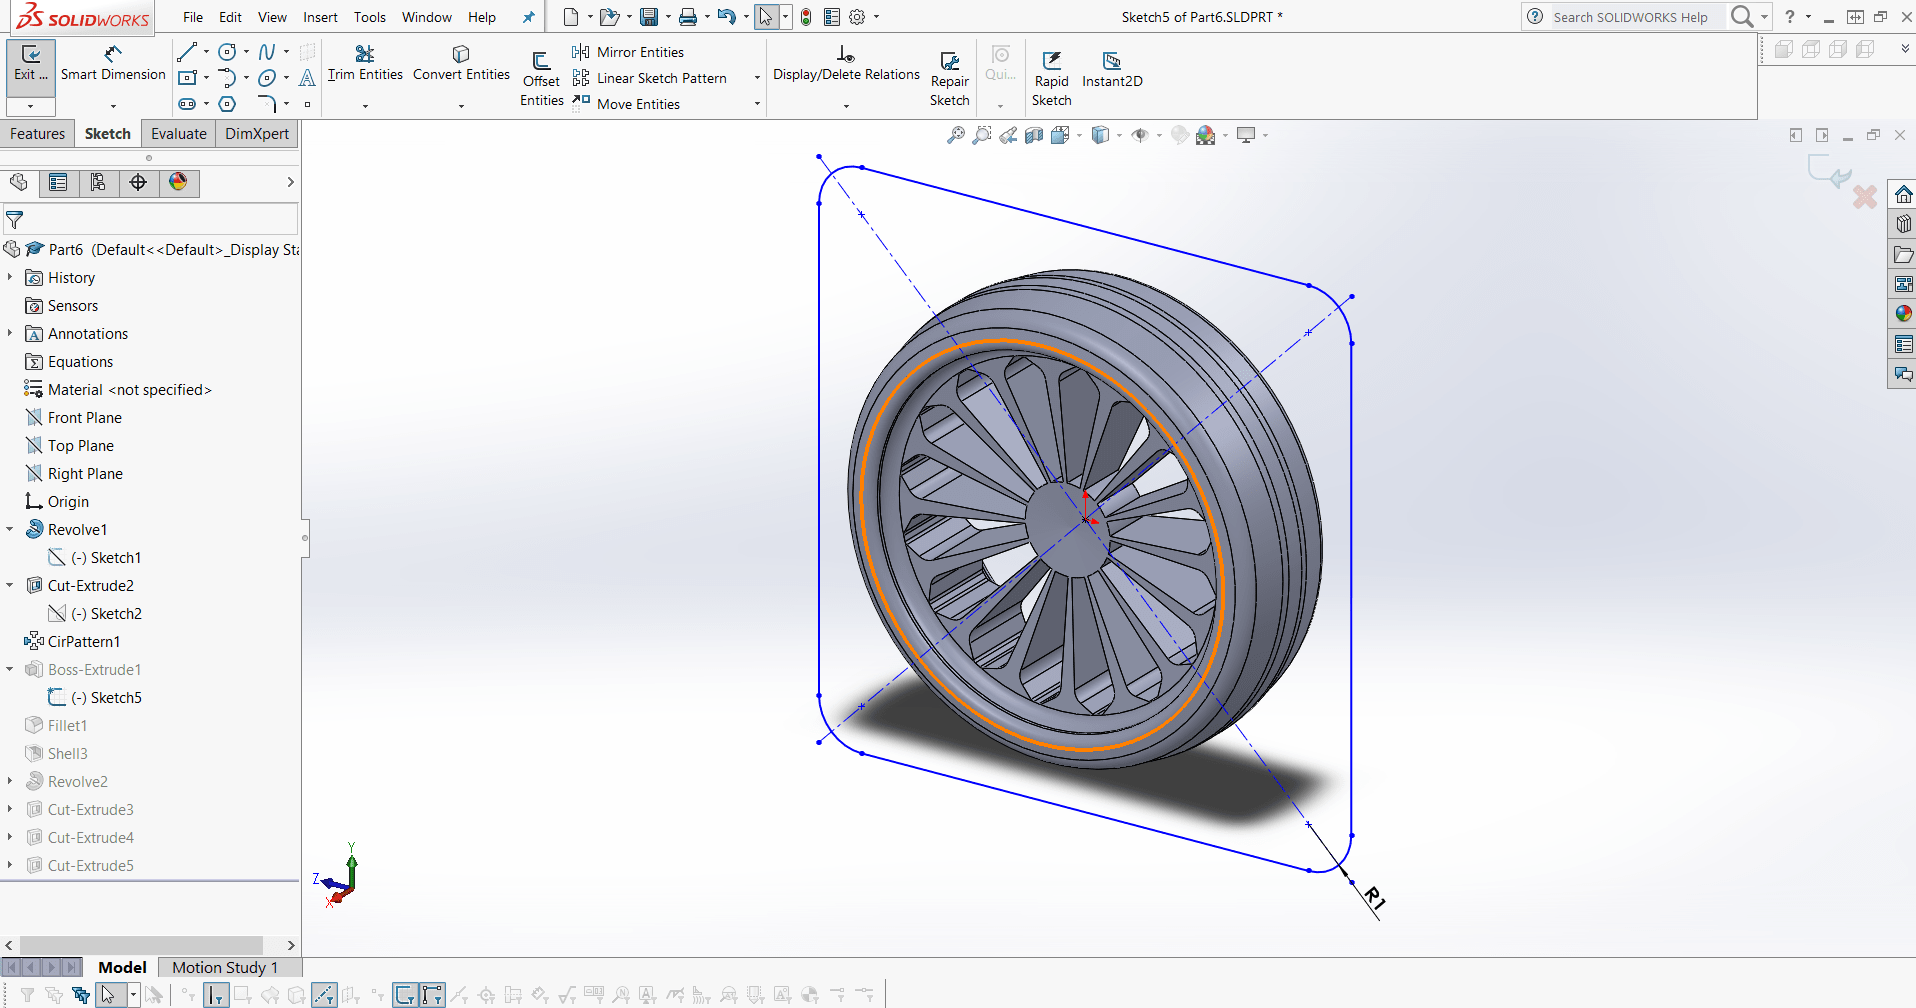
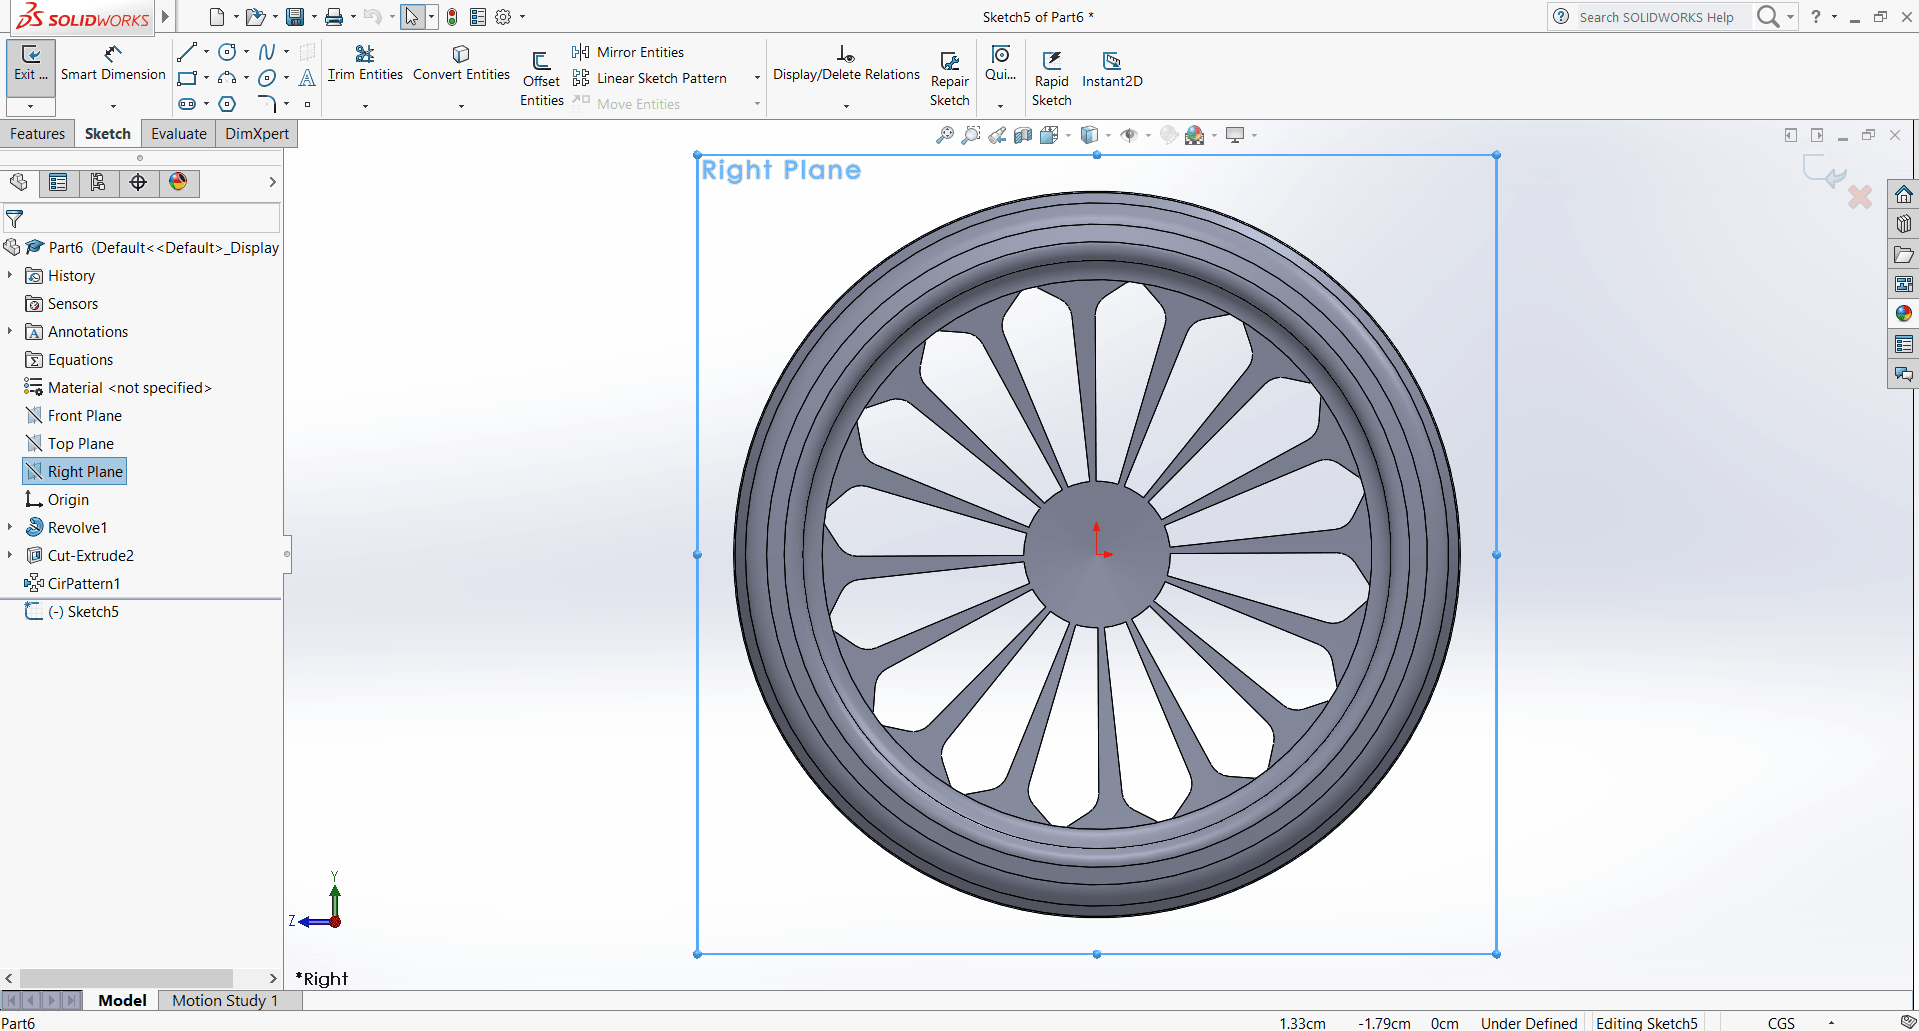
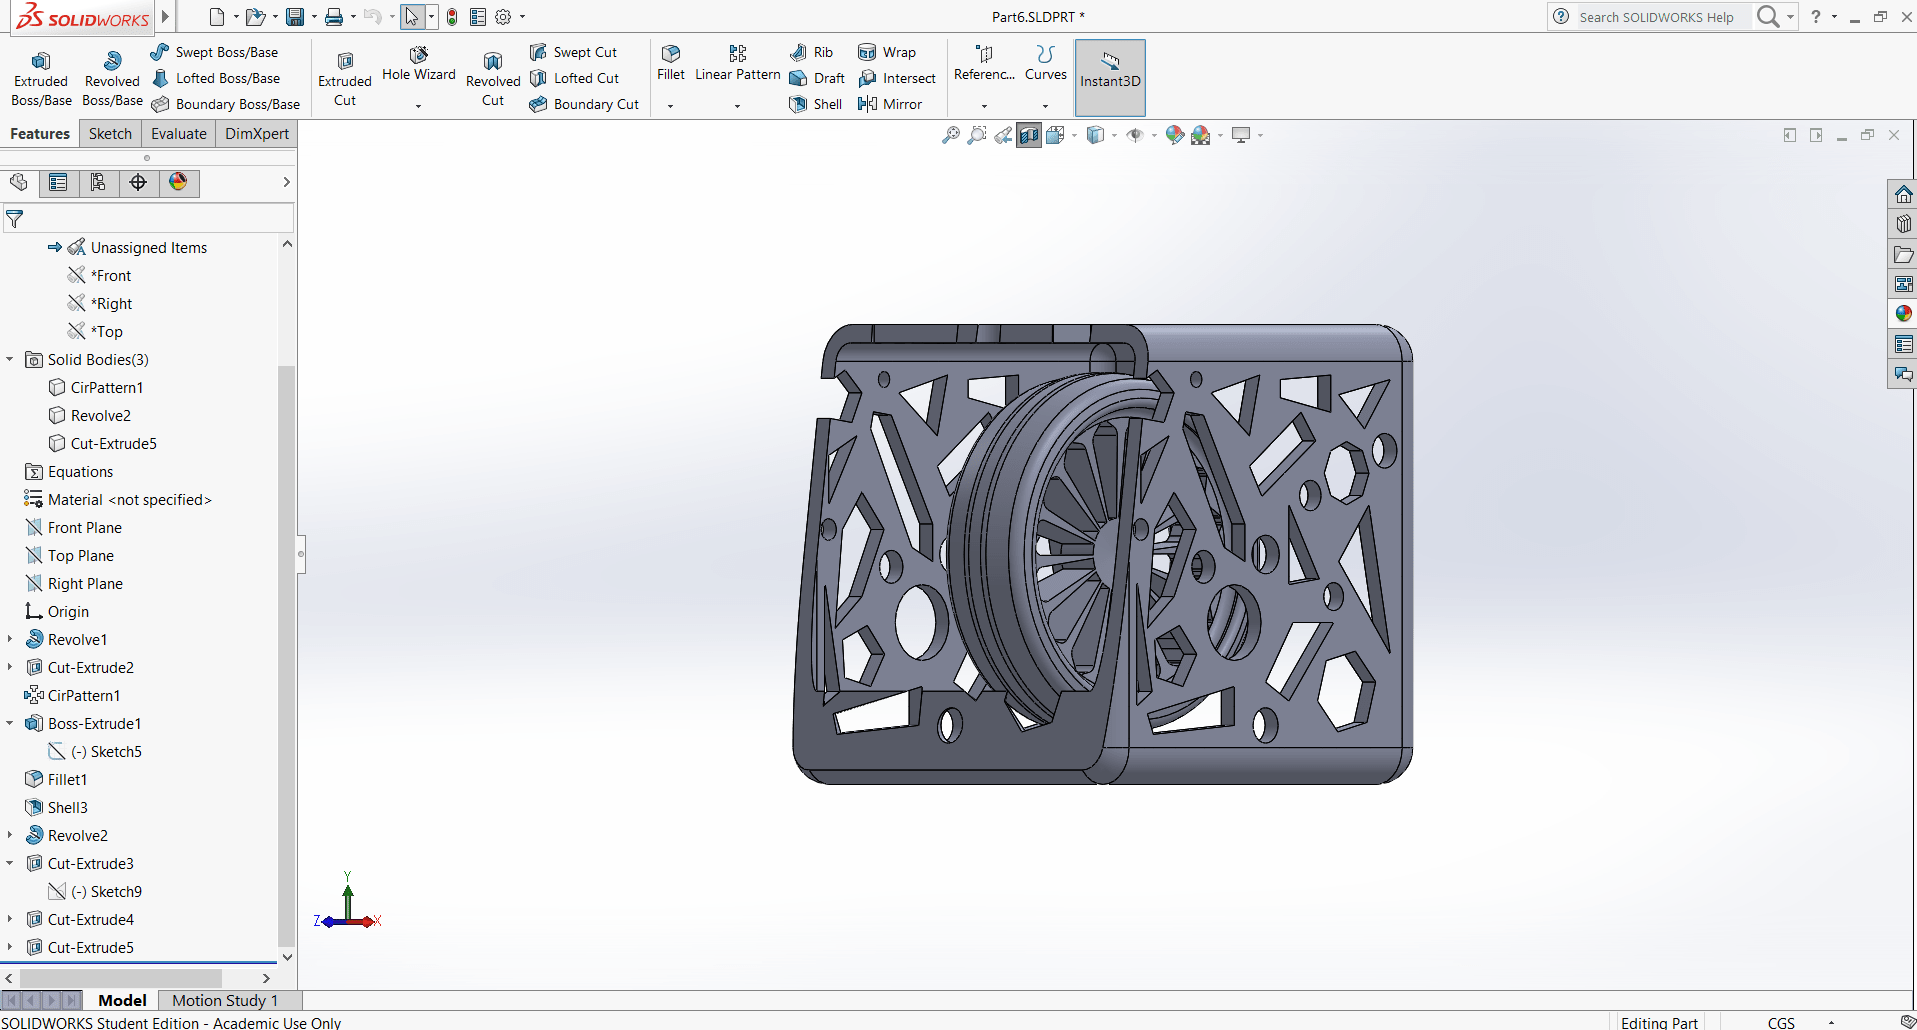
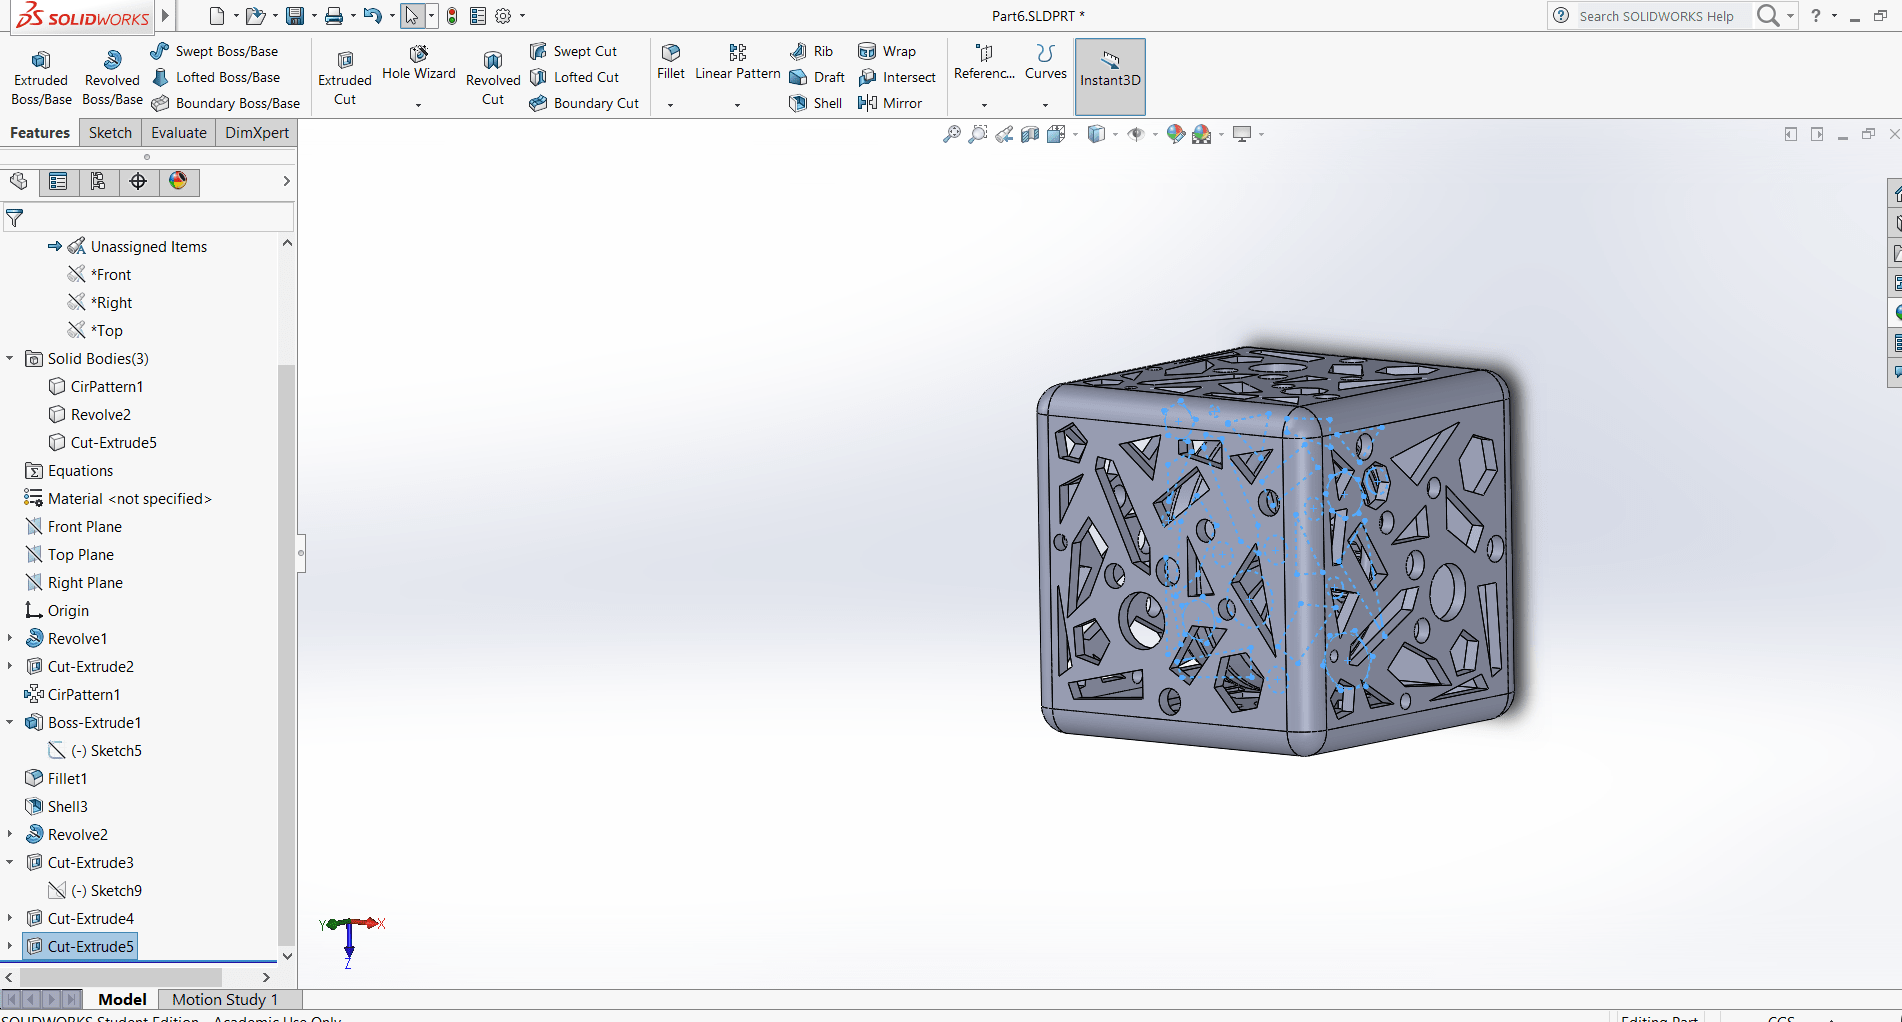
To create a non subtractive model i came up with a rather fancy design. I designed a wheel enclosed in a fancy box
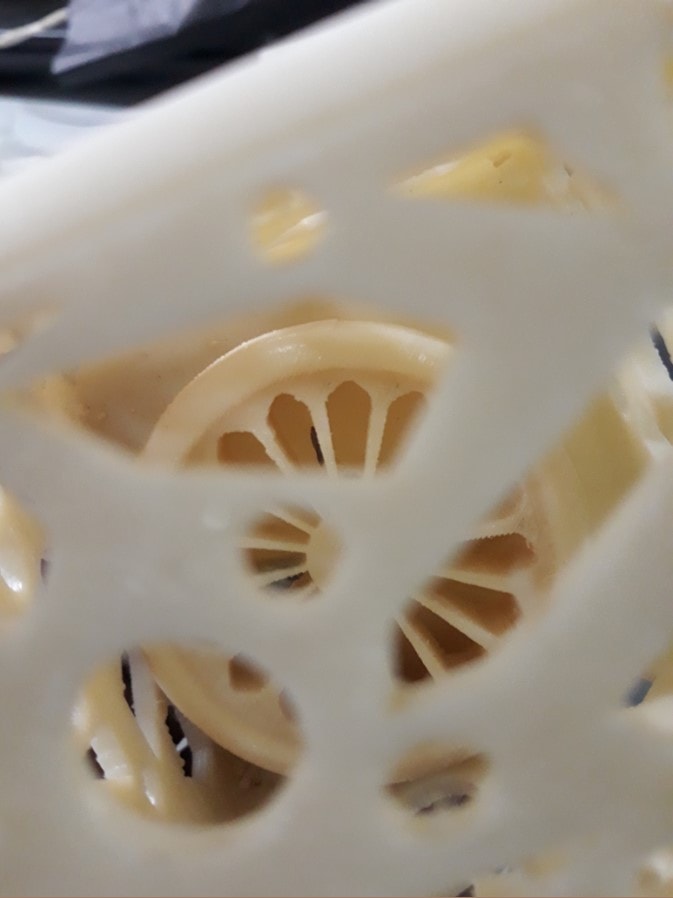
For making the wheel I made the made a design as shown below. The image is symmetric about the - axis
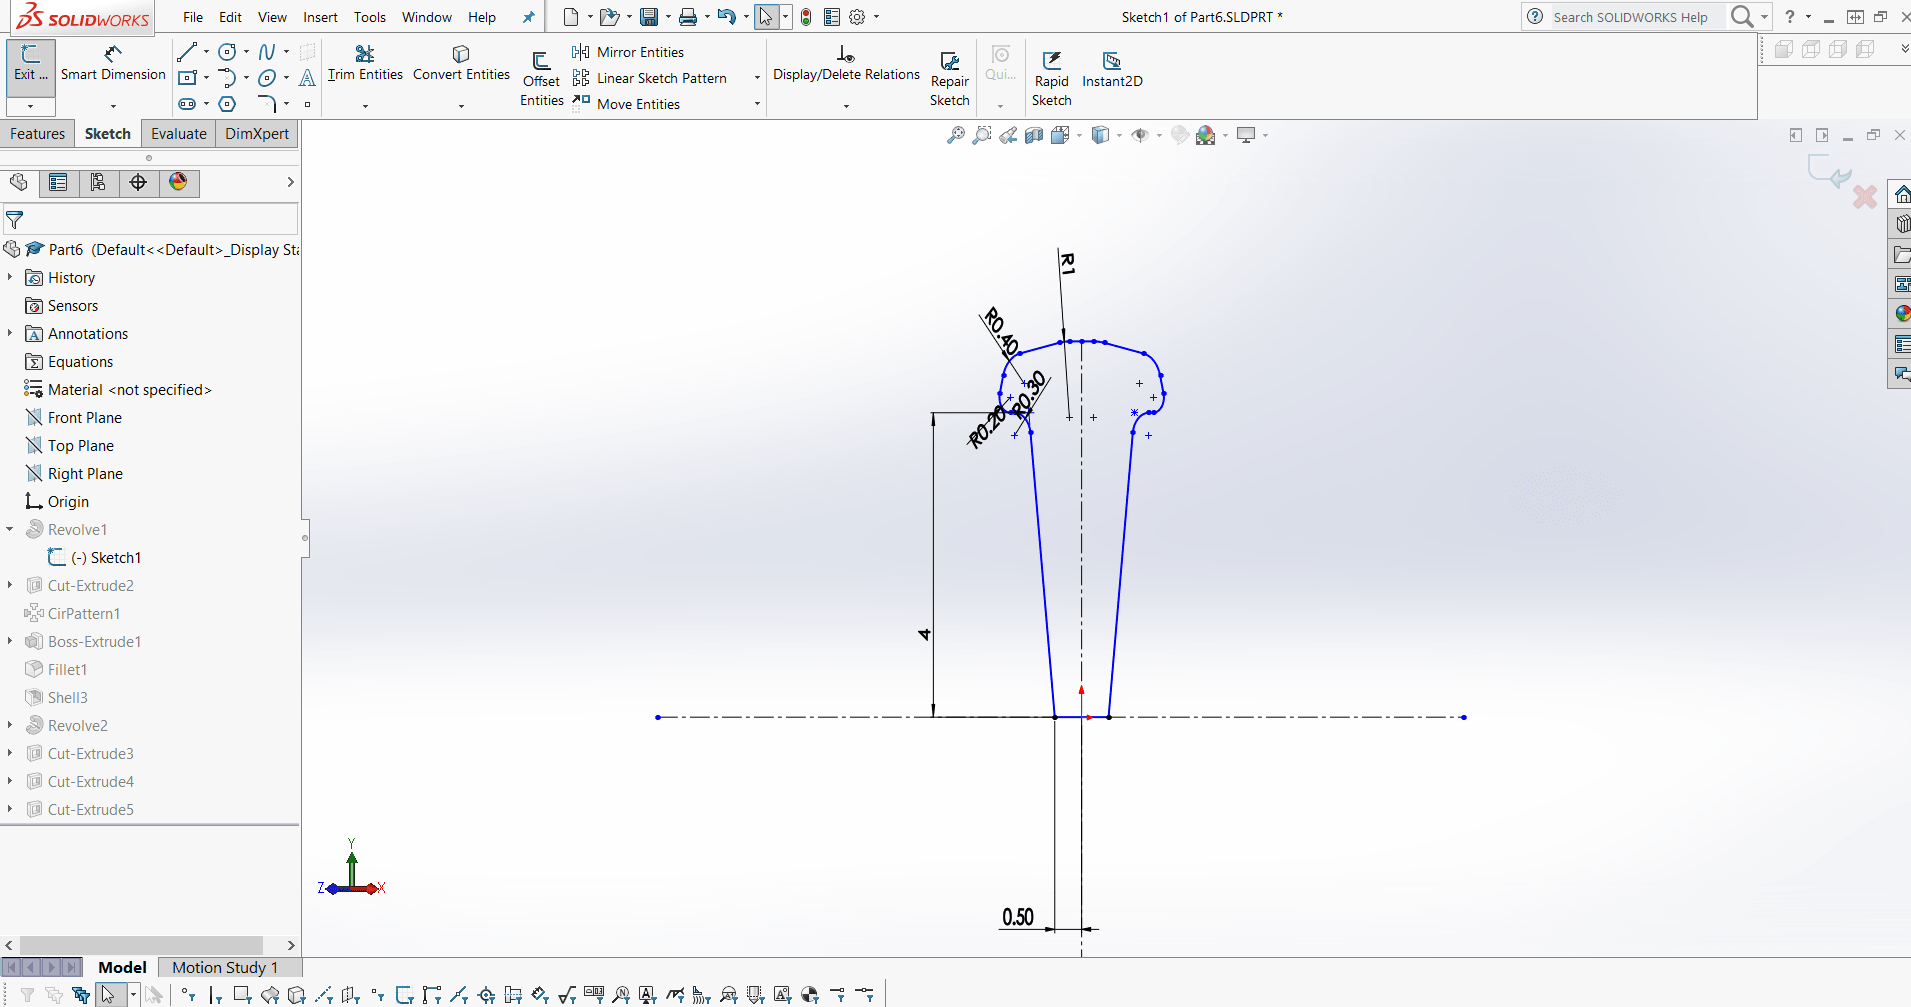
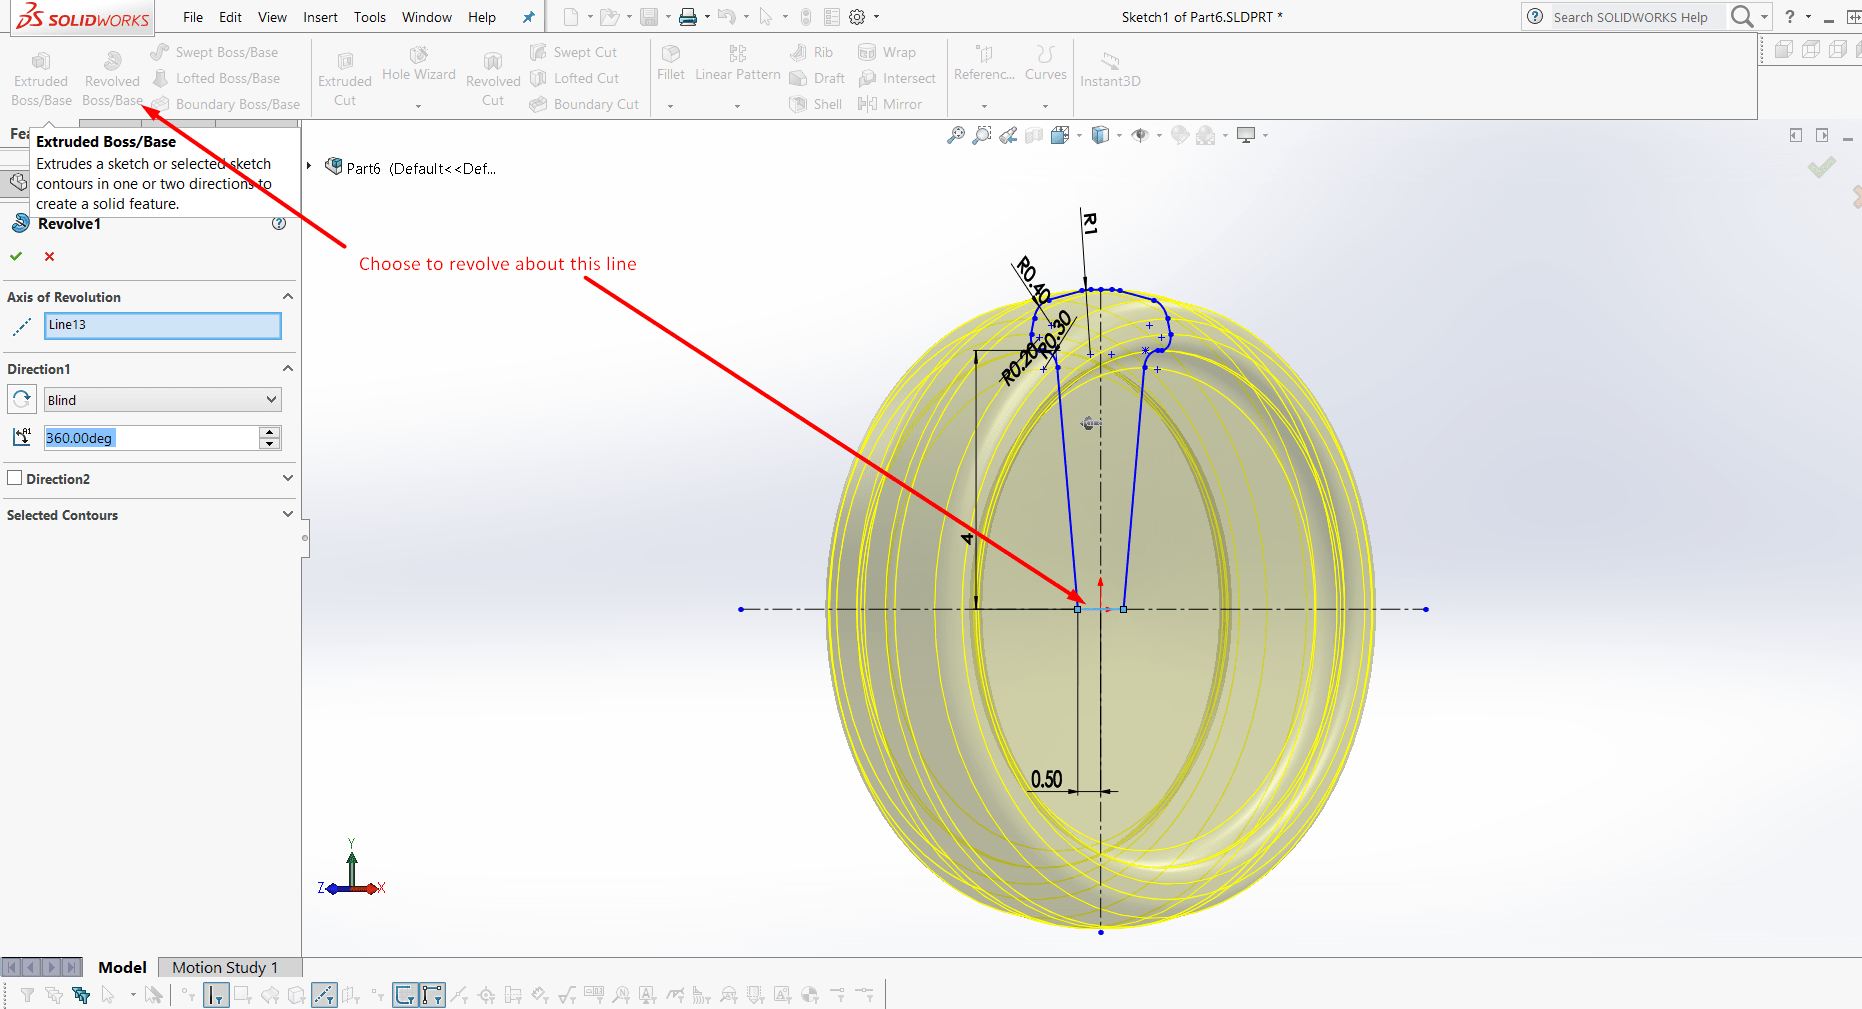
The contour was revolved about the x-axis using the revolve tool. This will generate a wheel.
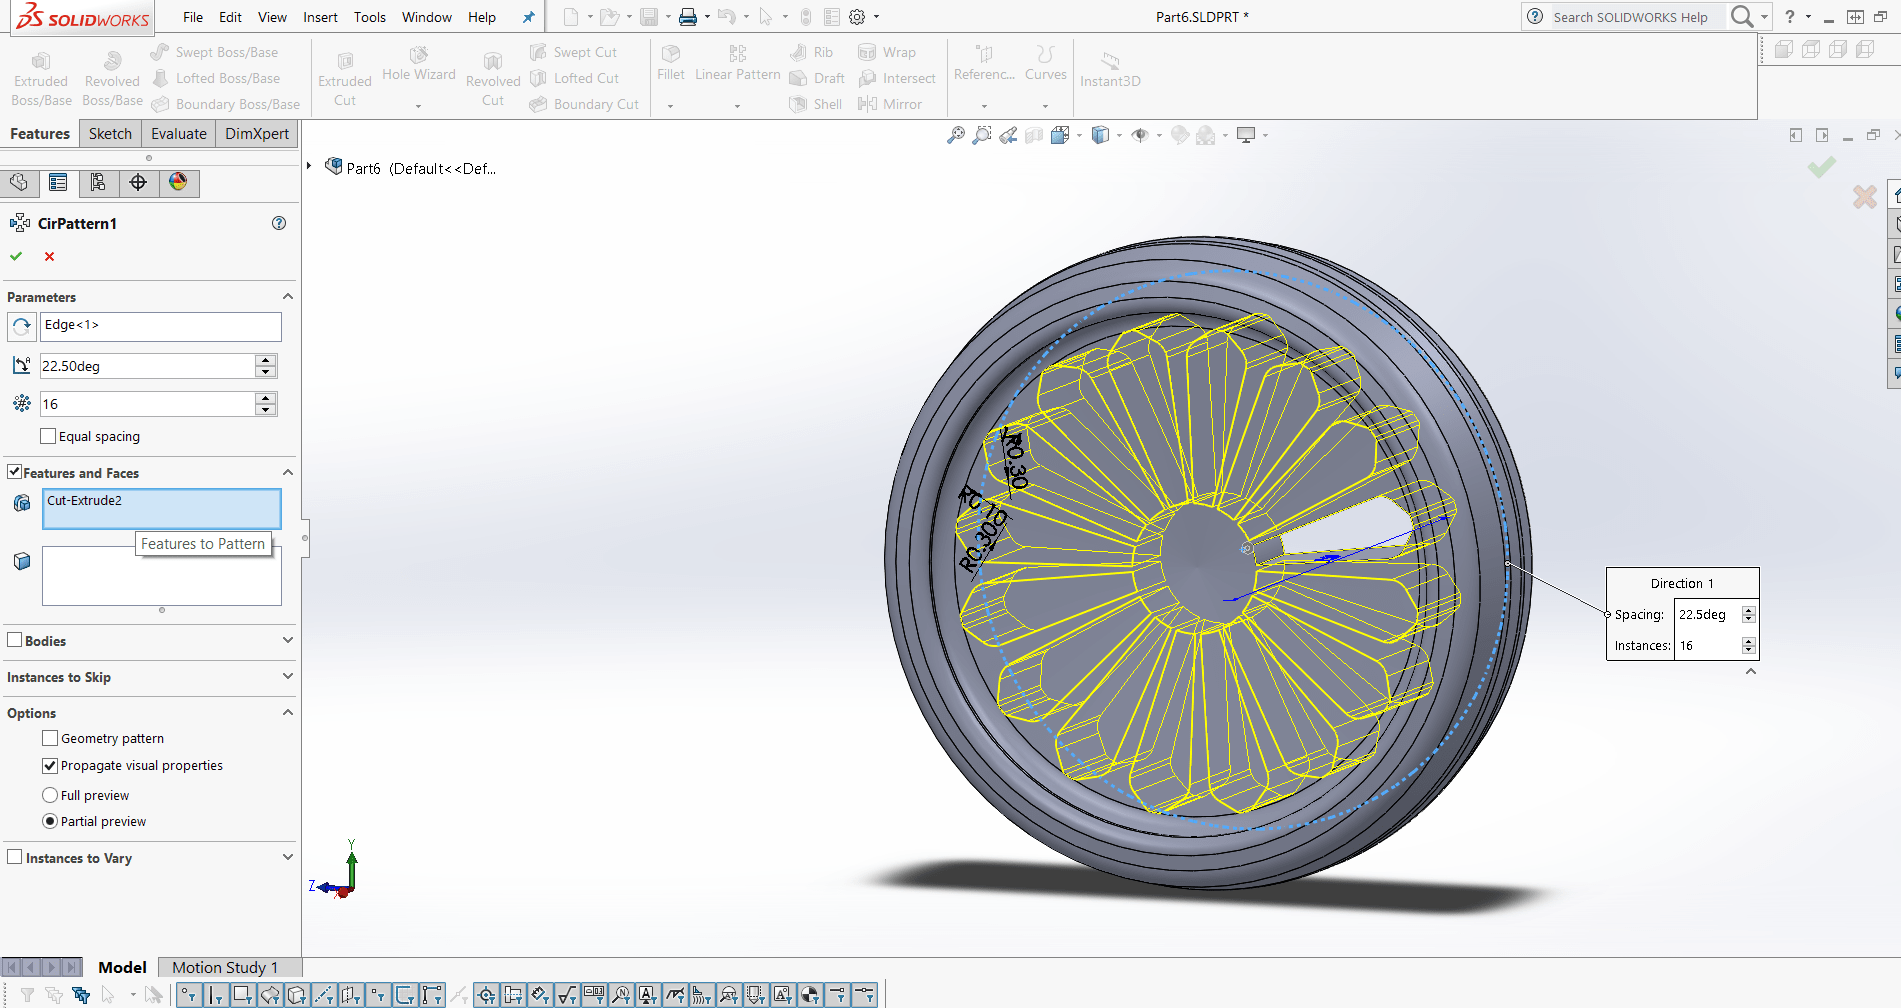
Once the wheel was generated I drew a random shape on its face and followed the circular pattern tool to create a circular pattern that is equally spaced.
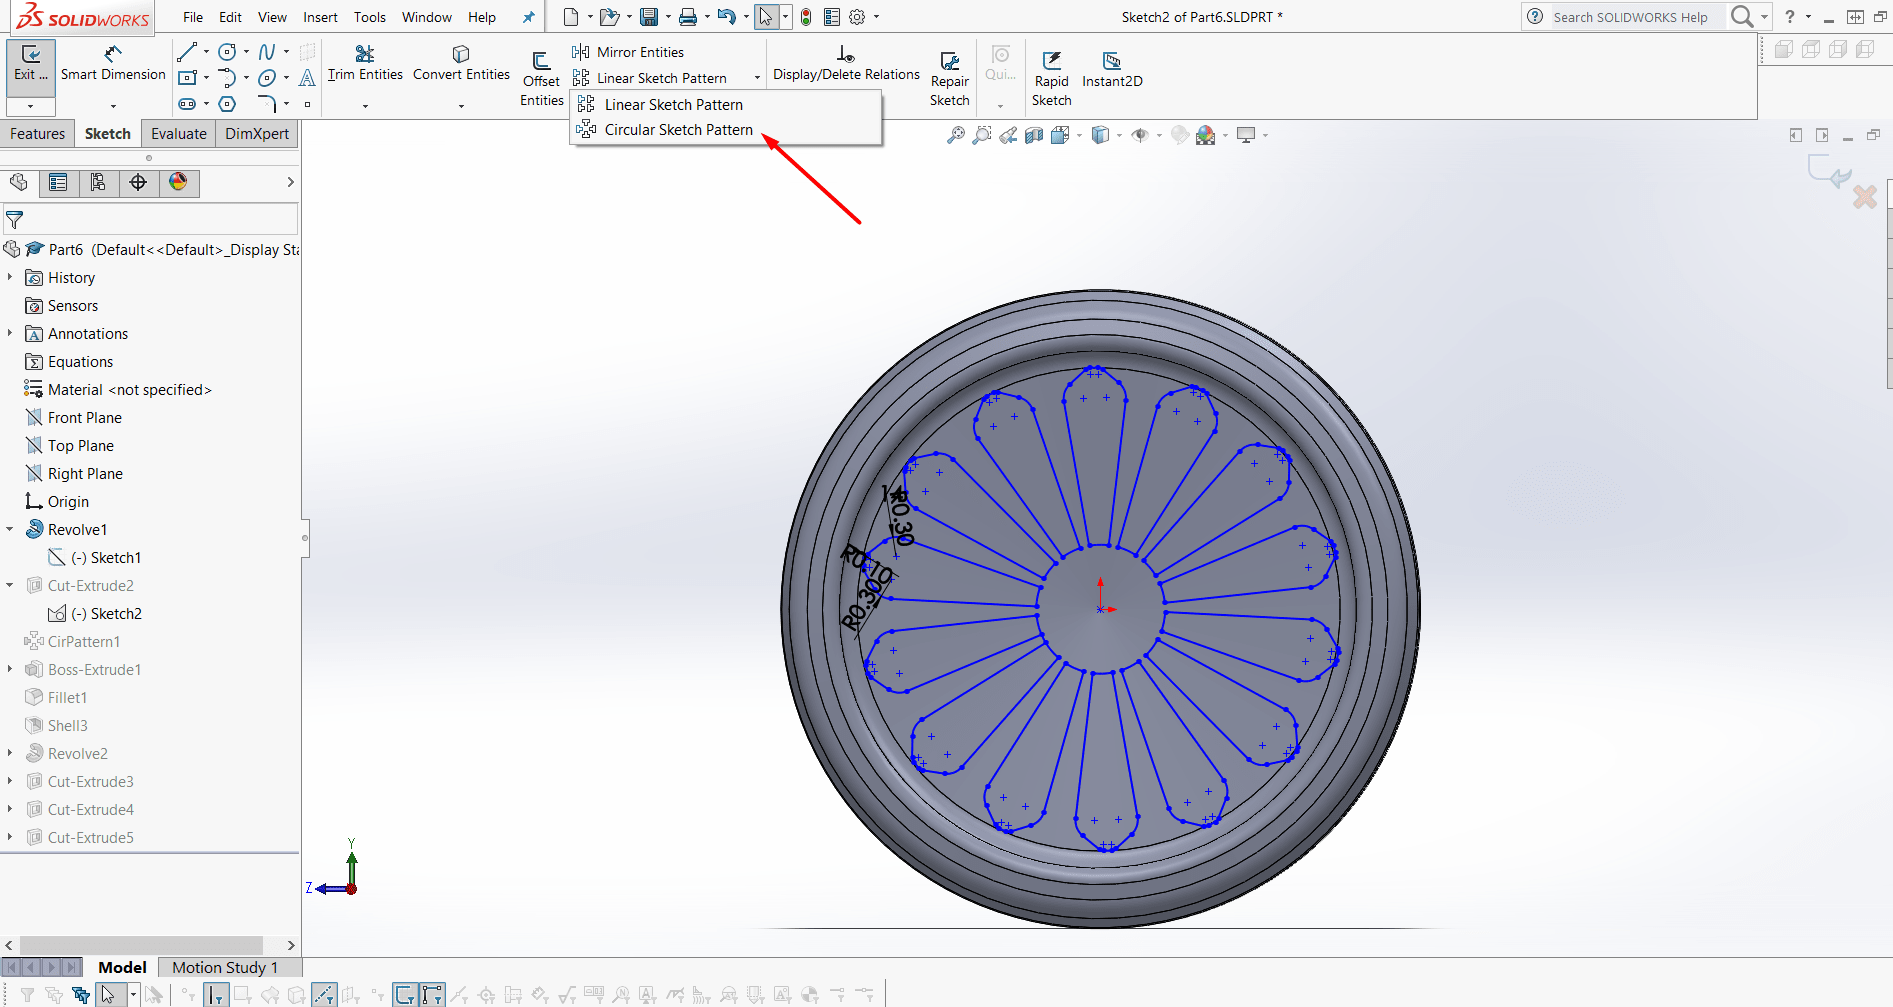
Using extrude cut feature the drawn shape was cut through the wheel.
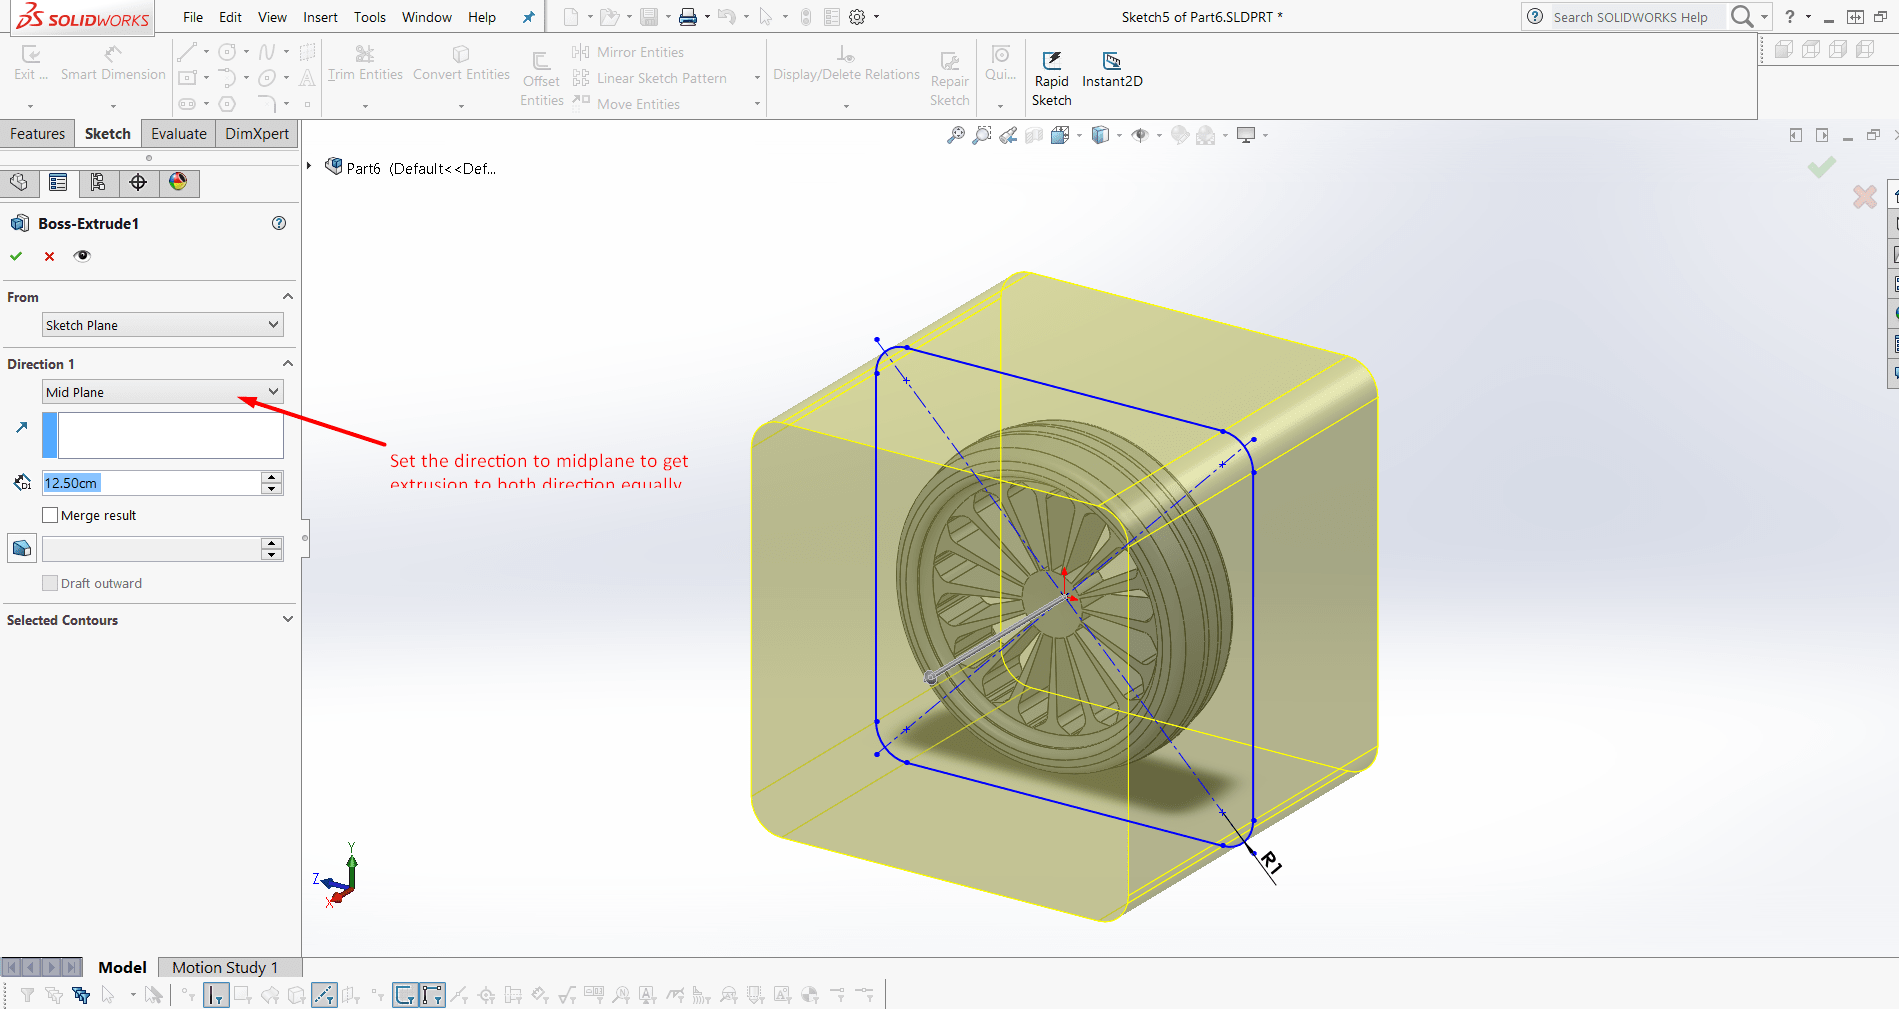
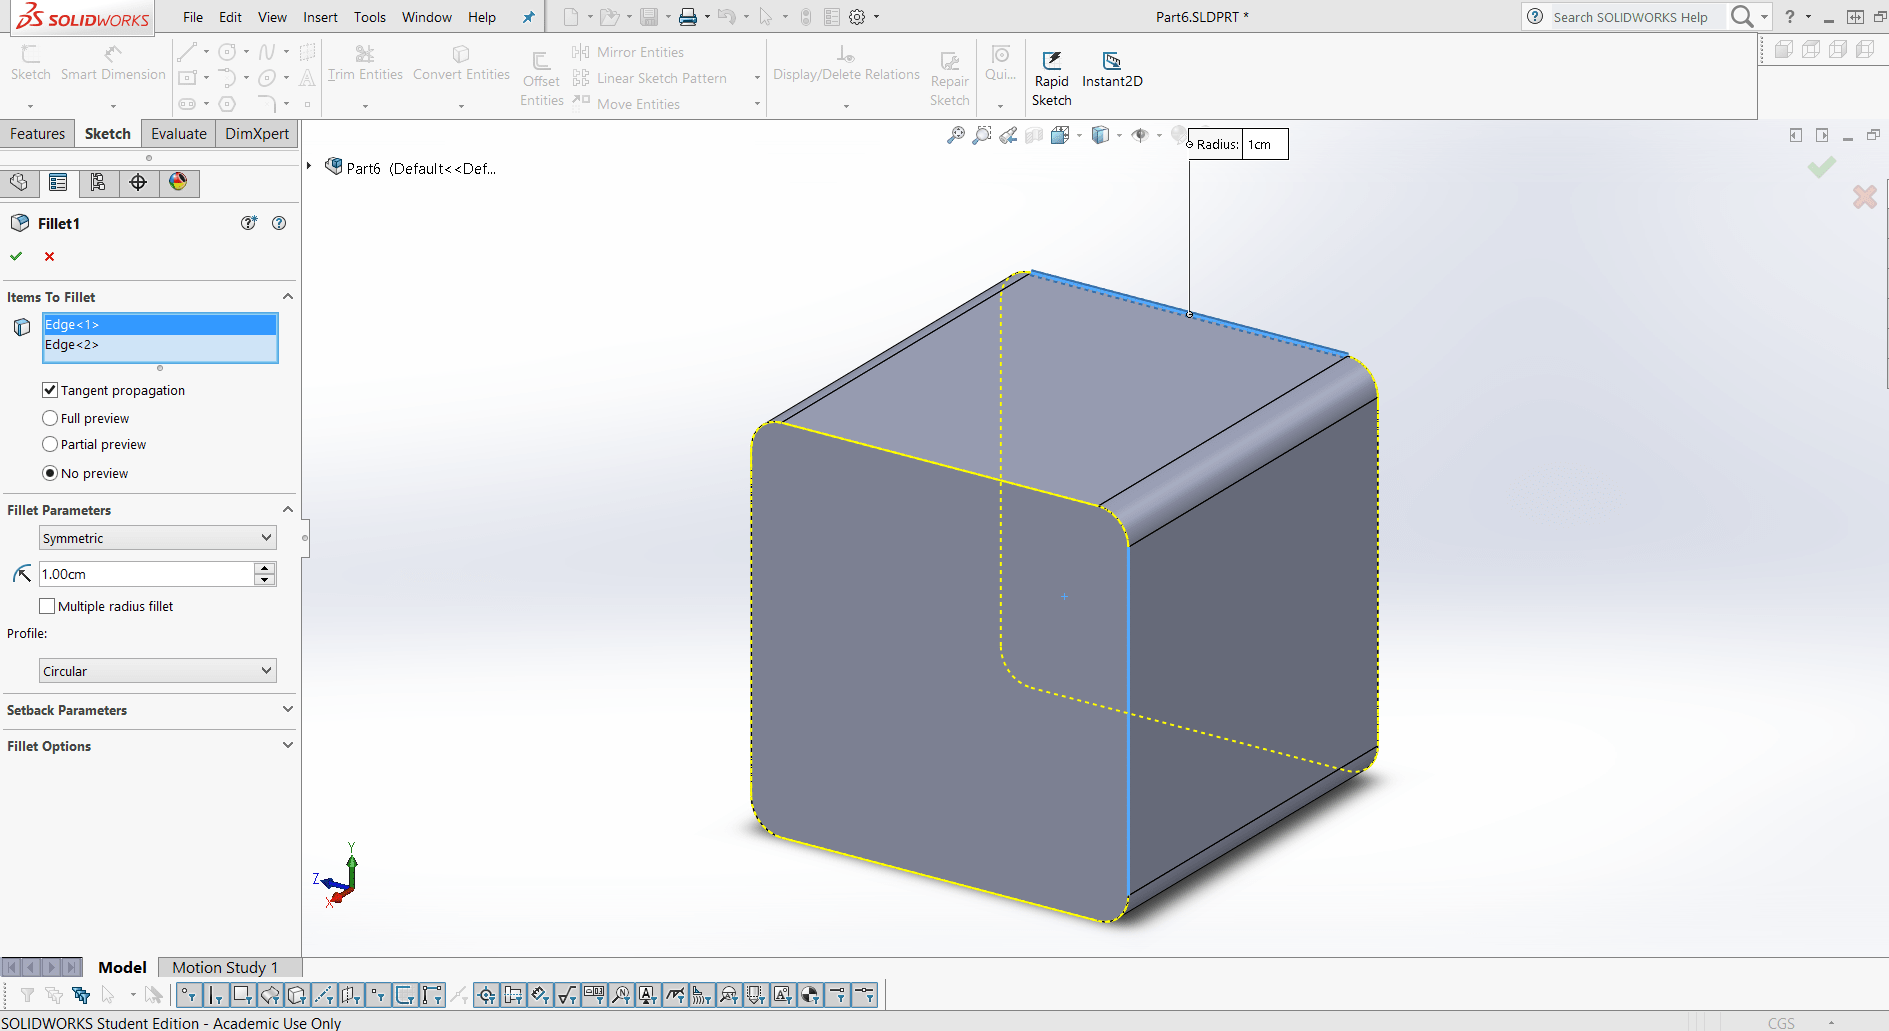
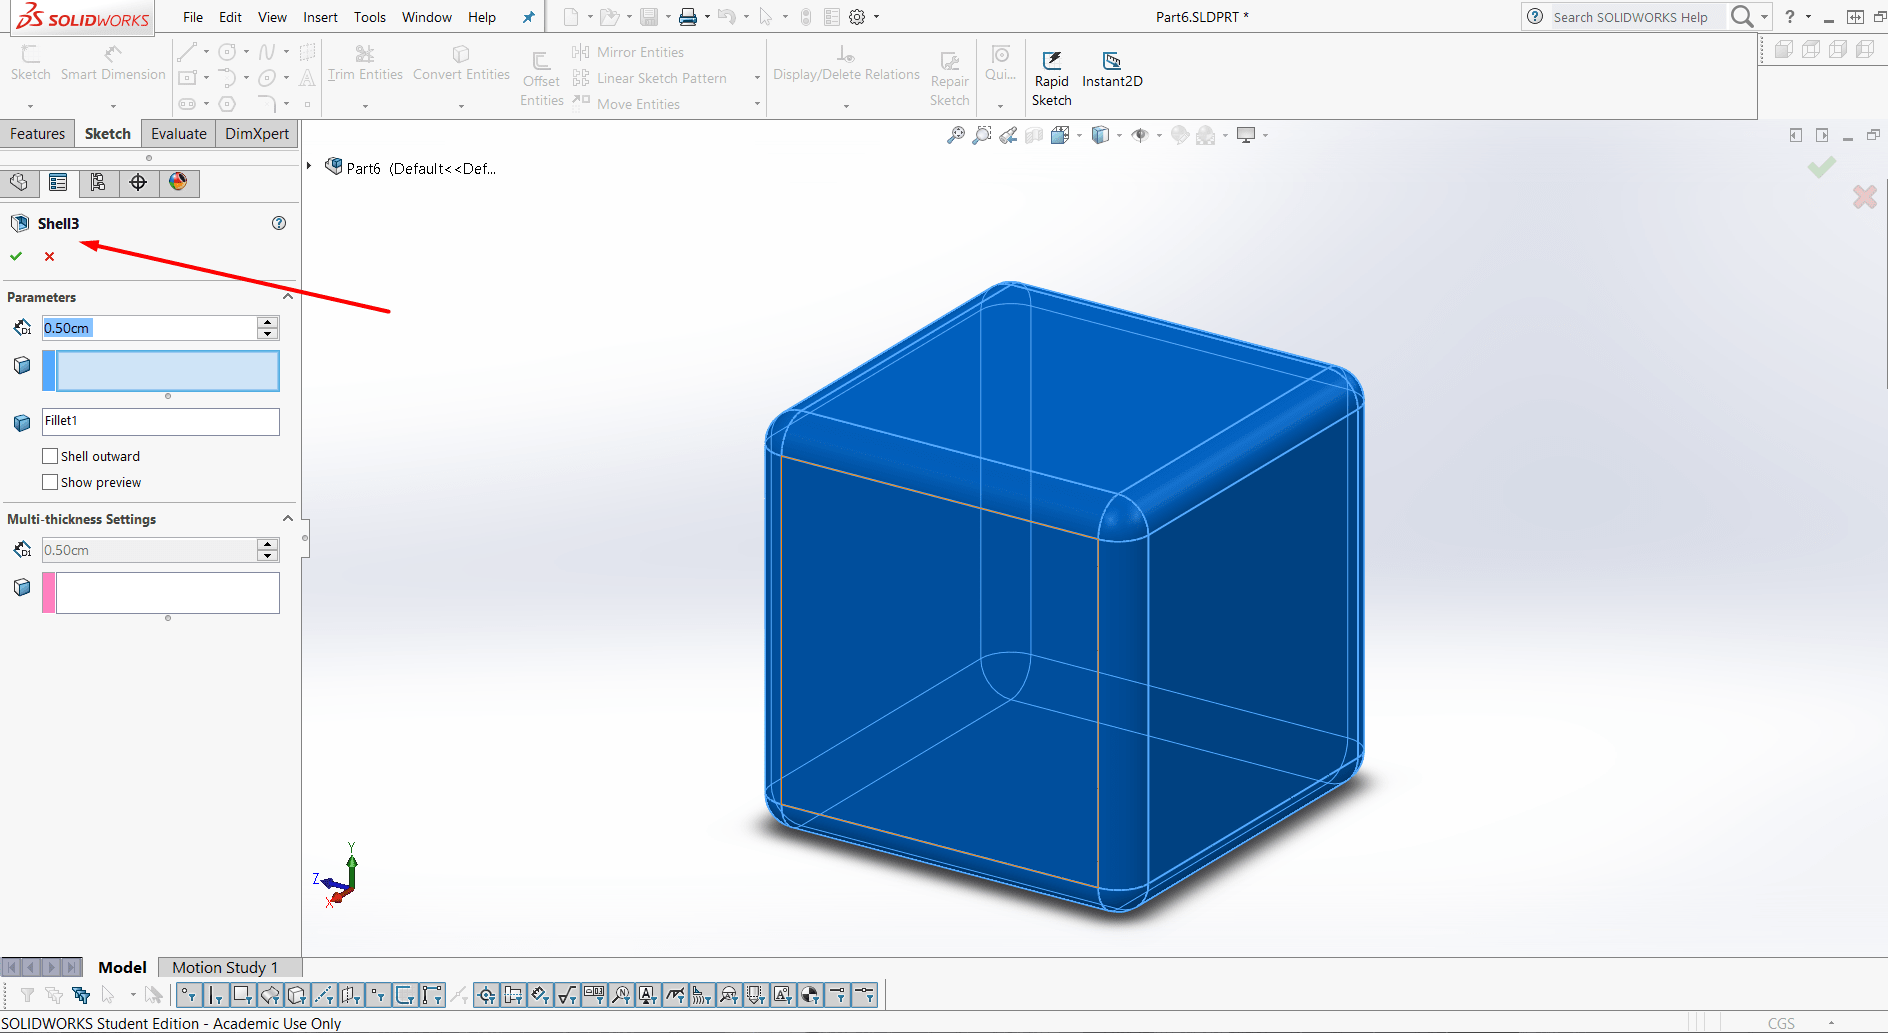
After the wheel was complete it was time to draw the box around the wheel. For this a square was drwan at the mid plane of the wheel. The corners were filled with fillets to avoid sharp edges.
Use extrude base feature to create a solid box around the wheel
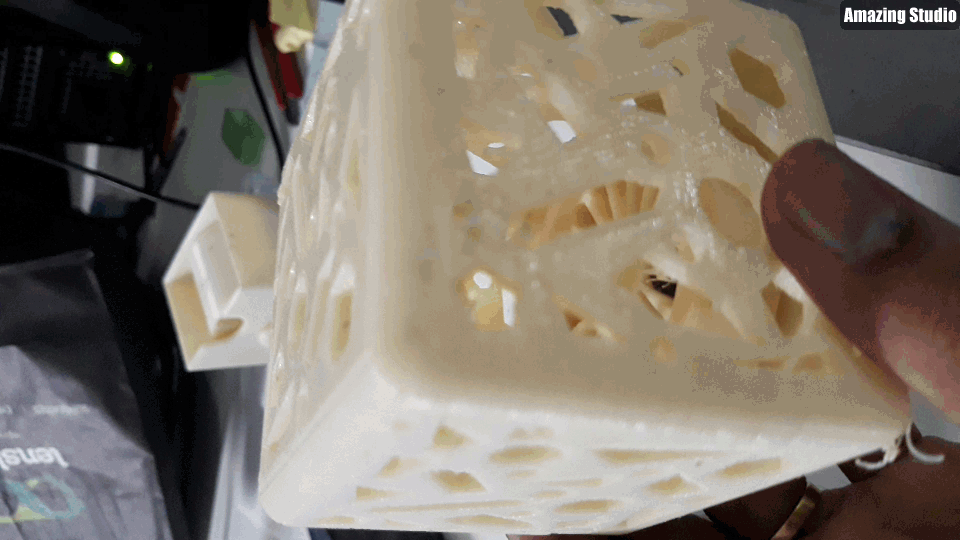
In order to make the box hollow I used the shell feature. Now we have a box that has a wheel inside. Since the walls are opaque the wheel cannot be seen.
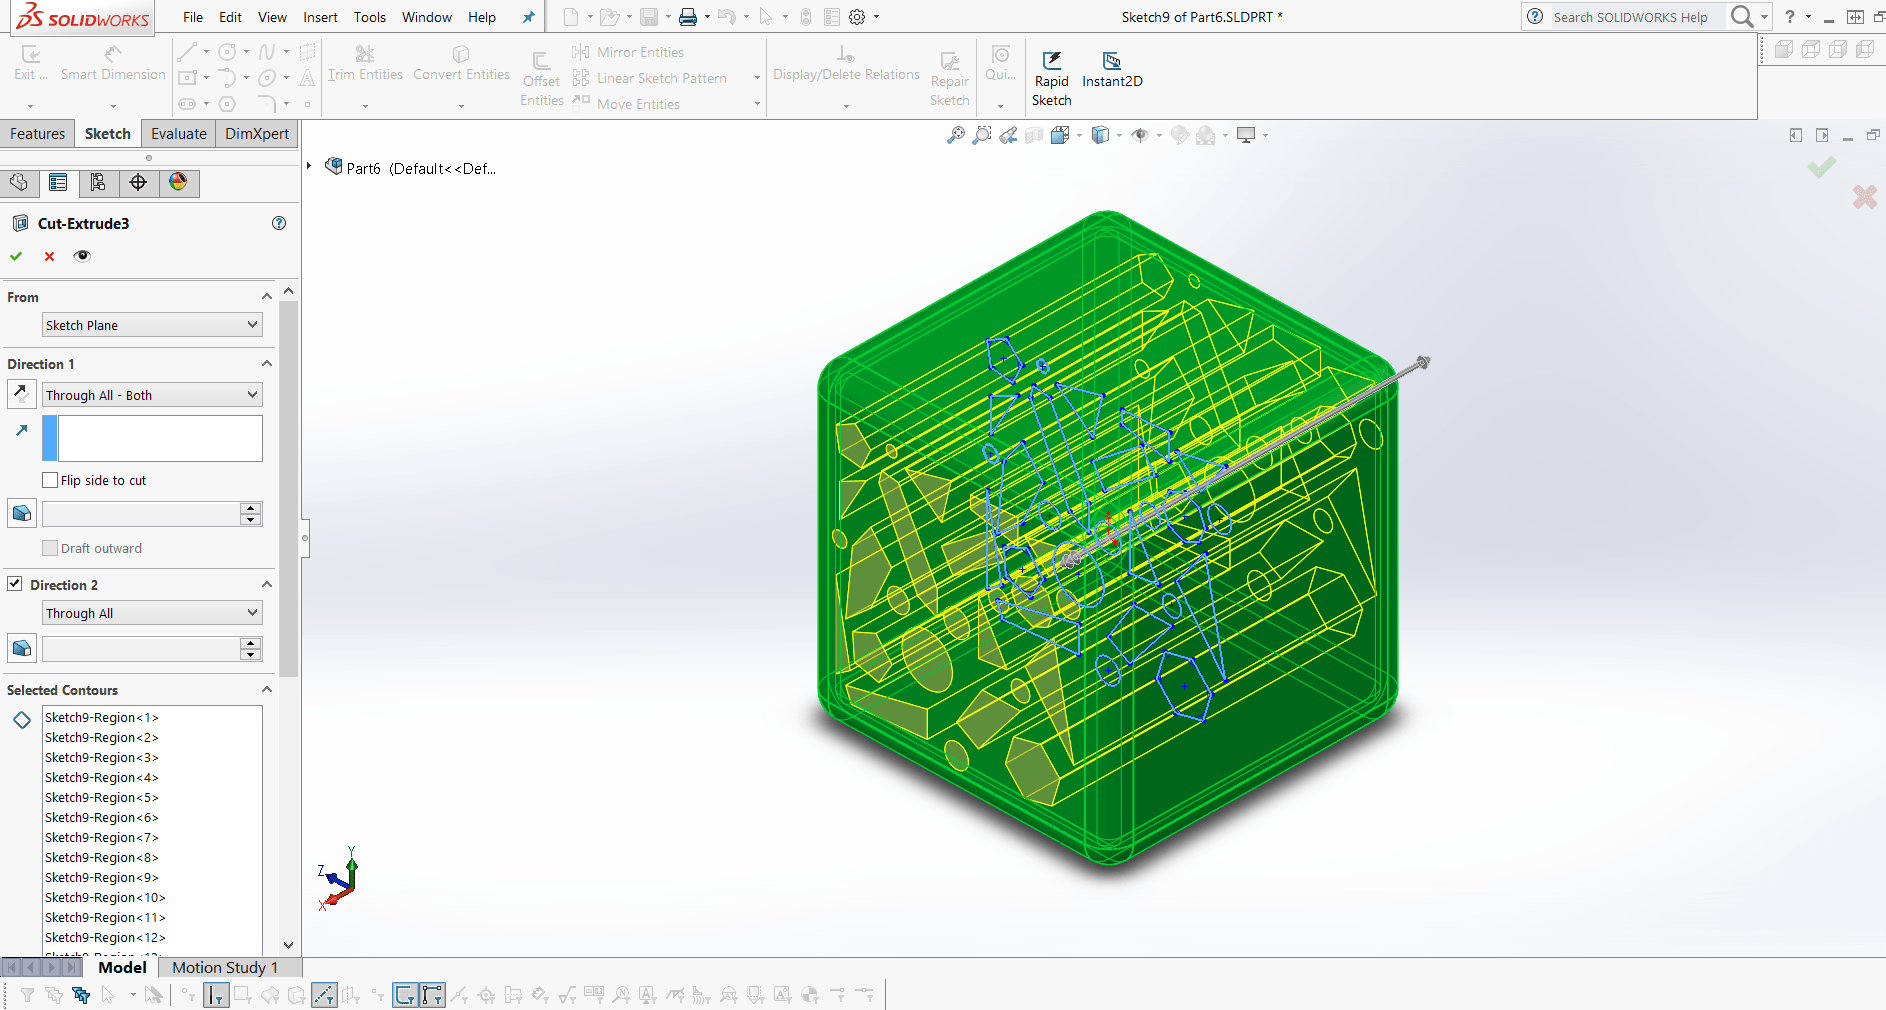
To see the inside of the box I planned to make multiple holes on the surface of the box by drawing random shapes. The shapes were drawn on the mid plane.
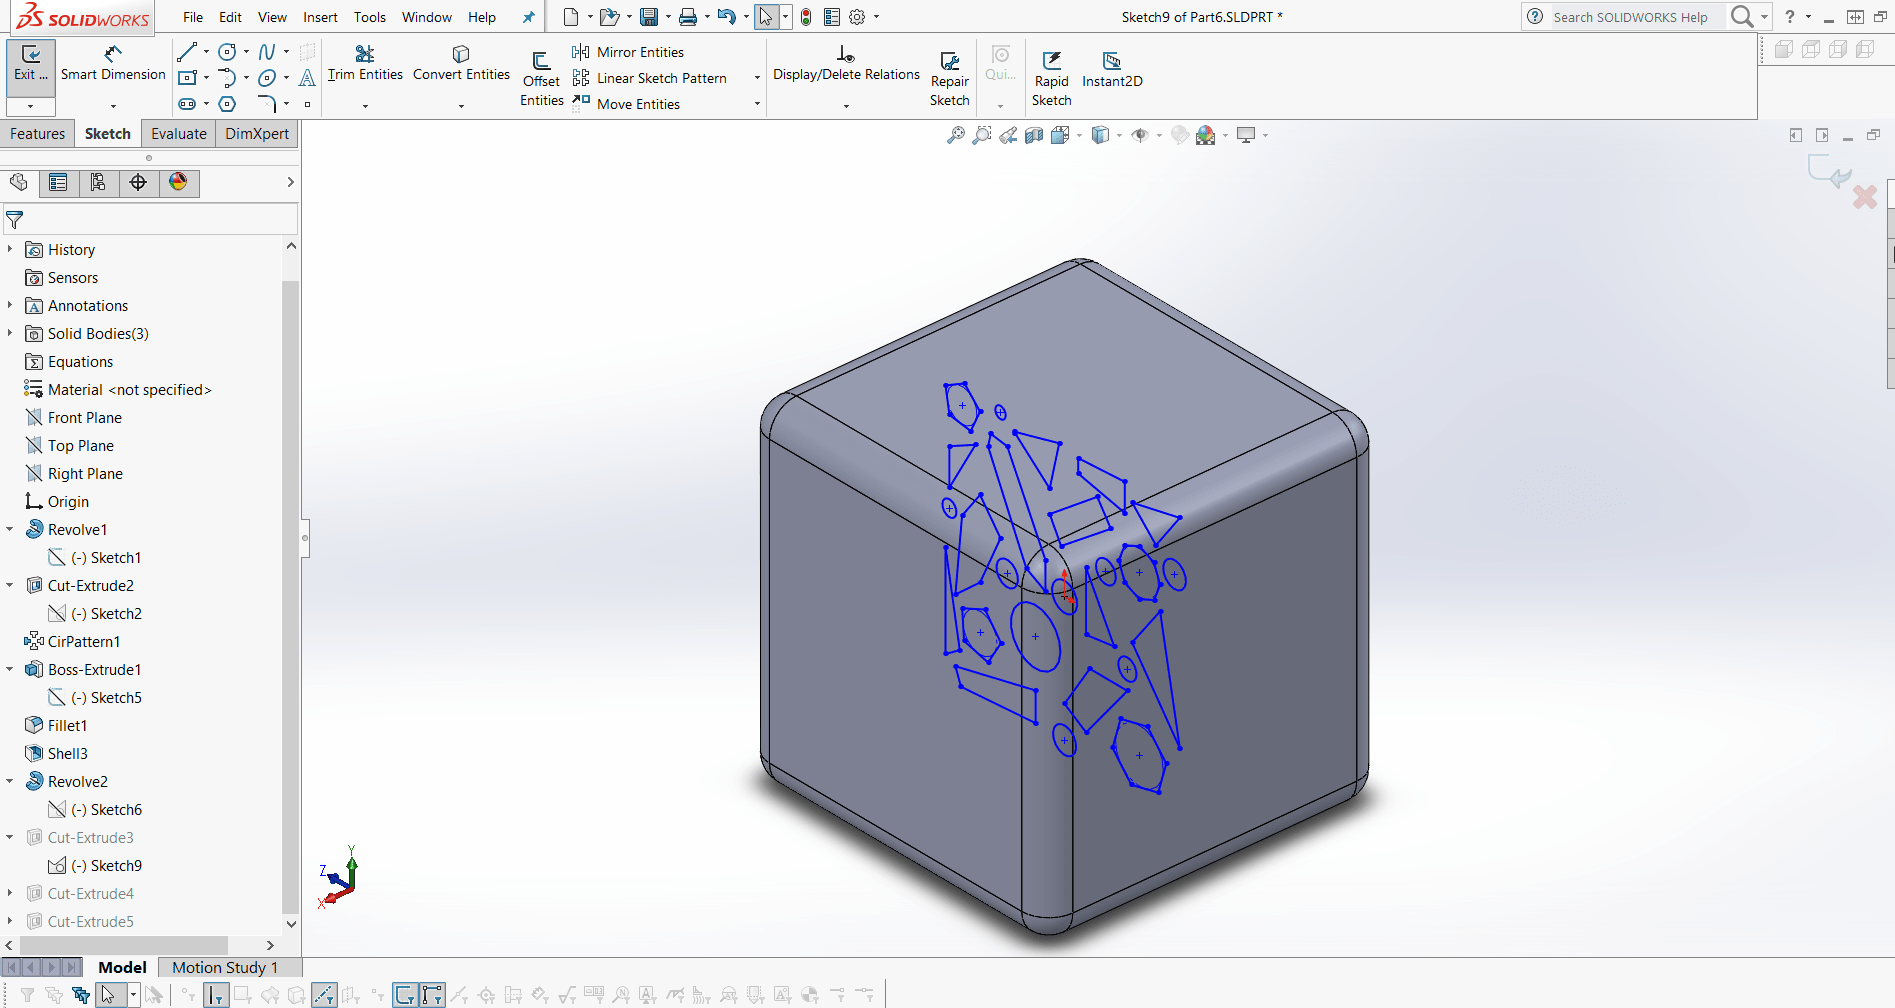
Using cut extrude feature the holes of different shapes were projected on the suface and cut through the surface.
The Wheel
Section View
Final look
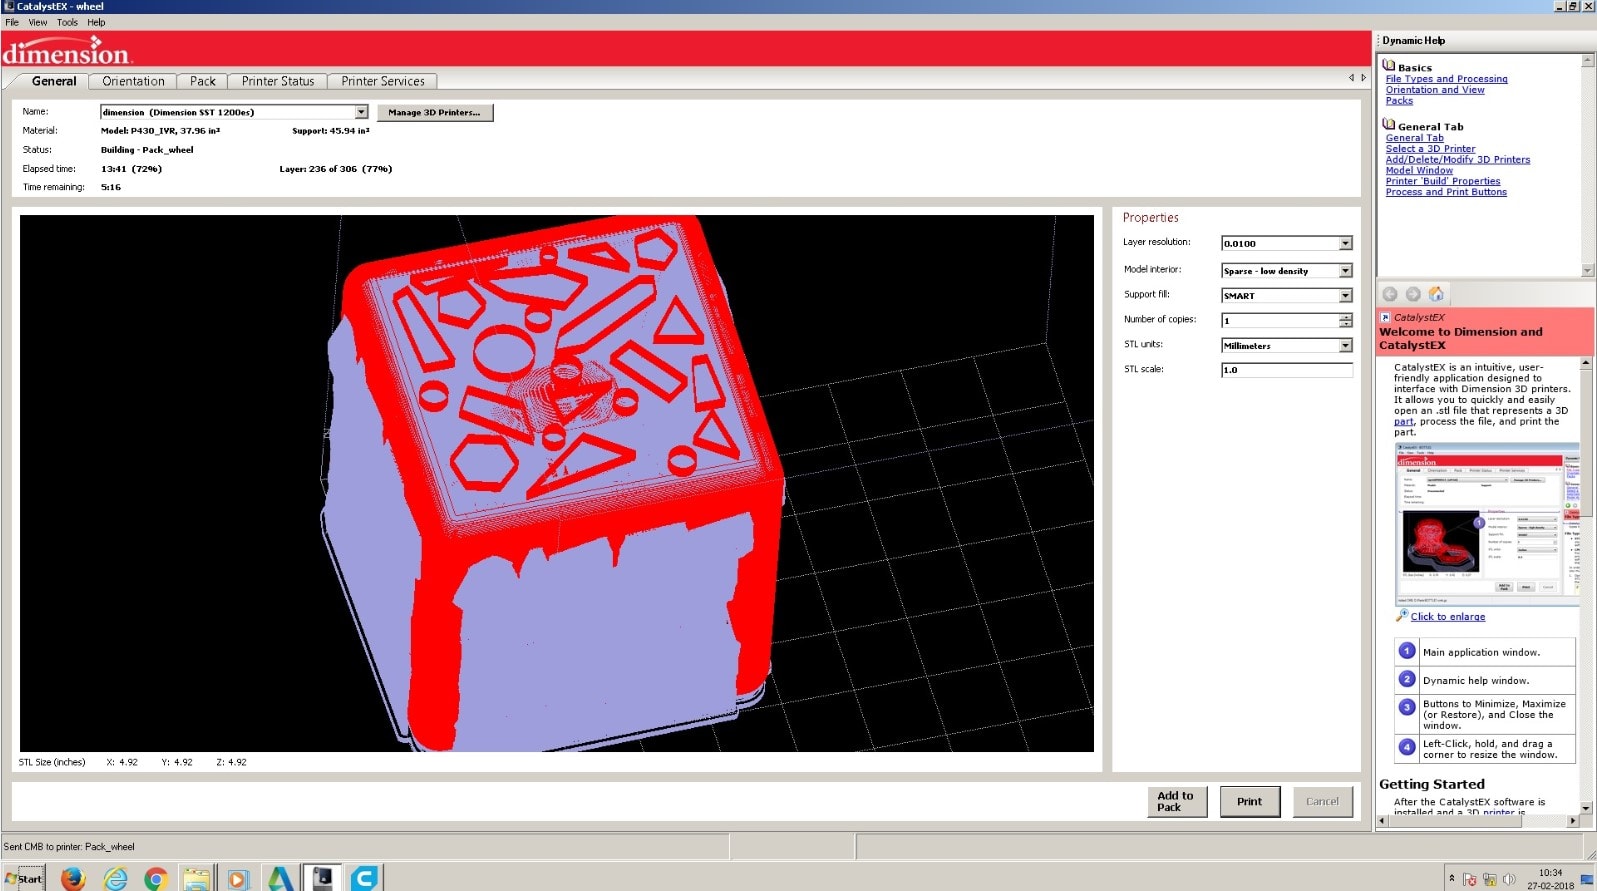
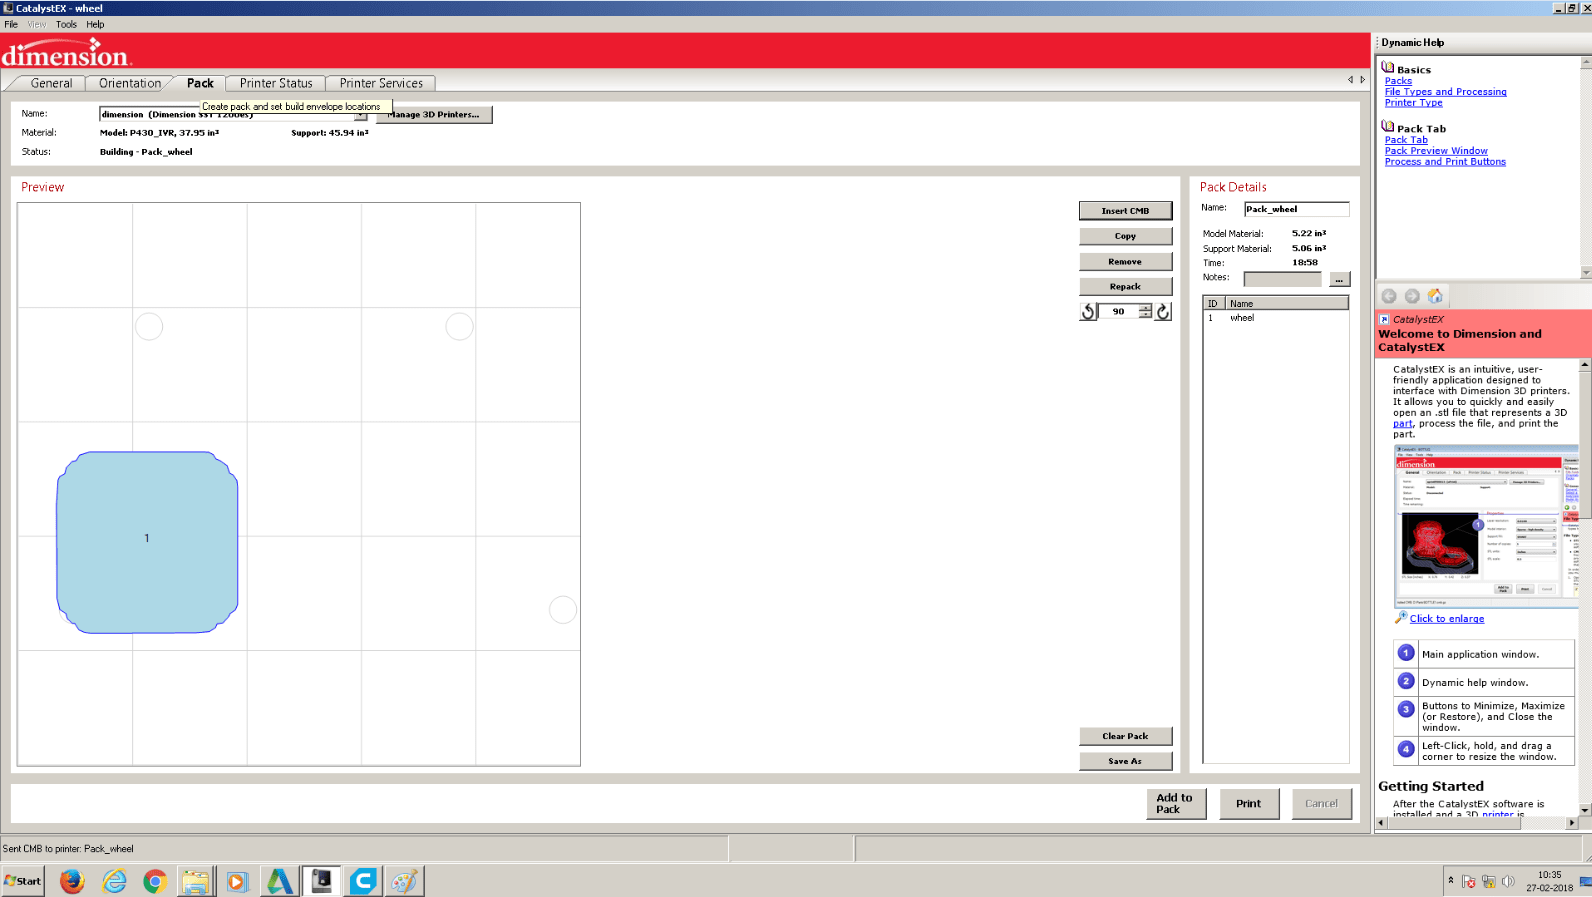
The final product was great. There was a lot of support material in the model and it took a long time to
be removed completely.
The support I had put in the design to hold the inner wheel in place broke off when the support material was dissolved