Networking and commmunication
Goals
- Study a Datasheet of a microcontroller
- Program the hello world board build from electronic design week to do something
since i am programming ATtiny44 microcontroller i choose its datasheet to study more about it
ATtiny44 Microcontroller
ATtiny44 is a microcontroller from AVR Microcontroller family. It is a High performance, low power ,8 bit microcontroller.It follows advanced RISC Architecture .
Pin Configaration
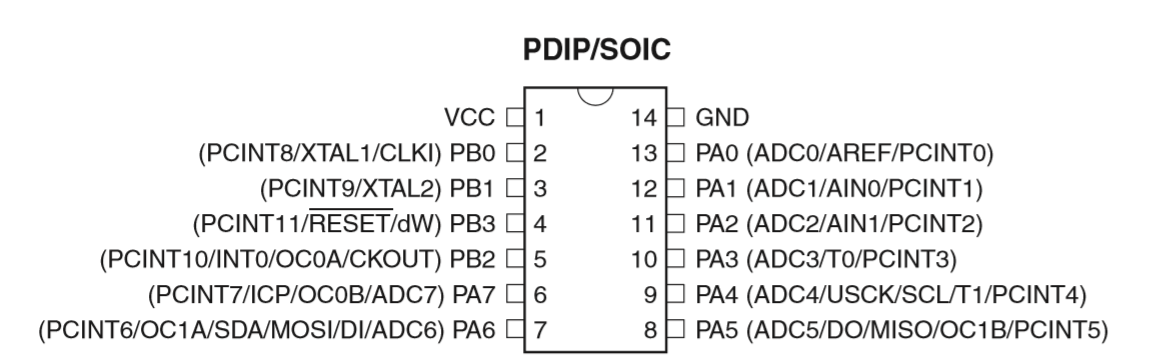
- VCC - It provides the supply voltage
- GND
- PortB(PB3:PB0) : It is a I/O Port with boidirectional data transfer.
- PortA (PA7:PA0):It is also a 8-bit I/O bidirectional board with internal pul up resistor.
- RESET :It is an inverted RESET pin.A low level pulse more than minimum length will reset pin.
Pin description
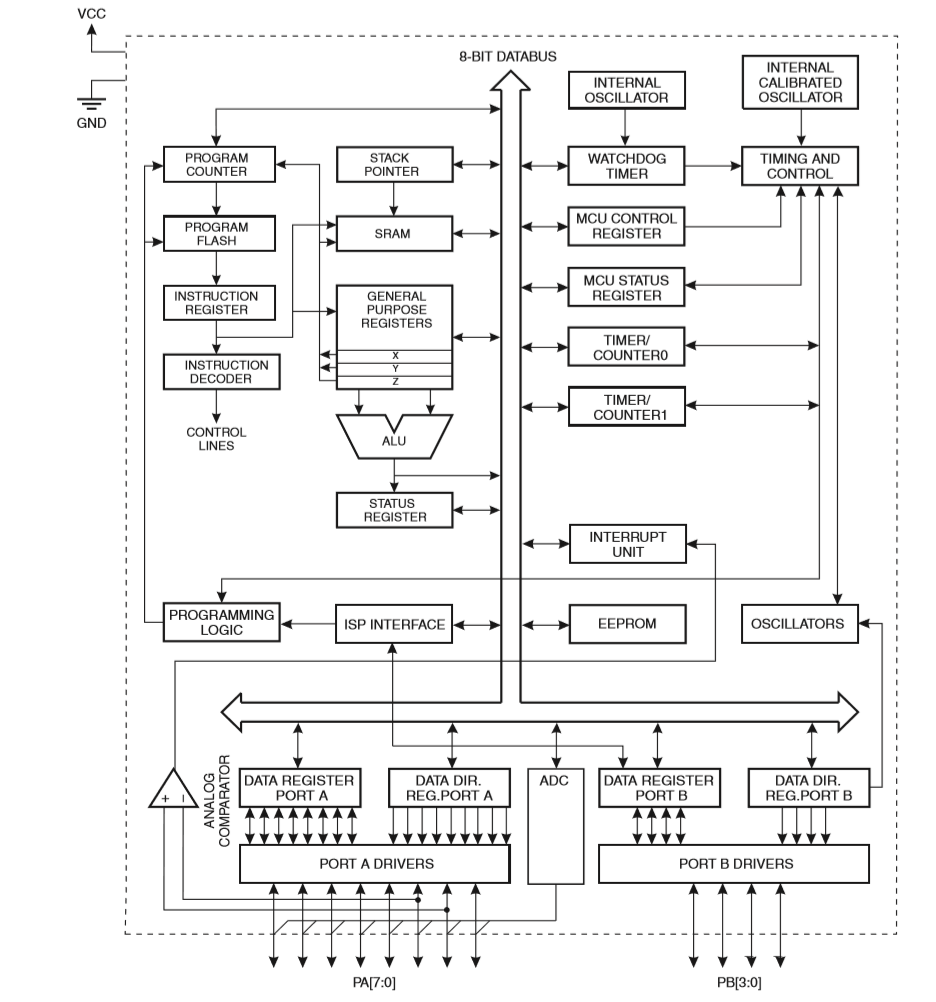
Block Diagram of ATtiny44
Programming Board
In order to program the board i have to identify the ports to which LED and Button are connected.So i refered my schematic to find the ports to which both components are connected.
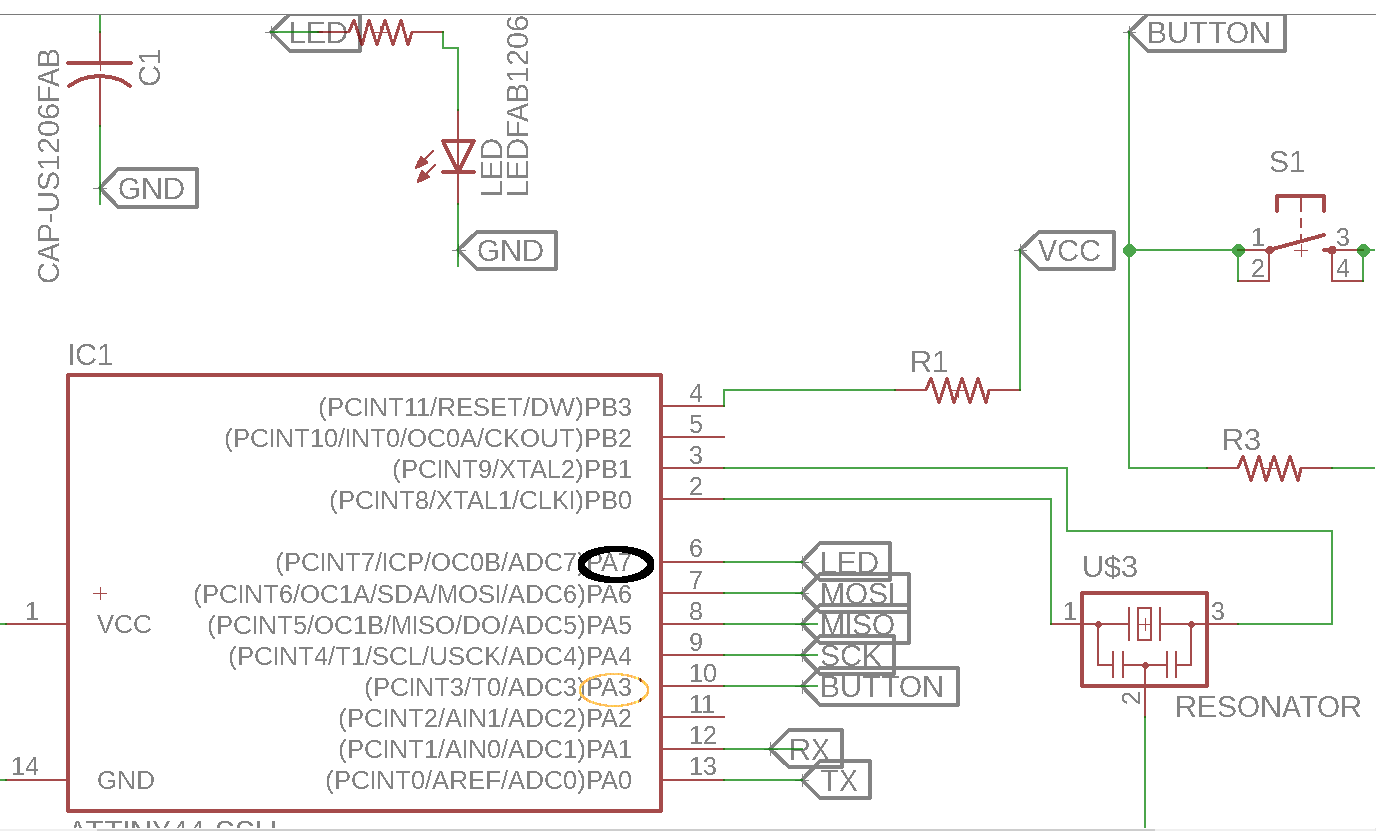
From the Schematic_image it can be seen that LED is connected to PA7 and Button is cnnected to port PA3.
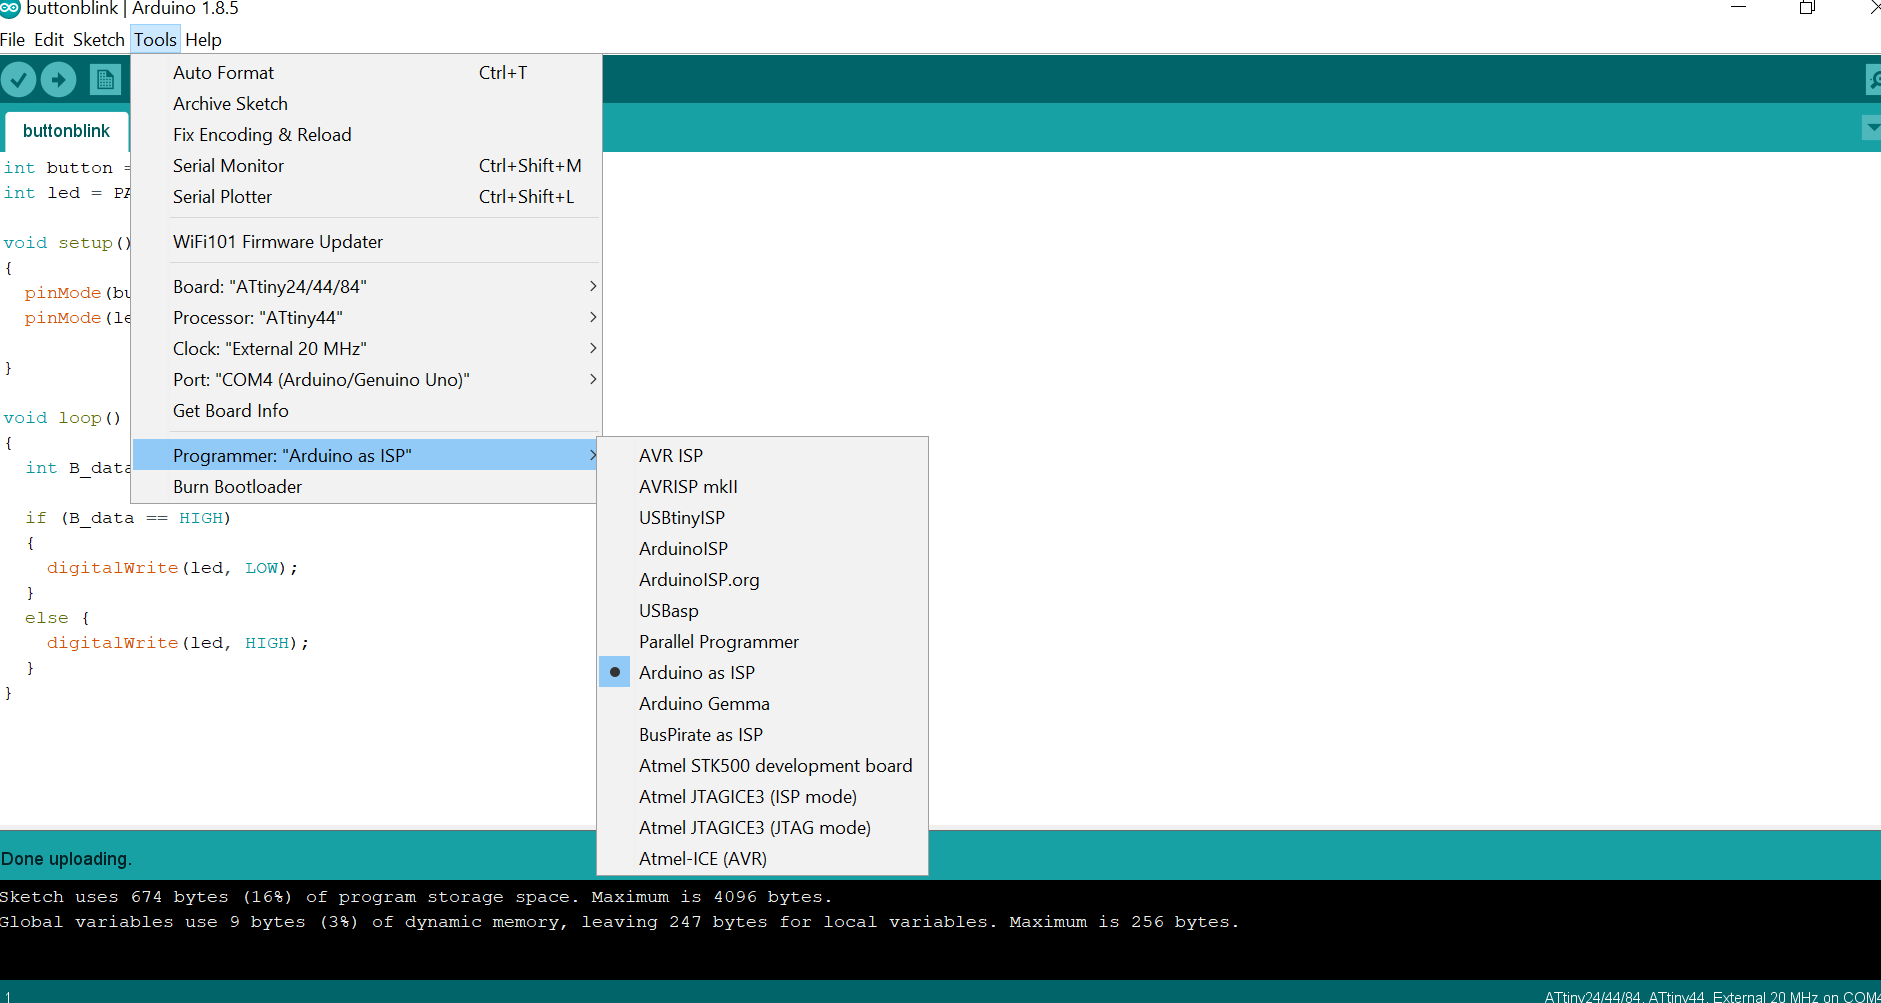
Blinking LED using Button in ArduinoIDE
Open the ArduinoIDE and install ATtiny44 board driver.

After installing driver set board to ATtiny44 and programmer to USBtinyISP. I wrote a simple LED blink code in c.
int button = PA3;
int led = PA7;

void setup()
{
  pinMode(button,INPUT);
  pinMode(led,OUTPUT);

}

void loop()
{
  int B_data = digitalRead(button);

  if (B_data == HIGH)
  {
    digitalWrite(led,LOW);
  }
  else{
    digitalWrite(led,HIGH);
  }
}
Blinking LED using Atmel Studio
After downloading Atmel studio select new project and select ATtiny44 from the device list. Then go to tool window.

After opening the project i wrote a simple Blinking LED program in it
              #define F_CPU 20000000UL

                    #include <avr/io.h>
                    #include <util/delay.h>


                    int main(void)
                    {


                      DDRA = 0xFF;


                        while (1)
                        {
                        PORTA = 0xFF;
                        _delay_ms(1000);
                        PORTA = 0x00;
                        _delay_ms(1000);

                        }
                    }
Arduino as a programmer
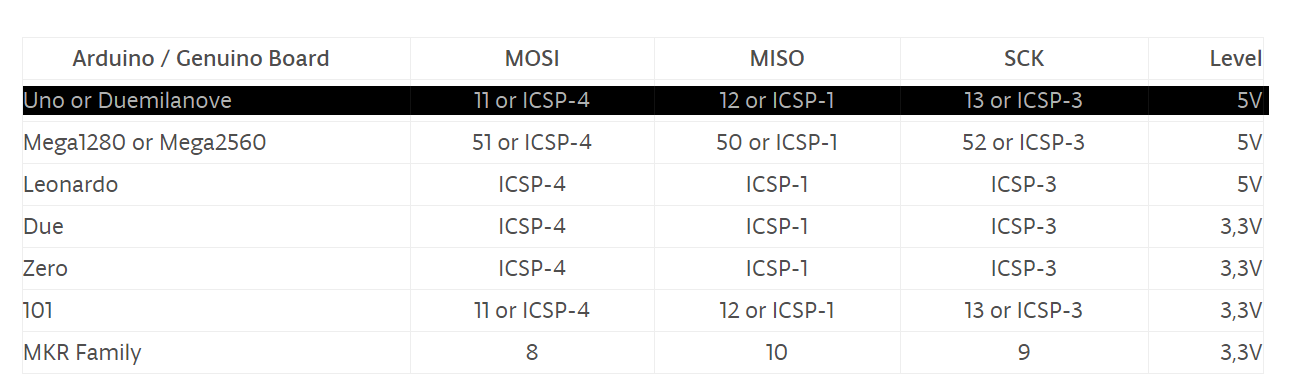
Alternative to USBtiny we can also use arduino as a programmer
Inorder to connect arduino board with the Custom board we builti have to find the pin corresponding to AVR isp header. So i refered the arduino official site find the pins