Week 10
Moulding and Casting
Group assignment
Individual assignment
Learning outcomes:
- Design appropriate objects within the limitations of 3 axis machining.
- Demonstrate workflows used in mould design, construction and casting.
Have you:
- Explained how you designed your 3D mould and created your rough and finish toolpaths for machining.
- Shown how you made your mould and cast the parts.
- Described problems and how you fixed them.
- Included your design files and ‘hero shot’ photos of the mould and the final object.
Group assignment:
Group assignment pageReading safety data sheets and trying different casting materials:
When doing moulding and casting we have to follow a certain workflow which is:
- Designing the piece that you want to create.
- Milling that shape in wax.
- Moulding: pouring a material inside the wax mold.
- Casting: process in which a liquid material is poured into a mold, which contains a cavity of the designed shape.
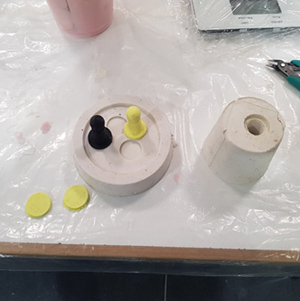
Before starting to design this week's project I did some tests with already made moulds.
1. Using Smooth-Cast-305:
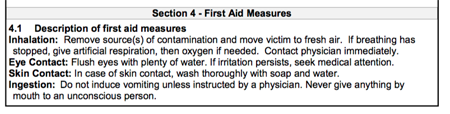
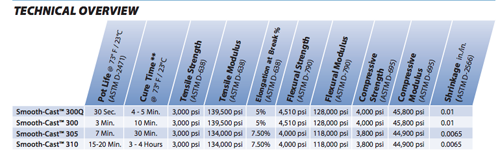
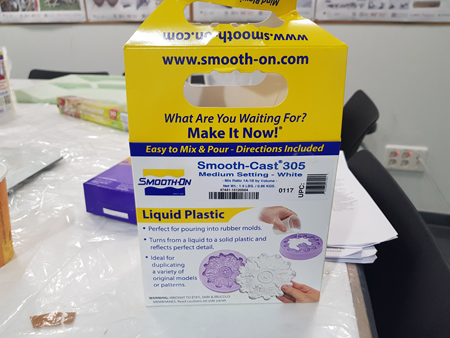 The first material that we used was Smooth-Cast-305. We read the data sheet for extracting the security information and also the volume ratio that we needed to use:
- Composition: 1A:1B by volume or 100A : 90B by weight.
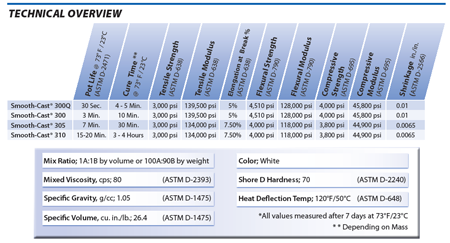
The mould that we were using was designed to create a pawn for playing chess. So, we calculated the volume of cast that we needed by pouring water inside the mould and then weighing that amount of water. Once we had that measure we multiplied by the material's density and putting 100 of A and 90 of B.
We wanted to add some ink, SO Strong colorant, to the cast, so we read its datasheet.
 As you can read, the colorants had to be added to component B before mixing both of them. We then mix the components and pour them into the mould.
In the technical overview we can also read the pot life time that the cast has, 7 min and the time that it takes to cure 30 min. We let it dry for 30 min approx and then we extracted the pawn (and the coins we did with the extra material).
2. Using Smooth-Sil-940:
I then tried another cast, the Smooth-Sil-940, which can be used with food. You have to be carefull not to use it with plastics or other materials as you won't be able to use with food afterwards anymore. The technical overview of this product is shown below:
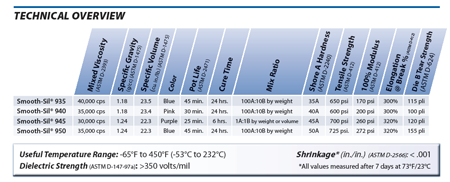 In this case the ratio of the components that we need to put is 100A : 10B by weight. The pot life is 30 min and the cure time is 24 hours. Is good that we have 30 min to mix, as in my case I had some trouble when mixing component A with B because of their consistency!
I read the security data sheet to know what risks I could had when using this cast and what precautions to take. You can download the data sheet and the security data sheet by clicking on this links.
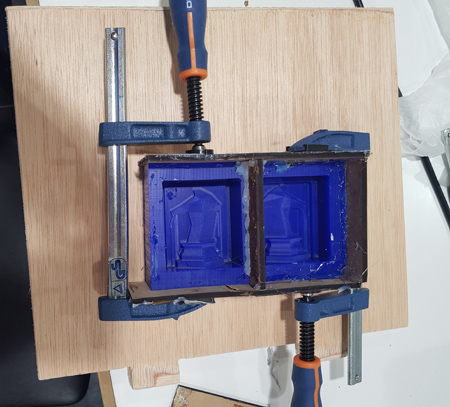 This time I was going to use this mould that was done the previous year by a student of the Fab Academy.
As done before I needed to know what volume I had to put of the mix. I filled the mould with water and then weighted it.
The weight of the water = 310g.
Then we multiplied this value for the materials density given in the previous table: 1.18 for the 940.
From the 365.8 of the toal we needed 100A and 10B. So by doing the calculus we obtain that we needed:
- 37 grams of B
- 329 grams of A.

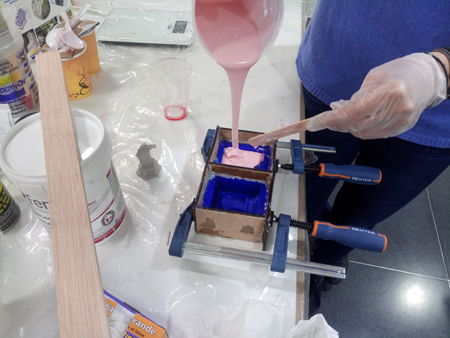
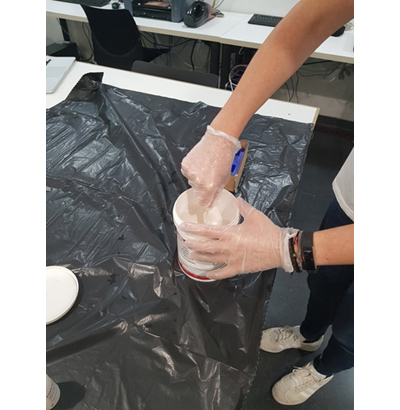
Before mixing the components I had to stir component A as it was quite consistent. Then I mixed them for 5 minutes and the material was ready to be poured.
In these two pictures below you can see me pouring the material to my mould and in the second one how it looked like once filled.
I waited for 24 hours and then I removed the cast from the mould: This was the result:
Before using it as a mould for food I checked what considerations I needed before cooking something with them:

Taking into account these safety considerations I tried my mould with dark chocolate. Here you can see the result:
3. Using SILASTIC 3481 silicone:
For the individual assignment mould I used a silicone, SILASTIC 3481.
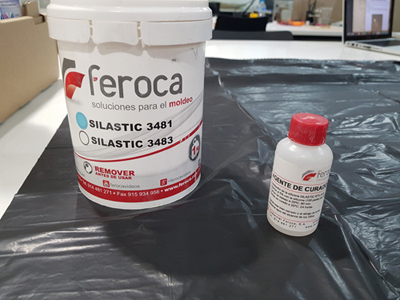
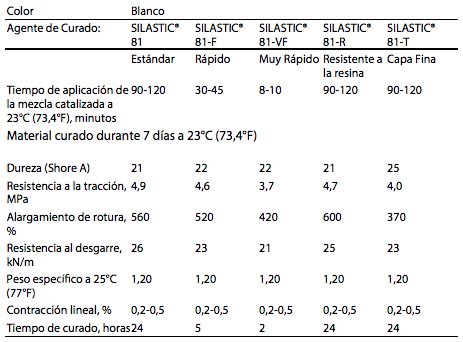
This material has an application time: of 90-120 minutes and the proportion is 100 of SILASTIC 3481 with 5 parts of SILASTIC 81. The cure time is 24h.
The properties of this material are specified in this table of the datasheet:
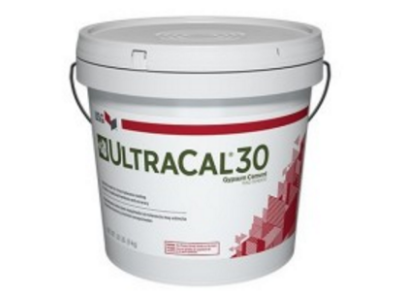
4. Using Ultracal 30 Gypsum Cement:
For the first figure that I did using my assignment mould I used Gypsum cement. The Datasheet of this material can be found on this link.
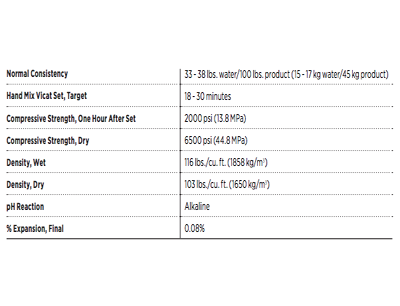
This cement needs 38 grams of water per 100 of the material, so I will explain bellow how I calculated the amount that I required bellow. It is also important to read the safety data sheet.
Individual assignment:
1. Designing a mould:
Considerations before starting to design the mould:
When we design a mould we have to take into account some considerations like:
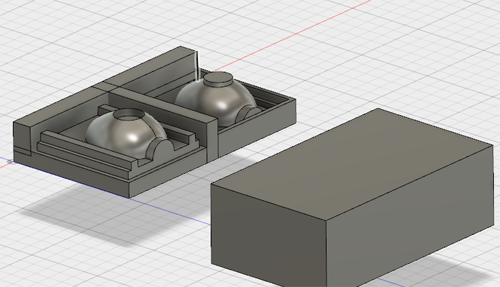
Steps that I followed for designing my mould:
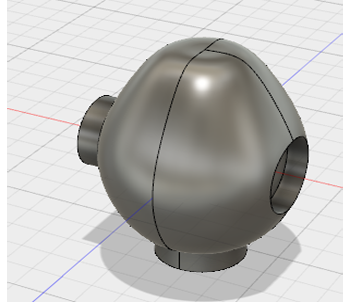
- I first created the piece that I wanted to mill in the wax.
- Then I imported that design in a new one. By doing so if I modify the piece in the original file it will be also modified in this new one.
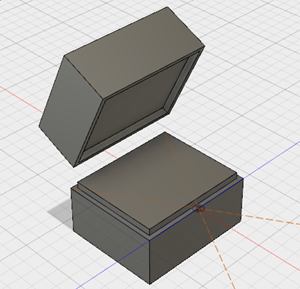
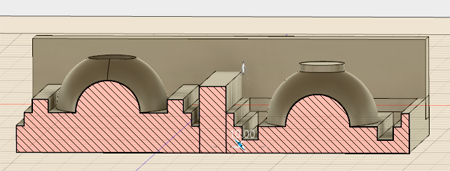
- Work with components: In the general one I will do two sketches, the first one will have the shape of the cube that will contain the figure and the second one with the joins of the two cubes.
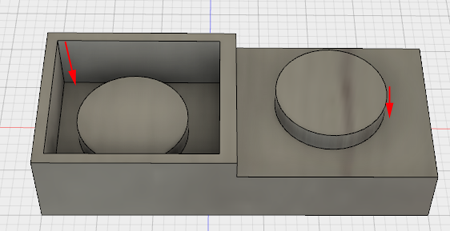
- From the sketch, create a negative and a positive cube, as we will insert the piece there and subtract it.
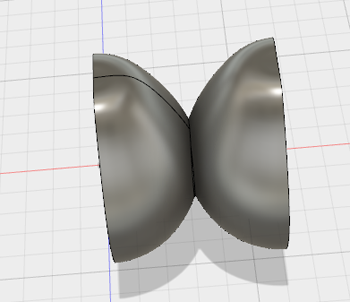
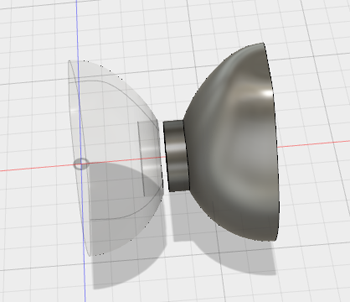
- Once I had the cubes, I placed the piece, cut in half, on each of them. What we can see in the picture now is how the silicone will look like.
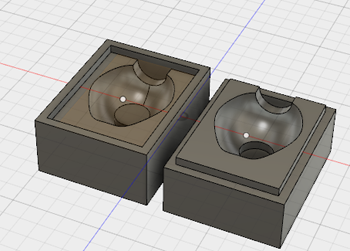
- So now we have to repeat the process, creating two more cubes to subtract that shape and that will give us the mould that we are looking for.
- To be able to pour the liquid in the mould I made some walls that I will cut with the laser cutter.
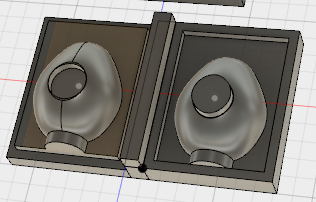
I did a Draft analysis to check how my parts will be milled. As the whole that I did to join the pieces was quite sharp I had to create drafts on those faces. That was also a fact that I had to consider, to leave TOLERANCE for the union.

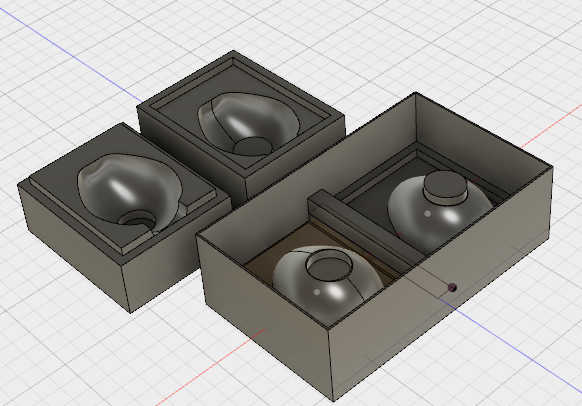
Problems of the desing:
At this point my instructor told me that if I design the union between the two faces like that, the union will be very weak and they won't close properly.
 He also advise me to fill the part that I am not using to avoid wasting the tool and also because that will reduce the milling time.

Milling the mould
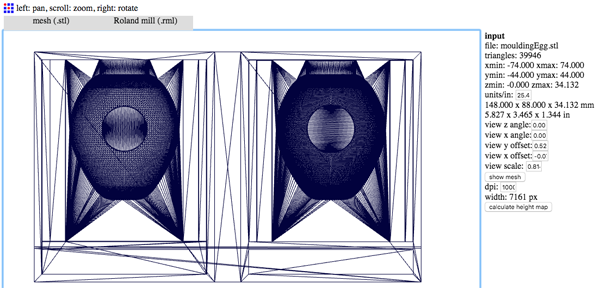
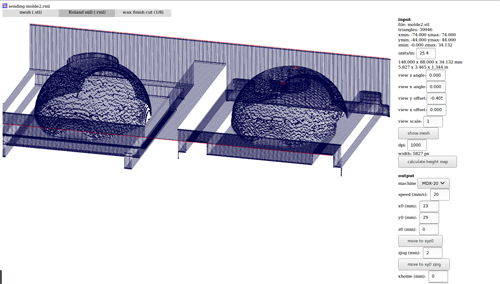
Once I had the design done I proceed to use Fabmodules to mill my wax. I opened a new window and I will work with the online server.
I selected the input file that I wanted, stl and Roland Mill. Then I calculated the height map by clicking the button that is on the bottom part of the next screenshot, changing the units as my design is in mm not in inch (25.4).
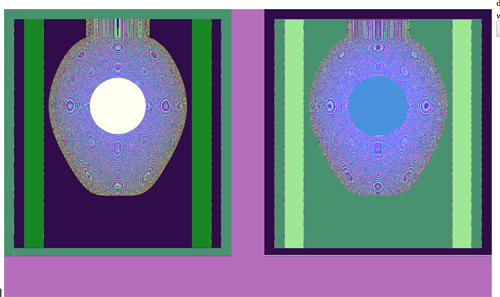
When this calculation finishes you go to process and you select Wax rough cut. You select the machine that you will be using and you click on calculate. This process takes a bit long so you can leave it calculating while doing other things. You can see on the top part of the window the progress of the calculation.
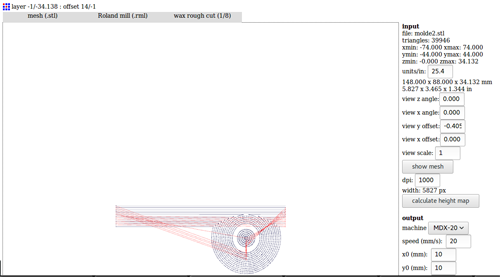
When this process finish you click on send and the machine will start milling. The first day that I was milling the mould it was taking long and I had to go to I stopped it with the idea of continuing the next day. This can be done (you will have to start from the beginning so the machine will be cutting the air for some time) but its important not to switch off the machine as you will lose the z0!.
When the rough cut finished I performed the wax finish cuts in both axis. I did first one axis and then the second one for timing reasons. You select the process on the top menu, you calculate and you send it.
The difference between these two modes, rough and finish cut, is that the first one only performs the cut with a 50% of overlap, whereas the finish cut does it with a 90%. The reason for doing it like this is to remove the bigger parts with the rought cut without taking a long time, and then performing the finish one to make it smooth.
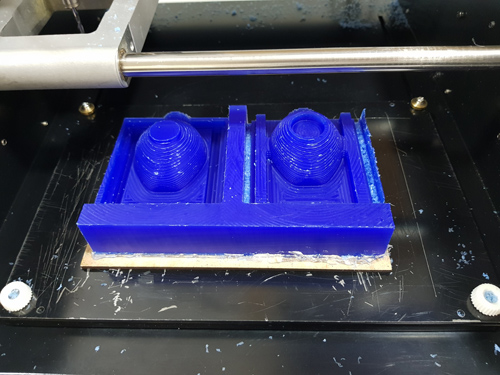
Problems when milling:
Once it finished milling the mould I had a problem, the sides of one of the faces was not separated from the wall that will make the union. This was because I didn't leave enough space between the egg and the wall, I left less than 3mm that is the diameter of the tool that I used.
So, I had to cut that extra wax and that means that I also broke part of the separation wall. I had to stick it before continuing!
I also had another problem caused by the lost of the z0. The surface was not as smooth as it should be after the finish cuts. At this point I had three options:
1. Melt the wax and do the mould again.
2. Do again the milling trying to do the zero correctly.
3. Leave it as it was. For timing reasons and also because I thought that it was actually going to look nice like this I decided to continue as it was.
I also cut with the Epilog Laser the walls of that I will use as a support. I gave a few mm of extra height in order to be more stable. I designed two rectangles one for the front and the back and two for the sides in Fusion, I exported them as a .dxf and I opened them in Rhino to send it to the Epilog.
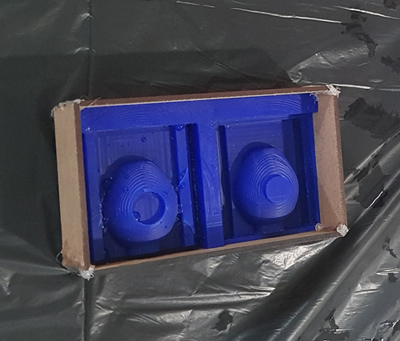
Creating the silicone mould:
For this mould I will use a silicone, SILASTIC 3481.
This material has an application time: of 90-120 minutes and the proportion is 100 of SILASTIC 3481 with 5 parts of SILASTIC 81. The cure time is 24h.
So I needed to know what was the volume of my design to calculate the amount needed of both parts. For doing so I designed the box that I will use around my mould, I calculated its volume and I subtracted the volume of the mould:
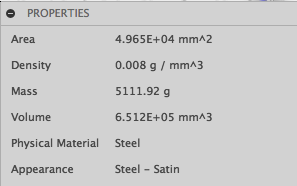
I right-clicked on both the mould and box and I selected properties to find out what the volume was:
Volume of the square box:
Volume of the mould:
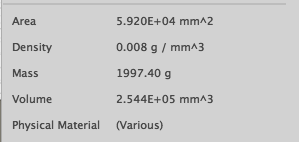
Approximate volume required of silicone:
Vsilicone = 651'2cm3 - 254'4cm3 = 396'8cm3.
Density of the silicone = 1,20 => So the mass of the mould will be:
mass = 1'2*396'8cm = 476'16 g
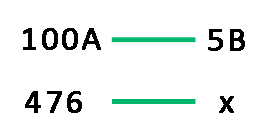 B = 23'8 g of component B
A = 452'2 g of component A
Mixing the components:
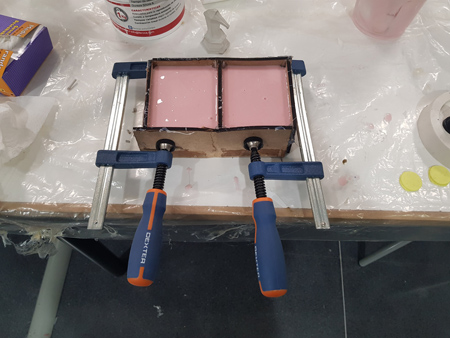
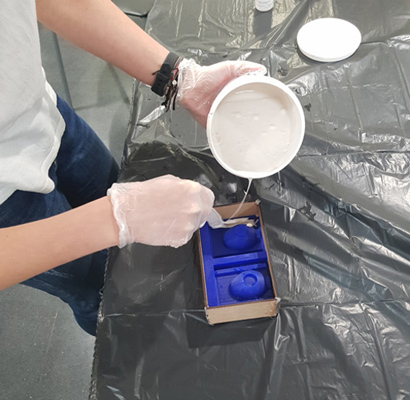
Once I had the grams that I needed from both of them I put them in a container and I mixed them until they were unified and then I poured the mix inside the mould. I tried not to create bubbles while doing this process and I let it try for 24 hours. What I did to try to avoid bubbles was:
- When I was mixing both components I tried not to insert bubbles by not pulling up and down the mix.
- When I was puring the mix in the mould I started on one corner so the mix expands uniformly layer by layer.
- Once the mix was in the mould I hit it against the table to the bubbles came up to the surface.
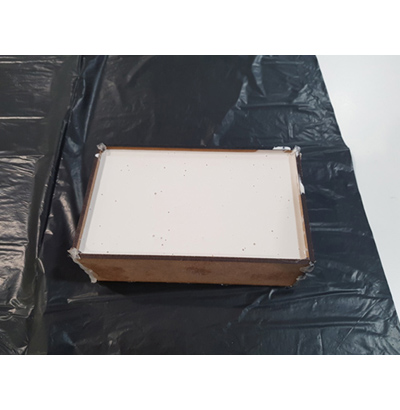
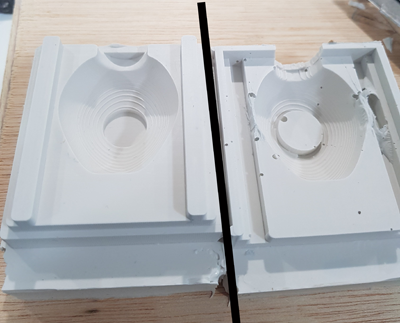
In that last picture another mistake can be observed!
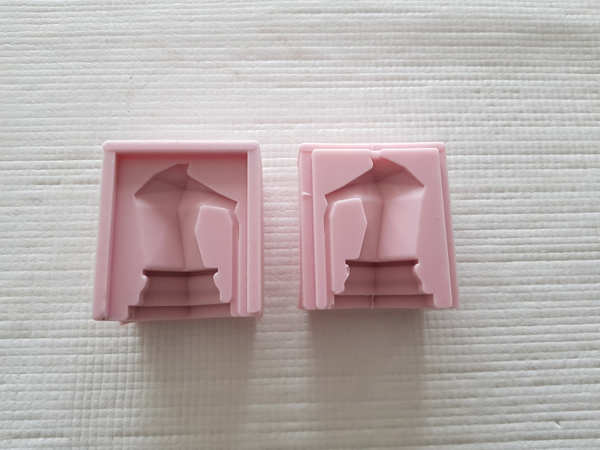
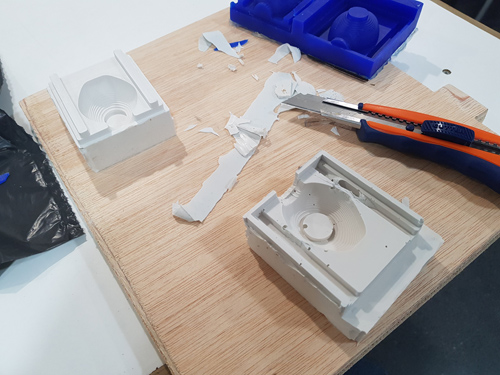
I forgot to put a piece of DM between the two moulds so they are going to be dry both of them together. Once it was dry I had to cut them to be able to separate them. I let it dry for more than 24h and I separate the silicone mould from the wax one, I cut the union between them:
Creating the figure with Ultracal 30 Gypsum cement:
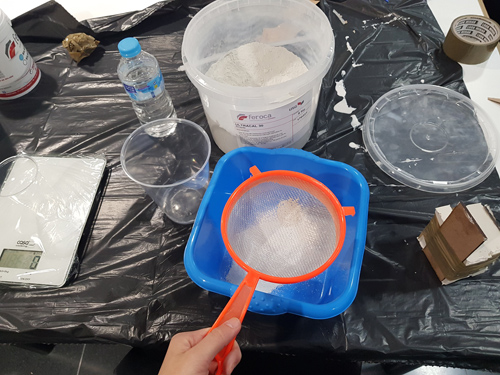
The first attempt that I did of the figure was using Gypsum cement. Datasheet: link. This gypsum cement needs 38 grams of water per 100 of the material so I went back to Fusion and I checkef what was the volume of the egg: 26mm3.
I calculated how much I needed then, and given than 38 corresponds to the total, 30 (rounding the quantitie) corresponds to 79g of Ultracal. I pured 30ml of water in a glass and then I added the Ultracal material.
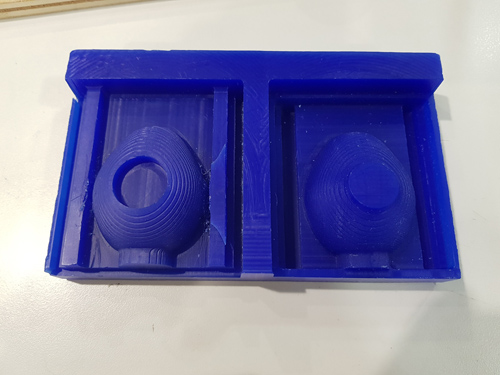
 Once the mix was done I inserted it into the mould and I waited for it to dry around 40 minutes or so. The result was not as good as I expected but enough for the first try!
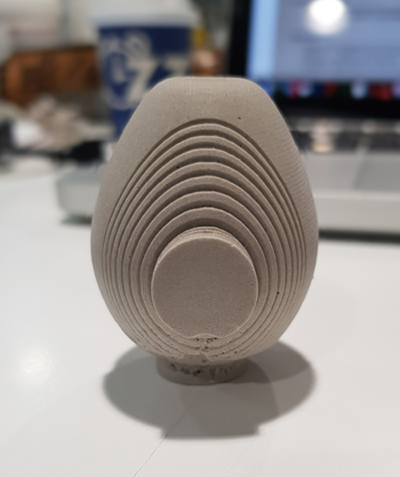
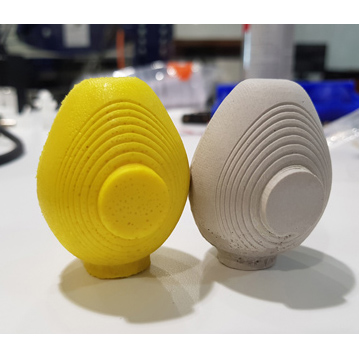
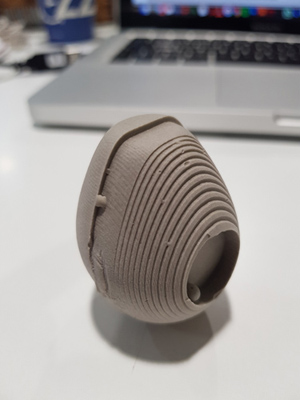
As you can see in the following pictures as I had a bubble in one of the parts I ended up with a small ball inside one of the unions. Moreover, the two moulds were not fixed perfectly so one sided was higher than the other one. In these pictures you can olso observes the lines that resulted from the non-smooth finish of my mould, as I said before I actually think that the figures looked nicer with this 'decoration'!

Creating the figure with smooth-cast 305
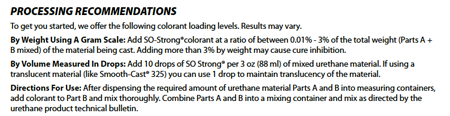
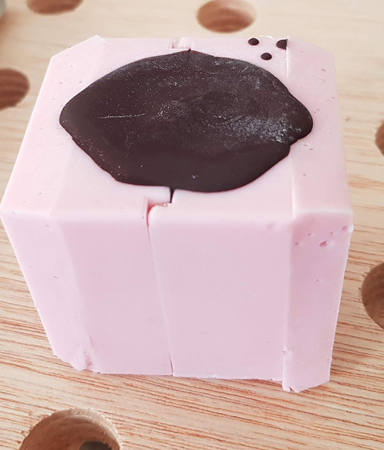
I also did the mould using Smooth-Cast 305, this time I added a colorant as I did in the chess pawn bellow. I added the colorant to component A and then I mixed component B.
This time to fix the bubble problem I added some clay in the whole.

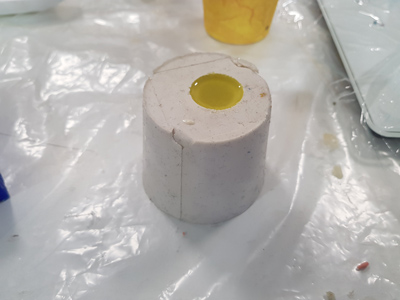
As can be read in the datasheet this cast requires 1A:1B in volume, so I used syringes to extract 15ml of each of the components as the total volume is 30ml. I mixed first the colorant with component A and then I added component B. I pured this content inside the mould and I waited for it to be dry. The pot life is 7min and the cure time around 30 minutes.
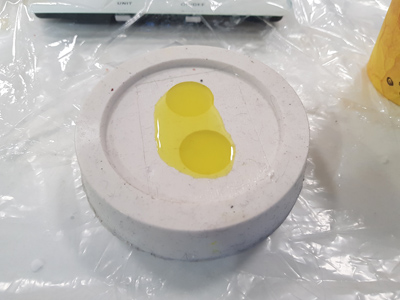
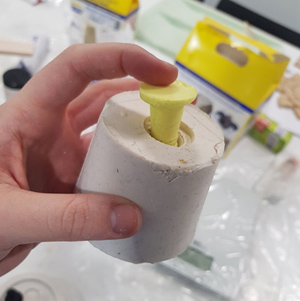
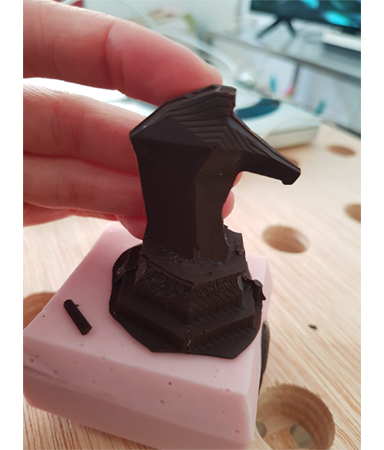
When I was adding the cast into the mould I realize that it was not enough mixture to cover all the figure so.. I decided to add a bit more. This ended uo in a kinf of volcanic eruption which gave my figure a funny shape.
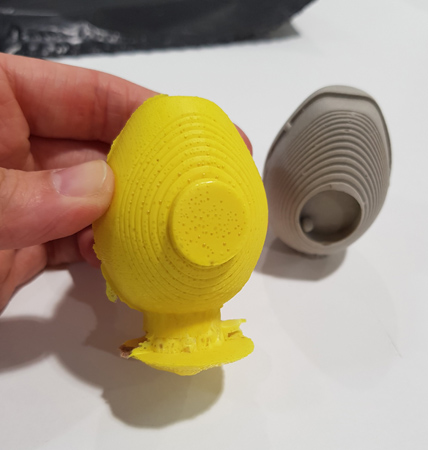
To correct this I just cut the extra part that was not suppose to be part of my figure. At least this time the moulds were align!