Week 16
Machine Design
Group assignment
Learning outcomes:
- Work and communicate effectively in a team and independently.
- Design, plan and build a system.
- Analyse and solve technical problems.
- Recognise opportunities for improvements in the design.
Have you:
- Shown how your team planned and executed the project.
- Described problems and how the team solved them.
- Listed future development opportunities for this project.
- Included your design files, 1 min video (1920x1080 HTML5 MP4) + slide (1920x1080 PNG).
Group assignment page
Final result video:
0. What are we going to use?
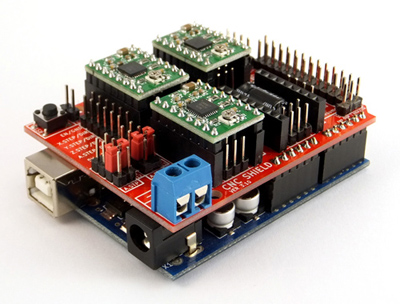
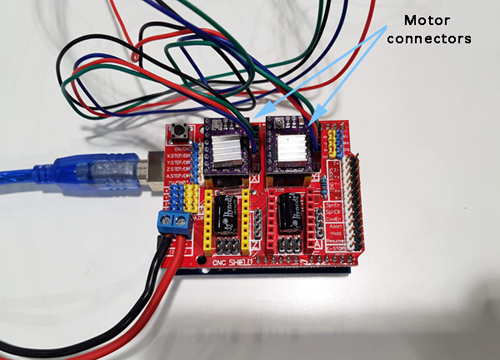
This week we are going to use Arduino CNC Shield to move the machine. This board can move up to 4 step motors: 3 independent axes and one clone axis. We will use Pololu Stepper Drivers.
1. Downloading GRBL code
For compiling grbl we followed this wiki tutorial where it explains you the libraries that are required for compiling and uploading the source code into the Arduino Uno.
The grbl libraries can be downloaded here.
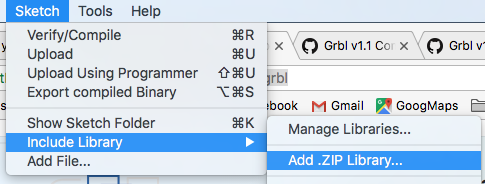
The steps that we needed to do was simply to download that .zip file which contains the libraries, open Arduino's IDE, go to Sketch -> Include library -> Add .ZIP library
 Once we have the library included we go to
 File -> Examples -> grbl, we open the example, we connected the Arduino board and we uploaded the program.

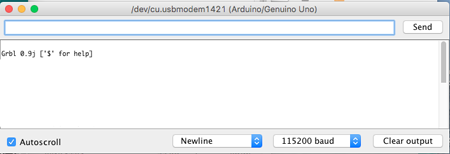
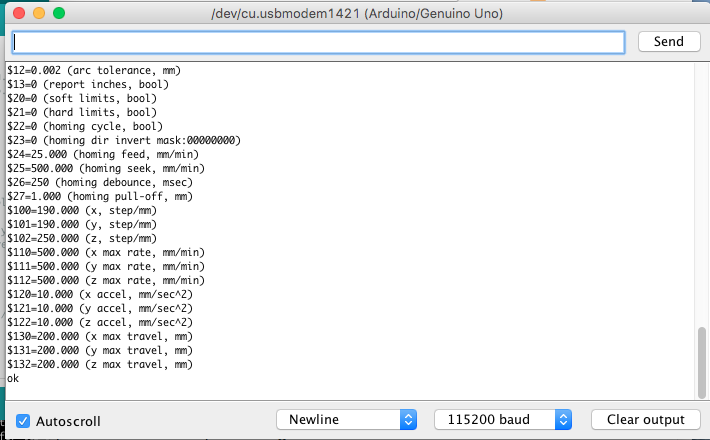
We opened the terminal to check that it was connected, setting to the default baud to 115200.
2. Setting the motor voltage reference
For this machine we are going to be using two Nema 17 motors with two DRV8825 Stepper Motor Drivers.
- The rated current of the motor is 1.7A.
- The maximum current rating of the driver is 2.2 A per coil.
Taking into account this specifications we are going to set the current limit = 1A, so we now need to calculate the voltage reference required for our motor. This can be done using this equation:
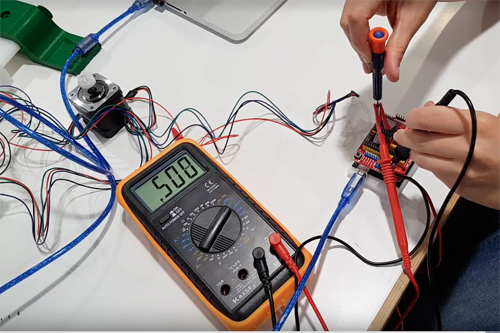
We connected the driver to our GRBL board, the USB connector of the Arduino to the computer and the power supply (at 12V) to the VCC and GND connector of the GRBL board:
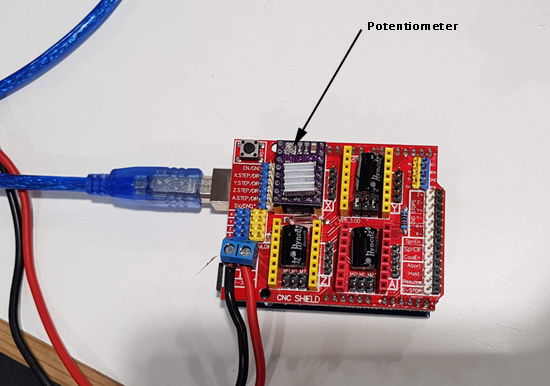
And following this video tutorial we measured with 20V in the multimeter the voltage reference on the top of the potentiometer. We turned the screw until the voltage was less than 2V. Then we changed the multimeter to 2V (to have more precision) and we continued lowering the value down to out goal: 0.5V.
3. Testing that the motor was moving
Before starting to change the different parameters we tested that the motor was working. We opened the serial monitor and we entered G91 G0 X10 and G91 G0 Y10 for both motors to move '10 mm'. The distance is still not accurate as that will have to be set depending on the motor specifications.
4. Setting the steps per mm
Grbl needs to know how far each step will take the tool in reality. In order to do so we used this equation:
We are going to use a microstep = 8. Then we needed to now the number of steps/revolution of the motor. We looked for that information in the Nema 17 Datasheet = 200 steps / revolution
The mm_revolution were calculated with the value that we have set in grasshoper for the number of steps in a mm. We have to divide the motor steps of revolution by this value to obtain how far we go in each revolution.
This value needs to be specified in the GRBL settings. We open the serial monitor and we write :
$100=189.973 for the x axis and $101=189.973 for the y axis.
5. Testing the machine
To be able to perform some tests with out machine we drill a hole at the end of the y axis and we inserted a pen. Then we sent commands through the Serial monitor moving the axis together to different positions: for example: G91 G0 X50 Y-30.
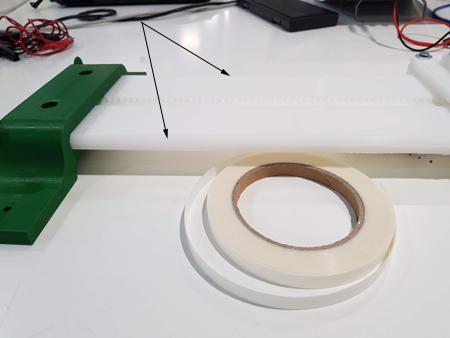
We decided to put some plastic tape on the border of the axis to reduce the friction between the different pieces. Like this the movement became smoother. By adding this we also had to release a bit the screws that were putting the pieces together as the size of the axis had increased.
6. bCNC
Once the axis were working properly we downloaded a GUI that allowed us to transform a .dxf image into Gcode commands. This commands will be sent to GRBL board and the motors will move our axis to the desired positions. In the GRBL wiki we had some GUIs recommendations. We decided to download the first one that appears in the page: bCNC.

Using bCNC
The .zip file that contains bCNC can be found in its Github page. We downloaded it and then we followed the wiki instructions to install it in my Mac OSX computer. Its important to know that this GUI works with Version2 of python. In my case I had to uninstal version3 and install the second one for it to work. Once we manage to install it we run the program by going to the file directory and typing ./bCNC.
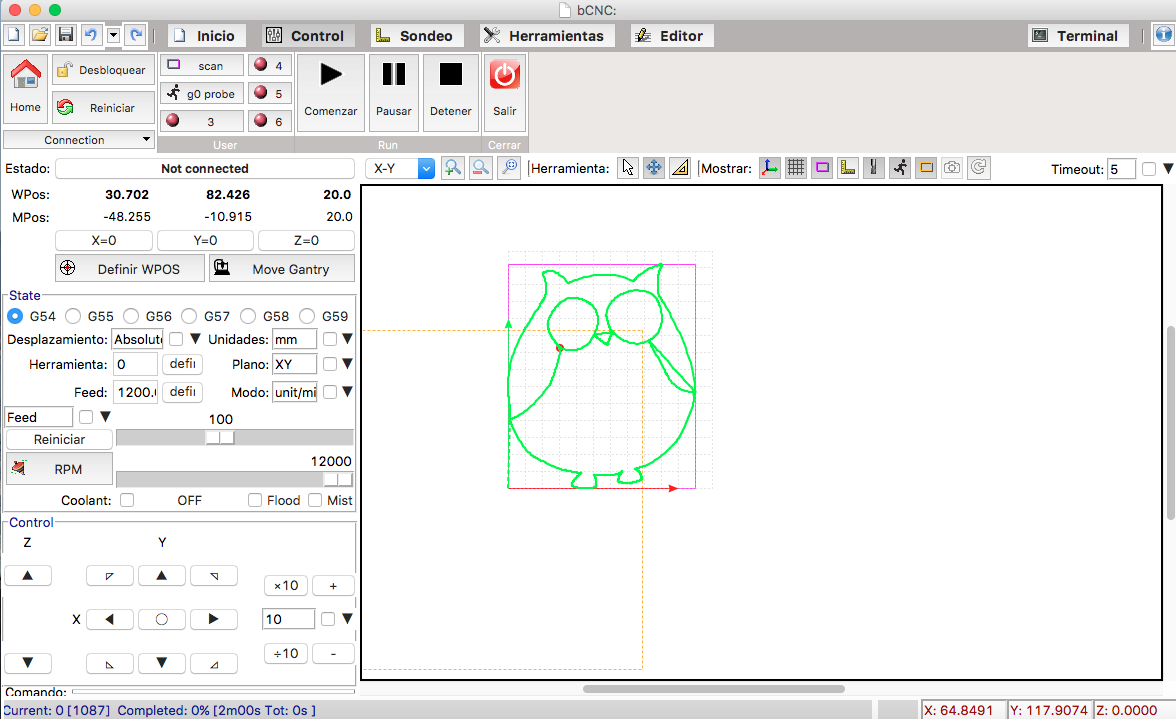
The GUI opened and we first selecting the port that we were using to connect the Arduino and then we clicked on Open file to load a sample design.
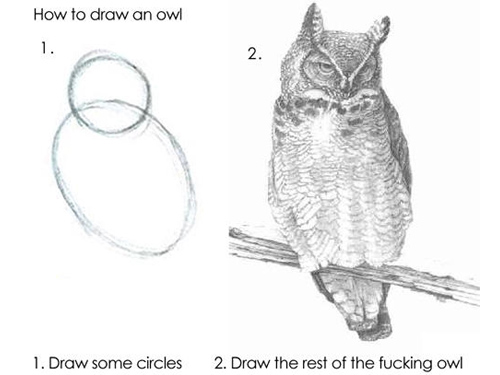
Following the advice for drawing of this week we decided to start drawing the shape of an owl...

We did a sketch of its shape in Illustrator and we exported it as a .dxf. The steps that we followed in bCNC were:
- We connected our machine and we opened the port connection in the Home window.
- We placed the pen that we have placed on the Y axis in the starting point and then we defined this point as the origin by clicking on the
X=0, Y=0 and Z=0. In our case we are not using Z but just in case. - The buttons than enables us to move the machine are located at the bottom of the window, being the center one the one that allows us to go back to the home position.
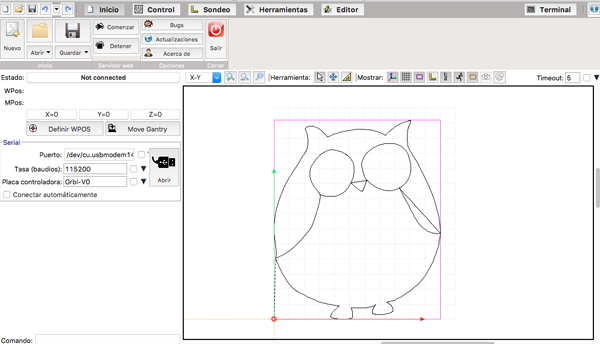
- Once we have establish our settings we opened the file that we wanted to draw in .dxf format and we went to the Editor window.
- There we moved the design to the left bottom corner and we checked what was the path that machine was going to do to draw it.
- When everything was ready we went to the control window and we started the process!

7. Future development opportunities for this project:
Next steps include designing the N-efector that will hold the pen and will allow us to draw with more accuracy.