Week9
Embedded Programming
Program ATtiny44
Assignment:
Compare the performance and development workflows for other architectures
You can see the complete documentation of group assignments on the opendot website at this LINK.
Read a microcontroller data sheet
Fot this assignment I decide to browse the complete datasheet of my ATtiny44 but for me, that I had never seen one, the interesting and understandable contents are already contained in the "reduced version" like this.
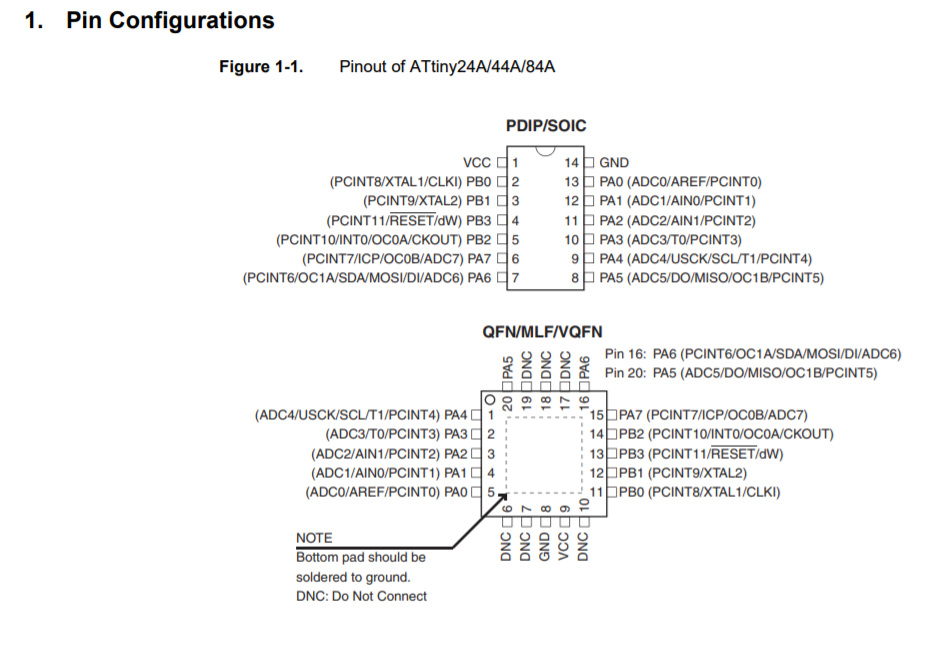
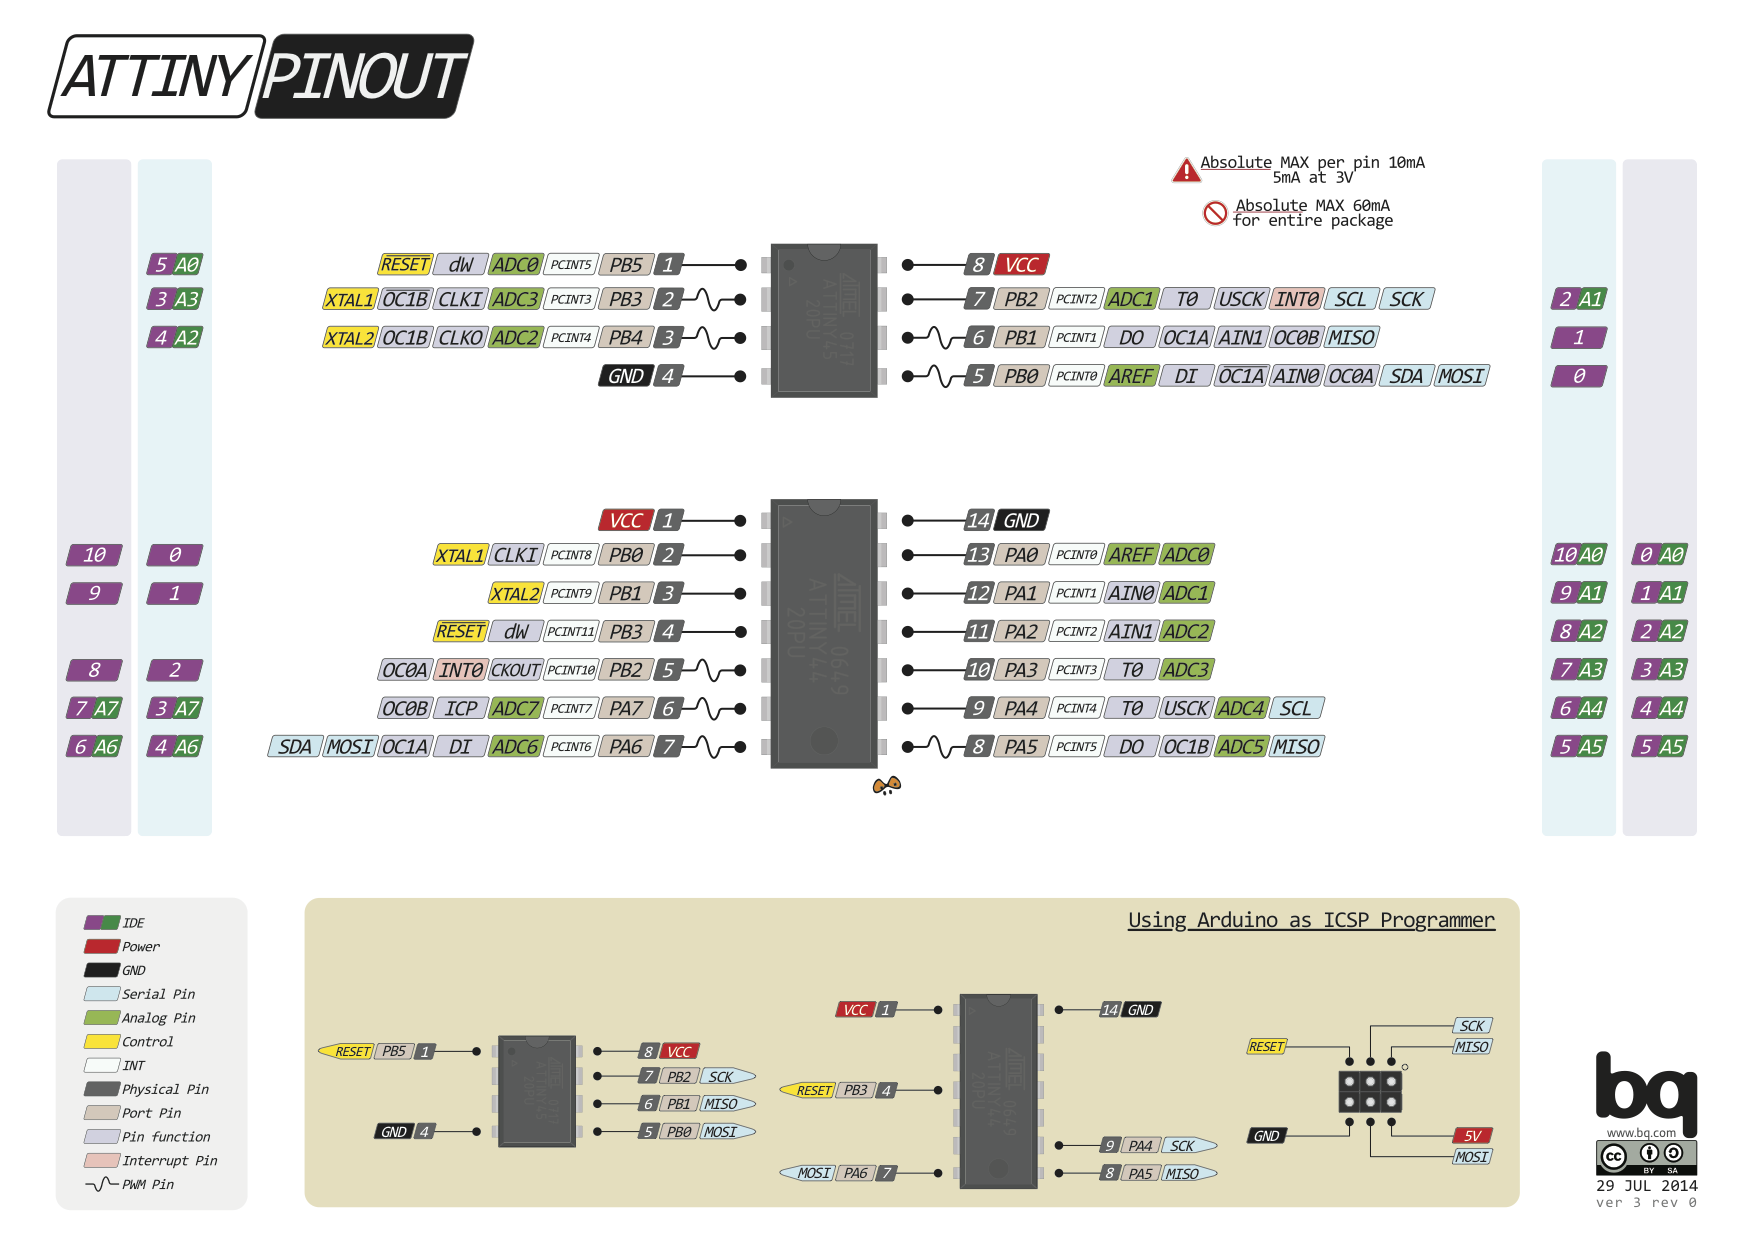
The part that I found the most difficult but also very interesting was that related to the pinout, I find that for these cards are on line a series of cheat sheets about PINOPUT that helped me to better understand how it worked.
Another interesting part was that related to the package. During the week of electronic design I had already come to check this step before inserting choose which component to import from Eagle's library.
Program my ATtiny 44
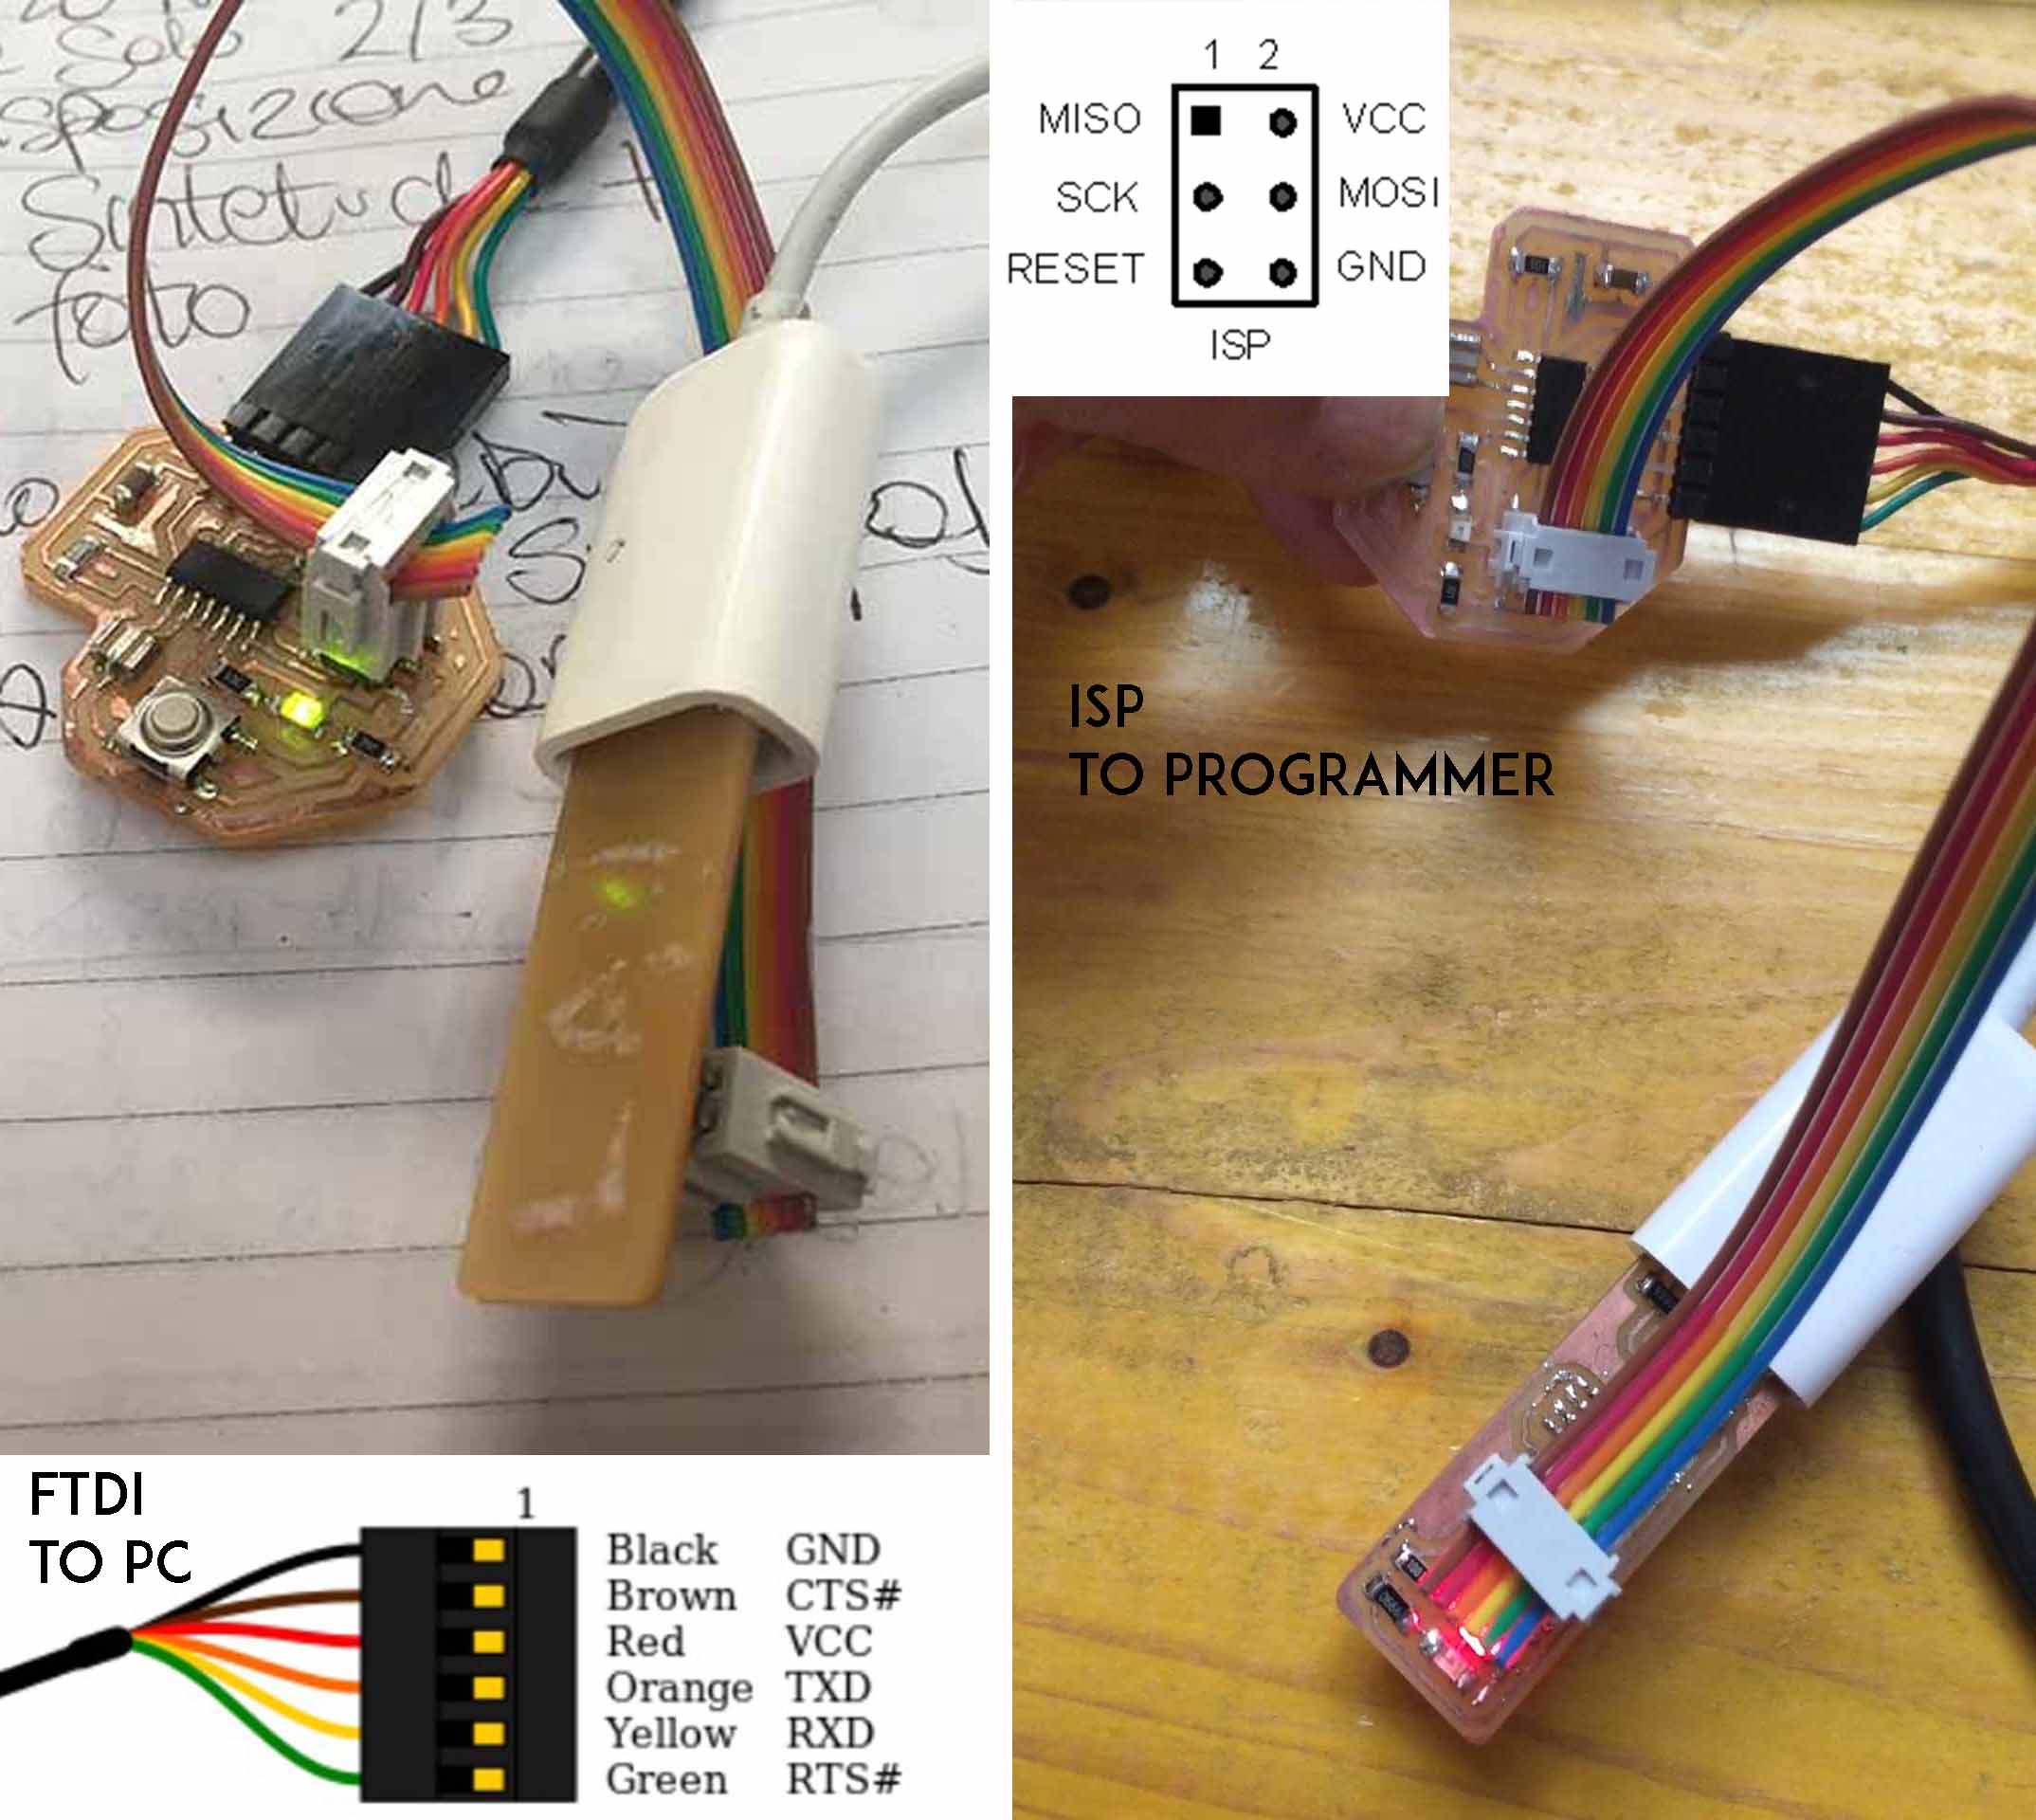 I started by connecting my board both to the power supply (in this case to my PC via FTDI) and to the programmer via a rainbow cable that attaches to the respective ISP connectors. I marked the GND on cable and on the pin because every time it was essential to open the Eagle file to review how they were positioned on the two boards.
During the Electronic design week exercise I could not resist and I tried to program my Helloboard.
I managed by following a tutorial step by step without understanding almost anything, or so I believed. yesterday opened IDE and started again to see what I remembered and, after Enrico's lesson, I managed not only to understand what I had already done, but to experiment with something different without fear of doing damage.
Thanks to Lucovico Russo's in-depth lesson, we tried to understand how to program our Attiny44 with "make" commands.
Fortunately having already programmed my programmer from this pc following the tutorial of Brian (electronic production week) I had already installed on Windows all the drivings and software necessary for this step."
Instead of launching commands from the terminal, Ludovico advised us to work with Visual Studio Code.
I do not know yet to evaluate well but for me this is very convenient because it compiles the commands in c and c ++ semiautomatically (
sometimes.
We start with modify a Make file, and it's the correct result.
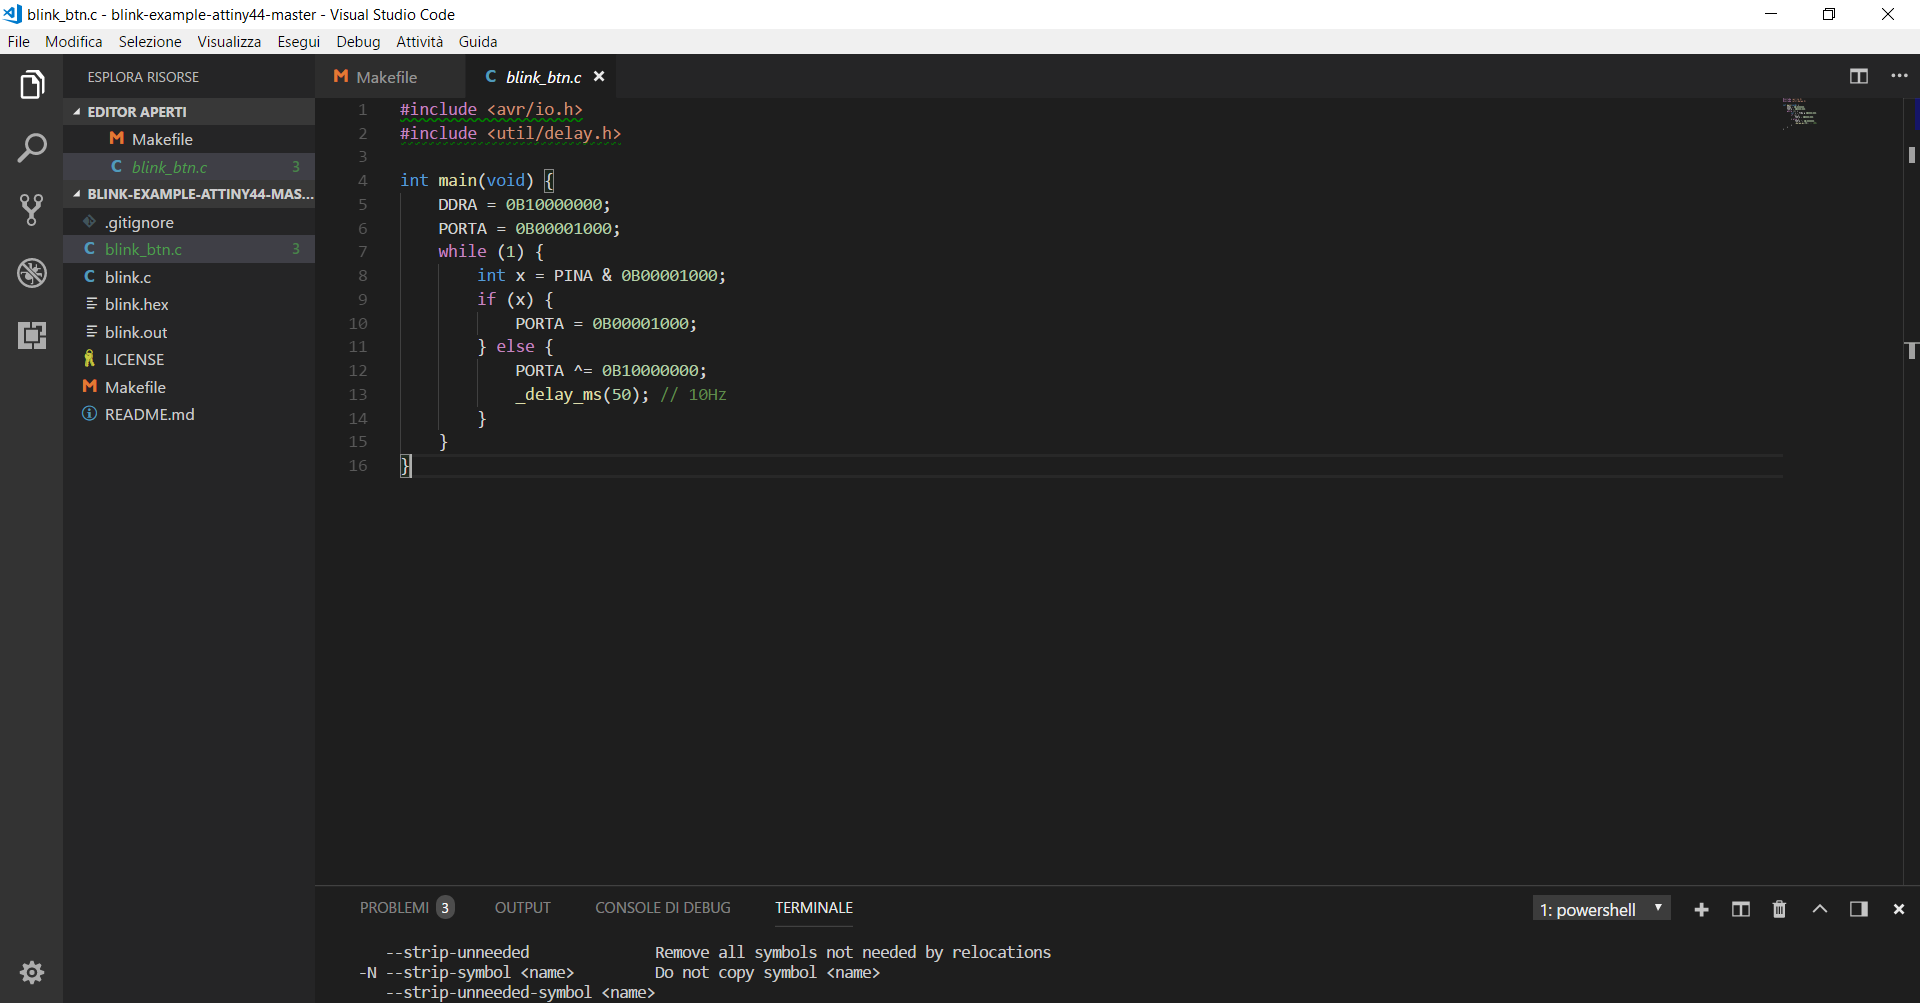
Afterwards we started to write a code to make blink Led of the ATtiny You can download all files here.
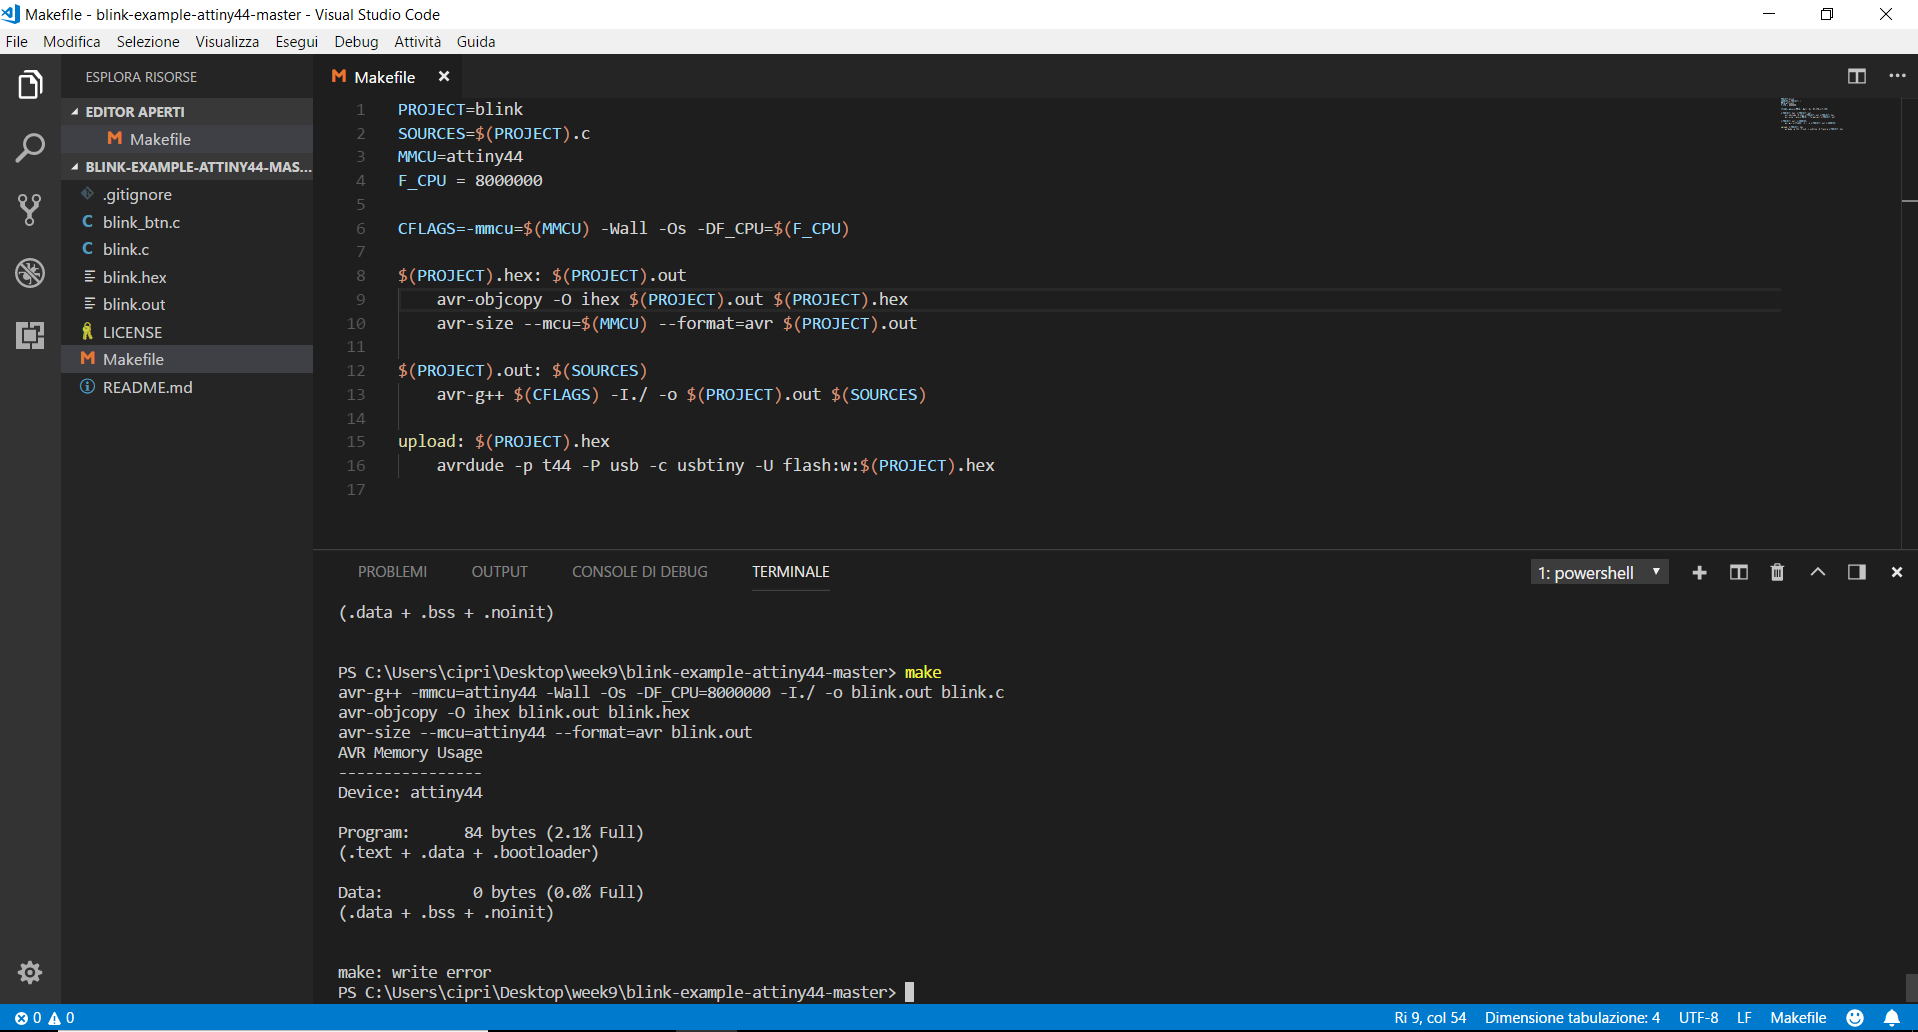
Then I tried to run the make command on the terminal (directly from Visual Studio Code Software) and the first 10 times did not work for some syntax error.
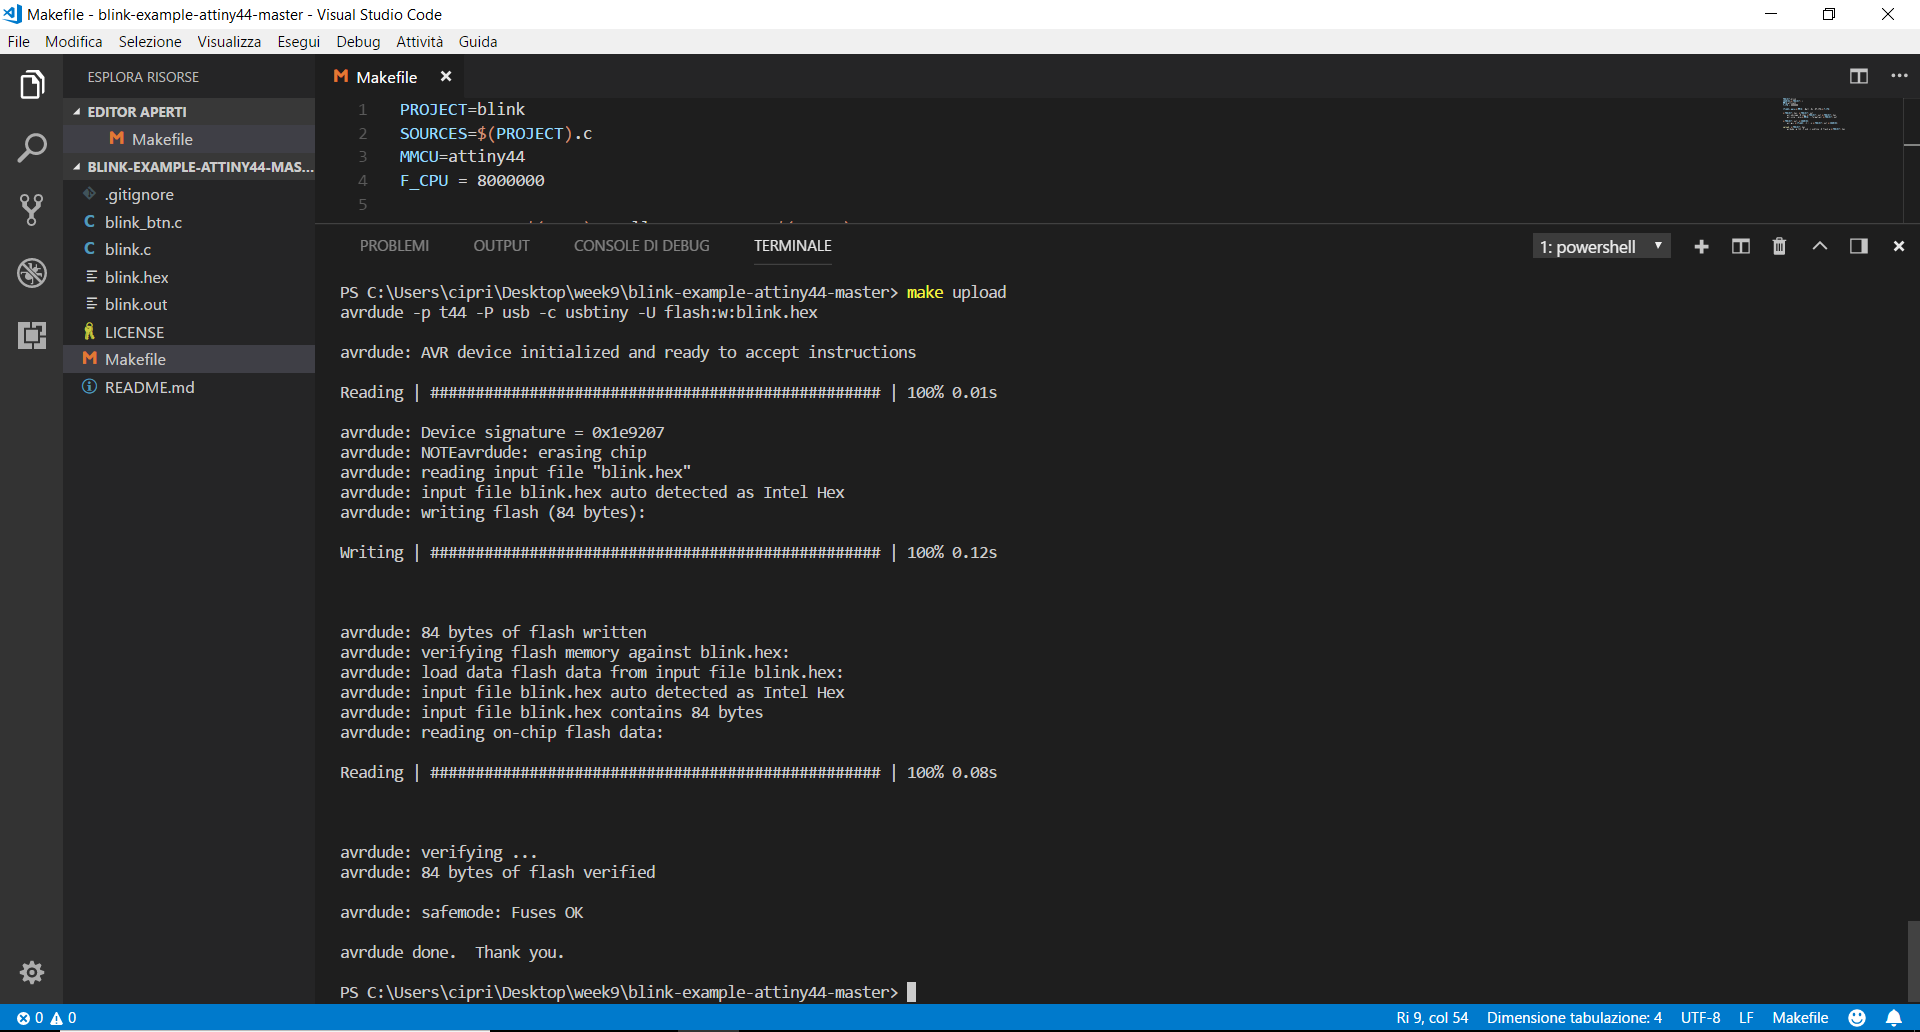
At the end, when finally the code was correct, the make command has finally generated the .hex and .out files .

Now there was nothing left but to launch the "make upload" command from the terminal to "flash" the code on the board. Remember to have the programmer connected!
blinkmake from lauracip on Vimeo.
Then I try to use Arduino IDE for programming my Hello board.
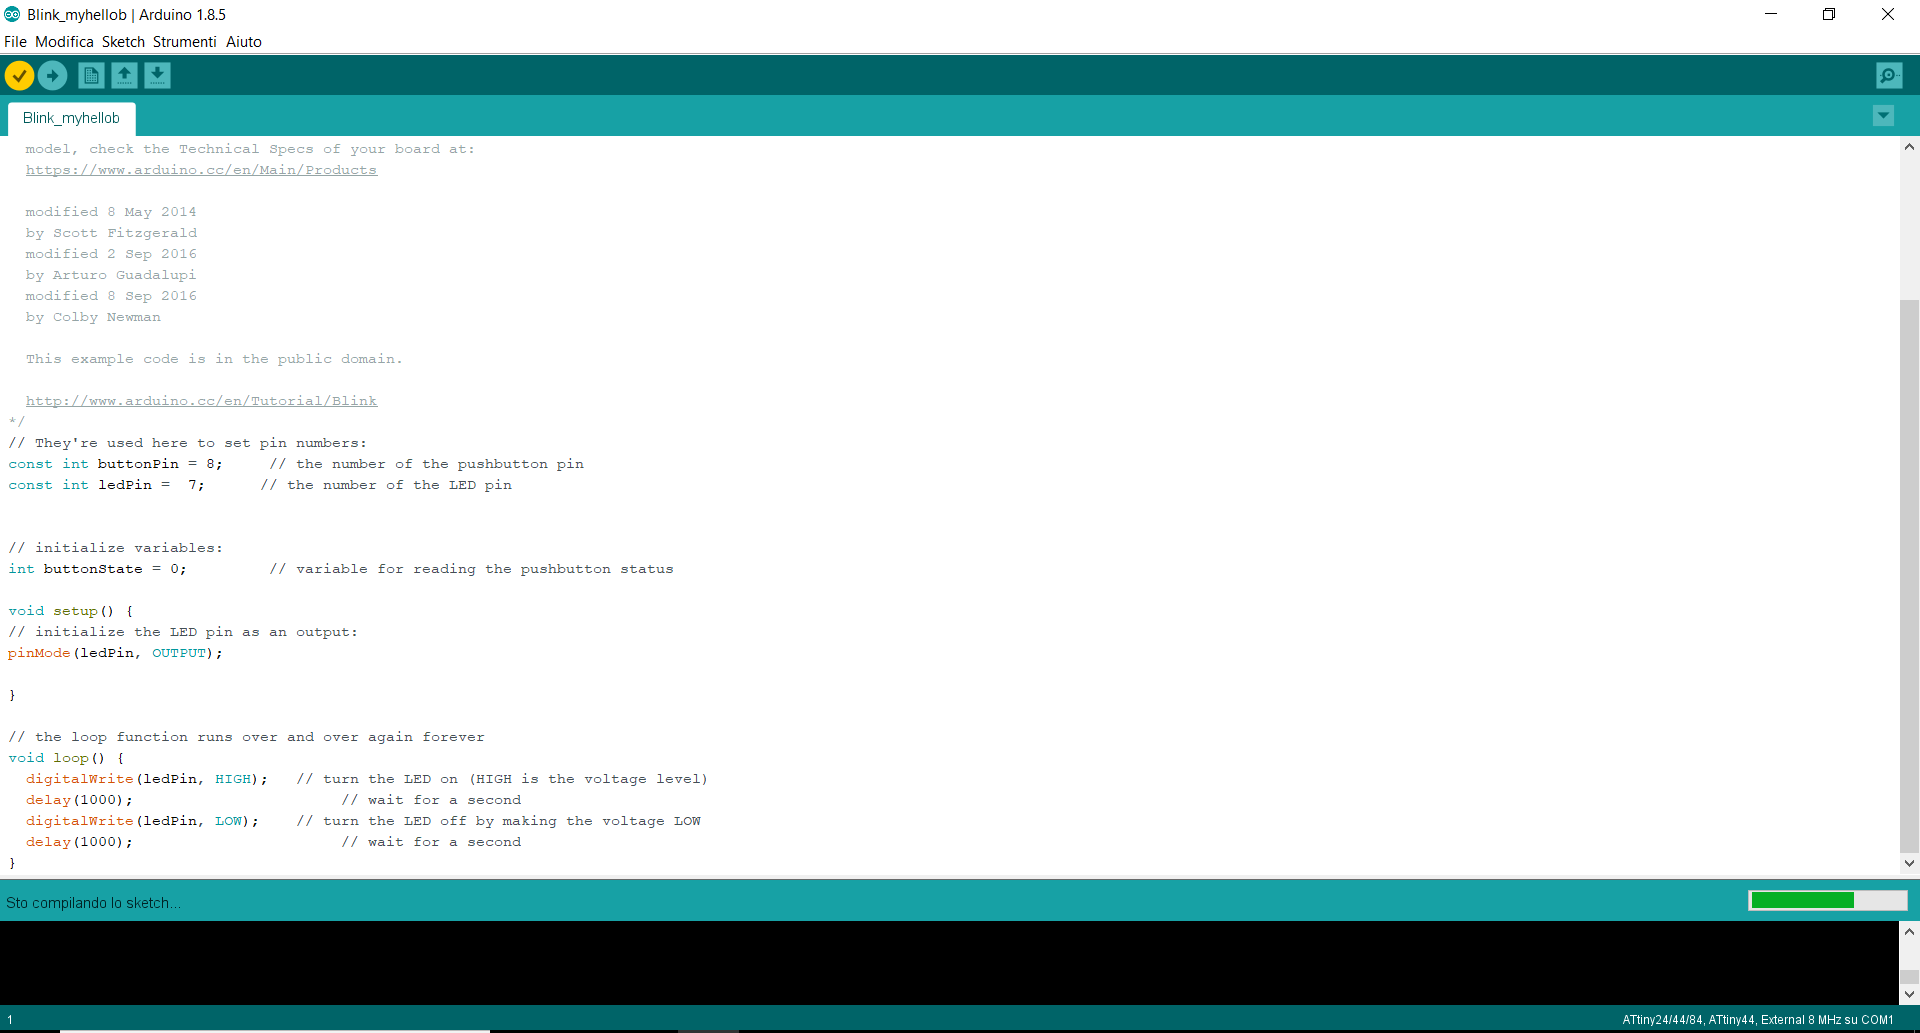
blinkarduino from lauracip on Vimeo.
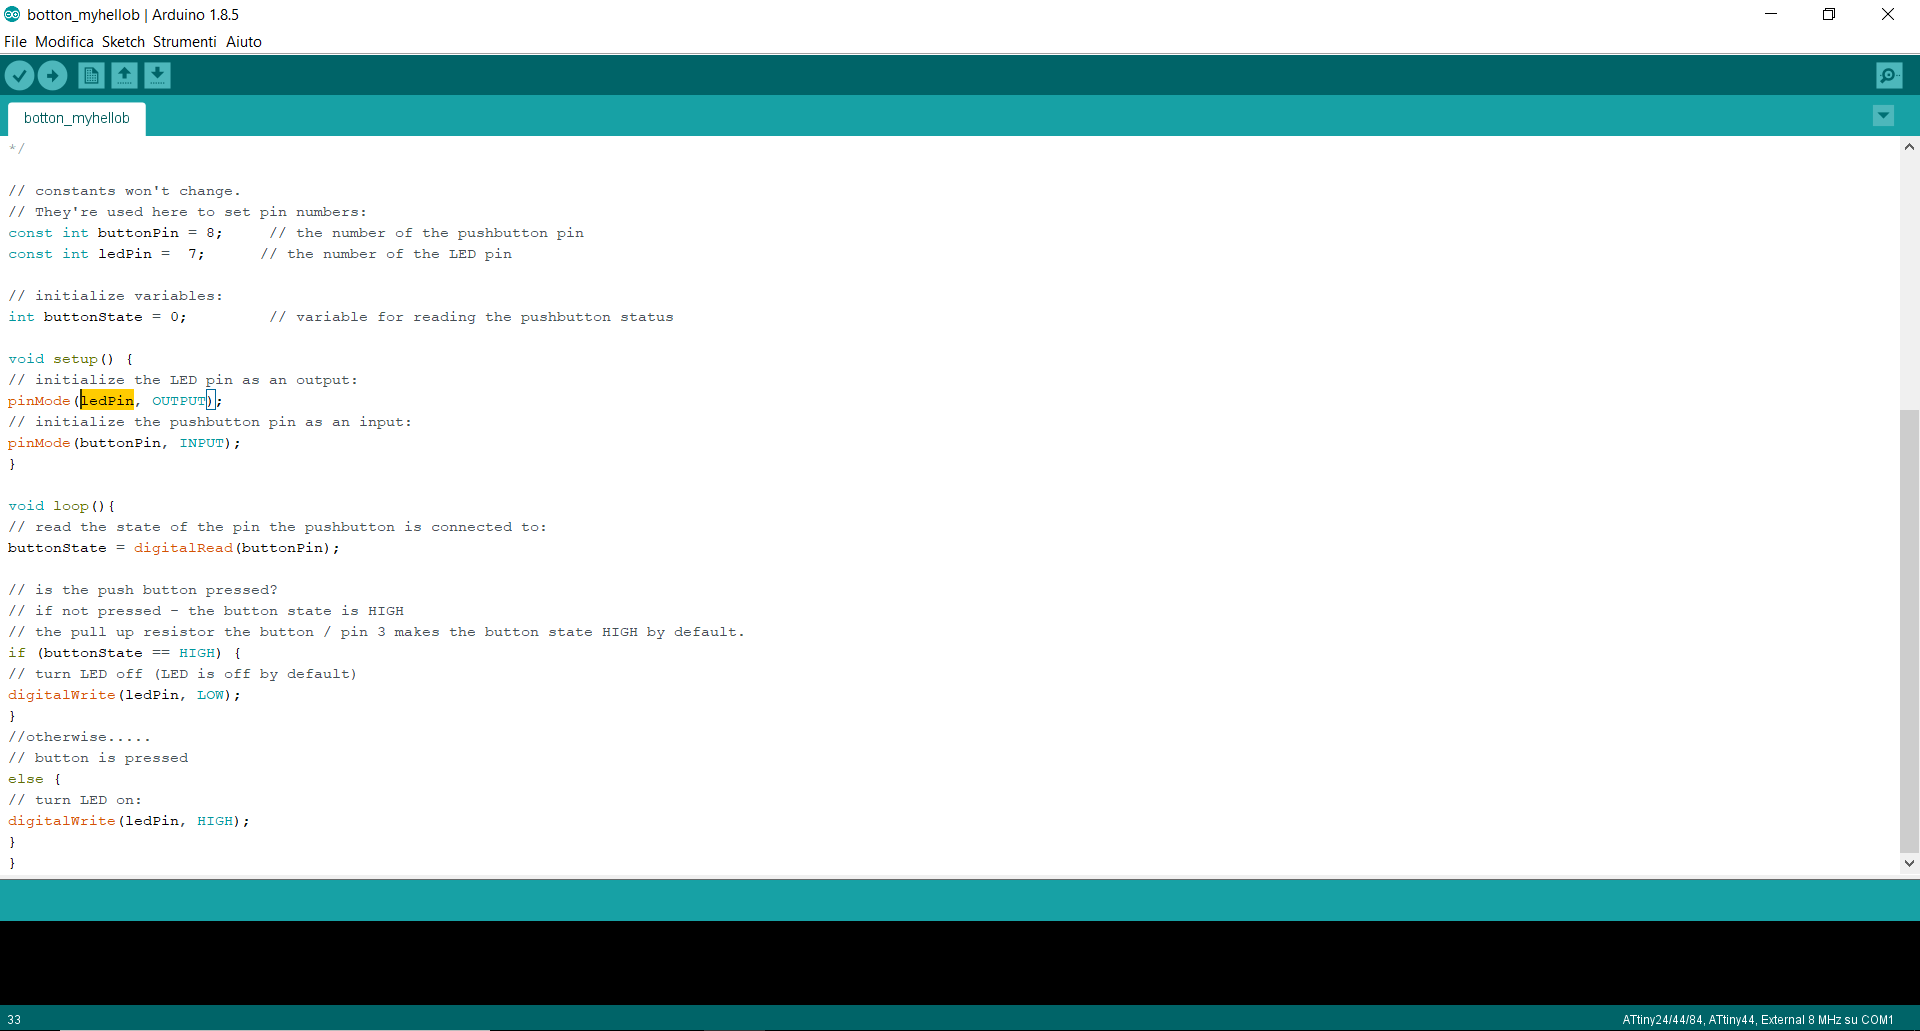
buttonide from lauracip on Vimeo.
Compare the performance and development workflows for other architectures (group assignment)
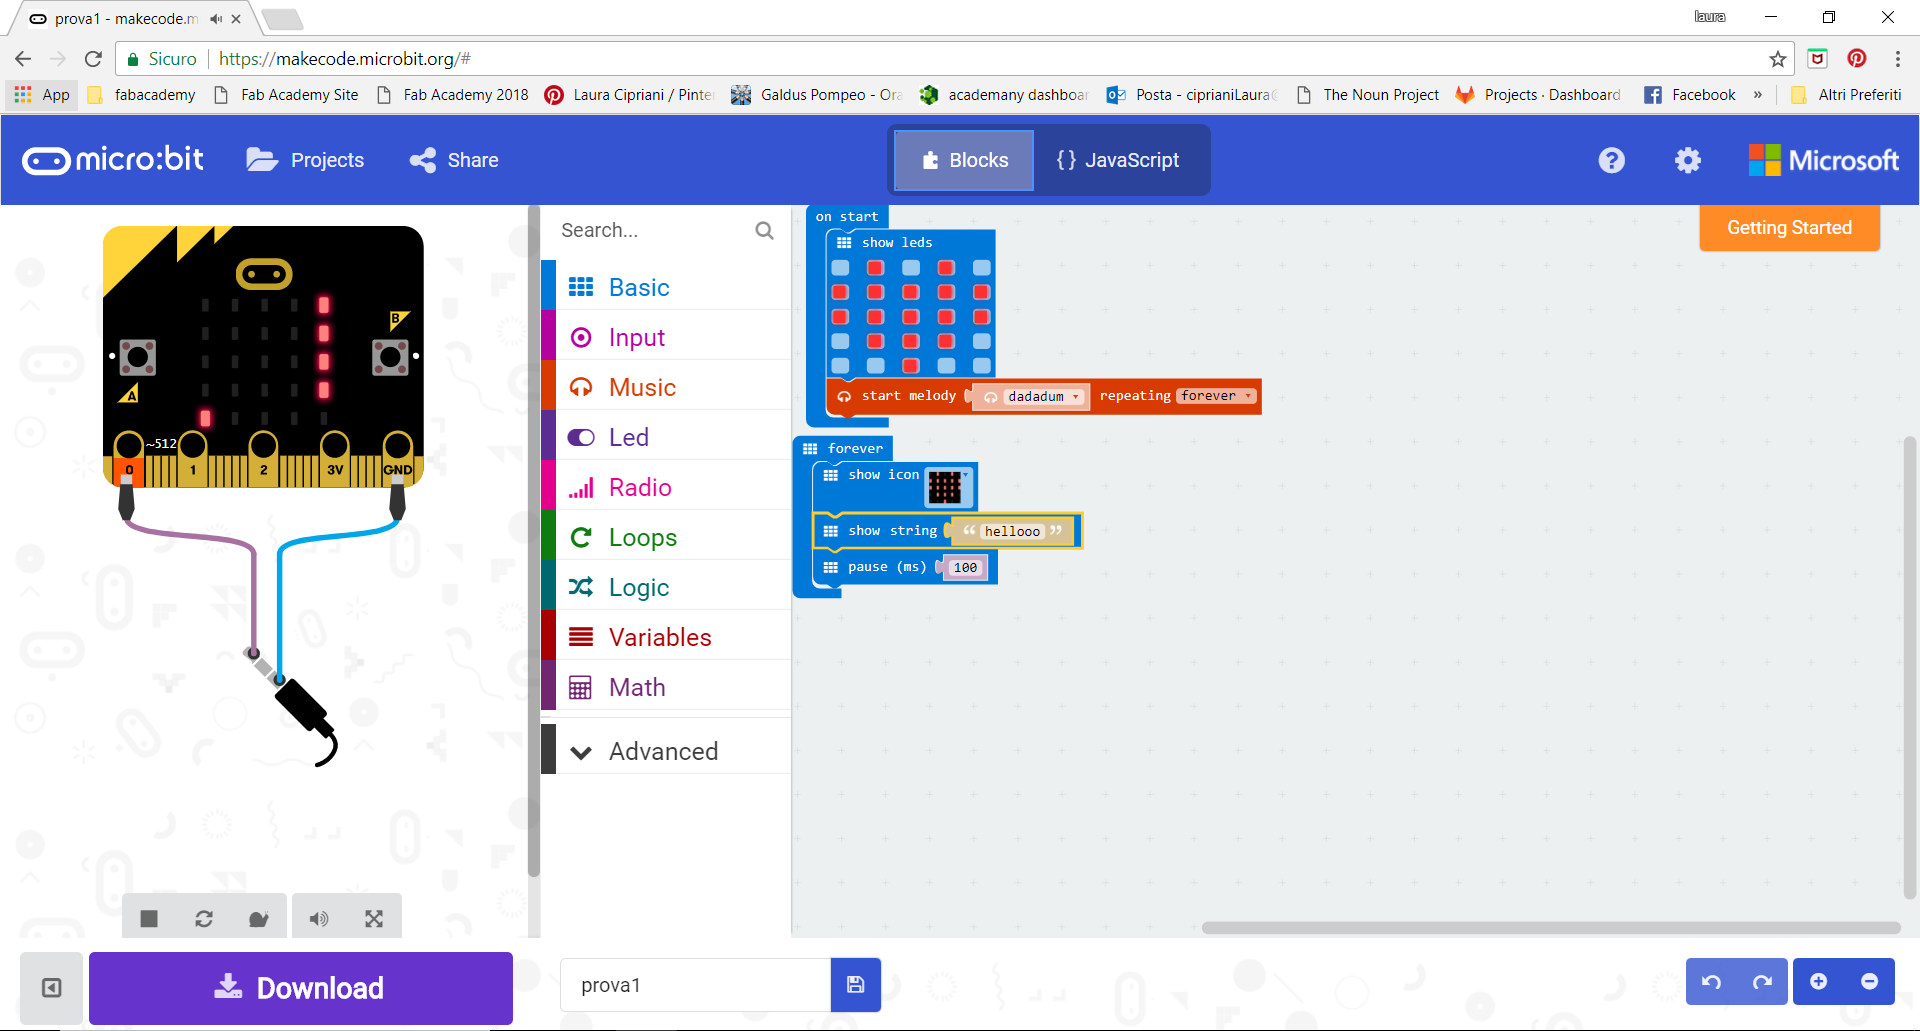
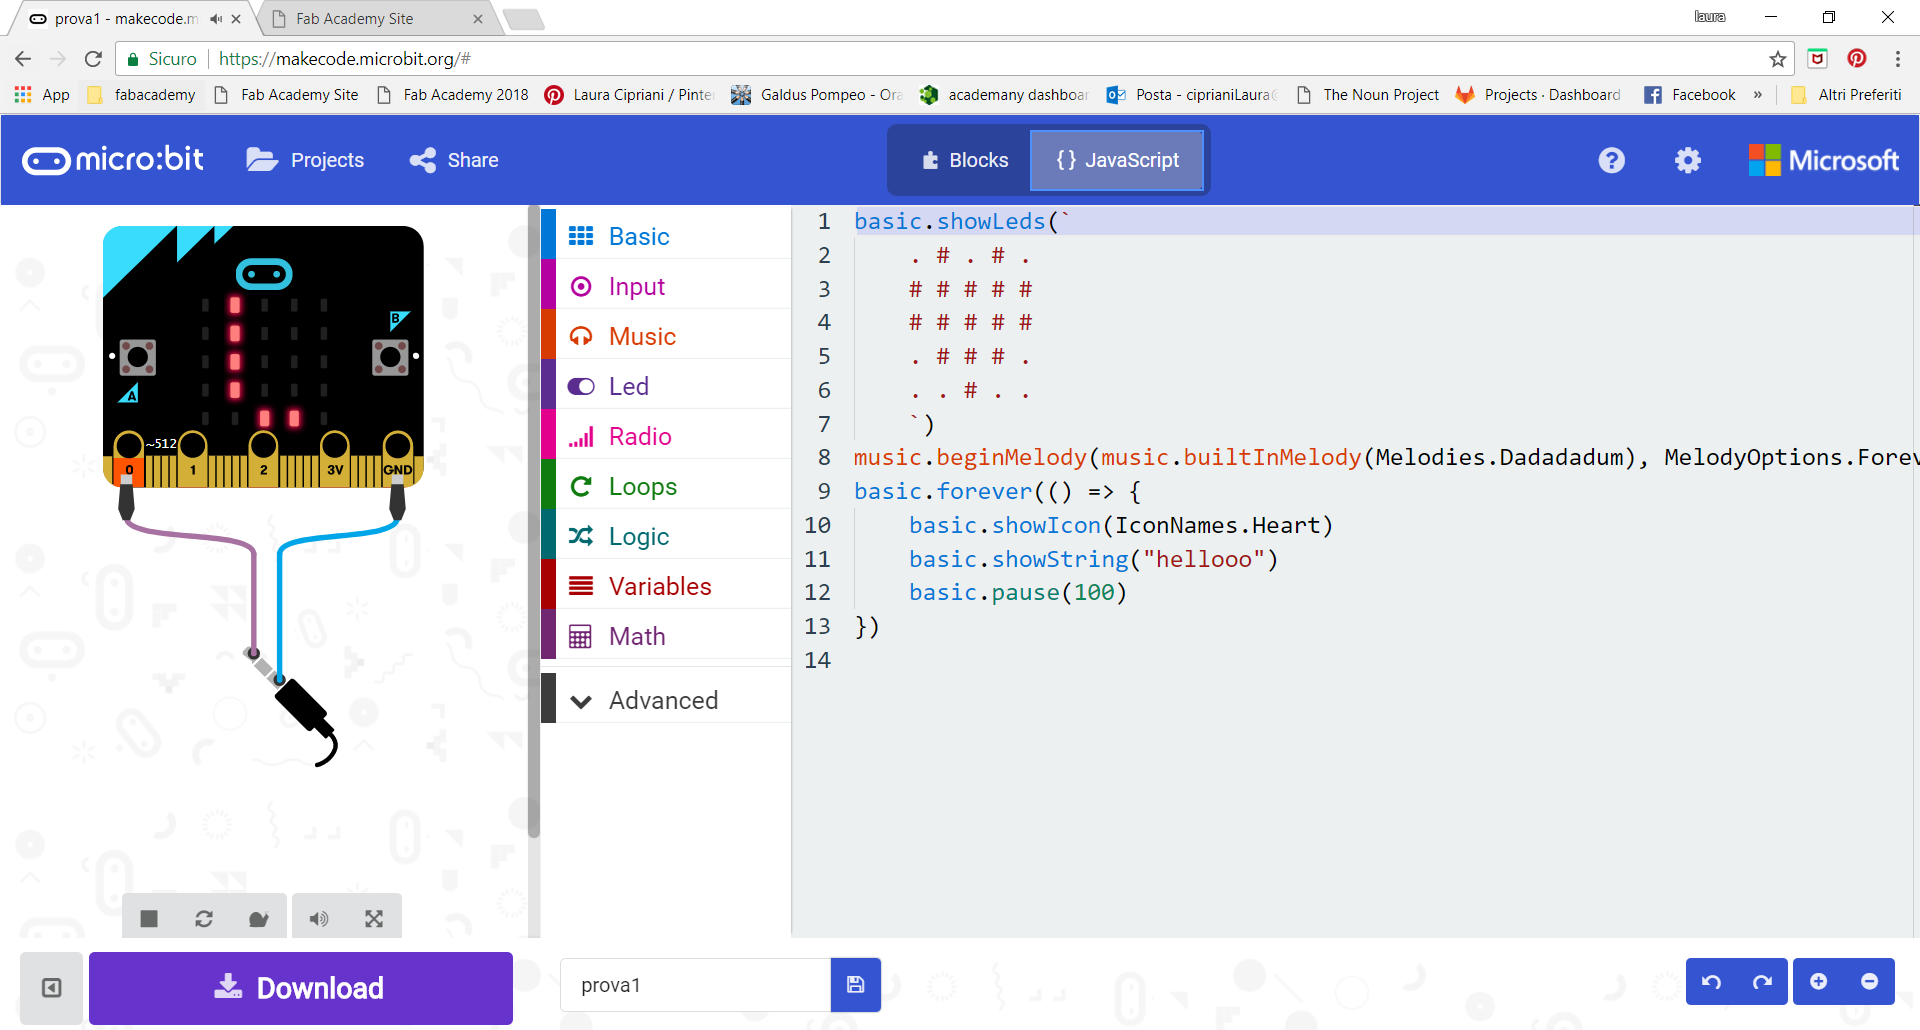
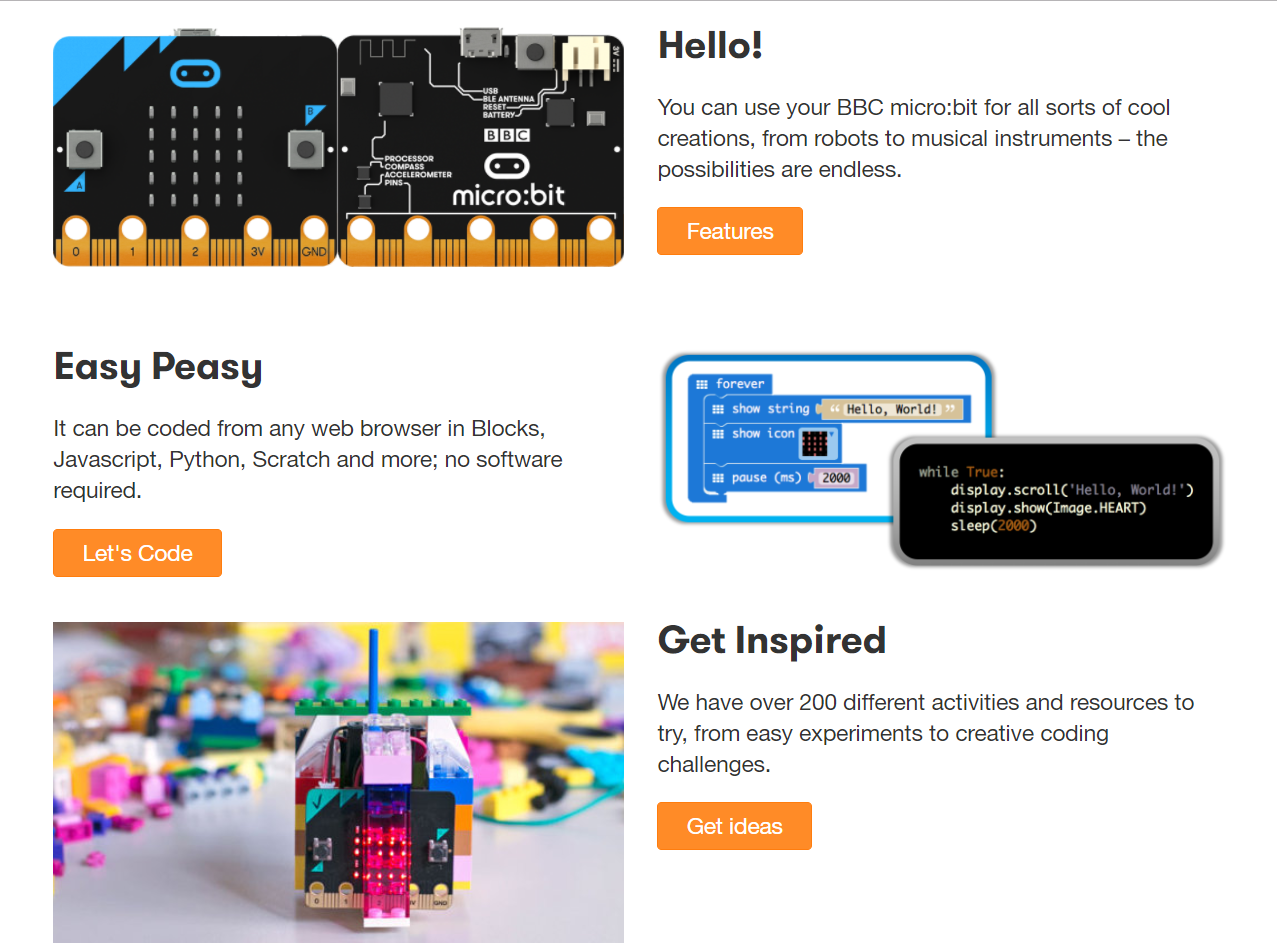
For this part of the exercise I decided to test Micro-bit This board is very nice to start coding with kids. First of all it is also manageable through a tablet app that works well enough. On the site there are already a number of resources, well done both from the training point of view, to help teachers in managing activities. This part is very interesting to take as a starting point for my final project.
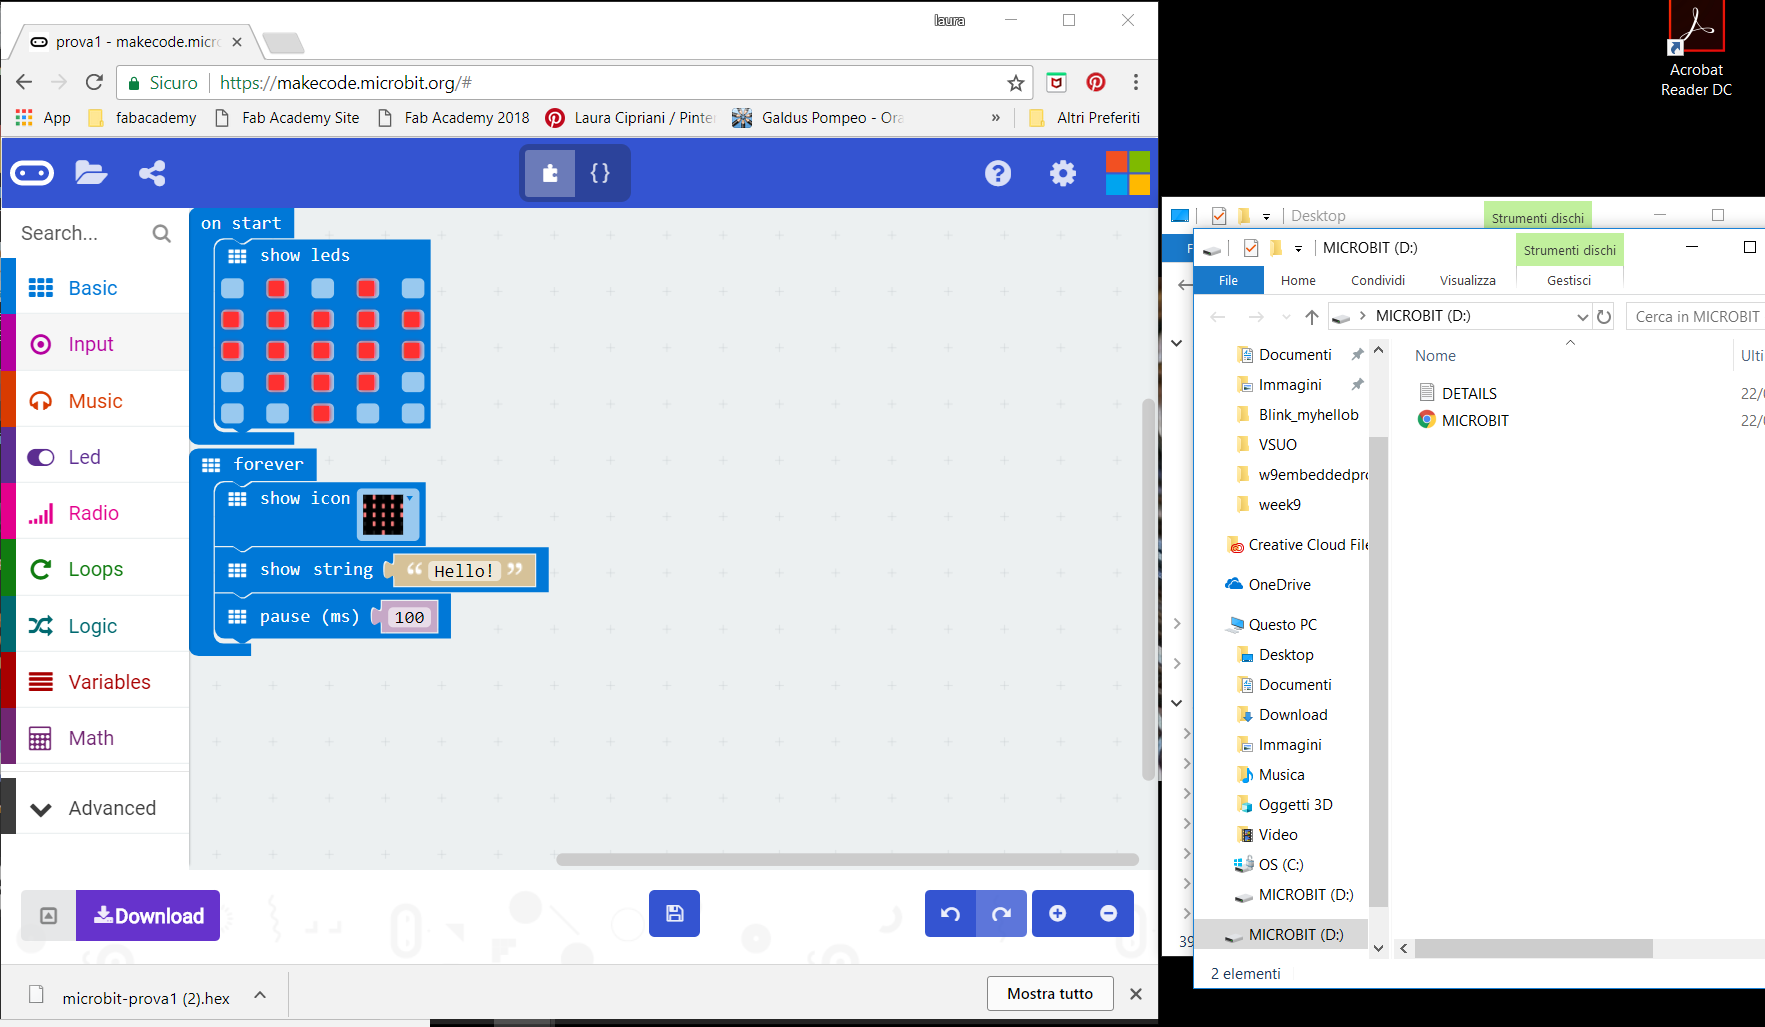
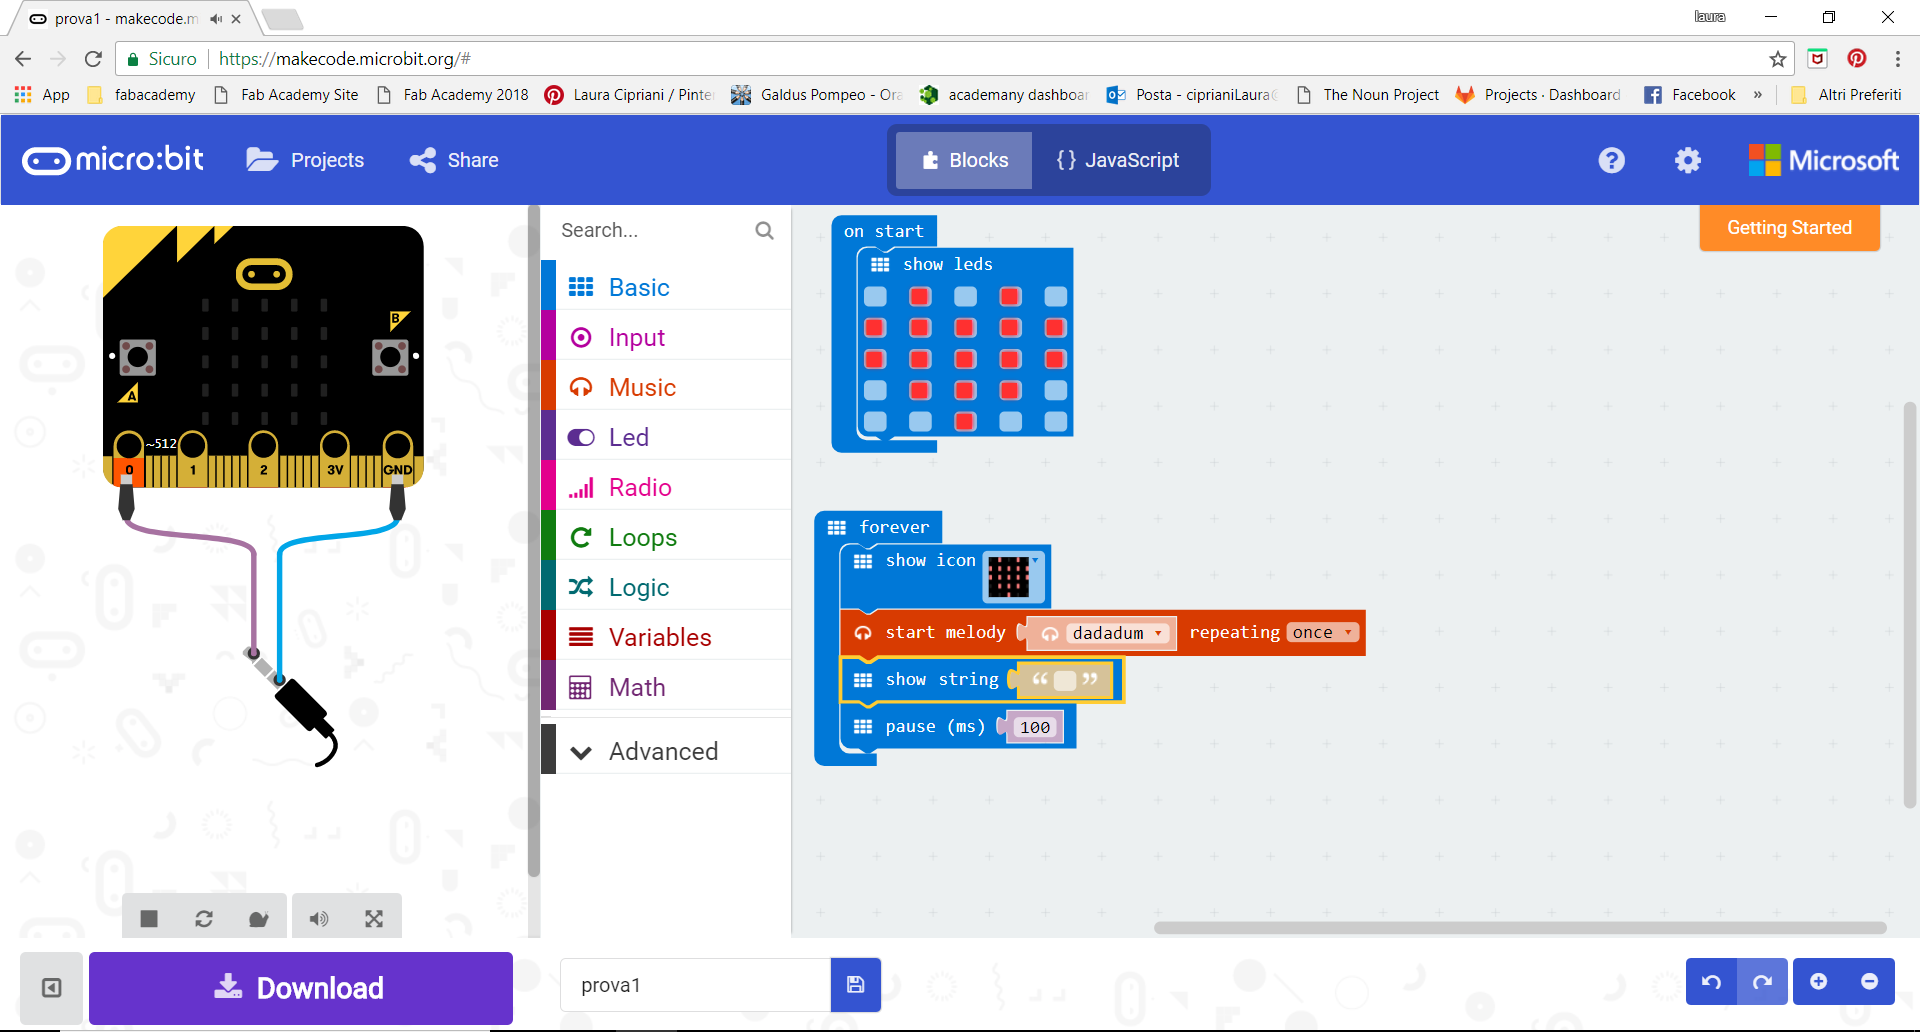
microbit from lauracip on Vimeo.
owser does not support the video tag.