Week 3: Computer-Aided Design
This week's tasks:
- Modeling (raster, vector, 2D, 3D, render, animate, simulate, ...) a possible final project, and posting it on my class page
Challenges that I faced while working with CAD program: It was my first experience with 3D designing. And I found the environment a bit challenging and confusing for the absolute begginers. Therefore I went thorough some tutorials to get familiar to the basics and I also tried to document the basics in detail with lots of screen shots so that other people could use it as well
I modeled the elements of my final project with Fusion 360, Inkscape and GIMP.
Fusion 360 - Designing a 3D Flower, Heart, Sun and Grass
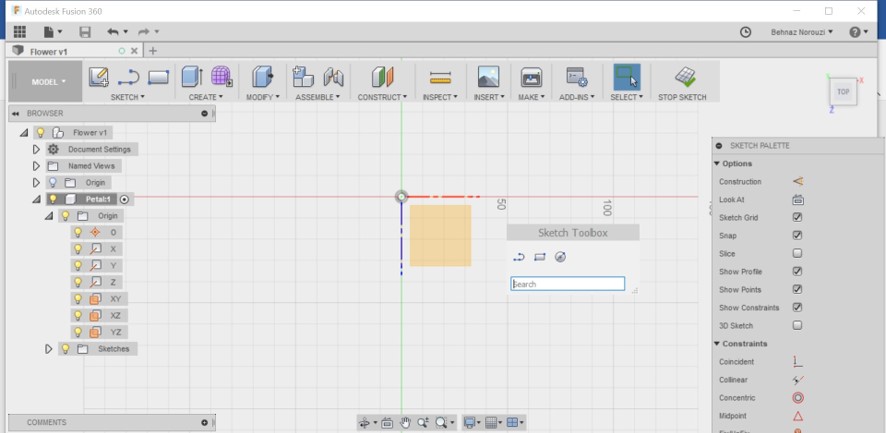
- Make sure you are in model environment. Model > model
- Check that the unit is correct. E.g. in mm (you can find unit under the document settings in the left side of the screen.)
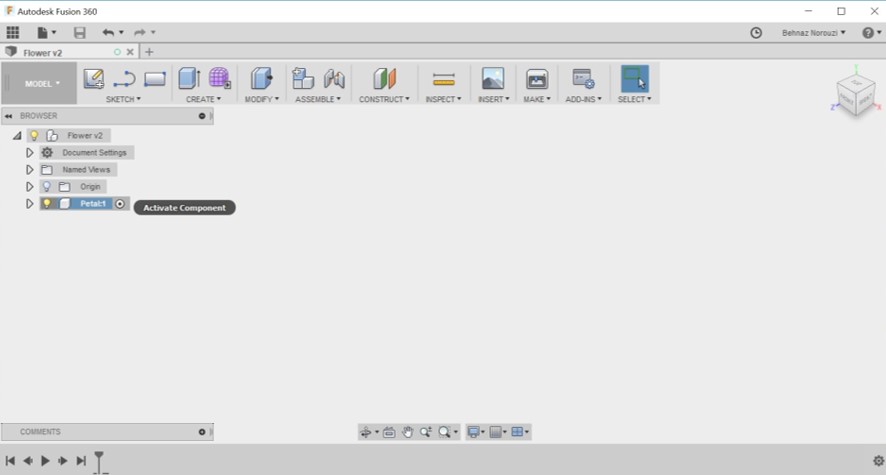
- Create component in the tree > right click > new component
- click on it and rename it
- There is a small circle in front of the name of component that appears when you hover you mouse on the component names. It is for activating the component. When you are working on a component, it is better to make sure that it is active.
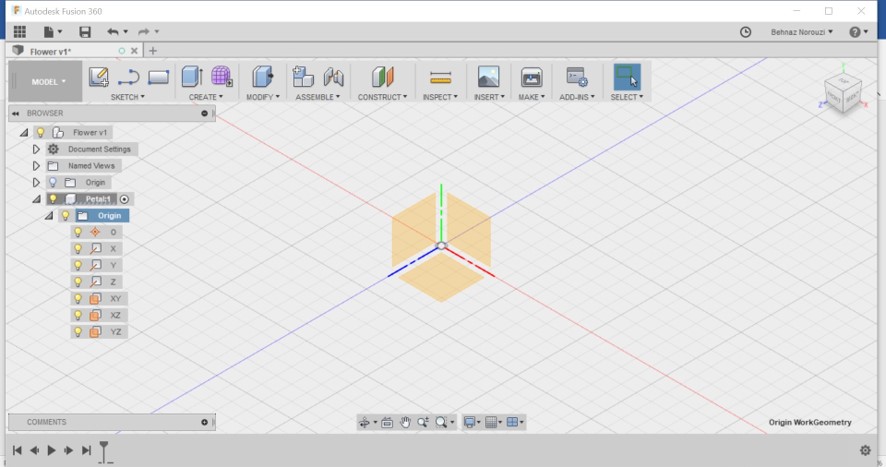
- Under each component there is a branch named 'origin'. Hit on the name of the component (here is Petal): Origin: now the plates appear for this component.
- When you start a 2D sketch, you always have to start a face or a plane.
- Right click > create sketch
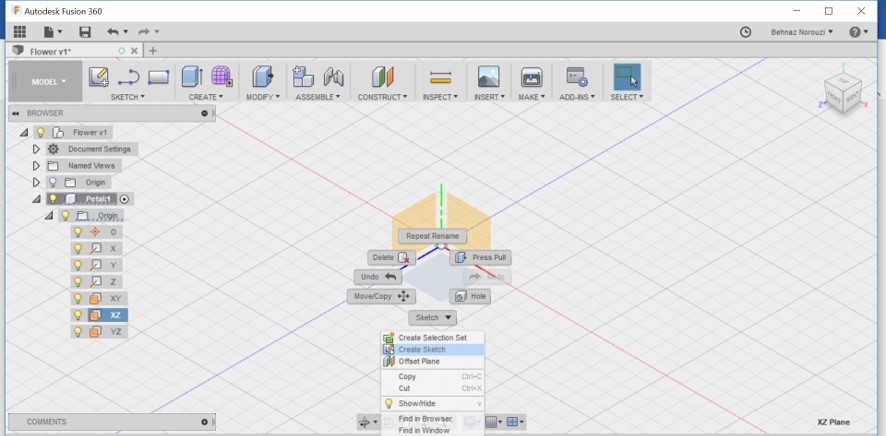
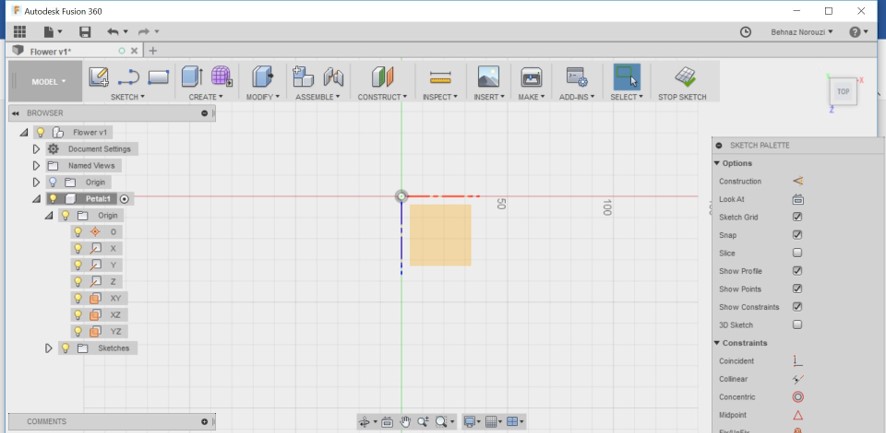
- A sketch palette appears for it.
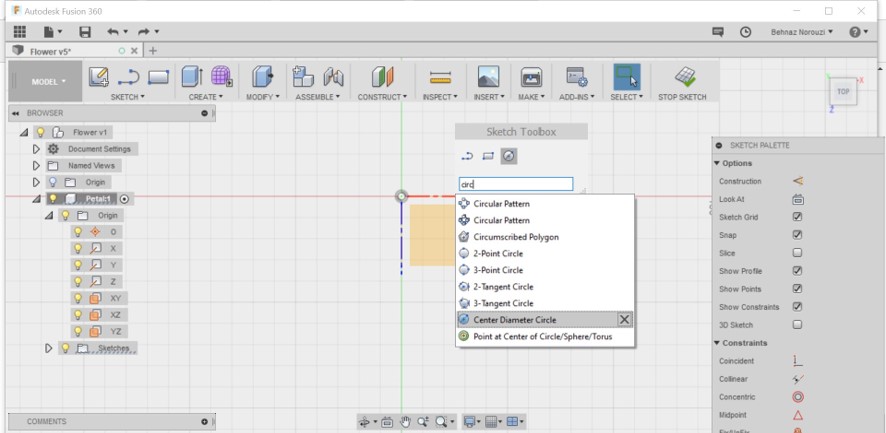
- It is better and faster to use shortcuts:
- S=Model Toolbox
- Q=Push/Pull
- C=Circle
- D=Dimension
- L=Line
- X=Construction
- P=Project
- Ctrl+Z=Undo
- J=Joint
- For example, if you press s, a sketch toolbox appears. There are some shortcuts there and also the possibility of searching specific tools.
- You can also add any specific tool to your toolbox by hovering the mouse on the name of the tool and then an icon in front of it for pinning the tool to the toolbox. In this case, we want a central rectangle.
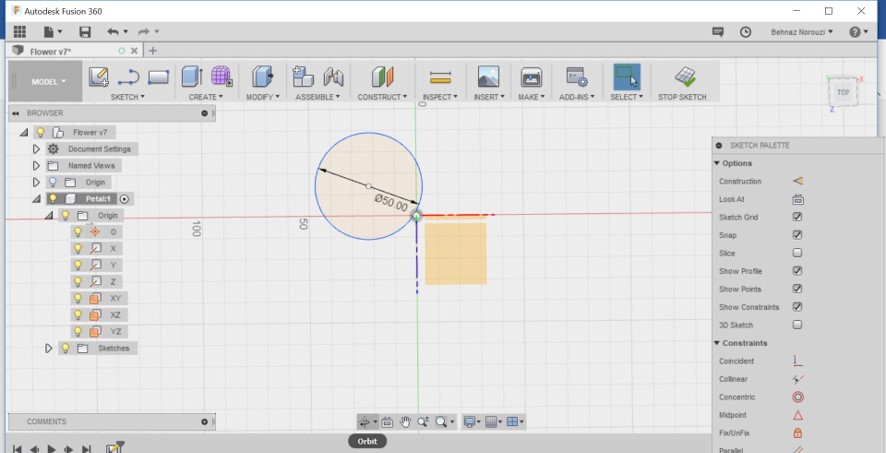
- You select the tool and start drawing. A small blue box appears for inputting the dimensions.
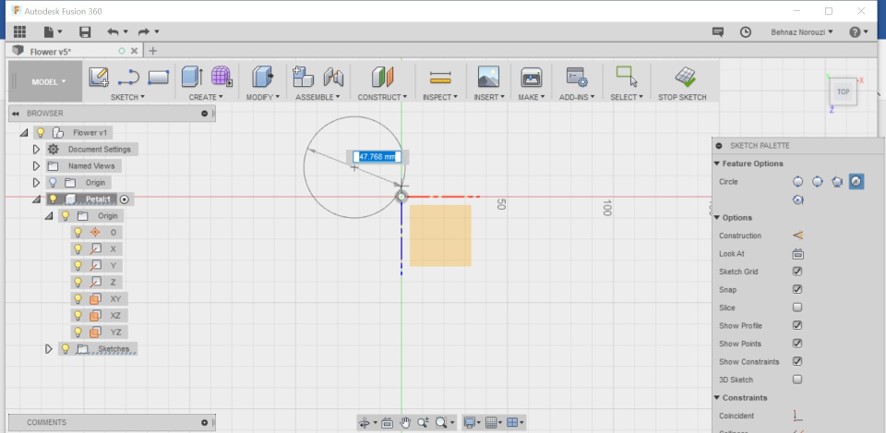
- If you are drawing a rectangle for example: to jump to the other input box for sizing the length: press tab on the keyboard. Input the number and hit enter. Also for rectangle, there are some other symbols around your sketch, which are called 'relationships'. Relationships are rules for our 2D sketches.
- Now you have a circle with some displays for its dimensions.
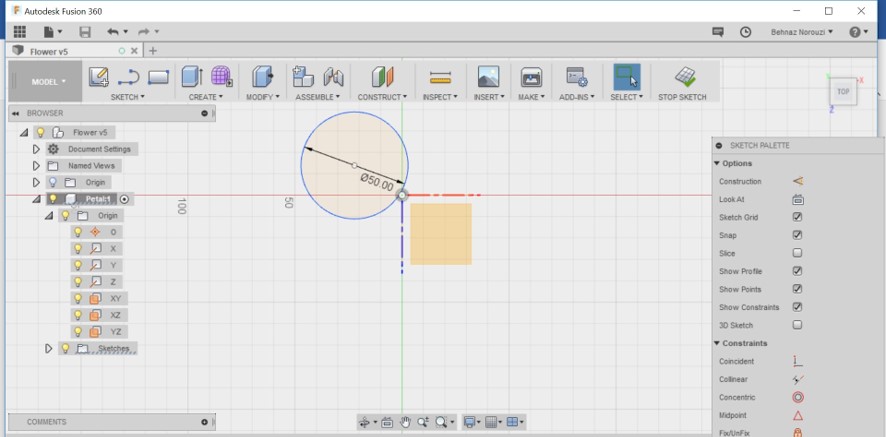
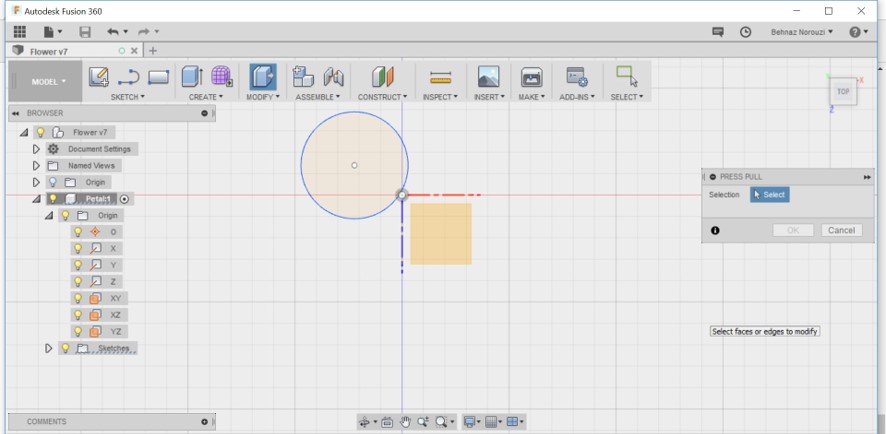
- Press Q: you will be jumped out of the sketch menu and press pull menu appears instead, in the right side of the screen.
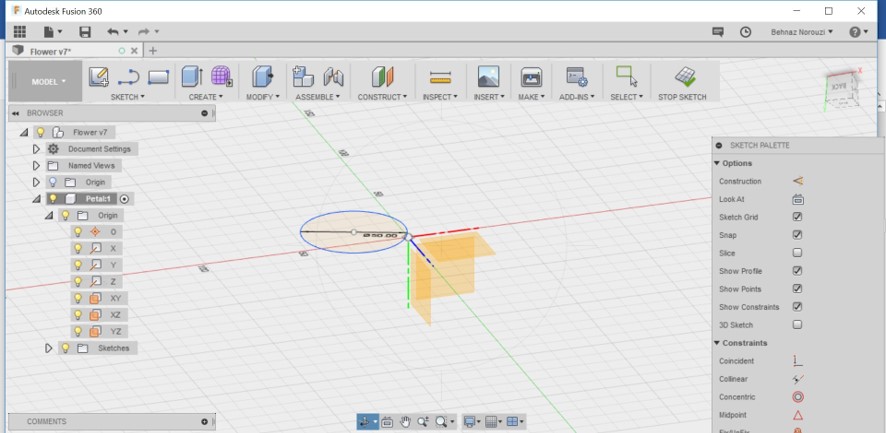
- Now use the orbit tool to turn the circle in order to see it from another angle for example from the above.
- Now select the object that you want to extrude to the 3D space. You get an arrow on the selected object. You can also start dragging that arrow
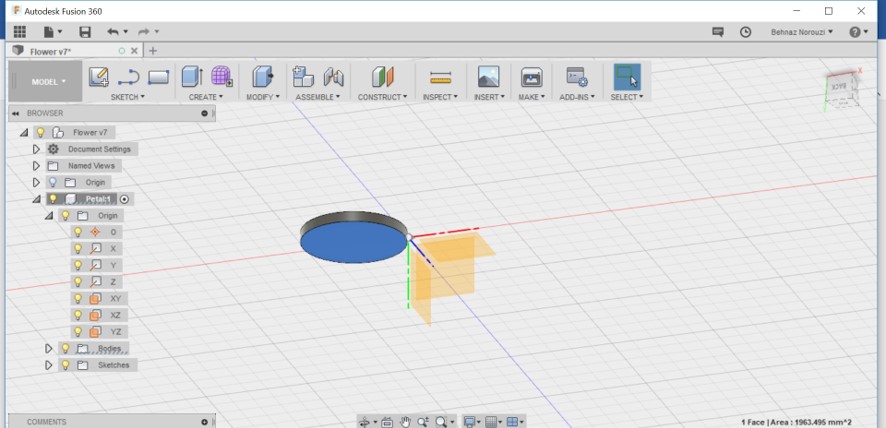
- Now you have created your first 3D object.
- I did the same stages for creating a petal of the flower as you see in the picture. I used the 3-point Arc for creating the petal.
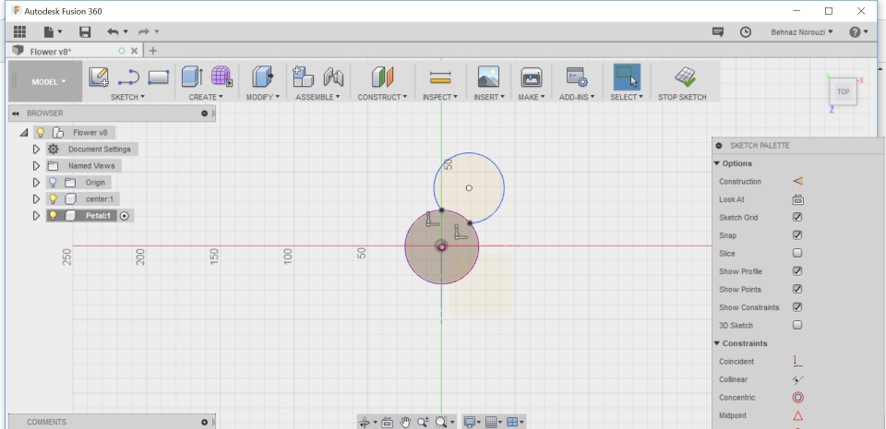
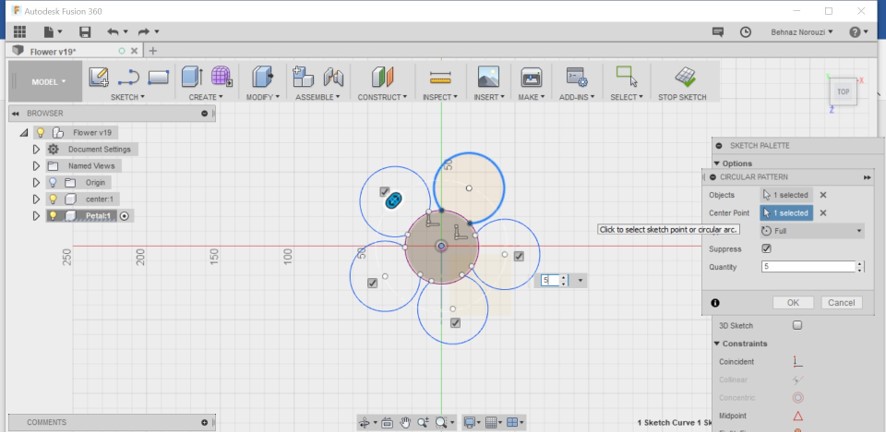
- Then I used ‘circular pattern’ to create the 4 other petal. Because my beautiful flower has 5 petals
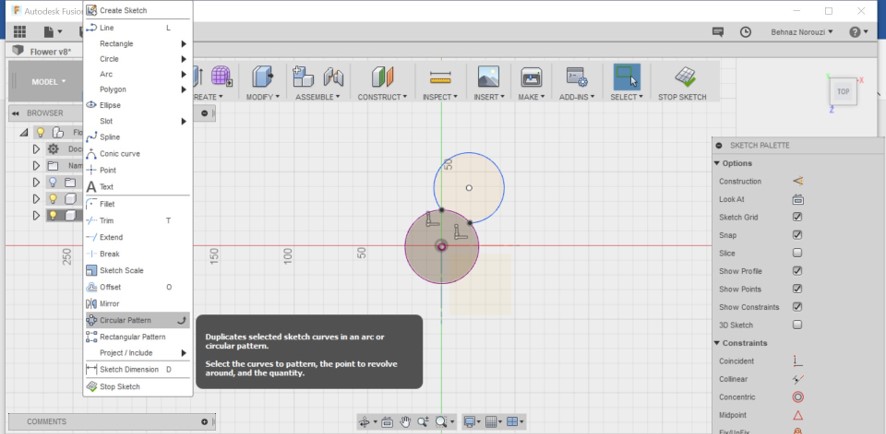
- When you choose ‘circular pattern’, then a menu would be opened for you. The first item is Objects, and you need to choose the object that you want to create patterns from it. So in this case, I selected the petal.
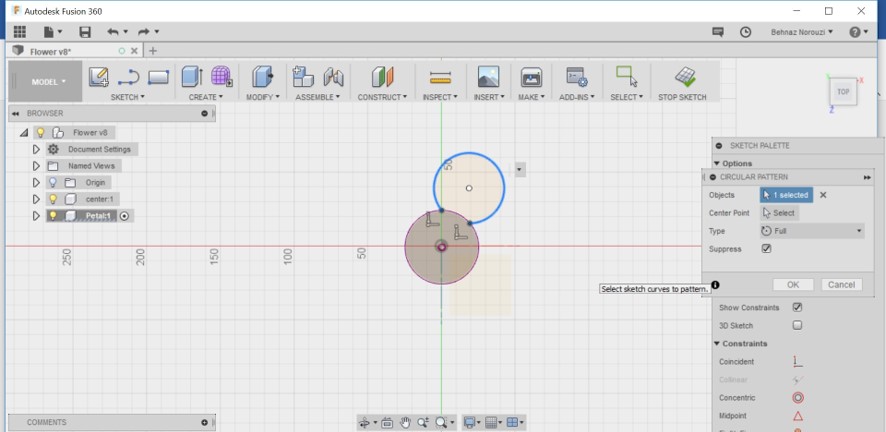
- The next item in circular pattern menu is Center point. You need to select the center point. In this case I chose the pistil of my flower as the center point. And I typed number 5 as quantity because I want 5 petals.
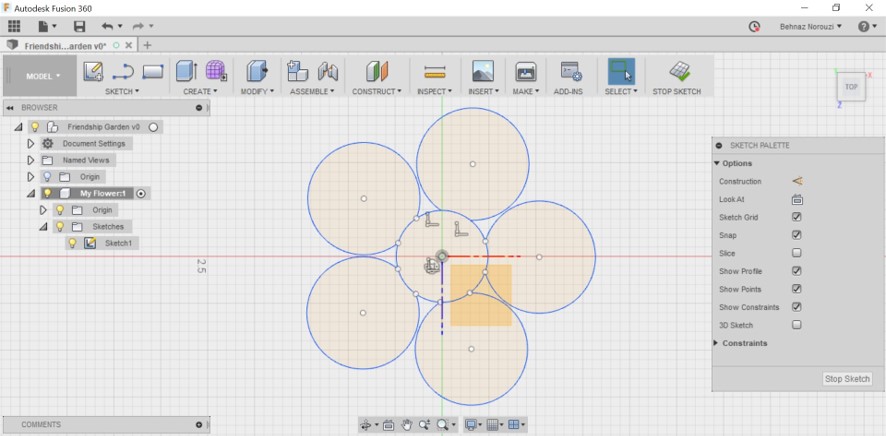
- Now when I wanted to extrude the petals, there were different centers that I was not able to move one of them. And I could not choose 2 of the petals for extrusion. And I could not figure out what the problem was. So it was a good lesson not to create lots of components. I could create just one component with different objects. Therefore, I did the whole process again as I explain previously. But the difference was that I designed my whole flower in a single component as you see in the picture.
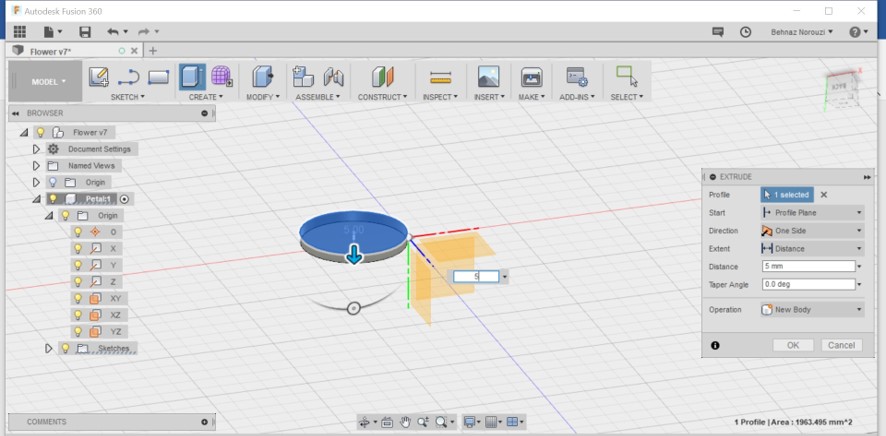
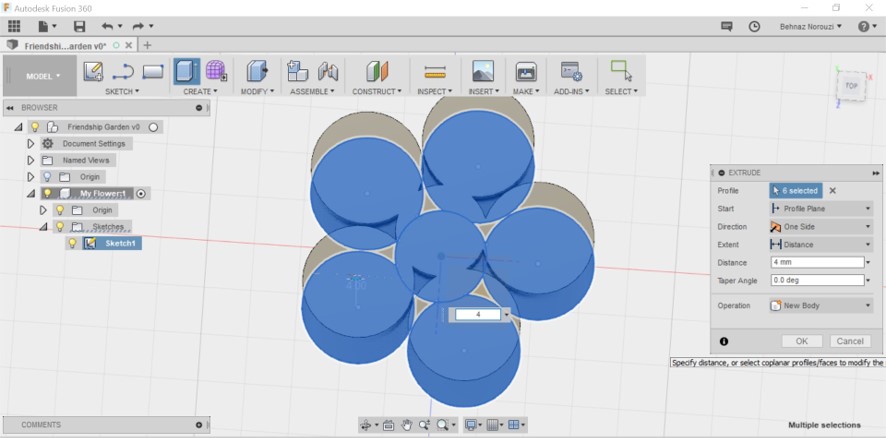
- Now time to extrude > hit Q > select all the objects > specify the distance > hit enter
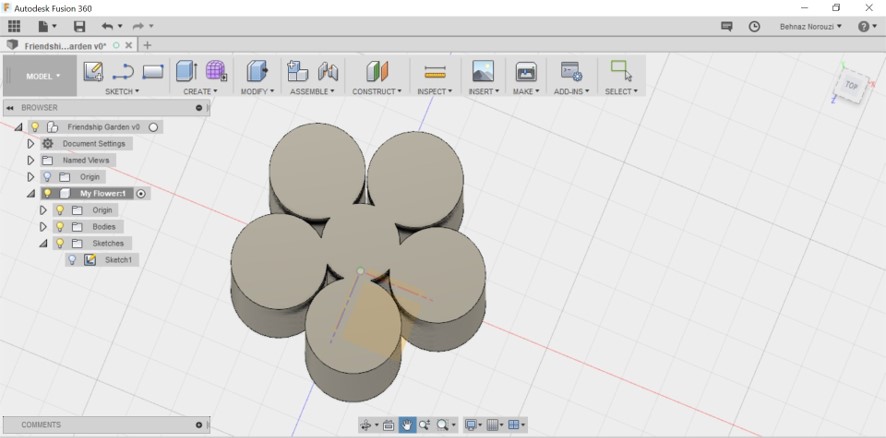
- Nice flower … But not exactly what I was imagining :-D But good enough for now as a starter. I will improve my design when my 3-D design skills improves
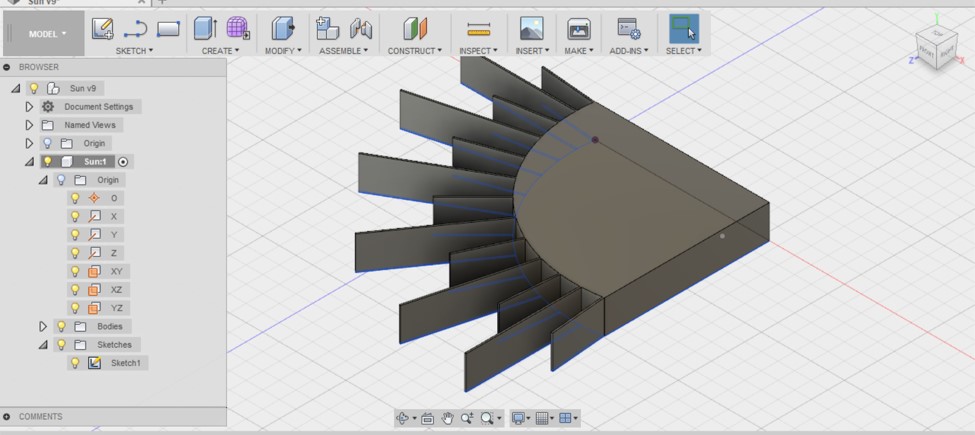
- I also made my sun with the combination of lines, rectangle and arc.
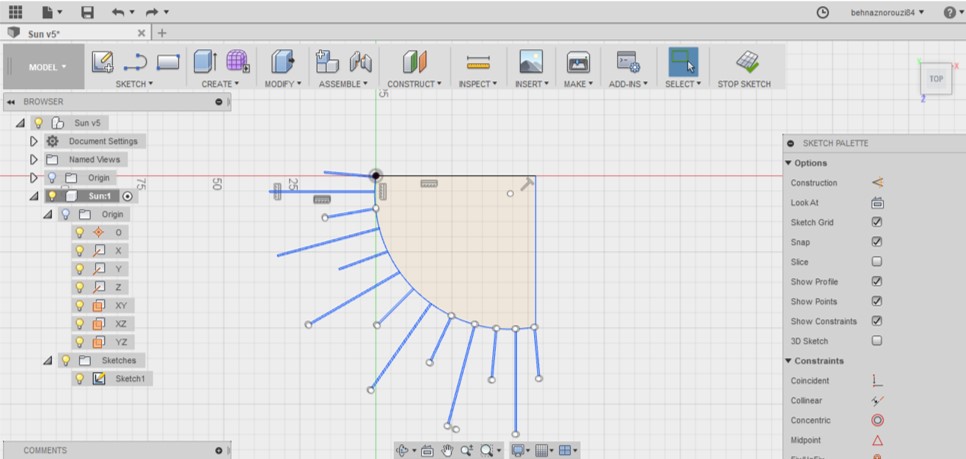
- Now time to extrude it.
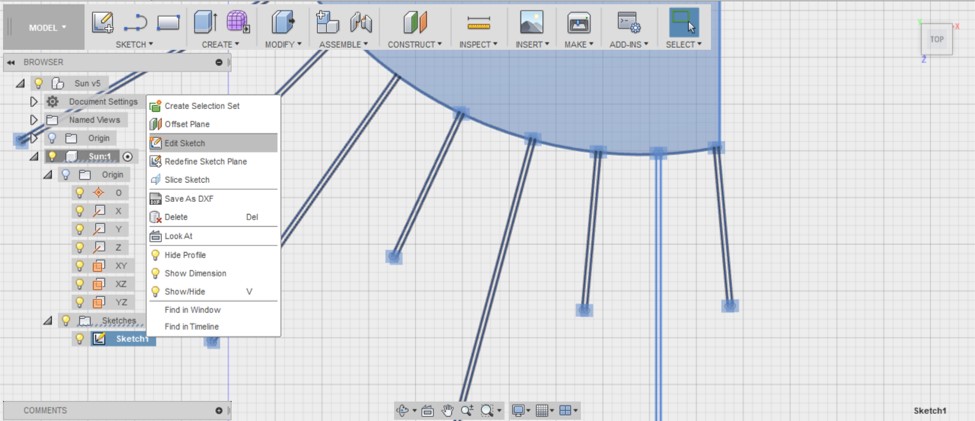
- The problem is that not all the sun rays are not extruded because they are not attached yet. So I used to: right click on sketches: edit sketch: coincident (from the sketch palette). Then zoom in and select on the start point of the line and then click somewhere on the circle line.
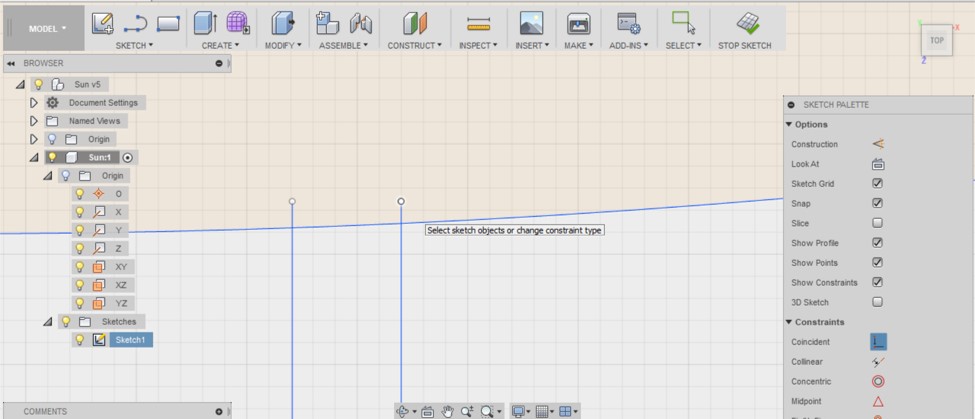
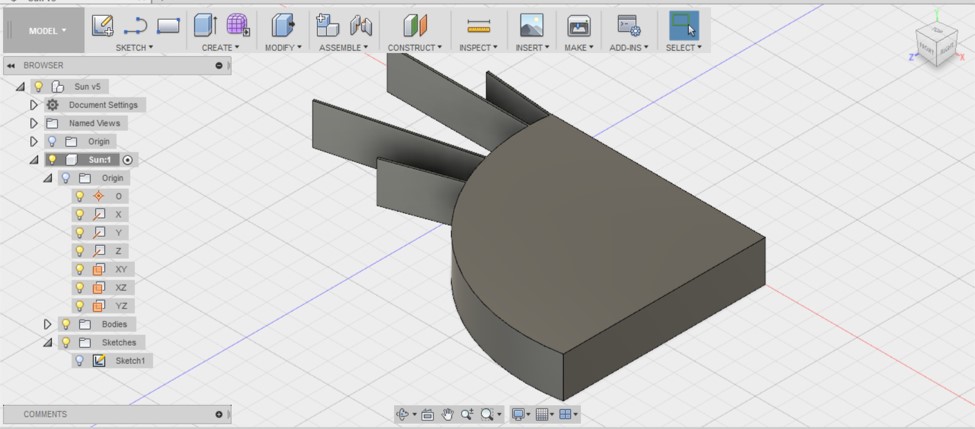
- I tried to extrude it again but it didn’t work. So I noticed that for some reason the other side of the rectangle is open. So I tried to close it by pressing L and attaching the points tohether.
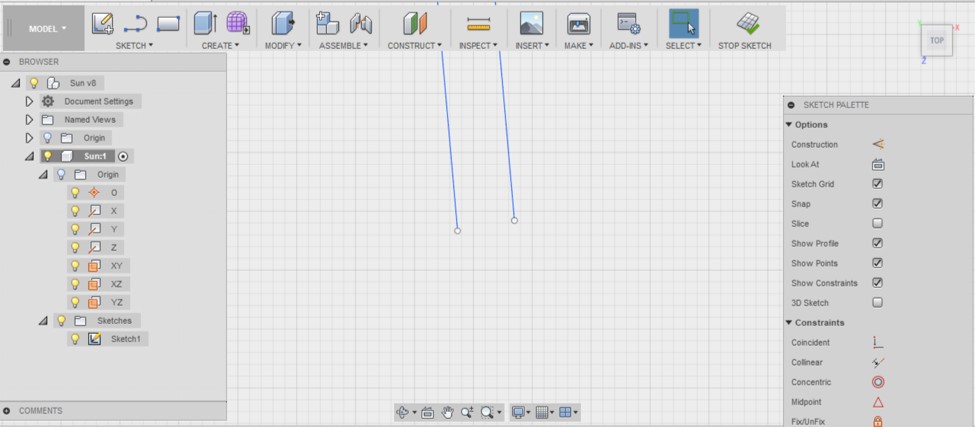
- And now everything is OK as you see.
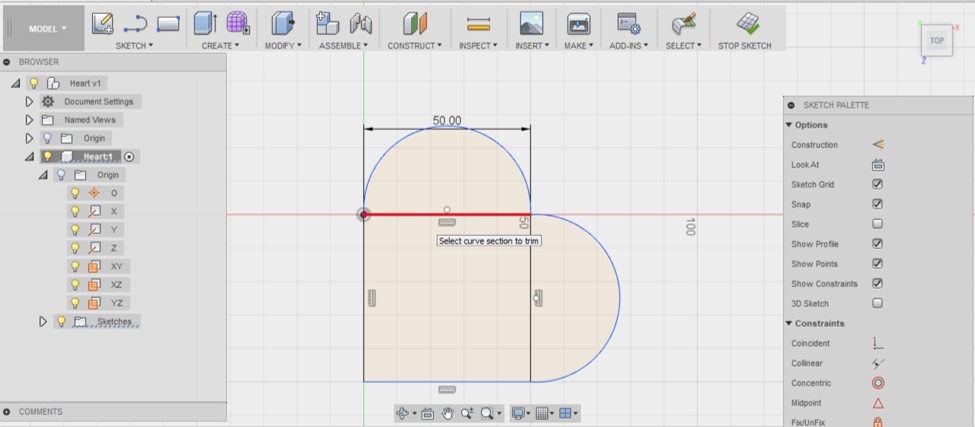
- Now it is time to make the heart. I created my heart with 1 rectangle and 2 arcs. And I used the coincident technique that I explained in step #29, to attach the lines together.

- Now time to delete those lines inside the the heart with trim tool.
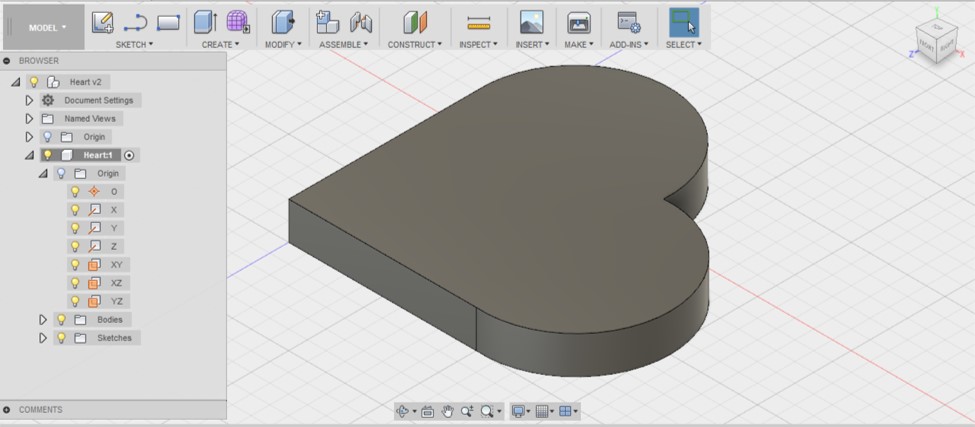
- And here is my 3D heart.
- And here is the grass of the garden that I created by attaching lines together.

Inkscape (Vector Based Program)
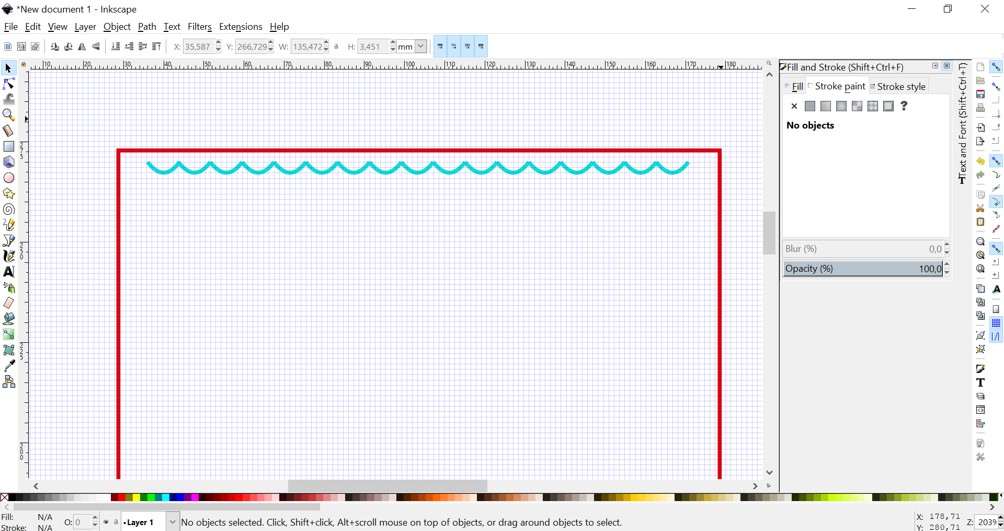
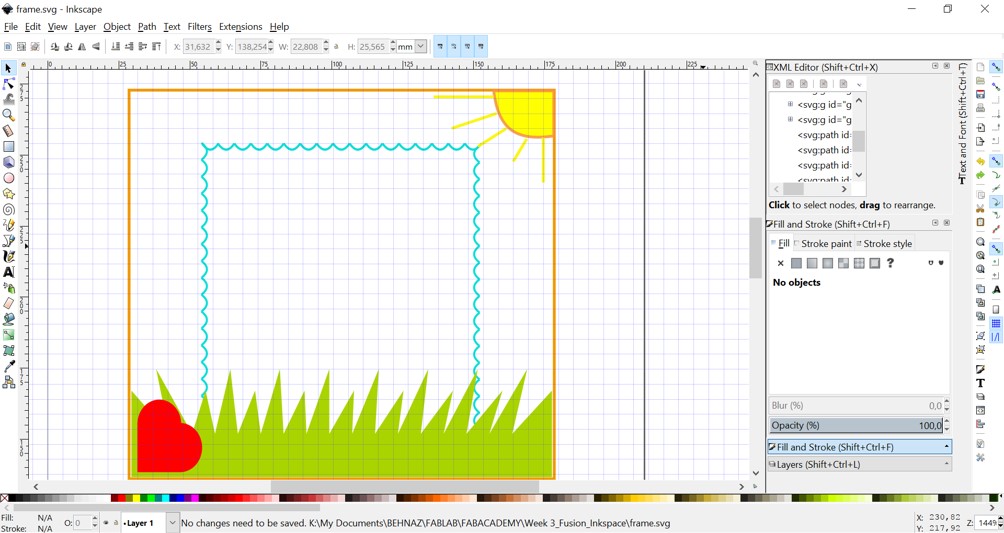
- In order to make a frame for the garden, I use Inkscape.
- From the tool bar located in the left, I choose rectangle. And I change the size from the change bar located in the top.
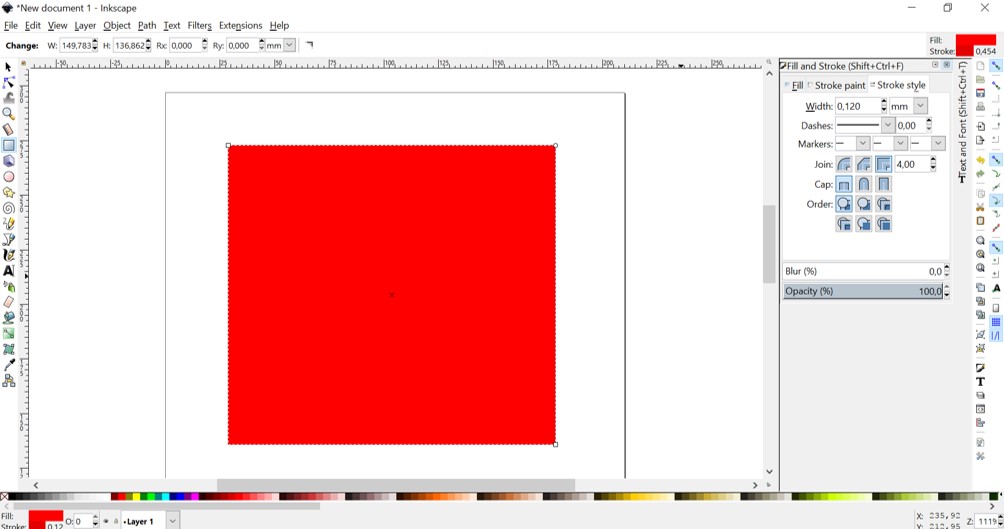
- I changed the stroke and fill color of the object by pressing shift+ctrl+f that gives me some options for editing the object.
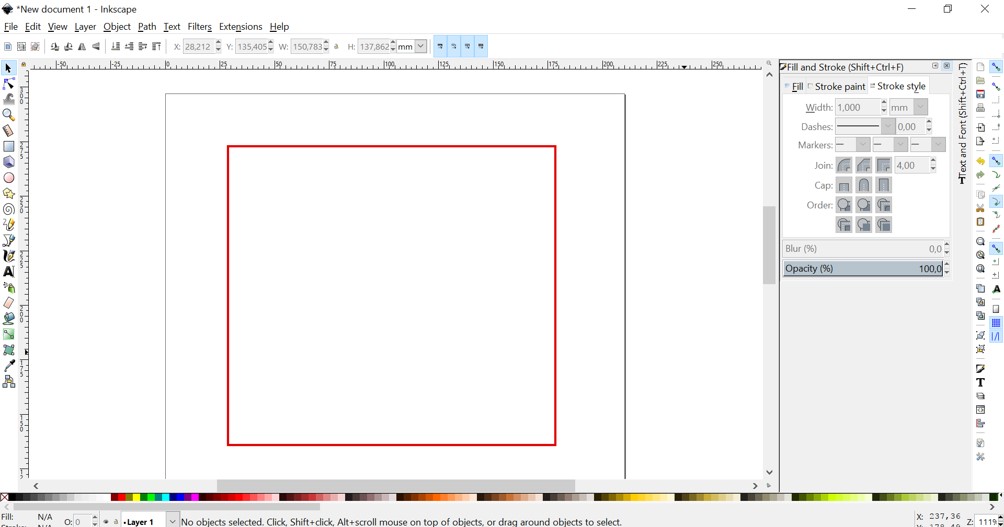
- I want my frame with no color, so I choose ‘no paint’ for fill. And I made the width of the frame 1 mm, so that it appears in the screenshot ;-)
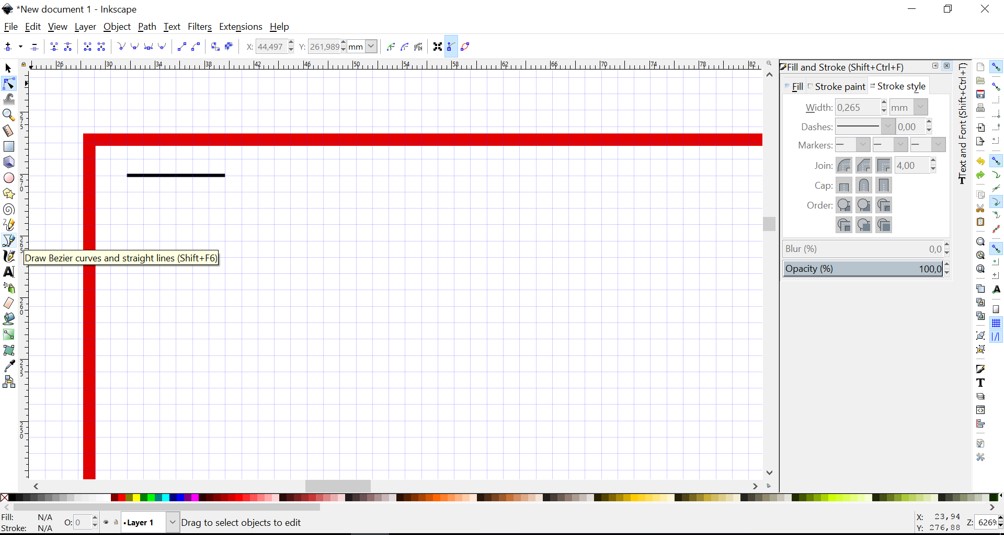
- For decorating my frame, I drew a simple line with the tool named “draw Bezier curves and straight lines” (Shift+F6).
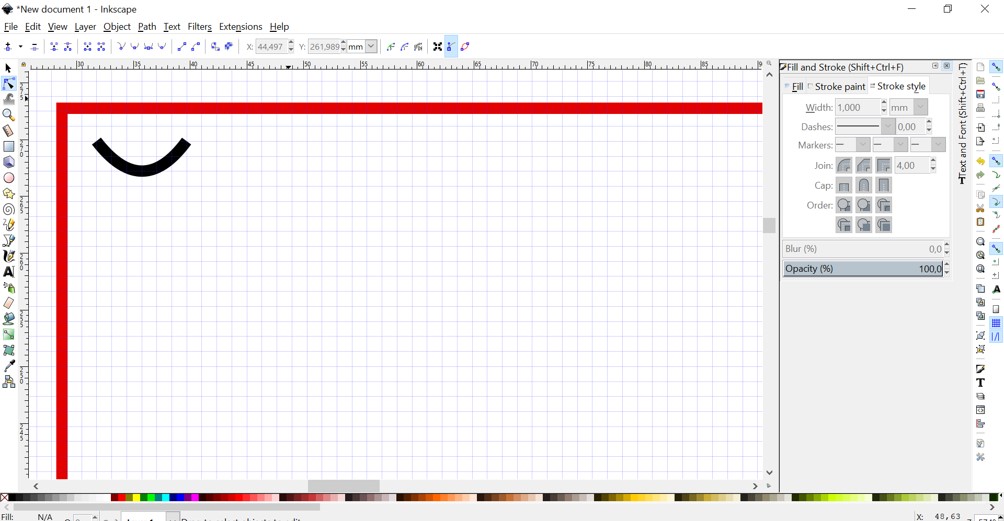
- Then I used ‘edit paths by nodes’ (F2) to make my line curved. When you select this tool, it gives you the variety of options. I used ‘make selected segments curves’. I pulled the line from middle toward down.
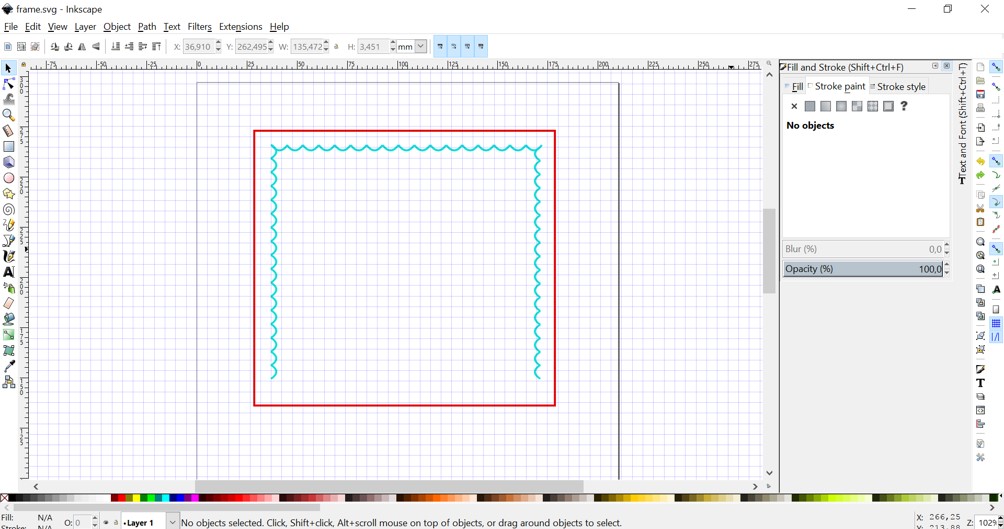
- I copied and pasted the shape that I created as much as I needed and I placed them one after another and at the end I selected all together, then from object menu I chose ‘group’ to group them together.
- I made a copy of my pattern and then used flip (vertically or horizontally) options to use it in other sides of the frame.
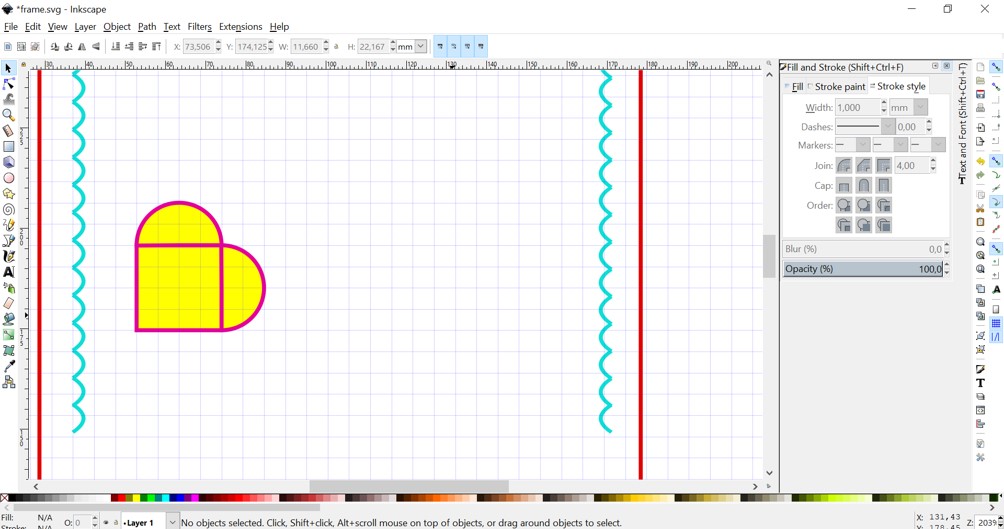
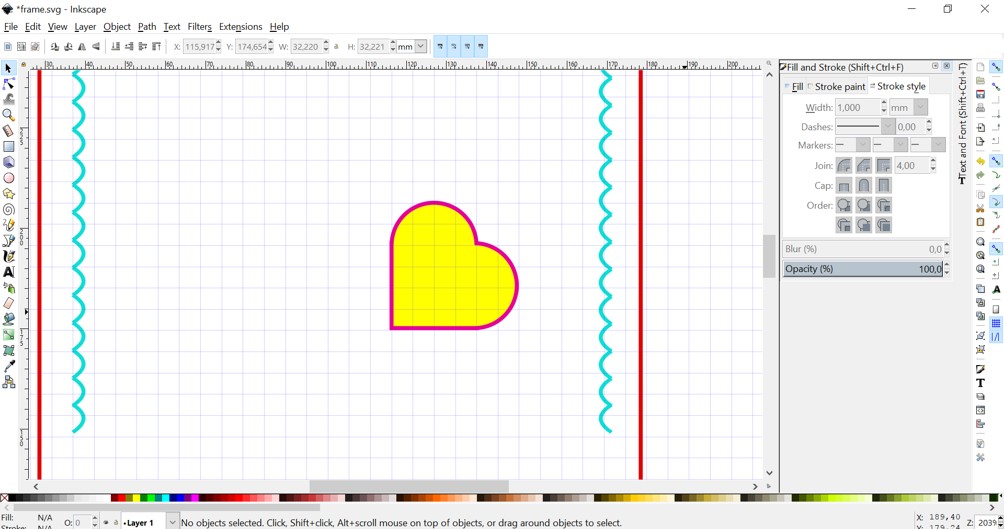
- I designed the heart, using ‘rectangle’ and 2 ‘half circles’.
- First I joined the rectangle and a half circle with the union tool.
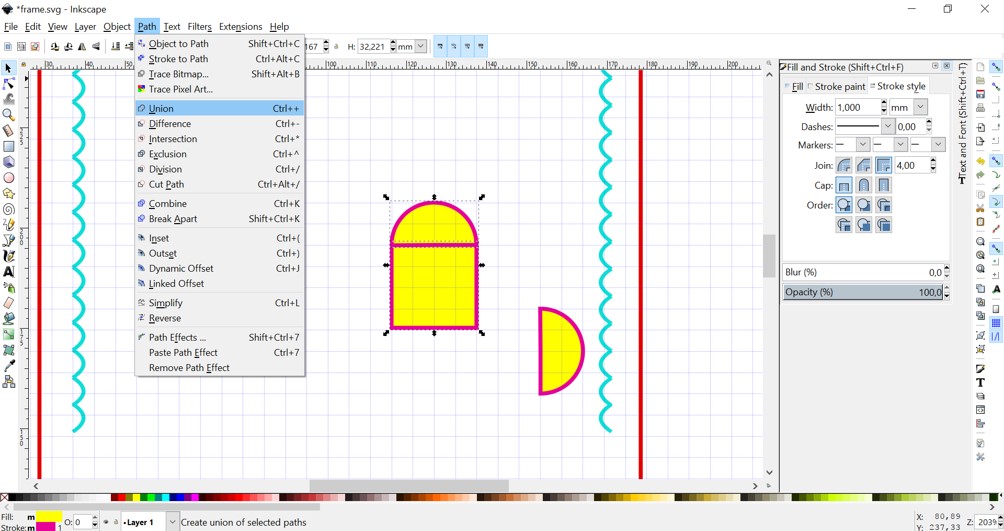
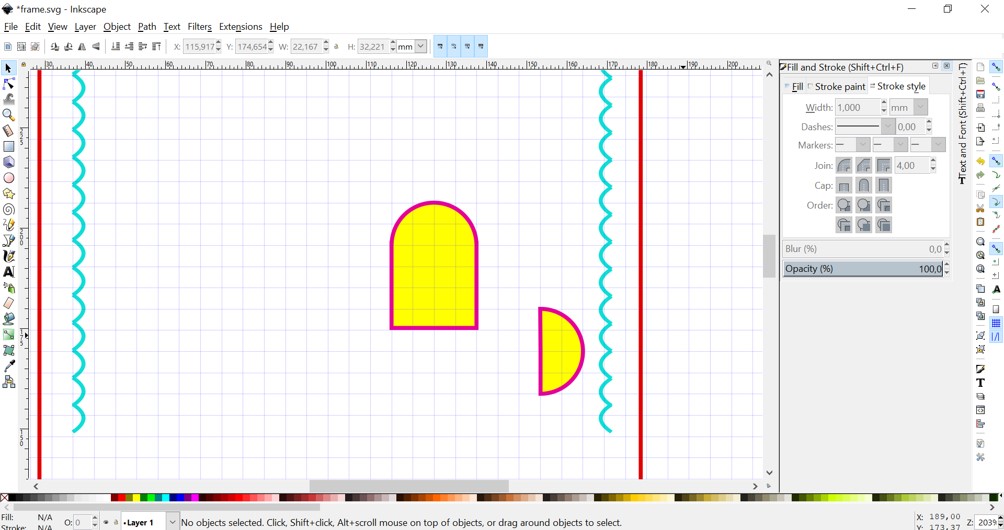
- Then I joined them with another half circle. Again using the ‘union’ tool.
- I made the grass using ‘draw Bezier curves and straight lines’ tool.
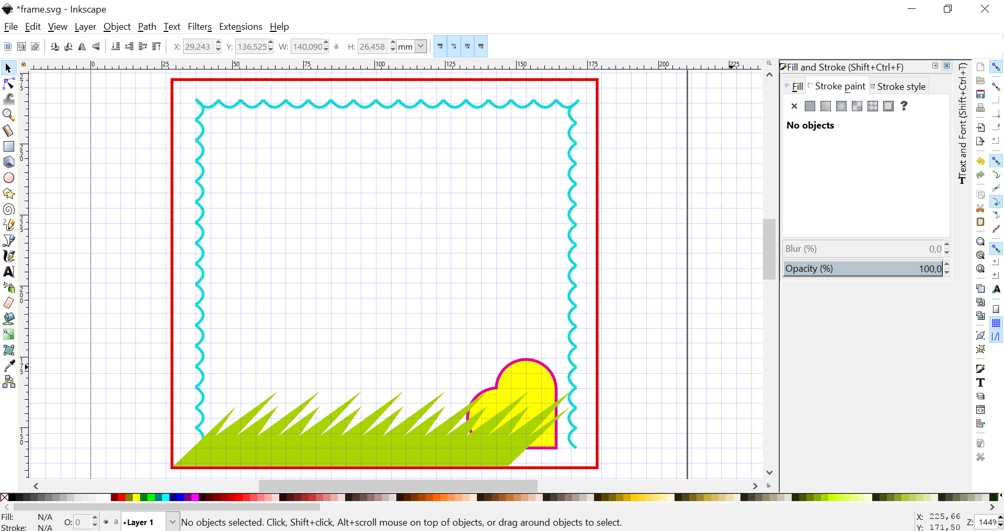
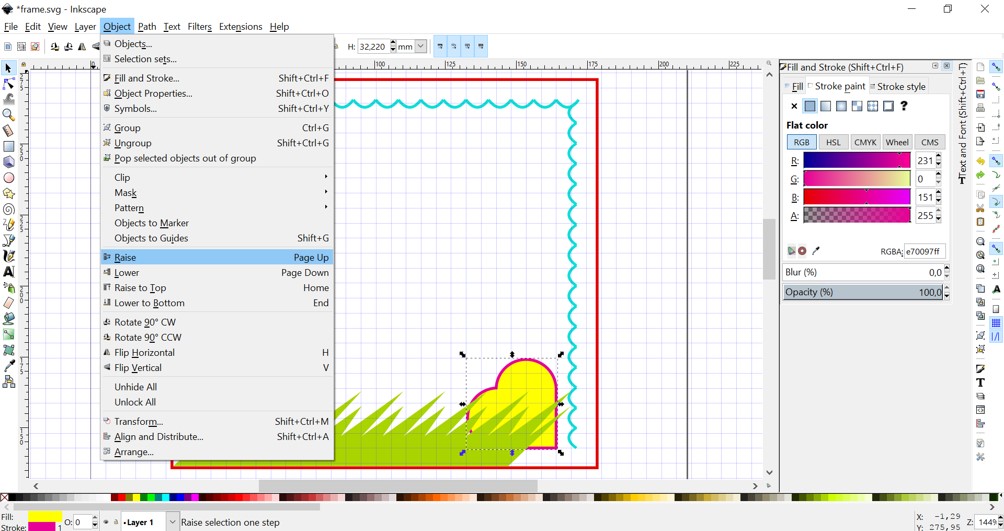
- For bringing the heart on top of other objects, I selected the heart, then ‘raise’ from the object menu.
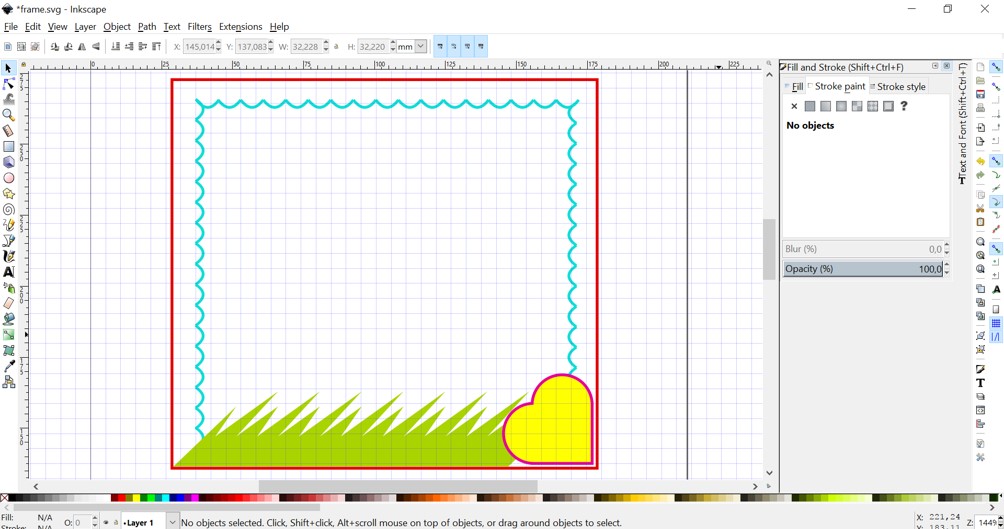
- I also designed the sun here. And rearranged the elements and played with the colors a bit also.
GIMP (Raster Based Program)
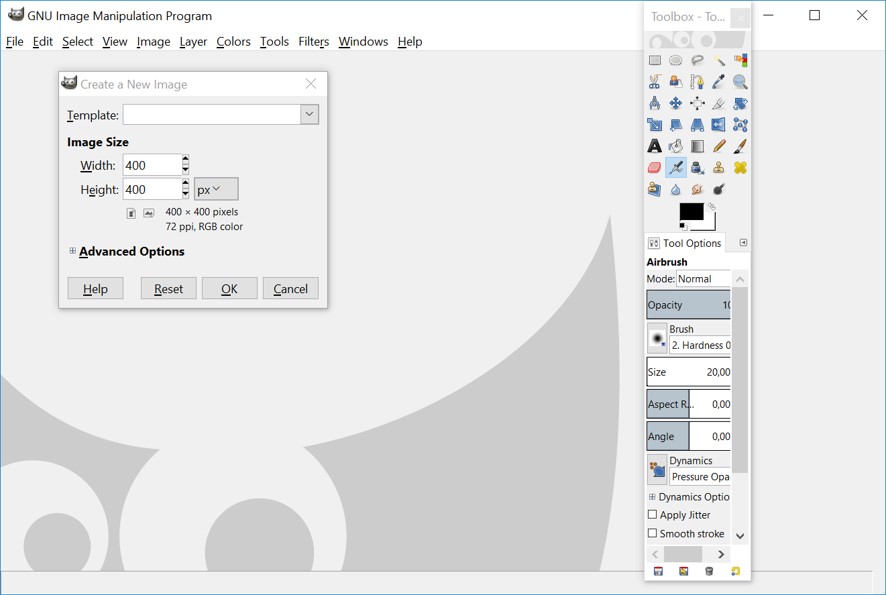
Since it was my first time working with GIMP, I prefered to learn its features by designing while following a tutorial. So I did follow this tutorial.- I created a new 400x400px image: file > new. I zoomed in by: view > zoom > zoom in.
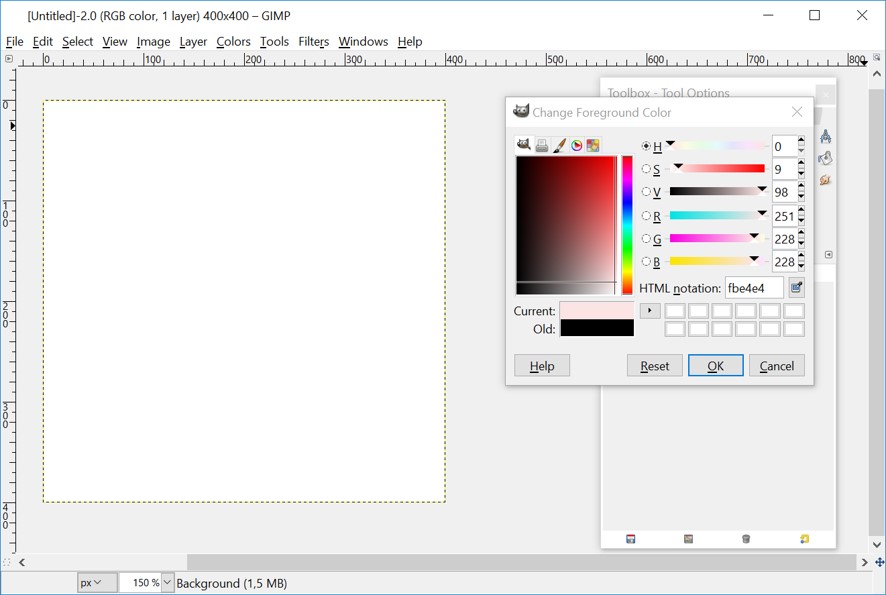
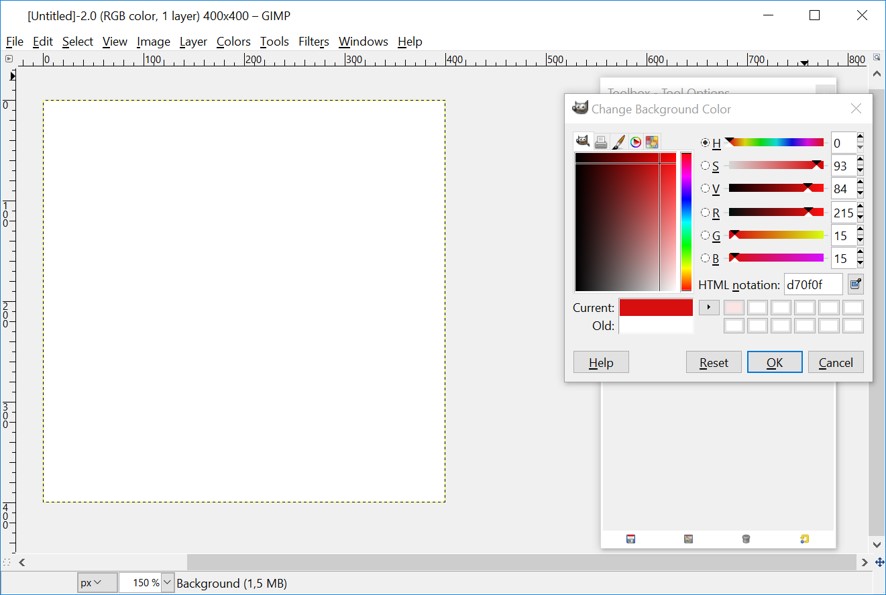
- I accidently closed the toolbox so I managed to bring it back through this path: Windows > recently closed docks > toolbox. I chose a light foreground color. And a dark background color.
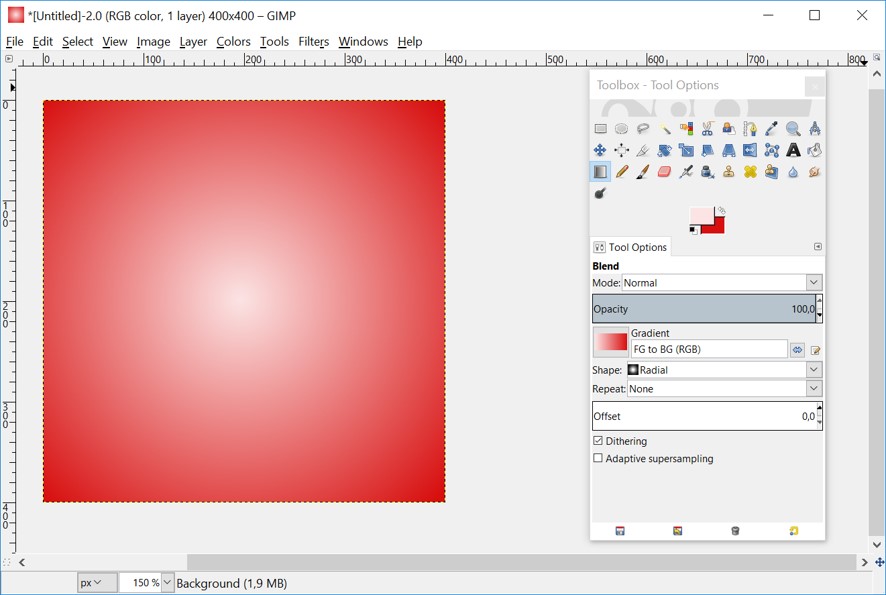
- I used a radial gradient for the background: Blend tool:Fill selected area with a color gradient.
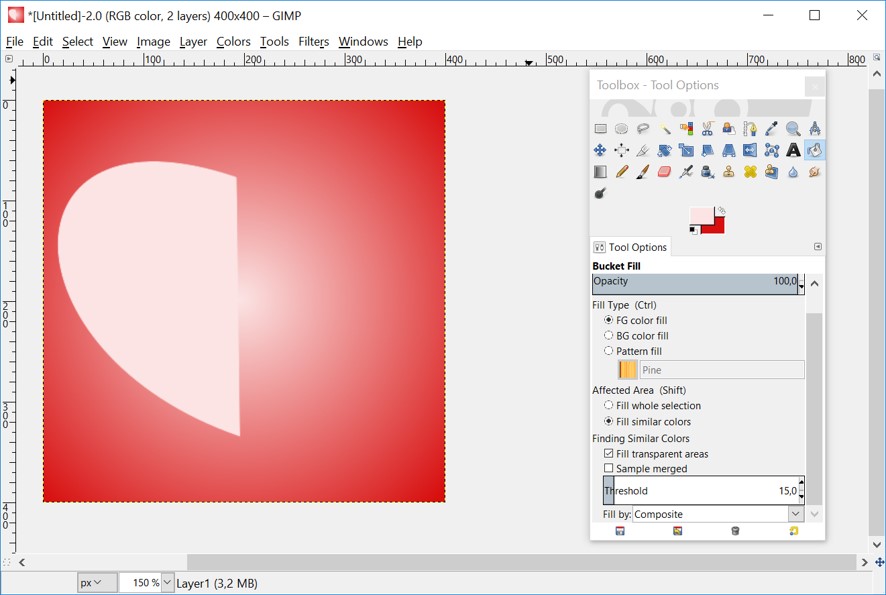
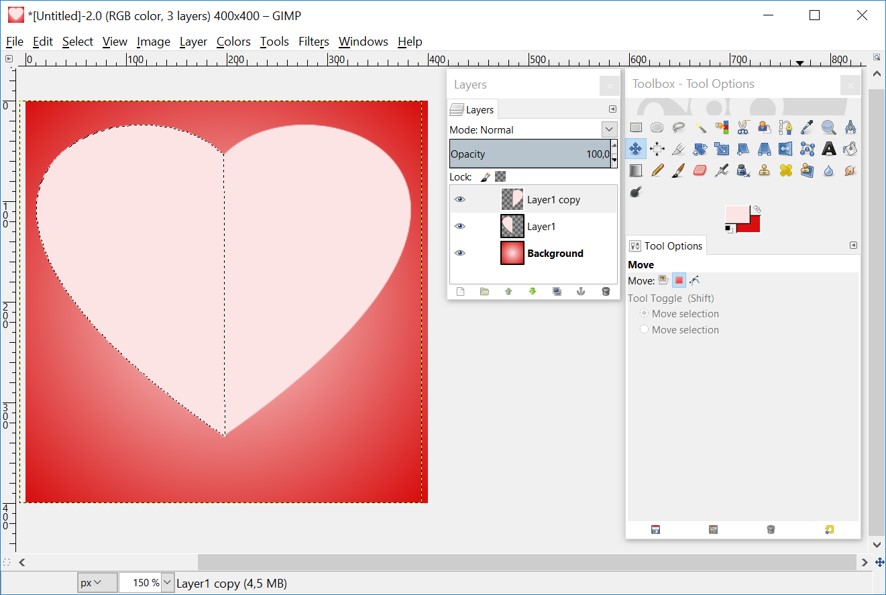
- I created a new layer (Layer > new layer). And I used Path tool to make a half of the heart. And Bucket to fill it with the similar color as fforeground color.
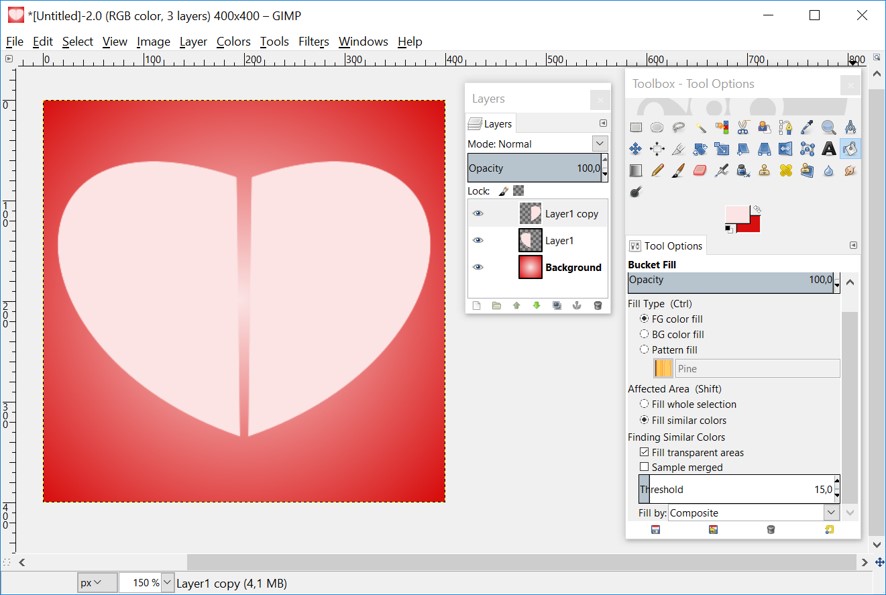
- Duplicating, Flipping and Merging layers: In the layer box I clicked on the 'Create a duplicate of the layer and add it to the image'. And then going to Layer > Transform > Flip Horizontally.
- Using move tool to move the other half close to the first half of the heart.
- I hided the bachground layer and then I right clicked on the copied layer and chose 'Merge visible layers'.
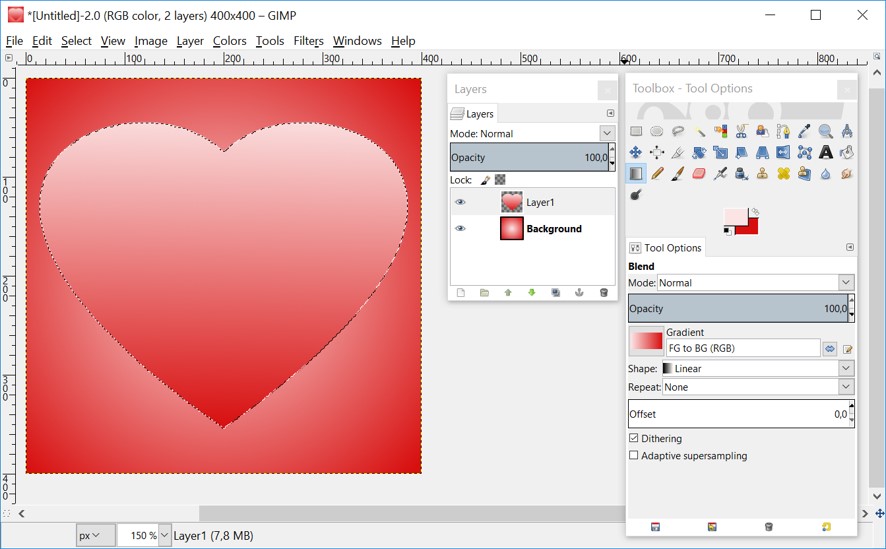
- Layer > autocrop Layer. Then choosing Alignment tool to align the design. Then I resized my layer to the size of the image by right clicking on the layer and choosing 'Layer to image size'.
- I selected the heart and stroke down with linear gradient. Right click on the layer > Alpha to selection. Then I used circle bruch and Linear gradient.
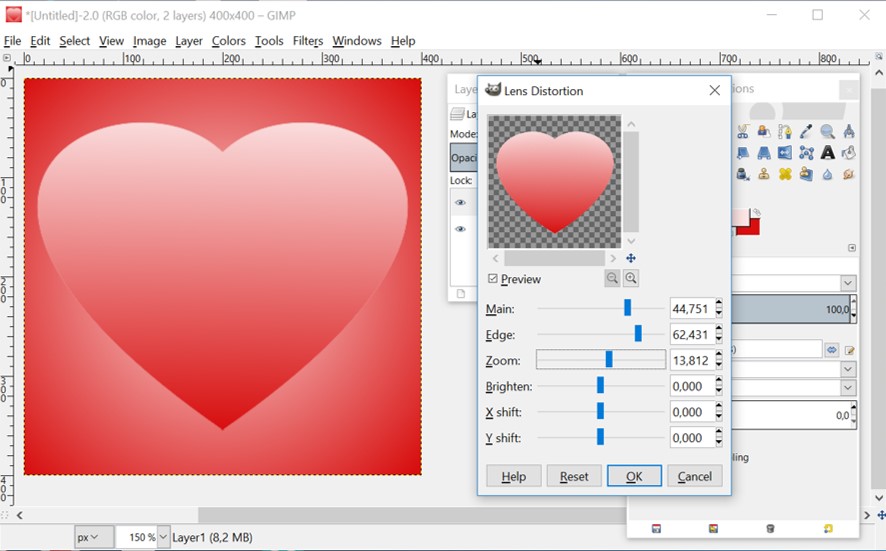
- Now I used lens distortion to add demension to the heart. Filters > Distort > Lens Distortion.
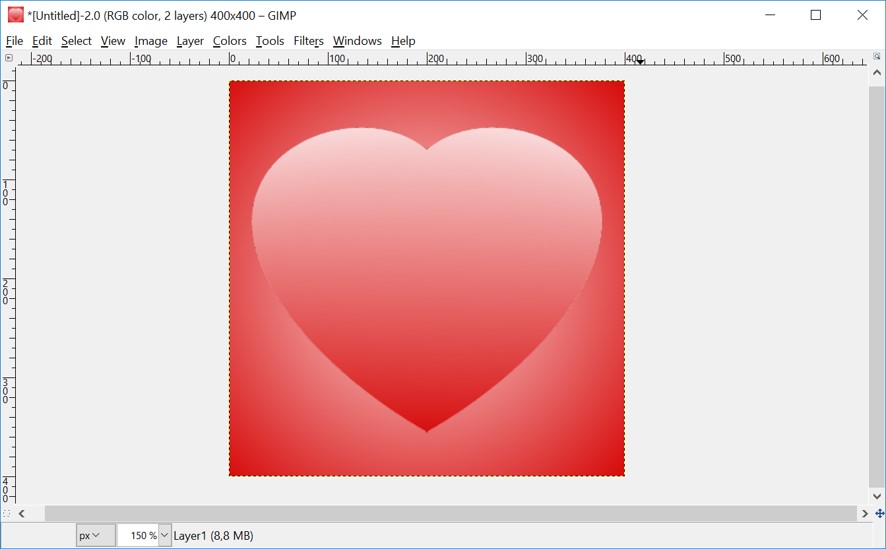
- And here is my beautiful heart
Evaluation of the selected tools:
I chose Fusion 360 because after browing the net and talking to fab lab people, I realized that this is one of the most powerful and highly suggested 3D design softwares that is also user-friendly at the same time. On the other hand, we have some instructors in our fab lab, who are well experienced in Fusion 360 and I could consider counting on their guidance in future challenges that I knew I would face for sure. Another good point is that Fusion 360 is a free software for students and academic institutions. The same story goes for the reason of choosing Inkscape. And regarding GIMP, I wanted to try a pixel-based program rather than photoshop (which i had some experinces in it beforehand), so I chose GIMP. And I could say that I GIMP is a very lighter version of Photoshop proper for modifications to the design. GIMP is free and open source and anyone could easily use it. What that was really annoying about GIMP is kinda heavy program, which takes a lot of time to start. What I really liked about both GIMP and Inkscape wa the variety of export options.
Fusion 360: Generally speaking although I had difficult time undestanding 3D design, I cannot blame Fusion 360 for this difficulty. It was my first time designing 3D model and working with 3D software so I even very simple tasks such as rotating a shape or drawing a simple rectangle seemed to be a bit different in this 3D environment and needed more practice to get to use to it. I had to draw and delete and re-draw lots of time to understand what is going on. Therefore, I could say that for the beginners with zeo experience in 3D design, it could be somehow a painful process. On the other hand, Fusion 360 is a very powerful software with variety of good features that make the design time more convenient such as rectangle, circle, circular pattern, extrusion, arc and lines (those that I have used up to now). I found also exporting objects conveniet. For example for exporting .stl file, when the design is done one just need to right click on the project name located at the top of BROWSER tab and select "Save as STL".
2D Design: I used both Inkscape and GIMP. Inkscape is a vector based program that adopts the geometry of points, lines, and curves and on the other hand, GIMP is a raster based program that deals with pixels. Considering working with both programs, I could say that I found both useful. I found Inkscape a good design tool with powerful and flexible drawing tools and features for creating a 2D design. And I believe that GIMP is more suitable for minor editting of the design instead of creating one. At least that was my first experience and assumption with both of them till now. I designed a heart using both Inkscape and GIMP and I found doing so with Inkscape the way more convenient compared to GIMP. But generally speaking, the efficiency of the software depends on the purpose of the use.
Original Design Files
3D Flower (.f3d)3D Flower (.stl)
3D Grass (f3d)
3D Grass (stl)
3D Heart (.f3d)
3D Heart (.stl)
3D Sun (.f3d)
3D Sun (.stl)
2D Friendship Garden (.svg)
2D Heart(.xcf)