Week thirteen: Interface and application programming
For this week I was not fully conscious about how much programming was needed, I started doing the app in app inventor and I thought everything was right but then I was encountering mistake after mistake, app inventor is really user-friendly but it does not do the work for you.
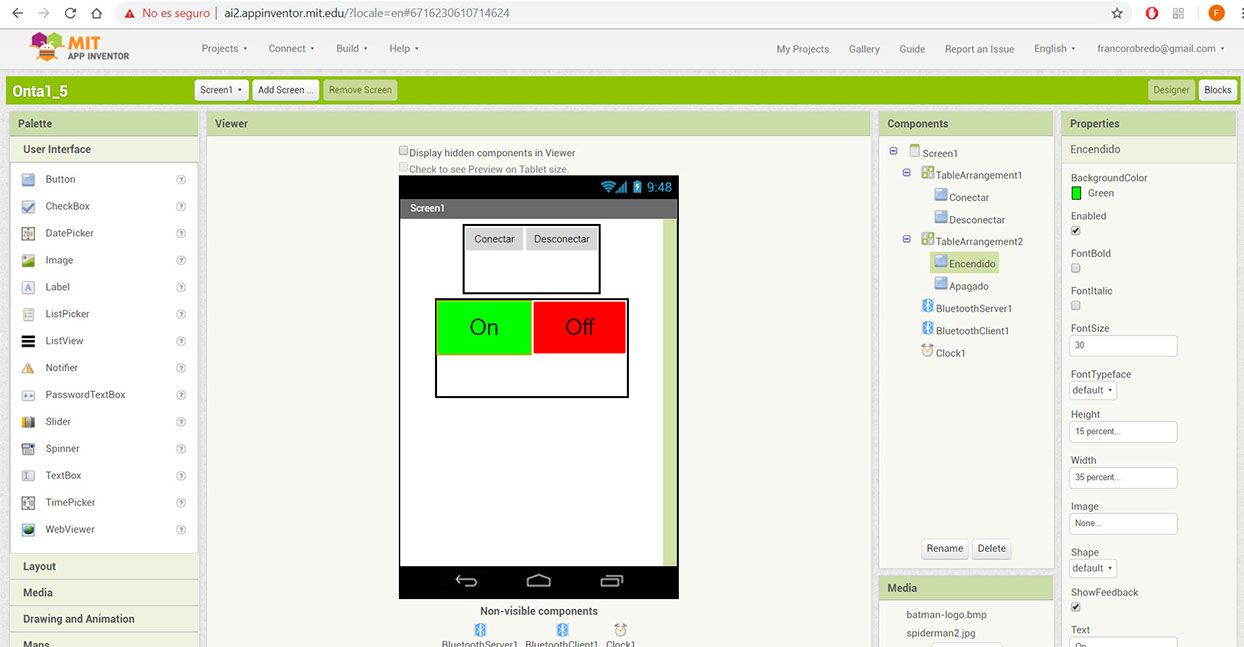
I made the interface and builded the program block using examples.
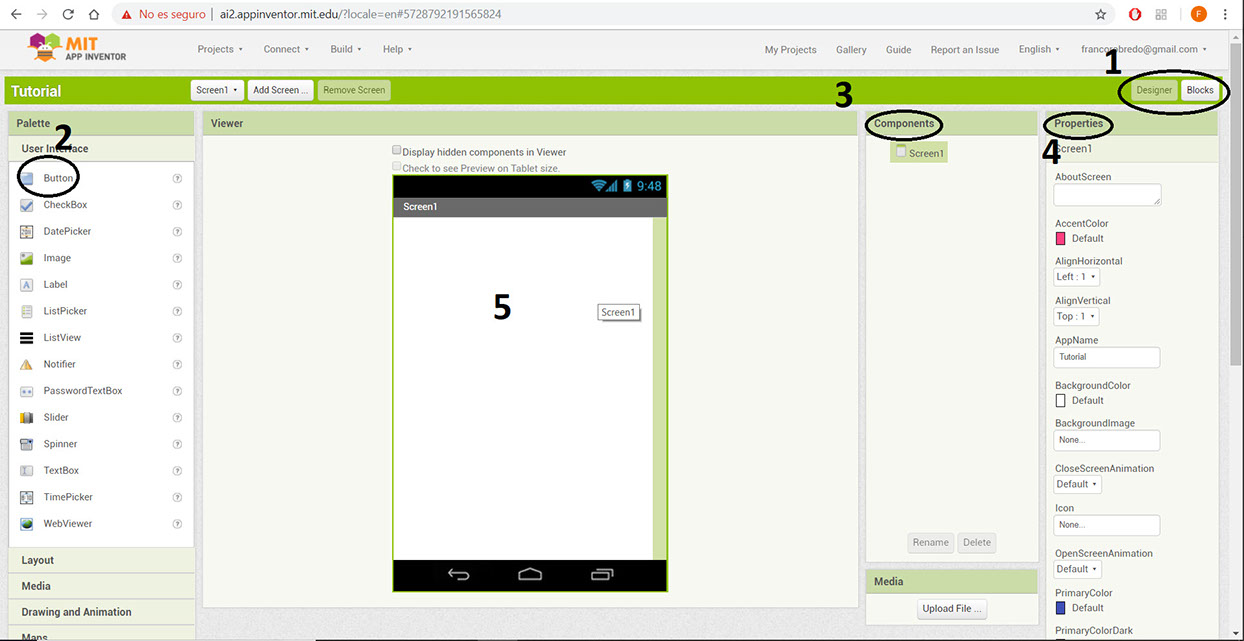
This is MIT's App inventor, to get to this screen click on "Projects", "start new project".
- There are 2 parts for programing your app, "Designer" which is the page above, here you are creating the visual part of the app. The other part is "Blocks", where you connect diferent blocks to create a program.
- In this Palette you have all the components you need in your app, in my case I only used Buttons so the app would stay easy to use and avoid problems.
- This is where you can visualize all the components you currently have in your app, you can rename them or delete them, also you can select each one so you can see their properties.
- These are the properties, just as size, color, background, font, text etc.
- This is the preview of the app, just as you would see it in your phone.
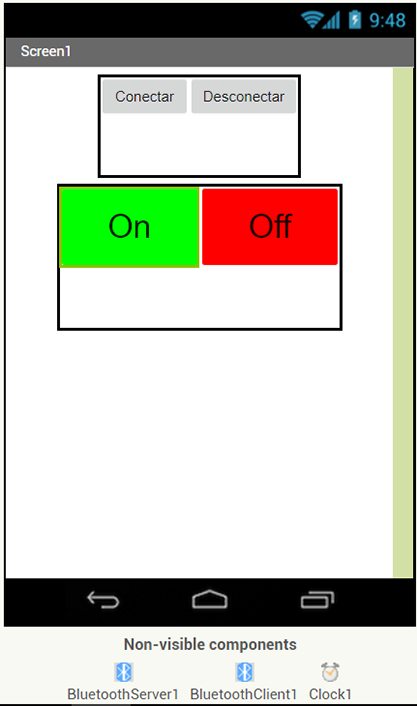
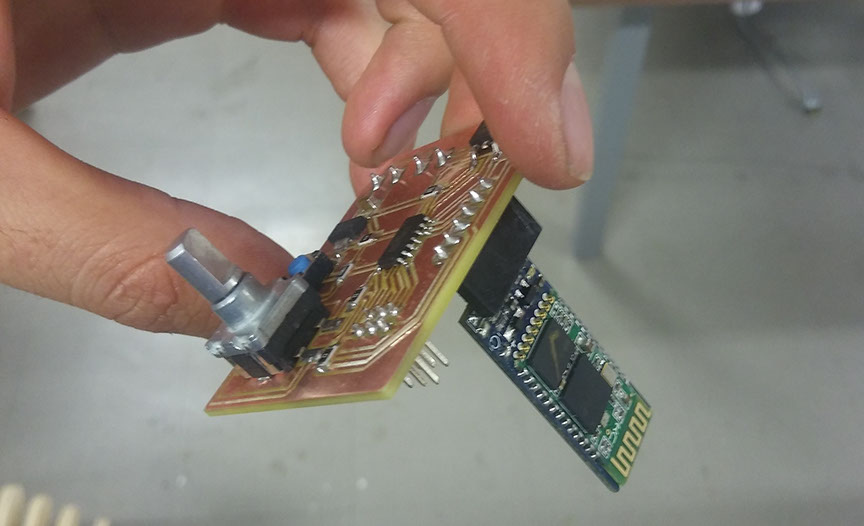
This is preview of my app completed, I have a button for connecting via bluetooth to my output board in which I previowsly connected a bluetooth hc-05 module.
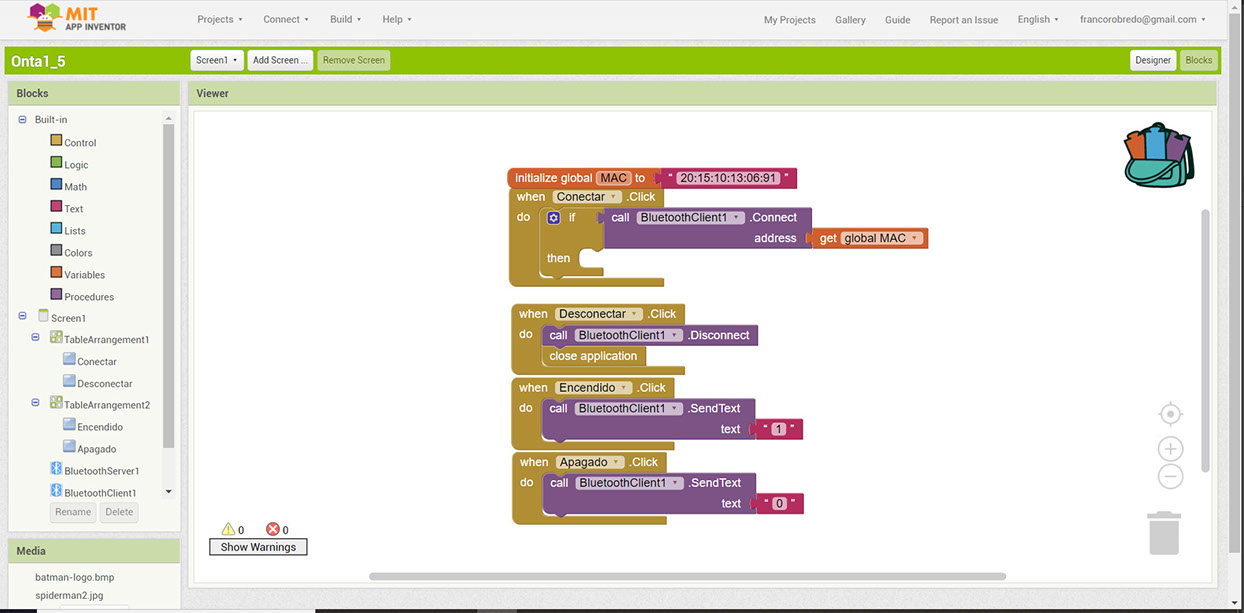
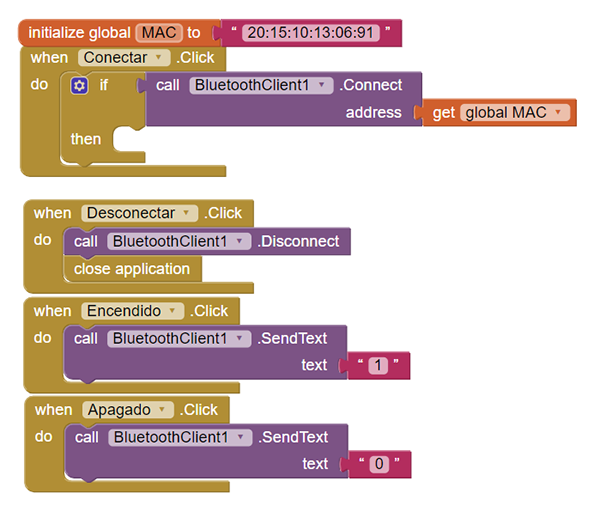
This is the "Blocks" programming I was explaining earlier, you click and drag the blocks on the left and start building your program, this is very intuitive and user-friently because only "logic" connections can be made.
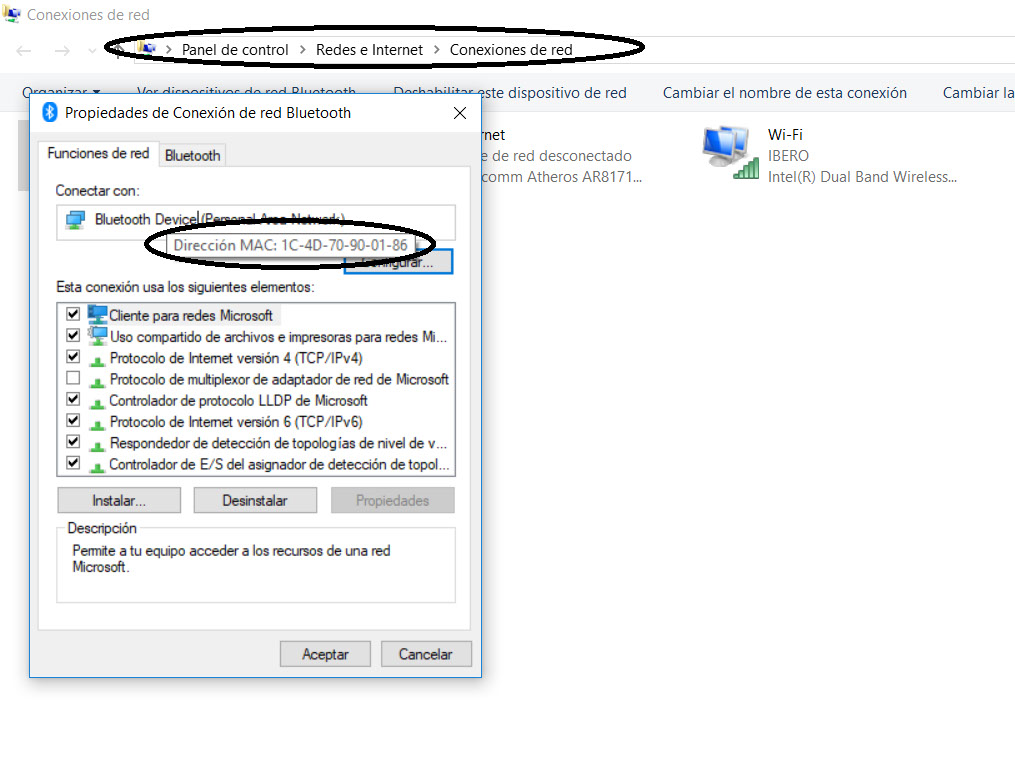
To get your "MAC address go to control panel>Internet and networks>network connections, right click on your device for properties, get your mouse pointer over the name of the device and you will see the MAC address.
/*
This code will run the bluetooth as slave
pressing 1 turns on led 4
pressing 0 turns off led 4
*/
#include //Software Serial Port
#define RxD 1
#define TxD 2
#define DEBUG_ENABLED 1
SoftwareSerial blueToothSerial(RxD,TxD);
int led = 4;
void setup()
{
pinMode(RxD, INPUT);
pinMode(TxD, OUTPUT);
setupBlueToothConnection();
pinMode(led,OUTPUT);
digitalWrite(led,HIGH);
}
void loop()
{
char recvChar;
while(1){
//check if there's any data sent from the remote bluetooth shield
if(blueToothSerial.available()){
recvChar = blueToothSerial.read();
if(recvChar == '1')
digitalWrite(led,HIGH);
else
digitalWrite(led,LOW);
}
}
}
void setupBlueToothConnection()
{
blueToothSerial.begin(9600); //Set BluetoothBee BaudRate to default baud rate 38400
blueToothSerial.print("\r\n+STWMOD=0\r\n"); //set the bluetooth work in slave mode
blueToothSerial.print("\r\n+STNA=HC-05\r\n"); //set the bluetooth name as "HC-05"
blueToothSerial.print("\r\n+STOAUT=1\r\n"); // Permit Paired device to connect me
blueToothSerial.print("\r\n+STAUTO=0\r\n"); // Auto-connection should be forbidden here
delay(2000); // This delay is required.
//blueToothSerial.print("\r\n+INQ=1\r\n"); //make the slave bluetooth inquirable
blueToothSerial.print("bluetooth connected!\n");
delay(2000); // This delay is required.
blueToothSerial.flush();
}
The code for the board was super hard, I thought it was just the app telling the attiny by bluetooth to turn on or off the PWM but for some reason I couldn't make it work. I will post my best try but in the end I found this code and it worked.
You can get it from this page:
Here you can download the functional program, my best try and de .apk for the app