MAKE SOMETHING BIG
When I started at the lab my Shpbot was not working as it should, it did drill it self down, not finding its zero point, claiming the emergency button to be on.
So a lot off things was not doing the right things. After a lot off atemts to fix it I contacted Tom from the support of Shopbot,
after 87 mails and a lot of videos and photos back and forth USA and Iceland I got Bas and Linda to come to Sauðárkrókur and have a Hangout meeting with Tom.
After a few discussions Tom found out that my spindel cabel(the orange one) had been to cloese to the others. The electricity pollution was too high and caused that the other cable
sending messages to the control panel even if it was not suppose to do so. This led to confusion, you can say the control panel became insane. So Tom sent me new control panel
and I replaced it with the old one and I cut all the fasteners apart and fixed them again, with more intervals.
When I had these features, I got a brand new machine, since then she has been
like my mind and done everything she desires.
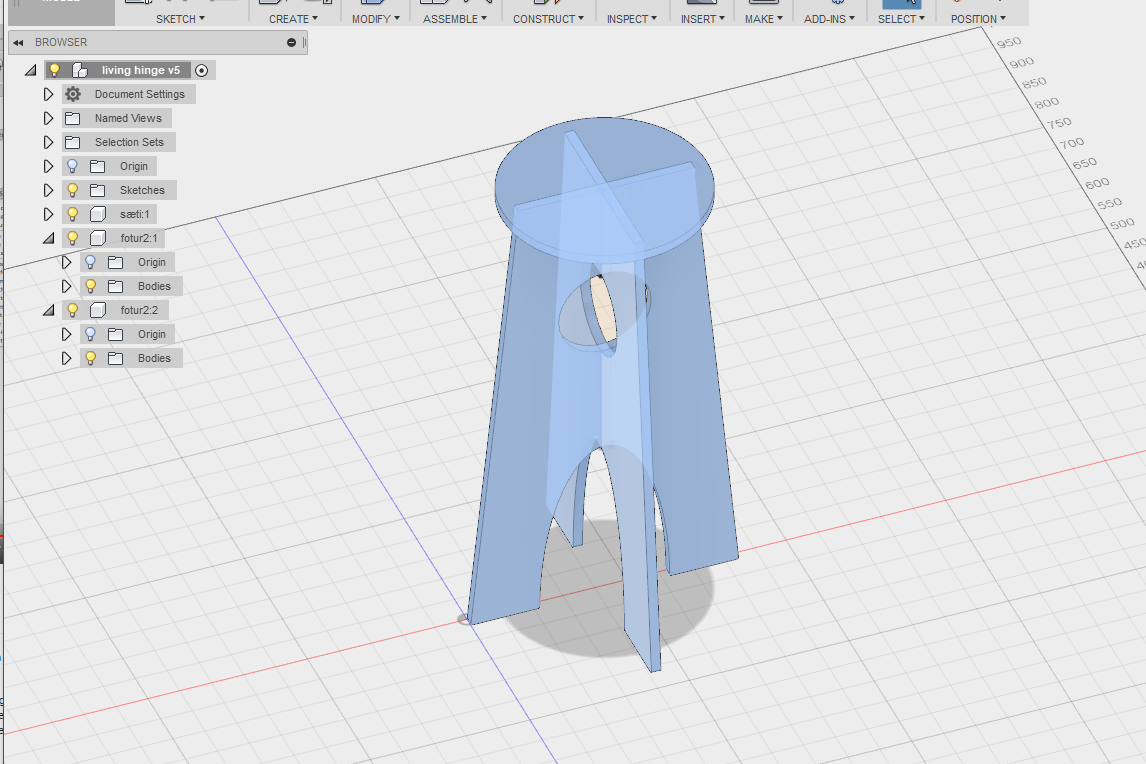
But my project in Make someting big, I wanted to make barstools for the lab.
First I researched good size for the stool. Found out that hight goes from 63-74 cm and the seat size was from 33-40 cm diameter.
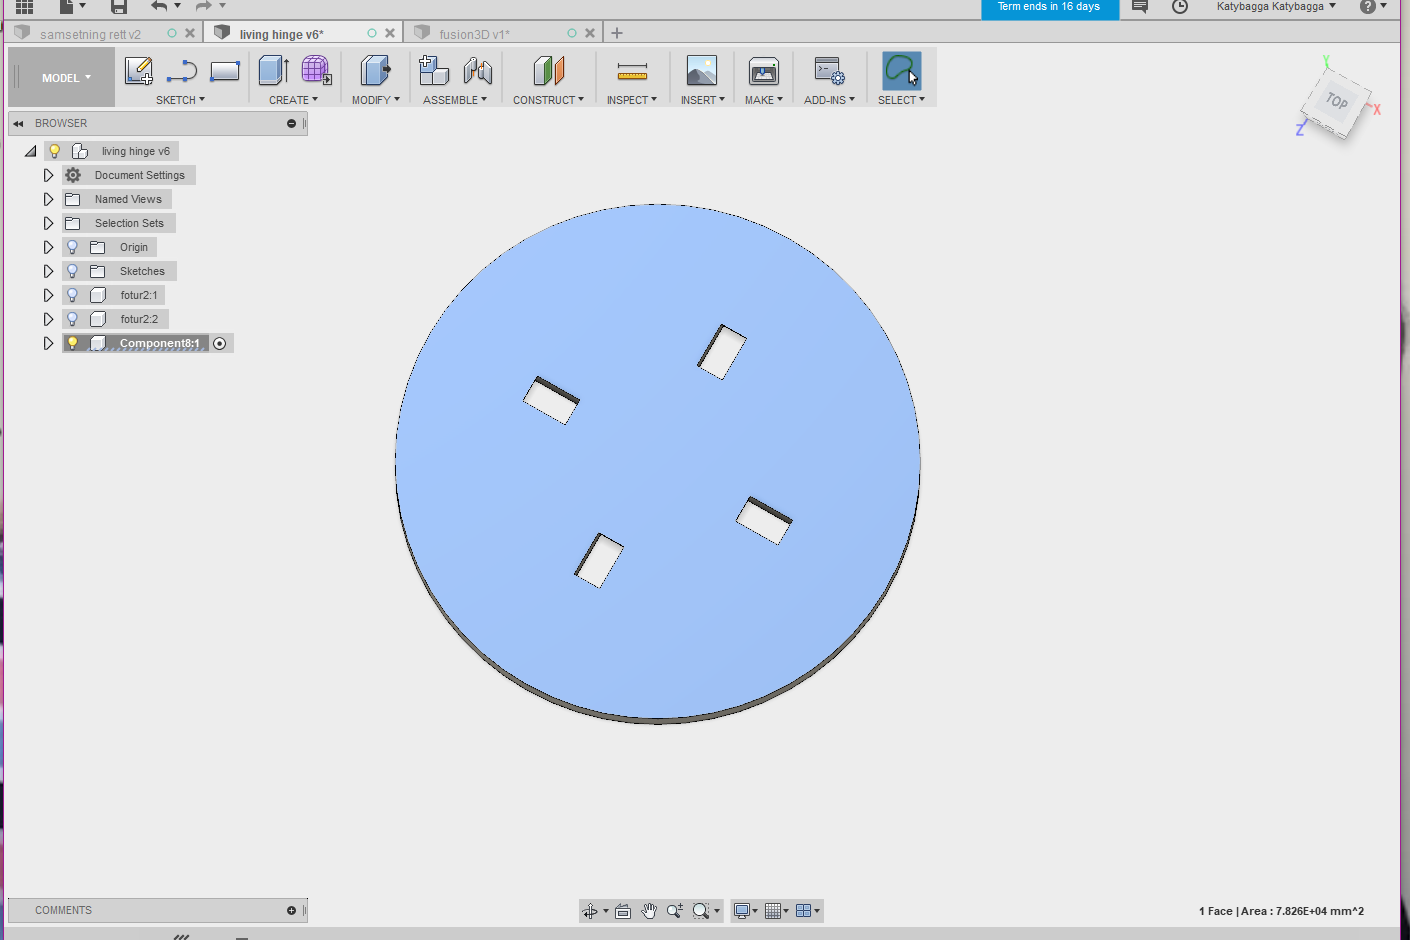
I decided to have him 72 cm in high and 33 cm in diameter.
I had some problem when it came to make the cut in the seat, I only made one foot size and made a coby for the other one,
but the copied one did not whant to make the cut right. And it took me a lot of time to figure out how to fix that! But what was the problem
was just settings in the compoment, and when i had deleted it and maked new one it was right.
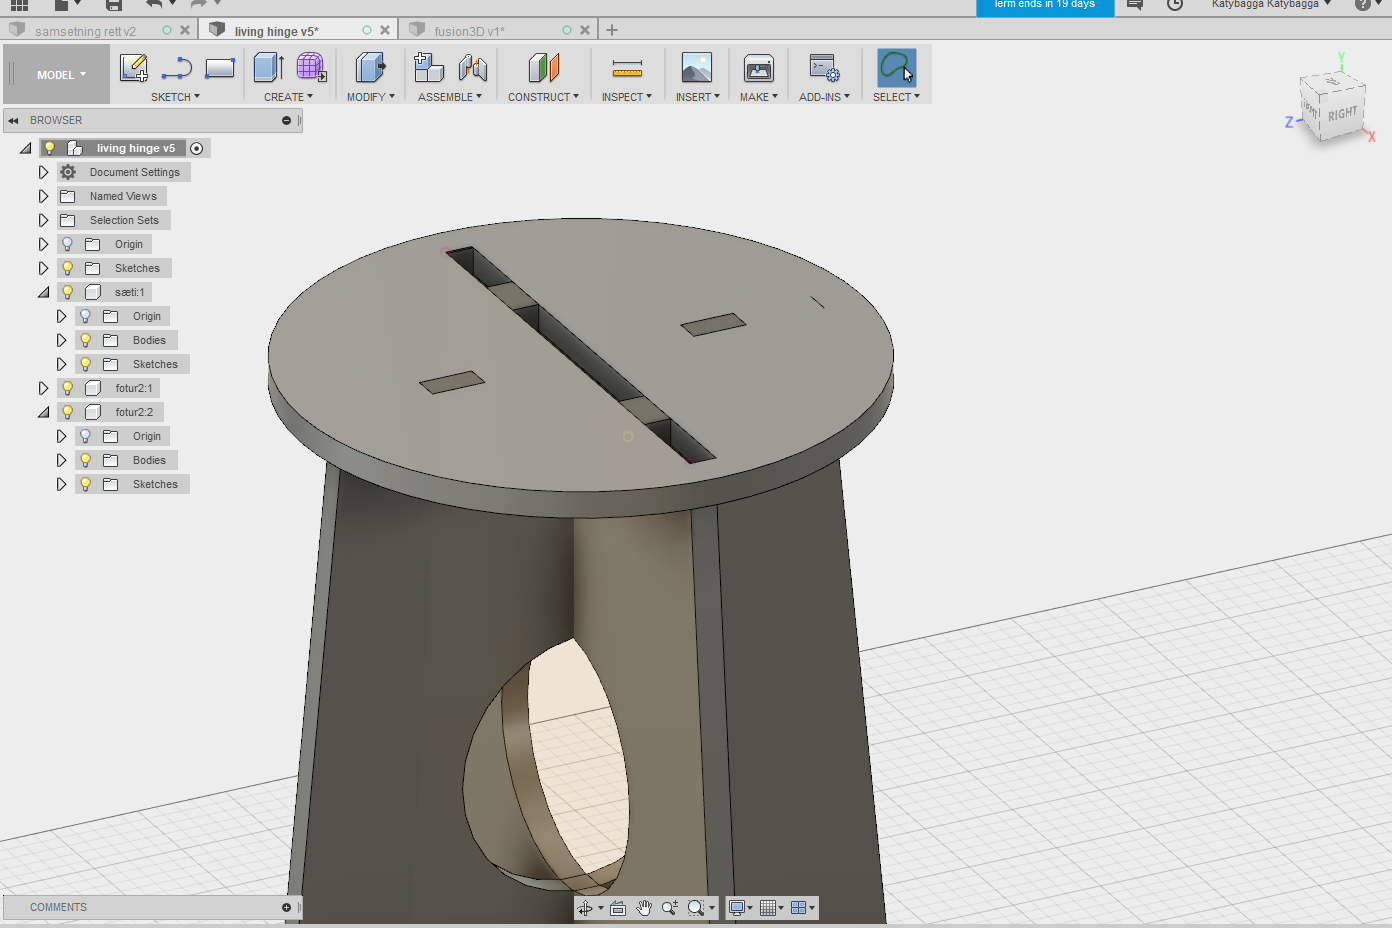
In the end I managed to get it right.
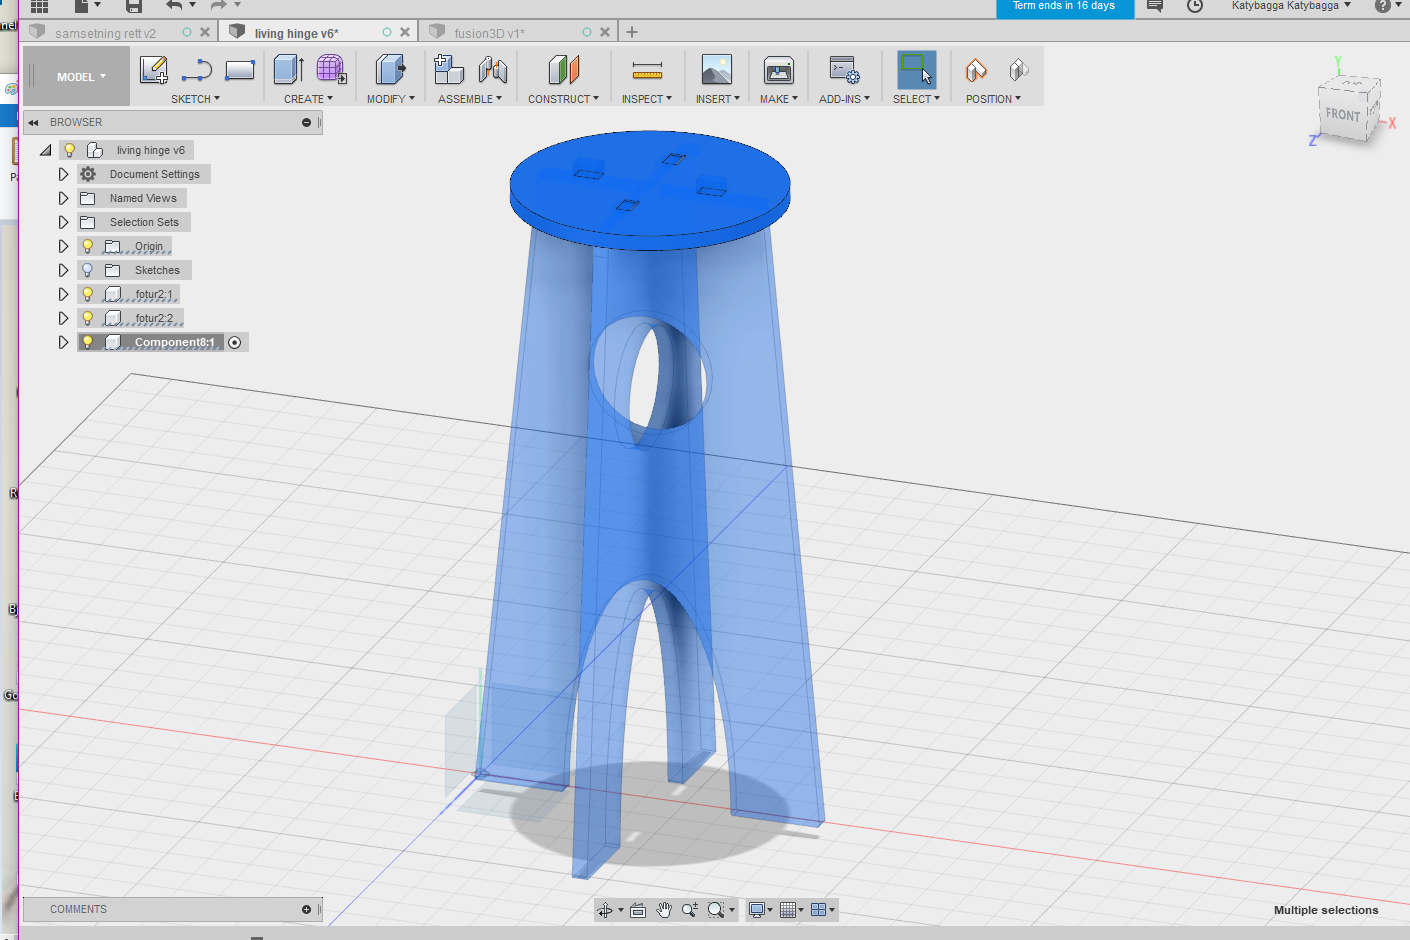
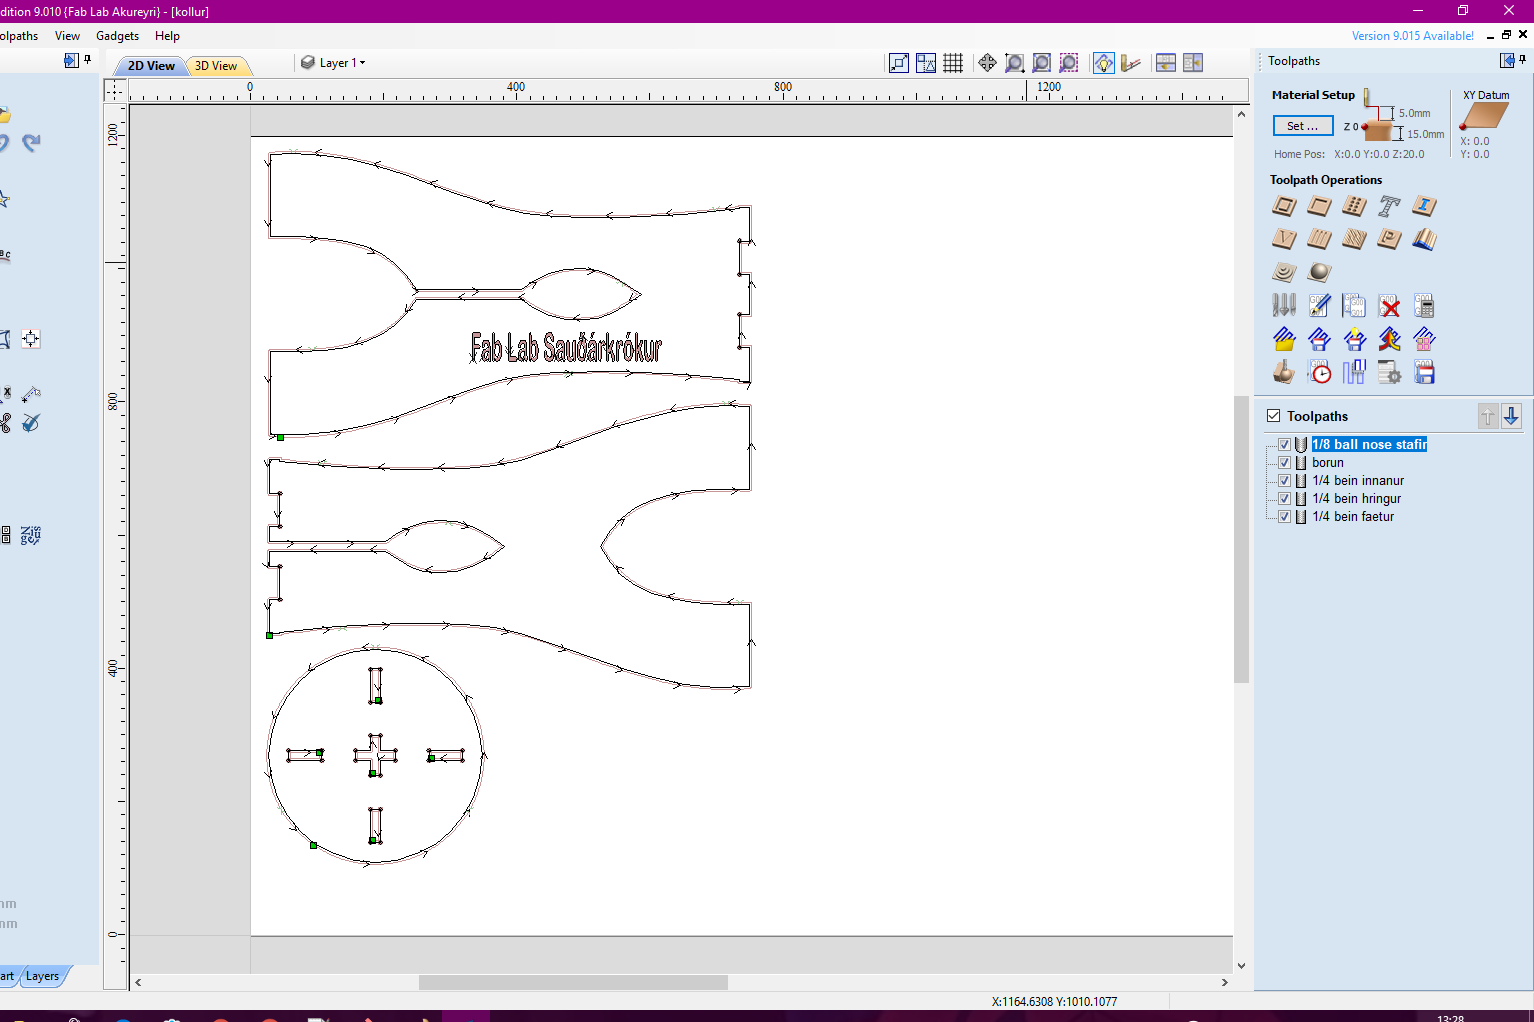
So here is my final drawing in Fusion.
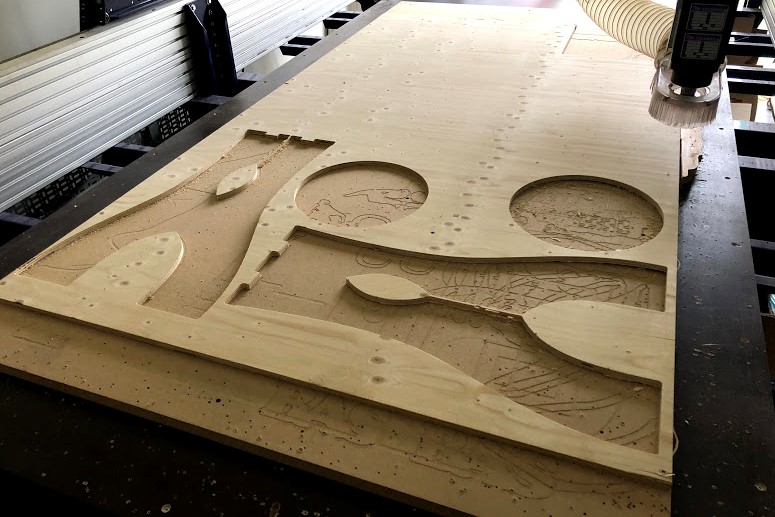
Next step was to make new componment for each piece and download them as an a dxf file, then I was abel to open it in vCarve and
make the milling paths in the Shopbot.
I also drew it in Inkscape to see the differens. Here I made some changes of the design of the topfittings.


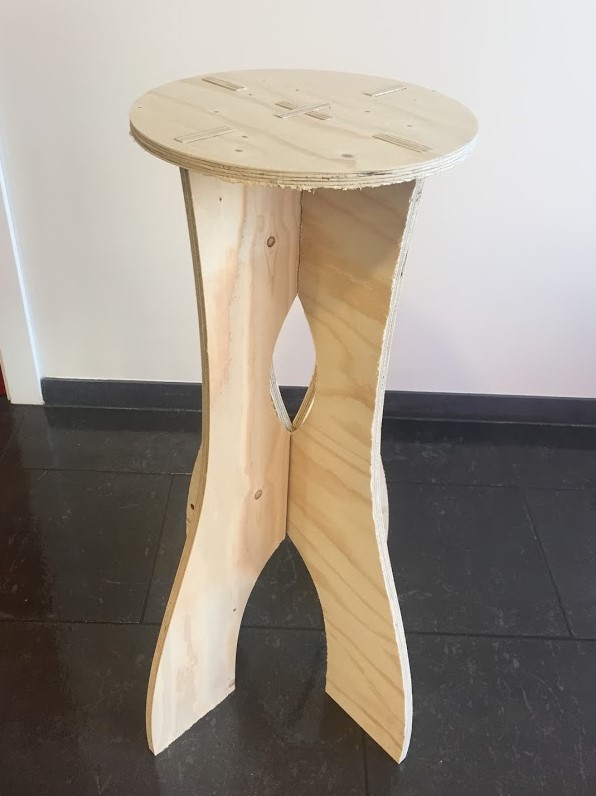
First I maked a test with 12 mm plaiwood and I found out that it was better to have the seat 32 cm in diameter so I changed that in the drawing.
I also found out that I liked it better with the wood stipes horizontal instead of verical.
So I bought a 15 mm plaiwood and did another test, I did add some text too the design and turned both horizontal for better look.
After the design I had too put it in the vCarve and I also addid more drilling holes for better asembly.
First I did the text, then changed the milling bit and did the drilling holes. After that I did the inside cutting and last the outside cutting.
How did I do the settings:
I uses a 1/4" ballnose for the text and 1/4" staight with 2 fluttes for the drilling and cutting.
I did make a 5 passes for the matterial, I added a tabs for the outside cutting 5/3 mm, so it would be fasten to the plate.

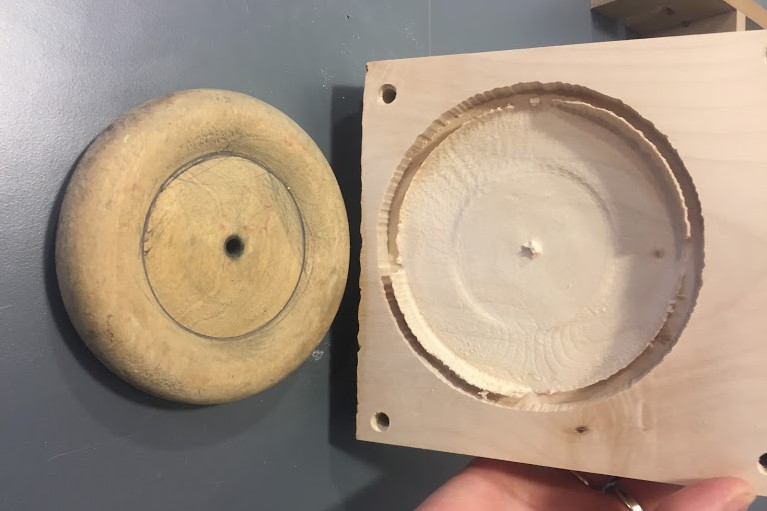
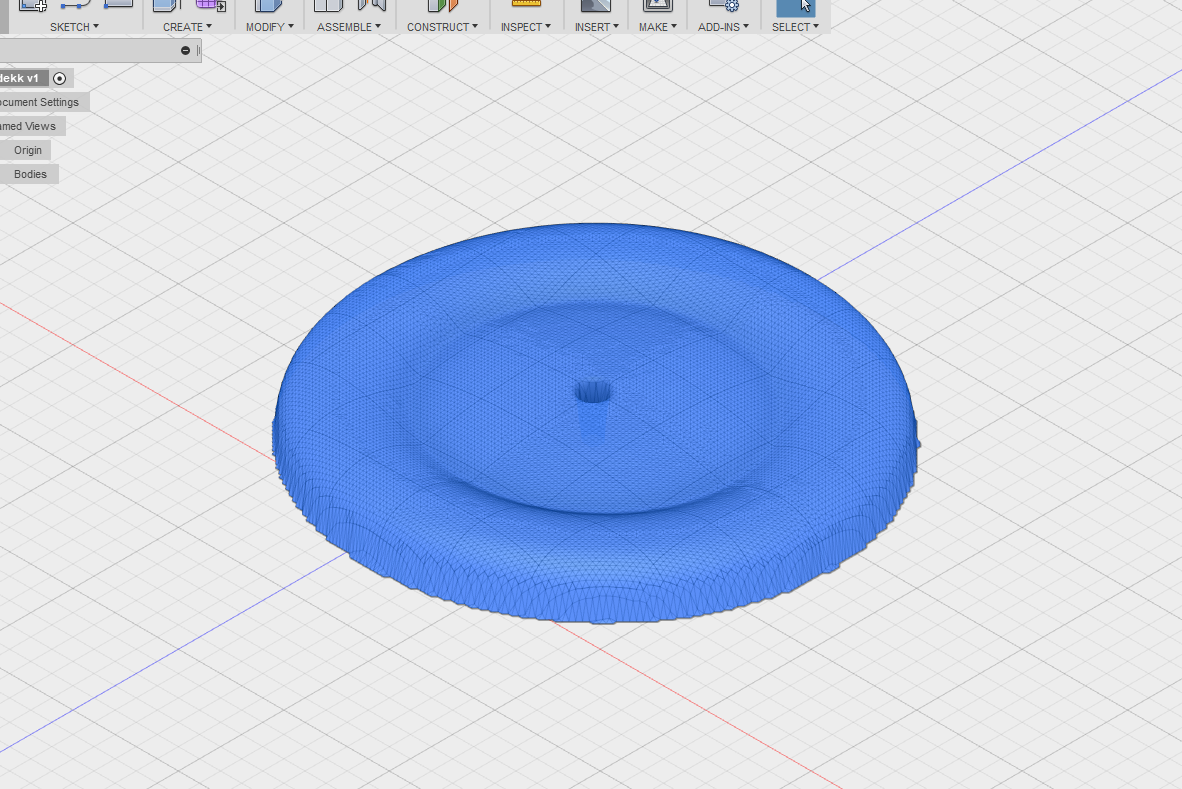
In week 6 I did the Roland Modula scaning and I scaned a tier from an old doll carriage from my grandmother.
I did that in Roland Modula and that went realy well, the format in Fabmodul are real easy to use for this format.
So this week I did the milling in the Shopbot machine. First I moved the scaning into the vCarve, and made a file for roughing and finishing. I use a 1/8 inch ball nose mill.
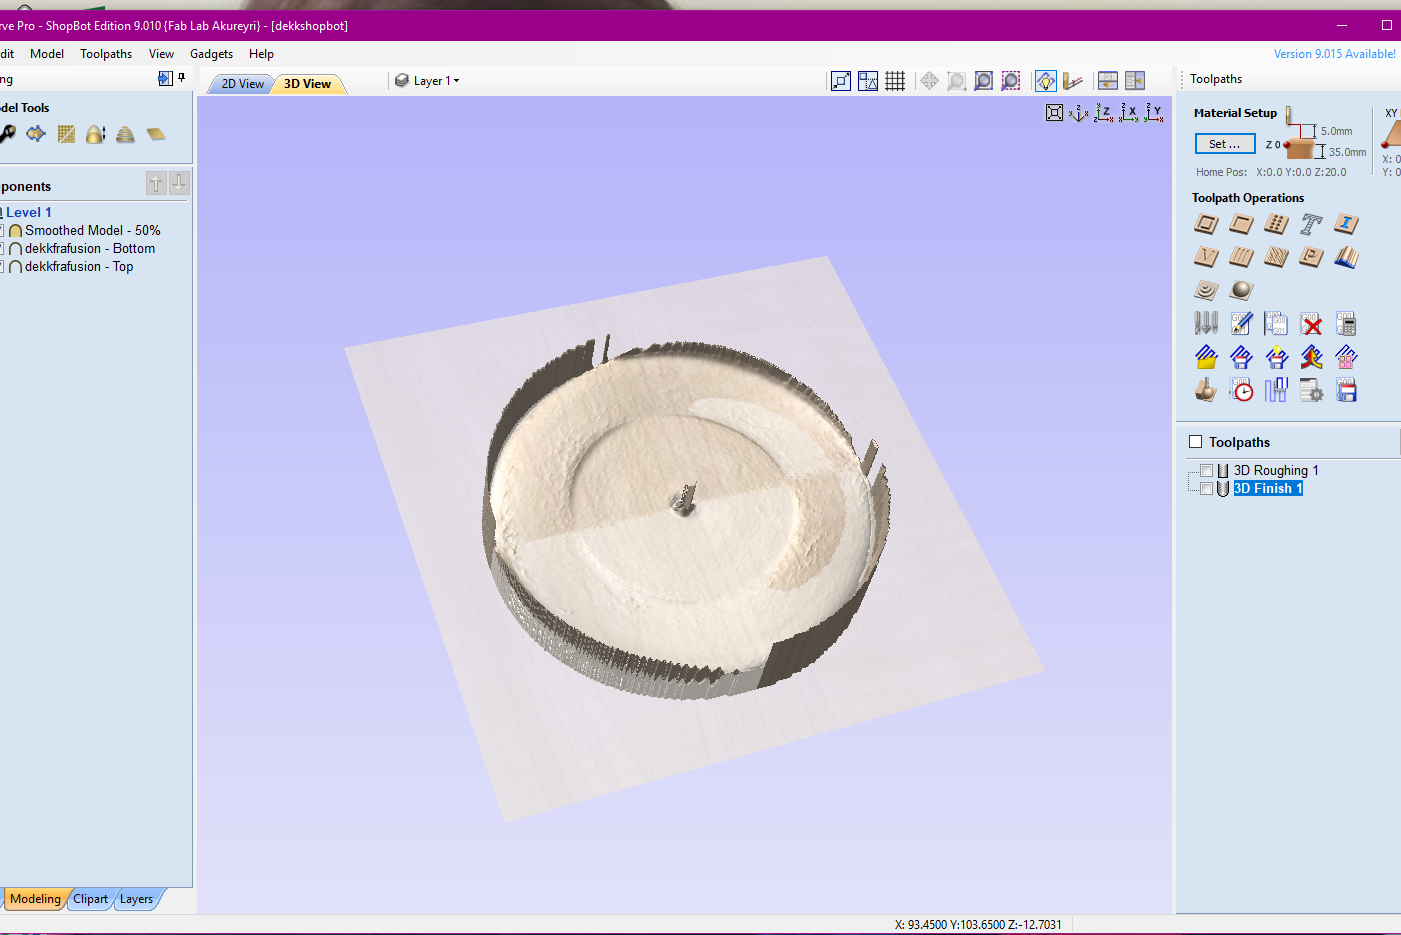
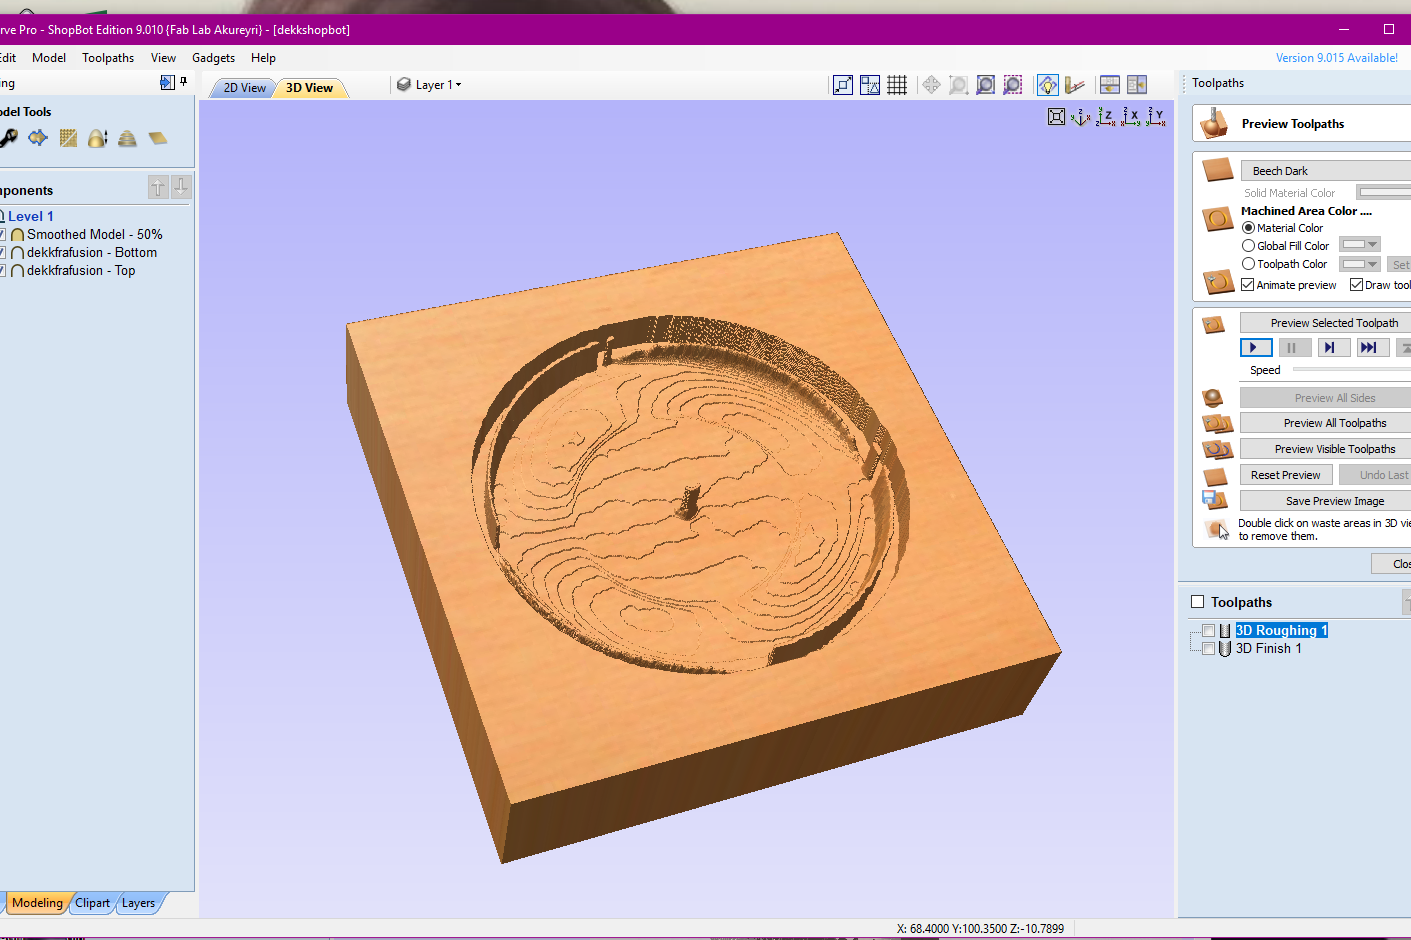
But the milling did not go as I thought, first I plased the center of the tier to deep, and then there was something off in the milling it did not mill as the scaning photo said.
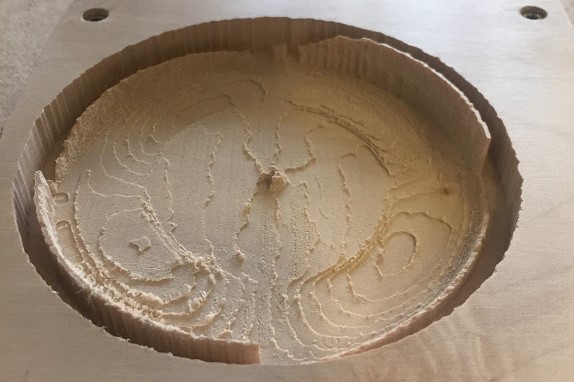
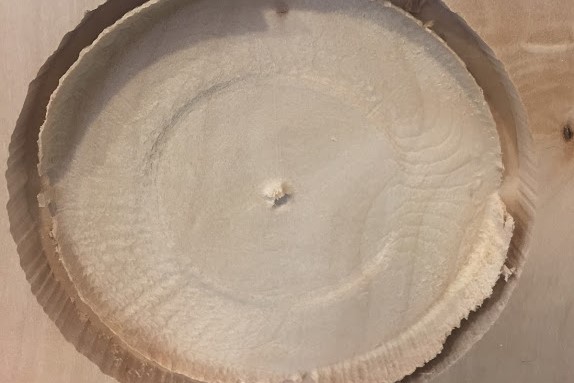
As you can see this is not the same. The milling is not accurate and not at the correct depth.