Embedded Programming
This assignment we have to read the datasheet of the microcontroller we will use and program it to do something.
Here I used an Attiny45 microcontroller to blink an LED.
This assignment was difficult for me and I had to use the help of my colleagues to finish it.
First I read the datasheet of the Attiny45 to understand how to use this microcontroller.
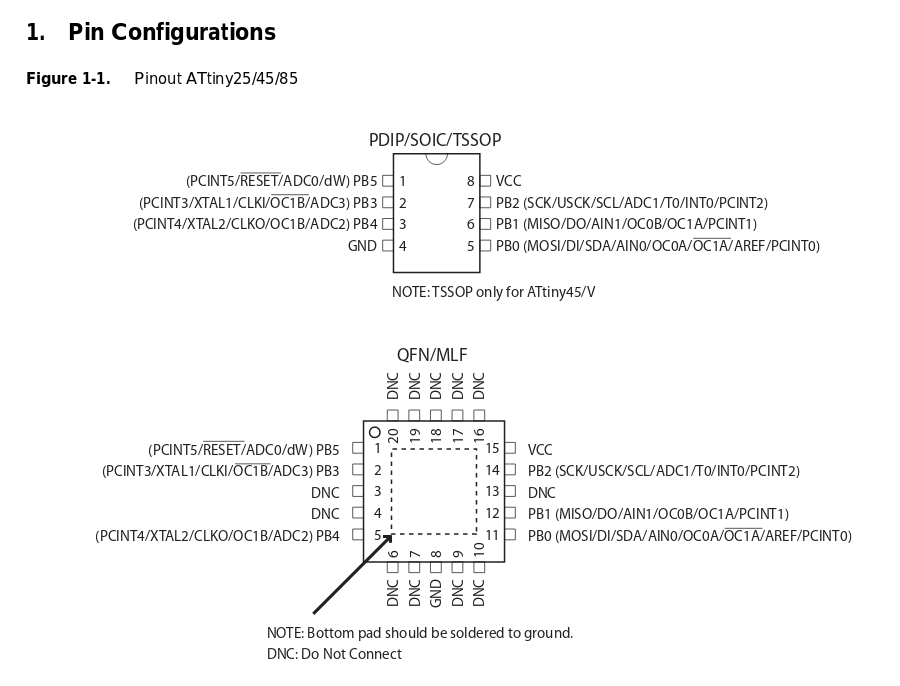
Img: Attiny45 pinout
I learned the basics on how to turn ON and OFF an LED using a microcontroller through its pins.
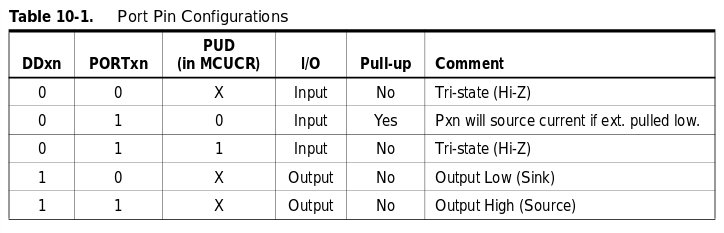
Img: Attiny45 ports
After having an idea on how microcontroller works, I designed the board I will be working on.
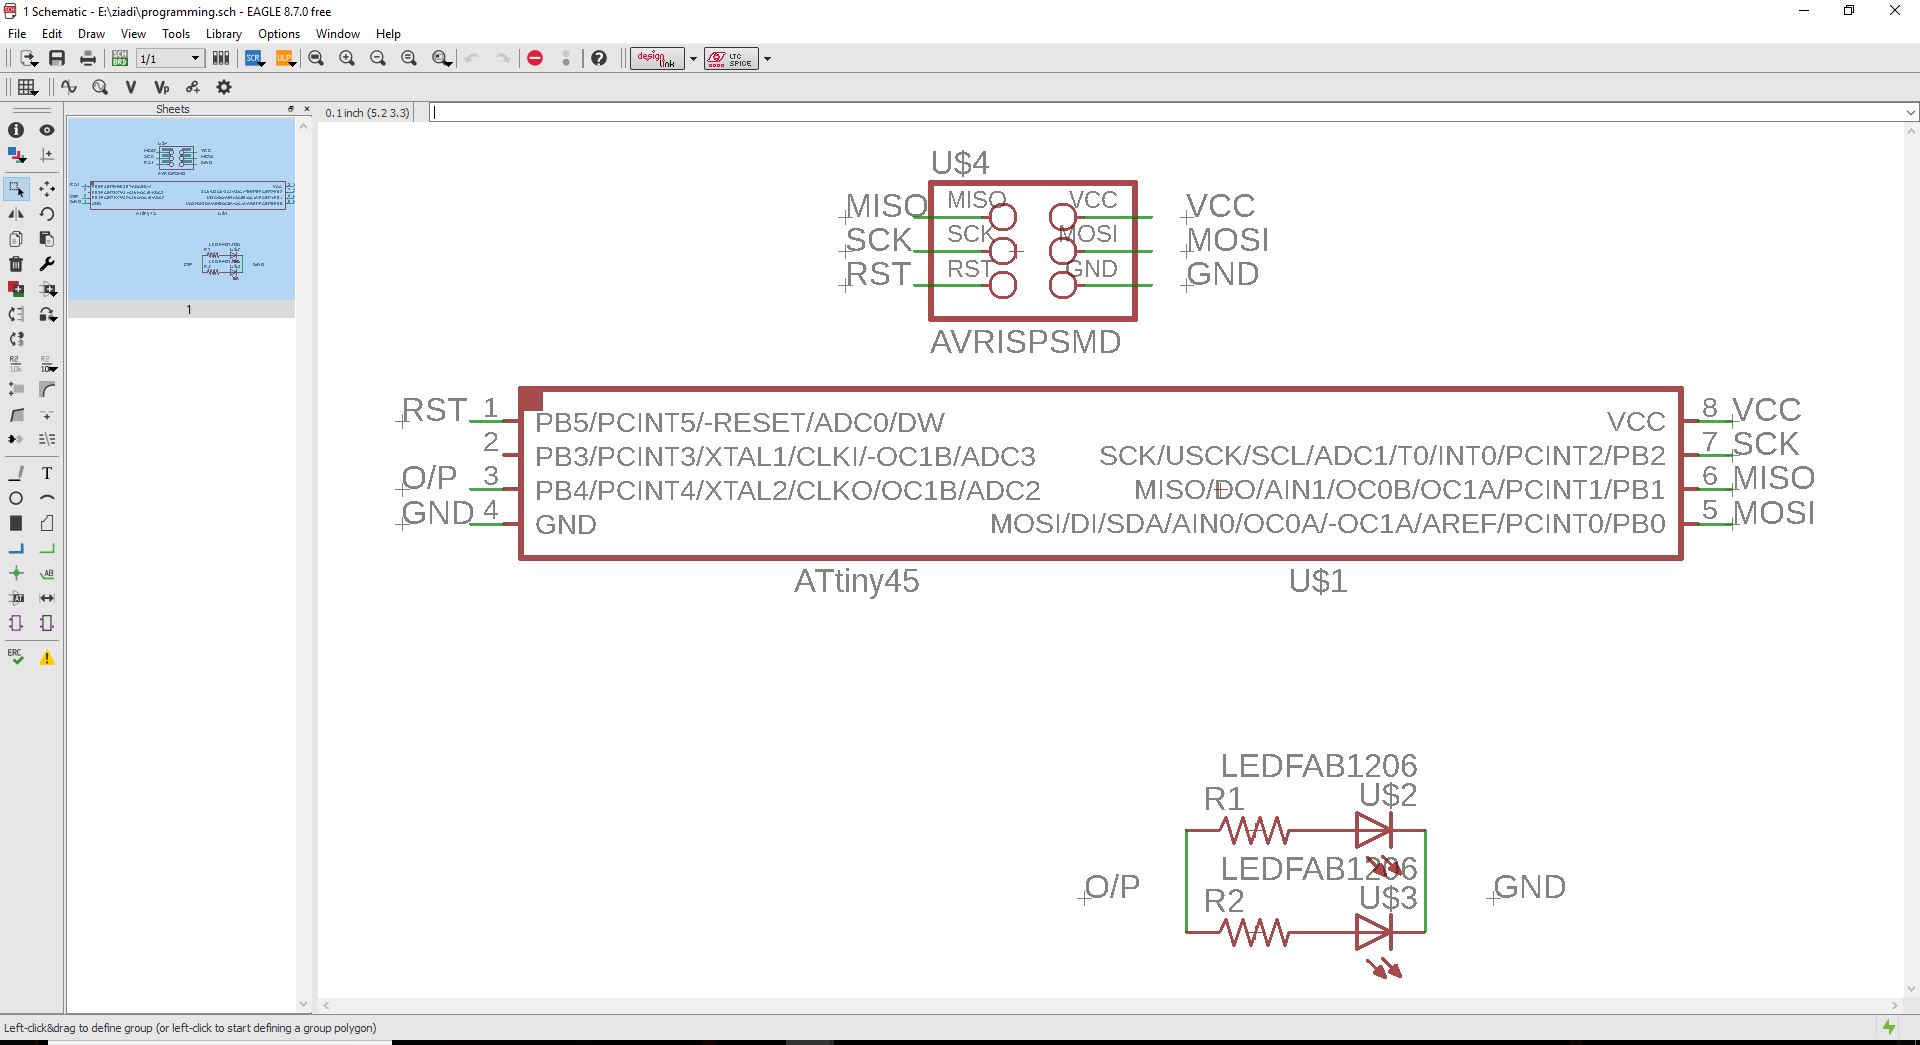
Img: Attiny45 schematic
And I continued to design the board I will be using.
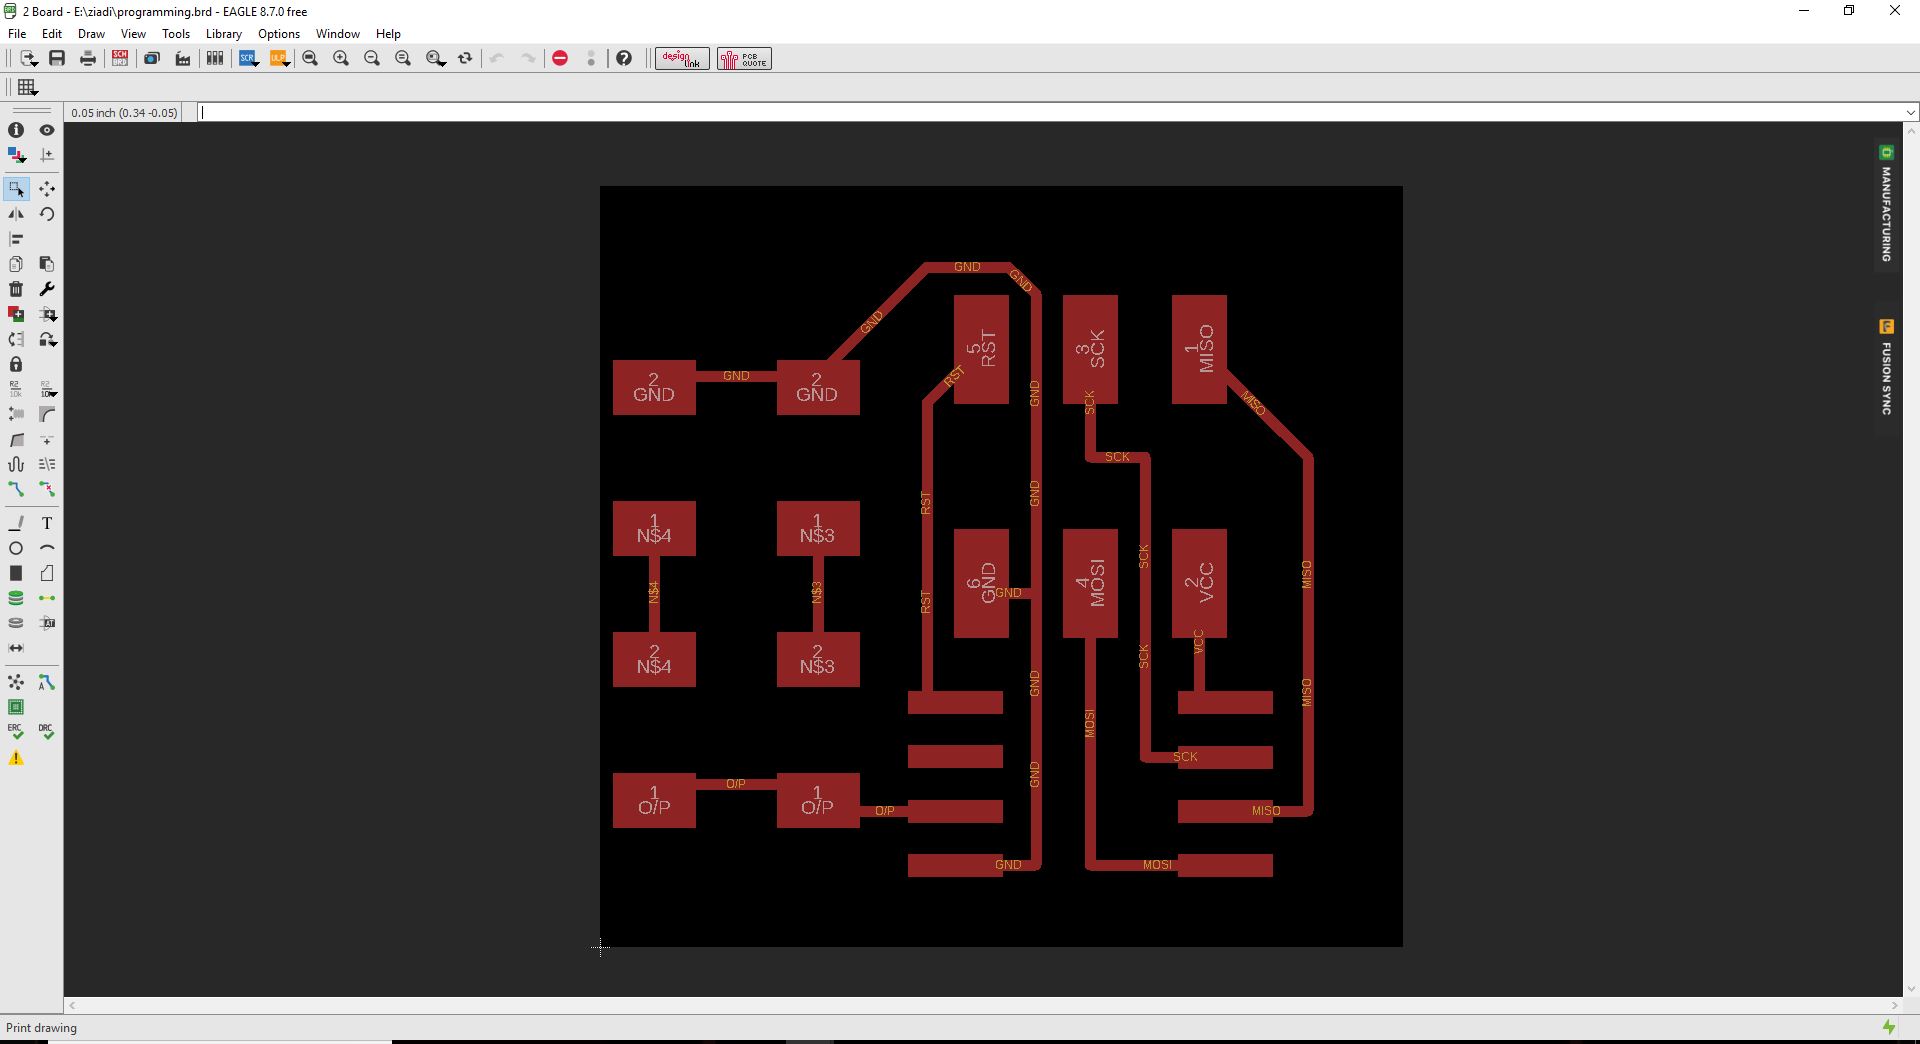
Img: Attiny45 board
I generated PNG files to convert to RML for the monoFab machine.

Img: Attiny45 PNG board

Img: Attiny45 PNG edge
I converted the above image into RML and milled the PCB of my design, I soldered all componets on the board.

Img: Attiny45 soldered
At this point the next step was to program the board to do what I wanted.
To program the board I used the Arduino IDE. The below is the program I wrote for board to blind the LED.
int outpin = 4;

				void setup(){
				     pinMode(outpin, OUTPUT);
				}

				void loop(){
				     digitalWrite(4, HIGH);
				     delay(1000);
				     digitalWrite(4, LOW);
				     delay(1000);
				}
This is the video of the board blinking successfully.
All files used can be found Here