WEEK 3 - COMPUTER-CONTROLLED CUTTING
THIRD ASSIGNMENT
- Characterize your lasercutter, making test part(s) that vary cutting settings and dimensions.
- Cut something on the vinylcutter.
- Design, make, and document a parametric press-fit construction kit.
Group assignment:
Individual assignment:
CHARACTERIZE YOUR LASER CUTER - GROUP ASSIGMENT
For this week, the assignment was to explore the use of computer-controlled cutting machines. The machines tested were a vinyl and a laser cutter. To begin with, my partner and I from Fab Lab Santiago did some engraving, cutting and flexing exercises on different materials.
This is how we made it happen.
EXCERSICES
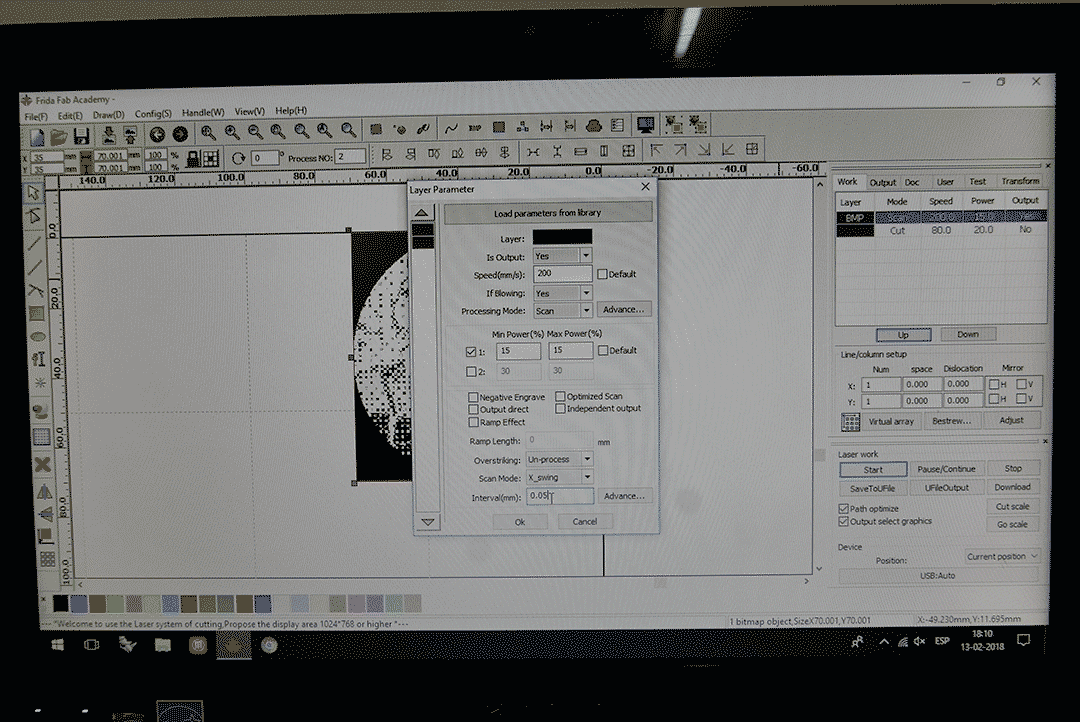
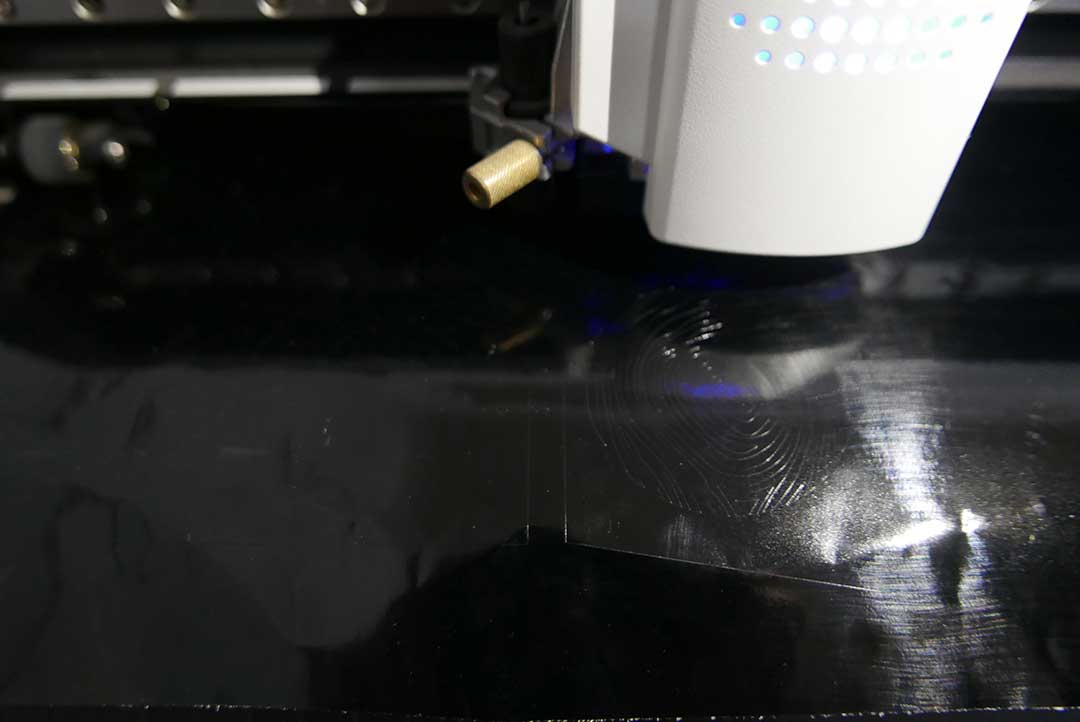
We first generated a .dxf file using illustrator and some tools we learned from our previous assignment. We later exported the file to the computer and then explored the laser cutter software.
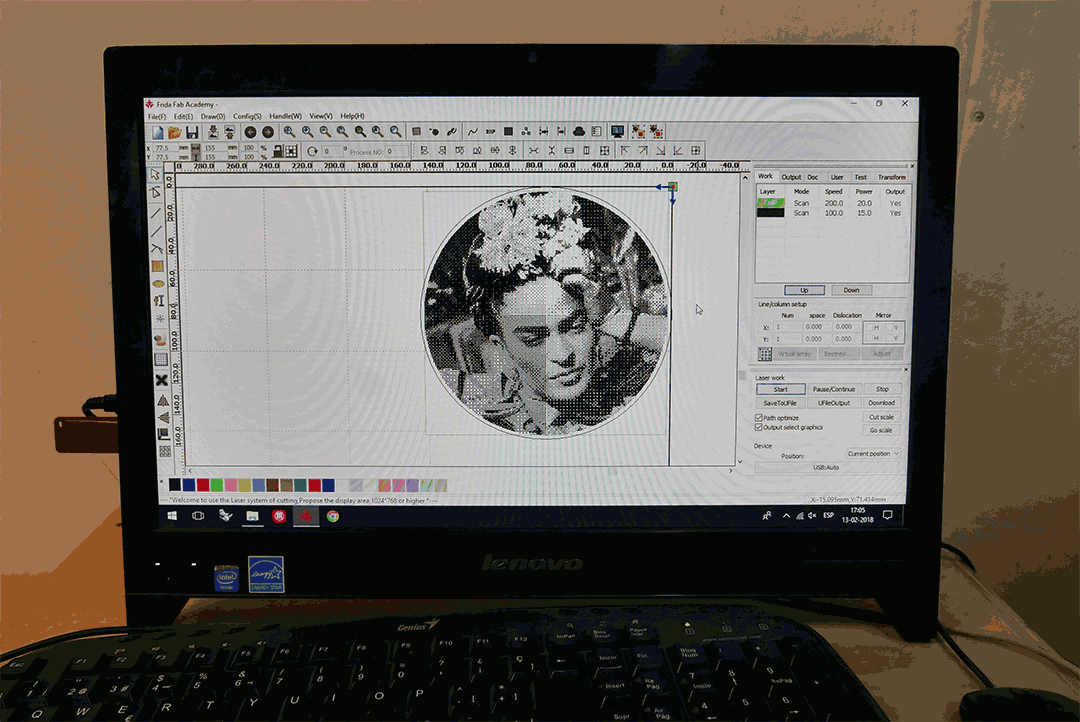
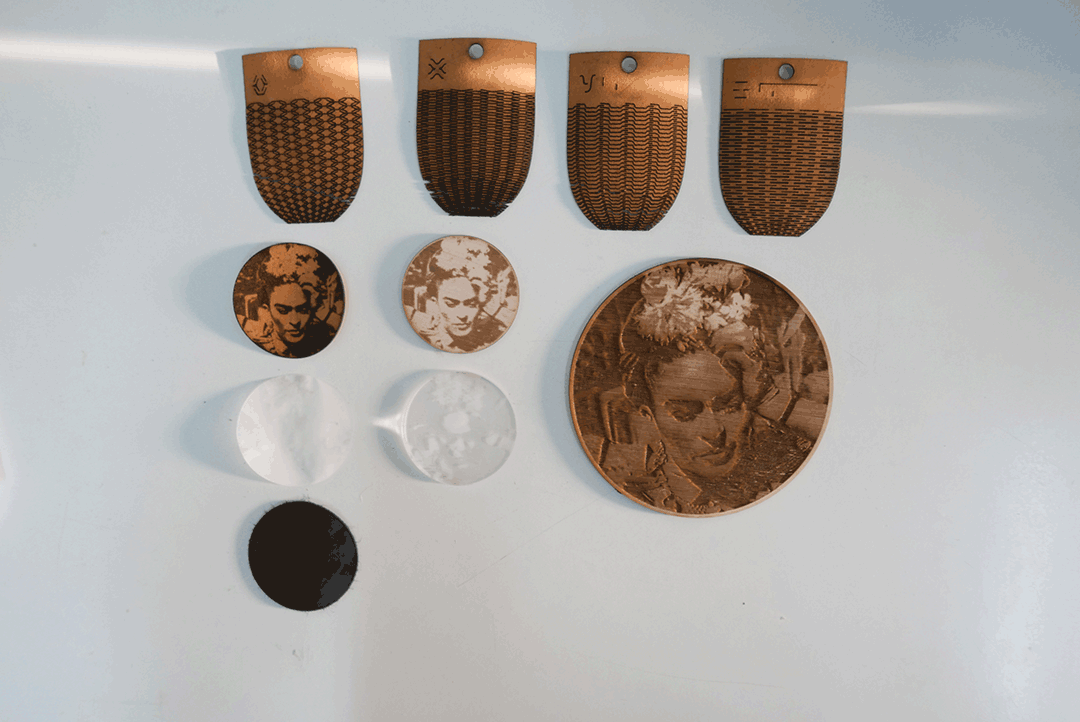
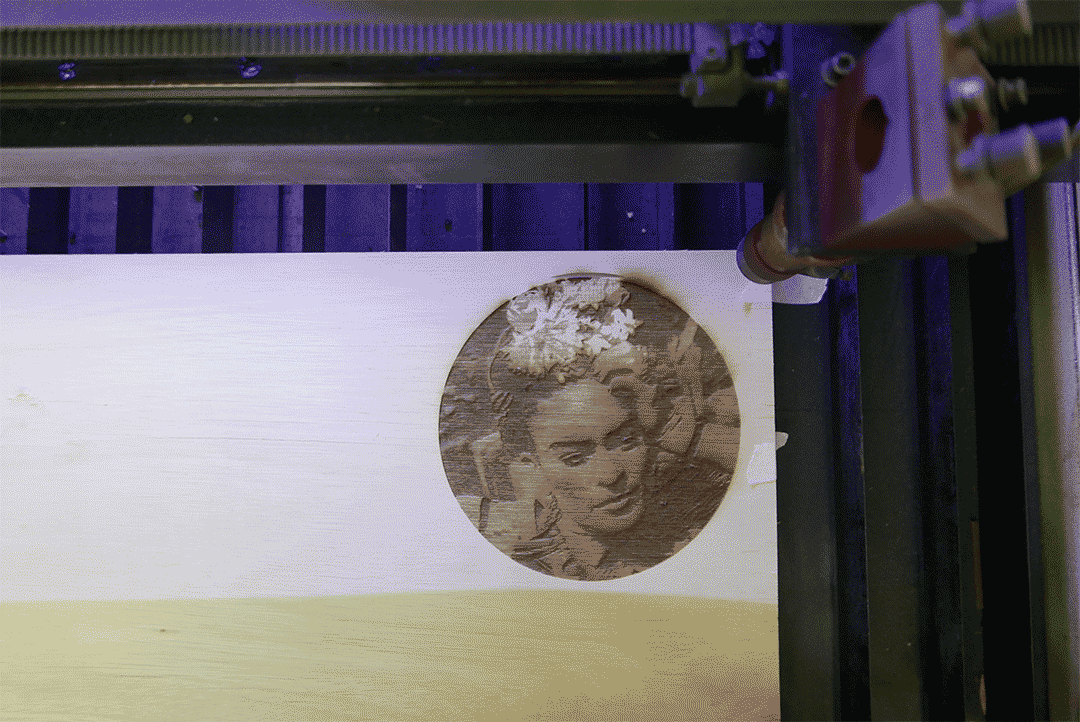
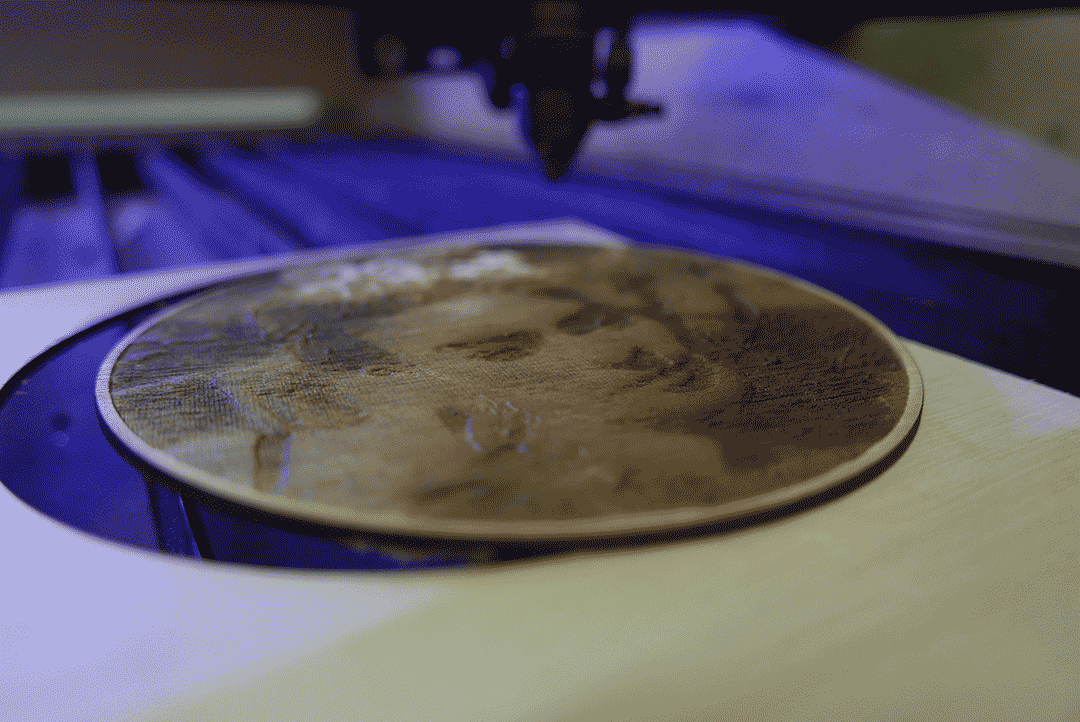
First engraving test went well, the parameters used on 3mm plywood, were:
Afterwards we made a cutting test and it also worked fine. The parameters used were:
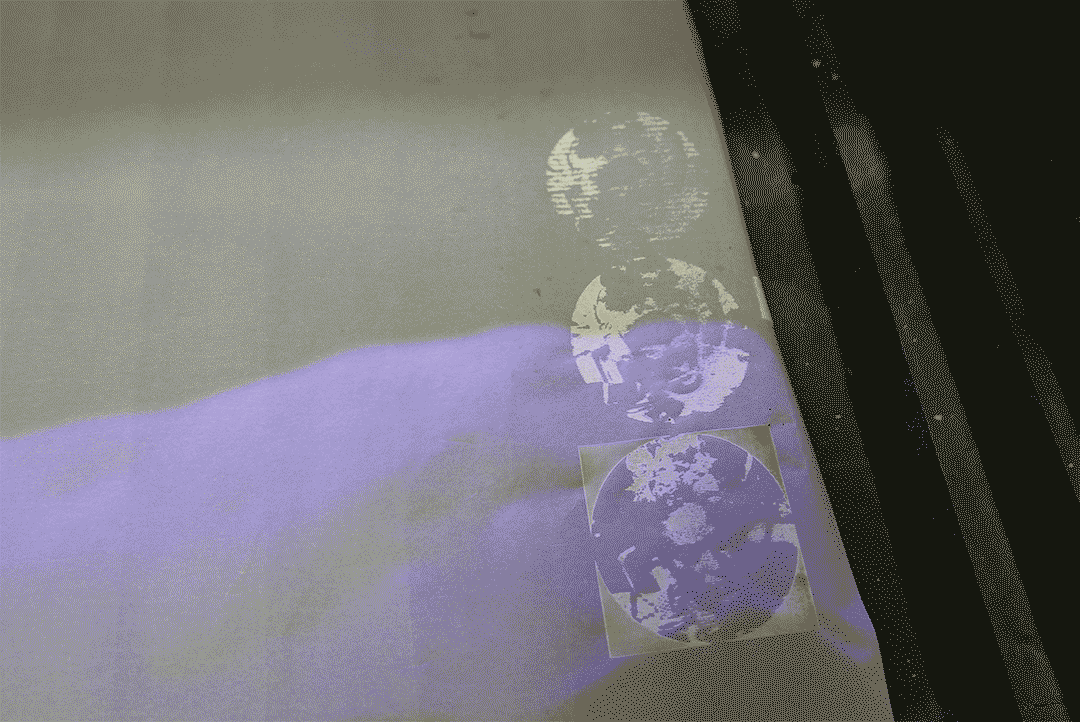
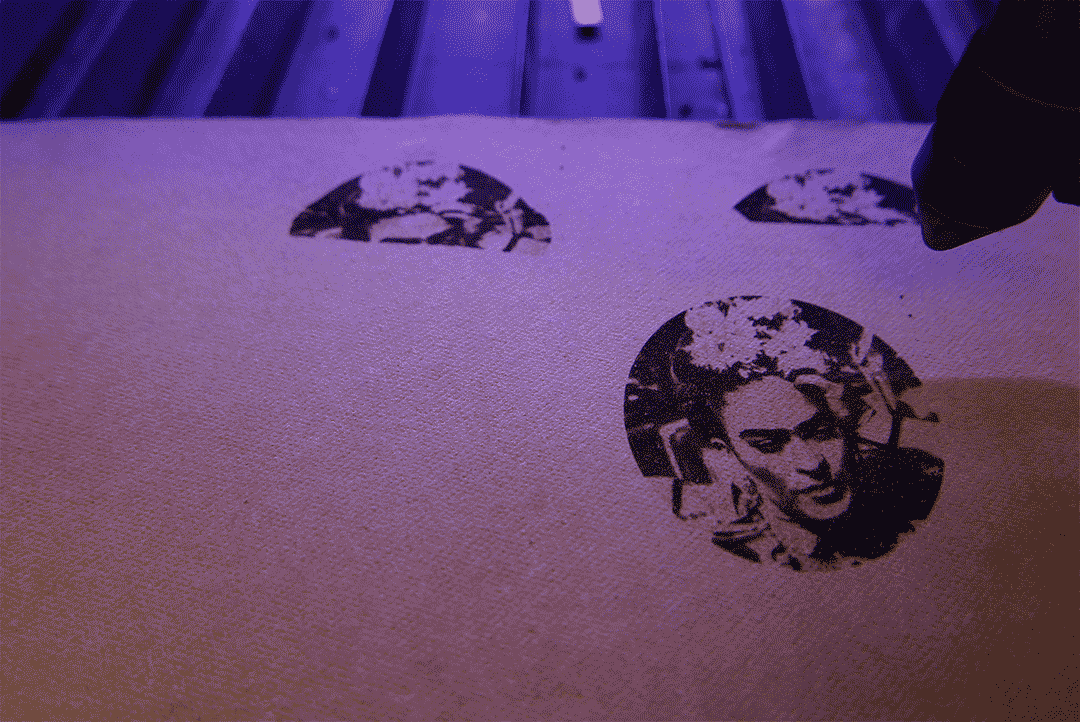
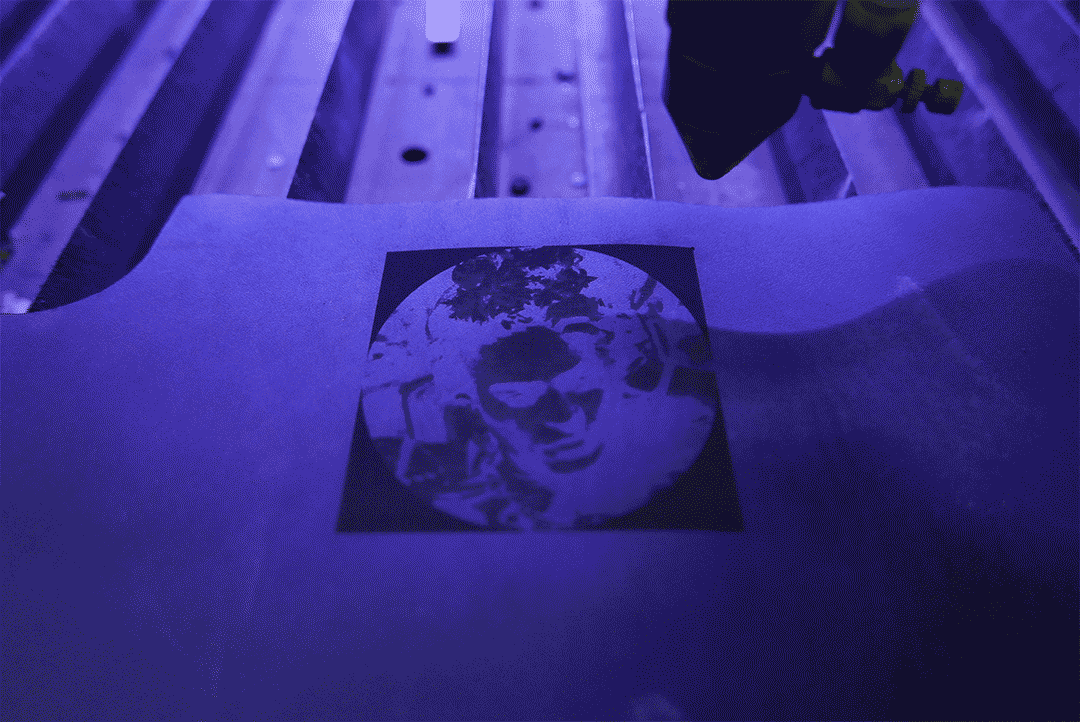
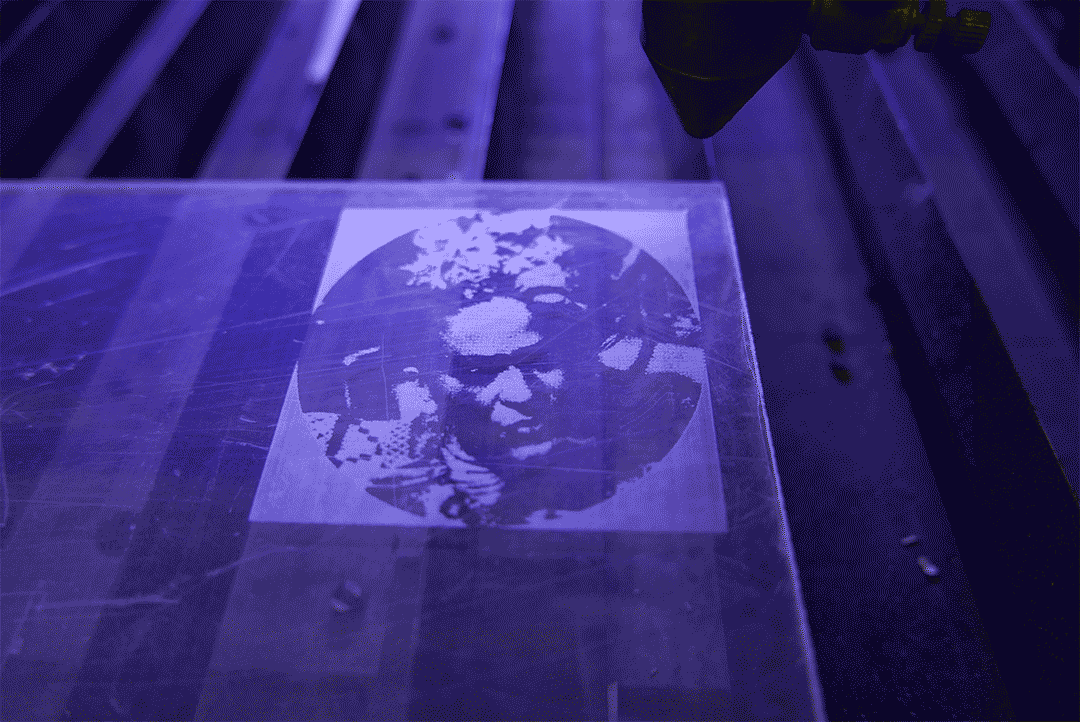
Then came the turn of another material, we tried paper this time. The outcome was very interesting because we used a darken toned image and a brighter one in order to see which one looked better.
The parameters used to engrave were:
And to cut were:
We later tested on two different leathers, the result was very interesting but we also learned to stick the material very well to the bed, otherwise it could move while the machine is in use and ruin your work.
To finish these tests, we finally tried acrylic, one of my favorite results from this exercises.
The parameters used to engrave were:
And to cut:
FLEXING
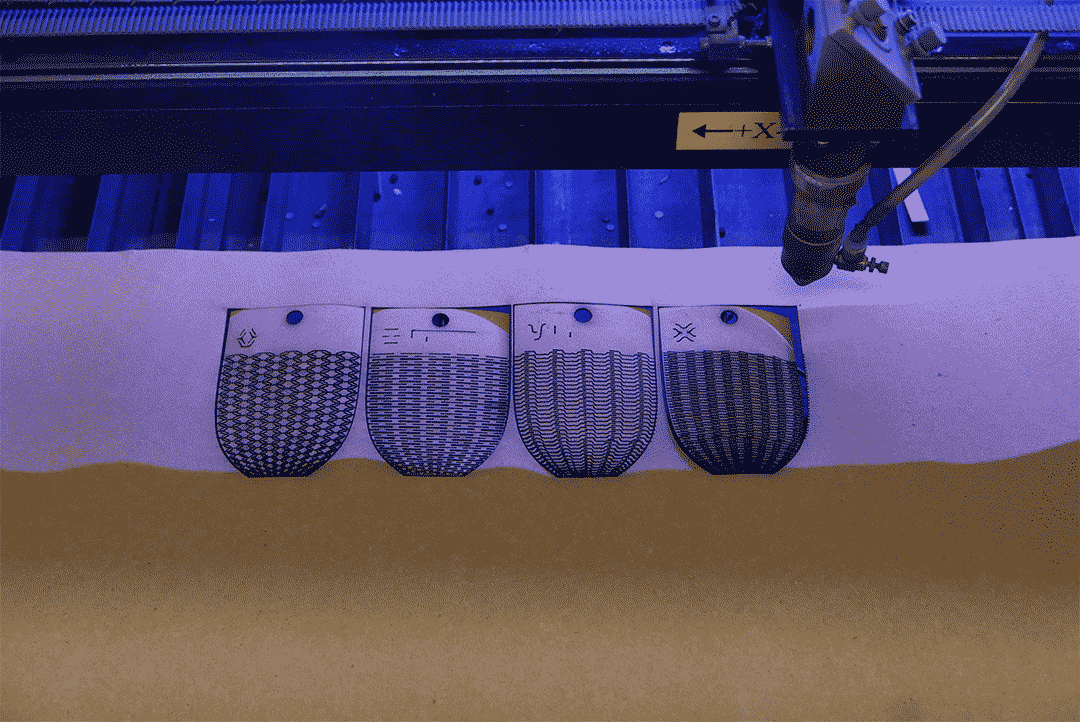
One of the most interesting tests was doing a pattern cut on leather in order to see the flexing properties of this material. We found out that depending on the design we could have a better result.
The parameters used were:
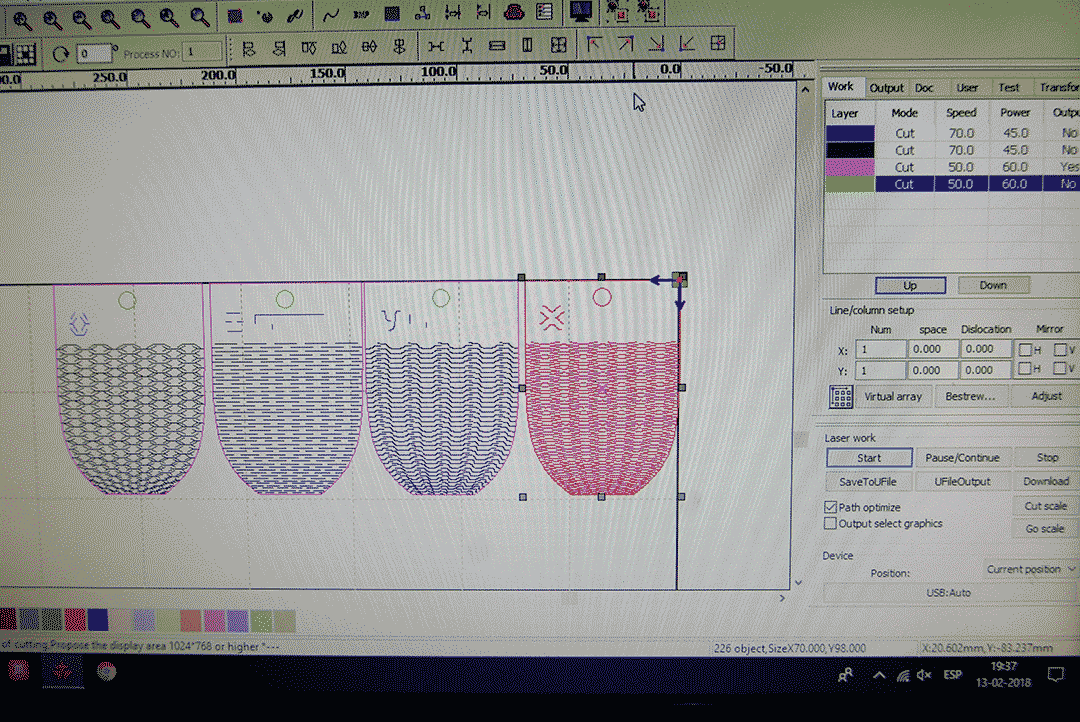
This is how it looked after it was cut.
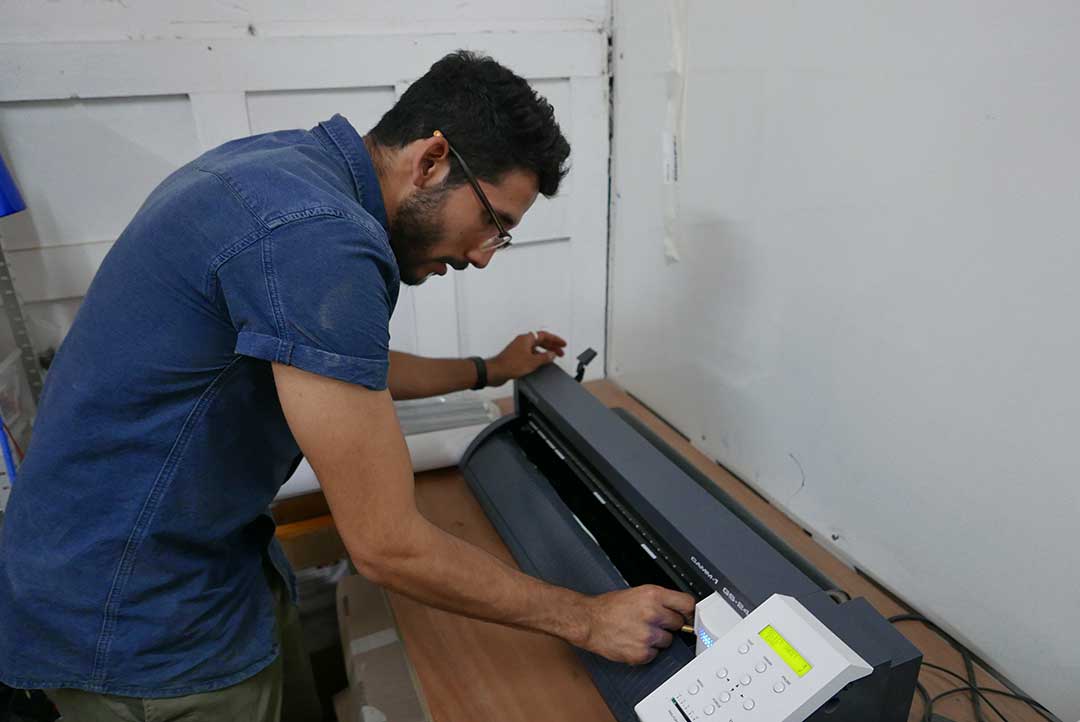
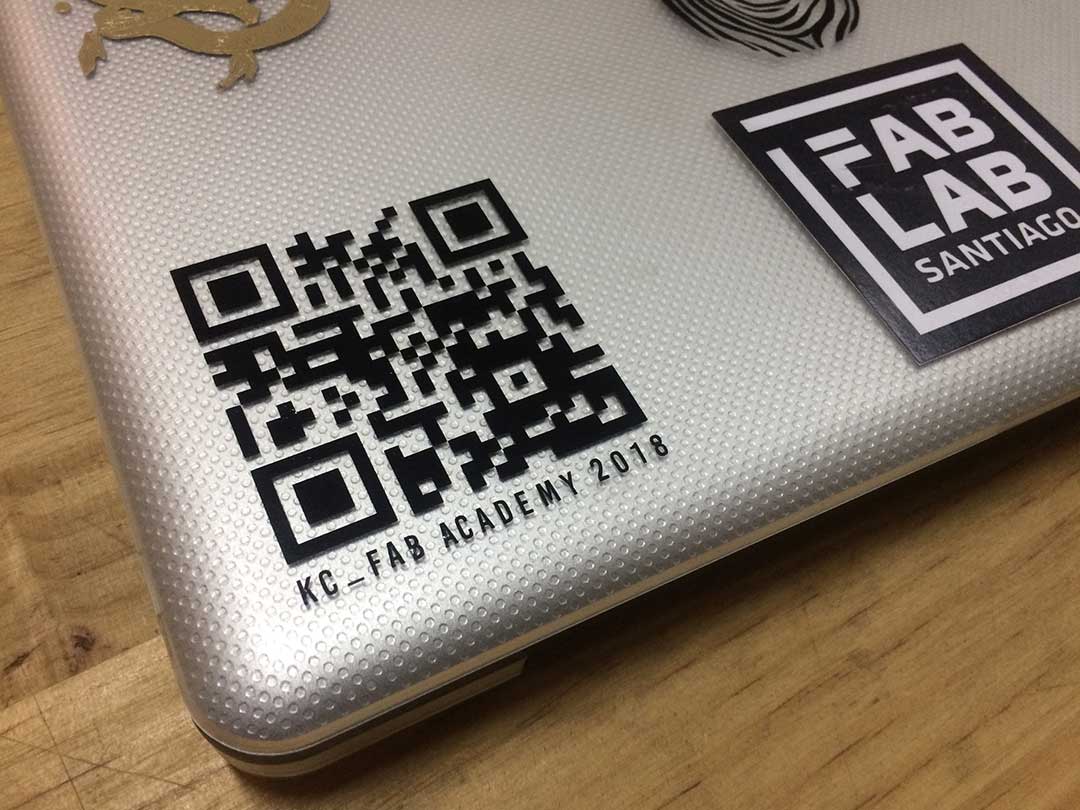
VINYL CUT
For the vinyl cutting test I made different type of files, the first one is my personal isotype logo and the second one was a QR code from my Fab Academy website.
I first saw a tutorial in order to see the kind of software and file I needed to use the Roland GX-24 vinyl cutter, after downloading and setting up the illustrator plugin for the vinyl cutter, I went to test my first file, my personal isotype.
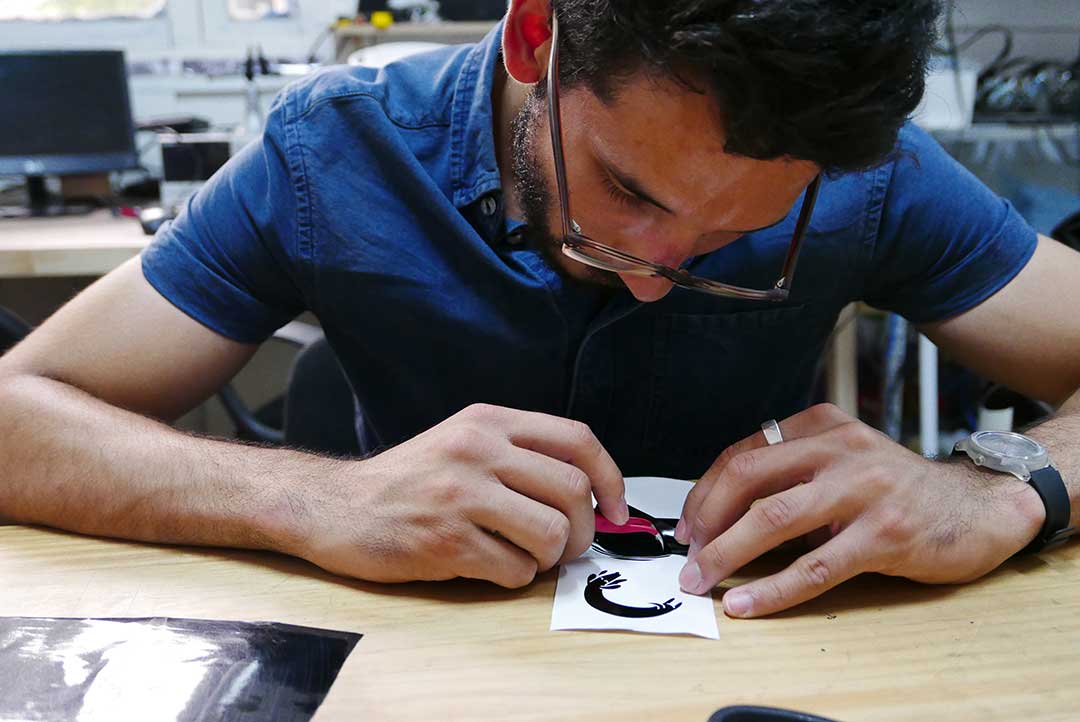
The result on the first attempt to peel my logo didn't went well but on the second one I learned to be careful with the lines in order to extract the parts I didn't need for the logo.
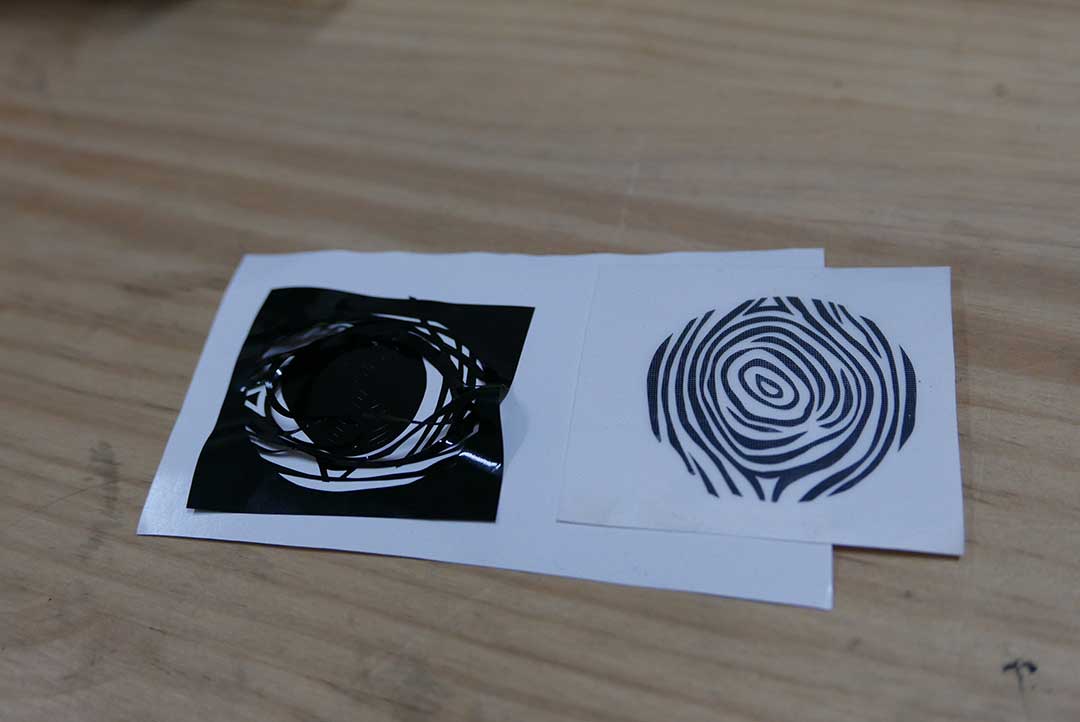
Then I put some transfer on the vinyl in order to be able to paste it on my computer, the result looked pretty nice.

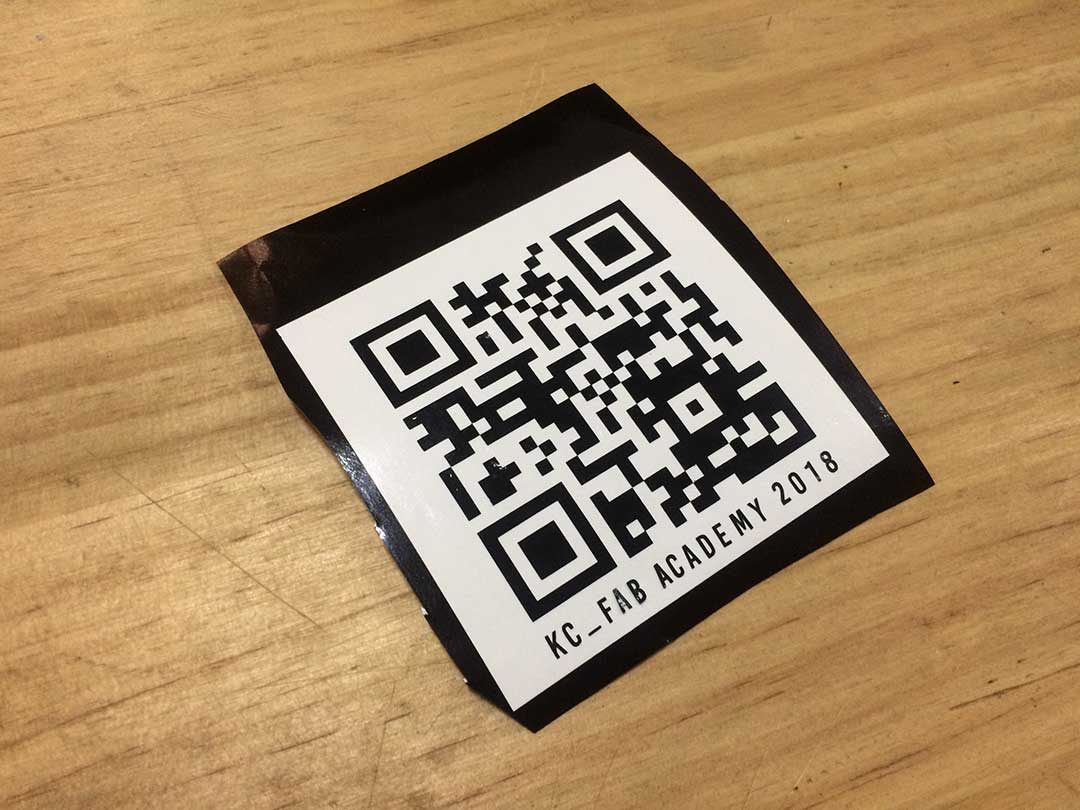
After this test, it was time to make a harder model, the QR code was difficult to peel because of the small pieces it has, even though it took my like an hour to finish this one, I was happy with the result. The QR code worked! ☺
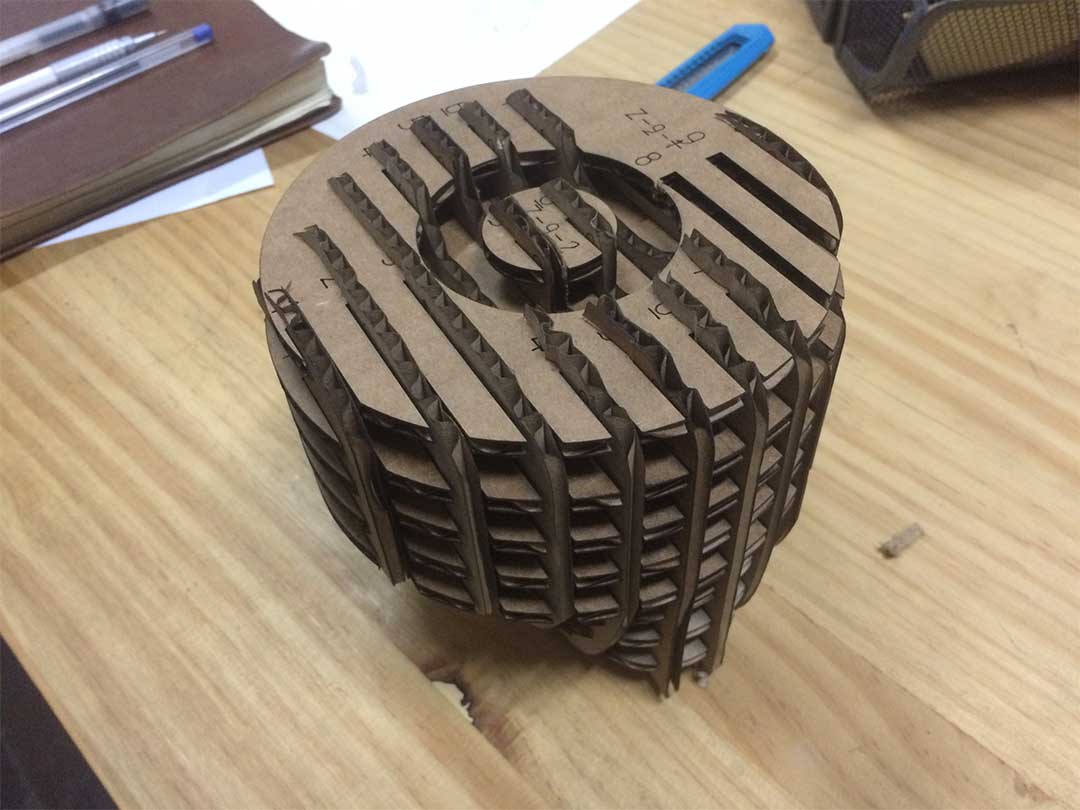
PRESS FIT CARDBOARD EXERCISE
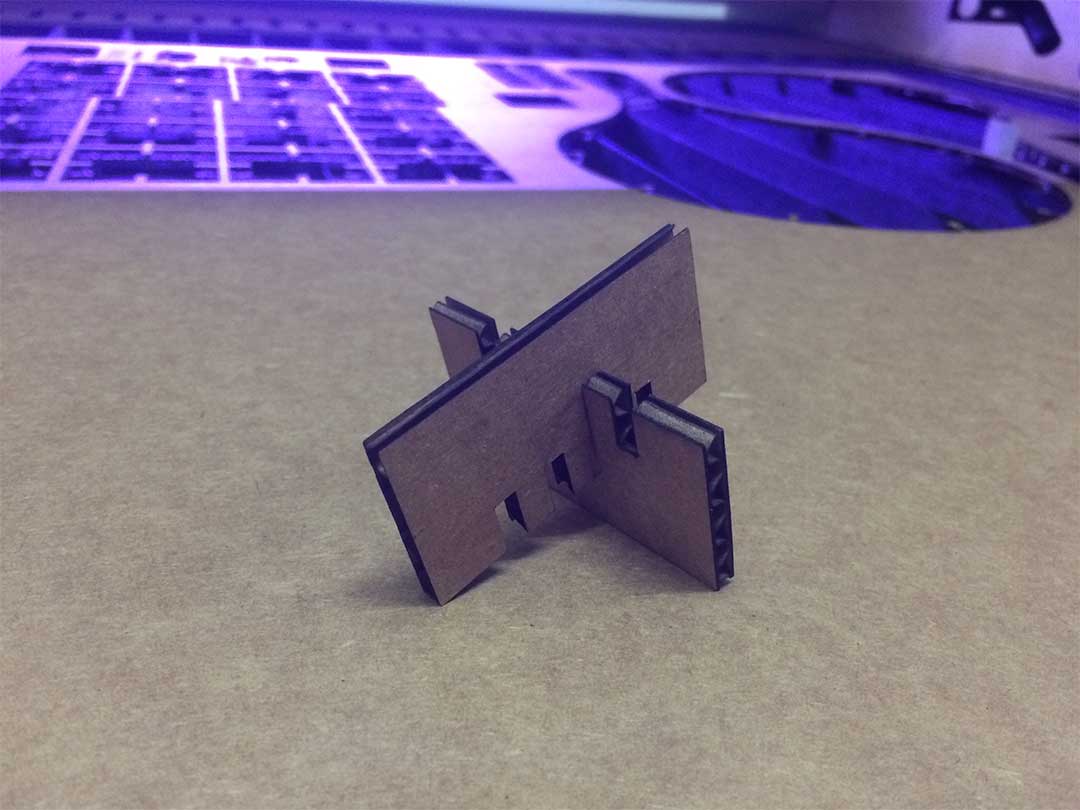
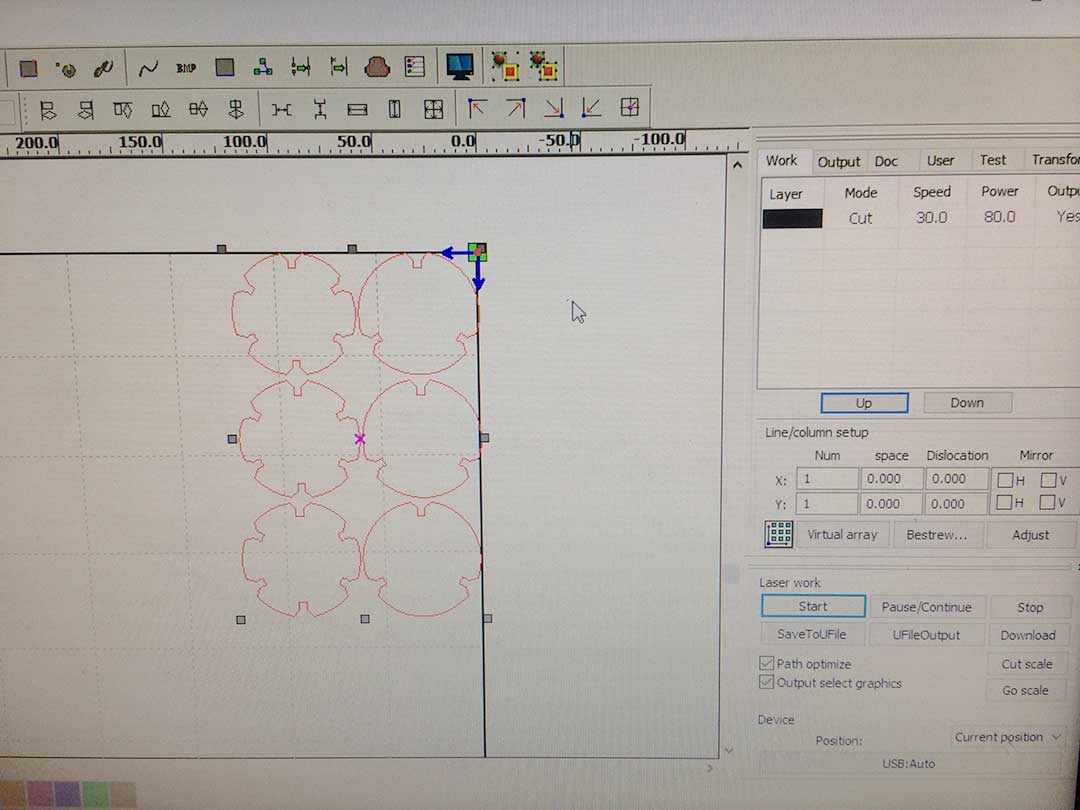
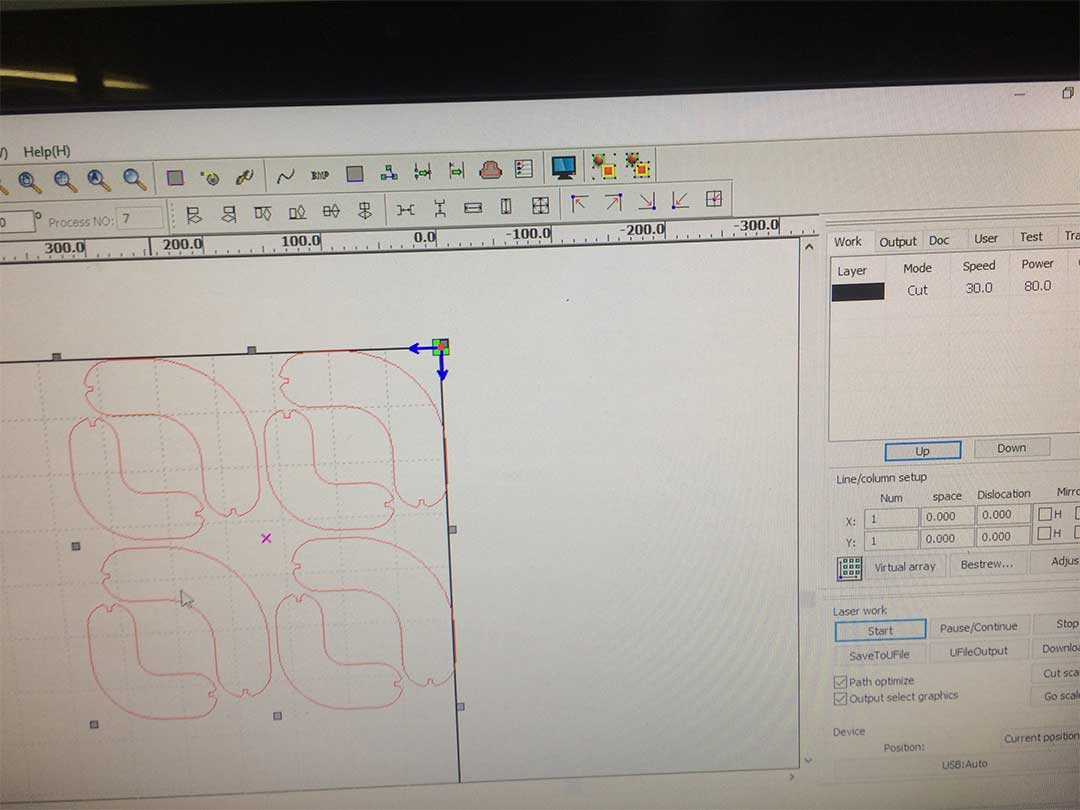
To make this exercise properly and save some time, I began by doing some fit tests on the laser cutter, this also gave me the right parameters to cut the cardboard.
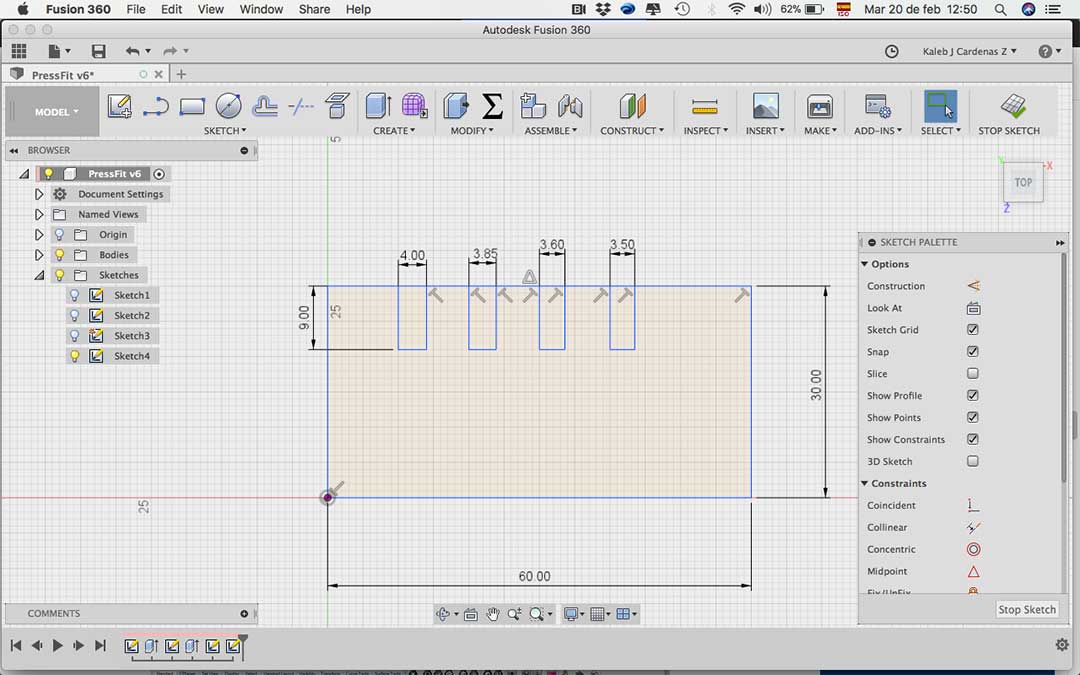
My cardboard´s thickness was 4.2mm with the cutting test I got the next parameters:
Joint measurement: 3.85mm
Laser:
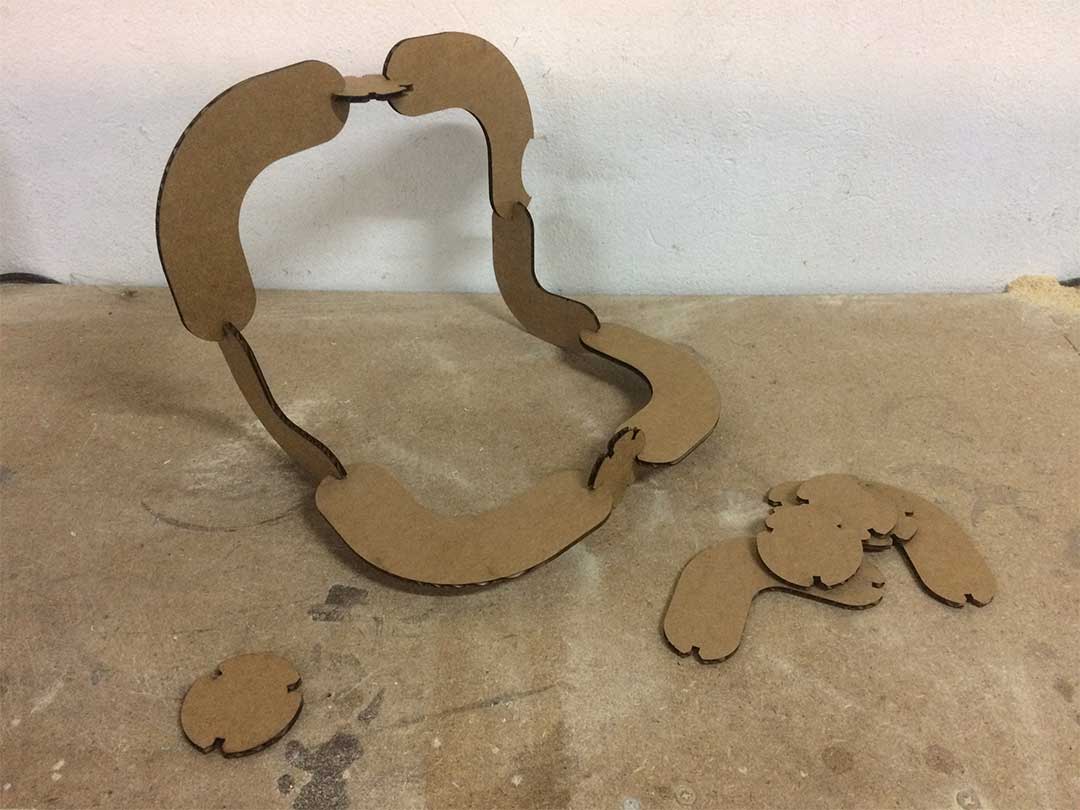
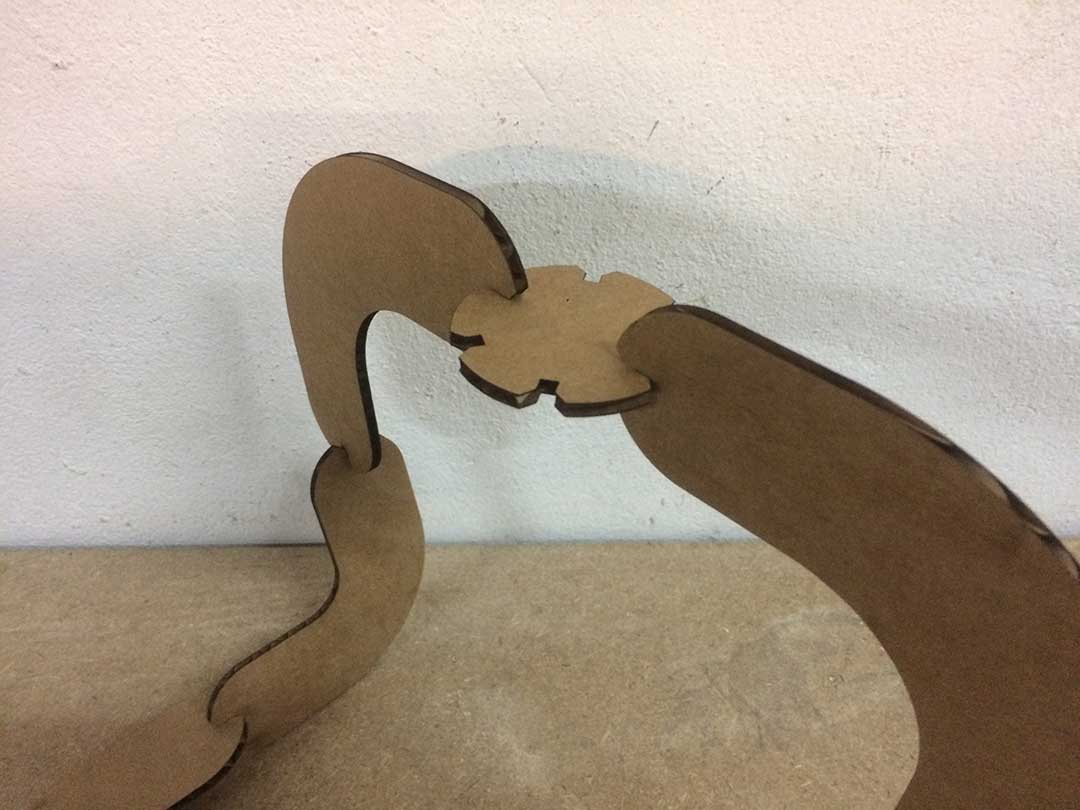
Here is an image of the test. The joint worked perfectly.
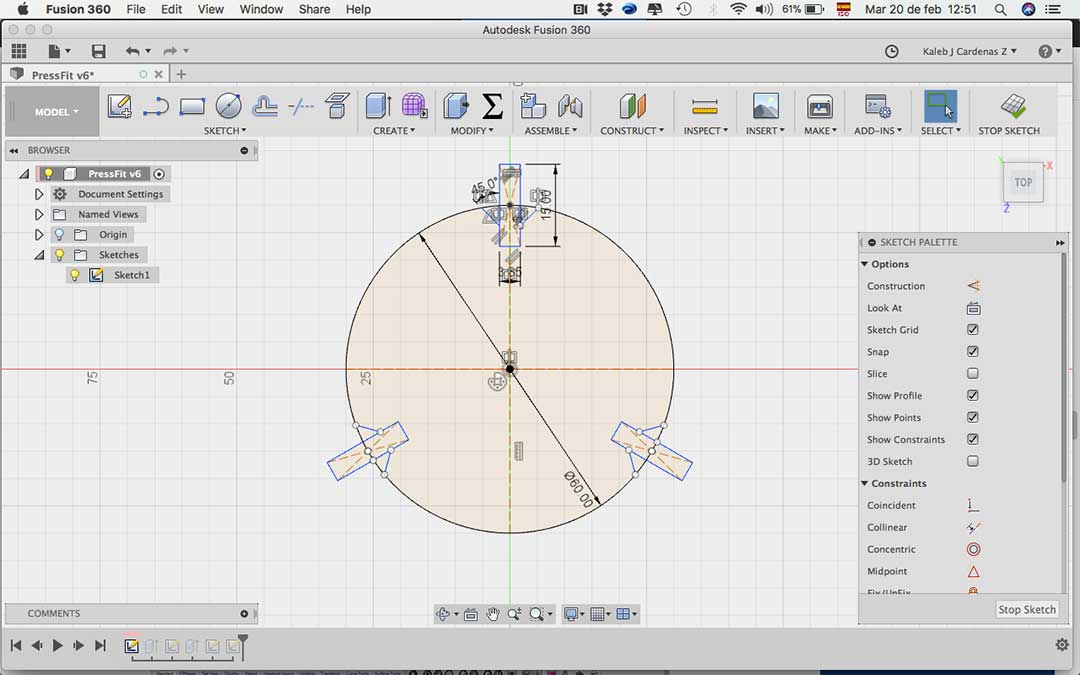
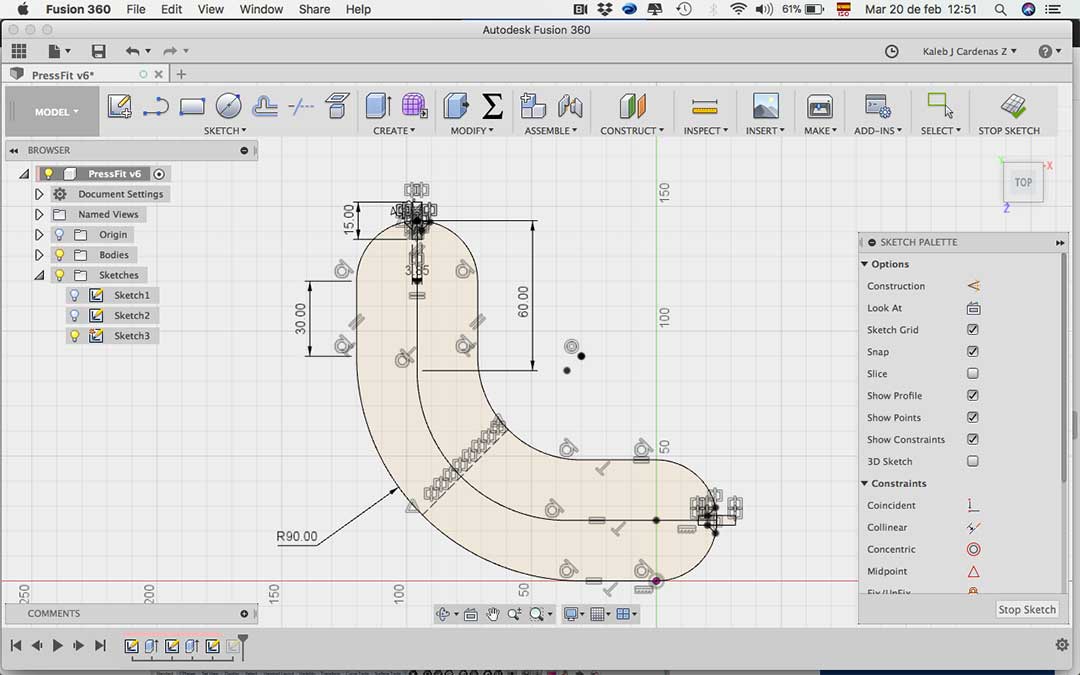
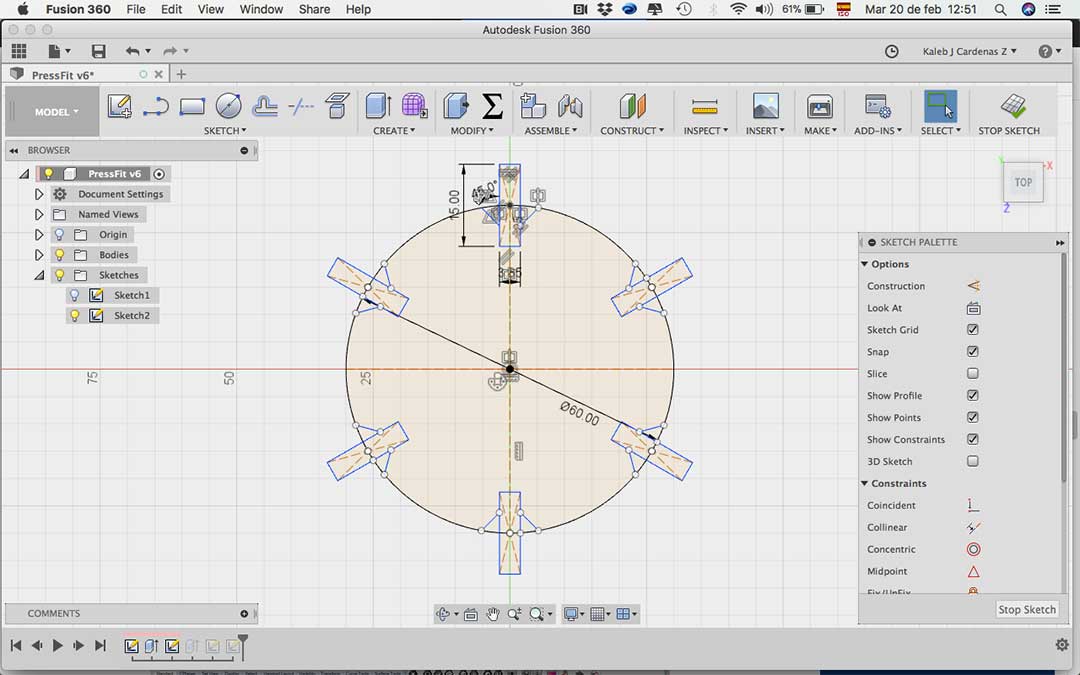
I then began to make my files with fusion 360 for the press fit, it was very interesting to model with parametric models because I was able to modify my design in no time. I decided to make a circular pattern that could allow me to make more organic shapes. The joint worked just fine.
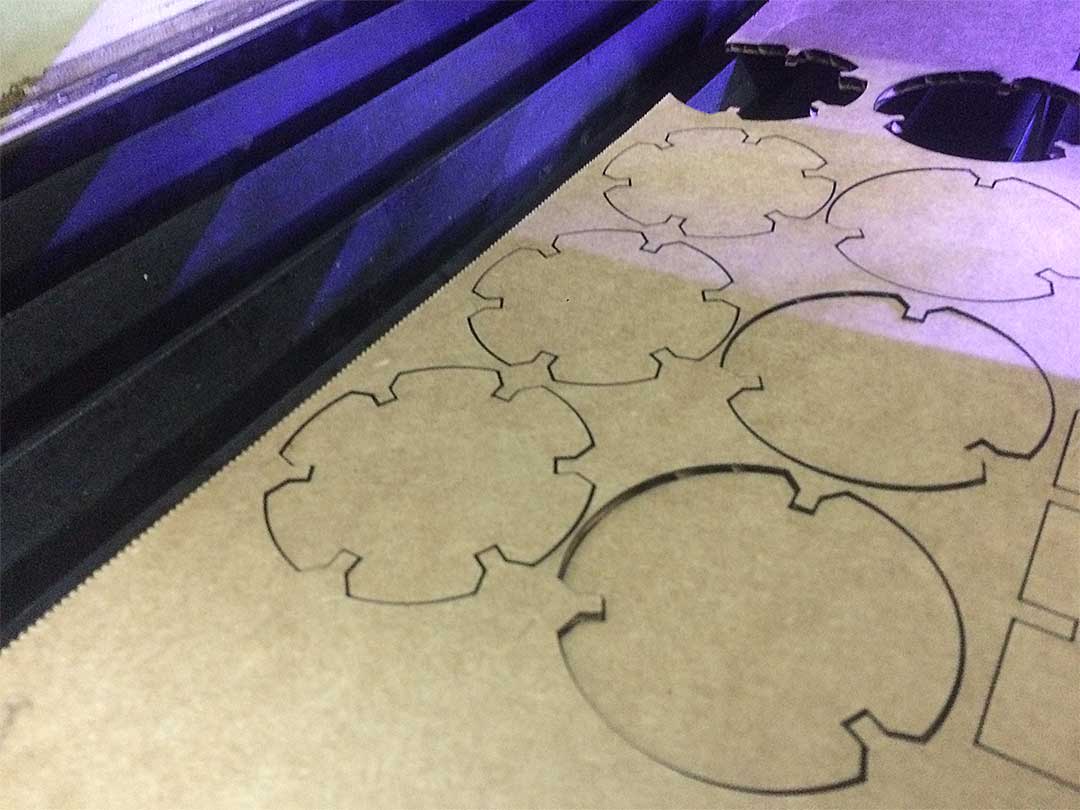

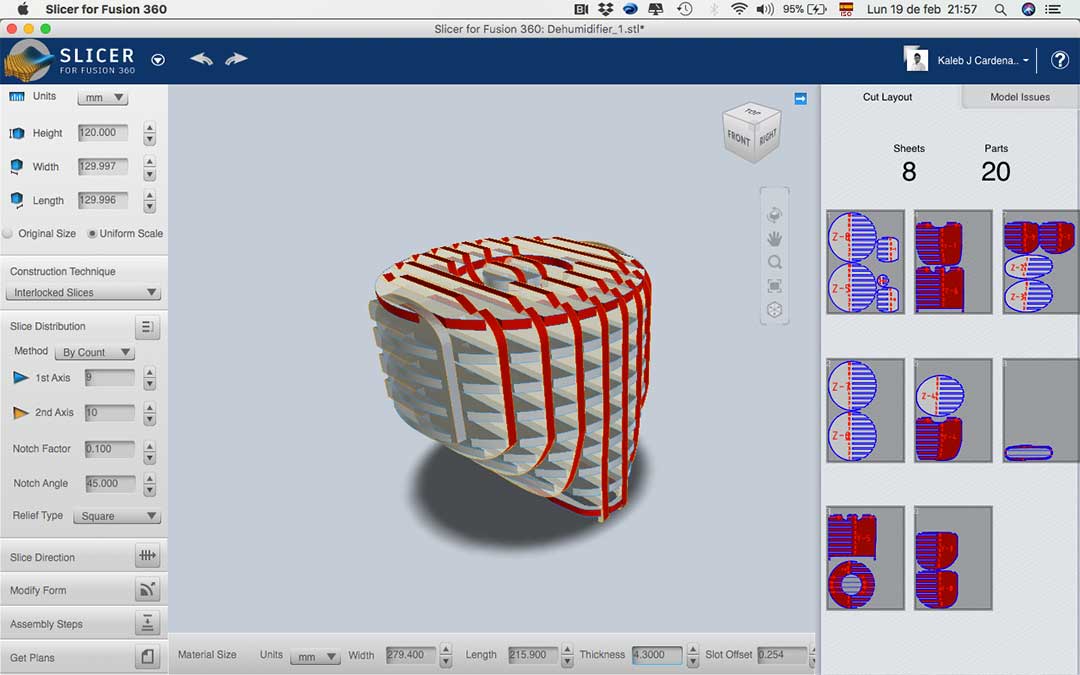
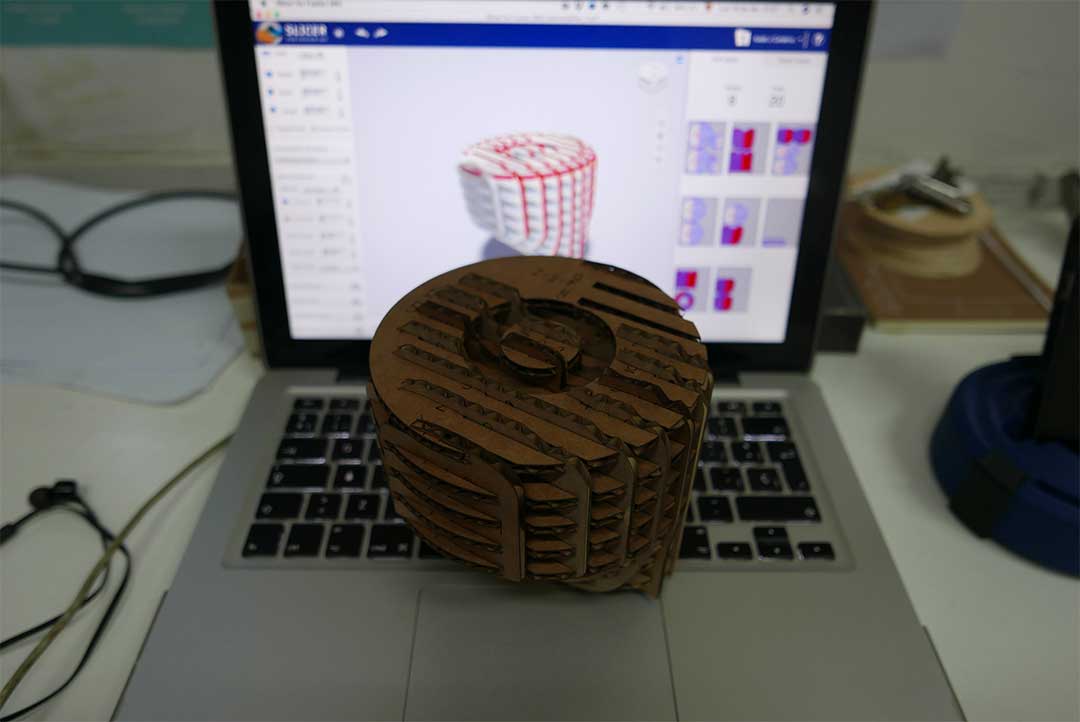
After all this exercises it was time to use all the recent knowledge gained for my final project, I decided to make a mock-up from one of my previous 3D models.
I used Slicer for Fusion 360 to generate de .DXF files for the laser cut. I really enjoyed this tool because my model gave me a good reference of the size and shape of my design. I will probably use this type of prototypes when I have a more defined design of the dehumidifier.
FILES
All the files can be downloaded
here: