

WEEK 11
Input Devices
Equipment
- Hardware: Roland Mill
- Software: Eagle, Arduino IDE
- Material: HC-SR04 Sonar Sensor, PCB Board, FTDI
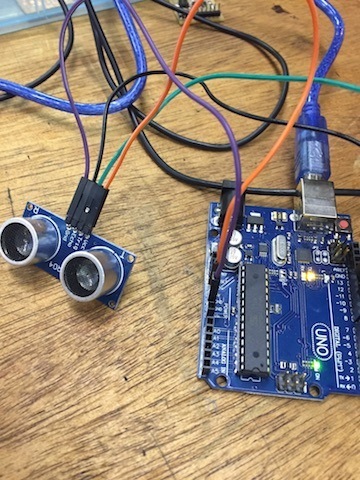
Testing Sonar Sensor using Arduino
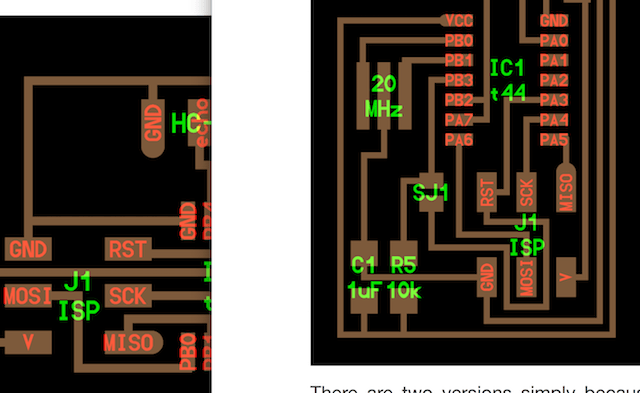
Board Design & Production
The HC-SR04 > is an ultrasonic sensor that can measure the distance of objects ranging from 2cm to to 4m. It runs on a +5v DC with a working current of 15 mAmps. It has 4 pins that connects to the Microcontroller: Ground, V, Echo and Trig (these can be connected to any digital I/O pin).The board will send out a high pulse on the trigger pin for 10microseconds. The sensor will then send out 8 cycles of sonic waves. The echo pin will listen for the return of the waves and output the time for the sonic waves to travel back and forth from the detected object in the serial monitor.
The HC-SR04 is not available in the Eagle Library, so I had to download it to use in the schematics for my echo board.
Programming
-
FTDI Driver & Serial Port
Download FTDI Driver
Once downloaded, this should allow for you to select the serial port from the tools menu

-
Download Serial Libraries
Libraries are a collection of functions that are grouped by performance purposes. For the sonar sensor I would be using the built in the Serial library as well as 2 additional Serial libraries in order to enable serial communication between the board and sensor: Software Serial and Send Only Software Serial
. When using an Arduino board, there is hardware built in for serial communication called the USART (Universal Synchronous/Asynchronous Receiver/Transmitter) that is connected to a designated pin on the Arduino Board Serial is used to view the serial commands and send debug information to your computer. In instances when you require serial communication between two boards, you need to initiate Software serial in order to establish this additional communication by creating a connection to another pin on the microcontroller via software. The use of the sendonlysoftwareserial is for when using boards other than the Arduino, or similar using the ATmega 328. This will create the serial communication link that the Arduino boards have built in.
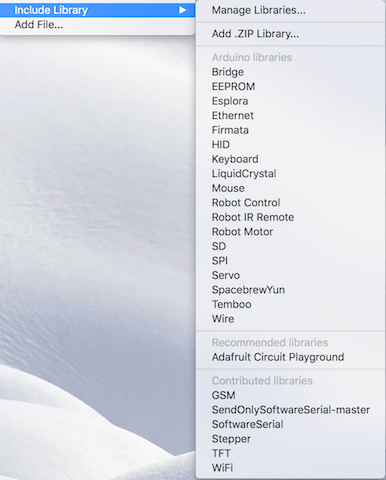
Move the new library files into your Arduino Libraries folder
Include the library you will use by selecting the libraries from the drop down menu or typing it in the beginning of your sketch.

-
Upload Sketch using ISP
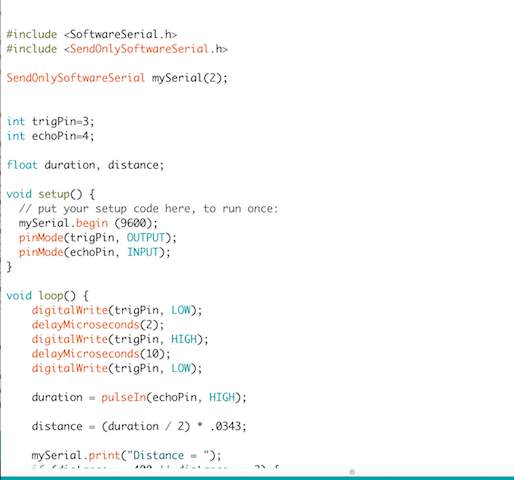
Define
Trig pin: sending signal out Echo pin: receiving signal Set float (they will have fractional values rather than int to get more accurate readings) elements duration & distance as these are the things that we will be measuring.void setup
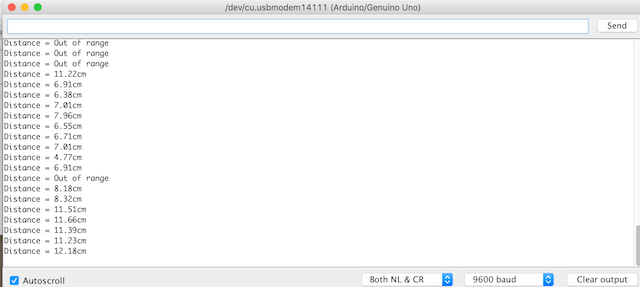
Serial data sent at rate of 9600 baudvoid loop
Sends out signal for 10 microseconds. Duration is equal to the time for the echopin to receive a signal from being bounced back. We can determine the distance by multiplying duration times the speed of sound (.0343 cm/microsecond). Duration is divided in half because it also includes the bounce back time.
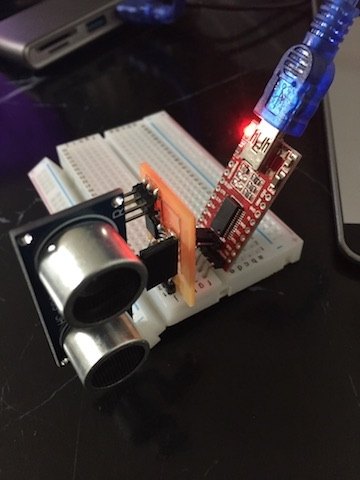
In the serial monitor, it will print "Distance= _____cm" and give us the serial reading of the sonar sensor. Connect FTDI to Sensor
The Sonar Sensor should be connected to the computer via the FTDI so that data can be transmitted serially between board & Arduino IDE.
-
Open Serial Monitor
Troubleshooting
-
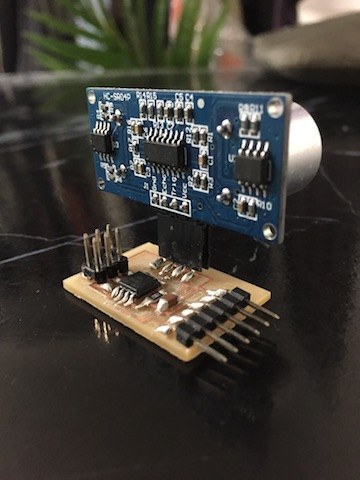
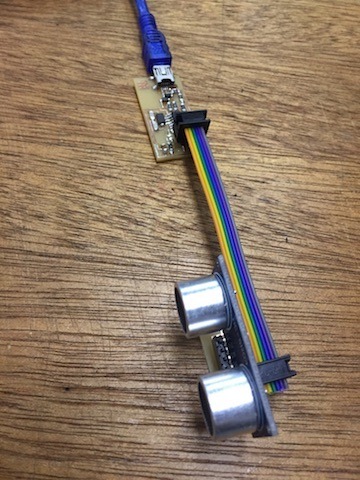
Broken Board
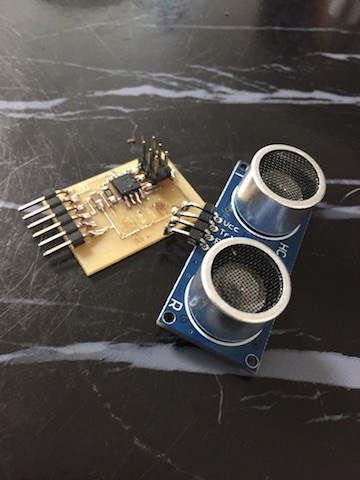
The first board I made broke. The sonar sensor pulled off the pads and eventually the paths broke as well. For the second board, I soldered a female header pin so that the sensor could detach and make it less likely to break. Error Serial not defined

Did not #include serial libraries in the beginning of sketch-
Blank Monitor
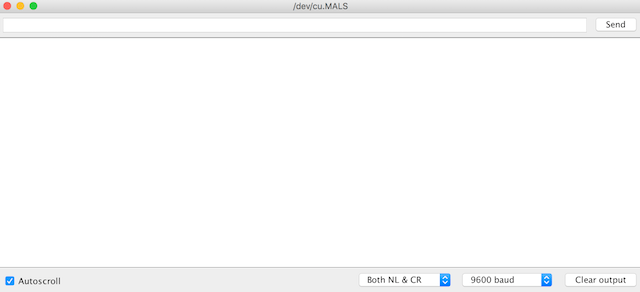
No readings on serial monitor because I didn't download the driver Strange readings
At first my readings were all backward question marks
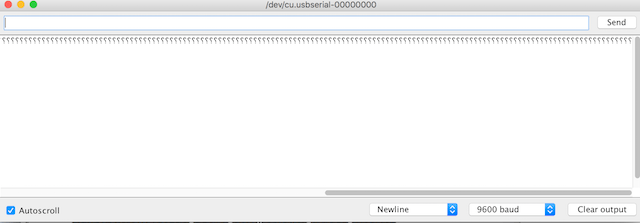
I tried my classmate's sketch which had been successful for her, but I was still getting strange readings from my board. I was wondering if something was wrong with the sensor component itself or possibly the fact that I was using a USB hub instead of a port directly on the computer. However, when my instructor tried using his ISP and code, it worked fine. He suggested that during the process of constantly connecting, disconnecing and uploading sketches that I could have possibly creating a bug. To fix this, it was a simple solution of re-burning the bootloader and then uploading the sketch. After this, my sketch worked!