WEEK 8 - Computer-Controlled Machining
Dario Bernabini, Tommaso Lombardi, Giada Allocca, Eleonora Piccinelli, Giuseppe Allocca, Antonio GarosiIndex
The ShopBot is a REALLY dangerous machine.
Until today, most of the processes we studied involved a degree of hazard and risk, but none was compared to be possible harms and damages that a ShopBot can inflict, hence when we got in touch with it we adopted all the necessary safety measures to use it properly.
This means that a minimun of two people were required to be present for every moment that the machine was operating, and both were required to wear safety glasses and headphones.
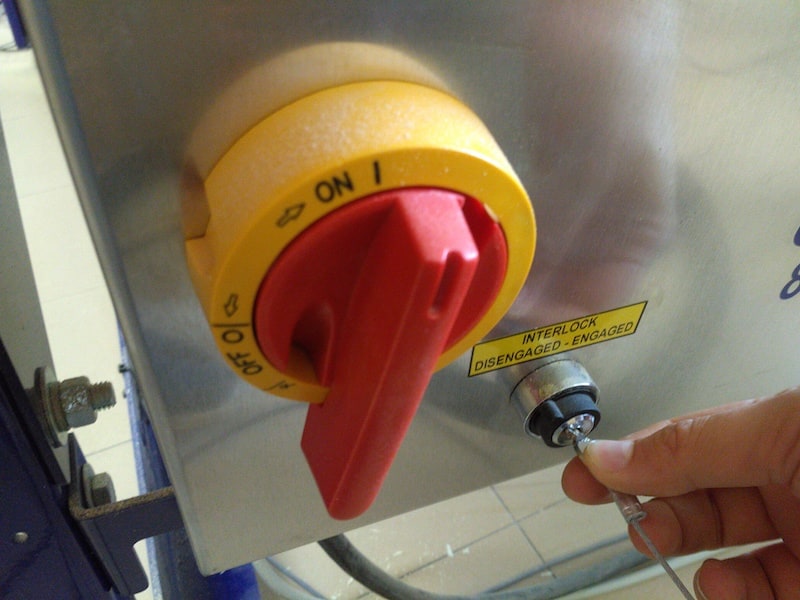
Beyond that, even before testing anything, we made sure that the emergency button was working properly. Once verified that it did, we proceeded to set up every step with the necessary precautions, meaning to turn of all the necessary switch when we had to operate on the machine itself.
Until today, most of the processes we studied involved a degree of hazard and risk, but none was compared to be possible harms and damages that a ShopBot can inflict, hence when we got in touch with it we adopted all the necessary safety measures to use it properly.
This means that a minimun of two people were required to be present for every moment that the machine was operating, and both were required to wear safety glasses and headphones.
Beyond that, even before testing anything, we made sure that the emergency button was working properly. Once verified that it did, we proceeded to set up every step with the necessary precautions, meaning to turn of all the necessary switch when we had to operate on the machine itself.
After turning on spindle and stepper motors but before installing any bit, an important operation to do for to properly mantain the ShopBot is the Spindle Warmup Routine. This operation, activable from the control software of the Shopbot, ensure that the oil inside the spindle motor is uniformly spread and warmed, making the future cut more safe and easy to perform for the machine
.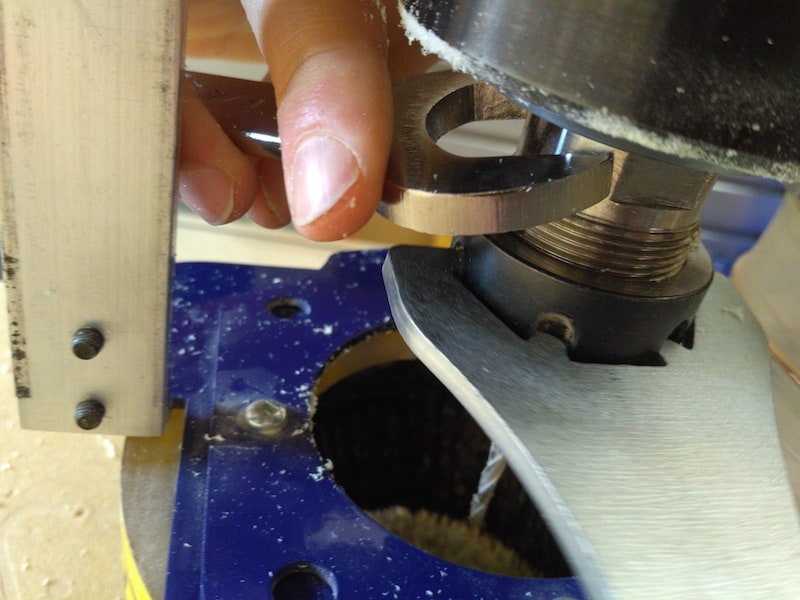
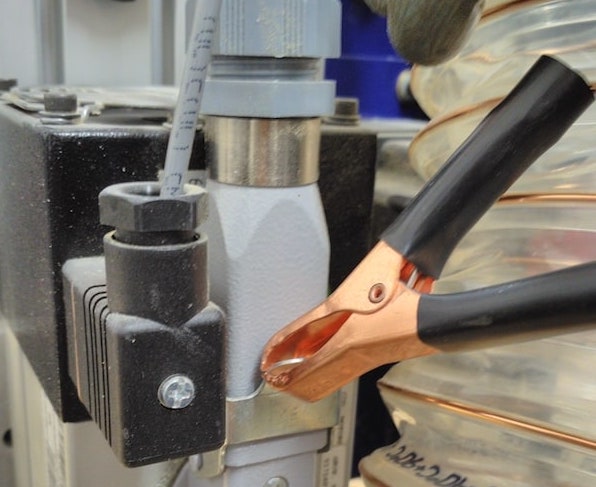
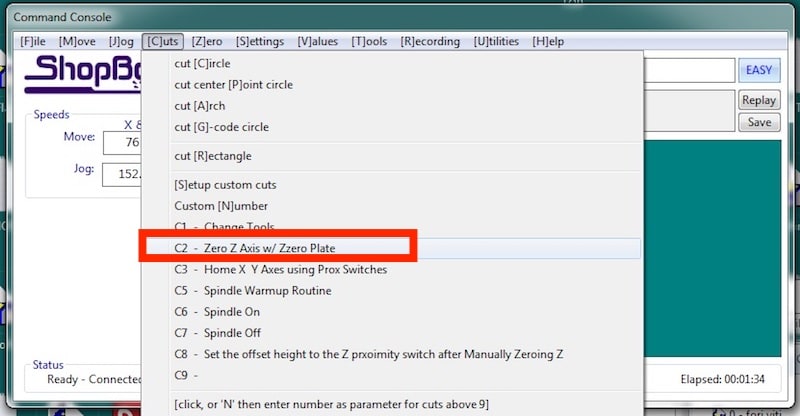
After screwing in the drilling bit (another operation better done in two) the following step was to set up properly the z of the machine, which is done through the help of a plate electrically connected to the ground. Following the guided procedure, this step is actually easy to accomplish but can still save issue for the user if she doesn't set the ground lead well (this can break the plate, the machine surface, the bit and the spindle at the same time).
To check the behavior of the ShopBot, through the direction controller of the machine, we tried to manually move it beyond its physical limits. To our surprise, the machine knows not when to stops, even though it's supposed to have end runs installed. In fact, if you tell it to move to a non-existent coordinate, its motor will try to push the machine beyond the rails, making a grinding, loud noise until you stop it. This was indeed something to consider when preparing the cuts and a true hands-on way to test the emergency button.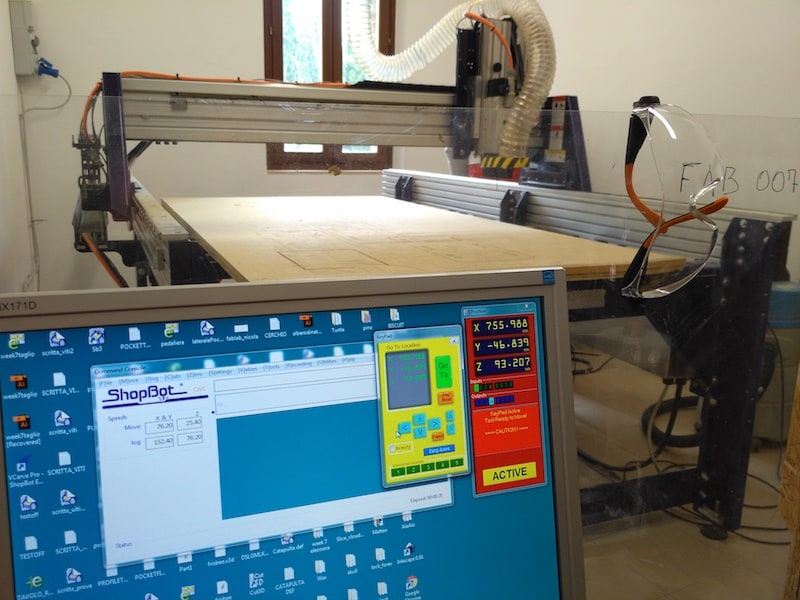
.
After screwing in the drilling bit (another operation better done in two) the following step was to set up properly the z of the machine, which is done through the help of a plate electrically connected to the ground. Following the guided procedure, this step is actually easy to accomplish but can still save issue for the user if she doesn't set the ground lead well (this can break the plate, the machine surface, the bit and the spindle at the same time).
To check the behavior of the ShopBot, through the direction controller of the machine, we tried to manually move it beyond its physical limits. To our surprise, the machine knows not when to stops, even though it's supposed to have end runs installed. In fact, if you tell it to move to a non-existent coordinate, its motor will try to push the machine beyond the rails, making a grinding, loud noise until you stop it. This was indeed something to consider when preparing the cuts and a true hands-on way to test the emergency button.
There are many ways to test the several parameters that could influence the work of a ShopBot, but due to lack of time, we tried to test all of them in our works. A very useful way to figure out if variables such as toolpaths, speed and aligments are set just fine was to prepare a test file for the cut we were working on. Essentially, if you prepare a path with a single plunge feed of your design and run it on the machine with a z set higher than the drilling surface you get a route exactly as you want to for your cut, testing if the bit will cover exactly the surface you want at the feedrate you've set without moving over unwanted parts such as holding screws or out-of-boundary coordinates. Furthermore, if multiplied by the plunges desired, this technique can give an approximately correct estimate of the time your machine will take to accomplish its full job.
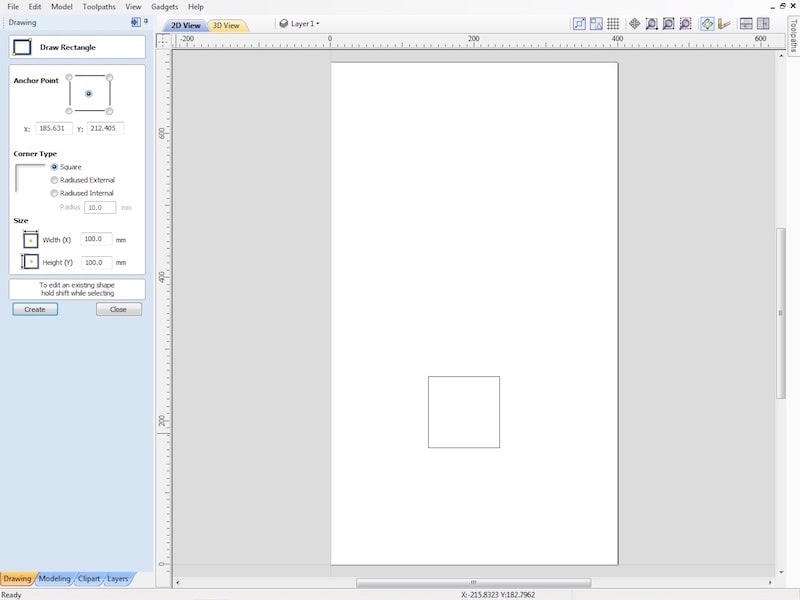
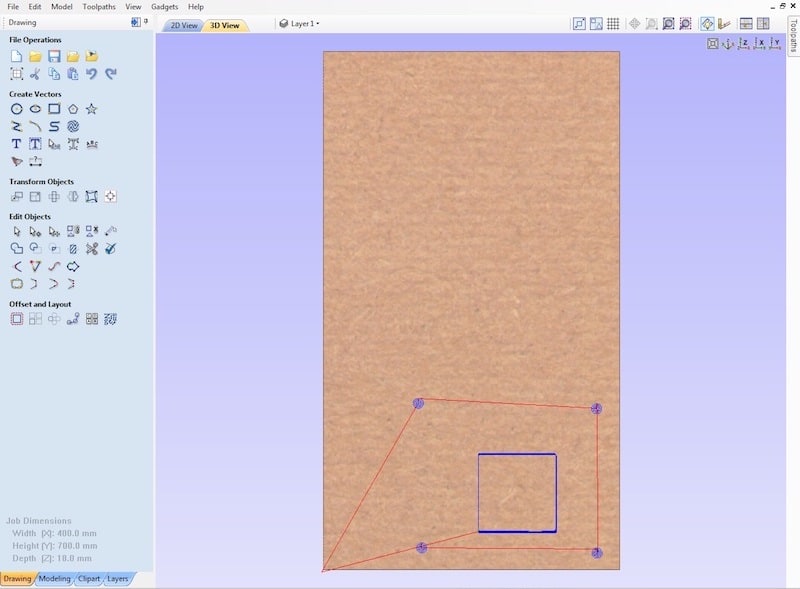
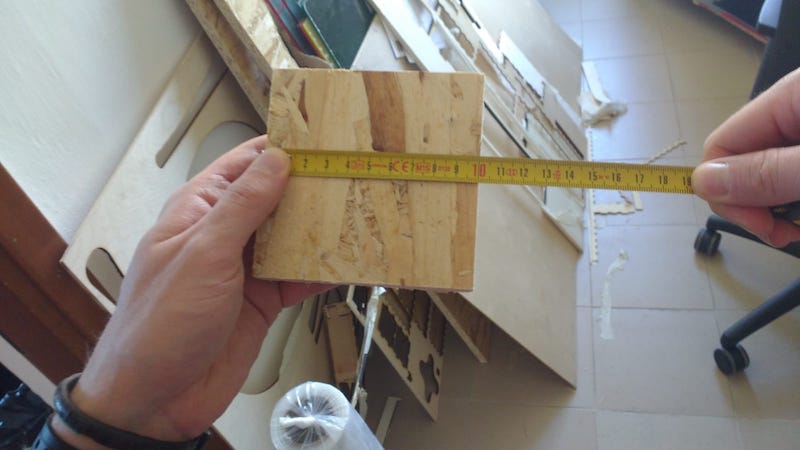
In order to test some parameters on our ShopBot machine like reliability on dimensions, alignments and runouts we decided to cut a simple 10 x 10 cm square in Aspire and measure it.
We inserted also four 2 cm circle to transform in pockets in order to insert washers and screws to fix the OSB sheet to the plane.
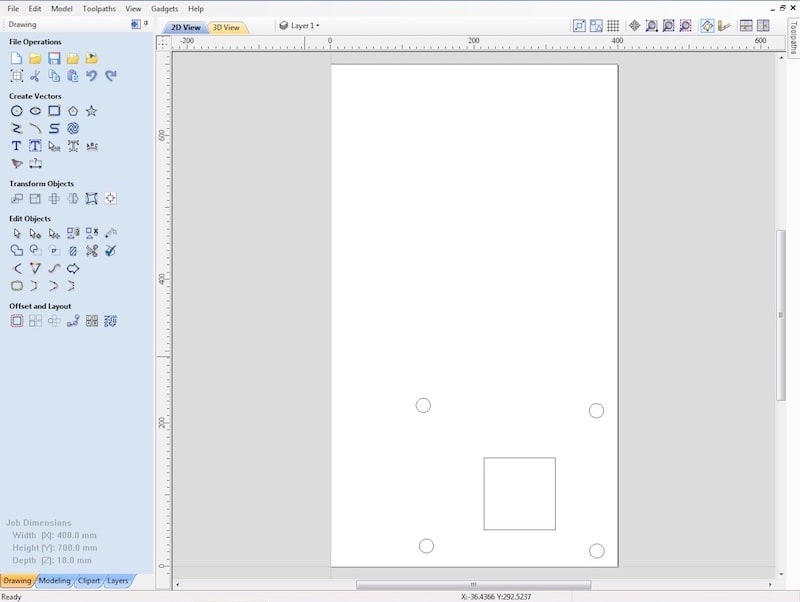
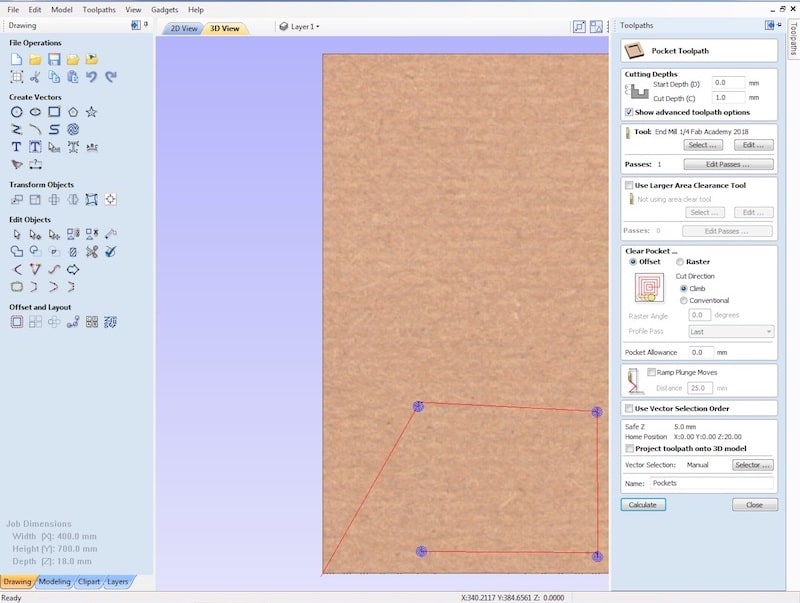
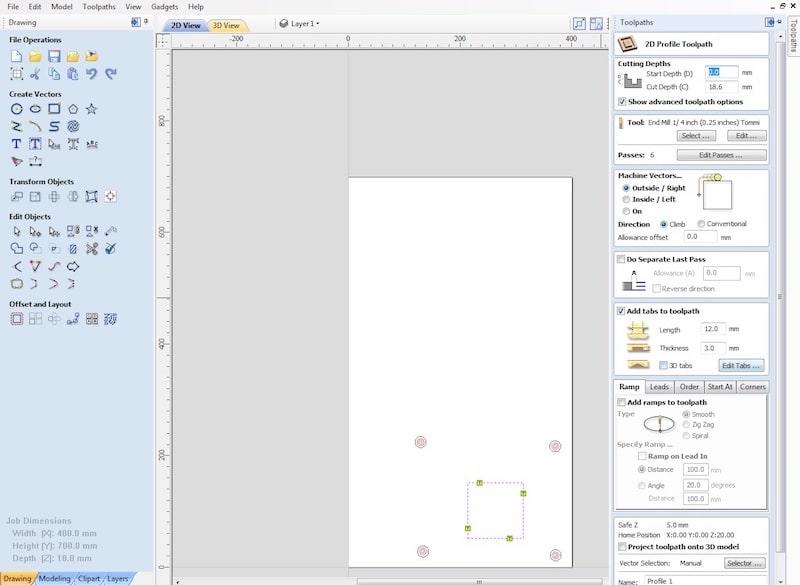
About toolpath profile, we choosed an external (outside) pattern: with this setting we was pretty sure to don't have to involve any kind of kerf. The only case where we need to considerate kerf is when we choose for Machine vector ON: here the drill bit (in this case, 1/4 inches end mill) will pass over the cut line and, because it removes some material from right and left sides. We add 4 tabs in order to keep our square attached to the rest of the board. We also setted 6 passes of around 3 mm as depth. About feedrate settings and how to calculate it, we made some explaination in our personal webpages:Giuseppe Allocca
Giada Allocca
Dario Bernabini
Antonio Garosi
Tommaso Lombardi
Eleonora Piccinelli
In this particular case, we used those settings:
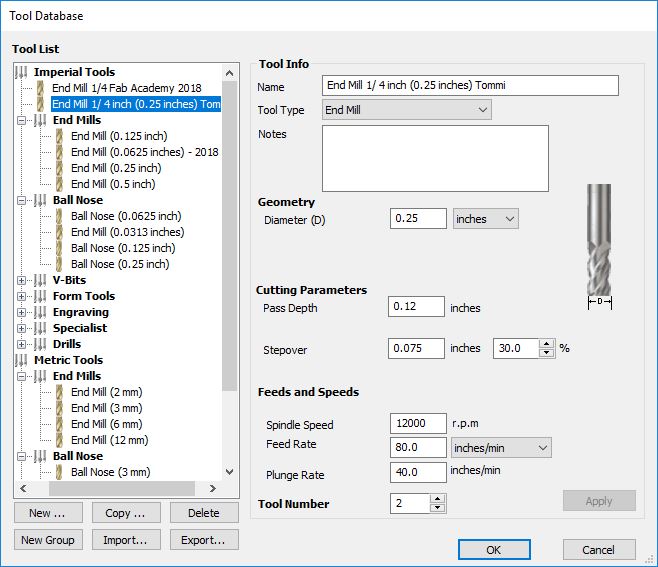
We setted 80 inch/min as feedrate but we could went faster. The maximum feedrate we could arrive was arond 165 inch/min, resulted by the formula:
whereRPM = 12000 (looking previus years documentations and our instructor's advices)
n° of cutting edges = 2 (setted by looking the tip)
chipload = 0.007 (choosed looking tip's manufacturer documentation about soft wood cutting and relative to the 1/4'' 57/900 tip)

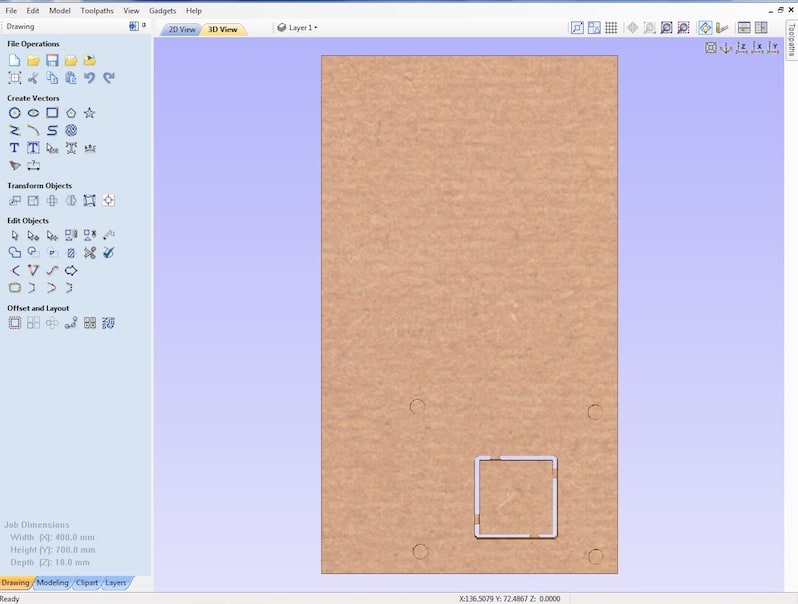
Once saved both files in .sbp (mm) extension file, we proceeded to launch them in ShopBot machine. First of all, of course, we fixed the OSB sheet inserting screws inside pockets we designed.
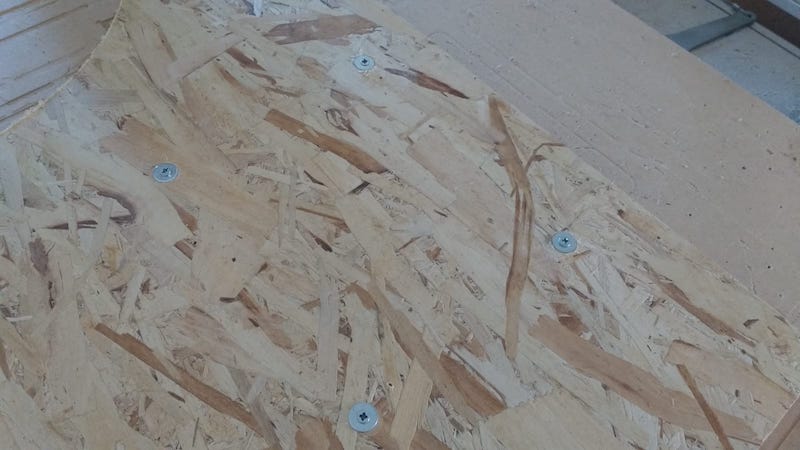
And here is the result after launched the second file (the profile one). Measures are around 10 cm as we decided but are irregular in some points. The cause is to reasearch in the material we used and in its characteristics: OSB is not a really realiable material that tends to splinter under this kind of works.
We inserted also four 2 cm circle to transform in pockets in order to insert washers and screws to fix the OSB sheet to the plane.
About toolpath profile, we choosed an external (outside) pattern: with this setting we was pretty sure to don't have to involve any kind of kerf. The only case where we need to considerate kerf is when we choose for Machine vector ON: here the drill bit (in this case, 1/4 inches end mill) will pass over the cut line and, because it removes some material from right and left sides. We add 4 tabs in order to keep our square attached to the rest of the board. We also setted 6 passes of around 3 mm as depth. About feedrate settings and how to calculate it, we made some explaination in our personal webpages:
In this particular case, we used those settings:
We setted 80 inch/min as feedrate but we could went faster. The maximum feedrate we could arrive was arond 165 inch/min, resulted by the formula:
Feedrate = RPM * n° of cutting edges * chipload
where
Once saved both files in .sbp (mm) extension file, we proceeded to launch them in ShopBot machine. First of all, of course, we fixed the OSB sheet inserting screws inside pockets we designed.
And here is the result after launched the second file (the profile one). Measures are around 10 cm as we decided but are irregular in some points. The cause is to reasearch in the material we used and in its characteristics: OSB is not a really realiable material that tends to splinter under this kind of works.