Week 1 - Project Management
Assignment
work through a git tutorial
build a personal site in the class archive describing you and your final project
Process
Git Learning
To properly understand how Git works, I went through a simple but efficient tutorial made by CodeSchool and sponsored by GitHub that makes you do several operation on a virtual repo.
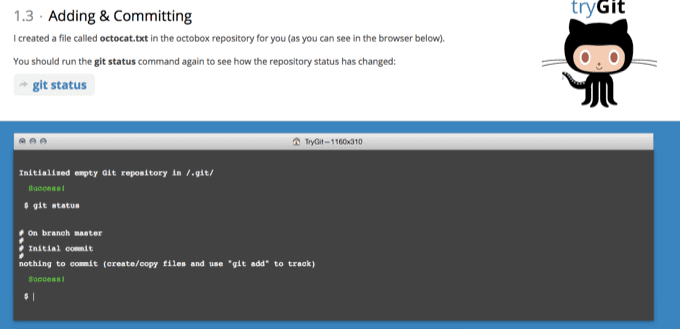
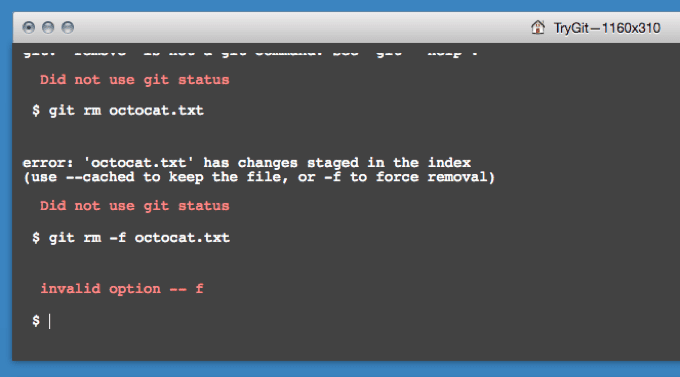
It doesn’t allow to get anywhere far from the written track, in fact even if you try to execute totallt legit commands but away from the given istruction you simply get an error message
However, this tutorial gives you a good foundation of this technology to make you ready, and a little more personal resarch made find a couple of useful cheat sheets and then I proceedeed to rehearse on my GitLab account and my personal computer.
Installing Hugo
Already having some basic front-end development knowledge, instead of just pasting together some outsourced code I wanted to try some more advanced tools and figured out that trying the static site generator Hugo would have been a good learning chance (also because it requires you to adopt some Git practices in order to use it). Hugo is well-documented, is well-implemented and has a lot of extensions, but to be honest using was more dauting than I expected since I had to understand how a static site generator works with little time and no previous knowledge of Go and Markdown languages, and Hugo workflow.
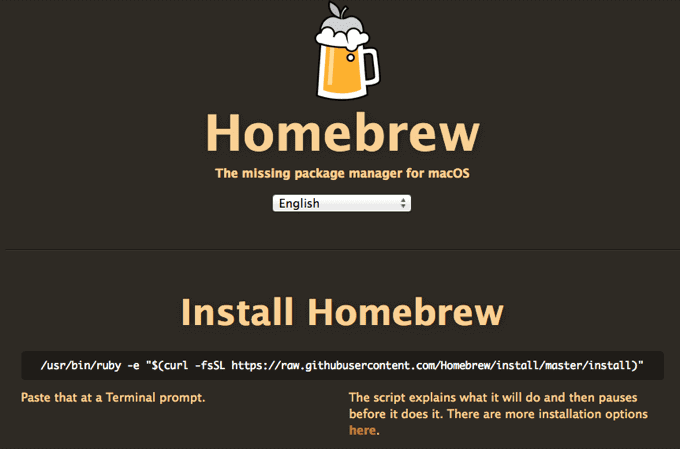
In order to use it, first of all you have to install from Bash a Ruby-based package extractor called Homebrew. This is pretty straightforward task and can be easily accomplised by writing down a command line as instruced by the official website.
Once Homebrew is on you have to download and install Hugo on you computer. Again, this is really easy task you can accomplish with a single command line from Bash.
brew install hugo
After that, you’re ready to use Hugo and its nuances.
Sublime Text
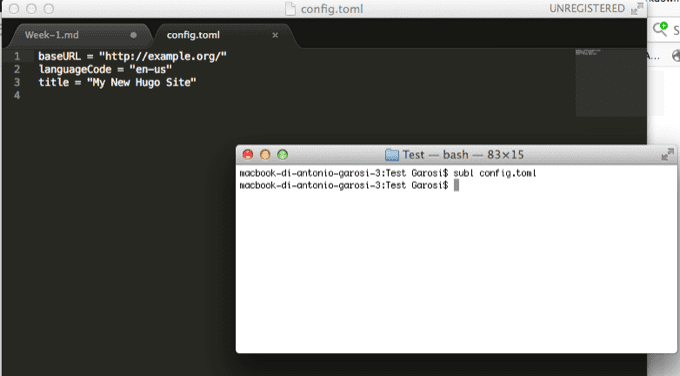
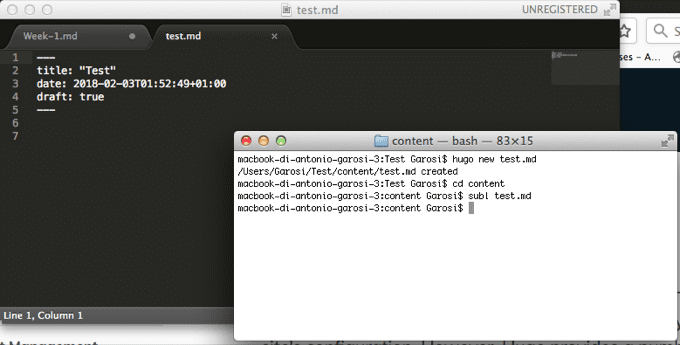
To easily modify and create the many code files this assignment requires, I’ve chosen to use the popular Sublime Text editor, which has many native features like multi-languange syntax-highlighting, indentation, code-folding and so on, that makes the weapon of choice for many developer. In order to make it more accessible from Bash I’ve changed some settings in my Macbook, as found through this handy instructions, so that just by typing subl <file-name> you either create and edit that file or just edit it, if it already exists.
Using Hugo
A very easy official tutorial explain the plaing basics of Hugo and leads in you creating your first web-site.
Essentially, on Hugo you work via Bash to create and modify several Markdown and Toml files (even though you can choose even among different high-level languages) that will define the architecture and the content of your website.
To start this process you have to initialize your website via the command hugo new site <site-name>, and automatically the program create a folder with a fully-fledged website for you.
Inside this root folder you’ll find several other folders and a config.toml file. This is the first one should check and implement, since in it you can already configure many contents and metadata of the website.
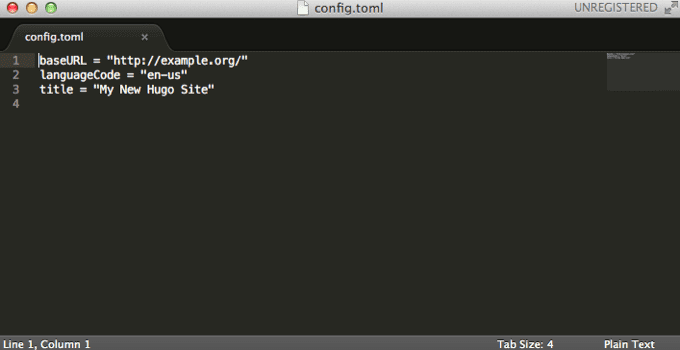
A useful list of all the parameters initializable in this part of the program are provided by the official documentation.
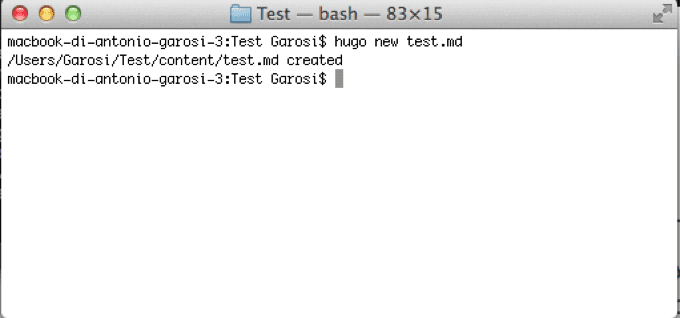
Hugo’s main purpose (although is not limitated to that) is to creat blog-like website. This is particularly apt for my Fab Academy portofolio, since it will require several pages regarding the assignments done, and to create a new page is actually a very simple process: if you want to make a new page you just type the command hugo new <file-name>. This operation will set up your new file in the Content folder, where you can access to all the pages of your website.
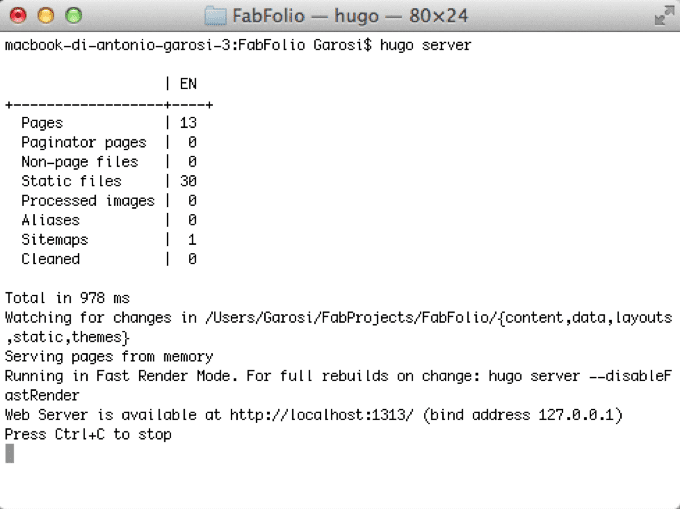
If you want to see how your website will look like you can do that via command line, with the instrutction hugo server. This will set up in your computer a local server hosting your website that you can check at the address http://localhost:1313.
Keep in mind that if you’re working with drafts of posts (this can be set in Front Matter section of the page with a boolean variable by the name draft) you have to type the command hugo server -D, otherwise you won’t see them. This is handy when you work on several pages at the same time and you don’t want to see them all published yet.
Themes on Hugo
If you do all the operation I exposed until now you won’t still be able to properly see a website, that’s because first Hugo also need a pre-coded theme. In these theme are defined many things such as templates, style sheets, page composition and many other behaviours. You can set up your own theme form scratch by putting together a structre of HTML, CSS, Javascript and Go codes, or else (especially if don’t have that many skills and want to save time) there is plenty of free and open-source themes to chose upon on the official website. For the reason exposed this was my choice, and after some research I found a nice and minimal theme called Goa that I favoured because I thought it could be easily edited and formatted without compromising the overall design (…and because it featured T.J. Miller’s inglorious character from Silycon Valley…).
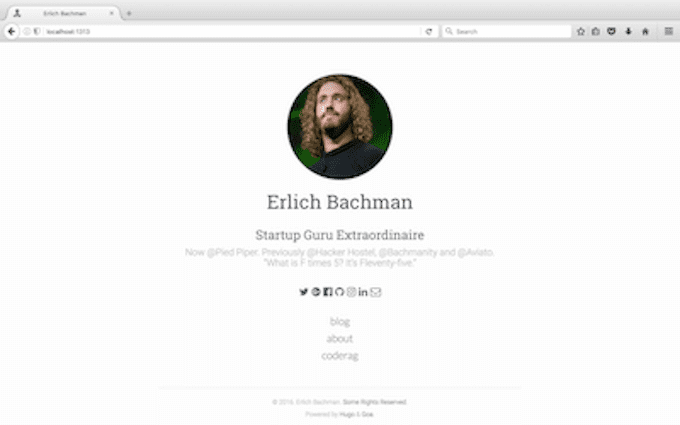
To install it, I had to make a theme direcotry inside my website and then clone Goa Github repo inside it. Simply doing so and running the Hugo server command is enough to render a proper website with all of its the pages instantiated. However, as minimal as a template can be, every theme need a certain degree of customization, be it in the Hugo configuration or in the website front-end appearance, that’s why it is really important to understand the underlying structure of a website and know for where you need to go when you have to make a specific change.
Hugo Customization
As previously noted, the first part one should address his changes is the config.toml file. In it, you can fidn several parameters that will fill your main page and other metadata useful to the site defintion. Furthermore, you can set up in here the sections of you website.
Any theme you install will already have some parameters preset in this file. In the theme I’ve chosen there were already configured a couple of menus and a social network section. After some customization the result is the following:
baseURL = "http://fab.academany.org/2018/labs/fablabsiena/students/antonio-garosi/"
languageCode = "en-us"
title = "Antonio Garosi - Fab Academy 2018 Website"
theme = "customized-hugo-goa"
contentdir = "content"
layoutdir = "layouts"
publishdir = "public"
author = "Antonio Garosi"

## Site Settings
[params]
	author = "Antonio Garosi"
	intro = "a pro noob"
	description = "welcome<br/><br>i'm Antonio from Siena, a 30-something guy interested in everything fab<br><br>this is the simple, minimal portfolio of the assignments<br/> done by me during Fab Academy 2018 course<br/><br/>navigate at your own risk"
	authorimage = "headshot.jpg"
	dateformat = "Jan 2, 2006"

## Site Meta Settings - momentarily disabled
[params.meta]
##description = "Simple minimalist theme"
##keywords = "minimalist,blog,goa,hugo,developer"

## Social Accounts
[params.social]
	gitlab = "antonio.garosi"
	twitter = "agarosi"
	email = "antonio_garosi@yahoo.it"
	medium = "https://medium.com/a-fab-tale"

## Extras
[params.extra]
	copyright = "Antonio Garosi"
	poweredby = true
	highlightjs = true

## Main Menu
[[menu.main]]
    name = "Weekly Assignments"
    identifier = "blog"
    url = "/weekly-assignments/"
    weight = 1

[[menu.main]]
    name = "Final Project"
    identifier = "final-project"
    url = "/final-project/"
    weight = 0
A couple of notes:
I’m not really a “socially-networked” person, hence I erased most of the available ones and replaced with the few I use. This parameters are linked to another page called
social.htmlinside a folder namedpartials(we’ll see it in further detail later) and it’s important to note that in order to show theme properly I added in this page a couple of icons from Font Awesome, a popular icon library that was already set-up and used by the original developer of the theme.The last section that is title with the comment Main Menu is where you put the link of the pages inside your index. Adding and modifying them is pretty straight-forward but it’s important to clarify better the use of the variable
weight. It’s needed to clarify the visualization order of the pages in the index, otherwise they will be alphabetically ordered via thenamevariable. This is very useful, especially in multi-language websites where you have different words for the same link.
There’s another file that is really important to work on, that even though is not of fundamental it can speed up a lot the process of authoring and publishing content. Inside the archetypes folder there’s a Markdown file called default.md which functions as the main template for all your posts. Markdown may not seem a very versatile formatting tool, but its premise stands on the rapidity of making code and text files, therefore having an already pre-formatted template can make you focus better on the content and to publish it more quickly. In order to give structure to all of my future documentantion and to speed up this process, I modified this default archetype file to quickly retrieve the way I want post to be formatted. Heres’ how it looks like:
---
title: "{{ replace .TranslationBaseName "-" " " | title }}"
date: {{ .Date }}
draft: false
showpagemeta: false
---
## Assignment
> Assignment text goes here
## Process
### This is a paragraph title
And this is your text

*This is the image description*
## Result
More text
## Gist & Further development
Even more text
## Tools and software used
* [And](asd.html)
* [This](asd.html)
* [Is](asd.html)
* [A](asd.html)
* [List](asd.html)
* [Of](asd.html)
* [Links](asd.html)
Hugo allows you to have multiple archetypes so that you can have different content formats for different purposes.
There’s another file inside the theme folder called theme.toml which provides some more parameters to work on, although most of them are just metadata and not too relevant to the website structure.
HTML customization
Inside the theme folder is present a folder called layouts which hosts all the HTML files that will compose our websites. These pages are not static, instead they’re made modularly so that when Hugo runs it can build according the instructions and contents you’ve given to it. These pages are coded in a blend of HTML and Go’s html/template and text/template libraries, that with some coding experience and a little focus even a Go agnostic like me can understand.
This is the code for the index.html file, made only out of Go:
{{ partial "header.html" . }}

{{ partial "avatar.html" . }}

{{ partial "info.html" . }}

{{ partial "main_menu.html" . }}

{{ partial "social.html" . }}

{{ partial "footer.html" . }}
And this is one of the partial files, essentialy the HTML and Go modules called by the program the build the page requested:
<section id="social-pane" class="row text-center social">
  {{ with .Site.Params.social.twitter }}
  <a href="https://twitter.com/{{.}}"><i class="fa fa-twitter" aria-hidden="true"></i></a>
  {{ end }}
  {{ with .Site.Params.social.gitlab }}
  <a href="https://gitlab.fabcloud.org/{{.}}"><i class="fa fa-gitlab" aria-hidden="true"></i></a>
  {{ end }}
  {{ with .Site.Params.social.medium}}
  <a href="https://medium.com/{{.}}"><i class="fa fa-medium" aria-hidden="true"></i></a>
  {{ end }}
  {{ with .Site.Params.social.email }}
  <a href="mailto:{{.}}"><i class="fa fa-envelope-o" aria-hidden="true"></i></a>
  {{ end }}
</section>
What I did to customize these page was essentially to re-arrange the order of the blocks composing them and erasing those I didn’t want. In few cases I added some classes that would be later handled by the CSS file.
Except for the social network link, none of the website content is written in here since all of that is held inside the config.toml file and the content folder.
CSS customization
Within the theme folder, at the static/CSS address, there’s a file called main.css that holds all the information regarding the style of the website. Most of the fine-tuning of the original theme done by me is in this file, but it’s little more than font-size adjustements, balancing paddings and color picking, all done solely according my taste.
The original theme already featured many classes linked to the popular Bootstrap library, which is a nice plus to have for easily authoring a consistent and responsive website across different browsers.
Javascript customization
Inside the static files folder there also one called main.js that uses some Javascript only for cross-browser purposes. Personally I added only the following snippet in jQuery to add some Bootstrap classes to the IMG elements inside the website.
$(document).ready(function(){
	$("img").addClass("img-rounded");
	$("img").addClass("center-block");
	$("img").addClass("img-fluid");
});
Publishing and pushing your website
All the images of the website should be hosted in the folder static/img of the theme directory, possible divided by page so that they are easier to manage. If the links are correct, the images can already be seen in the local server of Hugo.
Once you’ve checked that you’re website is fully functional and ready to be published, you only have to type the command hugo in the Bash while located in the website directory. This line will generate a folder called public into which the full static site will be available.
From this moment, there are few ways of proceeding to properly put the website online, like copy-pasting the public folder in your domain if you own one, or setting a Yaml file in your website folder and the pushing it to GitLab so that it will automatically build and deploy your website on request. Since Fab Lab’s GitLab accounts seem to work a little bit different from the norm and my website will be published in an very specific web address, I preferred to push the static site on the GitLab repo with the following commands:
git add --all
git commit -m "Update website"
git push
As I said, my GitLab account seems to work not some like documentation I found explains, hence, after this operation, I had to manually re-configure some broken links for images and style-sheet. This will be indeed a matter of invenstigation with my instructors.
Result
The result of all this working is the website you’re browsing right now!
Gist and further development
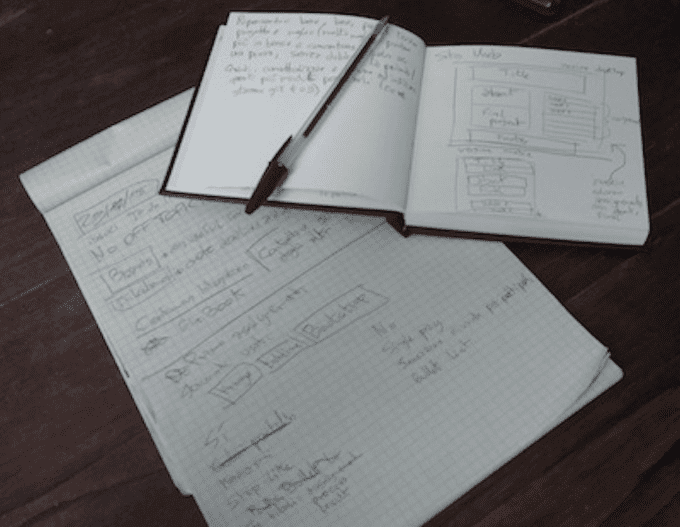
Getting a minimal and simple template running isn’t always an easy job, especially because it can’t be anything less that eye-cacthing and not fatiguing, and to do so I had to work on different facets of different components, not just some style refining. In the end, I’m really happy of its sleek but accessible feel. For making this assignment I didn’t use any project management tool such as Trello or Gant charts because I felt it was a bit too much of extra-work for a simple website. What really, really helped me was to sketch and point out manually many features before I got into coding, so that I already knew what I wanted to achieve before getting confused in the process.
Lots of notes
I’m very sure that in the following months this website will be updated and upgraded many times before I will consider it done, since I think this version is just a placeholder for my real intent (which I basically already have planned out). In doing so, I think I’ll try to use more of Javascript and jQuery, and to optimize the website responsiveness and user-experience.