
Fab Academy 2018 - Lucas Lim
Week 2 (24 Jan 2018) - Project Management
Week 2 (24 Jan 2018) - Project Management
Our first weekly meet-up between Mr Steven and Mr Rodney, both of our local Fab Lab instructors and gurus, and us students of Fab Academy 2018 began on Thursday morning after Wednesday night lesson.
This week my learning includes :
- Learning how Git works (like setup of remote repositories, ssh, git commands, etc)
- Learning webpage design and creation using HTML + CSS + javascript
- Learning on how to build a responsive web site that can be view on smaller screen size like tablet or even mobile phone
- Learning about modifying web page template
- Learning to use a text editor call "Sublime Text" to edit web pages (.html + .css files)
- Exploring Project Management software
I have followed the examples as shown by Fiore Basile during his recitation lesson on Gitlab on 29th Jan as well as refering to the Pro Git ebook by Scott Chacon , as refered during his recitation lesson.
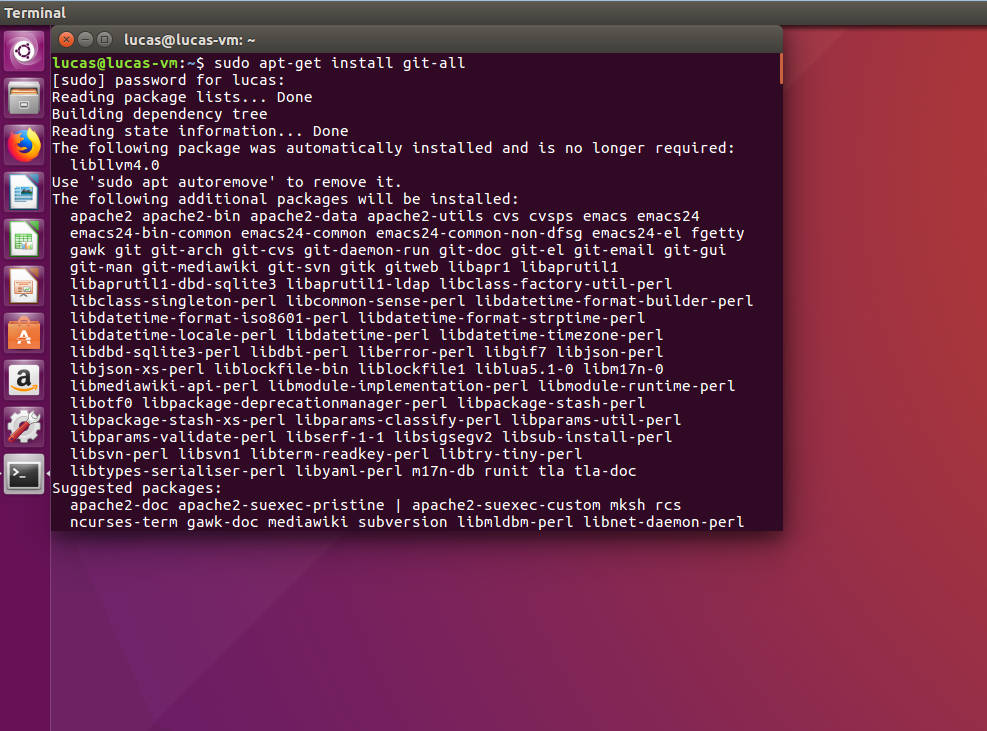
1. Installing "Git" by running the following command using the Terminal application in Ubuntu:
sudo apt-get install git -all
2. Initial Git configuration (typing in of user information) :
git config --global user.name "Lucas Lim"
git config --global user.name "{my email}"
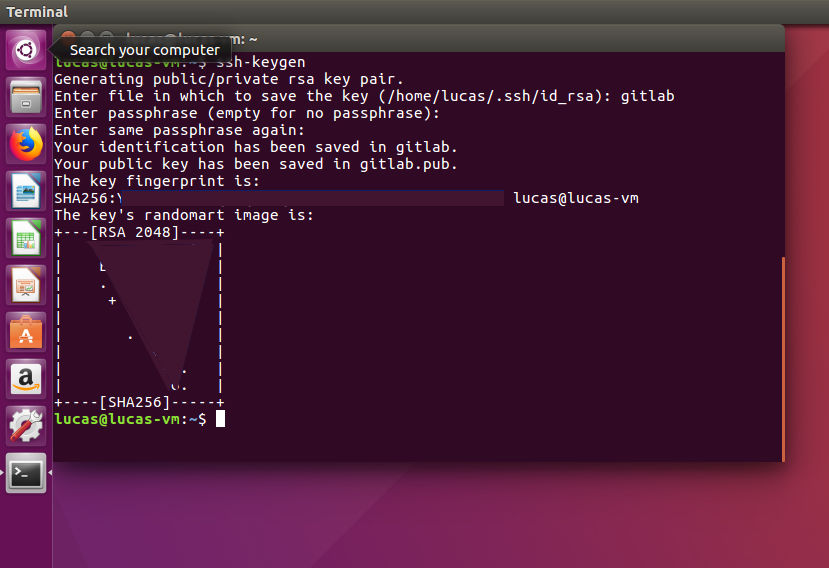
3. Generating ssh-key :
ssh-keygen
4. After generating the ssh key, at the Terminal screen, you can type the following command to view the content of the newly generated ssh public key. "gedit"is the default text editor installed on Ubuntu OS which you can use.
gedit ~/.ssh/gitlab.pub
5. Add the ssh public key to your Gitlab account (login to Gitlab account -> Settings -> select SSH Key -> Add an SSH key).
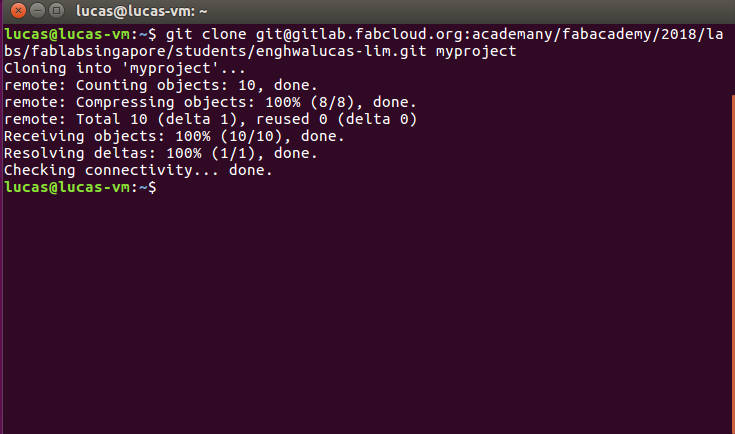
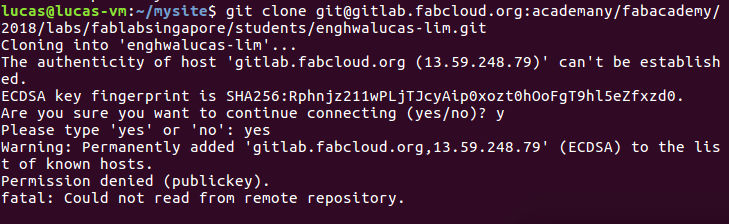
6. Next step is to copy down the content of the Git repository from Gitlab server (remote server) to your local machine.
Run the command "git clone {repo} {folder name}". The git clone command will copy down an existing repository (repo) into a specific folder, initiate and sync between the two locations (local copy and remote server).
Git clone command to copy down the Git repository from Gitlab: :
git clone git@gitlab.fabcloud.org:academany/fabacademy/2018/labs/fablabsingapore/students/{user name}.git {folder name}
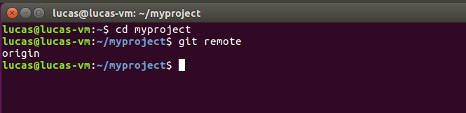
7. After I had successfully cloned my repository, I went to the local (copied) Git repository folder and run the "git remote command and I am able to see the word "origin" that is the default name of my local repository as well as representing my current connection to the remote server at Gitlab. The name for Git respository on the remote server is call "master. During the clone/copying process, these names are automatically created.
git remote
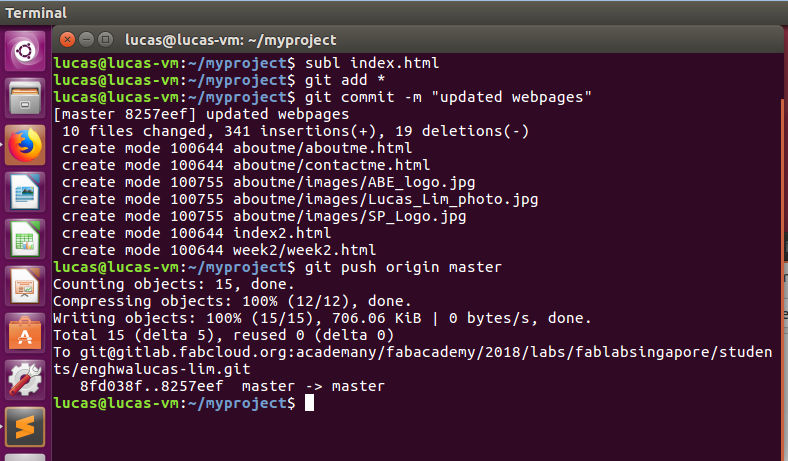
8. To upload any changes to the remote server at GitLab. The first step is to use the "git add {file name}" command to add modified file(s) to the staging area. Type "git add * (everything)" command, which is a handy tool to allow user to stage all changes done to one or multiple files which also include modified files in sub folder(s) too. To include changes done in project root folder as well as sub folders, you have to run "git add *" at the main project folder level.
The git add command is store all the modified files (changes) to the staging area. The second step is to save all these changes to the local Git respository and do to so by typing "git commit -m "log message"" command. The "-m" flag allow you to type in a meaningful comment/message to identify each saved or commit process.
Then use "git push {remote} {branch}" command to push changes up to the (master) Git respository at gitlab:
git add *
git commit -m "update operation"
git push origin master
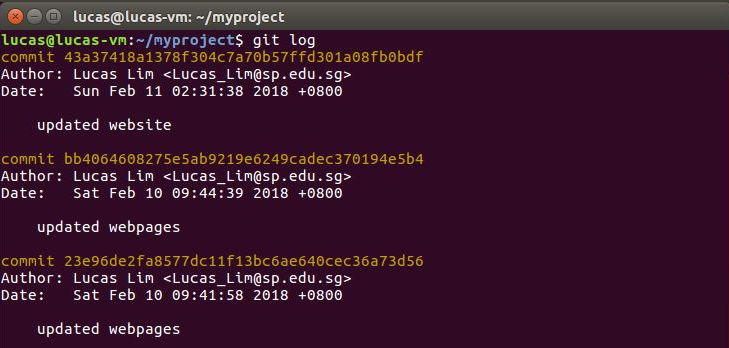
9. Type the "git log" command, and you can see the past previous commits carried out. If you really "messed things up" and need to restore to back to a point of time before your changes are carried out, you are able revert back all your project files by reverting back to any of the previous "commits". The "git log" provide the information of previous commits and your message that you typed-in are displayed here.
git log
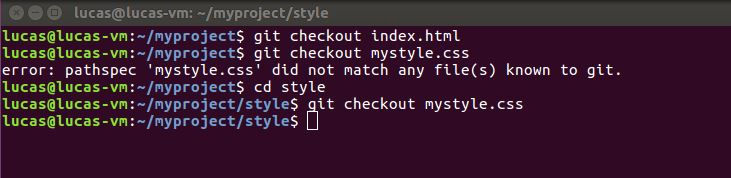
If you just want to restore one or two files, you can run the “git checkout “command.
git checkout {filename}
Gitlab, which the Fab Academy class is using, is similar to Github. Github is a popular platform for many programmers to share their files. Therefore I had tried and created a new repository in GitHub, and intend to use github to share files on my Fab Academy website.
After I uploaded my file to Github, I move my mouse and hover the filename in the list and right click to select "copy link address" to get the file's URL. However I would need to append "?raw=true" to the end of the URL adress to get a downloadable / embeddable version.
Reference :
How to Use Github for Hosting Files
I had attempted to use either the Fab Academy Template or one of the templates found online at w3schools.com, but was overwhelmed by the lots of codes found inside the template, therefore I decided to build my project web site from scratch, starting with learning the basics (basic html and css) and slowly over time when I am more familiar and skilled in web editing, then I would be able to explore and include more advanced web design techniques/coding like the use of javascript, etc. I would be able to copy and adapt some of the html codes found in these templates or other web sites into building up my project web site.
Resources on learning html and css :
- W3Schools Online Web Tutorials
- Learn CSS in 12 Minutes (bty Jake Wright)
Templates refered to :
- Template for Academy Website by Massimo Menichinelli
- Marketing / Website Template from w3schools
Sketching out my project web site on paper enabled me to visualize how it will look and how to oragnise my files, taking into consideration for the need for documentation of my weekly progress (posting weekly updates like an online blog) and cater for the weekly assignment (that will include codes, CAD files, etc).
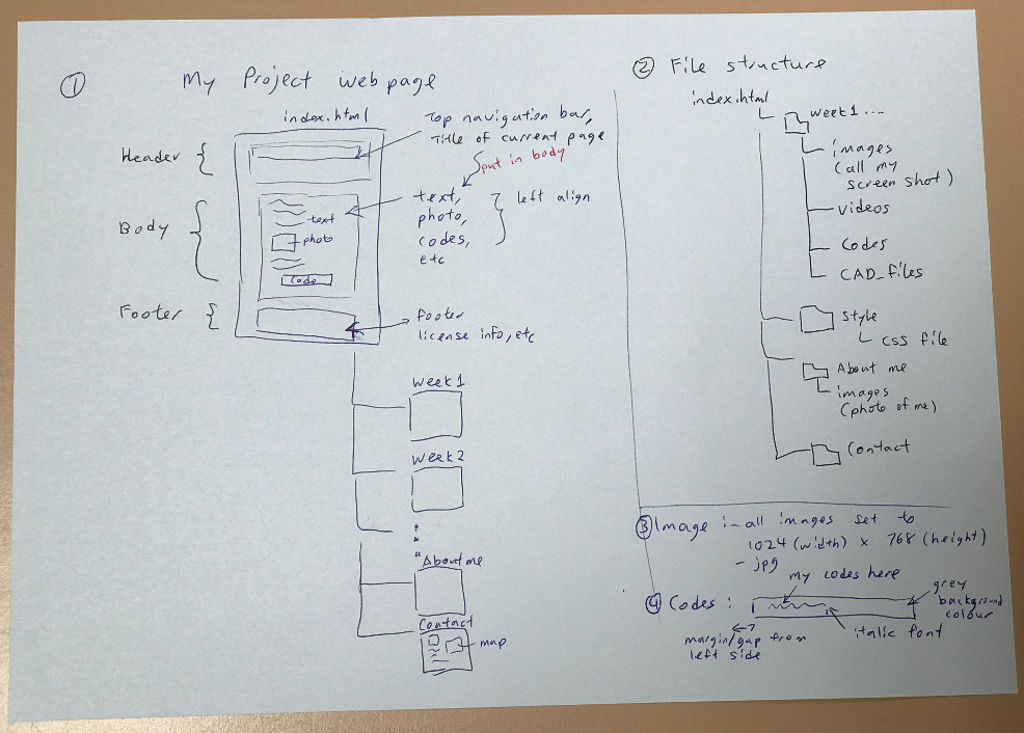
Folder structure :
In "myproject" folder (which is also my local Git respository), I had created sub-folders (like week1, week2, etc) and in each weekly sub-folder, I intend to create various sub-folders created for "images", "videos", "cad_files", etc. to help me organise all my images, video files, cad files, etc.
Handling of images and videos :
All images to be kept to the minimum size, especially photo taken on my iPhone which can be very hi-res and take up a lot of space. Resolution of all images to reduce to and standardise at 1024 (width) x 768 (height) resolution (if possible). Videos to be compress and save to a resonable minimum size.
Draft of first web page design (main page - index.html) :
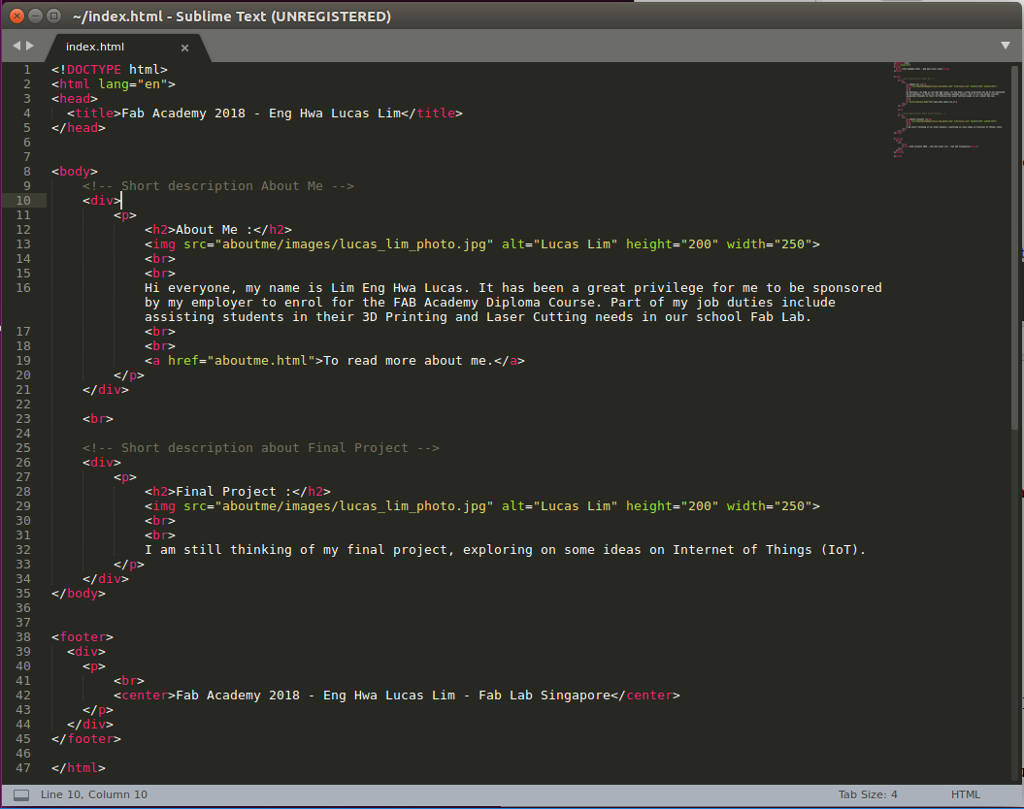
Having the main page (index.html) up, I began to explore, learn and add in codes from w3schools like for the responsive navigation bay (w3school : How TO - Responsive Top Navigation).
I am using "Sublime" text editor which is free to edit my html files. Sublime also allow installation of addition package like "View in Browser" which allow me to preview my currently opened .html file in a web browsers by using shortcut key "CTL + ALT + V". Go to main menu bar of sublime -> Preference -> Package Control -> Install Package -> search for package(add-on) that you like to install.
Command to openning and editing my index.html file :
cd {myproject folder}
subl {filename, eg. index.html}
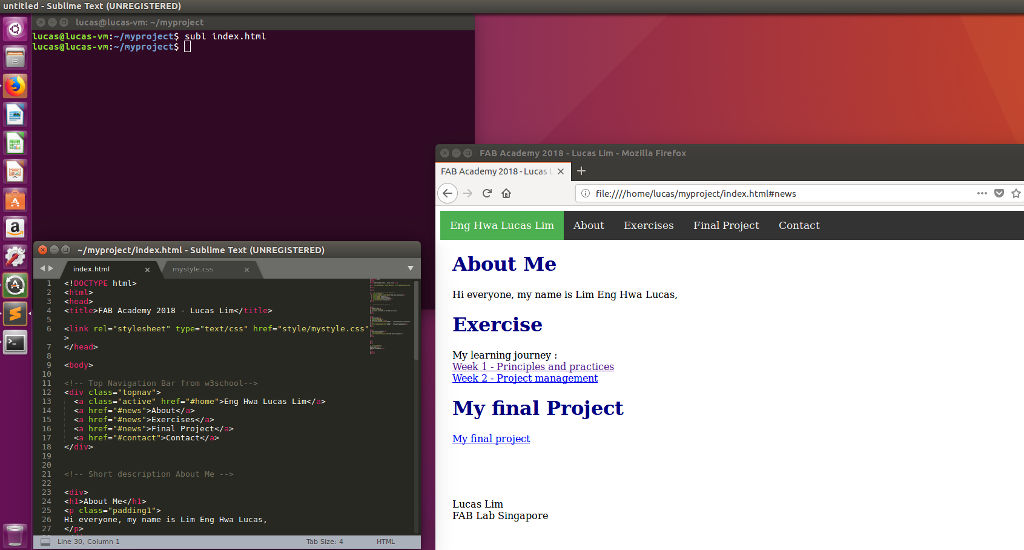
Sublime text editor allow easy formatting and viewing for my html and css codes with the use of various colours. It also has an auto-completion of closing (html) tags by typing just the first two characters of the closing tags like “</“.
My first web site created using Sublime text editor and previewing side-by-side using Sublime "View in Browser" function :
While designing my website, I am also learning to make my website responsive, so that my web site would not look out-of-alignment on a small screen like a mobile device. Example I noticed that my <h2> title text does scale down on small screen, it look large on my iPhone screen.
Resources on learning html and css :
- HTML Responsive Web Design (w3schools)
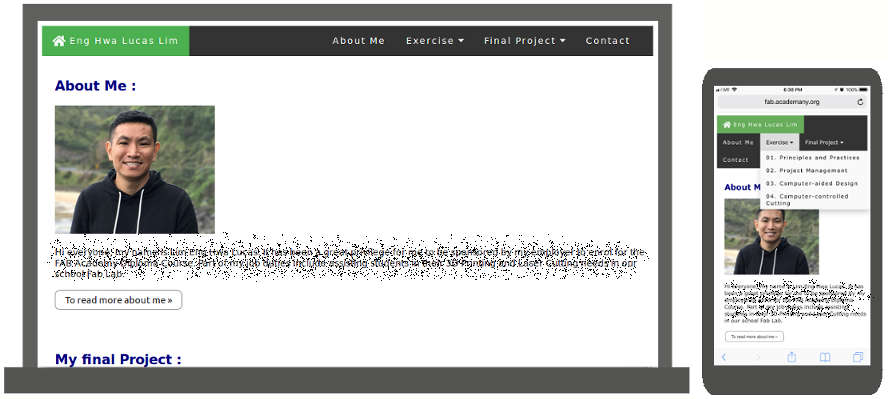
I had used a lot of <div> tags in my website as a container for each section. I prefered <div> tags over "grip" and "table" tags. Another way is the use of "width:50%"" over static "height=xx px width= xx px" for image.
Adding a responsive meta tag “<meta name="viewport" content="width=device-width, initial-scale=1">“ in the header section of all my web pages to tell the web browser to auto-scale to device size :

Using a responsive/dynamic html tag for displaying images instead of the static/fixed width and height :

Next on web page design, I choosen a color scheme that is simple, clean and warm, taking reference to "No. 9 warm tones" colour scheme on www.canva.com website.
The light brown colour projects an easy-to-read and inviting emotion.
The charcoal colour replaced the pure black colour, as pure black tend to overpower all the other colours surrounding it.
I also added a few splash of orange ochre colour to draw attention, and used this in my title text.
Reference :
Website Color Schemes: The Palettes of 50 Visually Impactful Websites to Inspire You
A Practical Guide For Creating the Best Website Color Schemes
Color picker : #ffffe6 Color Hex
Imagemagick is installed on Ubuntu (linux) operation system, and I can easily convert my screen captures and photos into a reduced file size for uploading onto my website.
Converting a .png image into .jpg using a compression ratio of 80 and resize to a width of 600px
convert howtogeek.png -quality 80 -resize 600 howtogeek.jpg
Mass converting all .png images into .jpg using a compression ratio of 80 and resize to a width of 600px
for file in *.png; do convert "$file" -quality 80 -resize 600 "${file%.*}.jpg"; done
Reference :
How to Quickly Resize, Convert & Modify Images from the Linux Terminal
The Fab Academy Diploman course is fast-pace programme with new topic introduced each week and an assignment allocated for each week, so project management skill and self-discipline is very important.
After completed my first offical assignment allocated for this (second) week, I am able to work out my time and plan for the subsequent "weekly cycle", so as not to fall behind each week or missed the deadline for the weekly assignment.
A good approach is to study the assignment and set your learning objectives, how far you should learn by the limited time you have. I will set aside two days after attending the online lesson to study or read up more on the topic learnt. Followed by two days to do the tutorial/assignment. And the one day to update gitlab website. The website should be updated half a day in advance before the next online lesson commences.
My typical Weekly cycle :
Next week lesson starts with a new topic and assignments. Adopt a "Spiral Development" approach to your weekly assignment as well as Final Project. Spiral Development approach is to starts with small managable portions and complete it first, before attempting more complex design or add-on more features which you can add-on later.
Another example is that after completing that week lesson, next week or in future, you can always "loop-back" and explore futhur on that topic/design when you have a bit of free time.
I have been using an mobile app call “Trello“ for some time, used for a group-collboration project with multiple users, therefore I had decided to use Trello to help me in managing the Fab Academy tasks and poject tracking as well. I placed Trello app on the home screen of my iPhone.
Some project management software like Microsoft Project offers a “linear“ path of project management, like with a timeline and one task leading to another (a finish-to-start relationship), Trello offers a “kanboard-like“ interface.
On the Trello board, I had created three lists; namely “To Do List“, “In Progress List“ and “Completed List“. If I have any new idea or some assigned tasks to do, I will create the task(s) in the form of card(s) under the “To Do List“. In the card, I can create due date, insert photo, assign/add team members to the task, create checklists, etc. When I am working on the task, I will drag the task across to the “In Progress “ list and after I had completed the task, I will drag in across to the “Completed“ list.
To know more click on Trello picture below or click here to go to Trello website.
Moving cards from one header to another in Trello :
- Fab Academy - Tutorials : http://fabacademy.org/2018/docs/FabAcademy-Tutorials/
- Learning html and CSS : https://www.w3schools.com/
- Learn CSS in 12 Minutes (bty Jake Wright) : https://www.youtube.com/watch?v=0afZj1G0BIE&t=13s
- HTML Responsive Web Design : https://www.w3schools.com/html/html_responsive.asp
- Jan 29 recitation: gitlab (Fiore Basile)
- Pro Git ebook by Scott Chacon, download from
https://www.gitbook.com/book/gitbookio/progit/details
- Trello Tour : https://trello.com/tour