Exercise 3 - Computer-Controlled Cutting
Assignment for this week
Explore Vinyl cutter, Laser cutter, and related design software.
Vinyl Cutter
1. From Inkscape, I open a new document, then imported a jpg image (Chinese New Year 2018).. Just accepted all defaults..
Then choose Trace, Bitmap, again accept all defaults. I'm a newbie in Inkscape so accept all defaults.
Then I export as svg file .
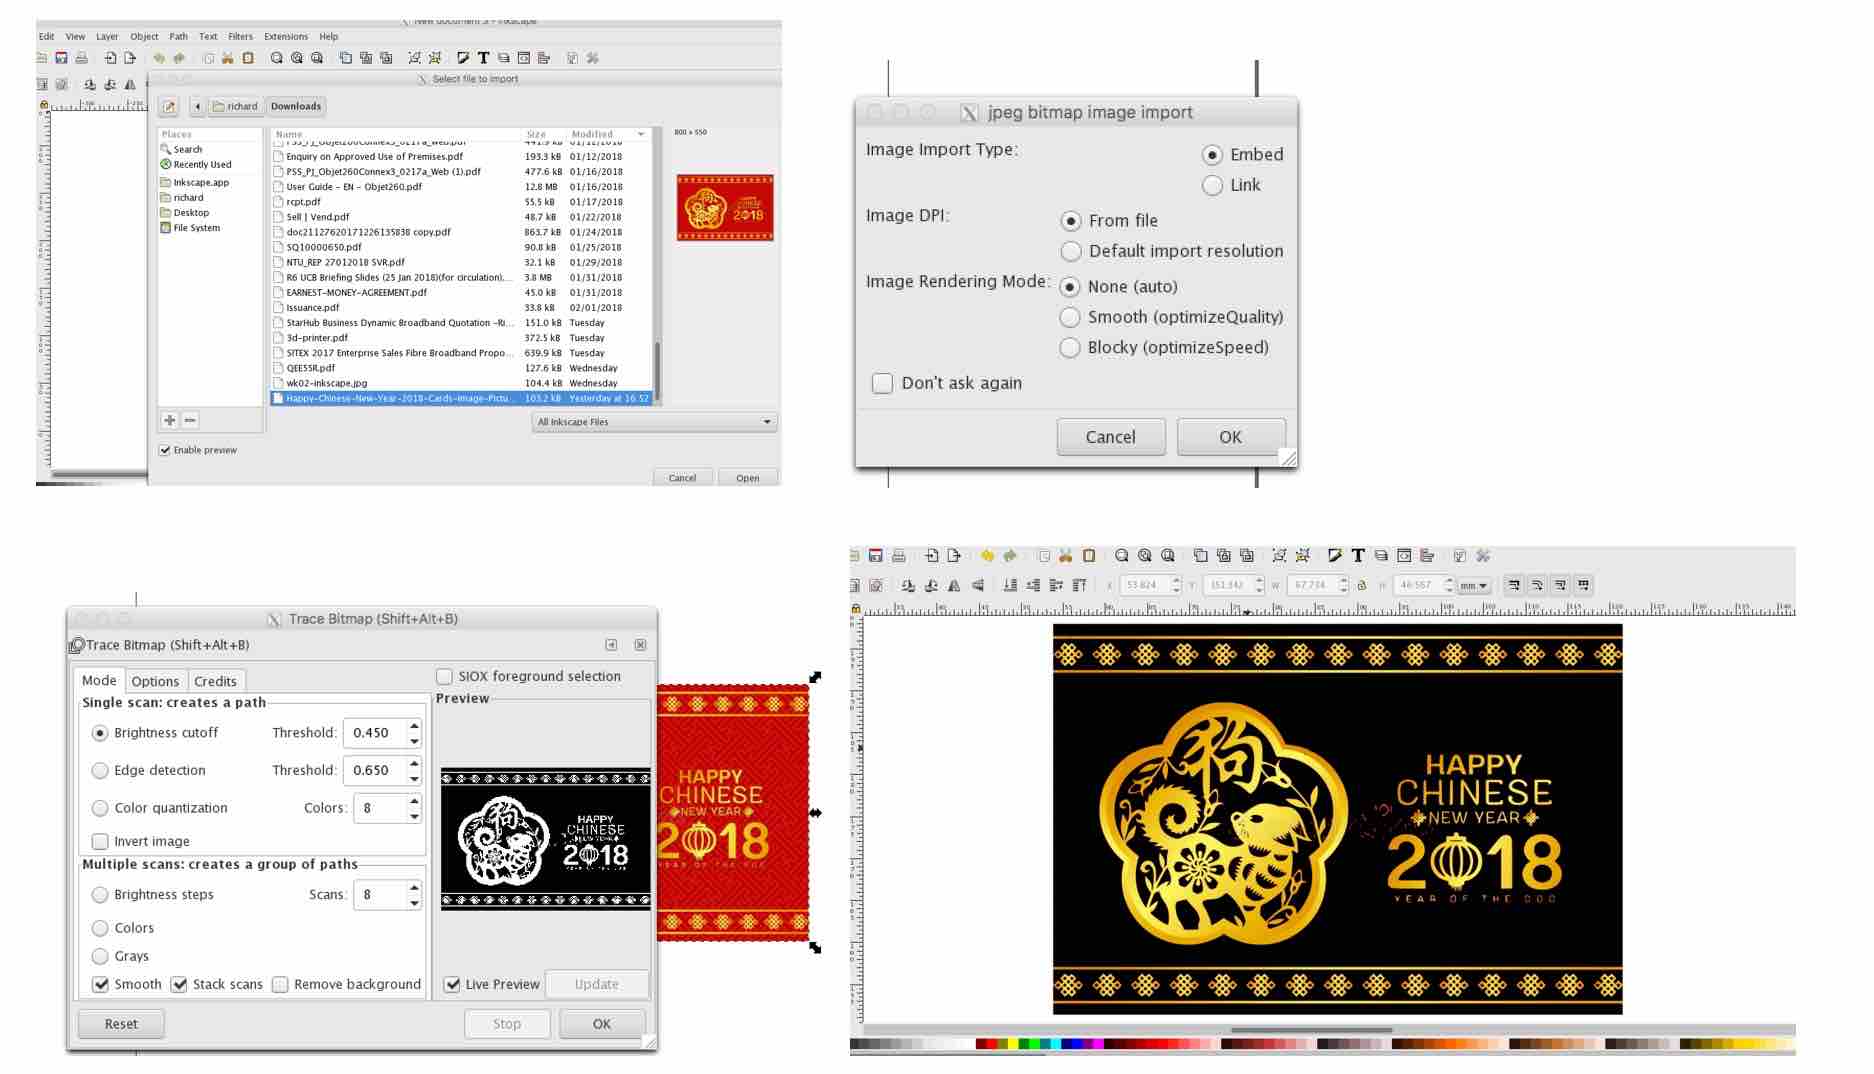
Unfortunately my vinyl cutter (Silhouette Cameo) and accompanying software (Silhouette Studio) does not support SVG file format so I had to save is as dxf file.
2. Silhouette Studio is a free download software from here ...
I open the dxf file. Hey it's ready to cut.
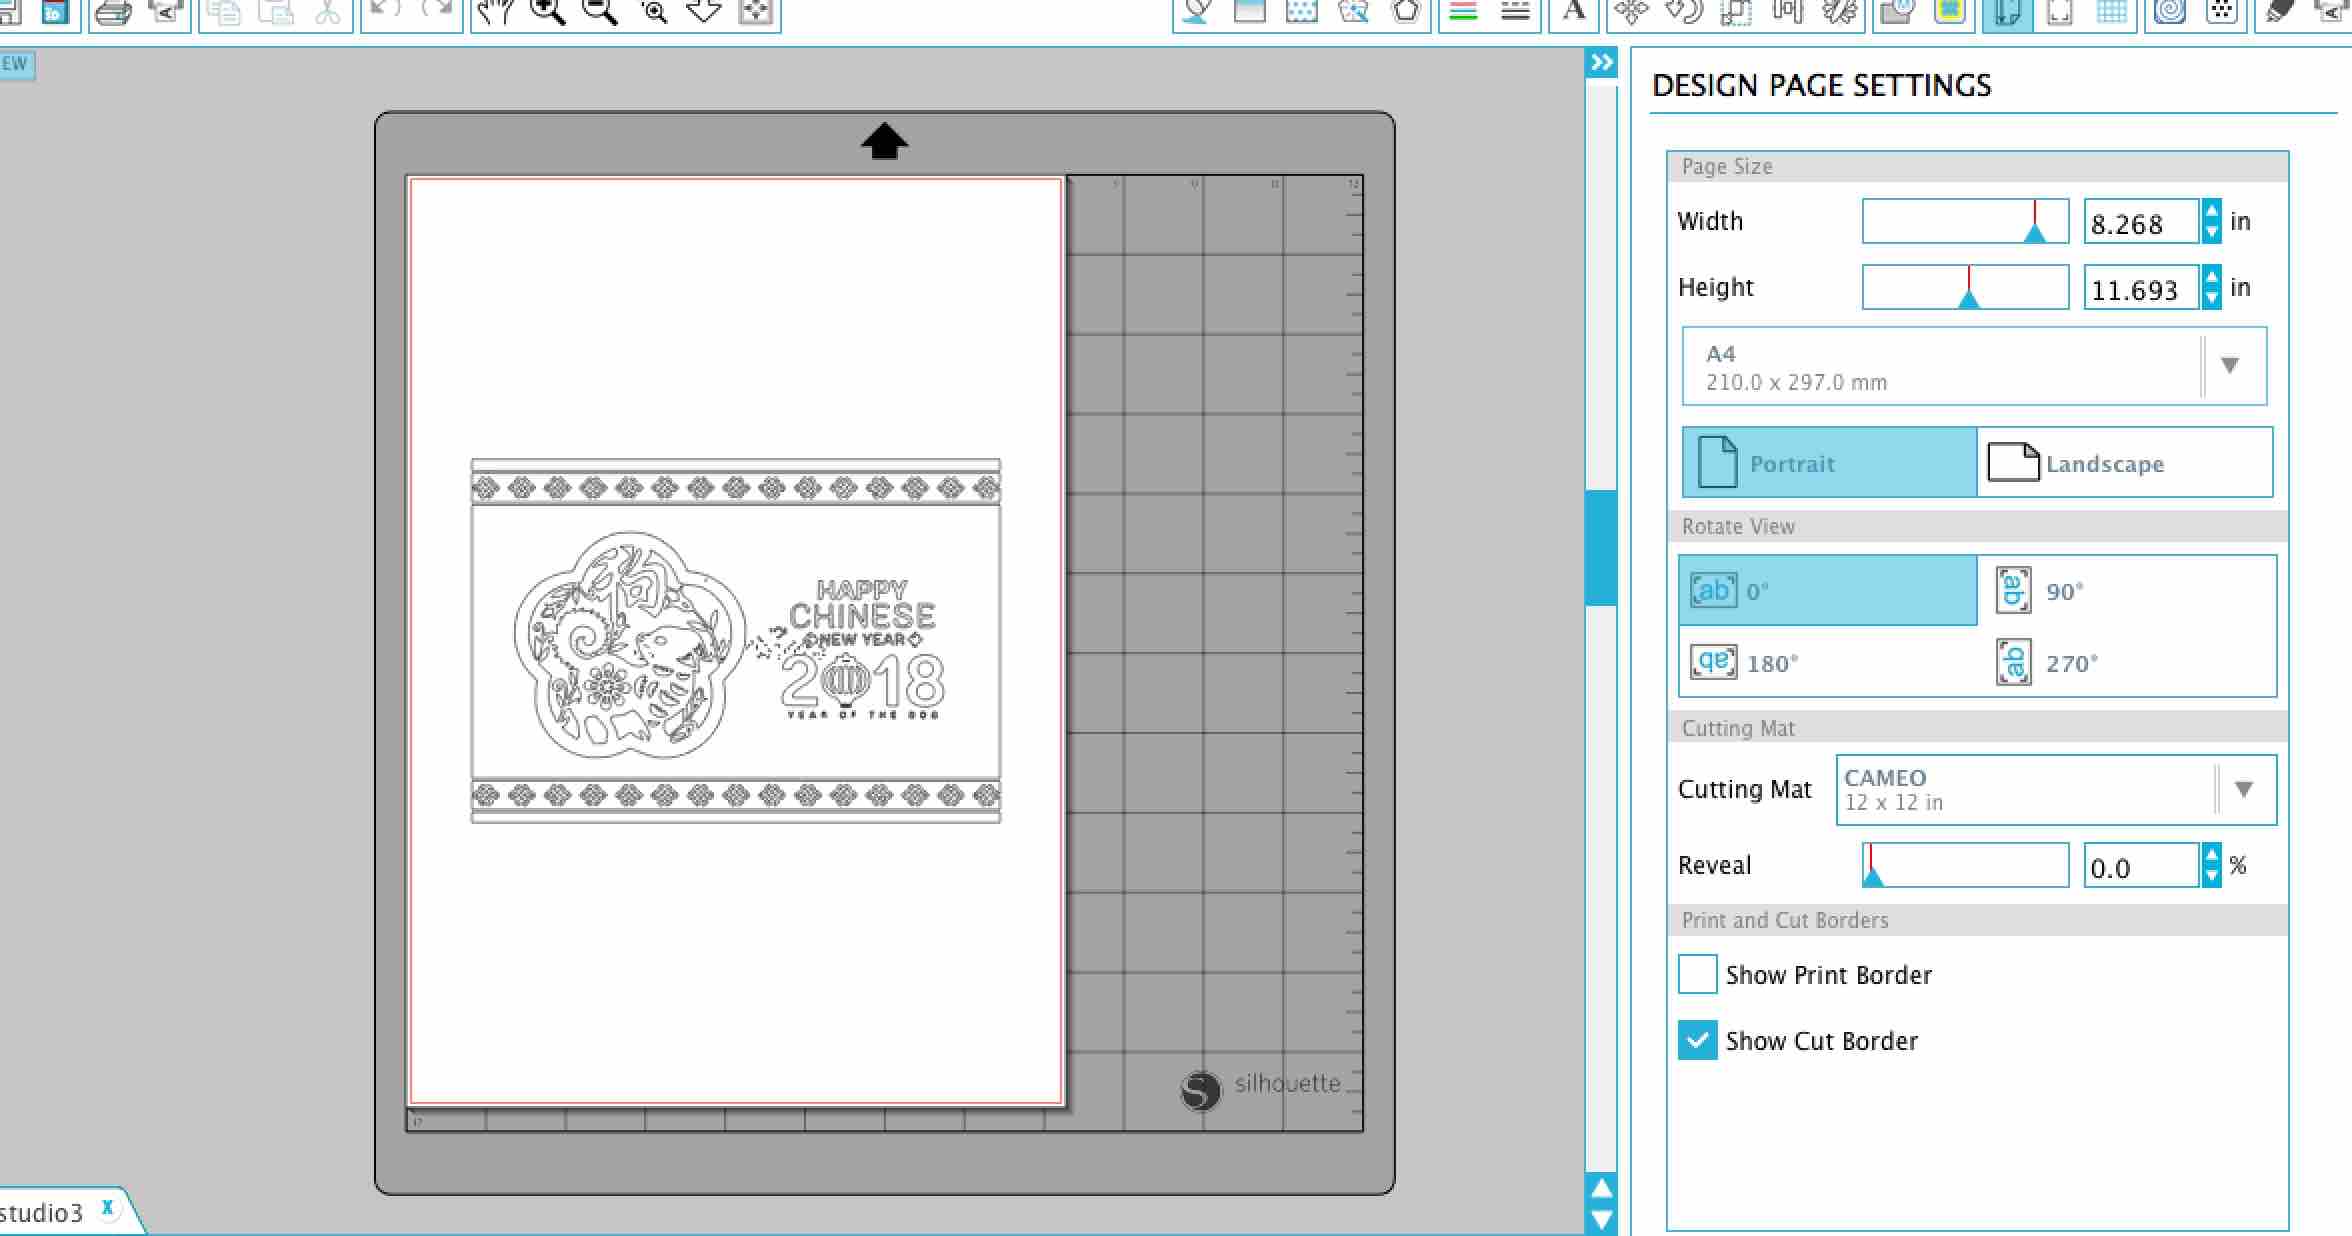
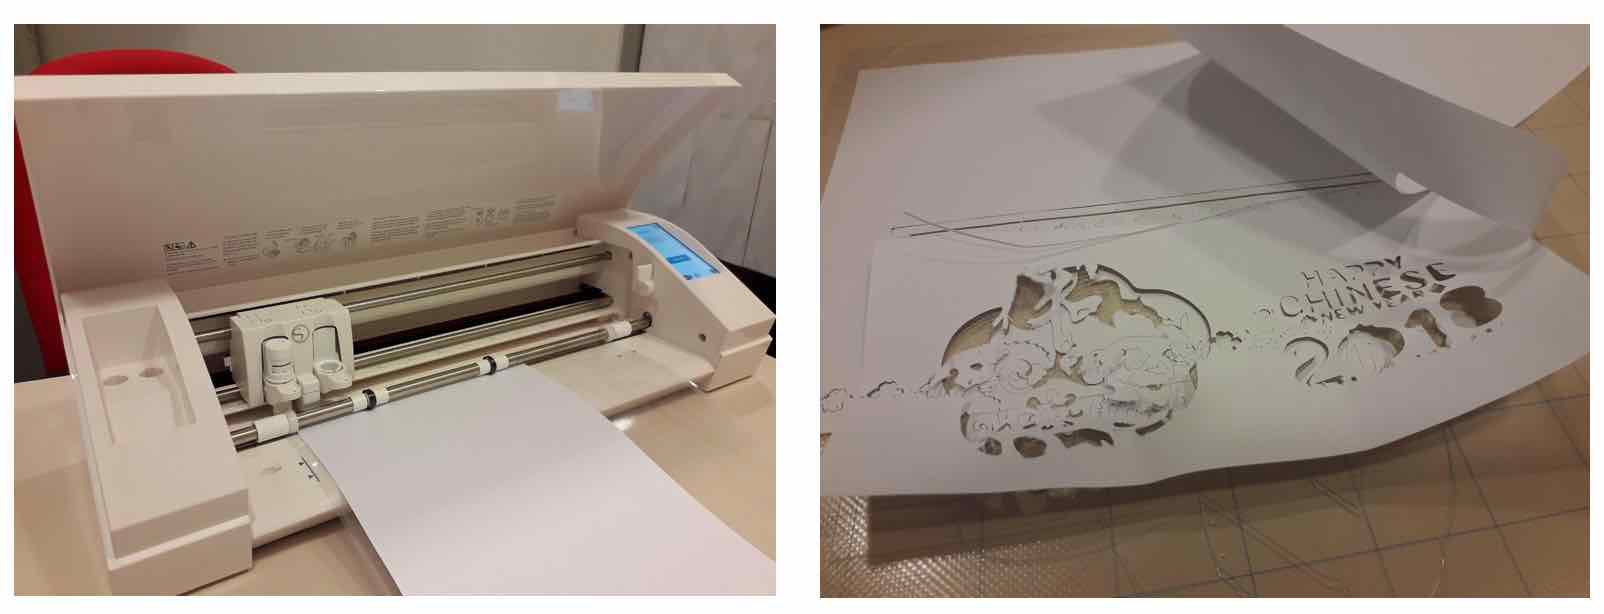
Go to Cut Settings, Choose Paper, then click 'Send to Silhouette'. Very intricate design so it took 5min to cut, and so complex that the A4 copy paper is unable to withstand the cutting by the blade.
Lesson learned: Design cannot be too complex for A4 paper. Maybe a finer blade will help, if Cameo has it.
Laser Cutter
1. We have an Epilog Zing 24 in the lab so I start by watching youtube videos recommended by our FabLab mentors (Steven and Rodney) -
how to use. Seems easy enough.. Now I want to design already.
2. I installed Fusion 360 on my laptop. I think it's free.
Images
You can set it up with:
	<p class="pic>><img src="http://academy.cba.mit.edu/2012/students/menichinelli.massimo/exercise07/exercise07_02.jpg">
	<legend>Here's the legend of the picture.</legend>
	</p>
Result:

Code
You can set it up with:
	<pre class="prettyprint linenums">
	Your code here
	</pre>
Result:
	for i in members:
		print ""
		print "USER:",members[i]
		print "Loading connections..."
		followers = load_connections([i], "followers")
		friends = load_connections([i], "friends")

		# Add edges...
		print "Building the graph..."

		for f in followers:
			for k in followers[f]:
				graph.add_edge(k,f)

		for f in friends:
			for k in friends[f]:
				graph.add_edge(f,k)
3D Model
The model can be rotated and zoomed with the mouse/trackpad. You can set it up with:
	<canvas id="cv" width=640 height=480>
	It seems you are using an outdated browser that does not support canvas :-(
	</canvas>
	<script type="text/javascript">
		var canvas = document.getElementById('cv');
		var viewer = new JSC3D.Viewer(canvas);
		viewer.setParameter('SceneUrl','media/monkey.stl');
		viewer.setParameter('ModelColor','#CAA618');
		viewer.setParameter('BackgroundColor1','#E5D7BA');
		viewer.setParameter('BackgroundColor2','#383840');
		viewer.setParameter('RenderMode','flat');
		viewer.setParameter('MipMapping','on');
		viewer.setParameter('Definition','high');
		viewer.setParameter('Renderer','webgl');
		viewer.init();
		viewer.update();
	</script>
You can set up the path to the 3D model (.stl/.obj) within this line:
viewer.setParameter('SceneUrl','media/monkey.stl');
Result:
Download
You can set up a button for files to be downloaded with:
	<a href="#">
	<button type="button" class="btn btn-primary btn-lg">Download the file</button>
	</a>
Result:
Would you like to insert more style/elements?
Check the documentation of Bootstrap here.