Exercise 5 - 3D Scanning and Printing
Assignment For This Week
Test your printer's design rules. Design and 3D Print and Object. 3D scan and Object.
Design with TinkerCad
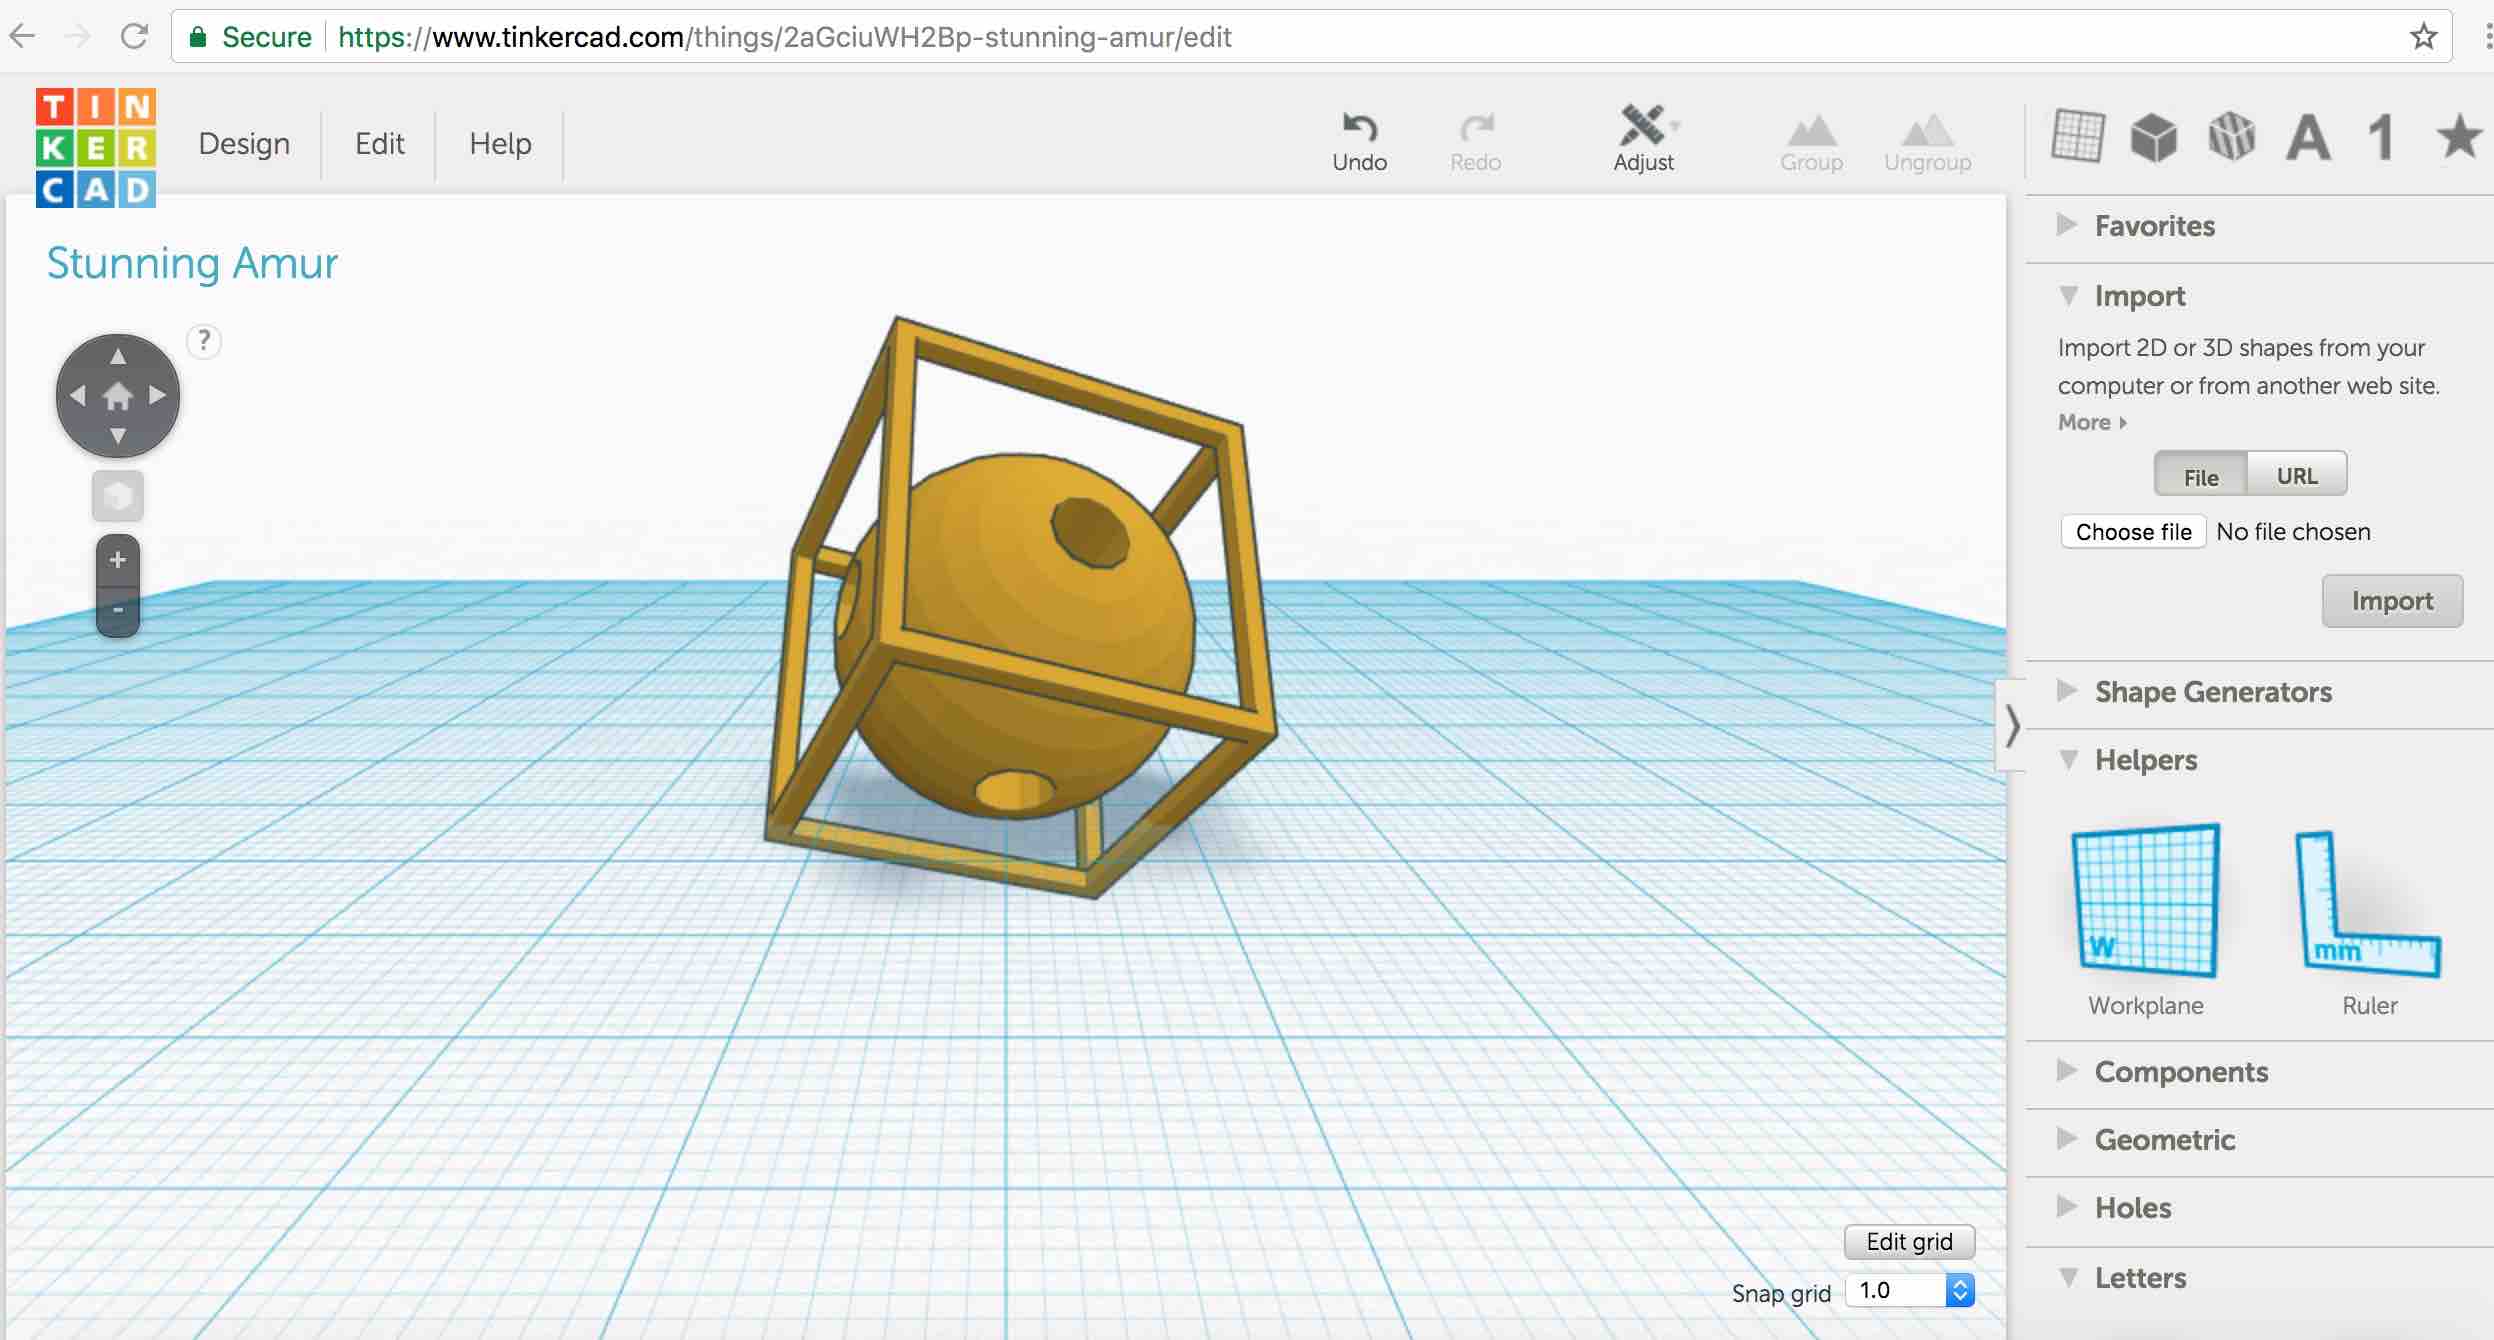
1. I have some experience with TinkerCad so I use it this time. The design needs to be something that cannot be done subtractively. So a sphere inside a cube sounds like a good idea. I export it to
stl format Stunning Amur and ready for printing.
Printing with Makerbot 2X
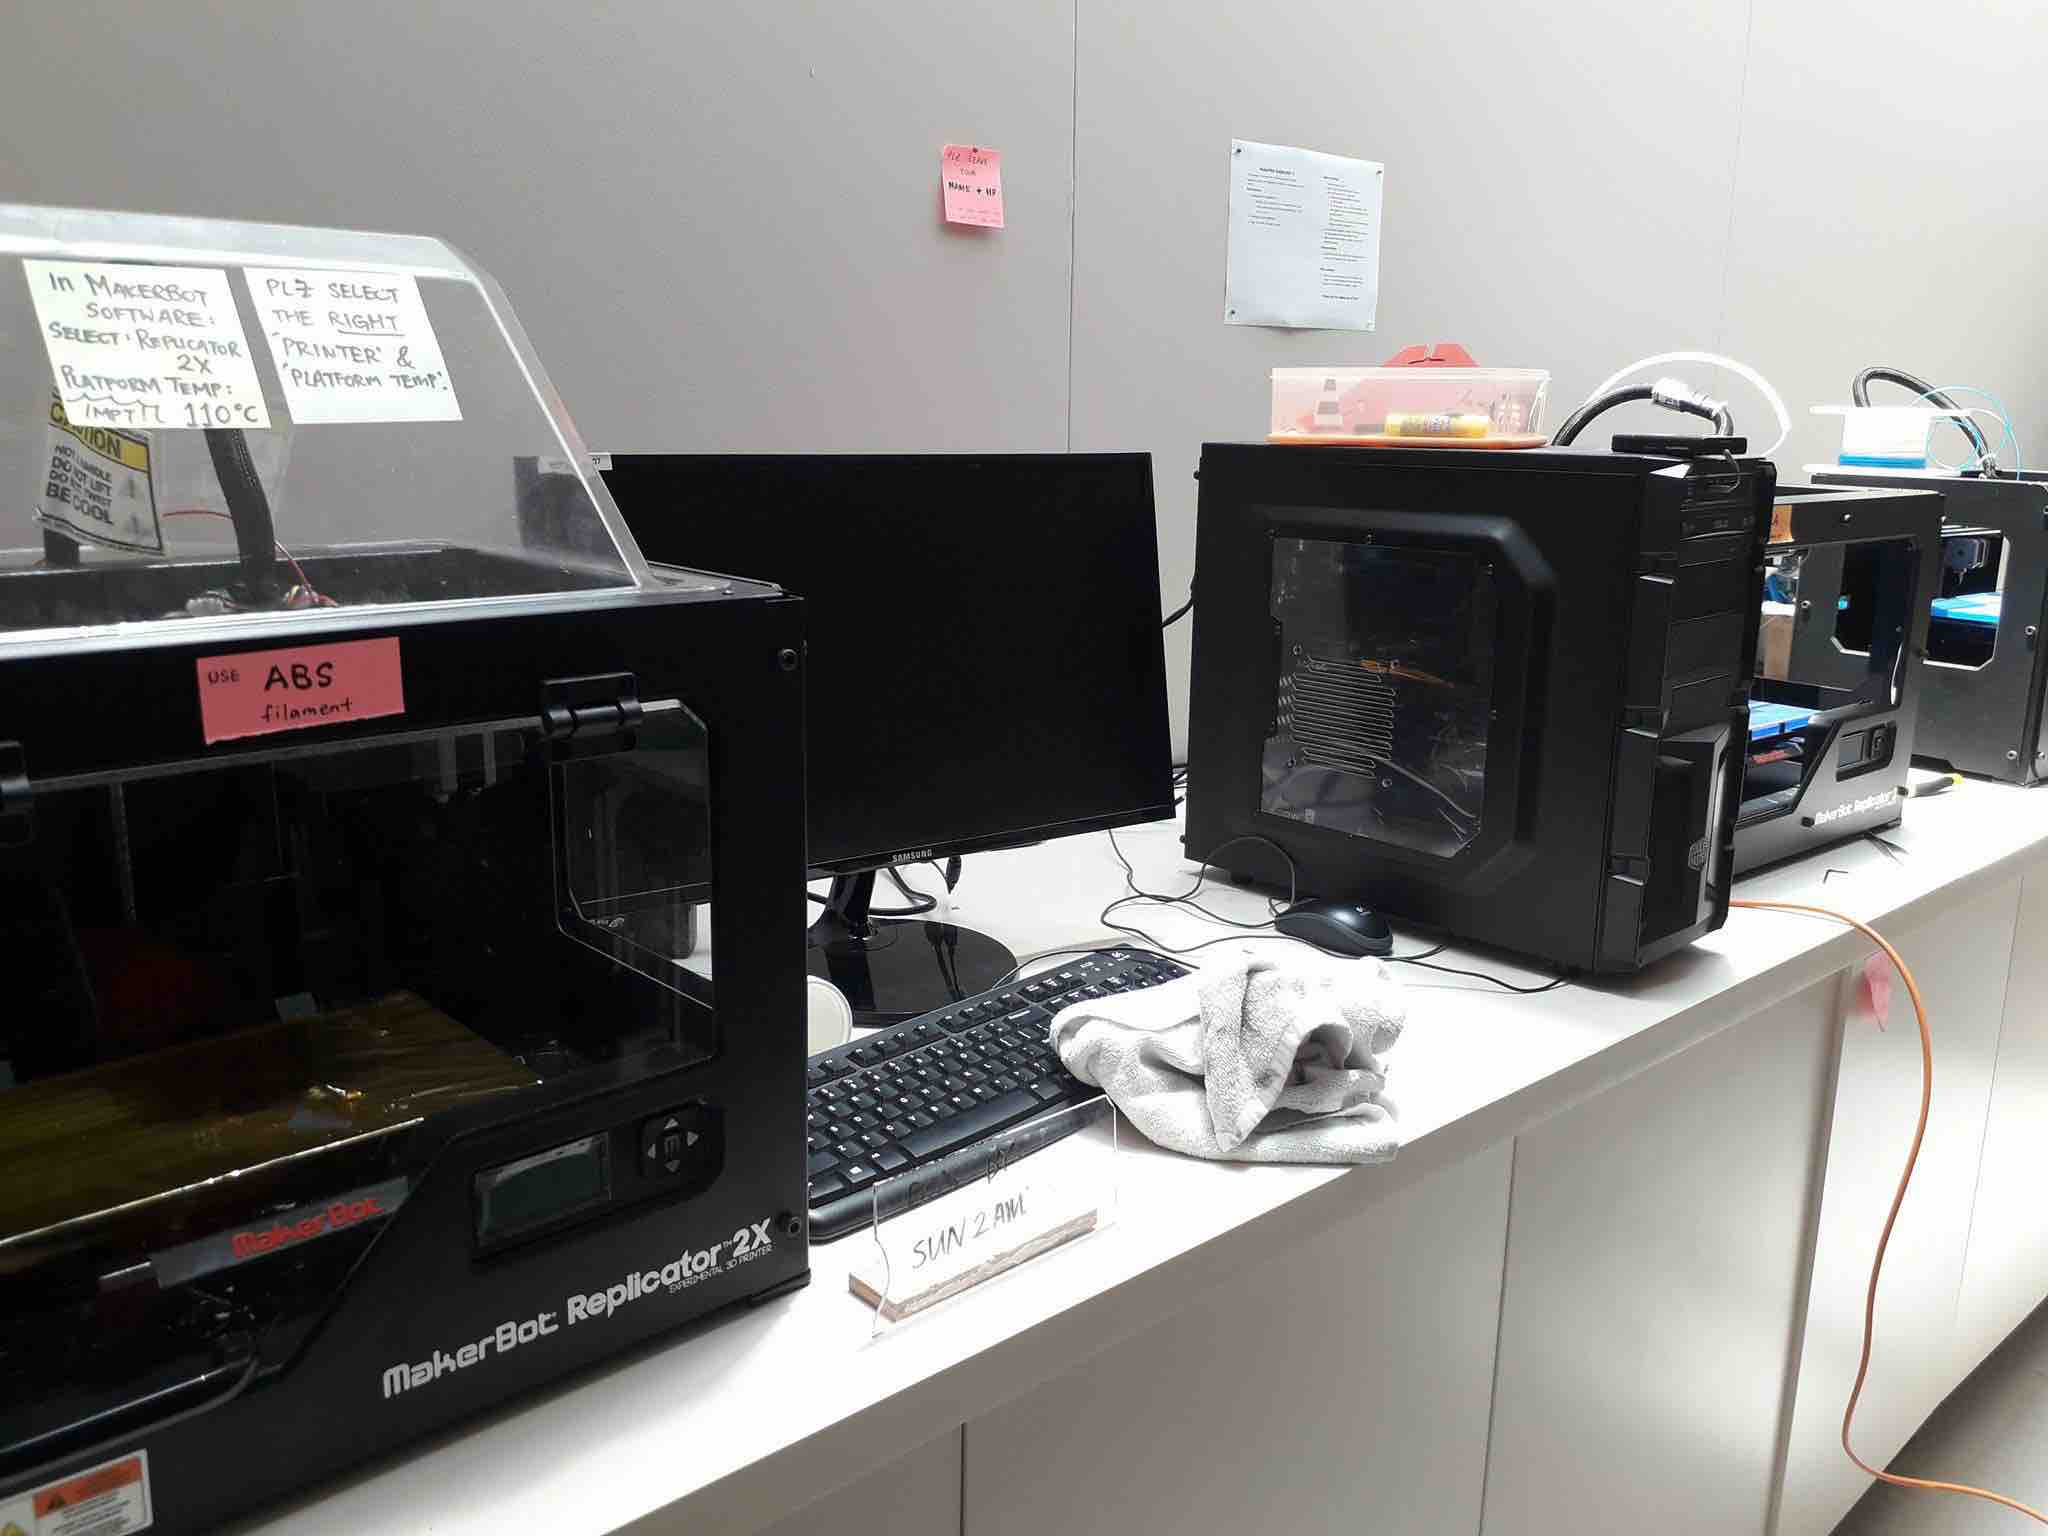
2. We have a coupole of old Makerbot Replicator 3D Printers, and 1 new Makerbot Replicator 2X. Also an old Stratasys Objet printer but it is currently down and need to be fixed. I will use the Replicator 2X for this project.
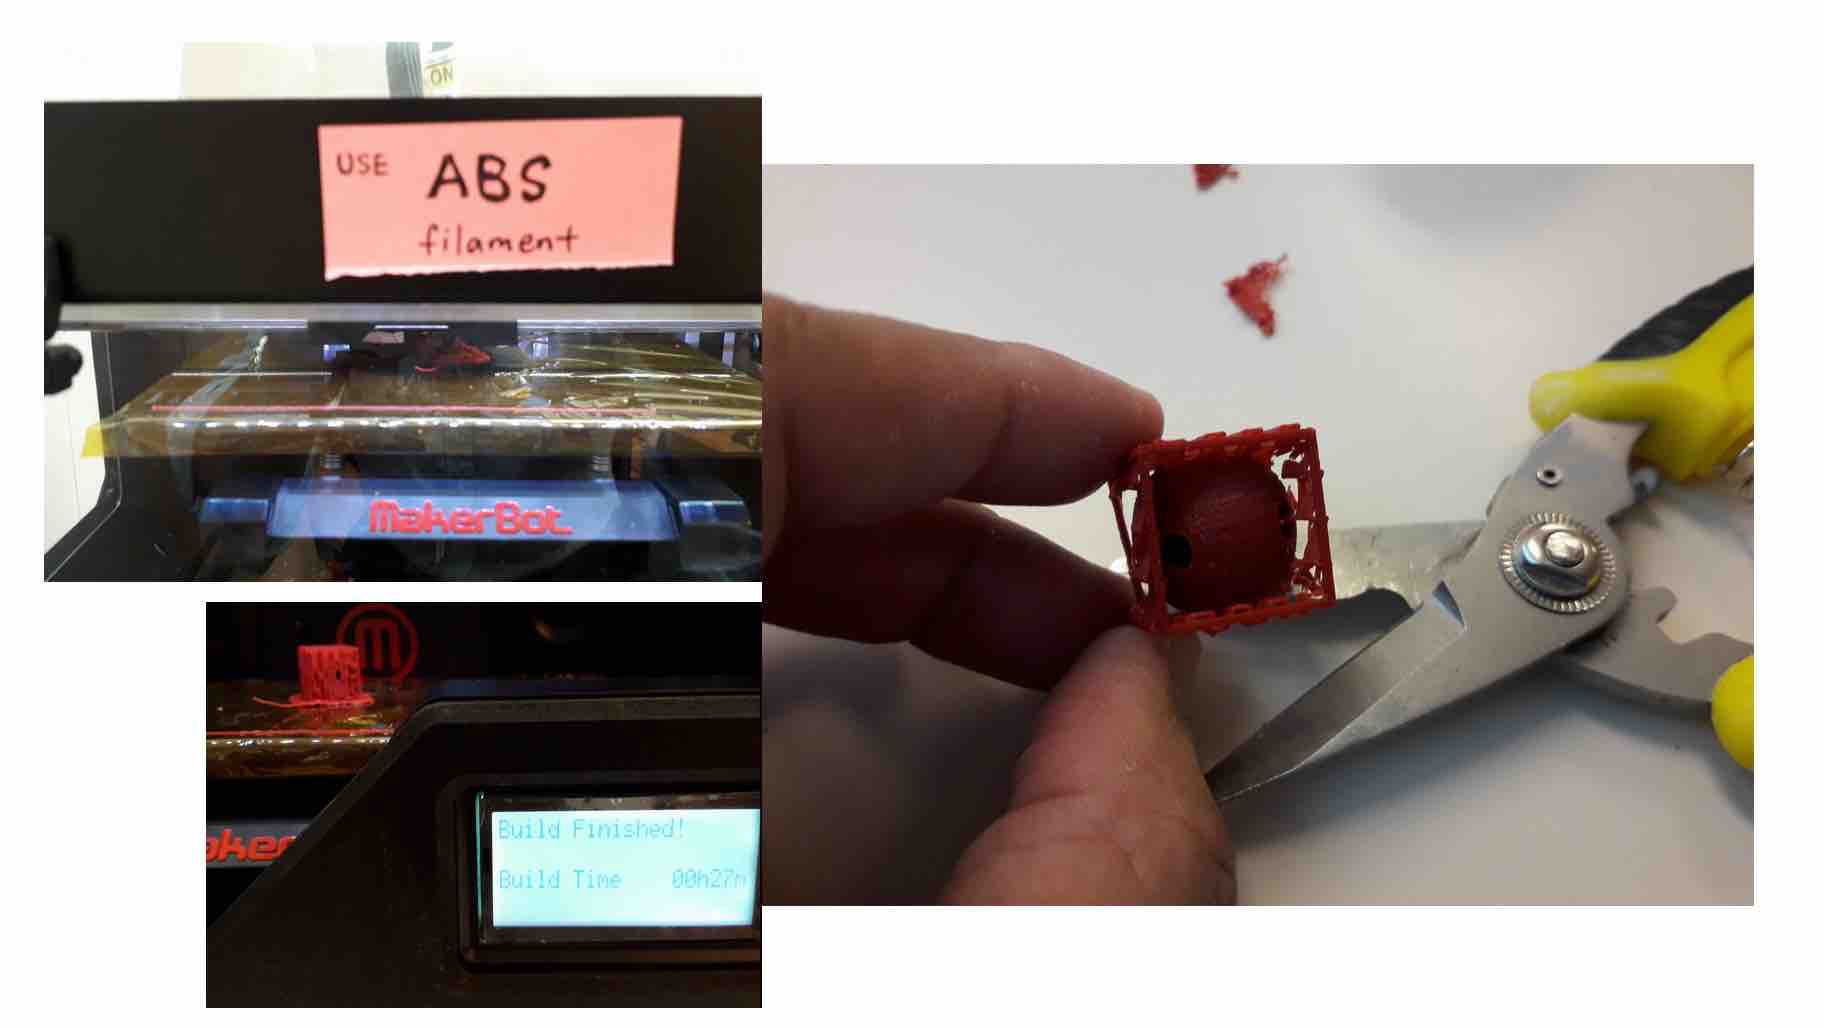
I just open the stl file using Makerbot Studio in the lab PC connected to the Replicator 2X, add a raft and support, print, and presto! Took 27min. Not the prettiest of outputs but will continue to adjust until I get the nice printout. For now, good enough.
3D Scanning
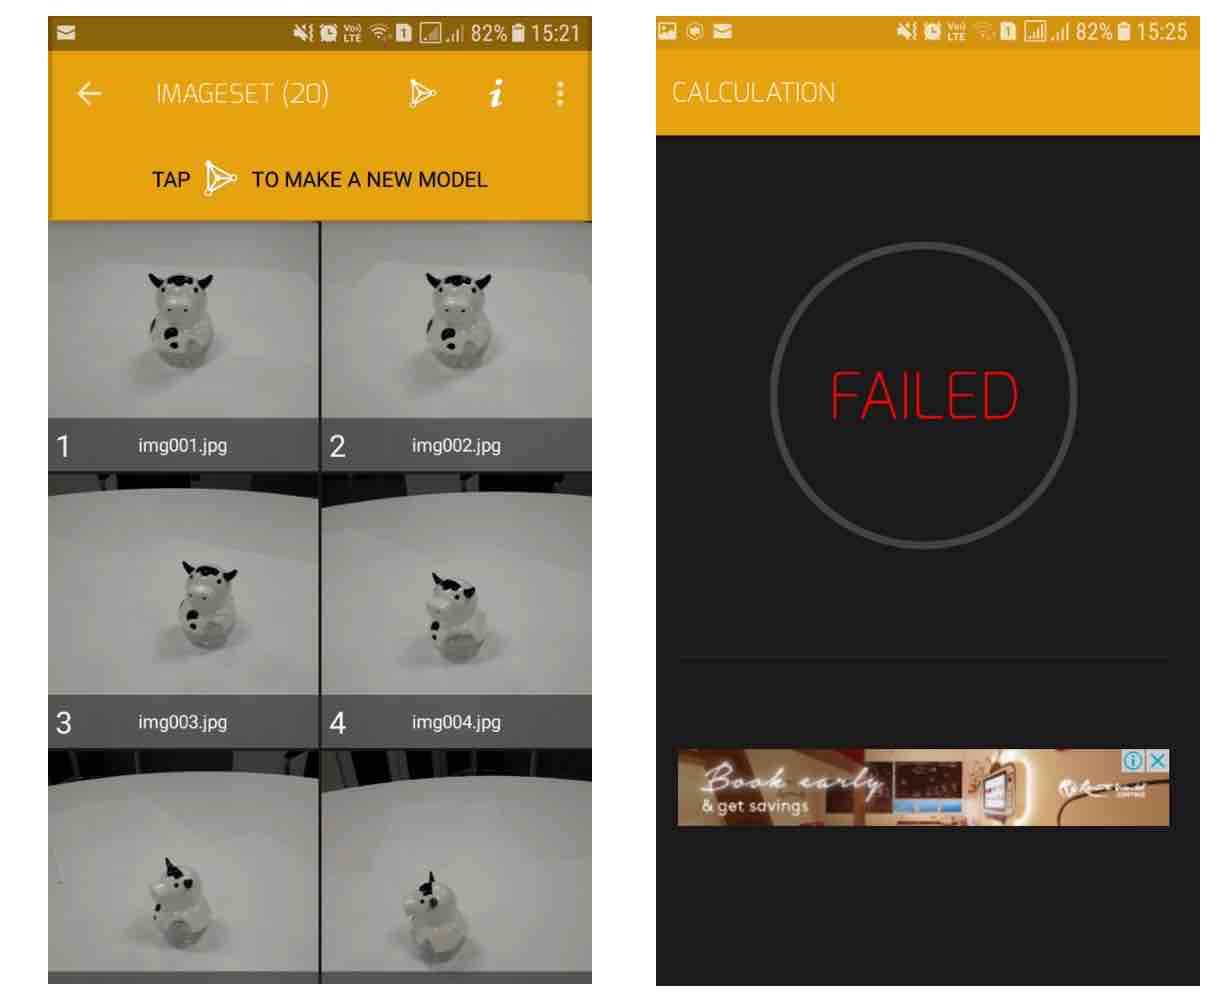
3. Now on to 3d scanning! 123dapp.com is dead. I installed Scann3D on my andriod phone (Samsung). Took 20 images around my model object, but the rendering keeps failing. I should try another model - something less shiny and has texture, according to Scann3D tips...
Images
You can set it up with:
	<p class="pic>><img src="http://academy.cba.mit.edu/2012/students/menichinelli.massimo/exercise07/exercise07_02.jpg">
	<legend>Here's the legend of the picture.</legend>
	</p>
Result:

Code
You can set it up with:
	<pre class="prettyprint linenums">
	Your code here
	</pre>
Result:
	for i in members:
		print ""
		print "USER:",members[i]
		print "Loading connections..."
		followers = load_connections([i], "followers")
		friends = load_connections([i], "friends")

		# Add edges...
		print "Building the graph..."

		for f in followers:
			for k in followers[f]:
				graph.add_edge(k,f)

		for f in friends:
			for k in friends[f]:
				graph.add_edge(f,k)
3D Model
The model can be rotated and zoomed with the mouse/trackpad. You can set it up with:
	<canvas id="cv" width=640 height=480>
	It seems you are using an outdated browser that does not support canvas :-(
	</canvas>
	<script type="text/javascript">
		var canvas = document.getElementById('cv');
		var viewer = new JSC3D.Viewer(canvas);
		viewer.setParameter('SceneUrl','media/monkey.stl');
		viewer.setParameter('ModelColor','#CAA618');
		viewer.setParameter('BackgroundColor1','#E5D7BA');
		viewer.setParameter('BackgroundColor2','#383840');
		viewer.setParameter('RenderMode','flat');
		viewer.setParameter('MipMapping','on');
		viewer.setParameter('Definition','high');
		viewer.setParameter('Renderer','webgl');
		viewer.init();
		viewer.update();
	</script>
You can set up the path to the 3D model (.stl/.obj) within this line:
viewer.setParameter('SceneUrl','media/monkey.stl');
Result:
Download
You can set up a button for files to be downloaded with:
	<a href="#">
	<button type="button" class="btn btn-primary btn-lg">Download the file</button>
	</a>
Result:
Would you like to insert more style/elements?
Check the documentation of Bootstrap here.